
Looking for a free download of the bootmgr file for Windows 7? Look no further.
Understanding BOOTMGR Issues
If you are experiencing BOOTMGR issues on your Windows 7 computer, there is a solution available. You can download the BOOTMGR file for free to fix the problem.
To begin, visit a reliable website that offers the BOOTMGR file for download. Make sure to choose a trusted source to avoid downloading any malware or viruses. Once you have found a suitable website, locate the download button for the BOOTMGR file.
Before proceeding with the download, it is recommended to create a recovery disc or USB flash drive. This will ensure that you have a backup in case anything goes wrong during the process. You can use a program like EasyBCD to create the recovery disc or USB flash drive.
After you have downloaded the BOOTMGR file, you will need to replace the existing file on your computer. To do this, follow these steps:
1. Insert the recovery disc or USB flash drive into your computer.
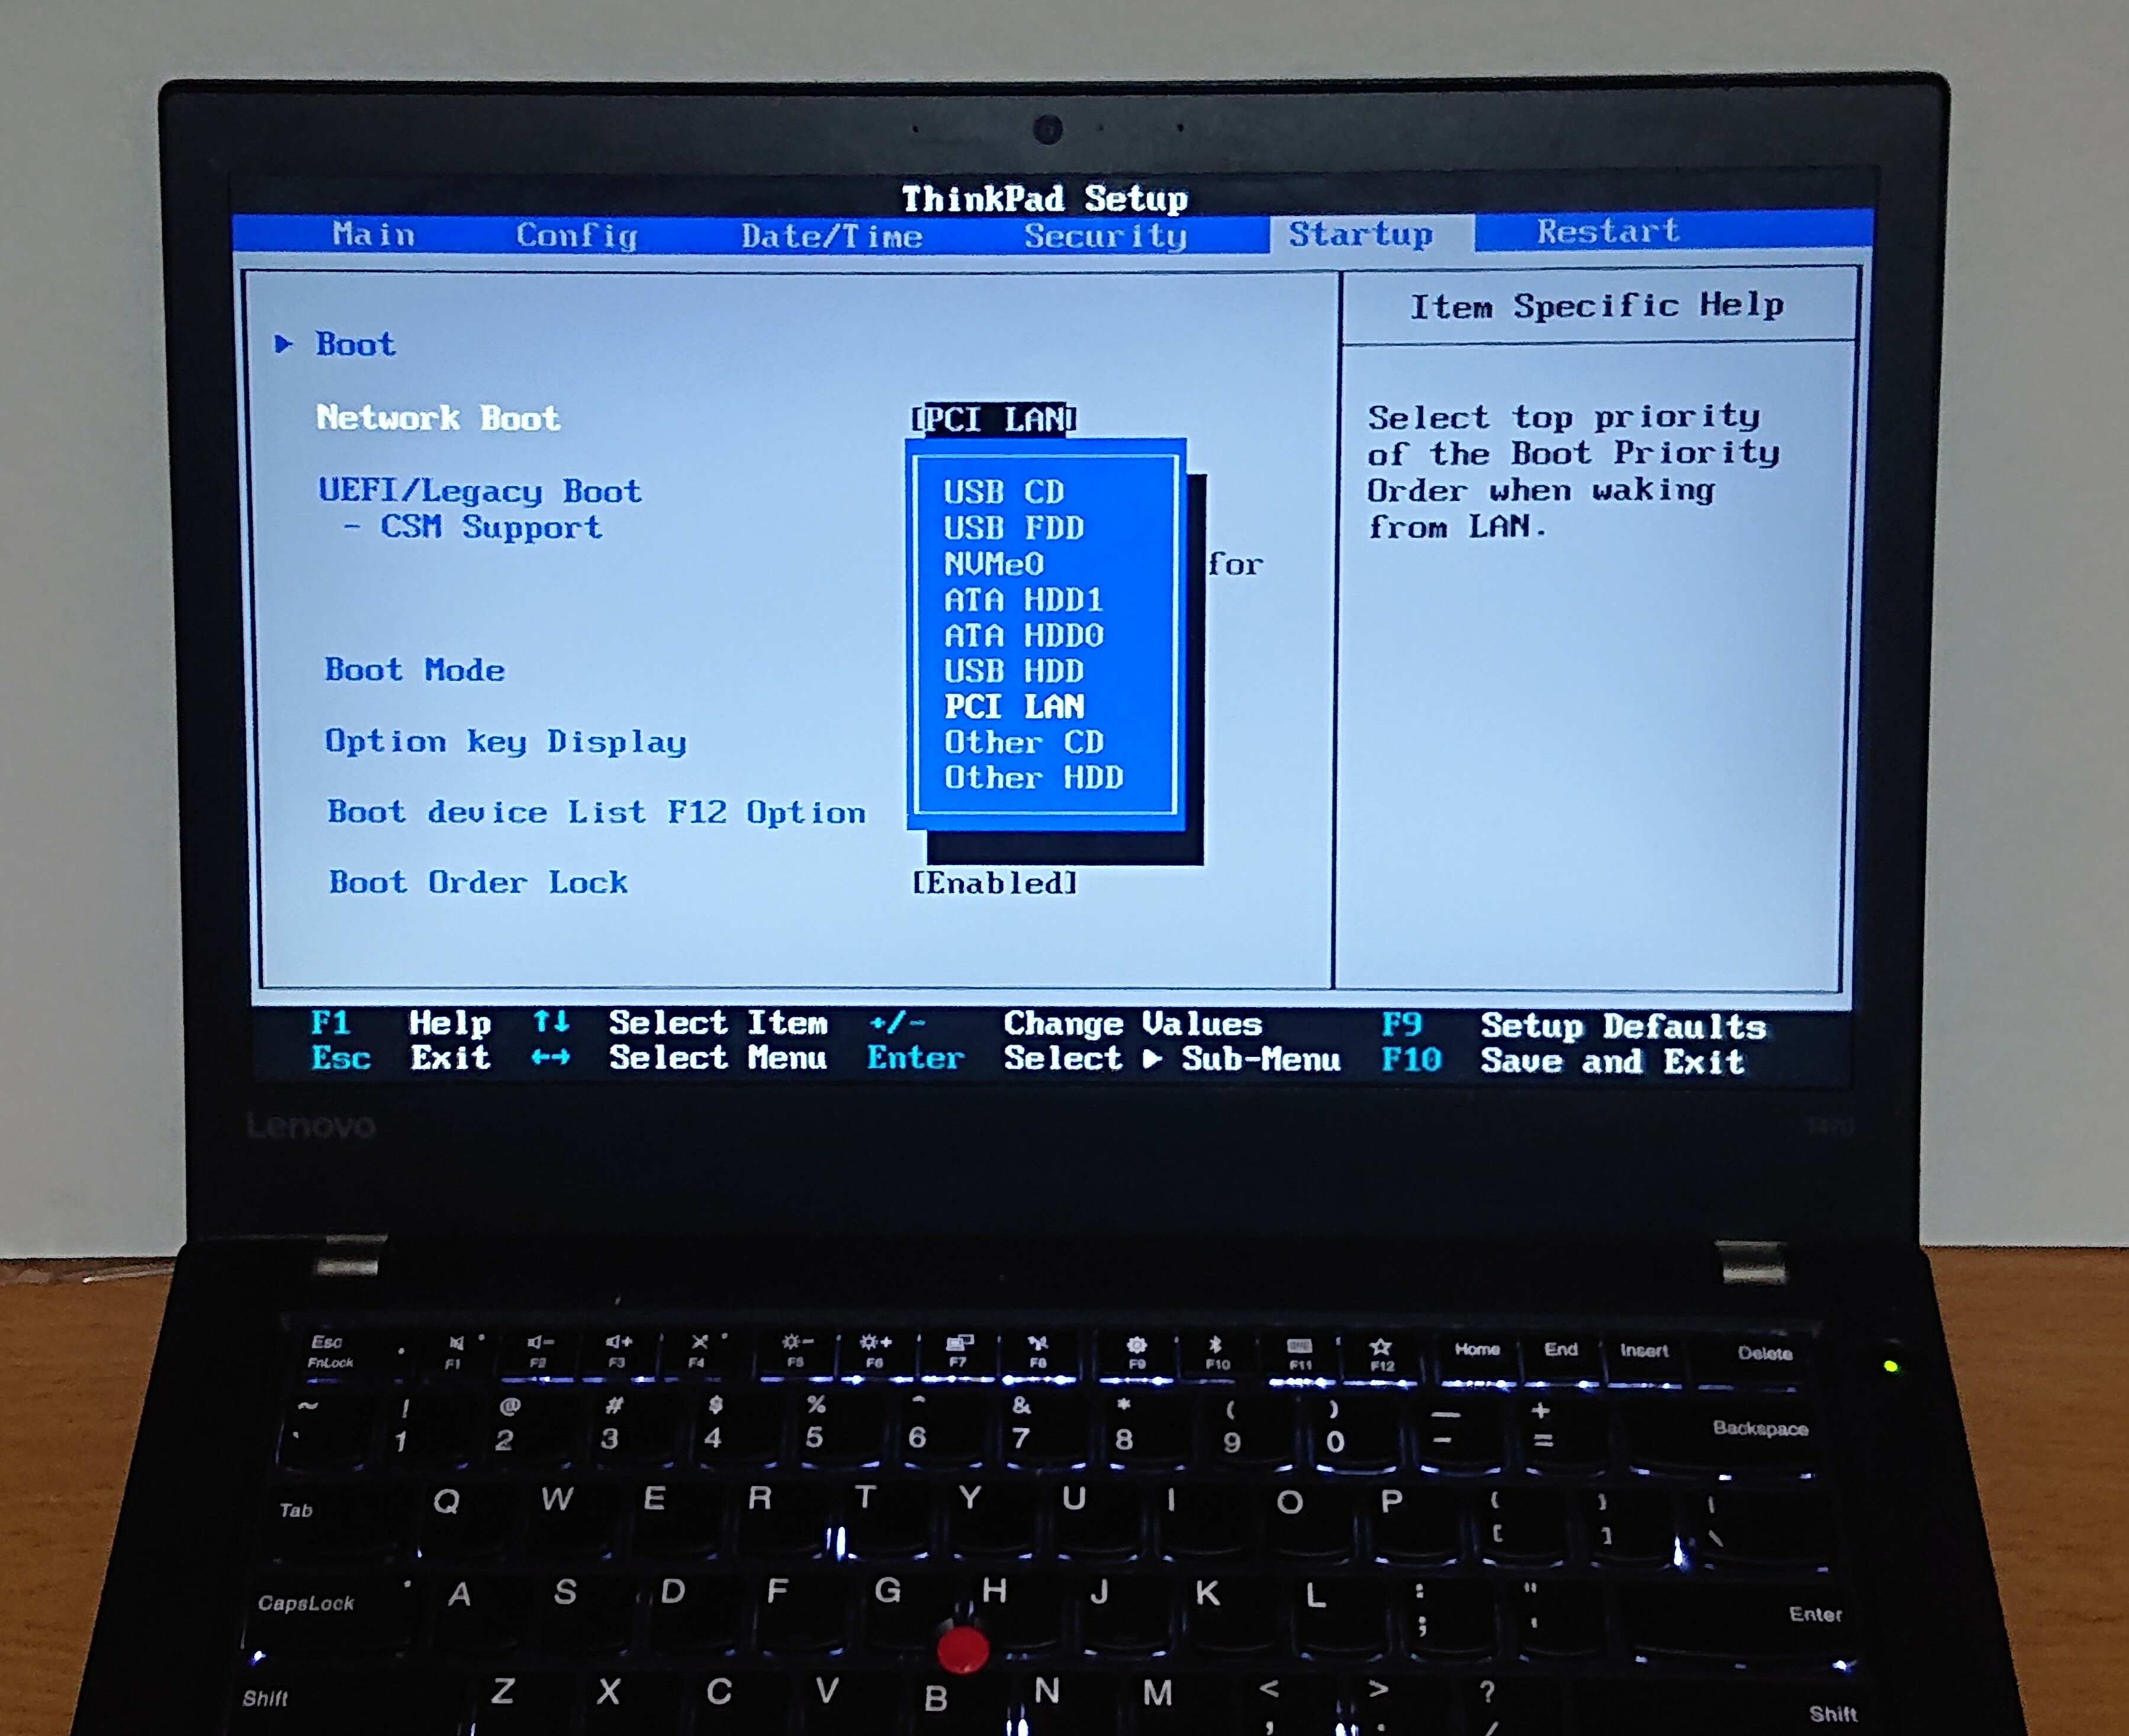
2. Restart your computer and enter the BIOS menu by pressing the appropriate key (usually F2 or Del) during startup.
3. Change the boot order to prioritize the recovery disc or USB flash drive.
4. Save the changes and exit the BIOS menu.
5. Your computer will now boot from the recovery disc or USB flash drive.
6. Follow the on-screen instructions to navigate to the BOOTMGR file on the disc or flash drive.
7. Replace the existing BOOTMGR file with the downloaded file.
8. Restart your computer and remove the recovery disc or USB flash drive.
Your computer should now boot up without any BOOTMGR issues. If you continue to experience problems, it may be necessary to seek further assistance or consult a knowledgeable resource.
Guaranteed Recovery Solutions
1. Visit the Guaranteed Recovery Solutions website and locate the Bootmgr file download page.
2. Click on the download link to start the download process.
3. Once the download is complete, locate the downloaded file on your computer.
4. Right-click on the file and select “Extract” to extract the contents of the file.
5. Open the extracted folder and locate the Bootmgr file.
6. Right-click on the Bootmgr file and select “Copy”.
7. Navigate to the drive where Windows 7 is installed (usually the C: drive).
8. Right-click on an empty space in the drive and select “Paste” to paste the Bootmgr file.
9. Confirm the file replacement if prompted.
10. Restart your computer to apply the changes.
After following these steps, your Windows 7 operating system should be able to boot up properly. If you encounter any issues or error messages, it is recommended to consult the Guaranteed Recovery Solutions knowledge base or seek assistance from their support team.
Initial Steps for Troubleshooting
1. Check your hardware connections: Ensure that all cables and peripherals are properly connected to your computer. Sometimes a loose connection can cause booting issues.
2. Restart your computer: Try restarting your computer to see if the issue resolves itself. A simple restart can often fix minor software glitches.
3. Check for error messages: Pay attention to any error messages or codes that appear on your screen during the boot process. These can provide valuable clues about the problem.
4. Use Windows Startup Repair: If your computer fails to boot, you can use the built-in Windows Startup Repair tool. Insert your Windows installation disc or USB and select the “Repair your computer” option.
5. Reset BIOS settings: If you recently made changes to your computer’s BIOS settings, try resetting them to their default values. This can help resolve compatibility issues.
6. Try booting from a different device: If your computer still won’t boot, try booting from a different device, such as a bootable USB or DVD. This can help determine if the issue is with your hard drive.
7. Use the Windows installation disc: If all else fails, you can use the Windows installation disc to access advanced troubleshooting options. From there, you can repair your computer or perform a clean installation of Windows.
Utilizing Startup Repair
If you’re experiencing issues with your Windows 7 bootmgr file, you can utilize the Startup Repair feature to help resolve the problem. To get started, follow these steps:
1. Insert your Windows 7 installation disc or a system repair disc into your optical disc drive.
2. Restart your computer and press any key when prompted to boot from the disc.
3. Select your language preferences and click “Next.”
4. Click on “Repair your computer” at the bottom left corner of the screen.
5. Select the operating system you want to repair and click “Next.”
6. Choose “Startup Repair” from the list of system recovery options.
7. The Startup Repair tool will begin diagnosing and fixing any issues with your bootmgr file.
8. Follow the on-screen instructions and allow the tool to complete the repair process.
9. Once the repair is finished, restart your computer and check if the bootmgr file issue has been resolved.
Remember, it’s important to have your Windows 7 installation disc or system repair disc on hand to perform the Startup Repair. If you don’t have one, you can create a system repair disc using another Windows 7 computer.
Rebuilding BCD with bootrec.exe
To rebuild BCD (Boot Configuration Data) in Windows 7, you can use the bootrec.exe tool. Here’s how:
1. Insert your Windows 7 installation disc or USB drive into your computer.
2. Restart your computer and boot from the installation media.
3. Select your language preferences and click “Next.”
4. Click on “Repair your computer” at the bottom left corner of the screen.
5. Select the operating system you want to repair (e.g., Windows 7) and click “Next.”
6. Click on “Command Prompt” to open the command line interface.
7. In the command prompt, type bootrec /fixmbr and press Enter. This command repairs the Master Boot Record (MBR) of your computer.
8. Next, type bootrec /fixboot and press Enter. This command repairs the boot sector.
9. Finally, type bootrec /rebuildbcd and press Enter. This command scans for Windows installations and adds them to the BCD.
Once the process is complete, restart your computer and check if the BCD has been successfully rebuilt. This method can help resolve boot-related issues and get your Windows 7 system up and running again.
Performing System Restore
Performing a System Restore in Windows 7 is a straightforward process that can help resolve various issues with your computer. To begin, you will need to access the System Restore feature, which allows you to revert your computer’s settings to a previous state. Here’s how to do it:
1. Start by booting up your computer and pressing the “F8” key repeatedly during the power-on self-test. This will bring up the advanced boot options menu.
2. From the menu, select “Repair Your Computer” and press “Enter”. This will launch the Windows Recovery Environment.
3. In the Windows Recovery Environment, select your language preferences and log in to an administrator account if prompted.
4. Next, click on “System Restore” in the System Recovery Options menu.
5. A new window will appear, displaying a list of available restore points. Select the restore point that you want to use and click “Next”.
6. Review the restoration details and click “Finish” to start the system restore process.
7. Your computer will now restart and begin the restoration process. It may take some time, so be patient.
8. Once the system restore is complete, your computer will restart again. You should now be able to log in and use your computer as usual.
Performing a system restore can be a useful tool for troubleshooting and resolving issues with your Windows 7 computer.
Advanced Bootrec.exe Commands
| Command | Description |
|---|---|
| bootrec /fixmbr | Writes a new Master Boot Record (MBR) to the system partition. |
| bootrec /fixboot | Writes a new boot sector to the system partition. |
| bootrec /scanos | Scans all disks for Windows installations compatible with the boot configuration data (BCD) store. |
| bootrec /rebuildbcd | Scans all disks for Windows installations and prompts you to select the ones you want to add to the BCD store. |
| bootrec /fixmbr | Writes a new Master Boot Record (MBR) to the system partition. |
| bootrec /fixboot | Writes a new boot sector to the system partition. |
Update and Installation Guide
To update and install the Bootmgr file for Windows 7, follow these steps:
1. Start by downloading the Bootmgr file from a reliable source.
2. Once the file is downloaded, locate it on your computer.
3. Right-click on the Bootmgr file and select “Copy.”
4. Navigate to the root directory of your Windows 7 installation. This is typically the C: drive.
5. Right-click in the root directory and select “Paste.” This will replace the existing Bootmgr file with the updated version.
6. If prompted, confirm that you want to replace the file.
7. Once the file is successfully copied, restart your computer.
8. During the restart process, your computer will perform a power-on self-test (POST). This is a routine check to ensure that all hardware components are functioning properly.
9. After the POST, your computer will boot into the Windows 7 Setup.
10. Follow the on-screen instructions to complete the installation process.
11. Once the installation is complete, your computer will restart again.
12. After the restart, your computer should now be using the updated Bootmgr file.
Note: It is important to ensure that you are downloading the Bootmgr file from a trustworthy source to avoid any potential computer viruses or malware.
Identifying and Solving Common Errors
- Check for typos or formatting errors:
- Read the article carefully and look for any spelling or grammatical mistakes.
- Check for any formatting errors such as missing or extra spaces, incorrect capitalization, or misplaced punctuation.
- Make corrections to the errors found in the article.
- Verify the source of the bootmgr file:
- Ensure that the bootmgr file being downloaded is from a trusted and reliable source.
- Check the file’s integrity by comparing its checksum or using an antivirus program to scan for any potential malware.
- If the source or integrity of the file is questionable, consider downloading the bootmgr file from a different source.
- Check compatibility with Windows 7:
- Confirm that the downloaded bootmgr file is compatible with the Windows 7 operating system.
- Refer to the documentation or specifications provided by the source to verify compatibility.
- If the file is not compatible, search for a version specifically designed for Windows 7.
- Perform a system scan for errors:
- Use a reliable system scanning tool, such as Windows System File Checker (SFC) or a third-party software, to scan for any corrupted or missing system files.
- Follow the instructions provided by the scanning tool to initiate the scan.
- If any errors are detected, allow the scanning tool to attempt repairs or follow the recommended actions to resolve the issues.
- Consider alternative solutions:
- If the above steps do not resolve the bootmgr file error, consider seeking assistance from technical support forums, online communities, or professional IT services.
- Provide detailed information about the error, steps taken, and any additional relevant details to facilitate a more accurate diagnosis and solution.
- Explore alternative solutions or workarounds suggested by experienced users or experts in the field.
Additional Recovery Options
If you are encountering issues with your Windows 7 bootmgr file, there are some additional recovery options you can try before resorting to more drastic measures.
1. Use the Windows installation disc: Insert your Windows installation disc into your optical disc drive and restart your computer. Follow the on-screen instructions to boot from the disc and select the “Repair your computer” option. From there, you can access the recovery options and attempt to fix the bootmgr file.
2. Utilize EasyBCD: EasyBCD is a freeware application software that can help you manage your bootloader and repair boot-related issues. You can download it from the official website and follow the step-by-step instructions to fix the bootmgr file.
3. Try a bootable USB or DVD: If you don’t have a Windows installation disc, you can create a bootable USB or DVD using ISO 9660 files. This will allow you to access the recovery options and attempt to repair the bootmgr file.
Frequently Asked Questions
Where is BOOTMGR file located in Windows 7?
The BOOTMGR file in Windows 7 is located in the root directory of the partition marked as Active in Disk Management. If there is a System Reserved partition, it does not obtain a drive letter. If there is no System Reserved partition, BOOTMGR is most likely located on the primary drive, usually C:.
How do I recover a missing BOOTMGR file?
To recover a missing BOOTMGR file, you can try the following solutions:
– Restart your desktop or laptop.
– Remove all removable media.
– Change boot order in BIOS.
– Repair the master boot record.
– Mark the partition as active.
– Test the hard drive.
– Perform a Windows startup repair.
How do I install Windows 7 Boot Manager?
To install Windows 7 Boot Manager, start your computer with the Windows 7 installation disc inserted. Press any key to boot from the CD or DVD. Choose your language, time and currency, and keyboard preferences, then click Next. Click on “Repair your computer.”
How to fix boot manager is missing in Windows 7 without CD?
To fix the “BOOTMGR is missing” error in Windows 7 without a CD, you can create a bootable USB from an ISO file and use it to enter the Windows Recovery Environment. From there, select “Startup Repair” under the System Recovery Options to resolve the issue.


