Fix Windows Settings Not Opening in Windows 10/11

In this article, I will discuss how to troubleshoot and fix Windows Settings not opening in Windows 10/11.

Alternative Access Methods

Another option is to use the Command Prompt or PowerShell to open Windows Settings. You can do this by opening the Command Prompt or PowerShell and typing “start ms-settings:” (without quotes) and pressing Enter.

If the above methods don’t work, you can also try accessing Windows Settings through the Control Panel. Open the Control Panel, go to System and Security, and then click on “Settings”.

By using these alternative access methods, you may be able to bypass the issue of Windows Settings not opening and make the necessary changes to your system settings.

Checking App Availability

  • Restart your computer
  • Check for Windows updates
  • Ensure the Windows Store is working
  • Run the Windows Store Apps Troubleshooter
  • Check if the app is available in the Microsoft Store
  • Look for alternative apps that provide similar functionality

System Integrity Verification

System integrity verification prompt

System Integrity Verification
What is System Integrity Verification?

System Integrity Verification is a process that checks the integrity and authenticity of system files and settings to ensure that they have not been tampered with or corrupted.

Why is System Integrity Verification important?

System Integrity Verification is important for maintaining the security and stability of your system. It helps protect against malware, unauthorized changes, and system errors.

How to perform System Integrity Verification in Windows 10/11:

  1. Open Command Prompt as administrator.
  2. Run the command: sfc /scannow
  3. Wait for the scan to complete and follow any prompts to fix errors.
  4. Restart your computer to apply any fixes.

Troubleshooting Updates

If you are experiencing issues with Windows Settings not opening in Windows 10 or 11, there are a few troubleshooting steps you can try to resolve the problem.

First, try running the System File Checker tool to scan for and repair any corrupted system files. To do this, open Command Prompt as an administrator and type “sfc /scannow” and press Enter.

You can also try resetting the Windows Update components to ensure that the Settings app is able to function properly. Open Command Prompt as an administrator and run the following commands:
– net stop wuauserv
– net stop cryptSvc
– net stop bits
– net stop msiserver
– ren C:\Windows\SoftwareDistribution SoftwareDistribution.old
– ren C:\Windows\System32\catroot2 Catroot2.old
– net start wuauserv
– net start cryptSvc
– net start bits
– net start msiserver

After running these commands, restart your computer and check if the issue has been resolved. If the problem persists, you may need to check for any pending Windows updates that could be causing conflicts with the Settings app.

Account Solutions

First, try running the System File Checker tool to scan and repair corrupted system files. To do this, open Command Prompt as an administrator and type “sfc /scannow” and hit Enter.

If that doesn’t work, you can try resetting the Windows Registry to default settings. Press the Windows key + R to open the Run dialog box, type “regedit” and hit Enter. Navigate to “HKEY_CURRENT_USER\Software\Microsoft\Windows\CurrentVersion\Policies” and delete the “Explorer” key.

Another solution is to check Group Policy settings that may be preventing Windows Settings from opening. Press the Windows key + R, type “gpedit.msc” and hit Enter. Navigate to “User Configuration\Administrative Templates\Control Panel” and make sure the “Prohibit access to Control Panel and PC settings” setting is disabled.

Frequently Asked Questions

How do I fix Windows 10 Cannot open Settings?

To fix Windows 10 Cannot open Settings, you can run a System File Check by opening command prompt or PowerShell with administrator rights, typing sfc /scannow, and then pressing Enter. Afterwards, try to open Settings. If the issue persists, consider reinstalling the Settings app.

How do I fix Windows 10 display Settings not opening?

To fix Windows 10 display Settings not opening, try restarting your computer first. Then, use keyboard shortcuts like pressing the Windows key + I to open the Settings app directly to the Display settings. You can also try using the Run command by pressing the Windows key + R to open the Run dialog box.

How do I force open Settings in Windows?

To force open Settings in Windows, you can use the Run command dialog box by pressing Win + R, typing CMD, and pressing Ctrl + Shift + Enter to open an elevated Command Prompt. Then type ms-settings: and press Enter to open the Settings window.

How do I fix Settings not opening in Windows 11?

To fix Settings not opening in Windows 11, you can try resetting the Settings app, running system restore, reinstalling the Settings app, performing a Windows in-place upgrade, or running the System File Checker.

Razer Mouse Scroll Click Not Working Fix

Having trouble with your Razer mouse scroll click not working? Let’s find a fix.

Check Internet Connection

To begin troubleshooting the issue of the Razer mouse scroll click not working, the first step is to check your internet connection. Sometimes a poor or unstable internet connection can cause the mouse to malfunction.

If you are using a wireless Razer mouse, make sure that the USB dongle is securely connected to your computer’s USB port. Sometimes a loose connection can lead to connectivity issues.

Next, try restarting your computer to see if that resolves the problem. Sometimes a simple reboot can fix minor software glitches that may be causing the scroll click to not work properly.

If the issue persists, try using a different USB port on your computer to rule out any potential issues with the port you are currently using.

Additionally, ensure that your mouse firmware is up to date. Visit the Razer website and download any available firmware updates for your specific mouse model.

If none of these steps fix the problem, there may be debris or dust blocking the scroll click button. Use compressed air to gently clean the area around the button to see if that improves its functionality.

Sign Out and Restart App

To fix the issue of your Razer mouse scroll click not working, one simple solution is to sign out and restart the app. This can help refresh the software and potentially resolve any glitches or bugs causing the problem.

First, sign out of the application where you are experiencing the scroll click issue. This could be a game, web browser, or any other software that utilizes your mouse’s scroll wheel.

Once you have signed out, completely close the app. You can do this by clicking on the ‘X’ in the top right corner of the window or using the taskbar to close the program.

After closing the app, restart it by launching it again from your desktop or start menu. This will reload the software and may fix any issues with the scroll click function on your Razer mouse.

If signing out and restarting the app does not resolve the problem, you may want to try other troubleshooting steps such as checking for software updates, cleaning the mouse to remove any debris that could be affecting the scroll wheel, or recalibrating the mouse in the software settings.

Restart Device or Home Network

  • Restart your computer:
    • Click on the Start menu and select Restart.
    • Wait for the computer to fully shut down and then turn it back on.
  • Restart your home network:
    • Unplug your modem and router from the power source.
    • Wait for about 30 seconds before plugging them back in.
    • Wait for the devices to fully restart before testing your Razer mouse scroll click.

Contact Internet Service Provider

If you’ve tried troubleshooting your Razer mouse scroll click issue and still can’t fix it, it might be time to contact your Internet Service Provider for help.

First, make sure your internet connection is stable and working properly. Check if other devices connected to the same network are experiencing any issues. You may need to reset your router or contact your ISP for assistance if there are any problems with your internet connection.

If you suspect that the problem is related to your ISP, contact their customer support team for further troubleshooting steps. They may be able to provide specific instructions or settings to help resolve the issue.

Be prepared to provide details about your internet connection, such as the type of connection you have (DSL, cable, fiber), the speed of your connection, and any recent changes or upgrades you’ve made. This information can help your ISP diagnose and fix the problem more efficiently.

In some cases, your ISP may recommend updating your modem or router firmware to improve compatibility with your Razer mouse or other devices. Make sure to follow their instructions carefully to avoid any potential issues.

If contacting your ISP doesn’t resolve the problem, you may need to consider other troubleshooting steps, such as checking for software updates or driver issues on your computer.

F.A.Qs

Why is my scroll click not working on my Razer Naga?

Your scroll click on your Razer Naga may not be working due to a potential issue with the scroll encoder. Try cleaning it with canned air and 100% IPA to see if that resolves the problem. If the issue persists even when connected to another PC, the scroll wheel may be dead.

How do I fix my Razer mouse not clicking?

To fix a Razer mouse not clicking, you can try updating or reinstalling the mouse driver through Razer Synapse. Unplug the mouse, uninstall the driver, then reinstall it, ensuring you are using Synapse 3.

Why does my scroll wheel not work when I click it?

Your scroll wheel may not work when you click it due to dust and grime clogging the mouse wheel, causing mechanical issues. Another common reason could be poor battery life in wireless mice.

Why is the scroll button on my mouse not clicking?

The scroll button on your mouse may not be clicking due to either dust and dirt accumulation causing mechanical issues with the mouse wheel, or low battery levels in wireless mice.

Cannot Open Downloaded Word Documents: 6 Proven Fixes

In my experience, opening downloaded Word documents can sometimes be a frustrating task. Here are 6 proven fixes to help you resolve this issue.

Common Reasons Why Word Documents Won’t Open

1. One common reason why Word documents won’t open is due to file corruption. Try opening the document in a different word processing program or try opening it on a different computer to see if the issue is with the file itself. If the file is corrupted, you may need to try recovering it using a file recovery tool.

2. Another reason why Word documents may not open is due to compatibility issues. Make sure you are using a version of Microsoft Word that is compatible with the document you are trying to open. You can also try opening the document in compatibility mode within Word.

3. Sometimes, Word documents won’t open due to issues with the software itself. Try repairing your Microsoft Office installation or reinstalling the program altogether to see if this resolves the issue.

4. If you are unable to open downloaded Word documents, it could be due to security settings on your computer. Check your security settings to ensure that Word documents are not being blocked from opening. You may need to adjust your security settings to allow the documents to open.

5. Malware on your computer can also prevent Word documents from opening. Run a full scan of your computer using an antivirus program to check for any malware that may be causing the issue. Remove any threats found and try opening the document again.

6. Lastly, if Word documents won’t open after trying the above fixes, it may be helpful to check for any updates or patches for Microsoft Word. Updating your software to the latest version can often resolve compatibility issues and ensure that the program is running smoothly.

Solutions to Repair Corrupt or Damaged Files

  • Use the Built-in Repair Tool in Word:
    • Open the corrupt Word document in Word.
    • Click on File and then select Open.
    • Choose the corrupt file and click on the arrow next to the Open button.
    • Select Open and Repair.
  • Recover Text from Corrupt Word Document:
    • Open a new Word document.
    • Click on Insert and then select Object.
    • Choose Text from File and select the corrupt document.
    • Click Insert to retrieve the text.
  • Use a Third-Party Recovery Tool:
    • Download and install a reputable file recovery tool.
    • Open the tool and select the corrupt Word document for recovery.
    • Follow the on-screen instructions to recover the damaged file.

Adjusting Settings to Enable Document Access

To enable document access, adjust the settings in Microsoft Windows by right-clicking on the downloaded Word document icon and selecting “Properties” from the context menu.

Next, click on the “Unblock” checkbox if it is available in the Properties window. This will remove any restrictions that may be preventing you from opening the document.

If the document still cannot be opened, try changing the file extension from .docx to .doc or vice versa. Sometimes, this simple adjustment can resolve compatibility issues.

Additionally, check if the file is corrupted by opening it in a different word processor or text editor. If the document opens successfully in another program, the issue may be with your Microsoft Office installation.

If none of these fixes work, try disabling any plug-ins or add-ons in your word processing program that may be causing the issue. Sometimes, third-party extensions can interfere with the opening of certain documents.

Finally, make sure that your antivirus software is not blocking the document from being opened. Temporarily disable your antivirus program and attempt to open the document again to see if this resolves the issue.

Utilizing Tools and Methods for File Repair

When you encounter issues with opening downloaded Word documents, it can be frustrating. There are several tools and methods available to help repair these files and get them back to working order. One proven fix is to utilize the built-in repair feature in Microsoft Word. To do this, open Microsoft Word, click on File, then Open, select the problematic document, and choose Open and Repair from the drop-down menu. This feature will attempt to repair any corruption within the file.

If the built-in repair feature does not work, another option is to use a third-party file repair tool. These tools are designed to specifically target and fix file corruption issues. Simply download a reputable file repair tool, install it on your computer, and follow the on-screen instructions to repair the problematic Word document.

In some cases, the issue may be related to the file extension. Try changing the file extension from .docx to .doc or vice versa and then attempt to open the document again. This simple fix can sometimes resolve compatibility issues and allow you to access the file.

Additionally, if the file is saved in a different format, such as RTF or TXT, you can try opening the document in a different word processor or text editor. This can sometimes bypass any corruption present in the original file format and allow you to view the content.

If none of the above methods work, you can try opening the Word document in Safe Mode. This will disable any plugins or add-ons that may be causing the issue. To do this, press and hold the Ctrl key while double-clicking on the document to open it in Safe Mode. If the document opens successfully in Safe Mode, you may need to disable any problematic plugins or add-ons in Microsoft Word.

In some cases, the issue may be related to the file location or permissions. Move the problematic Word document to a different directory or folder and try opening it again. If that doesn’t work, you can try adjusting the file permissions to ensure that you have the necessary access to open and modify the document.

By utilizing these tools and methods for file repair, you can effectively troubleshoot and fix issues with opening downloaded Word documents.

FAQ

Why can’t I open downloaded files in Word?

You can’t open downloaded files in Word because recent versions of the software have a stricter security policy. Update your Trust Center settings to allow access to copied or downloaded files. Difficulty opening Word documents may be due to the Enabled Protected View option being activated.

Why are my Word documents not opening?

Your Word documents may not be opening due to multiple reasons. One common issue could be an overload of active add-ins causing the program to become unresponsive. Additionally, corrupt or damaged templates or documents can prevent Word from opening. It is important to regularly update and maintain your files to avoid these issues.

How do I recover a Word document that won’t open?

To recover a Word document that won’t open, you can try using the Open and Repair feature in Microsoft Word. Simply go to File > Open > Browse, locate the document, click on it, select Open and Repair from the dropdown menu, and follow the prompts to attempt to recover the file.

How do you open a download in Word?

To open a download in Word, you can click on the File tab and then select Open. From there, you can choose the location where the downloaded file is saved and select the specific file you want to open.

Fix Active Partition Not Found Windows 10: 5 Solutions

Looking for solutions to fix the “Active Partition Not Found” error on Windows 10? Here are 5 methods to help resolve this issue.

Understanding an Active Partition

An active partition is the primary partition on a hard drive that the computer boots from. To understand an active partition in the context of fixing the “Active Partition Not Found” error on Windows 10, you need to ensure that the correct partition is set as active.

To check and set the active partition in Windows 10, follow these steps:

First, open the Command Prompt by pressing the Windows key + R, typing “cmd,” and hitting Enter.
Next, type “diskpart” and hit Enter to open the DiskPart command-line utility.
Then, type “list disk” and hit Enter to display all the disks connected to your computer.
Identify the disk where the active partition should be located and type “select disk X” (replace X with the disk number) and hit Enter.
Now, type “list partition” and hit Enter to display all the partitions on the selected disk.
Identify the active partition (usually marked as “Active”) and type “select partition Y” (replace Y with the partition number) and hit Enter.
Finally, type “active” and hit Enter to set the selected partition as active.

Common Causes for the Error

  • Restart your computer and enter BIOS settings by pressing a specific key (usually F2, F10, or Del) during startup.
  • Ensure that the correct hard drive is set as the primary boot device.
  • Save the changes and exit the BIOS settings.

Run Startup Repair

  • Insert a Windows installation disc or bootable USB drive.
  • Boot from the installation media.
  • Select “Repair your computer” and then choose “Troubleshoot” > “Advanced options” > “Startup Repair.”
  • Follow the on-screen instructions to complete the repair process.

Check Disk Errors

  • Open Command Prompt as an administrator.
  • Type chkdsk /f C: and press Enter (replace C: with the drive letter where Windows is installed).
  • Allow the disk checking process to complete.

Rebuild BCD

  • Open Command Prompt as an administrator.
  • Type the following commands one by one and press Enter after each:
    • bootrec /scanos
    • bootrec /rebuildbcd
    • bootrec /fixmbr
  • Restart your computer after executing the commands.

Check for Malware

  • Run a full system scan using a reliable antivirus program.
  • Remove any detected malware or viruses from your system.
  • Restart your computer and check if the issue persists.

BIOS Detection and Default Settings

Ensure the correct drive is set as the primary boot device: Navigate to the Boot Order or Boot Priority section and ensure that the drive containing the Windows operating system is listed as the first boot device. Save changes and exit the BIOS.

Restore default BIOS settings: If you’re unsure about the correct settings, you can reset the BIOS to its default configuration. Look for the option to “Load Default Settings” or “Restore Defaults” in the BIOS menu. Save changes and exit.

It’s important to note that incorrect BIOS settings can lead to boot issues and the “Active Partition Not Found” error in Windows 10. By carefully checking and adjusting the BIOS settings as needed, you can potentially resolve the problem and successfully boot into your operating system.

Repairing Corrupt System Files and MBR

If you are facing issues with an “Active Partition Not Found” error on Windows 10, it could be due to corrupt system files or Master Boot Record (MBR) issues. To fix this problem, you can start by repairing the corrupt system files using the Command Prompt.

1. Run System File Checker (SFC) tool: Open Command Prompt as an administrator and type “sfc /scannow” to scan and repair any corrupt system files.

2. Use Deployment Image Servicing and Management (DISM) tool: In Command Prompt, run “DISM /Online /Cleanup-Image /RestoreHealth” to repair Windows image files.

3. Rebuild MBR: You can use the Command Prompt to rebuild the MBR by running “bootrec /fixmbr” and “bootrec /fixboot” commands.

Setting the System Partition Active

To set the system partition active in Windows 10, you can use the Command Prompt. First, open the Command Prompt as an administrator by searching for “cmd” in the Start menu, right-clicking on it, and selecting “Run as administrator. ” Next, type diskpart and press Enter. Then, type list disk to display all the disks on your computer.

Identify the disk that contains the system partition and note its number. After that, type select disk X (replace X with the disk number) and press Enter. Finally, type list partition to display all the partitions on the selected disk and identify the system partition. To make it active, type select partition Y (replace Y with the partition number) and then type active.

Your system partition should now be set as active.

Recovering Important Data After Failure

If you are facing the issue of “Active Partition Not Found” in Windows 10, it is important to recover any important data before proceeding with any solutions. To recover data after a failure, you can follow these steps:

First, try to boot your computer using a Windows Preinstallation Environment (WinPE) USB drive. This will allow you to access your files without booting into the problematic Windows installation.

Once booted into WinPE, navigate to the disk partition where your important data is located. You can then copy the data to an external drive or USB stick to ensure it is safely backed up.

If you are unable to boot into WinPE, you can remove the hard drive from your computer and connect it to another computer as an external drive. This will allow you to access the files and recover any important data.

If all else fails, you can consider using data recovery software to retrieve your files. There are many reliable programs available that can help you recover data from a failing or inaccessible drive.

Backup Strategies for Future Protection

Backup Strategy Description
Regular Backups Make sure to regularly backup your important files and data to an external hard drive or cloud storage to prevent data loss in case of system failure.
System Image Backup Create a system image backup of your entire computer to easily restore it to a previous state in case of major system issues.
Incremental Backups Perform incremental backups in addition to regular backups to save time and storage space by only backing up changes made since the last backup.
Offsite Backup Store backups in a separate location from your computer to protect against physical damage or theft of your devices.
Automatic Backup Tools Use automatic backup tools or software to schedule regular backups and ensure that your data is always protected without manual intervention.

Frequently Asked Questions

How do I fix no active partition?

To fix no active partition, you can try checking if the Windows installation hard drive is detected by BIOS, setting BIOS to default settings, repairing system files via Startup Repair, repairing MBR via CMD, or setting the system partition as active.

How do I fix a partition error?

To fix a partition error, you can enter the command: chkdsk E: /f /r /x in Windows 10. Replace “E” with the drive letter of the partition you want to repair. This will run CHKDSK to check and repair disk errors.

How do I make my GPT partition active?

You cannot make a GPT partition active. Only MBR disks allow for partitions to be marked as active.

How do I fix a partition not showing?

To fix a partition not showing, you can access Disk Management by pressing Windows key + X and selecting it from the menu. Check if the missing partition is listed there, and if it is, right-click on it and assign a new drive letter through “Change Drive Letter and Paths.”

Netflix Not Working on Fire Tablet: Troubleshoot & Fix

Having trouble getting Netflix to work on your Fire Tablet? Let’s troubleshoot and fix the issue.

Clear App Data

To clear app data on your Fire Tablet for Netflix, go to Settings > Applications > Manage Installed Applications > Netflix. Then, select “Clear Data.” This will reset the app and may resolve any issues you’re experiencing with Netflix not working.

Reinstall the App

To troubleshoot and fix Netflix not working on your Fire Tablet, try reinstalling the app. Simply uninstall the Netflix app from your device and then reinstall it from the Amazon Appstore. This can often resolve any issues with the app not functioning properly.

If you are experiencing any other issues with Netflix on your Fire Tablet, such as streaming problems or playback errors, make sure your device is connected to a stable internet connection. You can also try clearing the cache and data for the Netflix app in the device settings to see if that resolves the issue.

Additionally, check for any updates available for the Netflix app or your Fire Tablet’s operating system. Keeping both the app and the device up to date can help ensure optimal performance.

Test Internet Connection

  • Check Wi-Fi Connection:
    • Make sure the Wi-Fi is turned on and you are connected to the correct network.
    • Try restarting the Wi-Fi router to refresh the connection.
  • Try Using Mobile Data:
    • If available, switch to using your mobile data to see if the issue is with the Wi-Fi connection.
  • Restart Device:
    • Try restarting your Fire Tablet to reset the network settings.

Restart Your Device and Network

Fire tablet and network icons

Restart Your Device and Network: If Netflix is not working on your Fire Tablet, start by restarting your device. Press and hold the power button until the power off prompt appears. Once the device is off, turn it back on. Additionally, reset your network by turning off your Wi-Fi router, waiting a few seconds, and turning it back on. This can help resolve connectivity issues.

Frequently Asked Questions

Why won’t Netflix play on Amazon Fire tablet?

Netflix won’t play on Amazon Fire tablet because there may be a need to force stop and clear data and cache for the App Store, check available memory, restart the device, sync with the network, and stop all background apps.

Does Amazon Fire tablet allow Netflix?

Amazon Fire tablet does allow Netflix, as you can download the Netflix app from the Amazon Appstore on tablets with Fire OS version 5 or later. Just follow the steps to connect your Amazon Fire tablet to your Netflix account.

Why won’t Netflix load on my Kindle?

Netflix may not be loading on your Kindle due to a potential issue with the app itself. Try uninstalling and reinstalling the app from the Amazon Appstore to see if that resolves the problem. Additionally, ensure that your device is up to date by checking for system updates in Settings.

How do I clear the cache on my Amazon Fire tablet?

To clear the cache on your Amazon Fire tablet, you can open the Settings menu, select Apps & Notifications, choose the app you are having trouble with, then select Storage and tap to Clear Cache.

Can’t Unpin Items From Taskbar Fix Windows 10/11

Struggling to unpin items from your taskbar in Windows 10/11? Let’s explore some potential solutions.

Restarting Explorer.exe Process

If you’re having trouble unpinning items from your taskbar in Windows 10/11, one possible solution is to restart the Explorer.exe process. Here’s how you can do it:

1. Press Ctrl + Shift + Esc to open the Task Manager.

2. In the Processes tab, locate Windows Explorer.

3. Right-click on Windows Explorer and select End task.

4. Click File in the Task Manager and select Run new task.

5. Type “explorer.exe” in the dialog box and click OK.

This should restart the Explorer.exe process and may resolve the issue you are experiencing with unpinning items from your taskbar. If you continue to have problems, you may need to explore other solutions such as checking for Windows updates, restarting your computer, or resetting the Windows Registry settings.

Removing Programs via Start Menu

  • Click on the Start menu icon in the bottom left corner of the screen
  • Locate the program you want to remove from the Taskbar
  • Right-click on the program’s icon
  • Select “Unpin from Taskbar
  • The program will be removed from the Taskbar

Deleting Shortcuts and Uninstalling Programs

To delete shortcuts and uninstall programs from the taskbar in Windows 10/11, follow these steps:

1. Right-click on the shortcut or program icon you want to remove from the taskbar.
2. From the context menu that appears, select Unpin from taskbar.
3. To uninstall a program, go to the Start menu and open the Settings app.
4. Click on Apps and then select Apps & features from the left-hand menu.
5. Scroll through the list of installed programs, find the one you want to uninstall, and click on it.
6. Click on the Uninstall button and follow the on-screen instructions to complete the uninstallation process.

If you encounter any issues with unpinning items from the taskbar, you can try resetting the taskbar by following these steps:

1. Press Ctrl + Shift + Esc to open the Task Manager.
2. Locate Windows Explorer in the list of processes, right-click on it, and select Restart.

If the problem persists, you may need to explore other solutions such as checking for Windows Registry errors or utilizing Group Policy settings. Feel free to seek further assistance from Microsoft support forums or Reddit communities specializing in Windows issues.

Modifying Taskbar Settings and Registry

To modify Taskbar settings and registry to fix the issue of not being able to unpin items from the Taskbar in Windows 10/11, follow these steps:

1. Open Registry Editor by pressing Windows key + R, typing “regedit”, and hitting Enter.
2. Navigate to the following key: HKEY_CURRENT_USER\Software\Microsoft\Windows\CurrentVersion\Explorer\Taskband
3. Right-click on Taskband and select New > DWORD (32-bit) Value.
4. Name the new value “NumThumbnails” and set its value data to 0.
5. Restart your computer for the changes to take effect.

By modifying these settings in the registry, you should now be able to unpin items from the Taskbar without any issues. If you are still experiencing difficulties, consider checking Group Policy settings or seeking help from Microsoft or online communities like Reddit for further assistance.

F.A.Q.

Why is my taskbar still locked?

Your taskbar may still be locked due to various reasons such as an incomplete operating system update, an update bug, corrupted system files, or corrupted user account files.

Windows 10 Installation Stuck Fix

Having trouble with your Windows 10 installation getting stuck? Let’s find a fix.

Perform a Hard Reset

To perform a hard reset on a stuck Windows 10 installation, follow these steps. First, power off your computer completely. Then, unplug all external devices and remove any discs from the drives. Next, press and hold the power button for at least 10 seconds to drain any residual power.

After that, plug your computer back in and turn it on again. Finally, attempt to resume the installation process. This hard reset can help resolve any issues causing the installation to be stuck. If the problem persists, you may need to seek further troubleshooting steps.

Repair Bad Sectors

Bad Sector Repair Steps Description
Step 1: Check Disk for Errors Run the chkdsk utility to scan for and repair bad sectors on the disk.
Step 2: Use Disk Cleanup Clean up temporary files and system files that may be causing the installation to get stuck.
Step 3: Disable Antivirus Software Temporarily disable any antivirus software that may be interfering with the installation process.
Step 4: Update Drivers Make sure all device drivers are up to date to prevent any conflicts during installation.
Step 5: Reset Windows Update Components Reset the Windows Update components to ensure a smooth installation process.

Change BIOS Settings

To change BIOS settings during a Windows 10 installation, you can access the BIOS menu by restarting your computer and pressing the specified key (usually F2, F12, Delete, or Esc) during the boot-up process. Once in the BIOS menu, navigate to the “Boot” tab using the arrow keys. Locate the “Boot Mode” or “Boot Priority” setting and change it to either UEFI or Legacy, depending on your system. Save the changes and exit the BIOS.

This should help resolve any issues with the installation being stuck.

Use External Media for Installation

External hard drive or USB drive

To fix a stuck Windows 10 installation, try using external media such as a USB flash drive or optical disc image. First, create a bootable USB drive with the Windows 10 installation files. Insert the USB drive into your computer and restart it. Access the boot menu by pressing a specific key (usually F12 or ESC) during startup.

Choose the USB drive as the boot device. This will allow you to bypass any installation issues and proceed with the setup process. If you encounter any errors or get stuck again, try using a different USB port or creating a new installation media. External media can often help resolve installation problems quickly and effectively.

Disconnect Additional Peripherals

Disconnect any additional peripherals such as external hard drives, printers, or USB devices before attempting to fix a Windows 10 installation that is stuck. This can help eliminate any potential conflicts that may be causing the issue.

Once you have disconnected all additional peripherals, restart your computer and see if the installation process progresses. If the installation is still stuck, you may need to troubleshoot further to identify the root cause of the problem.

Use a Newer USB Drive

To fix a Windows 10 installation that is stuck, try using a newer USB drive. The issue could be related to the drive itself, so using a different one might help resolve the problem. Make sure to use a USB drive that is in good condition and has enough storage space for the installation files. Try using a USB 3. 0 drive for faster data transfer speeds, which may help the installation process go more smoothly.

Additionally, double-check that the drive is properly formatted and set up for booting to avoid any potential issues during the installation process.

Download the Windows ISO File Again

To download the Windows ISO file again, visit the official Microsoft website and navigate to the Windows 10 download page. Choose the edition of Windows 10 that you need and select the language. Click on the “Download” button to begin the process.

Once the ISO file has finished downloading, you can use it to create a bootable USB flash drive or burn it to a DVD. Boot your computer from the USB or DVD and follow the on-screen instructions to reinstall Windows 10.

Delete All Partitions

Empty hard drive

To delete all partitions during the Windows 10 installation process, you can use the following steps. First, boot your computer using the Windows installation media. Then, when you reach the screen where you select the disk to install Windows on, press Shift+F10 to open a command prompt window. Next, type diskpart and press Enter to open the DiskPart tool.

Now, type list disk to display all the disks on your system. Identify the disk you want to delete partitions from by its size, then type select disk X (replace X with the appropriate disk number). Finally, type clean to delete all partitions on the selected disk.

Remove Unnecessary RAM Modules

To fix a Windows 10 installation that is stuck, one possible solution is to remove unnecessary RAM modules. First, shut down your computer and unplug all external devices. Next, open up your computer case and locate the RAM modules. Then, carefully remove any unnecessary RAM modules, leaving only the necessary ones installed. After removing the RAM modules, close up your computer case and restart your computer. This may help resolve any installation issues you were experiencing.

If the problem persists, you may need to explore other troubleshooting options.

Leave Setup Running

Leave Setup Running: If your Windows 10 installation seems stuck, don’t panic. Sometimes the process can take longer than expected. Give it some time to complete, as interrupting it may cause issues.

Make sure your computer is plugged in to avoid any power interruptions. If it’s been stuck for an unusually long time, try restarting your computer and running the installation again. It’s also a good idea to check if your hard disk drive or solid-state drive is functioning properly, as this could be causing the issue. Stay patient and let the installation process run its course.

F.A.Qs

What to do if installing Windows 10 stuck?

If installing Windows 10 is stuck, you can try updating the BIOS or UEFI firmware to the latest version. Additionally, you can reset the BIOS settings to default, ensure that UEFI is enabled, disable CSM or Legacy BIOS, set Windows Boot Manager as the first boot option, disable Secure and Fast Boot if needed, and set the SATA controller to AHCI. Save the changes and exit the BIOS settings.

When I install Windows 10 it freezes?

When installing Windows 10, ensure you have all the latest drivers such as BIOS, chipset, display, sound, USB3, Bluetooth, and network drivers. If you are experiencing freezing issues, try uninstalling and reinstalling the Wifi driver in Device Manager.

Why is my install not responding Windows 10?

Your install may not be responding in Windows 10 due to a damaged or missing file needed by Windows Update. Try restarting the device and running setup again. If the issue persists, use the Disk Cleanup utility to clean up temporary files and System files.

What to do if Windows reinstall is stuck?

If Windows reinstall is stuck, you can try restarting the process first. If that doesn’t work, consider booting into Safe Mode or using system restore options. Remember to backup your important data before attempting any fixes.

How to Fix HTTP 400 Bad Request: 6 Easy Methods

In this article, I will discuss six easy methods to fix the HTTP 400 Bad Request error.

Understanding the 400 Bad Request Error

The HTTP 400 Bad Request error occurs when the server cannot process the request sent by the client due to invalid syntax. This can happen for various reasons, such as incorrect URL formatting or missing required parameters.

To fix this error, start by checking the URL for any typos or extra characters. Make sure it follows the correct syntax and includes all necessary components.

Next, clear your browser’s cache and cookies, as outdated data stored in the cache can sometimes cause the error to occur.

If the issue persists, try accessing the website using a different browser or device to see if the error is specific to a certain platform.

You can also try resetting your network connection by restarting your modem or router, as connectivity issues can sometimes lead to the 400 Bad Request error.

If none of these methods work, consider contacting the website’s administrator for further assistance, as the error may be related to server-side issues beyond your control.

Common Causes of the Error

  • Open the browser you are using
  • Press Ctrl+Shift+Delete to open the Clear browsing data window
  • Select the time range you want to clear
  • Check the box next to “Cached images and files”
  • Click “Clear data”

Check URL for Errors

  • Double-check the URL you entered for any spelling errors
  • Ensure the URL is complete and accurate
  • Try retyping the URL
  • Check for any extra characters or spaces in the URL

Disable Browser Extensions

  • Open your browser’s extension or add-ons menu
  • Disable all extensions
  • Restart your browser
  • Check if the error persists
  • Enable extensions one by one to identify the cause

Clear Cookies

  • Open your browser
  • Press Ctrl+Shift+Delete to open the Clear browsing data window
  • Select the time range you want to clear
  • Check the box next to “Cookies and other site data”
  • Click “Clear data”

Check Requested URL

  • Verify the URL you are trying to access is correct
  • Ensure the URL is valid and properly formatted
  • Check for any special characters or encoding issues in the URL
  • Try accessing a different URL to see if the error is specific to one site

Restart Your Device

  • Close all open programs and applications
  • Shut down your device completely
  • Wait a few minutes before restarting your device
  • Open your browser and try accessing the site again

Identifying URL String Syntax Issues

To identify URL string syntax issues in the article titled “How to Fix HTTP 400 Bad Request: 6 Easy Methods,” you can first check for any special characters or spaces in the URL. Make sure there are no typos or missing characters that could be causing the error.

Next, look for any incorrect formatting or encoding in the URL string. Sometimes, special characters need to be encoded properly to work correctly in a URL. Check for any mistakes in this area.

If the URL includes parameters, verify that they are structured correctly and separated by the appropriate symbols. Incorrect parameter formatting can lead to a bad request error.

Additionally, check for any missing or extra slashes in the URL. The structure of the URL should be consistent and follow the correct syntax.

If you are still experiencing issues, try using a URL validator tool or online checker to help identify any syntax errors. These tools can pinpoint specific problems in the URL string that may be causing the bad request error.

Resolving Corrupted Browser Cache and Cookies

To resolve corrupted browser cache and cookies, the first step is to clear the cache and cookies in your web browser. In Google Chrome, you can do this by clicking on the three dots in the top right corner, selecting “More tools,” and then “Clear browsing data.” Make sure to check the boxes for “Cookies and other site data” and “Cached images and files.”

If you are using Microsoft Edge, you can clear your cache and cookies by clicking on the three dots in the top right corner, selecting “Settings,” then “Privacy, search, and services,” and finally “Choose what to clear.” Check the boxes for “Cookies and saved website data” and “Cached data and files.”

Another method to resolve HTTP 400 Bad Request is to reset your browser settings. In Google Chrome, go to “Settings,” scroll down to “Advanced,” and then click on “Restore settings to their original defaults.” This will reset your browser to its default state, eliminating any corrupt settings.

If clearing the cache and resetting the settings do not work, you can try updating your browser to the latest version. Outdated browsers can sometimes cause HTTP 400 errors. Check for updates in the settings of your browser and install any available updates.

In addition, you can try using a different web browser to see if the issue persists. Sometimes, a specific browser may have compatibility issues with certain websites, leading to HTTP 400 errors. Try accessing the website in a different browser, such as Mozilla Firefox or Safari, to see if the problem is resolved.

Addressing DNS Lookup Issues

To address DNS lookup issues causing an HTTP 400 Bad Request error, follow these 6 easy methods:

1. Check the URL: Ensure there are no typos or incorrect characters in the URL that could be causing the bad request error.

2. Clear browser cache: Clearing the cache in your web browser can help resolve DNS lookup issues by getting rid of any outdated or corrupted data.

3. Restart your computer: Sometimes a simple restart can help refresh your network connection and resolve DNS lookup problems causing the bad request error.

4. Flush DNS: Use the command prompt to flush your DNS cache, which can help resolve any issues with name resolution that may be causing the HTTP 400 error.

5. Change DNS server: Try switching to a different DNS server to see if that resolves the bad request error caused by DNS lookup issues.

6. Contact your ISP: If none of the above methods work, reach out to your Internet Service Provider to see if there are any larger network issues causing the DNS lookup problems.

Managing Large File Uploads

To manage large file uploads and avoid encountering an HTTP 400 Bad Request error, there are several easy methods you can try.

Method 1: Check the file size limit set by your web server and adjust it if necessary to accommodate larger files.

Method 2: Increase the timeout settings on your server to allow more time for the file upload process to complete.

Method 3: Make sure your client-side code is correctly handling the file upload process and not causing any conflicts with the server-side logic.

Method 4: Clear your cache and cookies to eliminate any potential data corruption that may be causing the bad request error.

Method 5: Verify that your file names do not contain any special characters or spaces, as this can sometimes trigger an error during the upload process.

Method 6: Double-check your network connection to ensure there are no issues with connectivity that could be disrupting the file upload.

Generic Server Errors Explained

If you encounter a Generic Server Error, such as an HTTP 400 Bad Request, there are several easy methods you can try to resolve the issue.

Check the URL: Make sure there are no typos or errors in the URL you are trying to access.

Clear your browser cache: Clearing your browser’s cache can help resolve issues with stored data that may be causing the error.

Check for server-side errors: Contact the website administrator to see if there are any server-side errors causing the problem.

If you are still experiencing the error, try using a different browser or device to see if the issue is specific to one platform.

Inspect your network connection: Ensure that your internet connection is stable and not causing any communication errors.

Double check your input: Make sure any forms or fields you are submitting information to are filled out correctly.

Appearance Across Different Browsers

Make sure to: test your website on popular browsers such as Google Chrome, Mozilla Firefox, Microsoft Edge, Safari, and Opera. This will give you a good idea of how your site looks across different platforms.

Check for: any HTML, CSS, or JavaScript issues that may be affecting the appearance of your site. Sometimes, a software bug can cause your site to display incorrectly on certain browsers.

Clear your cache: Before testing your site on different browsers, make sure to clear your web cache to avoid any potential conflicts.

Verifying the Submitted URL

To verify the submitted URL in an article titled “How to Fix HTTP 400 Bad Request: 6 Easy Methods,” follow these steps:

1. First, double check that the URL submitted is correct and properly formatted. Ensure there are no typos or missing characters.

2. Verify the IP address associated with the URL matches the intended destination. Use a lookup table to cross-reference the information.

3. Check for any potential data corruption or error messages that may be causing the HTTP 400 Bad Request. Look for any inconsistencies in the communication between the client and server.

4. Inspect the name resolution process to make sure the domain name is correctly mapped to the correct IP address. This can help identify any issues with the hostname.

5. If using a web cache, clear the cache to eliminate any potential glitches or logic errors that could be causing the bad request.

6. Finally, test the URL in different web browsers such as Opera or Safari to see if the issue persists across different platforms.

Deactivating Browser Extensions for Troubleshooting
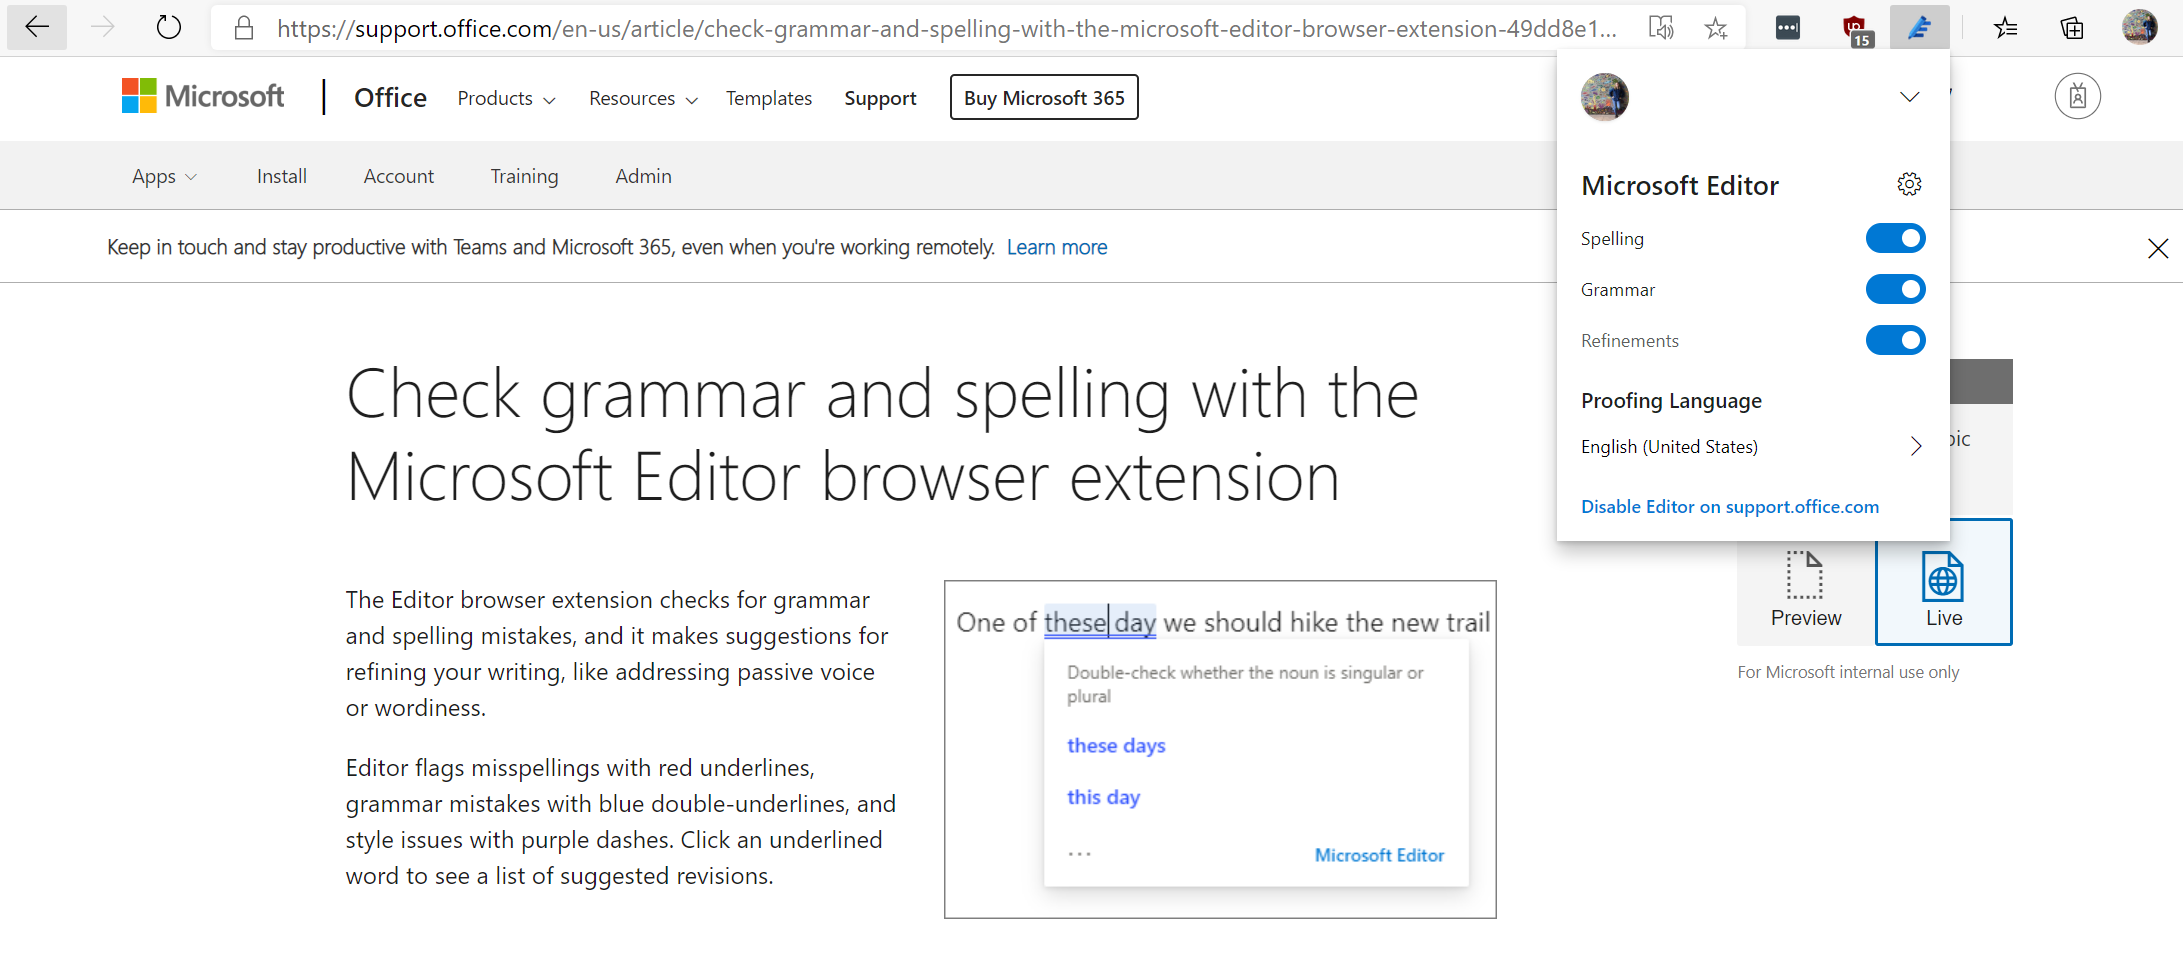
Browser extensions page

To troubleshoot HTTP 400 Bad Request errors, one effective method is to deactivate browser extensions. These extensions can sometimes interfere with the communication between the client and the web server, resulting in errors.

To deactivate browser extensions in Opera, click on the menu icon, go to “Extensions”, and disable them one by one. In Safari, open the browser, click on “Safari” in the menu bar, select “Preferences”, go to the “Extensions” tab, and disable them.

After deactivating the extensions, refresh the webpage where you encountered the HTTP 400 error. If the error is resolved, you can then enable the extensions one by one to identify which one was causing the issue.

Deactivating browser extensions can help in troubleshooting HTTP 400 Bad Request errors by eliminating potential conflicts between the extensions and the web server. It is a simple yet effective method to resolve such errors and ensure a smooth browsing experience.

Clearing the DNS Cache

To clear the DNS cache, follow these steps:

1. Windows:
– Press Windows key + R to open the Run dialog box.
– Type cmd and press Enter to open the Command Prompt.
– In the Command Prompt, type ipconfig /flushdns and press Enter to clear the DNS cache.

2. Mac:
– Open the Terminal application.
– Type sudo killall -HUP mDNSResponder and press Enter to clear the DNS cache on macOS.

3. Linux:
– Open the terminal.
– Type sudo /etc/init.d/nscd restart or sudo service nscd restart depending on your Linux distribution to clear the DNS cache.

Troubleshooting Device and Internet Connection

Method Description
1 Check your internet connection by restarting your router or switching to a different network.
2 Clear your browser’s cache and cookies to eliminate any corrupted data causing the bad request.
3 Update your browser to the latest version to ensure compatibility with the website you are trying to access.
4 Disable browser extensions and plugins that may be interfering with the website’s functionality.
5 Check for any firewall or antivirus software blocking the website and temporarily disable them to see if it resolves the issue.
6 Contact the website administrator or your internet service provider for further assistance if none of the above methods work.

Frequently Asked Questions

How do I fix HTTP 400 error?

To fix an HTTP 400 error, you can start by double-checking the URL for any errors. Clear your browser cache and cookies, turn off any browser extensions, clear the DNS cache, and make sure the file size does not exceed server limits.

What is HTTP 400 with reason?

HTTP 400 occurs when the server is unable to process a request due to a client error, such as malformed syntax or invalid message framing.

How to debug HTTP 400 errors?

To debug HTTP 400 errors, you can start by checking the submitted URL, clearing browser cache and cookies, checking if file uploads exceed server limits, clearing DNS cache, and deactivating browser extensions.
Fix iPad Earphone Not Working??????Tips

Having trouble with your iPad earphones not working? Here are some tips to help you fix the issue.

Common Reasons for Headphone Jack Issues

Headphone jack with an X mark symbolizing issue

If you are experiencing problems with your iPad earphones not working, try cleaning the headphone jack with a small brush or compressed air to remove any debris that may be causing the issue.

Another solution could be to try using a different pair of headphones to see if the problem lies with the headphones themselves.

If the problem persists, you may want to restart your iPad to see if that resolves the issue.

If none of these solutions work, it may be best to visit an Apple Store or Genius Bar for further troubleshooting or to inquire about potential warranty options.

Troubleshooting Steps and DIY Fixes

  • Check the Earphone Connection

    • Ensure the earphone is fully plugged into the iPad’s headphone jack.
    • Try removing and reinserting the earphone to see if it makes a proper connection.
    • Inspect the earphone for any damage or debris that may be blocking the connection.
  • Restart the iPad

    • Hold down the power button until the “Slide to Power Off” slider appears.
    • Slide the slider to turn off the iPad.
    • Wait a few seconds, then press the power button again to turn on the iPad.
  • Check Volume Settings

    • Adjust the volume using the volume buttons on the side of the iPad.
    • Make sure the volume is not muted or turned down too low.
    • Try playing audio from another app to see if the issue is specific to one app.

Professional Repair and Replacement Process

If the earphone on your iPad is not working, you may need to repair or replace it. Here is a professional process to help you fix the issue:

First, check the earphone connection to ensure it is plugged in properly. Sometimes a loose connection can cause the problem.

If the connection is secure and the earphone still does not work, try using a different pair of earphones to see if the issue is with the original pair.

If the problem persists, restart your iPad to see if that resolves the issue. Sometimes a simple restart can fix technical glitches.

If none of the above steps work, you may need to contact Apple support or visit an Apple store for further assistance. They can help diagnose the problem and offer solutions such as repair or replacement.

Post-Repair Checks and Additional Tips

iPad with earphones plugged in

After completing the repair process for the iPad earphone not working issue, it is important to perform post-repair checks to ensure everything is functioning correctly.

Firstly, test the earphones on another device to rule out any issues with the earphones themselves.

Secondly, try restarting the iPad to see if that resolves the problem.

Thirdly, check the audio settings on the iPad to make sure they are correctly configured.

If the issue persists, it may be necessary to seek further assistance from Apple support or visit a Genius Bar for professional help.

Additionally, it is always a good idea to avoid exposing your iPad to moisture and keep it away from extreme temperatures to prevent any potential damage to the earphone jack.

FAQ

Why are my headphones not working when I plug them in iPad?

Your headphones may not be working when plugged into your iPad due to a variety of reasons. First, try using a different pair of headphones to ensure the issue is not with the earphones themselves. If the problem persists, you may need to try a Hard Reset on your iPad. If the issue continues, it is possible that the headphone jack connector needs to be replaced.

Why are my earphones not working when I plug them in?

Your earphones may not be working when you plug them in due to a bent or damaged audio jack, cable, or internal headphone damage. Check for physical damage on the jack and cable to troubleshoot the issue.

How do I get my wired headphones to work on my iPad?

To get your wired headphones to work on your iPad, you can use a USB-C to 3.5 mm Headphone Jack Adapter. Simply plug the adapter into the USB-C port on your iPad and then plug your headphones into the adapter.

How do I get my iPad out of headphone mode?

To get your iPad out of headphone mode, try switching to speaker or enabling airplane mode. Simply go into settings and toggle on airplane mode to resolve the issue.

Garmin Express Uninstall Failed, Try Again

Having trouble uninstalling Garmin Express? Keep getting the “Uninstall failed, try again” message? Here’s what to do next.

Reasons Behind Uninstallation Attempts

Some common reasons behind failed Garmin Express uninstallation attempts include conflicts with other software, corrupted installation files, or insufficient permissions. Make sure to close all Garmin Express-related processes and try again. If that doesn’t work, boot your computer in Safe Mode and attempt the uninstallation. It may also be helpful to run a Windows Registry cleaner to fix any issues that could be causing the problem. If all else fails, contact Garmin support for further troubleshooting assistance.

Common Uninstallation Problems

Garmin Express uninstallation error message

  • Check for any running processes related to Garmin Express:

    • Open Task Manager by pressing Ctrl+Shift+Esc
    • Look for any Garmin Express processes running
    • End the process by selecting it and clicking on End Task
  • Use Control Panel to uninstall Garmin Express:

    • Press Windows key + R to open the Run dialog box
    • Type appwiz.cpl and press Enter
    • Locate Garmin Express in the list of installed programs
    • Click on Uninstall and follow the on-screen instructions
  • Clean up remaining files and registry entries:

    • Delete the Garmin Express folder from C:\Program Files
    • Press Windows key + R to open the Run dialog box
    • Type regedit and press Enter to open the Registry Editor
    • Navigate to HKEY_CURRENT_USER\Software and HKEY_LOCAL_MACHINE\Software
    • Delete any Garmin Express entries

Complete Uninstallation Methods

1. Use the Uninstaller Tool: Locate the Garmin Express uninstaller in the programs folder and run it to remove all program files.

2. Manually Delete Remaining Files: Go to the program files and app data folders to delete any remaining Garmin Express files.

3. Clear Registry Entries: Use the Windows Registry Editor to remove any Garmin Express registry entries.

4. Reboot Your Computer: Restart your computer after completing the uninstallation process to ensure all changes are applied.

Utilizing Third-party Tools for Removal

If Garmin Express uninstallation fails, try using third-party tools to remove the software completely. Some tools like Revo Uninstaller or CCleaner can help you get rid of stubborn programs. Download one of these tools and run it on your computer. Follow the on-screen instructions to scan for Garmin Express and remove it from your system.

Make sure to restart your computer after the process is complete to ensure the software is fully removed.

F.A.Qs

How do I uninstall Garmin Express?

To uninstall Garmin Express, you can go to Apps and Features or Programs and Features, locate Garmin Express in the list, and then click on uninstall to initiate the uninstallation process.

How do I uninstall Garmin from my Mac?

To uninstall Garmin from your Mac, you can open Finder, click on Go in the menu bar, select Computer, and then drag the Garmin device to the Trash to remove it safely.

How do I uninstall Garmin update?

To uninstall a Garmin update, you can navigate to the Settings menu from the Start menu, select Apps & features, and scroll down to find the Garmin Express or Garmin WebUpdater that you want to remove. Highlight the app and select uninstall.

Why won’t Garmin Express work?

Garmin Express may not work due to issues with the USB cable, USB ports, or outdated software. Try using a different USB cable, checking the USB ports, force quitting Garmin Express, restarting the computer, and ensuring that Garmin Express is up to date.