Why Netflix Won’t Work on My Computer: How to Fix Issues

I’ve been having trouble getting Netflix to work on my computer lately. Here are some tips for fixing common issues.

Restart Your Computer

If Netflix isn’t working on your computer, it could be due to a variety of reasons. One simple solution to try is restarting your computer. This can help refresh the system and potentially resolve any issues that may be causing Netflix to not work properly.

First, save any work you have open and close all applications. This will ensure that you don’t lose any important data when you restart your computer.

Next, click on the Start menu and select the option to restart your computer. Allow your computer to shut down completely and then turn it back on.

Once your computer has restarted, try accessing Netflix again to see if the issue has been resolved. If Netflix still isn’t working, you may need to try other troubleshooting steps.

Restarting your computer is a quick and easy way to potentially fix issues with Netflix not working on your computer. It’s always a good idea to start with simple solutions like this before moving on to more complex troubleshooting steps.

Clear the Netflix Cookie from Your Web Browser

To clear the Netflix cookie from your web browser, follow these steps:

1. Open your web browser and go to the Netflix website.

2. Sign in to your Netflix account if you are not already signed in.

3. Locate the menu in your web browser. This is typically found in the top right corner of the browser window.

4. Click on the menu button to open the drop-down menu.

5. Look for the option that allows you to access your browser’s settings or preferences.

6. Find the section that deals with cookies or browsing data.

7. Look for an option to clear cookies or browsing data.

8. Select the option to clear cookies or browsing data.

9. Confirm that you want to clear the cookies from your web browser.

10. Close your web browser and then reopen it.

11. Go back to the Netflix website and try to access your account again.

Check Your Internet Connection

If you are connected to Wi-Fi, try restarting your router and modem. Sometimes a simple reset can fix connectivity issues. Additionally, make sure your internet service provider is not experiencing any outages in your area.

If you are using a wired connection, check the Ethernet cable to ensure it is securely connected to both your computer and the modem or router. You may also want to try using a different Ethernet port on your router or switch.

It is also a good idea to check your DNS settings. Your DNS settings translate domain names into IP addresses that your computer can understand. If your DNS settings are incorrect, it can cause connectivity issues with certain websites, including Netflix.

To check your DNS settings, go to your network settings on your computer and look for the DNS configuration. You can try using Google’s public DNS (8.8.8.8 and 8.8.4.4) or your ISP’s DNS servers.

If you are still experiencing issues, try accessing Netflix on a different device, such as a smartphone or smart TV. If Netflix works on other devices but not on your computer, the issue may be with your computer hardware or software.

In some cases, clearing your browser’s cache and cookies can help resolve connectivity issues. You can do this by going to your browser settings and clearing your browsing data.

If none of these solutions work, you may want to contact your internet service provider for further assistance. They may be able to troubleshoot the issue and provide additional guidance on how to fix the problem.

Sign Out of Netflix

1. Click on your profile icon in the top right corner of the Netflix homepage.

2. Select “Account” from the drop-down menu.

3. Scroll down to the “Settings” section and click on “Sign out of all devices”.

4. Confirm your decision to sign out and you will be logged out of Netflix on all devices.

If you are experiencing issues with Netflix on your computer, signing out and then signing back in may help resolve any glitches or errors. Remember to also check your internet connection, clear your browser cache, and make sure your browser and computer are up to date.

Restart Your Home Network

Step 1: Start by turning off your computer, smart TV, router, and any other devices connected to your home network.

Step 2: Unplug the power cords from your router and modem. Wait for about 30 seconds before plugging them back in.

Step 3: Turn on your modem first and wait for it to fully boot up. Then, turn on your router and wait for it to establish a connection.

Step 4: Once your router and modem are up and running, turn on your computer and smart TV.

By restarting your home network, you are essentially refreshing the connection between your devices and the internet. This can help resolve any network issues that may be causing Netflix to not work properly on your computer.

If restarting your home network does not fix the issue, you may want to check for any software updates on your computer or smart TV. Sometimes, outdated software can cause compatibility issues with streaming services like Netflix.

Additionally, clearing your browser’s cache and cookies can also help resolve any streaming issues. Cookies are small pieces of data stored on your computer by websites, and clearing them can sometimes fix connectivity problems with streaming services.

Improve Your Wi-Fi Signal

Another way to boost your Wi-Fi signal is by reducing interference from other devices. Avoid placing your router near electronic devices like microwaves or cordless phones that can interfere with the signal. You can also try changing the channel on your router to minimize interference from other nearby networks.

Updating your router’s firmware can also help improve your Wi-Fi signal. Check the manufacturer’s website for any available updates and follow the instructions to install them. Regularly updating your router’s firmware can help improve its performance and stability.

Consider investing in a Wi-Fi extender or a mesh network system to boost your Wi-Fi signal in areas with poor coverage. Wi-Fi extenders can help amplify your existing signal, while mesh networks can provide seamless coverage throughout your home.

If you’re still experiencing issues with your Wi-Fi signal, you may need to contact your internet service provider for assistance. They can help troubleshoot any problems with your connection and ensure that your Wi-Fi signal is strong and stable.

Contact Your Internet Service Provider

When you contact your ISP, be sure to provide them with details about the specific issue you are experiencing. This could include error messages, loading issues, or any other symptoms that may be occurring when you try to use Netflix on your computer.

Your ISP may be able to provide you with troubleshooting steps to help resolve the issue. This could involve resetting your router, checking for any network outages in your area, or making sure that your DNS settings are correct.

If your ISP is unable to resolve the issue, they may recommend contacting Netflix directly for further assistance. Netflix may be able to provide you with additional troubleshooting steps specific to their service.

By contacting your ISP, you can ensure that you are taking the necessary steps to address any connectivity issues that may be preventing Netflix from working on your computer.

Clear the Netflix App Data

To clear the Netflix app data on your computer, follow these steps:

1. First, open the Netflix app on your computer.

2. Next, navigate to the settings or preferences section of the app.

3. Look for an option that allows you to clear the app data. This may be located under a section labeled “Storage” or “Advanced settings.”

4. Click on the option to clear the app data. This will remove any cached data or temporary files that may be causing issues with the app.

5. Once the app data has been cleared, close the Netflix app and restart your computer.

6. After restarting your computer, open the Netflix app again and see if the issue has been resolved. If not, you may need to try other troubleshooting steps or contact Netflix support for further assistance.

Go to Netflix.com on a Web Browser

If Netflix is not working on your computer, one common issue could be related to your web browser. To fix this problem, try accessing Netflix on a different web browser. Open a different web browser, such as Google Chrome, Mozilla Firefox, or Microsoft Edge, and go to Netflix.com. This can help determine if the issue is specific to your current browser.

Another potential reason why Netflix is not working on your computer could be related to your internet connection. Check your internet connection by opening a new tab and navigating to a different website to see if it loads properly. If other websites are loading fine, then the issue may not be related to your internet connection.

If Netflix still does not work on your computer, try clearing your browser’s cache and cookies. In your web browser, go to the settings or preferences section and find the option to clear browsing data. Make sure to select the option to clear cookies and cache, then restart your browser and try accessing Netflix again.

Sometimes, the issue may be related to outdated browser software. Check if your web browser is up to date by going to the browser’s settings and looking for the option to update the software. Updating your browser to the latest version can often resolve compatibility issues with websites like Netflix.

If none of these solutions work, the problem may be related to your computer’s hardware or software. Try restarting your computer to see if that resolves the issue. If Netflix still does not work after restarting, you may need to troubleshoot further or seek assistance from a technical support professional.

In some cases, the issue may be related to Netflix itself or the servers that host the streaming service. Check the Netflix status page or social media accounts to see if there are any reported outages or technical issues. If Netflix is experiencing problems on their end, you may need to wait for them to resolve the issue before you can access the service on your computer.

Check for Special Characters

1. Scan the text for any unusual symbols or characters that may not be recognized by the system. Special characters like %, &, *, $, and # can sometimes cause issues with compatibility. It’s important to ensure that all text in the article is in standard alphanumeric format.

2. Use a text editor or word processing software to review the entire article. Look for any instances where special characters are used inappropriately or where they may be interfering with the functioning of the text. Make sure to remove or replace any special characters that are not necessary for the content.

3. Pay special attention to any URLs or hyperlinks within the article. Sometimes special characters can cause links to break or malfunction. Check that all URLs are properly formatted and do not contain any special characters that could be causing issues with the functionality of the links.

4. Test the article on different devices and browsers. Sometimes special characters may display differently depending on the device or browser being used. By testing the article on multiple platforms, you can identify any issues related to special characters that may be causing problems with the display or functionality of the content.

Reload the Netflix App

To reload the Netflix app, simply close the app completely and then reopen it. This can be done by clicking on the “X” button to close the app and then launching it again from your desktop or Start menu.

If the issue persists, you can also try clearing the cache and cookies on your browser. This can help remove any stored data that may be causing conflicts with the Netflix app.

To clear the cache and cookies, go to your browser’s settings and look for the option to clear browsing data. Select the option to clear cache and cookies, then restart your browser and try opening Netflix again.

Another potential solution is to restart your computer. Sometimes a simple reboot can help resolve technical issues with applications like Netflix.

If you are still experiencing issues with Netflix on your computer, you may also want to check for any software updates that may be available for your operating system or browser. Keeping your software up to date can help ensure compatibility with streaming services like Netflix.

In some cases, the issue may be related to your internet connection. Make sure your Wi-Fi is working properly and that you have a strong signal. You may also want to try restarting your router to see if that helps resolve the issue.

If none of these solutions work, you may want to contact Netflix support for further assistance. They may be able to provide additional troubleshooting steps or help you identify any underlying problems with your account or device.

Restart the Netflix App

To restart the Netflix app on your computer, follow these steps:

1. Close the Netflix app completely by exiting out of it. This will ensure that the app is fully closed and not running in the background.

2. Wait a few moments before reopening the Netflix app. This will give the app time to fully shut down before you restart it.

3. Reopen the Netflix app on your computer. You can do this by clicking on the Netflix icon or opening the app through your web browser.

4. Sign back in to your Netflix account if prompted. Sometimes logging out and logging back in can help resolve any issues with your account.

5. Try playing a video on Netflix to see if the issue has been resolved. If the app is still not working, you may need to try other troubleshooting steps.

Reset the Netflix App

To reset the Netflix app, first close the app completely. This means exiting out of the app and making sure it is not running in the background.

Next, clear the cache of the Netflix app. This can help remove any temporary files that may be causing issues. You can do this by going to the settings of the app and finding the option to clear the cache.

Once you have cleared the cache, you can also try uninstalling and reinstalling the Netflix app. Sometimes, reinstalling the app can help fix any glitches or bugs that may be causing the issue.

If resetting the app does not work, you can also try restarting your computer and your router. Sometimes, a simple restart can help resolve connectivity issues that may be affecting Netflix.

If Netflix still does not work after resetting the app and restarting your devices, you may want to check your internet connection. Make sure you have a strong and stable connection to ensure that Netflix can stream properly.

In some cases, the issue may be with the Netflix servers themselves. You can check the Netflix status page to see if there are any reported outages or issues that may be affecting the service.

Reinstall the Netflix App

1. First, uninstall the Netflix app from your computer. To do this, go to the Control Panel and select “Uninstall a program.” Find Netflix in the list of installed programs and click on it to uninstall.

2. Once the app is uninstalled, go to the official Netflix website and download the latest version of the app for your computer.

3. After downloading the app, install it on your computer by following the on-screen instructions.

4. Once the app is installed, open it and log in to your Netflix account. Your account information should still be saved, so you won’t need to re-enter it.

5. Try playing a video on Netflix to see if the issue has been resolved. If Netflix is now working on your computer, the reinstallation was successful.

Reinstalling the Netflix app can often fix issues with playback, buffering, or other problems you may be experiencing. If reinstalling the app does not resolve the issue, you may need to look into other potential causes, such as internet connectivity problems or browser settings.

Remember to regularly update the Netflix app on your computer to ensure you have the latest features and bug fixes. This can help prevent future issues with the app not working properly on your computer.

Check the Date and Time Settings

To fix issues with Netflix not working on your computer, one of the first things you should check is the date and time settings. Incorrect date and time settings can cause errors when trying to access streaming services like Netflix.

Check the date and time settings on your computer:
– Go to your computer’s settings or control panel
– Look for the date and time settings
– Make sure the date and time are correct for your time zone

If the date and time settings are incorrect, adjust them accordingly and then try accessing Netflix again. This simple fix may resolve the issue and allow you to enjoy your favorite shows and movies without any interruptions.

It’s important to regularly check and update the date and time settings on your computer to ensure that all online services work properly. By taking this simple step, you can avoid common issues like Netflix not working and enjoy a seamless streaming experience on your computer.

Test Your Internet Connection

WiFi signal strength meter

If you are experiencing issues with Netflix not working on your computer, it could be due to a poor internet connection. Check your internet speed using an online speed test tool. This will give you an idea of the download and upload speeds you are getting.

If your internet speed is below the recommended speed for streaming Netflix, you may need to contact your internet service provider to upgrade your plan.

Another common issue that can cause Netflix to not work on your computer is a problem with your Wi-Fi connection. Restart your router by unplugging it for 30 seconds and then plugging it back in. This can help reset the connection and resolve any issues.

Check your Wi-Fi signal strength on your computer. If the signal is weak, try moving closer to the router or using an Ethernet cable for a more stable connection.

If you are still experiencing issues with Netflix not working on your computer, it may be due to a DNS or name server issue. Change your DNS settings to Google’s public DNS (8.8.8.8 and 8.8.4.4) or Cloudflare’s DNS (1.1.1.1). This can help improve your internet connection and resolve any DNS-related problems.

In some cases, the issue may be with your computer hardware or software. Make sure your computer meets the minimum requirements for streaming Netflix and update your operating system and web browser to the latest versions.

Deactivate and Reactivate the Netflix App

To deactivate and reactivate the Netflix app, follow these steps:

1. First, close the Netflix app on your computer.
2. Next, open the app settings or preferences on your computer.
3. Look for the option to deactivate the app or sign out of your account.
4. Click on the deactivate or sign out option to log out of your Netflix account.
5. Once you have signed out, close the app completely.
6. Reopen the Netflix app on your computer.
7. Sign back in to your Netflix account with your username and password.
8. Try playing a video to see if the issue has been resolved.

Deactivating and reactivating the Netflix app can often help fix common issues such as playback errors, buffering problems, or login issues. If the problem persists, you may need to troubleshoot your internet connection or check for any updates to the Netflix app on your computer.

Restore Your Default Connection Settings

First, navigate to your computer’s network settings. This can usually be found in the Control Panel or System Preferences, depending on your operating system.

Next, look for an option to reset your network settings to their default configuration. This may be labeled as “Reset network settings” or something similar.

Click on this option and follow any prompts to confirm that you want to reset your network settings. Your computer will then revert back to its default network configuration.

Once the reset is complete, try accessing Netflix again to see if the issue has been resolved. If not, you may need to restart your computer or router to ensure the changes take effect.

By restoring your default connection settings, you can help troubleshoot and fix any issues that may be causing Netflix to not work properly on your computer. This simple step can often resolve connectivity issues and get you back to streaming your favorite shows and movies in no time.

Contact the Device Manufacturer

Computer with a manufacturer's contact information displayed

Alternatively, you can visit the manufacturer’s website and look for troubleshooting guides or FAQs related to Netflix compatibility. Check for software updates or patches that may address the issue. Sometimes, outdated software can cause streaming problems, so make sure your device is running the latest version.

If the issue persists, consider resetting your device to factory settings to eliminate any potential software conflicts. This should be done as a last resort, as it will erase all data on your device. Make sure to back up any important files before proceeding.

In some cases, the problem may be related to your internet connection. Check your network settings and ensure that your device is connected to a stable Wi-Fi network. You can also try restarting your router or modem to refresh the connection.

If the issue is still not resolved, reach out to Netflix customer support for further assistance. They may be able to provide additional troubleshooting steps or escalate the issue if it is related to their service.

By contacting the device manufacturer and following these steps, you should be able to resolve any issues preventing Netflix from working on your computer.

Clear the System Cache

Step Instructions
1 Close all open browser windows and applications.
2 Press Ctrl + Shift + Delete on your keyboard to open the Clear browsing data window.
3 Select the time range for which you want to clear the cache (e.g. “Last hour”, “Last 24 hours”, “All time”).
4 Check the box next to “Cached images and files” or similar option.
5 Click on the “Clear data” button to clear the cache.
6 Restart your browser and try accessing Netflix again.

If clearing the cache does not resolve the issue, you may need to try other troubleshooting steps or contact Netflix support for further assistance.

Frequently Asked Questions

Why is my Netflix not working even though it’s connected?

Your Netflix may not be working even though it’s connected due to issues with your internet connection. Check for any internet outages in your area, troubleshoot common router or modem problems, and ensure that your network settings are correct. Restart or reset your network connection if needed.

Is there a problem with Netflix UK?

There is no problem with Netflix UK at the moment.

How do I get Netflix to work on my computer?

To get Netflix to work on your computer, you can visit netflix.com using a supported web browser or download the Netflix app for Windows. Make sure your computer and browser meet the system requirements to avoid any issues.

Why is Netflix not working on PC?

Why is Netflix not working on PC?

Ensure that the Netflix app is updated on both your laptop and PC. Outdated apps can sometimes cause issues. Check the Microsoft Store on Windows or the App Store/Google Play Store on your laptop for any available updates for the Netflix app.

Cannot Open Downloaded Word Documents: 6 Proven Fixes

In my experience, opening downloaded Word documents can sometimes be a frustrating task. Here are 6 proven fixes to help you resolve this issue.

Common Reasons Why Word Documents Won’t Open

1. One common reason why Word documents won’t open is due to file corruption. Try opening the document in a different word processing program or try opening it on a different computer to see if the issue is with the file itself. If the file is corrupted, you may need to try recovering it using a file recovery tool.

2. Another reason why Word documents may not open is due to compatibility issues. Make sure you are using a version of Microsoft Word that is compatible with the document you are trying to open. You can also try opening the document in compatibility mode within Word.

3. Sometimes, Word documents won’t open due to issues with the software itself. Try repairing your Microsoft Office installation or reinstalling the program altogether to see if this resolves the issue.

4. If you are unable to open downloaded Word documents, it could be due to security settings on your computer. Check your security settings to ensure that Word documents are not being blocked from opening. You may need to adjust your security settings to allow the documents to open.

5. Malware on your computer can also prevent Word documents from opening. Run a full scan of your computer using an antivirus program to check for any malware that may be causing the issue. Remove any threats found and try opening the document again.

6. Lastly, if Word documents won’t open after trying the above fixes, it may be helpful to check for any updates or patches for Microsoft Word. Updating your software to the latest version can often resolve compatibility issues and ensure that the program is running smoothly.

Solutions to Repair Corrupt or Damaged Files

  • Use the Built-in Repair Tool in Word:
    • Open the corrupt Word document in Word.
    • Click on File and then select Open.
    • Choose the corrupt file and click on the arrow next to the Open button.
    • Select Open and Repair.
  • Recover Text from Corrupt Word Document:
    • Open a new Word document.
    • Click on Insert and then select Object.
    • Choose Text from File and select the corrupt document.
    • Click Insert to retrieve the text.
  • Use a Third-Party Recovery Tool:
    • Download and install a reputable file recovery tool.
    • Open the tool and select the corrupt Word document for recovery.
    • Follow the on-screen instructions to recover the damaged file.

Adjusting Settings to Enable Document Access

To enable document access, adjust the settings in Microsoft Windows by right-clicking on the downloaded Word document icon and selecting “Properties” from the context menu.

Next, click on the “Unblock” checkbox if it is available in the Properties window. This will remove any restrictions that may be preventing you from opening the document.

If the document still cannot be opened, try changing the file extension from .docx to .doc or vice versa. Sometimes, this simple adjustment can resolve compatibility issues.

Additionally, check if the file is corrupted by opening it in a different word processor or text editor. If the document opens successfully in another program, the issue may be with your Microsoft Office installation.

If none of these fixes work, try disabling any plug-ins or add-ons in your word processing program that may be causing the issue. Sometimes, third-party extensions can interfere with the opening of certain documents.

Finally, make sure that your antivirus software is not blocking the document from being opened. Temporarily disable your antivirus program and attempt to open the document again to see if this resolves the issue.

Utilizing Tools and Methods for File Repair

When you encounter issues with opening downloaded Word documents, it can be frustrating. There are several tools and methods available to help repair these files and get them back to working order. One proven fix is to utilize the built-in repair feature in Microsoft Word. To do this, open Microsoft Word, click on File, then Open, select the problematic document, and choose Open and Repair from the drop-down menu. This feature will attempt to repair any corruption within the file.

If the built-in repair feature does not work, another option is to use a third-party file repair tool. These tools are designed to specifically target and fix file corruption issues. Simply download a reputable file repair tool, install it on your computer, and follow the on-screen instructions to repair the problematic Word document.

In some cases, the issue may be related to the file extension. Try changing the file extension from .docx to .doc or vice versa and then attempt to open the document again. This simple fix can sometimes resolve compatibility issues and allow you to access the file.

Additionally, if the file is saved in a different format, such as RTF or TXT, you can try opening the document in a different word processor or text editor. This can sometimes bypass any corruption present in the original file format and allow you to view the content.

If none of the above methods work, you can try opening the Word document in Safe Mode. This will disable any plugins or add-ons that may be causing the issue. To do this, press and hold the Ctrl key while double-clicking on the document to open it in Safe Mode. If the document opens successfully in Safe Mode, you may need to disable any problematic plugins or add-ons in Microsoft Word.

In some cases, the issue may be related to the file location or permissions. Move the problematic Word document to a different directory or folder and try opening it again. If that doesn’t work, you can try adjusting the file permissions to ensure that you have the necessary access to open and modify the document.

By utilizing these tools and methods for file repair, you can effectively troubleshoot and fix issues with opening downloaded Word documents.

FAQ

Why can’t I open downloaded files in Word?

You can’t open downloaded files in Word because recent versions of the software have a stricter security policy. Update your Trust Center settings to allow access to copied or downloaded files. Difficulty opening Word documents may be due to the Enabled Protected View option being activated.

Why are my Word documents not opening?

Your Word documents may not be opening due to multiple reasons. One common issue could be an overload of active add-ins causing the program to become unresponsive. Additionally, corrupt or damaged templates or documents can prevent Word from opening. It is important to regularly update and maintain your files to avoid these issues.

How do I recover a Word document that won’t open?

To recover a Word document that won’t open, you can try using the Open and Repair feature in Microsoft Word. Simply go to File > Open > Browse, locate the document, click on it, select Open and Repair from the dropdown menu, and follow the prompts to attempt to recover the file.

How do you open a download in Word?

To open a download in Word, you can click on the File tab and then select Open. From there, you can choose the location where the downloaded file is saved and select the specific file you want to open.

Microsoft(C) Register Server 32 bit CPU usage high troubleshoot help

In this article, I will provide troubleshooting tips to help resolve high CPU usage issues with Microsoft Register Server on a 32-bit system.

Syntax and Usage

If you are experiencing high CPU usage on your 32-bit Microsoft Register Server, follow these troubleshooting steps:

First, check for any third-party applications or background processes that may be contributing to the high CPU usage. Close any unnecessary programs to see if that resolves the issue.

Next, try restarting the Microsoft Register Server process to see if that helps alleviate the high CPU usage. This can be done by accessing the Task Manager, locating the process, and ending it.

If restarting the process does not work, you can try re-registering the Microsoft Register Server using the Command Prompt. Open the Command Prompt as an administrator and enter the following command: regsvr32 /u path_to_dll_file.dll. This will unregister the DLL file associated with the Register Server.

After unregistering the DLL file, re-register it using the following command: regsvr32 path_to_dll_file.dll. This may help resolve any issues causing the high CPU usage.

If the problem persists, you can try checking for any errors in the Windows Registry that may be affecting the Microsoft Register Server. Use the Registry Editor to navigate to the appropriate keys and make any necessary corrections.

It is also recommended to check for any updates or patches from Microsoft that may address known issues with the Register Server. Keeping your system up to date can help prevent high CPU usage and other performance issues.

If all else fails, you may need to consider uninstalling and reinstalling the Microsoft Register Server to resolve the high CPU usage problem. Be sure to back up any important data before proceeding with the uninstallation.

Resolving Errors and Best Practices

Resolving Errors: When dealing with high CPU usage on a 32-bit Microsoft Register Server, there are a few troubleshooting steps you can take to address the issue. First, check for any error messages that may give you a clue as to what is causing the high CPU usage. Look for any specific error codes or messages that can point you in the right direction.

Check Registry Settings: It’s important to review and verify the Microsoft Register Server settings in the Windows Registry. Make sure that all entries are correct and that there are no conflicts or errors present. Use the Windows Registry Editor to navigate to the appropriate keys and check for any abnormalities.

Utilize Command-Line Interface: The Command-Line Interface can be a powerful tool in troubleshooting high CPU usage issues. Use the command prompt to run diagnostic tools, check system processes, and identify any potential conflicts that may be causing the problem. Be sure to use the appropriate syntax and commands for the best results.

Review Environment Variables: Check the environment variables on your system to ensure that they are properly configured. Make sure that the paths are correct, and there are no conflicts with other variables that could be impacting the CPU usage. Verify that all settings are in line with the requirements for the Microsoft Register Server.

Uninstall Unnecessary Programs: If you suspect that a specific program or application is causing the high CPU usage, consider uninstalling it. Use the Control Panel or a third-party uninstaller tool to remove any unnecessary software that may be contributing to the issue. Be sure to follow the proper uninstallation procedures to avoid any conflicts.

Update System Drivers: Outdated or corrupted system drivers can also cause high CPU usage on a 32-bit Microsoft Register Server. Make sure that all your drivers are up to date by visiting the manufacturer’s website or using a driver update tool. This can help resolve any compatibility issues and improve system performance.

Seek Professional Help: If you have tried all the troubleshooting steps and the high CPU usage issue persists, it may be time to seek professional help. Contact Microsoft TechNet or a qualified IT professional who can provide further assistance in resolving the problem. They may have additional tools and resources to help diagnose and fix the issue.

Understanding Regsvr32.exe Information

  • Run a full system scan using your preferred antivirus software to check for any malware that may be causing the high CPU usage.
  • Remove any malware that is found during the scan to eliminate the potential cause of the issue.

Update Windows

  • Check for Windows updates and install any pending updates to ensure that your system is running the latest software.
  • Restart your computer after installing updates to apply the changes and see if the high CPU usage persists.

Check for Corrupted System Files

  • Run the System File Checker tool by opening Command Prompt as an administrator and typing “sfc /scannow” to scan for and repair any corrupted system files.
  • Follow the on-screen instructions to complete the scan and repair process, then restart your computer to see if the issue is resolved.

Additional Resources and References

One valuable resource to consider is Microsoft TechNet, which provides in-depth technical information and troubleshooting guides for various Microsoft products. Additionally, exploring forums and online communities dedicated to Windows operating systems may offer insights and solutions from other users who have encountered similar issues.

If you are dealing with high CPU usage on a 32-bit system, it might be beneficial to review information on 32-bit computing and how it differs from 64-bit computing. Understanding the limitations and capabilities of your system architecture can help pinpoint potential causes of the CPU usage issue.

In some cases, the problem may be related to compatibility issues with specific operating systems. Familiarizing yourself with the nuances of different Windows editions, such as Windows 7, Windows 8, Windows Vista, Windows XP, and Windows 10, can provide valuable context for troubleshooting.

Cmd.exe can be a useful tool for investigating CPU usage and running diagnostic commands in the Windows environment. Learning how to navigate the command line interface and execute commands related to system performance can help identify potential culprits causing high CPU usage.

If you encounter error messages or encounter issues related to HRESULT codes, it can be helpful to reference Microsoft’s documentation on Component Object Model (COM) errors and how to interpret and resolve them.

Exploring the use of Environment variables and their impact on system performance can also provide insights into optimizing CPU usage. Understanding how variables are set and utilized within the Windows environment can help troubleshoot issues related to resource allocation.

FAQs

How do I register for regsvr32?

To register for regsvr32, you need to find the dll you want to register or unregister. Then, go to the Start button and select Run. In the run box, type the command regsvr32 or regsvr32 /u. Highlight the dll, drag it to the run box, drop it after regsvr32 or regsvr32 /u, and select Go.

How do I register a 32-bit DLL in 64-bit Windows?

To register a 32-bit DLL in 64-bit Windows, you can open Command Prompt as an administrator and use the command “regsvr32 ” to register the DLL file.

Where is regsvr32.exe located in Windows 10?

Regsvr32.exe is located in the %systemroot%\System32 folder in Windows 10.

Fallout 3 won’t launch – What to do

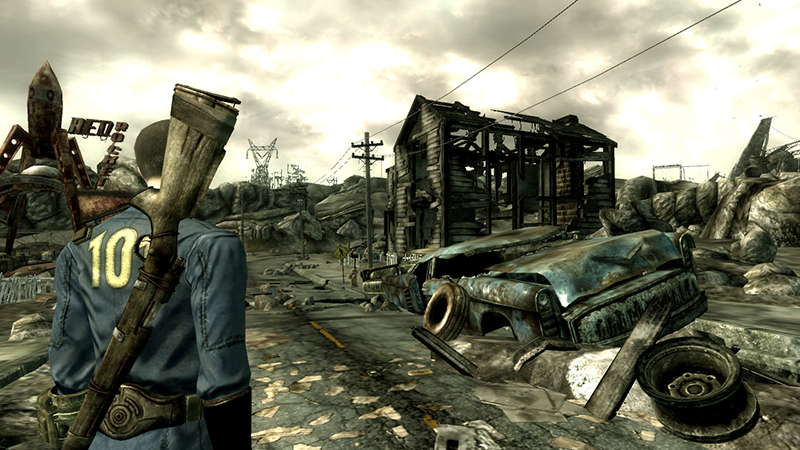
If you’re struggling to get Fallout 3 to launch on your computer, you’re not alone. Here are some steps you can take to troubleshoot the issue and get back to gaming.

Run as Administrator and Use Compatibility Mode

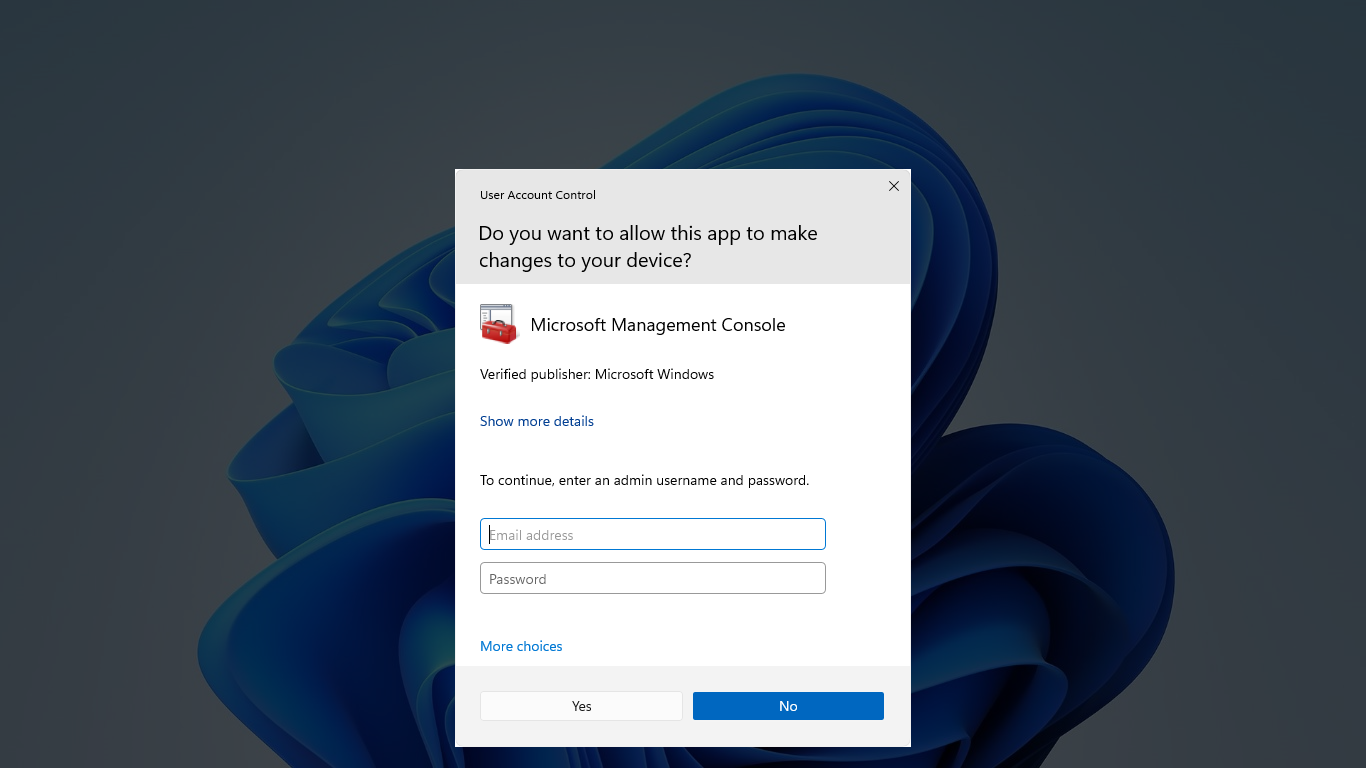
Windows UAC prompt

To troubleshoot the issue of Fallout 3 not launching, try running the game as an administrator. Right-click on the game’s executable file, select “Run as administrator” from the dropdown menu. This can help with any permission issues that may be preventing the game from starting. Additionally, using compatibility mode can resolve compatibility issues with newer operating systems like Windows 10. Right-click on the game’s executable file, go to properties, navigate to the compatibility tab, and check the box for running in compatibility mode.

Experiment with different versions of Windows, such as Windows 7, to see which works best. These steps can help get Fallout 3 up and running smoothly.

Update Graphics Driver

  • Open Device Manager by pressing Windows key + X and selecting Device Manager
  • Expand the Display adapters category to view your graphics driver
  • Right-click on the graphics driver and select Update driver
  • Choose to search automatically for updated driver software
  • Follow the on-screen instructions to complete the update process

Repair and Modify Game Files

Step Instructions
1 Open the Steam client and navigate to your game library.
2 Right-click on Fallout 3 in the list of games and select “Properties.”
3 Go to the “Local Files” tab and click on “Verify Integrity of Game Files.”
4 Wait for the process to complete. This will check for any missing or corrupted files and redownload them.
5 If the issue persists, you can try modifying the game files by installing community patches or mods.

Reinstall and Patch the Game

Fallout 3 game disc

Reinstalling and patching the game can often resolve issues with Fallout 3 not launching. First, uninstall the game completely, then reinstall it. Make sure your graphics card drivers are up to date.

If you are using Windows 10, try running the game in compatibility mode for Windows 7. Verify the game files through Steam to ensure they are intact. Installing the latest patches or unofficial patches may also fix the problem.

If the issue persists, check for updates for your device drivers and operating system. Troubleshooting any conflicts with other programs or software running in the background may also help.

Frequently Asked Questions

When I click play on Fallout 3 nothing happens?

When you click play on Fallout 3 and nothing happens, it may be due to your antivirus software blocking it. Add Fallout 3 and the Epic Game Launcher to the exclusion list. Make sure you have the latest version of DirectX installed. You can also try enabling Windows Game Mode by pressing Win+G and selecting “This is a game.”

Why can’t i play Fallout 3 on Windows 11?

I can’t play Fallout 3 on Windows 11 because the game may not be compatible with the operating system. To try and resolve this issue, you can run the game in compatibility mode by right-clicking on it, going to Properties, navigating to the Compatibility tab, and selecting a compatible version of Windows to run the game.

How to play Fallout 3 on Windows 10?

To play Fallout 3 on Windows 10, you need to install Games for Windows Live. You can download the installer from this link: http://download.gfwl.xboxlive.com/content/gfwl-public/redists/production/gfwlivesetup.exe. After running the executable, GFWL will install the necessary files for Fallout 3 to work.

Why can’t I run in Fallout 3?

You can’t run in Fallout 3 because the game only has walk and run speeds. If you feel like you are going slower when pressing Lshift, it means you were already running and switched to walking. The game does not have a sprinting option, so don’t expect to move super fast. You can check the difference by going into 3rd person view.

Why is my app not showing on Google Play Store Fix

I recently encountered an issue where my app was not showing on the Google Play Store. After some troubleshooting, I discovered a few common reasons why this may happen. In this article, I will discuss potential fixes for this problem.

Refresh Device and Clear Cache

To refresh your device and clear cache, start by turning off your device and then turning it back on. Next, clear the cache of the Google Play Store app by going to Settings > Apps > Google Play Store > Storage > Clear Cache. Additionally, clear the cache of Google Play Services by following the same steps. Finally, refresh the Google Play Store by force stopping the app and reopening it.

This should help resolve any issues with your app not showing on the Google Play Store.

Use the Right Google Account

To ensure your app is showing on Google Play Store, make sure you are using the right Google account. Check that you are logged in with the correct account that is associated with your app’s developer profile. This is crucial for your app to be visible to users. If you are not seeing your app on the Play Store, double-check the account you are using. If needed, switch to the correct account and update your developer profile settings. This simple step can make a big difference in getting your app the visibility it needs to succeed.

Ensure Google Play Store is Updated

Steps to Ensure Google Play Store is Updated
1. Open Google Play Store on your Android device.
2. Go to the menu by tapping on the three horizontal lines in the top left corner.
3. Scroll down and tap on “Settings”.
4. Look for the “Play Store version” and tap on it.
5. If there is an update available, tap on “Update” to ensure your Google Play Store is up to date.

Verify App Compatibility and Safety

To verify app compatibility and safety on Google Play Store, check the app’s requirements and permissions to ensure it meets the necessary criteria. Run a security scan on the app to detect any potential threats or malware. Additionally, review user feedback and ratings to gauge the app’s performance and reliability. It’s also helpful to update your app regularly to ensure it stays compatible with the latest system updates.

FAQ

How do I get Google Play to show all apps?

To get Google Play to show all apps, open the Play Store, tap the account icon, and then manage apps & device. From there, you can choose to view recently installed apps or most recently updated apps by sorting them accordingly.

Why do apps disappear from Google Play?

Apps disappear from Google Play for a variety of reasons. Developers may choose to remove their app voluntarily, or the app may be removed or suspended by Google Play for violating their policies or agreements.

Why can’t i get an app on Google Play?

You can’t get an app on Google Play because clearing the cache and data of the Google Play Store may resolve the issue. This is a common solution when encountering problems with downloading apps from Google Play Store.

Why are my apps not installed on Play Store?

Your apps may not be installed on the Play Store due to a weak Wi-Fi or mobile data connection, which can prevent the download of app files. Additionally, the app may not be compatible with your device, so be sure to check compatibility requirements before attempting to install.

Fallout 3 Crashes Windows 10: Solutions & Fixes

As a Fallout 3 player on Windows 10, dealing with crashes can be frustrating.

Play in Windowed Mode or Adjust Settings

If you are experiencing crashes while playing Fallout 3 on Windows 10, one solution is to play in Windowed Mode or adjust the settings. This can help reduce the strain on your system and prevent crashes. To play in Windowed Mode, go to the options menu in the game and look for the display settings. From there, you should see an option to switch to Windowed Mode. If adjusting the settings does not work, you can also try running the game in compatibility mode. Right-click on the game’s executable file, go to properties, and then compatibility.

From there, you can choose to run the game in compatibility mode for a previous version of Windows such as Windows 7 or Windows XP.

Update or Install Graphics Card Drivers

Step Instructions
1 Open Device Manager by pressing Windows key + X and selecting Device Manager from the menu.
2 Expand the Display adapters category to see the graphics card drivers installed on your system.
3 Right-click on the graphics card driver and select Update driver.
4 Choose Search automatically for updated driver software and follow the on-screen instructions to complete the update process.
5 If no updates are found, you can also visit the manufacturer’s website to download and install the latest graphics card drivers manually.

Set Game Compatibility and Administrative Privileges

Set Game Compatibility: Ensure that Fallout 3 is compatible with Windows 10 by adjusting the game’s settings. Right-click on the game’s shortcut or .exe file, select Properties, go to Compatibility tab, check the box “Run this program in compatibility mode for”, and choose an older Windows version such as Windows 7 or Windows XP. Click Apply and OK to save changes.

Administrative Privileges: Grant administrative privileges to the game to prevent crashes on Windows 10. Right-click on the game’s shortcut or .exe file, select Properties, go to Compatibility tab, check the box “Run this program as administrator”. Click Apply and OK to save changes.

Make sure to apply these settings before launching the game to avoid any compatibility issues.

Reinstall the Game or Repair System Files

If Fallout 3 is crashing on Windows 10, one solution is to reinstall the game or repair system files. This can help resolve any corrupted files that may be causing the crashes. To do this, first, uninstall Fallout 3 from your computer. Then, reinstall it from the original source or download it again from Steam.

Next, you can verify the integrity of game files through Steam to ensure all necessary files are present. If the issue persists, you can repair system files by running the System File Checker tool in Windows. This will scan for and repair any corrupted system files that may be affecting Fallout 3.

F.A.Q.

Is Fallout 3 stable on Windows 10?

Fallout 3 is stable on Windows 10 for me, requiring no additional adjustments after downloading from Steam.

Why does Fallout 3 randomly crash?

Fallout 3 may crash randomly due to outdated video card drivers. It is important to regularly update your system’s video card drivers for optimal gaming performance. Check for updates on your computer manufacturer’s or video card manufacturer’s support website.

Can you still play Fallout 3 on Windows 10?

Yes, you can still play Fallout 3 on Windows 10, but you may need to install Games for Windows Live yourself due to compatibility issues with the operating system’s architecture.

Outlook 2013 not responding in Windows 7 – Solutions

Having issues with Outlook 2013 not responding in Windows 7? Here are some solutions to help resolve the issue.

Start in Safe Mode to Diagnose Issues

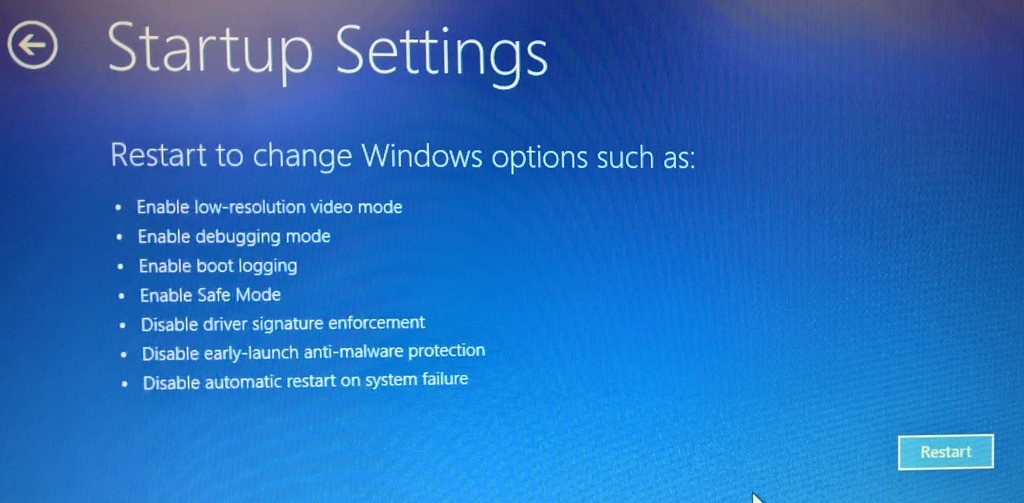
Windows safe mode screen

To diagnose issues with Outlook 2013 not responding in Windows 7, start in Safe Mode. Press the “Windows key + R” to open the “Run” dialog, then type “outlook.exe /safe” and hit Enter. This will launch Outlook in Safe Mode, disabling any plugins or add-ins that may be causing the problem.

If Outlook opens in Safe Mode without any issues, then the problem likely lies with a plugin or add-in. Disable them one by one in the “File” menu under “Options” to identify the culprit. You can also try running Windows Update to ensure your system is up to date, as outdated software can cause compatibility issues.

Additionally, running a scan with your antivirus software can help identify and remove any potential threats that may be affecting Outlook’s performance. If the issue persists, consider creating a new user profile in Outlook or repairing your Microsoft Office installation through the Control Panel.

Check for Open Dialog Boxes

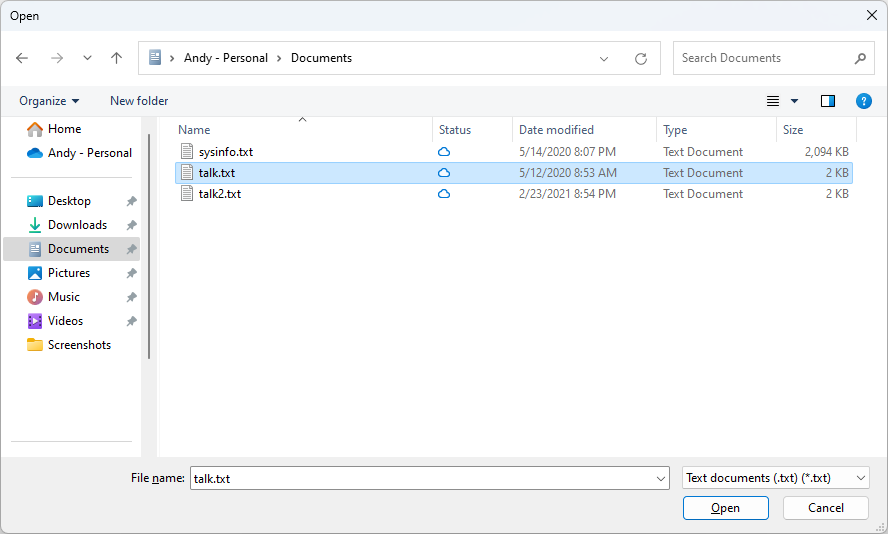
Open dialog box in Outlook 2013

When troubleshooting Outlook 2013 not responding in Windows 7, be sure to check for any open dialog boxes that may be hidden behind other windows. These dialog boxes can sometimes cause the program to appear unresponsive.

If you suspect that a dialog box may be open, press Alt-Tab to cycle through the open windows and see if any dialog boxes are hidden. You can also try minimizing all windows to see if any dialog boxes are revealed on the desktop.

Make sure to close any open dialog boxes before attempting to use Outlook again. This simple step can often resolve the issue and get Outlook back up and running smoothly.

By being aware of hidden dialog boxes and promptly closing them, you can help prevent Outlook from becoming unresponsive and improve your overall user experience with the software.

Verify No Large Processes Are Running

Verify No Large Processes Are Running: Check the Task Manager to ensure there are no large processes consuming excessive resources. Press Ctrl + Shift + Esc to open Task Manager. Look for any processes that are taking up a significant amount of CPU or memory. If you find any, end those processes to free up resources for Outlook.

This can help resolve the issue of Outlook 2013 not responding in Windows 7.

Install Latest Windows and Office Updates

To resolve the issue of Outlook 2013 not responding in Windows 7, it is important to ensure that you have the latest Windows and Office updates installed.

1. Check for Windows Updates: Go to Control Panel > System and Security > Windows Update and install any available updates.

2. Update Office: Open any Office application, go to File > Account > Update Options and select Update Now.

3. Restart your computer: After installing updates, restart your computer to apply the changes.

Regularly updating Windows and Office can help address software bugs and vulnerabilities that may be causing Outlook to freeze. If the issue persists, consider troubleshooting further or seeking additional support.

Ensure Outlook is Not in Use by Another Process

Ensure Outlook is not in use by another process: Check the Task Manager for any Outlook processes running in the background. If you find any, end those processes and try opening Outlook again. Additionally, restart your computer to ensure all processes are closed properly.

This should help resolve any issues related to Outlook not responding.

Repair Office Programs Automatically

To automatically repair Office programs, first close all Office applications and go to Control Panel. Then, click on Programs and Features, select your Office program, and choose Change. From there, select Repair and follow the on-screen instructions to complete the process. This will help resolve any issues with Outlook 2013 not responding in Windows 7.

After the repair is done, restart your computer and check if the problem is resolved. If Outlook is still not responding, you may need to consider other solutions such as updating Windows or reinstalling Office.

Investigate and Repair Outlook Data Files

If Outlook 2013 is not responding in Windows 7, there may be issues with the data files. To investigate and repair these files, follow these steps:

1. Run the Microsoft Outlook Repair Tool: Navigate to the Control Panel and search for “Mail”. Click on “Mail (32-bit)” and then select “Data Files”. Choose the Outlook data file that is causing issues and click on “Repair”. Follow the on-screen instructions to complete the repair process.

2. Create a new Outlook profile: Sometimes, creating a new Outlook profile can resolve the issue. Go to Control Panel and click on “Mail”. Select “Show Profiles” and then click on “Add”. Follow the prompts to create a new profile and set it as the default.

3. Check for corrupt data files: Use the Inbox Repair Tool (Scanpst.exe) to check for and repair any corrupt data files. This tool is usually located in the following directory: C:\Program Files (x86)\Microsoft Office\root\Office16.

Examine Possible Add-In Conflicts

When Outlook 2013 is not responding in Windows 7, one possible cause could be add-in conflicts. To examine this issue:

First, open Outlook in safe mode by holding down the Ctrl key while launching the program. If Outlook opens in safe mode without any issues, then an add-in conflict may be causing the problem.

Next, disable all add-ins by going to File > Options > Add-ins. From there, select “COM Add-ins” from the Manage dropdown menu and click “Go.” Uncheck all add-ins and restart Outlook to see if the issue persists.

If Outlook now responds properly, re-enable the add-ins one by one to determine which one is causing the conflict. Remember to restart Outlook after each re-enable to test for responsiveness.

Once the problematic add-in is identified, consider updating it or contacting the add-in developer for further assistance. By resolving add-in conflicts, you can improve the performance of Outlook 2013 in Windows 7.

Verify Mailbox Size is Not Too Large

Verify Mailbox Size is Not Too Large: One common reason for Outlook 2013 not responding in Windows 7 is due to an excessively large mailbox size. To check the size of your mailbox, go to File > Info > Mailbox Settings > Tools > Mailbox Cleanup. From there, you can see the size of your mailbox and clean up unnecessary emails or attachments to reduce its size.

Keeping your mailbox under control can help improve the performance of Outlook and prevent it from freezing or crashing. Regularly managing your mailbox size is essential for a smooth Outlook experience.

Update or Check Antivirus Software Compatibility

To resolve the issue of Outlook 2013 not responding in Windows 7, it is important to update or check the compatibility of your antivirus software. Make sure your antivirus software is up to date with the latest patches and versions to ensure that it is compatible with Outlook 2013 and Windows 7. If your antivirus software is not updated, it may cause conflicts with Outlook and lead to unresponsiveness.

Additionally, check the settings of your antivirus software to ensure that it is not blocking Outlook or any of its features. Sometimes, security settings can prevent Outlook from functioning properly. By adjusting the settings or adding Outlook as an exception, you can prevent any conflicts from occurring.

It is also recommended to run a scan on your computer using the antivirus software to check for any potential threats or malware that could be causing Outlook to freeze or become unresponsive. Removing any malicious files can help improve the performance of Outlook and prevent further issues from arising.

Create a New Outlook User Profile

To create a new Outlook user profile in Windows 7 and resolve the issue of Outlook 2013 not responding, follow these steps. First, open Control Panel and navigate to User Accounts. Click on Mail and then Show Profiles. Next, select Add to create a new profile.

Enter a name for the profile and click OK. Set up the new profile with your email account information. Finally, open Outlook and select the new profile from the dropdown menu. This should resolve any issues with Outlook not responding in Windows 7.

Perform a Selective Startup for Advanced Troubleshooting

  • Open the System Configuration window by pressing Windows key + R and typing msconfig then hitting Enter
  • Click on the Services tab and check the box that says Hide all Microsoft services
  • Click on Disable all to disable all non-Microsoft services
  • Click on the Startup tab and Open Task Manager by pressing Ctrl+Shift+Esc
  • Disable all the startup items by selecting them and clicking on Disable
  • Close Task Manager and click OK on the System Configuration window
  • Restart your computer to apply the changes

FAQ

Why is Outlook 2013 not responding?

Outlook 2013 may not be responding due to corrupted data files, outdated or conflicting antivirus software, a corrupted user profile, or conflicts with another program.

How do I fix Outlook not opening in Windows 7?

To fix Outlook not opening in Windows 7, you can try restarting your computer, opening Outlook in Safe Mode, checking for Windows updates, scanning for malware, repairing Outlook, repairing your Outlook profile, repairing your Outlook data files, and resetting the navigation pane.

How do I restart Outlook that is not responding?

To restart Outlook that is not responding, you can try launching it in safe mode by typing “Outlook.exe /safe” in the Start menu search bar (for Windows 10) and pressing Enter. This may help fix the issue and allow you to open Outlook normally again.

Is Outlook 2013 still supported?

Outlook 2013 is no longer supported as of Ap. Continuing to use it could pose security risks.

Fix Can’t Save PDF Files: Tips to Resolve Issues

In my experience, fixing the issue of not being able to save PDF files can be frustrating.

Common Reasons for PDF Saving Problems

Corrupted Files: If the PDF file itself is corrupted, you may encounter issues when trying to save it. In this case, try opening the file in a different PDF viewer or using online services like PDFescape to repair the file.

Insufficient Disk Space: If your computer is running low on disk space, you may not be able to save PDF files. Make sure to free up some space on your computer before trying to save the file again.

Permission Issues: If you do not have the necessary permissions to save the PDF file in a specific location, you will encounter saving problems. Try saving the file to a different location or changing the permissions on the folder where you are trying to save the file.

Reconfiguring Adobe Acrobat Reader Settings

To reconfigure Adobe Acrobat Reader settings to fix the issue of not being able to save PDF files, follow these steps:

1. Open Adobe Acrobat Reader on your computer.
2. Click on the Edit menu in the top toolbar.
3. Select Preferences from the dropdown menu.
4. In the Preferences window, navigate to the General tab.
5. Check the box next to Enable Protected Mode at startup to disable it.
6. Click on OK to save the changes.
7. Try saving the PDF file again to see if the issue has been resolved.

If you are still experiencing problems with saving PDF files, you may need to explore other options such as using a different PDF reader like Foxit Software or Preview on macOS. Additionally, clearing your browser cache or updating your Adobe Acrobat Reader to the latest version may also help resolve the issue.

Updating or Reinstalling PDF Software

If updating or reinstalling your PDF software doesn’t fix the issue of not being able to save PDF files, you may need to try a few additional steps.

First, check for any available updates for your PDF software. This can often resolve any bugs or glitches causing the problem.

If updating doesn’t work, try uninstalling and reinstalling the software. This can sometimes clear up any issues that may be causing the inability to save PDF files.

If you’re using Adobe Acrobat, make sure to download the latest version from the official website.

After reinstalling, restart your computer to ensure the changes take effect. This simple step can sometimes make a big difference in resolving software issues.

Solutions for Corrupted PDF Documents

  • Download and install a reliable PDF repair tool on your computer.
  • Open the tool and select the corrupted PDF file that you want to repair.
  • Follow the on-screen instructions to repair the PDF file.
  • Once the repair process is complete, try opening and saving the PDF file again.

Convert PDF to Another Format

  • Open the corrupted PDF file in a PDF reader or editor.
  • Go to the “File” menu and select “Save As” or “Export.”
  • Choose a different file format to convert the PDF to, such as Word or JPEG.
  • Save the converted file to your computer.
  • Try opening and saving the converted file to see if the issue is resolved.

Use Online PDF Repair Service

  • Go to a reputable online PDF repair service website.
  • Upload the corrupted PDF file to the website.
  • Follow the instructions on the website to repair the PDF file.
  • Download the repaired PDF file and try opening and saving it again.

Comprehensive PDF Editing and Saving Solutions

When encountering issues with saving PDF files, it is important to have comprehensive editing and saving solutions at your disposal. One common problem is not being able to save changes made to a PDF document. To resolve this issue, try checking the permissions of the PDF file to ensure you have the necessary access rights to save changes.

Another solution is to use a different PDF editing software that may have better compatibility with the file. Programs such as Foxit Software or Adobe Acrobat are popular choices for editing and saving PDF files.

If you are using a web browser to view the PDF, try downloading the file and opening it in a dedicated PDF editing program for better functionality. Additionally, make sure to update your software to the latest version, as this can often resolve saving issues.

F.A.Q.

How do I enable Save as PDF?

To enable Save as PDF in Microsoft Office (2010 and later), click on the “File” tab, select “Save As,” choose the save location, and then select “PDF (*.pdf)” from the “Save as type” dropdown menu.

Why won’t my PDF open or save?

Your PDF may not be opening or saving because your laptop may not have a PDF reader installed, your PDF reader may be out of date and needs an update, or your PDF application could potentially be damaged and needs to be rebooted.

Why can’t I download a file as a PDF?

You may be unable to download a file as a PDF due to a slow or unstable internet connection, which can cause the download to fail or take a long time. Additionally, server overload on PDF Drive’s servers may cause delays in downloads or make files temporarily unavailable.

How do I fix a PDF that won’t download?

To fix a PDF that won’t download, you can try enabling JavaScript, checking for Anti-Virus updates, using a different browser, attempting a direct download link, ensuring a stable internet connection, updating the video card driver (Windows only), and troubleshooting any specific errors that may be occurring.

How to Fix HTTP 400 Bad Request: 6 Easy Methods

In this article, I will discuss six easy methods to fix the HTTP 400 Bad Request error.

Understanding the 400 Bad Request Error

The HTTP 400 Bad Request error occurs when the server cannot process the request sent by the client due to invalid syntax. This can happen for various reasons, such as incorrect URL formatting or missing required parameters.

To fix this error, start by checking the URL for any typos or extra characters. Make sure it follows the correct syntax and includes all necessary components.

Next, clear your browser’s cache and cookies, as outdated data stored in the cache can sometimes cause the error to occur.

If the issue persists, try accessing the website using a different browser or device to see if the error is specific to a certain platform.

You can also try resetting your network connection by restarting your modem or router, as connectivity issues can sometimes lead to the 400 Bad Request error.

If none of these methods work, consider contacting the website’s administrator for further assistance, as the error may be related to server-side issues beyond your control.

Common Causes of the Error

  • Open the browser you are using
  • Press Ctrl+Shift+Delete to open the Clear browsing data window
  • Select the time range you want to clear
  • Check the box next to “Cached images and files”
  • Click “Clear data”

Check URL for Errors

  • Double-check the URL you entered for any spelling errors
  • Ensure the URL is complete and accurate
  • Try retyping the URL
  • Check for any extra characters or spaces in the URL

Disable Browser Extensions

  • Open your browser’s extension or add-ons menu
  • Disable all extensions
  • Restart your browser
  • Check if the error persists
  • Enable extensions one by one to identify the cause

Clear Cookies

  • Open your browser
  • Press Ctrl+Shift+Delete to open the Clear browsing data window
  • Select the time range you want to clear
  • Check the box next to “Cookies and other site data”
  • Click “Clear data”

Check Requested URL

  • Verify the URL you are trying to access is correct
  • Ensure the URL is valid and properly formatted
  • Check for any special characters or encoding issues in the URL
  • Try accessing a different URL to see if the error is specific to one site

Restart Your Device

  • Close all open programs and applications
  • Shut down your device completely
  • Wait a few minutes before restarting your device
  • Open your browser and try accessing the site again

Identifying URL String Syntax Issues

To identify URL string syntax issues in the article titled “How to Fix HTTP 400 Bad Request: 6 Easy Methods,” you can first check for any special characters or spaces in the URL. Make sure there are no typos or missing characters that could be causing the error.

Next, look for any incorrect formatting or encoding in the URL string. Sometimes, special characters need to be encoded properly to work correctly in a URL. Check for any mistakes in this area.

If the URL includes parameters, verify that they are structured correctly and separated by the appropriate symbols. Incorrect parameter formatting can lead to a bad request error.

Additionally, check for any missing or extra slashes in the URL. The structure of the URL should be consistent and follow the correct syntax.

If you are still experiencing issues, try using a URL validator tool or online checker to help identify any syntax errors. These tools can pinpoint specific problems in the URL string that may be causing the bad request error.

Resolving Corrupted Browser Cache and Cookies

To resolve corrupted browser cache and cookies, the first step is to clear the cache and cookies in your web browser. In Google Chrome, you can do this by clicking on the three dots in the top right corner, selecting “More tools,” and then “Clear browsing data.” Make sure to check the boxes for “Cookies and other site data” and “Cached images and files.”

If you are using Microsoft Edge, you can clear your cache and cookies by clicking on the three dots in the top right corner, selecting “Settings,” then “Privacy, search, and services,” and finally “Choose what to clear.” Check the boxes for “Cookies and saved website data” and “Cached data and files.”

Another method to resolve HTTP 400 Bad Request is to reset your browser settings. In Google Chrome, go to “Settings,” scroll down to “Advanced,” and then click on “Restore settings to their original defaults.” This will reset your browser to its default state, eliminating any corrupt settings.

If clearing the cache and resetting the settings do not work, you can try updating your browser to the latest version. Outdated browsers can sometimes cause HTTP 400 errors. Check for updates in the settings of your browser and install any available updates.

In addition, you can try using a different web browser to see if the issue persists. Sometimes, a specific browser may have compatibility issues with certain websites, leading to HTTP 400 errors. Try accessing the website in a different browser, such as Mozilla Firefox or Safari, to see if the problem is resolved.

Addressing DNS Lookup Issues

To address DNS lookup issues causing an HTTP 400 Bad Request error, follow these 6 easy methods:

1. Check the URL: Ensure there are no typos or incorrect characters in the URL that could be causing the bad request error.

2. Clear browser cache: Clearing the cache in your web browser can help resolve DNS lookup issues by getting rid of any outdated or corrupted data.

3. Restart your computer: Sometimes a simple restart can help refresh your network connection and resolve DNS lookup problems causing the bad request error.

4. Flush DNS: Use the command prompt to flush your DNS cache, which can help resolve any issues with name resolution that may be causing the HTTP 400 error.

5. Change DNS server: Try switching to a different DNS server to see if that resolves the bad request error caused by DNS lookup issues.

6. Contact your ISP: If none of the above methods work, reach out to your Internet Service Provider to see if there are any larger network issues causing the DNS lookup problems.

Managing Large File Uploads

To manage large file uploads and avoid encountering an HTTP 400 Bad Request error, there are several easy methods you can try.

Method 1: Check the file size limit set by your web server and adjust it if necessary to accommodate larger files.

Method 2: Increase the timeout settings on your server to allow more time for the file upload process to complete.

Method 3: Make sure your client-side code is correctly handling the file upload process and not causing any conflicts with the server-side logic.

Method 4: Clear your cache and cookies to eliminate any potential data corruption that may be causing the bad request error.

Method 5: Verify that your file names do not contain any special characters or spaces, as this can sometimes trigger an error during the upload process.

Method 6: Double-check your network connection to ensure there are no issues with connectivity that could be disrupting the file upload.

Generic Server Errors Explained

If you encounter a Generic Server Error, such as an HTTP 400 Bad Request, there are several easy methods you can try to resolve the issue.

Check the URL: Make sure there are no typos or errors in the URL you are trying to access.

Clear your browser cache: Clearing your browser’s cache can help resolve issues with stored data that may be causing the error.

Check for server-side errors: Contact the website administrator to see if there are any server-side errors causing the problem.

If you are still experiencing the error, try using a different browser or device to see if the issue is specific to one platform.

Inspect your network connection: Ensure that your internet connection is stable and not causing any communication errors.

Double check your input: Make sure any forms or fields you are submitting information to are filled out correctly.

Appearance Across Different Browsers

Make sure to: test your website on popular browsers such as Google Chrome, Mozilla Firefox, Microsoft Edge, Safari, and Opera. This will give you a good idea of how your site looks across different platforms.

Check for: any HTML, CSS, or JavaScript issues that may be affecting the appearance of your site. Sometimes, a software bug can cause your site to display incorrectly on certain browsers.

Clear your cache: Before testing your site on different browsers, make sure to clear your web cache to avoid any potential conflicts.

Verifying the Submitted URL

To verify the submitted URL in an article titled “How to Fix HTTP 400 Bad Request: 6 Easy Methods,” follow these steps:

1. First, double check that the URL submitted is correct and properly formatted. Ensure there are no typos or missing characters.

2. Verify the IP address associated with the URL matches the intended destination. Use a lookup table to cross-reference the information.

3. Check for any potential data corruption or error messages that may be causing the HTTP 400 Bad Request. Look for any inconsistencies in the communication between the client and server.

4. Inspect the name resolution process to make sure the domain name is correctly mapped to the correct IP address. This can help identify any issues with the hostname.

5. If using a web cache, clear the cache to eliminate any potential glitches or logic errors that could be causing the bad request.

6. Finally, test the URL in different web browsers such as Opera or Safari to see if the issue persists across different platforms.

Deactivating Browser Extensions for Troubleshooting

Browser extensions page

To troubleshoot HTTP 400 Bad Request errors, one effective method is to deactivate browser extensions. These extensions can sometimes interfere with the communication between the client and the web server, resulting in errors.

To deactivate browser extensions in Opera, click on the menu icon, go to “Extensions”, and disable them one by one. In Safari, open the browser, click on “Safari” in the menu bar, select “Preferences”, go to the “Extensions” tab, and disable them.

After deactivating the extensions, refresh the webpage where you encountered the HTTP 400 error. If the error is resolved, you can then enable the extensions one by one to identify which one was causing the issue.

Deactivating browser extensions can help in troubleshooting HTTP 400 Bad Request errors by eliminating potential conflicts between the extensions and the web server. It is a simple yet effective method to resolve such errors and ensure a smooth browsing experience.

Clearing the DNS Cache

To clear the DNS cache, follow these steps:

1. Windows:
– Press Windows key + R to open the Run dialog box.
– Type cmd and press Enter to open the Command Prompt.
– In the Command Prompt, type ipconfig /flushdns and press Enter to clear the DNS cache.

2. Mac:
– Open the Terminal application.
– Type sudo killall -HUP mDNSResponder and press Enter to clear the DNS cache on macOS.

3. Linux:
– Open the terminal.
– Type sudo /etc/init.d/nscd restart or sudo service nscd restart depending on your Linux distribution to clear the DNS cache.

Troubleshooting Device and Internet Connection

Method Description
1 Check your internet connection by restarting your router or switching to a different network.
2 Clear your browser’s cache and cookies to eliminate any corrupted data causing the bad request.
3 Update your browser to the latest version to ensure compatibility with the website you are trying to access.
4 Disable browser extensions and plugins that may be interfering with the website’s functionality.
5 Check for any firewall or antivirus software blocking the website and temporarily disable them to see if it resolves the issue.
6 Contact the website administrator or your internet service provider for further assistance if none of the above methods work.

Frequently Asked Questions

How do I fix HTTP 400 error?

To fix an HTTP 400 error, you can start by double-checking the URL for any errors. Clear your browser cache and cookies, turn off any browser extensions, clear the DNS cache, and make sure the file size does not exceed server limits.

What is HTTP 400 with reason?

HTTP 400 occurs when the server is unable to process a request due to a client error, such as malformed syntax or invalid message framing.

How to debug HTTP 400 errors?

To debug HTTP 400 errors, you can start by checking the submitted URL, clearing browser cache and cookies, checking if file uploads exceed server limits, clearing DNS cache, and deactivating browser extensions.

Troubleshoot Facebook Trending Not Showing Fix

Having trouble with Facebook Trending not showing up? Let’s troubleshoot the issue together.

Checking Connectivity and Account Settings

To troubleshoot Facebook Trending not showing, start by checking your internet connection. Ensure you have a stable connection on your mobile device or computer. Next, verify your Facebook account settings to make sure the Trending section is enabled. Go to your account settings and look for the Trending section to ensure it is turned on. If the issue persists, try clearing your cache on the Facebook app or website.

Clear the cache on your device to remove any stored data that may be causing the problem. If all else fails, consider checking for any Facebook downtime or outages using a service like Downdetector.

Strategies for Effective Searching

  • Use specific keywords: Be as precise as possible when entering search terms to narrow down results.
  • Utilize quotation marks: Enclose phrases in quotation marks to search for an exact match.
  • Exclude terms: Use a minus sign before a keyword to exclude it from search results.
  • Filter by date: Utilize the date filter option to narrow down search results to a specific time frame.
  • Explore advanced search options: Familiarize yourself with Facebook’s advanced search features for more refined results.
  • Check spelling and grammar: Ensure that your search terms are correctly spelled to avoid missing relevant results.
  • Clear browsing data: Clearing your browser’s cache and cookies can help resolve any technical issues affecting search functionality.
  • Update the Facebook app: Make sure your Facebook app is up to date to access the latest search features and improvements.

Utilizing Tools and Features for Discovery

Tool/Feature Description
Facebook Help Center Provides step-by-step guides and troubleshooting tips for common issues related to Facebook Trending not showing.
Facebook Community Forums Allows users to connect with others facing similar issues and seek advice on how to fix Facebook Trending not showing.
Facebook Support Chat Enables direct communication with Facebook support team to address and resolve the issue of Trending not showing.
Clear Browser Cache Refreshing the browser by clearing cache can help resolve display issues with Facebook Trending.
Update Facebook App Ensuring the Facebook app is up-to-date can fix glitches and bugs causing Trending not showing.

Contacting Support and Troubleshooting Issues

If you are experiencing issues with Facebook Trending not showing up, contact Facebook support for assistance. They can help troubleshoot the problem and provide a solution. Make sure to check your internet connection and ensure that you have a stable connection. Additionally, try clearing your cache on your device to see if that resolves the issue.

Sometimes, simply refreshing the page or restarting your device can also help. If the problem persists, consider reaching out to Facebook support for further assistance.

FAQs

Why can’t I see most recent on Facebook anymore?

You can’t see the Most Recent option on Facebook anymore because it has been replaced with the Feeds button, which organizes your activity chronologically. Look for the Feeds button towards the bottom of the menu on the left hand side of your Facebook home screen.

Why is Facebook not showing my recent searches?

Facebook may not be showing your recent searches due to issues such as poor internet connection, pending app updates, or problems with the app’s cache memory. To resolve this, ensure you have a stable internet connection and update the app.

How do I get Facebook to show most recent posts?

To get Facebook to show most recent posts, you can tap on the Feeds tab on iOS and Android devices. This tab will display the most recent posts from the people, Favorites, Pages, and groups you follow, allowing you to see the newest posts first.