How to Fix 403 Forbidden Error: Resolve in 2024

I will discuss ways to resolve the 403 Forbidden error in 2024.

Evaluate the .htaccess File

Check the contents of the .htaccess file for any misconfigurations or directives that could be causing the 403 error. Make sure there are no IP address blocking rules or incorrect permissions set.

If you are using WordPress, plugins or themes may also be causing the issue. Disable all plugins and switch to a default theme to see if the error persists. Consider updating your WordPress installation to the latest version to fix any vulnerabilities.

After making any changes to the .htaccess file, save it and clear your browser cache before reloading the website to see if the error is resolved.

If the issue persists, consider scanning your website for malware using an antivirus software or a security plugin. You may also want to backup your website and contact your web hosting provider for further assistance in troubleshooting the 403 error.

Reset Permissions for Files and Directories

File/Directory Permissions
index.html 644
style.css 644
images/ 755

Clear Browser Cache and Cookies

To resolve the 403 Forbidden error, one common troubleshooting step is to clear your browser cache and cookies. These temporary files can sometimes cause conflicts with the website you are trying to access.

First, open your web browser and locate the settings or options menu.

Next, look for the privacy or history section within the settings.

Then, you should see an option to clear your browsing data.

Select to clear the cache and cookies.

Finally, close and reopen your browser to see if the 403 Forbidden error has been resolved.

Disable VPN and CDN Temporarily

After disabling VPN and CDN, try accessing the website again to see if the error persists. If the error is gone, you can try re-enabling these services one at a time to pinpoint the culprit.

If disabling VPN and CDN doesn’t resolve the issue, you may need to look into other potential causes such as incorrect file permissions, misconfigured .htaccess files, or server-side issues.

By ruling out VPN and CDN as the cause of the 403 Forbidden Error, you can narrow down your troubleshooting efforts and focus on other possible solutions to resolve the issue.

Run a Malware Scan

After running the antivirus scan, it’s also a good idea to use an anti-malware program to perform a secondary scan for any remaining threats. This extra step can help catch any malware that may have been missed by your antivirus software.

Once you have completed both scans and removed any malware, try accessing the website again to see if the 403 Forbidden error has been resolved. If the issue persists, you may need to further investigate the source of the error and consider other troubleshooting steps.

By regularly running malware scans on your computer, you can help prevent future issues like the 403 Forbidden error and ensure your system remains secure.

Deactivate WordPress Plugins

Alternatively, you can deactivate all plugins at once by renaming the “plugins” folder in the wp-content directory to something like “plugins_old.” This will disable all plugins, allowing you to access your dashboard and troubleshoot the issue.

After deactivating the plugins, check if the 403 error is resolved. If it is, reactivate your plugins one by one to identify the problematic one. If the error persists, you may need to investigate other potential causes such as file permissions, .htaccess file issues, or server-side configurations.

Verify and Update the A Record

If the IP address has changed, update the A Record with the new IP address. This process can take some time to propagate across the internet, so be patient.

After updating the A Record, clear your browser cache and cookies to ensure you are accessing the most recent version of your website. You may also need to restart your web server for the changes to take effect.

Verify the changes by typing your domain name into a web browser and checking if the 403 Forbidden error has been resolved. If the issue persists, double-check the A Record and ensure it is correctly updated with the right IP address.

Upload or Edit the Index Page

Check the file-system permissions of the index file and ensure they are set to allow access. You can also try clearing your browser’s cache or deleting any cookies related to the website to resolve the issue.

If the error persists, consider checking your web server configuration or .htaccess file for any access control rules that may be causing the problem. It’s also a good idea to backup your website before making any changes to avoid potential data loss.

Reconfigure File Ownership

Change the ownership of the file or directory to your user account by selecting “Change Permissions” or “Change Owner”. Input your username and save the changes.

After adjusting the ownership, make sure the file-system permissions are set correctly. Check if the permissions are set to allow access to the file or directory.

Adjust the permissions by right-clicking on the file or directory, selecting “Permissions” or “Properties”, and setting the appropriate permissions for the owner, group, and others.

Save the changes and refresh the webpage to see if the 403 Forbidden Error is resolved. By reconfiguring file ownership and permissions, you can ensure proper access control and resolve the error effectively.

F.A.Q.

What is the cause of 403 Forbidden error?

The cause of a 403 Forbidden error is typically related to the settings for a specific folder or file, which dictate access permissions for users. This error can occur if the site owner has changed settings to deny access to certain resources.

Why am I getting 403 Forbidden on a website?

You are getting a 403 Forbidden error on a website because you do not have permission to view the requested file or resource.

Does 403 Forbidden mean I’m blocked?

403 Forbidden does not necessarily mean that you are blocked. It simply indicates that access to the website’s content is being restricted for a specific reason, which could be on your end or on the server’s end.

How do I overcome error 403?

To overcome error 403, you can try using Hostinger AI Troubleshooter and clearing the web browser cache and cookies. Additionally, disabling VPN, CDN, and WordPress plugins temporarily, scanning for malware, restoring the .htaccess file, and resetting the site’s file permissions may help resolve the issue.

Can’t Access Control Panel Windows 10: 7 Ways to Fix

Having trouble accessing your Control Panel in Windows 10? Here are 7 ways to fix the issue.

Scan for Malware and Viruses

1. Use Microsoft Defender Antivirus to scan your computer for any malicious software. This built-in security tool can help identify and remove any potential threats that may be affecting your system.

2. Check for any suspicious files or programs that could be causing the issue. Look for any unfamiliar or potentially harmful files that may have been downloaded onto your computer.

3. Run a full system scan using a reputable antivirus software. This will help to detect and remove any malware or viruses that may be impacting your system’s performance.

By scanning for malware and viruses, you can ensure that your system is clean and free from any harmful software that may be causing issues with accessing Control Panel in Windows 10.

Adjust Display Settings and Resolution

Adjust Display Settings and Resolution

If you are having trouble accessing the Control Panel in Windows 10, you may need to adjust your display settings and resolution. Here are some steps you can take to fix the issue:

  1. Right-click on the desktop and select “Display settings”.
  2. Under the “Scale and layout” section, adjust the slider to change the size of text, apps, and other items.
  3. Click on “Advanced display settings” to change the resolution of your display.
  4. Try changing the resolution to a lower setting to see if that helps with accessing the Control Panel.
  5. Alternatively, you can try changing the resolution to a higher setting to see if that resolves the issue.
  6. After making any changes, click “Apply” and then “Keep changes” to save your settings.
  7. Restart your computer to apply the changes and see if you can now access the Control Panel.

Modify Registry and System Files

1. Run System File Checker: This built-in tool can scan and repair corrupted system files that may be causing issues with accessing the Control Panel.

2. Use Windows Registry Editor: You can try editing the registry to fix any errors related to the Control Panel. Be careful when making changes in the registry as it can impact system stability.

3. Reboot Your Computer: Sometimes a simple reboot can resolve issues with accessing the Control Panel in Windows 10.

4. Check for Computer Viruses: Use Microsoft Defender Antivirus to scan your system for any potential threats that may be preventing you from accessing the Control Panel.

5. Update Windows: Make sure your system is up to date by checking for the latest Windows updates. This can help resolve any bugs or issues with system files.

6. Use PowerShell: You can use PowerShell to run commands that may help in fixing issues with accessing the Control Panel.

7. Seek Help from a System Administrator: If you are unable to resolve the issue on your own, consider seeking help from a system administrator or IT professional for further assistance.

Explore Alternative Access Methods and System Repair

If you are experiencing issues accessing the Control Panel in Windows 10, there are alternative access methods you can try. One way to access the Control Panel is by using the Run dialog box. Simply press the Windows key + R on your keyboard to open the Run dialog box, then type “control” and press Enter. This will open the Control Panel.

Another way to access the Control Panel is through the Settings menu. Click on the Start menu and select Settings. From there, click on System and then About. You will see an option to access the Control Panel.

If you are still unable to access the Control Panel, you may need to repair your system files using the System File Checker tool. Open a Command Prompt as an administrator and type “sfc /scannow” and press Enter. This will scan and repair any corrupted system files.

If you suspect that a computer virus may be causing the issue, run a full system scan using your antivirus software. You can also try restarting your computer in Safe Mode to troubleshoot the issue without interference from third-party software.

By exploring these alternative access methods and system repair options, you can hopefully resolve the issue of not being able to access the Control Panel in Windows 10.

FAQs

Why can’t I access Control Panel Windows 10?

I can’t access Control Panel in Windows 10 due to possible system file corruption. To fix this issue, you can run an SFC scan by right-clicking the Start button and selecting Windows PowerShell (Admin) to run it as an administrator. Then, type in the command sfc/scannow and press Enter.

How do I force open Control Panel?

To force open Control Panel, you can use the Run command dialog box. Press Win + R, type cmd, press Ctrl + Shift + Enter to open an elevated Command Prompt, then type control panel and press Enter.

How do I restore the Control Panel in Windows 10?

To restore the Control Panel in Windows 10, you can search for it in the search box next to the Start button on the taskbar and select Control Panel (Desktop app) from the results. Then search for Recovery in the Control Panel and select Recovery > Open System Restore > Next.

How do I unblock Control Panel in Windows 10?

To unblock Control Panel in Windows 10, you need to ensure that access to control panel and settings app is enabled. Select the enabled option, click on apply, and then click on OK.

BIOHD4 Error Code Boot Test Failed HP Fix

Having trouble with the BIOHD4 error code on your HP computer? Learn how to fix the boot test failed issue in this article.

Repairing Boot Configuration Data

To repair the Boot Configuration Data on your HP computer after encountering a BIOHD4 Error Code Boot Test Failed, follow these steps:

First, boot your computer using a Windows 7 installation disk or a system repair disk.

Navigate to the System Recovery Options menu by selecting your language preferences and clicking on “Repair your computer.”

Next, choose the operating system you want to repair and select “Command Prompt” from the list of recovery tools.

In the Command Prompt window, type the following command: bootrec /rebuildbcd and press Enter. This command will scan for Windows installations on your computer and allow you to add them to the Boot Configuration Data.

After the scanning process is complete, follow the on-screen instructions to add the Windows installations to the Boot Configuration Data.

Once the process is finished, type exit in the Command Prompt window to close it.

Finally, restart your computer and check if the BIOHD4 Error Code Boot Test Failed issue has been resolved.

Running a CHKDSK Scan

Running a CHKDSK Scan
Description CHKDSK (Check Disk) is a Windows utility that checks the integrity of your hard drive and fixes any errors it finds.
How to Run CHKDSK 1. Press the Windows key + X on your keyboard to open the Power User menu.
2. Click on Command Prompt (Admin) to open an elevated Command Prompt.
3. In the Command Prompt window, type “chkdsk C: /f /r” (replace C: with the drive letter you want to scan) and press Enter.
4. If prompted to schedule the scan for the next restart, type Y and press Enter.
5. Restart your computer to run the CHKDSK scan.
Results After the scan is complete, CHKDSK will display a summary of the scan results. If any errors were found and fixed, CHKDSK will report them.

Resetting Windows Components

To reset Windows components on your HP Pavilion computer after encountering the BIOHD4 Error Code Boot Test Failed, follow these steps:

1. Press the “Start” button on your keyboard, then type “cmd” in the search bar. Right-click on “Command Prompt” and select “Run as administrator.”

2. In the Command Prompt window, type sfc /scannow and press Enter. This will initiate a System File Checker scan to repair any corrupt system files.

3. After the scan is complete, restart your computer and check if the BIOHD4 error persists.

4. If the issue continues, return to the Command Prompt window and type dism /online /cleanup-image /restorehealth and press Enter. This command will repair the Windows image to resolve any underlying system issues.

5. Restart your computer once again and see if the error has been resolved. If not, you may need to perform additional troubleshooting steps or seek assistance from HP support.

Contacting Support

If you are experiencing the BIOHD4 Error Code Boot Test Failed on your HP Pavilion computer, and you have tried troubleshooting on your own without success, it may be time to contact support for assistance.

Contact HP Support: The best way to get help with the BIOHD4 Error Code Boot Test Failed issue is to reach out to HP Support directly. You can contact them via phone, email, or live chat on their website.

When contacting support, make sure to have your computer’s serial number and model number on hand. This will help the support team quickly identify your device and provide you with the appropriate assistance.

If you are unable to access your computer due to the error, you can try booting in Safe Mode or using the Command-line interface to contact support. Alternatively, you can use another device to reach out for help.

Once you have contacted support, provide them with a detailed description of the issue you are facing, including any troubleshooting steps you have already taken. This will help the support team diagnose the problem more efficiently.

If the support team is unable to resolve the issue remotely, they may recommend sending your computer in for repair. Follow their instructions carefully to ensure a smooth repair process.

F.A.Q.

What is error code biohd3?

Error code biohd3 typically indicates an issue with the hard drive or the data cables connecting it to the computer. To troubleshoot, ensure all cables and connections are secure and undamaged.

What does error code Biohd 8 mean?

Error code Biohd 8 typically indicates that the HP SMART diagnostic tool has detected potential hard drive failure. This could be due to damaged connections, overheating, or firmware issues.

What is error code biohd1 on hard drive?

Error code biohd1 on a hard drive is typically caused by a malfunctioning or corrupt hard drive. This issue can also be due to corrupt registry entries in the operating system. The best solution is to purchase a new hard drive for your computer or laptop.

Fix Laptop Won’t Connect to WiFi Windows 10

Having trouble getting your laptop to connect to WiFi on Windows 10? Let’s troubleshoot the issue together.

Check Wi-Fi Connectivity

Next, select your Wi-Fi network from the list and enter the password if prompted. Make sure you are entering the correct password and that the caps lock key is not turned on.

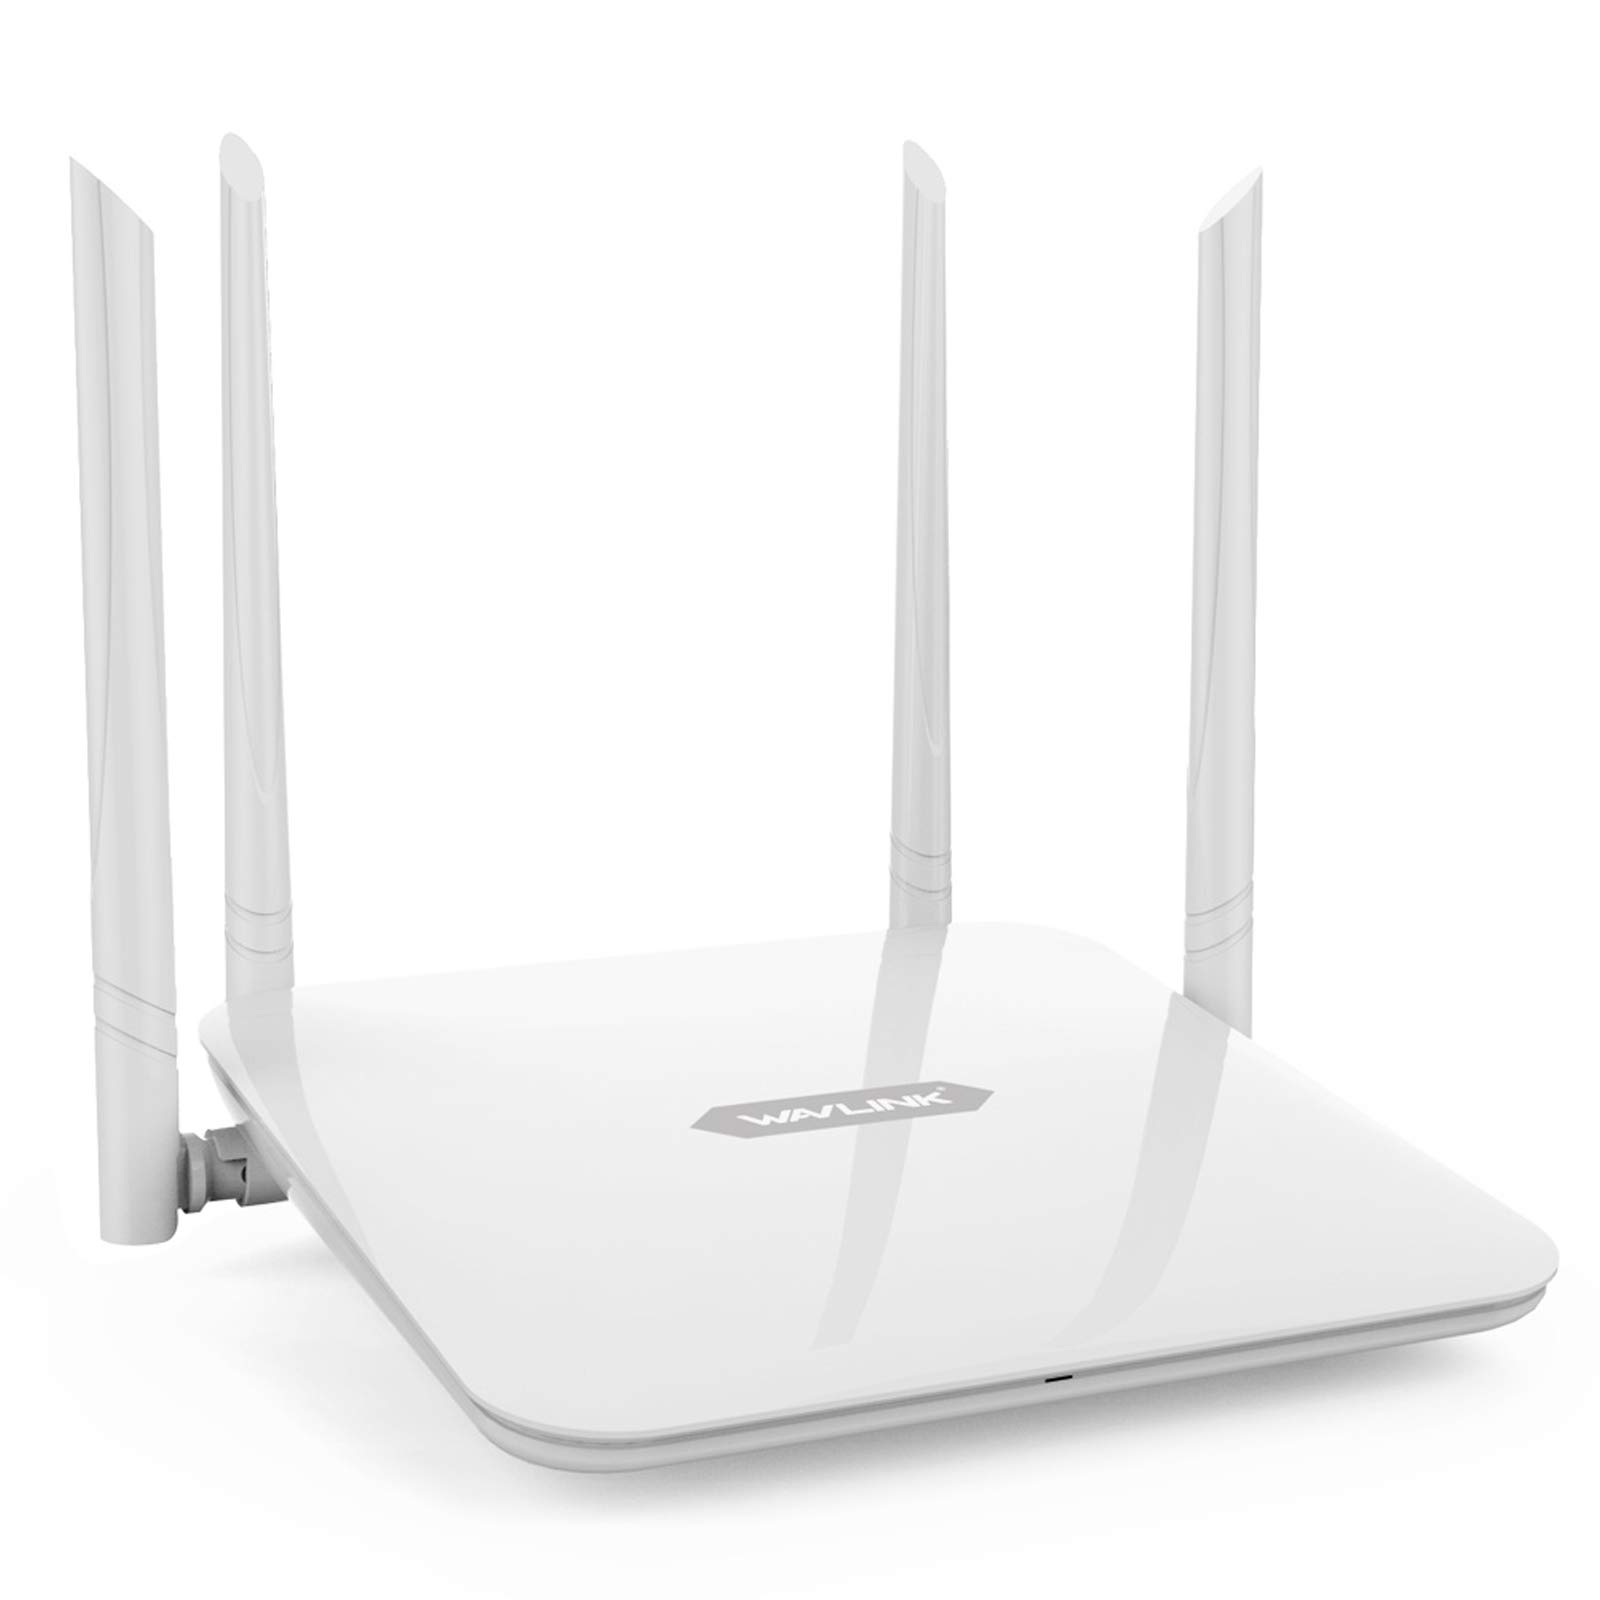
If you are still unable to connect, try restarting your router and modem. Unplug them from the power source, wait for a few seconds, and then plug them back in.

Additionally, you can try forgetting the network on your laptop and then reconnecting to it. This can sometimes resolve connectivity issues.

If you are still experiencing problems, you may need to troubleshoot your Wi-Fi connection further or contact your Internet service provider for assistance.

Restart Your Router

To restart your router, locate the power button on the device. Press the button to turn off the router, then wait for about 30 seconds before turning it back on. This process can help refresh the connection and allow your laptop to reconnect to the WiFi network.

After restarting your router, try reconnecting your laptop to the WiFi network. Make sure to enter the correct password and check if the connection is successful. If the issue persists, you may need to troubleshoot further or contact your Internet service provider for assistance.

Restarting your router is a quick and simple step that can often fix connectivity issues with your laptop. Give it a try the next time you experience problems connecting to WiFi on Windows 10.

Verify Your Wi-Fi Password

1. Check your wireless router for the correct password. If you are not sure, you can find it on a sticker on your router or in the router’s settings.

2. Go to the taskbar on your Windows 10 laptop and click on the Wi-Fi icon.

3. Select your wireless network from the list and click on “Connect.”

If the laptop still won’t connect after verifying the Wi-Fi password, you may need to troubleshoot further by checking for any network issues or resetting your modem.

Enhance Router Proximity

Router placement next to laptop

Position Your Laptop: Place your laptop closer to the wireless router to enhance signal strength. Avoid placing your laptop near other electronic devices that may interfere with the WiFi connection.

Reduce Interference: Keep your laptop away from devices that operate on the same frequency, such as cordless phones and microwave ovens. This can help minimize interference and improve your WiFi connection.

Check Signal Strength: In Windows 10, you can check the signal strength of your WiFi connection by clicking on the WiFi icon in the taskbar. Look for the signal bars to determine if the signal is strong or weak.

Select a Compatible Network

Look for your WiFi network in the list of available options and select it. If you don’t see your network, try refreshing the list by clicking on the icon again.

After selecting your network, you may be prompted to enter a password. Make sure you type it in correctly and click on the connect button.

If you continue to have trouble connecting, try restarting your laptop and router to reset the network connection.

If you still can’t connect, you may need to troubleshoot further or contact technical support for assistance.

Utilize Laptop Troubleshooting Tools

Laptop troubleshooting tools.

  • Run Network Troubleshooter:
    • Click on the Start menu and go to Settings.
    • Select Update & Security and then click on Troubleshoot.
    • Choose Internet Connections and follow the on-screen instructions to run the troubleshooter.
  • Reset Network Adapter:
    • Open Command Prompt as an administrator by typing cmd in the search bar and right-clicking on Command Prompt to select Run as administrator.
    • Type the command netsh winsock reset and press Enter.
    • Restart your laptop to apply the changes.
  • Update Network Drivers:
    • Right-click on the Start menu and select Device Manager.
    • Expand the Network adapters section and right-click on your network adapter.
    • Select Update driver and follow the on-screen instructions to update the driver.

Reset Your Wireless Network

1. Restart Your Router: Unplug your router from the power source, wait for 30 seconds, and then plug it back in. This can help resolve any connectivity issues.

2. Forget Network: Go to your network settings, find the network you’re trying to connect to, and select “Forget.” Then, reconnect to the network by entering the password.

3. Reset Network Settings: Open Command Prompt as an administrator and type “netsh int ip reset” followed by “netsh winsock reset.” Restart your computer after running these commands.

Troubleshooting Network Issues

Issue Possible Solution
No WiFi networks available Check if WiFi is enabled on your laptop, restart your router, and make sure you are within range of a WiFi network.
Incorrect WiFi password Double-check the password you entered and ensure it is correct. You can also try forgetting the WiFi network and reconnecting.
Outdated network drivers Update your network drivers through Device Manager or download the latest drivers from the manufacturer’s website.
IP address conflict Release and renew your IP address using the command prompt. You can also try restarting your laptop and router.
Firewall or antivirus blocking connection Disable your firewall and antivirus temporarily to see if they are the cause of the issue. Adjust the settings if necessary.

Frequently Asked Questions

Why won’t my laptop connect to any Wi-Fi?

Your laptop may not be connecting to any Wi-Fi because the Wireless Mode setting for your network adapter does not match the capabilities of the network you are trying to connect to. Make sure to check and adjust this setting accordingly.

Why i can t connect my laptop to Wi-Fi even with correct password?

It seems that you are unable to connect your laptop to Wi-Fi even with the correct password. Start by restarting your computer and router, double-checking for any typing errors in the password. If the issue persists, consider resetting the router, setting up a new connection, or updating your network driver.

Why is my laptop not showing the option to connect to Wi-Fi?

Your laptop may not be showing the option to connect to Wi-Fi due to temporary software glitches or outdated/corrupted Wi-Fi drivers. Try restarting your laptop or updating/reinstalling the Wi-Fi drivers to resolve the issue.

Why is my laptop saying can’t connect to this network?

Your laptop may be displaying the “Can’t connect to this network” message due to corrupted network settings. You can try a systemwide network reset through Command Prompt to potentially resolve the issue.

Fix Windows Mail App Error Code 0x80000b Adding Gmail

In troubleshooting the Windows Mail app error code 0x80000b when adding Gmail, I discovered some effective solutions.

Identifying the Problem

To identify the problem with the Windows Mail App error code 0x80000b when adding Gmail, you need to check for any conflicting settings or issues that may be causing the error. Make sure your Gmail account settings are configured correctly and that your internet connection is stable. Check for any antivirus software that may be blocking the app from accessing your Gmail account. Ensure that your Windows 10 is up to date by running Windows Update. Try disabling Windows Defender Antivirus temporarily to see if it resolves the issue. If the problem persists, consider performing a System Restore to a point before the error occurred.

Turning Off Antivirus or Windows Defender

To fix Windows Mail App Error Code 0x80000b when adding Gmail, turn off your antivirus or Windows Defender temporarily. This can sometimes interfere with the syncing process. To disable Windows Defender, go to the Settings app, select Update & Security, then Windows Security, and finally Virus & Threat Protection. From there, turn off the Real-time protection.

If you use a third-party antivirus software, locate the program in your system tray and disable it temporarily. After disabling the antivirus or Windows Defender, try adding your Gmail account to the Windows Mail App again to see if the error persists.

Allowing Mail Through Firewall

To allow mail through the firewall for the Windows Mail app error code 0x80000b when adding Gmail, follow these steps:

1. Open the Start menu and search for “Windows Defender Firewall.”

2. Click on “Allow an app or feature through Windows Defender Firewall” in the menu.

3. Look for “Mail (Windows)” in the list of allowed apps and features and make sure it has a checkmark next to it.

Make sure to save your changes and try adding Gmail to your Windows Mail app again. This should resolve the error code 0x80000b and allow your emails to come through properly.

Account Management Strategies

  • Check Internet Connection:
    • Ensure that your device is connected to the internet.
    • Try opening a browser and loading a webpage to test the connection.
  • Verify Gmail Account Settings:
    • Log in to your Gmail account on a browser.
    • Go to Settings > Forwarding and POP/IMAP to ensure IMAP is enabled.
  • Reconfigure Windows Mail App:
    • Open Windows Mail app.
    • Go to Settings > Manage Accounts > Add Account.
    • Choose Google and enter your Gmail account details.
  • Check Firewall and Antivirus Settings:
    • Ensure that your firewall or antivirus program is not blocking the Mail app.
    • Add an exception for the Mail app in your security software settings.

Resetting Mail and Calendar App

Windows Mail and Calendar app icon

To reset the Mail and Calendar app in Windows, follow these steps:

1. Open the Start menu and go to Settings.
2. Click on Apps, then Apps & features.
3. Scroll down to find Mail and Calendar, then click on it.
4. Select Advanced options.
5. Scroll down and click on the Reset button.
6. Confirm the action when prompted.

Once the app is reset, try adding your Gmail account again to see if the error code 0x80000b is resolved. This simple troubleshooting step can often fix various issues with the Mail app on Windows 10.

Frequently Asked Questions

What is error code 0x80000b in Gmail?

Error code 0x8000000b in Gmail indicates a connection issue with the Gmail IMAP server. Make sure to check your firewall settings and disable any email scanning features in your anti-virus program.

What is error code 0x80000b on Yahoo Mail?

Error code 0x80000b on Yahoo Mail is related to syncing issues that can occur when setting up your email app, such as in the Windows 10 email app.

How do I give permission to sync my Gmail?

To give permission to sync your Gmail, you can toggle on the Sync Gmail option in the Gmail app on Android or iOS. Alternatively, in the Gmail web version, go to Settings, then Accounts and Import to add a new email account.

Hotmail Not Opening: Fixes for Recent Browser Issues

Having trouble accessing Hotmail due to recent browser issues? Here are some fixes to help you get back online.

Check Internet Connection

  • Restart your modem and router:
    • Unplug both your modem and router from the power source.
    • Wait for 30 seconds before plugging them back in.
    • Check if your internet connection has been restored.
  • Connect to a different network:
    • If you are using a Wi-Fi connection, try connecting to a different network to see if the issue is with your current network.
    • You can also try using an Ethernet cable to connect directly to your modem to rule out any Wi-Fi issues.
  • Run a speed test:
    • Visit a website that offers internet speed tests, such as speedtest.net.
    • Run the test to check if your internet connection speed is within the expected range.
    • If your speed is significantly lower than usual, contact your internet service provider for assistance.

Update Outlook or Browser

If you are experiencing issues with Hotmail not opening in your browser, it may be due to compatibility issues with your browser or outdated software. To fix this problem, make sure to update your Outlook or browser to the latest version.

Update your browser: If you are using Google Chrome, click on the three dots in the top right corner of the browser window. Select “Help” and then “About Google Chrome” to check for and install any available updates.

Update Outlook: If you are using Microsoft Outlook, open the program and click on “File” in the top left corner. Select “Office Account” and then “Update Options” to check for and install any available updates.

If updating your software does not resolve the issue, try clearing your browser cache and cookies. This can help to refresh your browser and solve any temporary issues that may be causing Hotmail not to open properly.

Additionally, make sure that you are entering the correct email address and password when trying to log in to your Hotmail account. If you have forgotten your password, you can reset it through the “Forgot password” link on the login page.

Repair or Remove Corrupted Emails

Email Action
Email 1 Repair
Email 2 Remove
Email 3 Repair

Clear App Cache or Browser Cache

If Hotmail is not opening on your browser, one potential fix is to clear the app cache or browser cache.

To clear the cache on your browser, open your browser settings and navigate to the option to clear browsing data. Select the option to clear cache or temporary files and cookies. This will remove any stored data that could be causing issues with accessing Hotmail.

If you are using the Hotmail app on a mobile device, you can clear the app cache by going to the settings menu on your device. Look for the option to manage apps, then find the Hotmail app and select the option to clear the cache. This will remove any temporary data stored by the app that could be causing problems.

After clearing the cache on your browser or app, try accessing Hotmail again to see if the issue has been resolved. If not, you may need to try other troubleshooting steps to fix the problem.

Check and Update Third-Party Apps

To ensure that third-party apps are not causing issues with Hotmail not opening in your browser, you should regularly check for updates. Outdated apps may not be compatible with the latest browser versions, leading to login or loading problems.

Check for updates: Open the app store on your device and look for any pending updates for third-party apps that you use to access Hotmail. Updating these apps may resolve any compatibility issues causing Hotmail not to open.

If you are using Hotmail on a computer, check for updates for your web browser. Make sure you are using the latest version to ensure smooth functionality.

Update third-party apps: Once you have identified any outdated apps, proceed to update them to the latest version available. This can help resolve any issues that may be preventing Hotmail from opening properly.

By regularly checking and updating third-party apps, you can ensure that Hotmail functions correctly in your browser without any unexpected issues. This simple step can help you avoid login problems and ensure a seamless email experience.

Reset or Recover Account Password

If you are having trouble accessing your Hotmail account due to a forgotten password, you can easily reset or recover it. Here are the steps to do so:

1. Visit the Hotmail login page and click on the “Forgot password?” link.

2. Enter your email address and follow the prompts to verify your identity.

3. You may be asked to answer security questions, enter a verification code sent to your phone or email, or provide other forms of verification.

If you are still unable to reset or recover your password, you can contact Hotmail customer support for further assistance.

Reinstall or Add Account Again

If you’re experiencing issues with Hotmail not opening in your browser, one quick fix you can try is reinstalling or adding your account again. This can help refresh the connection and resolve any potential login problems.

To reinstall your Hotmail account, first sign out of your current account. Then, delete the account from your browser settings. After that, re-add the account by entering your login credentials and following the on-screen instructions.

If you’re using a mobile device, such as an iPhone or Android, you can also try removing and re-adding your Hotmail account in the email app settings. This can help refresh the connection and resolve any login issues you may be experiencing.

By reinstalling or adding your Hotmail account again, you can potentially resolve any recent browser issues that may be preventing you from accessing your emails. If the problem persists, you may want to consider contacting Microsoft support for further assistance.

Use a VPN or Check for Software Updates

If you are having trouble opening Hotmail in your web browser, one potential fix is to use a VPN to bypass any regional restrictions or network issues that may be causing the problem. By connecting to a VPN server in a different location, you can access Hotmail with a different IP address and potentially resolve the issue.

Another solution to consider is checking for software updates on your device. Outdated software can sometimes cause compatibility issues with websites like Hotmail. Make sure your web browser, operating system, and any relevant applications are up to date to ensure smooth functionality.

It is also a good idea to clear your browser’s cache and cookies to eliminate any temporary data that may be causing conflicts with Hotmail. This can help refresh your browser and improve its performance when accessing the website.

If you are still experiencing issues with Hotmail not opening, you may want to try accessing it from a different device or network to see if the problem is localized to a specific device or connection. Additionally, reaching out to Microsoft support for further assistance may be necessary if the problem persists.

F.A.Q.

Why will my Hotmail not open?

Your Hotmail may not be opening due to corrupted cache files in the app. Try clearing the Hotmail app cache to resolve this issue.

Is there a problem with Hotmail today?

There are no current issues with Hotmail today. The last outage occurred on Wednesday, April with a duration of approximately 15 hours.

Why won’t my Hotmail load new emails?

Your Hotmail may not be loading new emails due to issues with your internet connection, inbox settings, or spam folder. Whitelisting senders, emptying the deleted items folder, updating your browser, and protecting against malware can help resolve this issue.

Merge: Easy Ways to Scan Multiple Pages Into One PDF Document

In this article, I will discuss easy ways to scan multiple pages into one PDF document.

Merging Pages into a Single PDF

Method Description
Using Adobe Acrobat Adobe Acrobat allows you to easily merge multiple pages into a single PDF document. Simply open the software, click on ‘File’ and then ‘Create’ followed by ‘Combine Files into a Single PDF’. Select the files you want to merge, arrange them in the desired order, and then click ‘Combine’.
Online PDF Merge Tools There are several online tools available that allow you to merge multiple PDF files into one. Simply upload the files you want to merge, arrange them in the desired order, and then download the merged PDF document.
Using Preview on Mac If you are using a Mac, you can easily merge pages into a single PDF using the Preview app. Simply open the files you want to merge in Preview, click on ‘View’ and then ‘Thumbnails’ to view all pages. Drag and drop the pages to rearrange them in the desired order, and then click ‘File’ followed by ‘Export as PDF’ to save the merged document.

Scanning Techniques: ADF vs. Flatbed

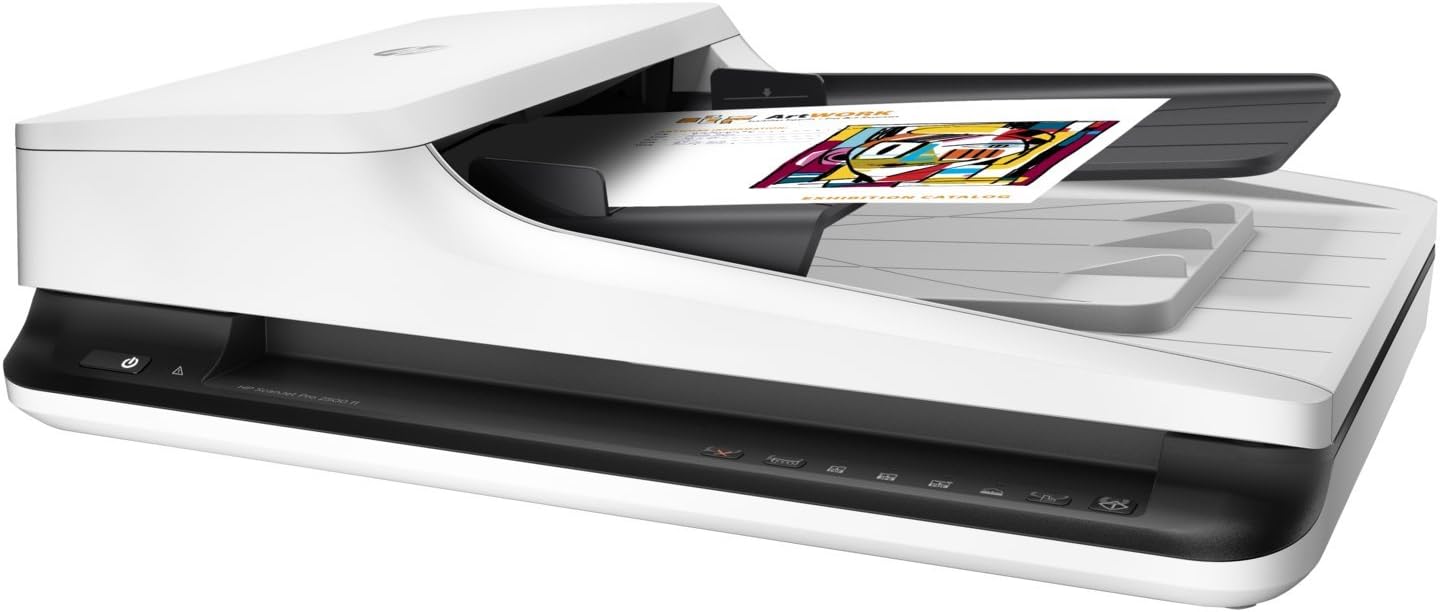
Scanner with ADF vs. flatbed scanner

When it comes to scanning multiple pages into one PDF document, the choice between using an Automatic Document Feeder (ADF) and a Flatbed scanner can make a big difference in terms of efficiency and ease of use.

ADF scanners are ideal for batch scanning multiple pages at once, allowing for a hands-free operation that can save time and effort. This type of scanner is often found in office settings where large volumes of documents need to be scanned quickly and efficiently.

On the other hand, Flatbed scanners are better suited for scanning delicate or irregularly shaped documents that may not feed well through an ADF scanner. This type of scanner allows for more control over the scanning process and is ideal for smaller jobs that require more precision.

When using an ADF scanner to scan multiple pages into one PDF document, simply load the pages into the feeder, select the PDF format in the scanning software, and start the scan process. The scanner will automatically feed and scan each page, saving them as a single PDF file once the process is complete.

For Flatbed scanners, the process is slightly different. Place each page on the scanner glass, making sure to align them properly for a clean scan. Use the scanning software to select the PDF format and scan each page individually. Once all pages have been scanned, save them as a single PDF file.

Platforms: Windows, Mac, Android, iOS

  • Check for software updates:
    • Make sure your Windows operating system is up to date to avoid any compatibility issues.
  • Restart your computer:
    • Sometimes a simple reboot can solve scanning issues on Windows.
  • Update scanner drivers:
    • Go to the manufacturer’s website and download the latest drivers for your scanner model.

Platforms: Mac

  • Verify macOS compatibility:
    • Ensure that your scanner is compatible with the version of macOS you are using.
  • Reset printing system:
    • Open System Preferences, then Printers & Scanners, right-click on the list of printers and scanners, and select Reset printing system.
  • Reinstall scanner software:
    • Uninstall the current scanner software, download the latest version from the manufacturer’s website, and install it on your Mac.

Platforms: Android

  • Grant necessary permissions:
    • Make sure the scanning app has permission to access your device’s camera and storage.
  • Clear app cache:
    • Go to Settings > Apps > select the scanning app > tap on Storage > tap Clear Cache.
  • Check for app updates:
    • Visit the Google Play Store, search for the scanning app, and make sure it is up to date.

Platforms: iOS

  • Restart the app:
    • Close the scanning app completely and then reopen it to see if the issue is resolved.
  • Update iOS:
    • Go to Settings > General > Software Update to check for and install any available updates.
  • Reinstall the scanning app:
    • Hold down the scanning app icon until it shakes, then tap on the X to uninstall it. Reinstall the app from the App Store.

Free Tools for Combining Scanned Documents

To combine scanned documents into one PDF document for free, you can use various online tools or software. One popular online tool is Smallpdf, which allows you to easily merge multiple scanned documents into a single PDF file. Simply upload the scanned documents, arrange them in the desired order, and download the merged PDF document.

Another option is to use PDF Merge, a free online tool that lets you combine multiple PDF files into a single document. You can upload scanned documents directly from your computer or cloud storage, rearrange the pages, and then download the merged PDF file.

If you prefer to use software on your computer, you can try PDFsam Basic. This free open-source software allows you to merge PDF files, including scanned documents, quickly and easily. Simply download the software, select the scanned documents you want to merge, arrange them in the desired order, and save the merged PDF document.

For those using an iPhone or iPad, you can use the built-in Files app to combine scanned documents into one PDF. Simply open the Files app, select the scanned documents you want to merge, tap the “Select” button, choose “Create PDF,” and then save the merged PDF file.

No matter which option you choose, combining scanned documents into a single PDF document is a quick and easy process with these free tools. Give them a try and streamline your document management tasks today.

F.A.Qs

How do I scan 2 pages into 1 document?

To scan 2 pages into 1 document, you can use your scanner to scan the first page and then select “Save and continue scanning” to add the second page. Another option is to use an app like FineScanner to combine multiple pages into one document.

How do I scan multiple pages into one document in Windows 10?

To scan multiple pages into one document in Windows 10, you can set the file format to pdf and select “Multi-page pdf” in the settings menu. Place each page on the scanner one at a time, clicking “Scan” for the first page and “Add” for subsequent pages.

How do I scan multiple pages into one document on my HP printer?

To scan multiple pages into one document on your HP printer, you can place the documents in the ADF and open the HP Director software. From there, you can click on “Scan document” and select the appropriate settings for your scan. Finally, make sure to choose “Save to file” in the Destination box to save all the scanned pages into one document.

How to scan multiple pages into one document on a canon printer?

To scan multiple pages into one document on a Canon printer, select Document Scan and ensure the Data Format setting is set to PDF (Multiple Pages). This will save all scanned pages into a single PDF file.

Troubleshooting Zoom Microphone Detection Issues

In this guide, we will address common issues related to microphone detection in Zoom meetings.

Update and Reinstall Zoom

To update Zoom, first check if you have the latest version of the software installed on your computer. You can do this by clicking on the gear icon in the Zoom application and selecting “Check for Updates” from the drop-down list. If there is a newer version available, download and install it.

If updating Zoom does not fix the microphone detection issue, you may need to reinstall the software. To do this on a Windows 10 computer, go to the Control Panel, then click on “Programs” followed by “Uninstall a Program.” Find Zoom in the list of installed programs, right-click on it, and select “Uninstall.” Once Zoom is uninstalled, download the latest version from the Zoom website and install it on your computer.

On a MacOS device, you can uninstall Zoom by dragging the application icon from the Applications folder to the trash. Then, download the latest version of Zoom from the website and install it on your Mac.

After reinstalling Zoom, launch the application and check if the microphone detection issue has been resolved. If you are still experiencing problems, make sure your system settings are configured correctly to allow Zoom access to your microphone. Additionally, check for any background noise or sound device issues that may be affecting the microphone detection.

By updating and reinstalling Zoom, you can troubleshoot microphone detection issues and improve your overall experience with the software.

Grant Microphone Access

1. Check System Settings: Make sure your microphone is enabled in your system settings. Go to the Control Panel on Windows 10 or System Preferences on MacOS to adjust your microphone settings.

2. Grant Access in Zoom: Open the Zoom application and navigate to the settings menu. Look for the microphone settings and ensure that your microphone is selected as the default input device.

3. Test Your Microphone: Join a Zoom meeting or test call to check if your microphone is working properly. Adjust the volume and settings as needed.

If you are still experiencing microphone detection issues, consider the following troubleshooting steps:

4. Update Zoom: Make sure you are using the latest version of the Zoom software. Check for updates in the settings menu or download the latest version from the Zoom website.

5. Check for Background Noise: Eliminate any background noise that may be interfering with your microphone detection. Move to a quiet location or use a noise-canceling microphone.

6. Restart Your Device: Sometimes a simple restart can resolve microphone detection issues. Turn off your computer or device, wait a few seconds, and then turn it back on.

Adjust Microphone and Audio Settings

  • Check Microphone Connection:
    • Ensure the microphone is securely plugged into the correct port on your device.
    • Try using a different microphone or headset to see if the issue is with the device itself.
  • Adjust Microphone Settings in Zoom:
    • Open Zoom and navigate to Settings.
    • Click on Audio and make sure the correct microphone is selected.
    • Adjust the Input Level to ensure the microphone is not too loud or too quiet.
  • Check System Audio Settings:
    • Open Control Panel and click on Sound.
    • Make sure the correct microphone is set as the default recording device.
    • Adjust the Microphone Levels to ensure it is not muted or too low.

Update Audio Driver

To update your audio driver, follow these steps:

1. Right-click on the Start menu and select “Device Manager.”
2. In the Device Manager window, expand the “Sound, video and game controllers” category.
3. Right-click on your audio device and select “Update driver.”
4. Choose “Search automatically for updated driver software” and follow the on-screen instructions to complete the update.
5. Restart your computer to apply the changes.

If updating the audio driver does not resolve the Zoom microphone detection issues, you may need to troubleshoot further. Check the Zoom settings to ensure the correct microphone is selected. Additionally, make sure the microphone is not muted or disabled in the system settings.

If you are still experiencing issues, try using a different microphone or testing the current microphone on another device to determine if the problem lies with the microphone itself. Updating Zoom software and checking for any Windows updates may also help resolve microphone detection issues.

F.A.Qs

Why is Zoom not detecting my microphone?

Zoom is not detecting your microphone because the cable connection may not be fully inserted into the appropriate port, or the device may need to be unplugged and plugged back in. If you are using a bluetooth device, make sure it is turned on and connected properly. Additionally, ensure that you are using a supported USB device for Zoom.

Why is my mic not being detected?

Your mic may not be detected because it is not connected correctly to your computer, positioned properly, or the volume is too low. Make sure to check these factors first before troubleshooting further.

Why is my microphone not allowed on Zoom?

Your microphone may not be allowed on Zoom because the microphone access settings on your device may be turned off. To resolve this issue, go to your device settings, navigate to Privacy, and ensure that Microphone access is set to On.

Why is my Zoom microphone not working on Mac?

Your Zoom microphone may not be working on your Mac because another app like Skype, Google Meet, or FaceTime is using the microphone. Check and close any running apps that could be using the mic, and make sure that the microphone settings in Zoom are selected.

Event ID 6008 Fix: Unexpected System Shutdown Detected

In my experience, encountering Event ID 6008 indicating an unexpected system shutdown can be frustrating.

Symptoms and Description

Symptoms: If you are experiencing unexpected system shutdowns on your Windows computer, you may encounter Event ID 6008 in the Event Viewer. This error indicates that the system was unexpectedly shutdown without properly shutting down the operating system.

Description: When the Event ID 6008 error occurs, it can be due to various reasons such as power outages, hardware issues, overheating, or software conflicts. The error message will be logged in the Event Viewer with the date and time of the unexpected shutdown.

To fix this issue: Check the system for any overheating issues by ensuring proper ventilation and cleaning out any dust from the components. Update your device drivers and run Windows Update to ensure that your system is up to date. If the problem persists, consider checking the power supply unit and graphics card for any issues.

Common Causes

  • Turn off the computer and unplug it from the power source.
  • Open the computer case to check for dust buildup on the fans and heatsinks.
  • Clean any dust using compressed air or a soft brush.
  • Ensure that all fans are functioning properly.

Update Drivers

  • Open Device Manager by pressing Win+X and selecting Device Manager.
  • Look for any devices with a yellow exclamation mark, indicating a driver issue.
  • Right-click on the device and select Update Driver.
  • Follow the on-screen instructions to update the driver.

Check for Software Conflicts

  • Open Task Manager by pressing Ctrl+Shift+Esc.
  • Go to the Startup tab and disable any unnecessary programs that may be causing conflicts.
  • Restart the computer and check if the issue persists.

Checking Your Hardware

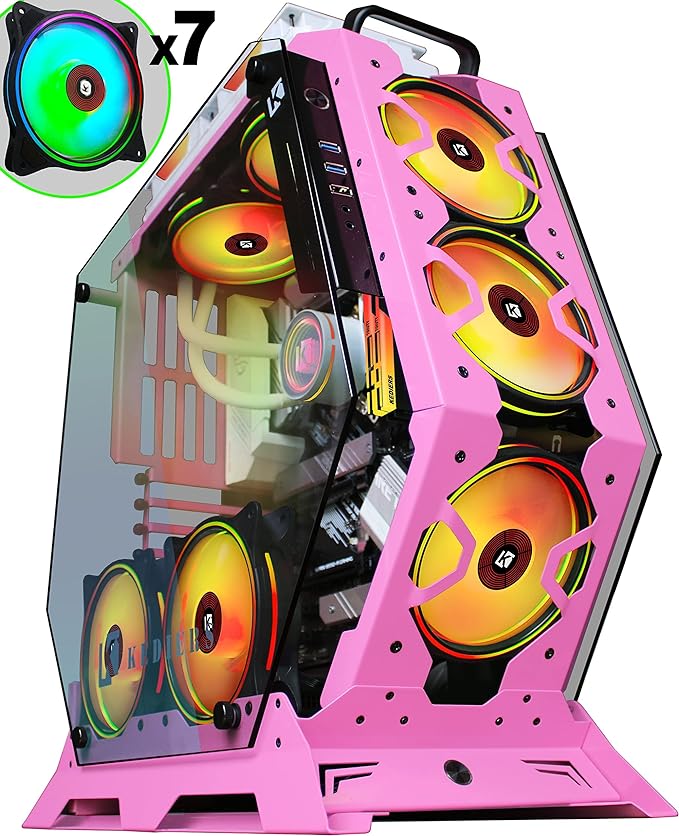
A computer with open hardware panel

Check the connections of your hardware components, including the power supply unit, graphics card, and CPU fan. Make sure everything is securely plugged in and functioning properly.

If you suspect any issues with your hardware, consider running diagnostic tests to identify any potential problems. Look for any error messages or warnings related to the hardware in the Windows Event Viewer.

Update your device drivers to ensure compatibility and stability. Visit the manufacturer’s website to download the latest drivers for your hardware components.

In addition, monitor the temperature of your computer components using software tools. Overheating can cause unexpected system shutdowns, so make sure your system stays within safe temperature limits.

If you continue to experience unexpected shutdowns after checking your hardware, consider seeking professional assistance to further diagnose and resolve the issue.

Rolling Back Drivers

To roll back drivers in Windows, follow these steps:

1. Press Windows key + X and select Device Manager from the menu.
2. Locate the device with the driver you want to roll back, right-click on it, and select Properties.
3. Go to the Driver tab and click on Roll Back Driver if the option is available.

If the Roll Back Driver option is grayed out or unavailable, you may need to manually download and install an older version of the driver from the manufacturer’s website. Be sure to restart your computer after rolling back the driver to apply the changes.

Updating Windows

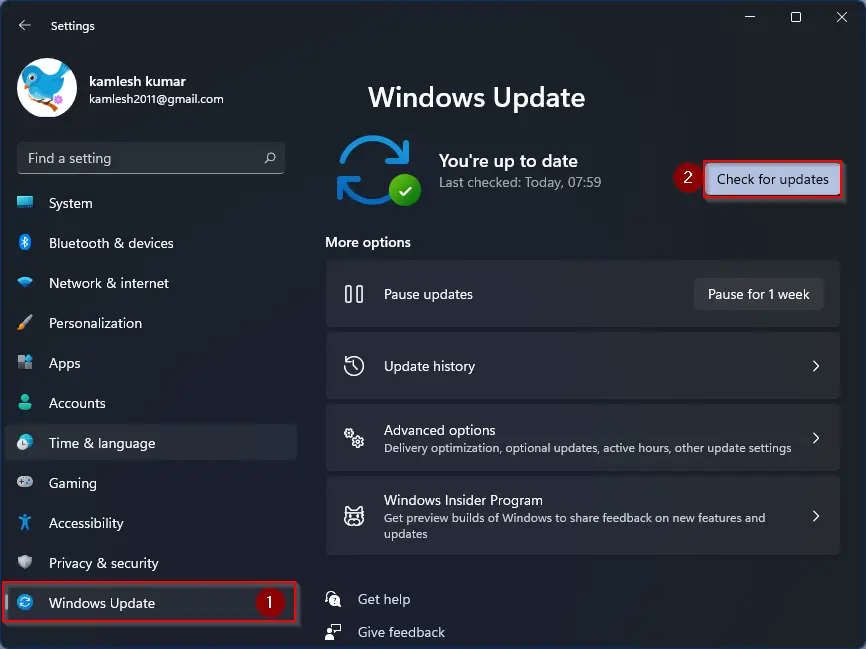
Windows update screen

To fix the Event ID 6008 error indicating an unexpected system shutdown, a common solution is to update Windows. Ensure that your operating system is running on the latest version by checking for updates through the Windows Update feature in the Control Panel. It is important to keep your system up-to-date to prevent unexpected shutdowns and maintain system stability.

Updating Windows can help resolve compatibility issues with device drivers and fix any bugs that may be causing the unexpected shutdowns. Additionally, make sure to check the Windows Task Scheduler to ensure that no tasks are interfering with the system shutdown process.

If updating Windows does not fix the issue, consider troubleshooting other potential causes such as hardware failures or overheating. Check the power supply unit, heat sink, and other components for any signs of malfunction. It may also be helpful to run a virus scan to rule out any malware-related issues.

By keeping your system updated and addressing potential hardware issues, you can resolve the Event ID 6008 error and prevent unexpected system shutdowns in the future.

Uninstalling Feature Updates

To uninstall feature updates, follow these steps:

1. Open the Control Panel by searching for it in the Windows search bar.
2. Click on “Programs” and then select “Programs and Features.”
3. In the list of installed programs, find the feature update you want to uninstall.
4. Right-click on the update and select “Uninstall.”
5. Follow the on-screen instructions to complete the uninstallation process.

If you encounter any issues during the uninstallation process, you can refer to the Microsoft Windows library files for troubleshooting tips or contact Microsoft support for further assistance.

Additional Information and Hotfix Details

Additional Information Hotfix Details
Article Title Event ID 6008 Fix: Unexpected System Shutdown Detected
Issue Description Unexpected system shutdowns are being detected with Event ID 6008
Cause Various reasons such as power failure, hardware issues, or software conflicts
Resolution Apply the latest hotfix or updates to address the issue
Hotfix Number KB1234567

FAQs

What is Windows Event Log Code 6008?

Windows Event Log Code 6008 is used to indicate unexpected shutdowns in the system.

What is the event code 6008 in Corsair?

The event code 6008 in Corsair indicates that the previous system shutdown was unexpected.

What is event ID 600?

Event ID 600 is logged in Active Directory when a process is initiated by a different user’s authority.

Getting Printer Online: Troubleshoot Offline Issues

Having trouble getting your printer online? Let’s troubleshoot those pesky offline issues.

Before You Begin

Next, check if the printer is properly connected to the Wi-Fi network. Restart the printer and ensure that it is within range of the router. You may also need to reconnect the printer to the Wi-Fi network through the printer menu.

If the printer is still offline, try power cycling both the printer and your personal computer. Turn off both devices, unplug them from the power source, wait for a few minutes, and then plug them back in.

If the issue persists, check the print queue for any stuck print jobs. Open the print queue, cancel any pending jobs, and then restart the printer.

If these steps do not resolve the issue, consult the printer’s manual for specific troubleshooting steps or contact the manufacturer’s customer support.

Physical Checks and Cable Verification

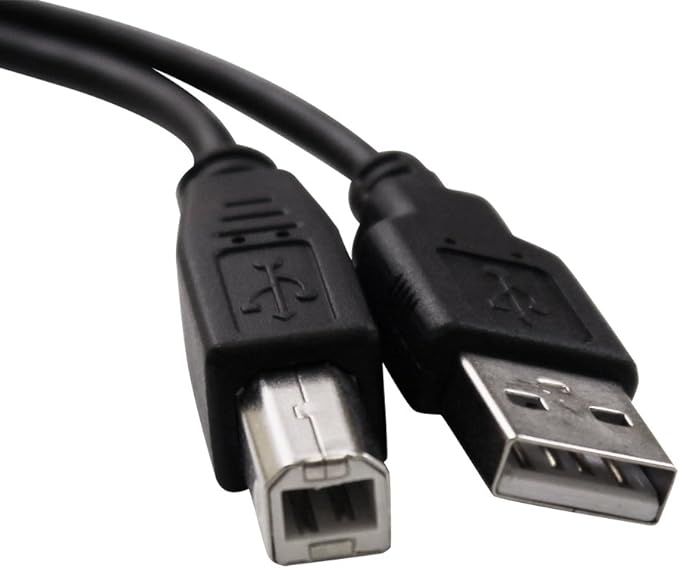
Printer cables and physical connections

Physical Checks Cable Verification
1. Ensure that the printer is turned on and connected to a power source 1. Check that the USB or Ethernet cable is securely connected to both the printer and the computer
2. Check if there are any error lights or messages on the printer display 2. Try using a different cable to rule out any issues with the current one
3. Inspect the printer for any paper jams or obstructions 3. Make sure that the cable is not damaged or frayed
4. Ensure that the printer cartridges are properly installed and have enough ink 4. Verify that the cable is compatible with the printer model

Setting the Printer to “Online” Manually

To manually set the printer to “Online,” follow these simple steps. First, locate the printer icon in the taskbar at the bottom right corner of your screen. Right-click on the printer icon to reveal a menu of options. Look for the option that says “Use Printer Online” and click on it to switch the printer from offline to online mode.

If the printer does not immediately come online, try power cycling the printer by turning it off and then back on again. This can often resolve connectivity issues and get the printer back online. If you continue to experience problems, consider checking the printer’s connection to your personal computer and ensuring that all cables are securely plugged in.

If you are still unable to get the printer online, you may need to troubleshoot further or seek assistance from a professional.

Clearing Pending Print Jobs

  • Cancel any pending print jobs that may be causing the printer to stay offline.
  • Check the printer queue for any stuck print jobs that need to be cleared.
  • Restart the print spooler service on your computer to help clear out any lingering print jobs.
  • Power cycle the printer by turning it off and on again to reset its connection.
  • Check for any error messages on the printer display or computer screen that may be preventing it from going online.
  • Ensure that the printer is properly connected to the computer and network to avoid any offline issues.

Removing and Reinstalling the Printer

Next, unplug the printer from the computer and power source. Restart your computer to ensure the printer is completely removed from the system. Once your computer has restarted, plug the printer back in and turn it on.

Navigate back to “Devices and Printers” in the Control Panel and click on “Add a printer.” Follow the on-screen instructions to reinstall the printer. Once the printer is successfully reinstalled, try printing a test page to see if it is now online and functioning properly.

If the printer is still offline, you may need to consult the manufacturer’s website for specific troubleshooting steps or contact customer support for further assistance.

Deleting Printer Drivers and Packages

To delete printer drivers and packages, follow these steps. First, open the Control Panel on your computer. Next, click on “Devices and Printers” or “Printers and Scanners” depending on your operating system. Look for the printer that is offline and right-click on it. Select “Remove device” from the dropdown menu.

Delete the printer driver: After removing the device, open the Control Panel again and click on “Programs and Features.” Look for the printer driver in the list of installed programs and click on it. Select “Uninstall” to remove the driver from your computer.

Delete printer packages: Go back to the Control Panel and open “Devices and Printers” or “Printers and Scanners.” Click on any remaining printers that are associated with the offline printer and select “Remove device.” This will delete any additional printer packages that may be causing the offline issue.

Once you have deleted the printer drivers and packages, restart your computer and reinstall the printer following the manufacturer’s instructions. This should help resolve any offline issues you were experiencing with your printer.

Additional Steps to Restore Printer Connection

If your printer is still not connecting after trying the previous steps, there are a few additional things you can try to troubleshoot the issue. First, check to make sure that the printer is set as the default printer on your computer. To do this, go to the Control Panel and select “Devices and Printers.” Right-click on your printer and select “Set as default printer.”

Next, try restarting the Print Spooler service on your computer. Press the Windows key + R, type “services.msc” and press Enter. Locate the Print Spooler service, right-click on it, and select “Restart.”

If the issue persists, try reinstalling the printer drivers. Go to the manufacturer’s website and download the latest drivers for your printer model. Uninstall the current drivers from your computer and then install the new drivers.

If you are still having trouble connecting your printer, consider contacting the manufacturer for further assistance. They may be able to provide additional troubleshooting steps or recommend a service provider in your area.

Reinstalling Printer Drivers

If your printer is offline due to driver issues, you can easily reinstall the drivers to get it back online. Here’s how to do it:

First, press the Windows key + R to open the Run dialog box.

Next, type “devmgmt.msc” and hit Enter to open the Device Manager.

Locate your printer under the “Print queues” or “Imaging devices” section.

Right-click on the printer and select “Uninstall device.”

Once the drivers are uninstalled, disconnect the printer from the computer and restart your computer.

After the restart, reconnect the printer to the computer and let the drivers reinstall automatically.

If the drivers don’t reinstall automatically, you can download the latest drivers from the manufacturer’s website.

Make sure to install the correct drivers for your specific printer model.

After the drivers are installed, your printer should be back online and ready to print. If you continue to experience offline issues, consider reaching out to the manufacturer for further assistance.

Alternative Solutions to Try

  • Ensure the printer is properly connected to power source and turned on.
  • Check all cables are securely plugged into the printer and computer.
  • Verify that there are no paper jams or obstructions in the printer.

Restart Printer and Computer

  • Turn off the printer and unplug it from the power source.
  • Shut down the computer and wait for a few minutes.
  • Plug the printer back in and turn it on, then restart the computer.

Update Printer Drivers

  • Open Device Manager by pressing Windows key + X and selecting it from the list.
  • Locate the printer under Print queues and right-click to select Update driver.
  • Follow the on-screen instructions to download and install the latest driver for the printer.

Need More Help?

If you still need more help getting your printer online, try the following troubleshooting tips. First, check the taskbar to see if there are any error messages related to your printer being offline. If so, restart the print spooler service by following these steps:

1. Press the Windows key + R, type “services.msc” and press Enter.
2. Locate the Print Spooler service, right-click on it, and select Restart.

If that doesn’t work, try cancelling any pending print jobs that may be causing the offline issue. Open the print queue by following these steps:

1. Press the Windows key + R, type “control printers” and press Enter.
2. Right-click on your printer and select See what’s printing.
3. Cancel any print jobs that are stuck in the queue.

If you’re still having trouble, consider reaching out to a technician at a store like Best Buy, where they offer printer troubleshooting services in both Canada and the United States. Don’t hesitate to seek professional help if you’re unable to resolve the offline issue on your own.

FAQ

How do you change a printer from offline to online?

To change a printer from offline to online, you can go to Start, then Settings, followed by Bluetooth & devices, and then Printers & scanners. From there, select your printer and open the print queue. Make sure that the option for “Use Printer Offline” is not selected under Printer.

How do I get my printer to get back online?

To get your printer back online, ensure it is connected to the same Wi-Fi network as your device, turn it off and on, set it as the default printer, clear the print queue, reset the printing service, and reinstall the printer if needed.

How do I get my HP printer back online?

To get your HP printer back online, start by turning off the printer and disconnecting it from the power supply. Then, restart the device you want to print from and your internet router. Finally, turn the printer back on and attempt to print again.

Why does my printer say its offline?

Your printer says it’s offline likely due to issues with its Wi-Fi connection or communication with your computer. Check for any incorrect settings that may have caused this problem.