
Does your computer slow down or crash frequently because of WMI Provider Host high CPU usage? This article will guide you on how to fix this issue easily.
Understanding WMI Provider Host (WmiPrvSE.exe)
To fix high CPU usage and crashes caused by the WMI Provider Host (WmiPrvSE.exe) on your PC, there are a few steps you can take. First, open Task Manager and identify if it is the culprit of the problem. If it is, restart the WmiPrvSE.exe program to see if that resolves the issue. If not, try starting your computer in Safe Mode and then restart the WMI service. Another solution is to update or reinstall the WMI driver on your computer.
If none of these solutions work, you can try following a repair guide specific to your operating system. It’s important to note that high CPU usage can be caused by other factors such as overheating or other programs running in the background. Make sure your system is up to date and check for malware that could be affecting your CPU resources. By following these steps, you can fix the WMI Provider Host high CPU usage problem and improve the performance of your system.
Methods to Fix WMI Provider Host Errors
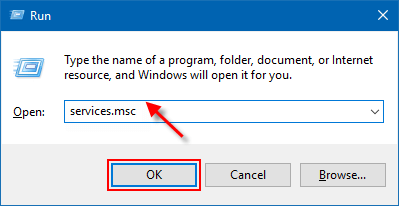
- Open Run by pressing Win+R
- Type services.msc and press Enter
- Find Windows Management Instrumentation service and right-click on it
- Select Restart
- Wait for the process to complete and check if the issue is resolved
Method 2: Run System File Checker
- Open Command Prompt as an administrator
- Type sfc /scannow and press Enter
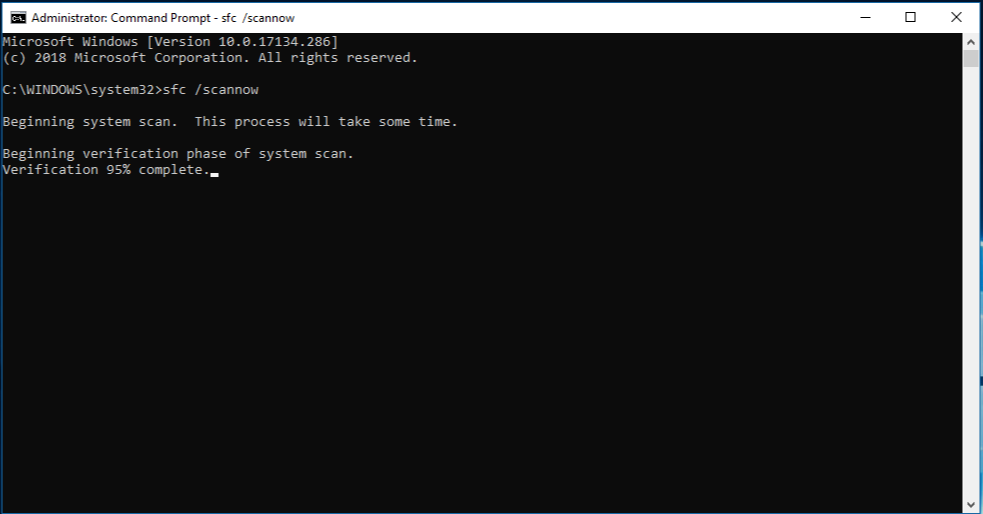
- Wait for the process to complete and check if the issue is resolved
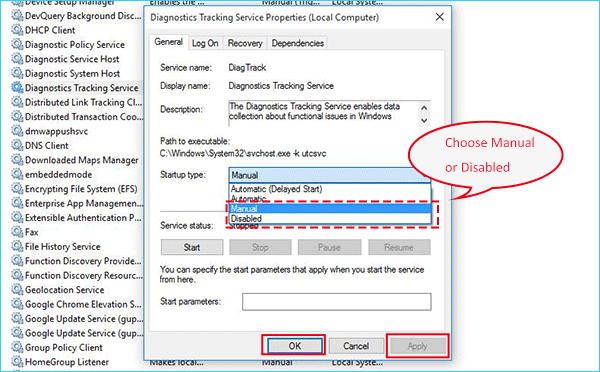
Method 3: Disable WMI Performance Adapter
- Open Run by pressing Win+R
- Type services.msc and press Enter
- Find WMI Performance Adapter service and right-click on it
- Select Properties
- Change the Startup Type to Disabled
- Click Apply and then OK
- Restart your computer and check if the issue is resolved
Method 4: Run DISM Tool
- Open Command Prompt as an administrator
- Type Dism /Online /Cleanup-Image /RestoreHealth and press Enter
- Wait for the process to complete and check if the issue is resolved
Run a Virus Scan to Fix WMI Provider Host Errors
To fix WMI Provider Host errors, run a virus scan on your PC. Viruses and malware can cause high CPU usage and crashes, making it important to identify and remove any malicious files. Start by booting your computer in Safe Mode, and then run a full virus scan using a reliable antivirus program. Once the scan is complete, check Task Manager to see if the WMI Provider Host CPU usage has decreased. If the issue persists, update your drivers and check for any corrupt files. You can also try a repair guide specific to your operating system or contact Microsoft for more information. By addressing the root cause of the problem, you can ensure that your CPU resources are being used efficiently and prevent any further lags or overheating issues.
Boot into Safe Mode with Networking to Fix WMI Provider Host Errors
To fix WMI Provider Host errors causing high CPU usage and crashes, boot into Safe Mode with Networking. This mode loads only essential drivers and services, allowing you to troubleshoot the issue without interference from other applications.
To boot into Safe Mode with Networking, press the “Windows Key + R” to open the Run dialog box, type “msconfig,” and press Enter. Select the “Boot” tab, check the “Safe boot” option, and select “Network.” Click “Apply” and “OK,” and then restart your computer.
Once you are in Safe Mode with Networking, open the Task Manager by pressing “Ctrl + Shift + Esc.” Look for the “WMI Provider Host” process and note its CPU utilization levels. If it’s still high, update your drivers or run a malware scan. If it’s normal, the culprit may be a third-party application causing the issue.
After fixing the issue, exit Safe Mode by repeating the above steps and unchecking the “Safe boot” option. Restart your computer and check if the WMI Provider Host error persists.
Restart WMI Provider Host Service to Fix Errors
To fix errors related to WMI Provider Host service, you need to restart it. Follow these simple steps. First, press the Windows key + R. This will open the Run dialog box. In the Run dialog box, type services.msc and press Enter. This will open the Services window. Look for Windows Management Instrumentation service and right-click on it. Select Restart. Alternatively, you can also stop the service and then start it again. This should resolve issues related to high CPU usage and crashes caused by WMI Provider Host service. It is important to keep your drivers up to date, as outdated drivers can cause problems with WMI service and other components of your system.
Uninstall Components and Drivers Causing the Problem
- Open Control Panel
- Select Programs and Features
- Click Turn Windows features on or off
- Expand Windows Management Instrumentation

- Uncheck WMI SNMP Provider
- Click OK
- Restart your computer
Find the WMI Service Process
To locate the WMI Service Process, follow these steps:
1. Press the Windows key + R to open the Run dialog box.
2. Type services.msc and hit Enter.
3. Scroll down and locate the Windows Management Instrumentation service.
4. Right-click on the service and select Properties.
5. Under the General tab, you can see the Service name and Service type.
6. You can also check the Service status and Startup type.
7. If you need to restart the service, click on the Restart button.
Knowing how to locate the WMI Service Process is essential if you are experiencing high CPU usage or crashes related to WMI Provider Host. By restarting the service, you can resolve many issues related to WMI. If you continue to experience problems, consider updating your drivers or seeking further assistance from Microsoft or a qualified technician.
Fix High CPU Usage via Elevated Command Prompt Window
To fix high CPU usage caused by the WMI Provider Host, use an elevated command prompt window. First, open the Start menu and type “cmd.” Right-click on “Command Prompt” and select “Run as administrator.”
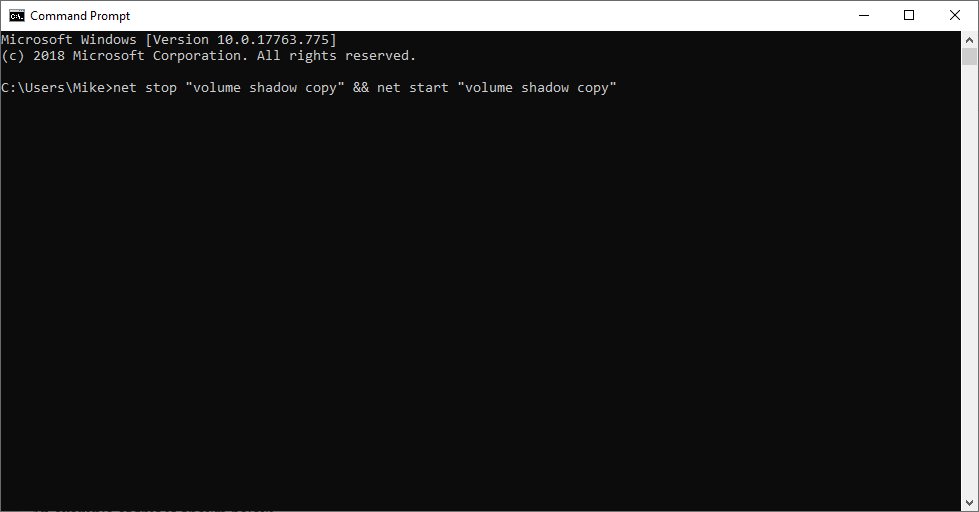
Enter the following commands: “net stop wuauserv” and “net stop iphlpsvc”.
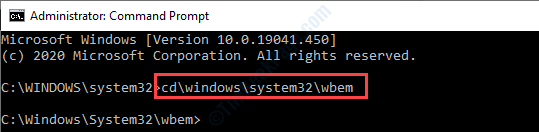
Next, navigate to the “C:\Windows\System32\wbem” folder and rename the “Repository” folder to “Repository.old.”
Enter the following commands: “net start wuauserv” and “net start iphlpsvc”.
Finally, restart your computer and check if the high CPU usage issue has been resolved.
If the issue persists, it may be caused by a driver or software conflict. Try updating your drivers or uninstalling recently installed applications. If your CPU is overheating, consider cleaning or replacing your cooling system.
Perform a System Scan to Fix WMI Provider Host Errors
Performing a system scan is a helpful way to fix WMI Provider Host errors. To do this, follow these steps:
– Press the Windows key + R to open the Run dialog box.
– Type “cmd” and press Enter to open the Command Prompt.
– Type “sfc /scannow” and press Enter to start the system scan.
– Wait for the scan to complete, as this may take some time.
– Once the scan is complete, restart your computer.
By performing a system scan, you may be able to fix any underlying issues that were causing the WMI Provider Host errors. This can help to reduce high CPU usage, crashes, lags, and other issues you may have been experiencing. Keep in mind that this method can be used on both Windows 10 and Windows Server, and can be helpful for users at all levels of experience. If you continue to experience issues with CPU utilization or overheating, you may need to seek additional information or assistance.
Disable HP Software Framework Service to Fix WMI Provider Host Errors
To fix WMI Provider Host errors causing high CPU usage and crashes, disabling the HP Software Framework Service can be a solution.
To do this, open the Services app by pressing Windows key + R and typing services.msc. Look for the HP Software Framework Service, right-click it, and select Properties. Change the startup type to Disabled and click Apply and OK.
This service is known to cause issues with the WMI Provider Host, which is responsible for monitoring system performance. By disabling it, you can solve the high CPU usage and crashes caused by this issue.
Remember, this solution is specific to those who have the HP Software Framework Service installed and experiencing WMI Provider Host errors. If this doesn’t work, check for other causes such as CPU overheating or other software conflicts.
FAQ about WMI Provider Host
- Open Run box by pressing Win+R
- Type services.msc and press Enter
- Locate Windows Management Instrumentation service and right-click it
- Select Restart
Method 2: Disable IP Helper service
- Open Run box by pressing Win+R
- Type services.msc and press Enter
- Locate IP Helper service and right-click it
- Select Properties
- Select Disabled from the dropdown menu under Startup type
- Click Apply and then OK
- Restart your computer
Method 3: Repair WMI repository
- Open Command Prompt as administrator by searching for it in the Start menu and right-clicking it to select Run as administrator
- Type net stop winmgmt and press Enter
- Open File Explorer and navigate to C:\Windows\System32\wbem
- Rename the folder Repository to Repository.old
- Go back to the Command Prompt and type net start winmgmt
- Restart your computer
Method 4: Update drivers
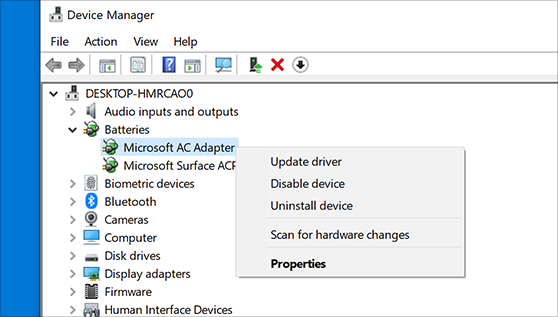
- Open Device Manager by searching for it in the Start menu
- Expand each category and right-click on each device
- Select Update driver
- Follow the on-screen instructions to update the driver
- Repeat for all devices
- Restart your computer


