Fix Laptop Won’t Connect to WiFi Windows 10

Having trouble getting your laptop to connect to WiFi on Windows 10? Let’s troubleshoot the issue together.

Check Wi-Fi Connectivity

Next, select your Wi-Fi network from the list and enter the password if prompted. Make sure you are entering the correct password and that the caps lock key is not turned on.

If you are still unable to connect, try restarting your router and modem. Unplug them from the power source, wait for a few seconds, and then plug them back in.

Additionally, you can try forgetting the network on your laptop and then reconnecting to it. This can sometimes resolve connectivity issues.

If you are still experiencing problems, you may need to troubleshoot your Wi-Fi connection further or contact your Internet service provider for assistance.

Restart Your Router

To restart your router, locate the power button on the device. Press the button to turn off the router, then wait for about 30 seconds before turning it back on. This process can help refresh the connection and allow your laptop to reconnect to the WiFi network.

After restarting your router, try reconnecting your laptop to the WiFi network. Make sure to enter the correct password and check if the connection is successful. If the issue persists, you may need to troubleshoot further or contact your Internet service provider for assistance.

Restarting your router is a quick and simple step that can often fix connectivity issues with your laptop. Give it a try the next time you experience problems connecting to WiFi on Windows 10.

Verify Your Wi-Fi Password

1. Check your wireless router for the correct password. If you are not sure, you can find it on a sticker on your router or in the router’s settings.

2. Go to the taskbar on your Windows 10 laptop and click on the Wi-Fi icon.

3. Select your wireless network from the list and click on “Connect.”

If the laptop still won’t connect after verifying the Wi-Fi password, you may need to troubleshoot further by checking for any network issues or resetting your modem.

Enhance Router Proximity
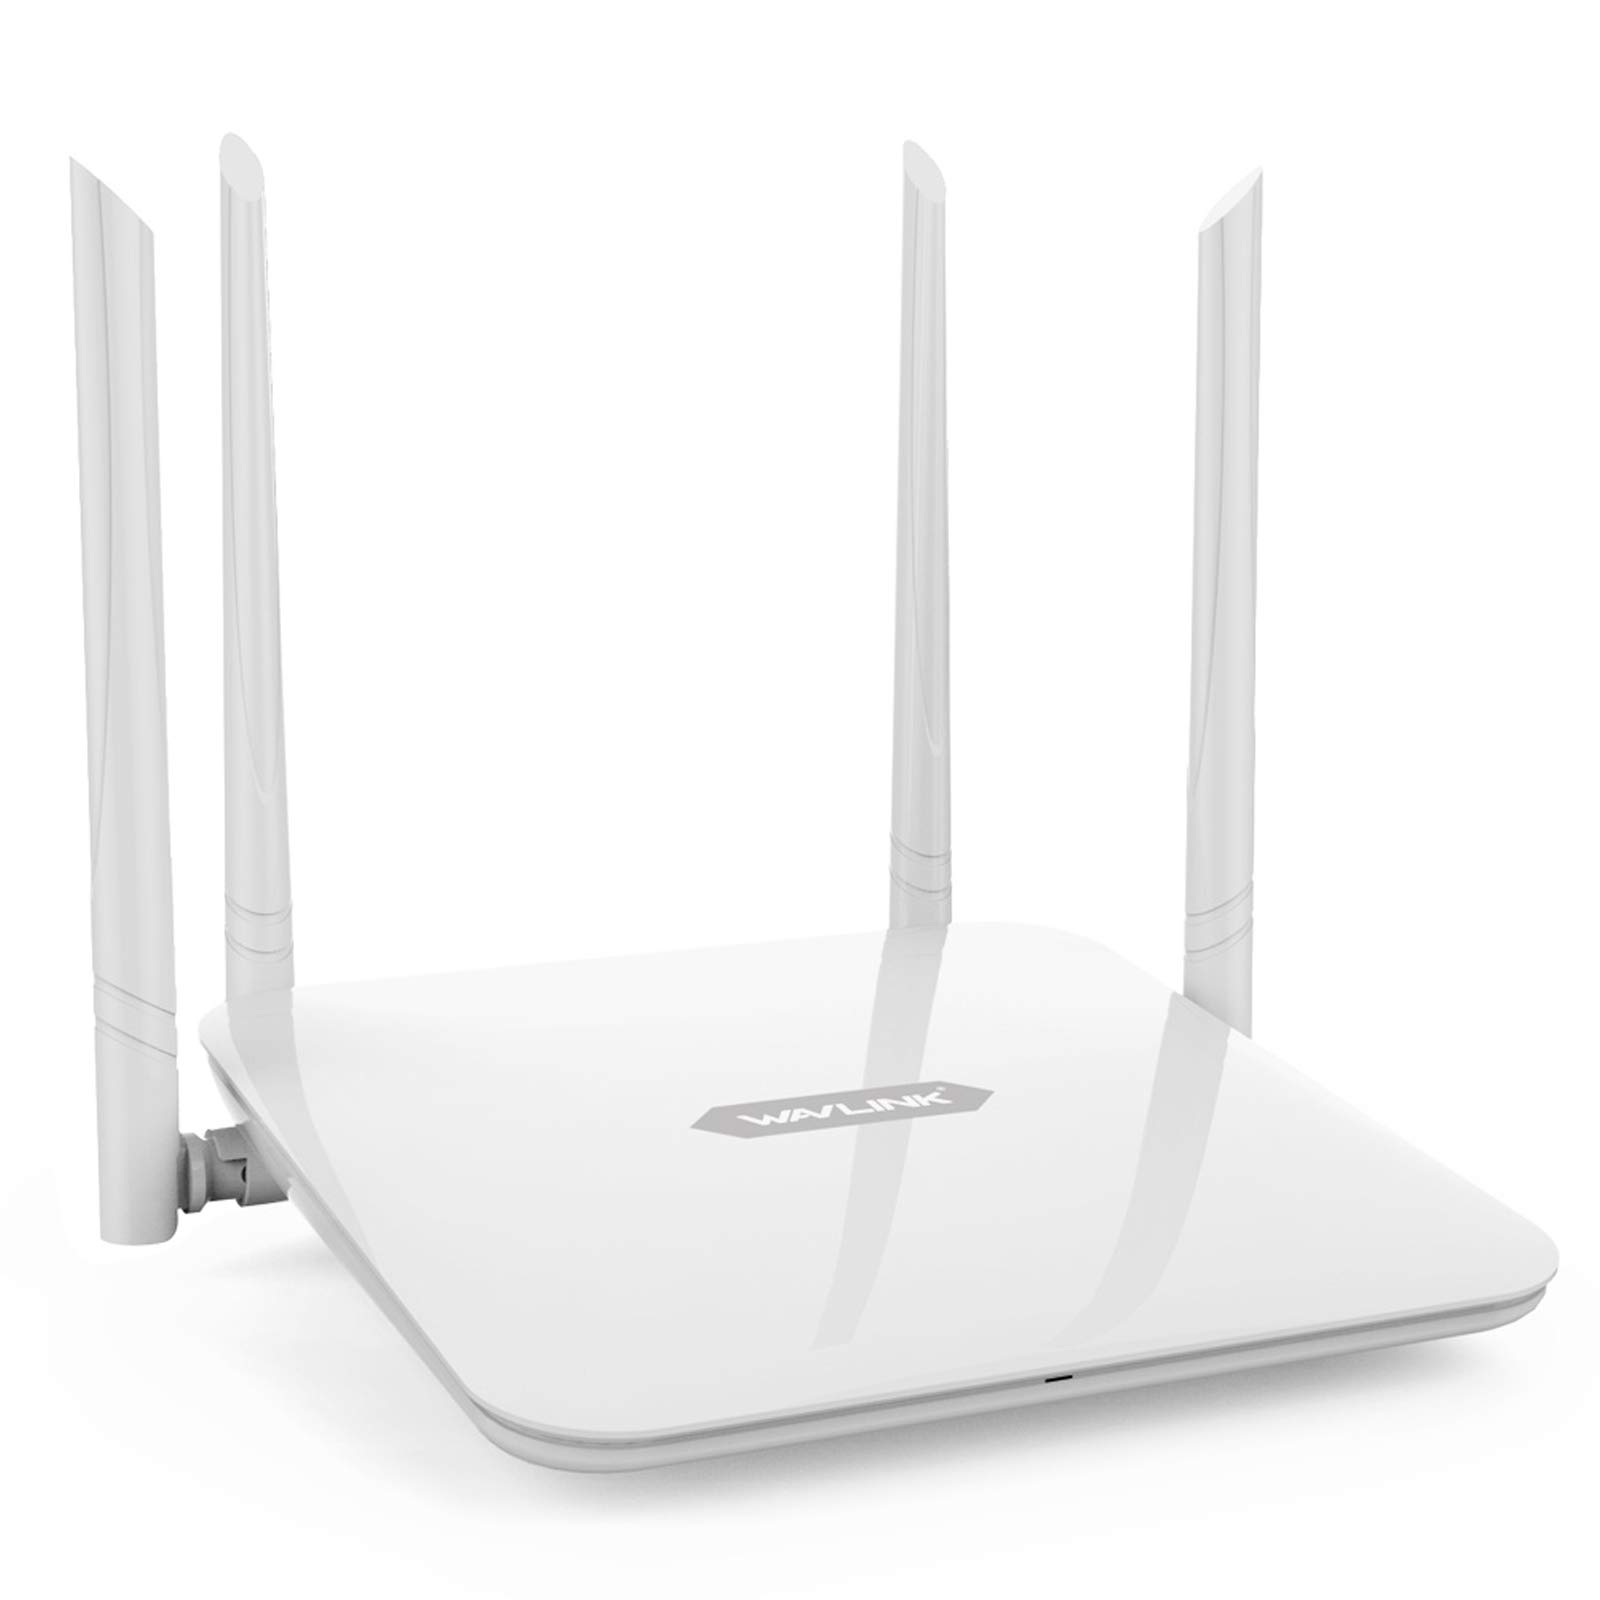
Router placement next to laptop

Position Your Laptop: Place your laptop closer to the wireless router to enhance signal strength. Avoid placing your laptop near other electronic devices that may interfere with the WiFi connection.

Reduce Interference: Keep your laptop away from devices that operate on the same frequency, such as cordless phones and microwave ovens. This can help minimize interference and improve your WiFi connection.

Check Signal Strength: In Windows 10, you can check the signal strength of your WiFi connection by clicking on the WiFi icon in the taskbar. Look for the signal bars to determine if the signal is strong or weak.

Select a Compatible Network

Look for your WiFi network in the list of available options and select it. If you don’t see your network, try refreshing the list by clicking on the icon again.

After selecting your network, you may be prompted to enter a password. Make sure you type it in correctly and click on the connect button.

If you continue to have trouble connecting, try restarting your laptop and router to reset the network connection.

If you still can’t connect, you may need to troubleshoot further or contact technical support for assistance.

Utilize Laptop Troubleshooting Tools

Laptop troubleshooting tools.

  • Run Network Troubleshooter:
    • Click on the Start menu and go to Settings.
    • Select Update & Security and then click on Troubleshoot.
    • Choose Internet Connections and follow the on-screen instructions to run the troubleshooter.
  • Reset Network Adapter:
    • Open Command Prompt as an administrator by typing cmd in the search bar and right-clicking on Command Prompt to select Run as administrator.
    • Type the command netsh winsock reset and press Enter.
    • Restart your laptop to apply the changes.
  • Update Network Drivers:
    • Right-click on the Start menu and select Device Manager.
    • Expand the Network adapters section and right-click on your network adapter.
    • Select Update driver and follow the on-screen instructions to update the driver.

Reset Your Wireless Network

1. Restart Your Router: Unplug your router from the power source, wait for 30 seconds, and then plug it back in. This can help resolve any connectivity issues.

2. Forget Network: Go to your network settings, find the network you’re trying to connect to, and select “Forget.” Then, reconnect to the network by entering the password.

3. Reset Network Settings: Open Command Prompt as an administrator and type “netsh int ip reset” followed by “netsh winsock reset.” Restart your computer after running these commands.

Troubleshooting Network Issues

Issue Possible Solution
No WiFi networks available Check if WiFi is enabled on your laptop, restart your router, and make sure you are within range of a WiFi network.
Incorrect WiFi password Double-check the password you entered and ensure it is correct. You can also try forgetting the WiFi network and reconnecting.
Outdated network drivers Update your network drivers through Device Manager or download the latest drivers from the manufacturer’s website.
IP address conflict Release and renew your IP address using the command prompt. You can also try restarting your laptop and router.
Firewall or antivirus blocking connection Disable your firewall and antivirus temporarily to see if they are the cause of the issue. Adjust the settings if necessary.

Frequently Asked Questions

Why won’t my laptop connect to any Wi-Fi?

Your laptop may not be connecting to any Wi-Fi because the Wireless Mode setting for your network adapter does not match the capabilities of the network you are trying to connect to. Make sure to check and adjust this setting accordingly.

Why i can t connect my laptop to Wi-Fi even with correct password?

It seems that you are unable to connect your laptop to Wi-Fi even with the correct password. Start by restarting your computer and router, double-checking for any typing errors in the password. If the issue persists, consider resetting the router, setting up a new connection, or updating your network driver.

Why is my laptop not showing the option to connect to Wi-Fi?

Your laptop may not be showing the option to connect to Wi-Fi due to temporary software glitches or outdated/corrupted Wi-Fi drivers. Try restarting your laptop or updating/reinstalling the Wi-Fi drivers to resolve the issue.

Why is my laptop saying can’t connect to this network?

Your laptop may be displaying the “Can’t connect to this network” message due to corrupted network settings. You can try a systemwide network reset through Command Prompt to potentially resolve the issue.

Fallout 3 Crashes Windows 10: Solutions & Fixes

As a Fallout 3 player on Windows 10, dealing with crashes can be frustrating.

Play in Windowed Mode or Adjust Settings

If you are experiencing crashes while playing Fallout 3 on Windows 10, one solution is to play in Windowed Mode or adjust the settings. This can help reduce the strain on your system and prevent crashes. To play in Windowed Mode, go to the options menu in the game and look for the display settings. From there, you should see an option to switch to Windowed Mode. If adjusting the settings does not work, you can also try running the game in compatibility mode. Right-click on the game’s executable file, go to properties, and then compatibility.

From there, you can choose to run the game in compatibility mode for a previous version of Windows such as Windows 7 or Windows XP.

Update or Install Graphics Card Drivers

Step Instructions
1 Open Device Manager by pressing Windows key + X and selecting Device Manager from the menu.
2 Expand the Display adapters category to see the graphics card drivers installed on your system.
3 Right-click on the graphics card driver and select Update driver.
4 Choose Search automatically for updated driver software and follow the on-screen instructions to complete the update process.
5 If no updates are found, you can also visit the manufacturer’s website to download and install the latest graphics card drivers manually.

Set Game Compatibility and Administrative Privileges

Set Game Compatibility: Ensure that Fallout 3 is compatible with Windows 10 by adjusting the game’s settings. Right-click on the game’s shortcut or .exe file, select Properties, go to Compatibility tab, check the box “Run this program in compatibility mode for”, and choose an older Windows version such as Windows 7 or Windows XP. Click Apply and OK to save changes.

Administrative Privileges: Grant administrative privileges to the game to prevent crashes on Windows 10. Right-click on the game’s shortcut or .exe file, select Properties, go to Compatibility tab, check the box “Run this program as administrator”. Click Apply and OK to save changes.

Make sure to apply these settings before launching the game to avoid any compatibility issues.

Reinstall the Game or Repair System Files

If Fallout 3 is crashing on Windows 10, one solution is to reinstall the game or repair system files. This can help resolve any corrupted files that may be causing the crashes. To do this, first, uninstall Fallout 3 from your computer. Then, reinstall it from the original source or download it again from Steam.

Next, you can verify the integrity of game files through Steam to ensure all necessary files are present. If the issue persists, you can repair system files by running the System File Checker tool in Windows. This will scan for and repair any corrupted system files that may be affecting Fallout 3.

F.A.Q.

Is Fallout 3 stable on Windows 10?

Fallout 3 is stable on Windows 10 for me, requiring no additional adjustments after downloading from Steam.

Why does Fallout 3 randomly crash?

Fallout 3 may crash randomly due to outdated video card drivers. It is important to regularly update your system’s video card drivers for optimal gaming performance. Check for updates on your computer manufacturer’s or video card manufacturer’s support website.

Can you still play Fallout 3 on Windows 10?

Yes, you can still play Fallout 3 on Windows 10, but you may need to install Games for Windows Live yourself due to compatibility issues with the operating system’s architecture.

Fix for iPhone Not Recognized by Computer

Having trouble getting your iPhone recognized by your computer? This article provides a solution to fix this frustrating issue.

Basic Tips to Try First

If your iPhone is not being recognized by your computer, there are a few basic tips you can try first. First, make sure your iPhone is unlocked and the screen is on. Next, check your USB cable to ensure it is not damaged or faulty. Try using a different USB port on your computer or a different USB cable altogether.

If that doesn’t work, restart both your iPhone and computer to see if that helps establish a connection. You can also try updating your iTunes to the latest version, as outdated software can sometimes cause issues with device recognition.

Another option is to reset your iPhone’s settings by going to Settings > General > Reset > Reset All Settings. This will not erase your data, but it may help fix any software glitches causing the connection problem.

Restart Your Devices

To fix an iPhone not being recognized by your computer, try restarting both devices. First, unplug the USB cable connecting your iPhone to the computer. Then, restart your iPhone by holding down the power button until the slider appears, then sliding to power off. Next, restart your computer by clicking on the Start menu and selecting Restart. Once both devices are back on, plug the USB cable back in and see if your iPhone is recognized. This simple step can often resolve connectivity issues between your iPhone and computer.

Check USB Cable and Port

USB cable and port

Check the USB cable to ensure it is not damaged or frayed. Plug it securely into both the iPhone and the computer’s USB port. Make sure the USB port is clean and free of debris or dust. Try using a different USB port on the computer to see if that resolves the issue.

If the iPhone is still not recognized, try using a different USB cable to rule out any issues with the original one. Restart both the iPhone and the computer to see if that helps establish a connection. Check the device manager on the computer to ensure the iPhone is recognized by the system.

If the iPhone is still not recognized after trying these steps, it may be helpful to update the device drivers on the computer or reinstall iTunes. You can also try connecting the iPhone to a different computer to see if the issue is with the original computer. If all else fails, consider reaching out to Apple support for further troubleshooting.

Trust Your Computer

Computer screen with trust pop-up

Once you have trusted your computer, try unplugging and replugging the USB cable to see if your iPhone is now recognized. If this does not work, you may need to check for any updates on your computer or iPhone that could be causing the issue.

If your iPhone is still not being recognized, try restarting both your iPhone and computer. Sometimes a simple restart can resolve connectivity issues between devices.

If all else fails, you may need to consider checking for device drivers or performing a software update on your computer to ensure compatibility with your iPhone.

Update Your Operating System

To fix an iPhone not being recognized by a computer, one solution is to Update Your Operating System. Make sure your iPhone is connected to your computer via a USB cable. Then, check for any available updates for your operating system. If you are using a Mac, go to the Apple menu and select “Software Update.

” For Windows users, go to the Start menu, then Settings, Update & Security, and finally Windows Update. Install any updates that are available. After updating your operating system, restart both your iPhone and your computer. This should help resolve the issue of your iPhone not being recognized by your computer.

Ensure iTunes is Up to Date

To ensure that iTunes is up to date, open iTunes on your computer and go to the “Help” menu. From there, select “Check for Updates” to see if there are any available updates for iTunes. If there are updates, download and install them to make sure you have the latest version.

It is important to keep iTunes updated as this can help resolve issues with your iPhone not being recognized by your computer. Outdated software can sometimes cause compatibility problems between devices.

Having the latest version of iTunes can also ensure that your iPhone has the most up-to-date drivers and software necessary for it to be recognized by your computer. This can help with troubleshooting any connection issues you may be experiencing.

By regularly checking for updates and keeping iTunes up to date, you can help prevent any potential issues with your iPhone not being recognized by your computer. This simple step can save you time and frustration in the long run.

Update Device Drivers

iPhone connected to a computer with a USB cable.

1. Connect your iPhone to your computer using a USB cable.

2. Open Device Manager on Windows or System Information on MacOS.

3. Find your iPhone under the list of connected devices.

4. Right-click on your iPhone and select “Update driver” on Windows or “Update Software” on MacOS.

5. Follow the on-screen instructions to complete the driver update process.

6. Restart your computer after updating the drivers.

7. Try connecting your iPhone to the computer again to see if it is recognized.

By updating your device drivers, you can ensure that your iPhone is properly recognized by your computer for syncing, backing up, and other tasks.

Verify Apple Mobile Device Support and Service

Apple Mobile Device Support and Service page on Apple's website

To fix the issue of your iPhone not being recognized by your computer, it’s crucial to ensure that Apple Mobile Device Support and Service are correctly installed. These components are essential for proper communication between your iPhone and computer.

If you are using a Windows computer, navigate to Control Panel > Programs and Features and look for Apple Mobile Device Support in the list of installed programs.

If Apple Mobile Device Support is not listed, you will need to reinstall iTunes to ensure that it is properly installed. Make sure to also check for any updates to iTunes that may include necessary drivers for your iPhone.

After reinstalling iTunes, restart your computer and connect your iPhone to see if it is now recognized. If the issue persists, you may need to contact Apple Support for further assistance.

Reinstall iTunes if Necessary

If your iPhone is still not being recognized by your computer, you may need to reinstall iTunes. First, uninstall iTunes completely from your computer. Then, download the latest version of iTunes from the official Apple website. Install the program and restart your computer. Connect your iPhone to the computer using a USB cable and open iTunes.

Your iPhone should now be recognized by the computer. If you are still experiencing issues, consider checking for any updates for your computer’s operating system and iTunes software. Additionally, ensure your USB hardware is working properly and try using a different USB port.

Troubleshooting with Advanced Methods

1. Restart both your iPhone and computer to refresh the connection.

2. Try using a different USB port or cable to rule out any hardware issues.

3. Ensure that you have the latest version of iTunes installed on your computer.

If the issue persists, consider updating your device drivers or checking for any software conflicts that may be causing the problem. Sometimes, simply restarting your devices can resolve the issue. If all else fails, contact Apple support for further assistance.

Fix System Issues to Enhance Detection

System Issue Solution
Outdated operating system Update your iPhone to the latest version of iOS
Driver issues Update or reinstall the Apple Mobile Device USB driver
USB cable connection problems Try using a different USB cable or port
Locked iPhone screen Unlock your iPhone and trust the computer on your device
Software conflicts Uninstall any third-party security software that may be interfering with the connection

F.A.Q.

Why is my PC not recognizing my iPhone?

Your PC may not be recognizing your iPhone due to potential damage or dirt in either the USB slot on the PC or the iPhone USB connector. Additionally, make sure your iPhone is unlocked with the Passcode and showing the Home Screen before reconnecting it to the PC via the USB cable.

Why is my computer not recognizing my iPhone connected?

Your computer may not be recognizing your iPhone because the driver may need to be updated or reinstalled. Drivers are necessary for the operating system to communicate with hardware devices, so if they are missing or outdated, it can cause connectivity issues.

How do I allow my PC to see my iPhone?

To allow your PC to see your iPhone, connect the two devices and enter your passcode to unlock the iPhone. Then, select the iPhone in the Finder or Apple Devices app and click on “Trust” to grant access to your computer.

Why my PC Cannot access my iPhone?

My PC cannot access my iPhone because the drivers may need to be updated. Disconnect your iPhone, unlock it, and reconnect it to the PC, but quit iTunes if it opens. Then, right-click the Start button and choose Device Manager. Find and expand the Portable Devices section. Right-click on your iPhone, choose Update driver, and select Search automatically for updated driver software.

Knockout City Network Error Fix Troubleshooting

In my experience playing Knockout City, network errors can be frustrating. Here are some troubleshooting tips to help you fix them.

Verify Server and Game Status

To verify the server and game status in Knockout City, the first step is to check the official game server status page. This will provide real-time updates on any ongoing issues or maintenance. If the servers are up and running, but you are still experiencing network errors, try restarting your router and modem. This can often resolve connectivity issues.

Additionally, check your internet connection to ensure it is stable and strong. Consider switching to a wired connection if you are using Wi-Fi. You can also try changing your DNS settings to Google Public DNS or using a VPN like NordVPN for a more secure connection.

If the problem persists, it may be worth checking for any firewall or antivirus settings that could be blocking the game. Make sure that Knockout City has the necessary permissions to access the internet.

Ensure Stable Internet and DNS Configuration

Issue Solution
Slow Internet Connection Check your internet speed using a speed test tool. Contact your internet service provider if necessary.
Unstable Internet Connection Move closer to your Wi-Fi router or use a wired connection for better stability. Consider upgrading your internet plan if needed.
DNS Configuration Error Check your DNS settings and make sure they are configured correctly. You can use Google DNS (8.8.8.8 and 8.8.4.4) for better stability.
Network Firewall Blocking Connection Check your firewall settings and make sure Knockout City is allowed to connect to the internet. Disable any third-party firewall software that may be causing issues.

Utilize VPN and Update Network Drivers

VPN connection icon

  • Download and install a reputable VPN service
  • Connect to a server location that is closest to the game’s server location
  • Launch the game and see if the network error persists

Update Network Drivers

  • Open Device Manager by pressing Windows Key + X and selecting Device Manager
  • Expand the Network adapters section
  • Right-click on your network adapter and select Update driver
  • Follow the on-screen instructions to update the driver
  • Restart your computer and test the game to see if the network error is resolved

Keep Your Game Version Current

If your game is already up to date, consider restarting your device and clearing the cache to refresh your connection. Sometimes network errors can be caused by temporary data or settings issues.

Additionally, ensure your internet connection is stable and strong. Try resetting your router or modem, or switching to a different network if possible. Test your connection speed and consider using a virtual private network (VPN) for added security and stability.

By keeping your game version current and maintaining a strong internet connection, you can troubleshoot and fix network errors in Knockout City efficiently.

F.A.Q.

Is Knockout City servers down?

Knockout City’s official servers shut down in June, but the community has kept the game alive on PC. If you want to join in, you can still play through community-run servers.

Why is Knockout City servers shutting down?

Knockout City servers are shutting down because Velan Studios has decided to close the game, but a private server version will be released for PC players to continue playing.

Is Knockout City going offline?

Knockout City is going offline on June 6th, 2023 at 12pm (noon) UTC.

Outlook 2013 not responding in Windows 7 – Solutions

Having issues with Outlook 2013 not responding in Windows 7? Here are some solutions to help resolve the issue.

Start in Safe Mode to Diagnose Issues

Windows safe mode screen

To diagnose issues with Outlook 2013 not responding in Windows 7, start in Safe Mode. Press the “Windows key + R” to open the “Run” dialog, then type “outlook.exe /safe” and hit Enter. This will launch Outlook in Safe Mode, disabling any plugins or add-ins that may be causing the problem.

If Outlook opens in Safe Mode without any issues, then the problem likely lies with a plugin or add-in. Disable them one by one in the “File” menu under “Options” to identify the culprit. You can also try running Windows Update to ensure your system is up to date, as outdated software can cause compatibility issues.

Additionally, running a scan with your antivirus software can help identify and remove any potential threats that may be affecting Outlook’s performance. If the issue persists, consider creating a new user profile in Outlook or repairing your Microsoft Office installation through the Control Panel.

Check for Open Dialog Boxes

Open dialog box in Outlook 2013

When troubleshooting Outlook 2013 not responding in Windows 7, be sure to check for any open dialog boxes that may be hidden behind other windows. These dialog boxes can sometimes cause the program to appear unresponsive.

If you suspect that a dialog box may be open, press Alt-Tab to cycle through the open windows and see if any dialog boxes are hidden. You can also try minimizing all windows to see if any dialog boxes are revealed on the desktop.

Make sure to close any open dialog boxes before attempting to use Outlook again. This simple step can often resolve the issue and get Outlook back up and running smoothly.

By being aware of hidden dialog boxes and promptly closing them, you can help prevent Outlook from becoming unresponsive and improve your overall user experience with the software.

Verify No Large Processes Are Running

Verify No Large Processes Are Running: Check the Task Manager to ensure there are no large processes consuming excessive resources. Press Ctrl + Shift + Esc to open Task Manager. Look for any processes that are taking up a significant amount of CPU or memory. If you find any, end those processes to free up resources for Outlook.

This can help resolve the issue of Outlook 2013 not responding in Windows 7.

Install Latest Windows and Office Updates

To resolve the issue of Outlook 2013 not responding in Windows 7, it is important to ensure that you have the latest Windows and Office updates installed.

1. Check for Windows Updates: Go to Control Panel > System and Security > Windows Update and install any available updates.

2. Update Office: Open any Office application, go to File > Account > Update Options and select Update Now.

3. Restart your computer: After installing updates, restart your computer to apply the changes.

Regularly updating Windows and Office can help address software bugs and vulnerabilities that may be causing Outlook to freeze. If the issue persists, consider troubleshooting further or seeking additional support.

Ensure Outlook is Not in Use by Another Process

Ensure Outlook is not in use by another process: Check the Task Manager for any Outlook processes running in the background. If you find any, end those processes and try opening Outlook again. Additionally, restart your computer to ensure all processes are closed properly.

This should help resolve any issues related to Outlook not responding.

Repair Office Programs Automatically

To automatically repair Office programs, first close all Office applications and go to Control Panel. Then, click on Programs and Features, select your Office program, and choose Change. From there, select Repair and follow the on-screen instructions to complete the process. This will help resolve any issues with Outlook 2013 not responding in Windows 7.

After the repair is done, restart your computer and check if the problem is resolved. If Outlook is still not responding, you may need to consider other solutions such as updating Windows or reinstalling Office.

Investigate and Repair Outlook Data Files

If Outlook 2013 is not responding in Windows 7, there may be issues with the data files. To investigate and repair these files, follow these steps:

1. Run the Microsoft Outlook Repair Tool: Navigate to the Control Panel and search for “Mail”. Click on “Mail (32-bit)” and then select “Data Files”. Choose the Outlook data file that is causing issues and click on “Repair”. Follow the on-screen instructions to complete the repair process.

2. Create a new Outlook profile: Sometimes, creating a new Outlook profile can resolve the issue. Go to Control Panel and click on “Mail”. Select “Show Profiles” and then click on “Add”. Follow the prompts to create a new profile and set it as the default.

3. Check for corrupt data files: Use the Inbox Repair Tool (Scanpst.exe) to check for and repair any corrupt data files. This tool is usually located in the following directory: C:\Program Files (x86)\Microsoft Office\root\Office16.

Examine Possible Add-In Conflicts

When Outlook 2013 is not responding in Windows 7, one possible cause could be add-in conflicts. To examine this issue:

First, open Outlook in safe mode by holding down the Ctrl key while launching the program. If Outlook opens in safe mode without any issues, then an add-in conflict may be causing the problem.

Next, disable all add-ins by going to File > Options > Add-ins. From there, select “COM Add-ins” from the Manage dropdown menu and click “Go.” Uncheck all add-ins and restart Outlook to see if the issue persists.

If Outlook now responds properly, re-enable the add-ins one by one to determine which one is causing the conflict. Remember to restart Outlook after each re-enable to test for responsiveness.

Once the problematic add-in is identified, consider updating it or contacting the add-in developer for further assistance. By resolving add-in conflicts, you can improve the performance of Outlook 2013 in Windows 7.

Verify Mailbox Size is Not Too Large

Verify Mailbox Size is Not Too Large: One common reason for Outlook 2013 not responding in Windows 7 is due to an excessively large mailbox size. To check the size of your mailbox, go to File > Info > Mailbox Settings > Tools > Mailbox Cleanup. From there, you can see the size of your mailbox and clean up unnecessary emails or attachments to reduce its size.

Keeping your mailbox under control can help improve the performance of Outlook and prevent it from freezing or crashing. Regularly managing your mailbox size is essential for a smooth Outlook experience.

Update or Check Antivirus Software Compatibility

To resolve the issue of Outlook 2013 not responding in Windows 7, it is important to update or check the compatibility of your antivirus software. Make sure your antivirus software is up to date with the latest patches and versions to ensure that it is compatible with Outlook 2013 and Windows 7. If your antivirus software is not updated, it may cause conflicts with Outlook and lead to unresponsiveness.

Additionally, check the settings of your antivirus software to ensure that it is not blocking Outlook or any of its features. Sometimes, security settings can prevent Outlook from functioning properly. By adjusting the settings or adding Outlook as an exception, you can prevent any conflicts from occurring.

It is also recommended to run a scan on your computer using the antivirus software to check for any potential threats or malware that could be causing Outlook to freeze or become unresponsive. Removing any malicious files can help improve the performance of Outlook and prevent further issues from arising.

Create a New Outlook User Profile

To create a new Outlook user profile in Windows 7 and resolve the issue of Outlook 2013 not responding, follow these steps. First, open Control Panel and navigate to User Accounts. Click on Mail and then Show Profiles. Next, select Add to create a new profile.

Enter a name for the profile and click OK. Set up the new profile with your email account information. Finally, open Outlook and select the new profile from the dropdown menu. This should resolve any issues with Outlook not responding in Windows 7.

Perform a Selective Startup for Advanced Troubleshooting

  • Open the System Configuration window by pressing Windows key + R and typing msconfig then hitting Enter
  • Click on the Services tab and check the box that says Hide all Microsoft services
  • Click on Disable all to disable all non-Microsoft services
  • Click on the Startup tab and Open Task Manager by pressing Ctrl+Shift+Esc
  • Disable all the startup items by selecting them and clicking on Disable
  • Close Task Manager and click OK on the System Configuration window
  • Restart your computer to apply the changes

FAQ

Why is Outlook 2013 not responding?

Outlook 2013 may not be responding due to corrupted data files, outdated or conflicting antivirus software, a corrupted user profile, or conflicts with another program.

How do I fix Outlook not opening in Windows 7?

To fix Outlook not opening in Windows 7, you can try restarting your computer, opening Outlook in Safe Mode, checking for Windows updates, scanning for malware, repairing Outlook, repairing your Outlook profile, repairing your Outlook data files, and resetting the navigation pane.

How do I restart Outlook that is not responding?

To restart Outlook that is not responding, you can try launching it in safe mode by typing “Outlook.exe /safe” in the Start menu search bar (for Windows 10) and pressing Enter. This may help fix the issue and allow you to open Outlook normally again.

Is Outlook 2013 still supported?

Outlook 2013 is no longer supported as of Ap. Continuing to use it could pose security risks.

How to Fix Facebook Freezing on iPhone App

If your Facebook app keeps freezing on your iPhone, here are some troubleshooting steps you can try.

Understanding Causes of Crashes

Understanding the causes of crashes on the Facebook iPhone app can help you fix the issue and prevent it from happening again. One common reason for the app freezing is a software bug that may be present in the current version.

To fix this issue, try updating the Facebook app to the latest version available on the App Store. This can help resolve any bugs that may be causing the app to freeze. Another possible cause of crashes could be a lack of memory on your iPhone.

To address this, try closing any unused apps running in the background and freeing up some space on your device by deleting unnecessary files or apps. Additionally, clearing the cache of the Facebook app can also help in resolving freezing issues.

To do this, go to the Facebook app settings on your iPhone, and look for the option to clear cache or data.

Update Strategies for Stability

  • Check for app updates:
    • Open the App Store on your iPhone
    • Go to the “Updates” tab
    • Look for the Facebook app and tap “Update” if available
  • Update iOS:
    • Go to Settings on your iPhone
    • Tap on “General”
    • Select “Software Update”
    • If an update is available, tap “Download and Install”
  • Reinstall the Facebook app:
    • Press and hold the Facebook app icon on your home screen
    • Tap the “X” when it appears to delete the app
    • Go to the App Store and reinstall the Facebook app

Optimizing iPhone Storage and Memory

To optimize iPhone storage and memory to fix Facebook freezing on the iPhone app, start by clearing the cache on your device. This can help free up space and improve performance. Next, delete unused apps and files to further optimize your storage.

You should also update your iPhone’s operating system to the latest version. Software updates often include bug fixes and improvements that can help resolve freezing issues. Another helpful tip is to restart your iPhone regularly to clear out any temporary files or processes that may be causing the app to freeze.

Additionally, consider limiting the number of apps running in the background on your iPhone. This can help conserve memory and prevent freezing issues. Lastly, if you continue to experience problems, you may want to reset your iPhone’s settings to default. This can help resolve any underlying issues that may be causing freezing on the Facebook app.

Advanced Solutions for Persistent Issues

iPhone with Facebook app frozen

If your Facebook app keeps freezing on your iPhone, there are advanced solutions you can try to resolve this persistent issue.

First, update your Facebook app to the latest version available on the App Store. This can often fix bugs and compatibility issues that may be causing the app to freeze.

If updating doesn’t work, try clearing the cache of the Facebook app. To do this, go to the Settings app on your iPhone, then scroll down to find the Facebook app. Tap on it, and then select “Clear Cache.” This can help resolve any temporary data issues that may be causing the app to freeze.

Another solution is to delete and reinstall the Facebook app on your iPhone. This can sometimes fix more stubborn issues that are not resolved by simply updating or clearing the cache.

Frequently Asked Questions

Why does my Facebook page keep freezing up?

Your Facebook page keeps freezing up because there may be too much clutter in the cache and temporary files on your device. To fix this issue, clear the cache by going to Settings > Apps > Facebook > Storage > Clear cache & Clear data.

Why is Facebook stopping on my phone?

Facebook may be stopping on your phone because the app is not being updated regularly. To avoid this issue, make sure to update the Facebook app through the Google Play Store on your Android device.

Why is my Facebook not responding on my iPhone?

Your Facebook may not be responding on your iPhone because there is not enough storage space to load the app. To fix this issue, you can go to Settings > General > iPhone Storage > Manage Storage, locate the Facebook app, and delete it to free up space.

Why is Facebook not working on my iPhone iOS 15?

Facebook may not be working on your iPhone with iOS 15 for various reasons such as network errors, app glitches, server outages, outdated app, or iOS bugs. Try force quitting the app, checking your network connection, signing out and back in, updating or re-installing the app, or removing it from Screen Time to resolve the issue.

Omegle Black Screen Camera Fix – Easy Solutions

In this article, I will discuss easy solutions to fix the Omegle black screen camera issue.

Clearing Browser Cookies and Cache

To fix the Omegle black screen camera issue, one simple solution is to clear your browser cookies and cache. This can help resolve any technical glitches that may be causing the problem.

To do this, go to your browser’s settings and clear your browsing data. Make sure to select the option to clear cookies and cached images/files.

After clearing the cookies and cache, refresh the Omegle page and see if the black screen issue is resolved. If not, you may need to restart your browser or even your device.

Using a Different Browser

If you are experiencing a black screen on Omegle, one easy solution is to try using a different browser. Sometimes, certain browsers may have compatibility issues with the platform. Simply open a different browser such as Chrome, Firefox, or Safari and log into Omegle to see if the issue persists. If the black screen problem is resolved, it may be worth considering using this alternative browser for future Omegle interactions. It’s a quick and easy fix that can save you time and frustration.

Updating Camera and Browser

To fix the Omegle black screen camera issue, make sure to update your camera and browser. Outdated software can cause compatibility issues with the website.

First, check for any available updates for your camera drivers. Visit the manufacturer’s website to download and install the latest version.

Next, ensure that your browser is up to date. Go to the settings menu of your browser and look for any pending updates.

It’s also a good idea to clear your browser’s cache and cookies to refresh the connection with Omegle. Go to the settings or history section of your browser to do this.

After updating your camera and browser, restart your device and try accessing Omegle again to see if the black screen issue has been resolved.

Closing Other Camera-Accessing Apps

To fix the Omegle black screen camera issue, make sure to close any other apps that may be accessing your camera. This can include video conferencing apps, social media apps, or any other programs that use your camera. Close these apps completely before trying to use Omegle.

If you’re using a mobile device, swipe up or press the home button to access your recent apps and then swipe away any apps that are using the camera. On a computer, make sure to fully exit out of any camera-accessing programs in the taskbar or system tray.

By closing these apps, you’ll free up your camera for use on Omegle without any interference. This simple step can often resolve the black screen camera issue on the platform.

Disabling Firewall Settings

To disable firewall settings that may be causing the black screen camera issue on Omegle, follow these steps. First, open the Control Panel on your computer. Next, click on “System and Security” and then select “Windows Defender Firewall. ” Click on “Turn Windows Defender Firewall on or off” on the left side of the window. Turn off the firewall for both private and public networks by unchecking the boxes next to each option. Finally, click “OK” to save the changes.

Turning Off MS Store Apps’ Camera Permissions

To turn off MS Store apps’ camera permissions, follow these steps:

1. Go to Settings on your Windows device.
2. Click on Privacy, then Camera.
3. Under “Allow apps to access your camera,” toggle off the switch.
4. Scroll down to “Choose which Microsoft Store apps can access your camera” and toggle off the apps you don’t want to access your camera.

FAQs

Why can’t i see video on Omegle?

You can’t see video on Omegle because your web browser may not have permission to access your camera. To fix this, go to Omegle’s website, click on Video, and look for a camera icon in your browser to enable permissions.

Why isn’t my Omegle loading?

Your Omegle may not be loading due to issues with your browser cache. Clearing out these temporary files can help resolve the problem and improve the loading speed.

What is the GREY screen issue on Omegle?

The GREY screen issue on Omegle is likely caused by a slow or buggy browser. To fix it, try closing all tabs and reopening them after a few minutes to refresh the connection with the server and clear any temporary glitches.

How to use Omegle without webcam?

To use Omegle without a webcam, you can simply open the website on your browser and add your interests in the text box. The server will then find a random person for you to chat with.

Fix Windows 11 Personalized Settings Not Responding – How To Fix

Struggling with Windows 11 personalized settings not responding? Here’s how to fix it.

Restart Computer or File Explorer

To fix Windows 11 Personalized Settings not responding, try restarting your computer or File Explorer. Sometimes, a simple reboot can resolve the issue. Press Ctrl + Alt + Delete to open the Task Manager and select “Restart” to reboot your computer.

If restarting doesn’t work, try restarting File Explorer. Press Ctrl + Shift + Esc to open the Task Manager, find “Windows Explorer” in the list of processes, right-click on it, and select “Restart.”

If the issue persists, you may need to check for Windows updates or run troubleshooting tools. Make sure your system is up to date by going to Settings > Update & Security > Windows Update.

If you are still experiencing issues, consider seeking technical support or consulting online forums like Reddit for further assistance.

Update Graphics Driver

  • Open Device Manager by right-clicking on the Start button and selecting it from the list.
  • Expand the Display adapters category by clicking on the arrow next to it.
  • Right-click on your graphics driver and select Update driver.
  • Choose to search automatically for updated driver software and follow the on-screen instructions to complete the update process.

Use System Restore Point

To fix Windows 11 personalized settings not responding, you can try using a System Restore Point. This feature allows you to revert your system back to a previous state where everything was working fine. Here’s how you can do it:

1. Press the Windows key + R to open the Run dialog box.
2. Type “rstrui” and press Enter to open System Restore.
3. Click on “Next” and select a restore point from the list.
4. Follow the on-screen instructions to complete the restoration process.

Using a System Restore Point can help resolve issues with personalized settings not responding on Windows 11. If this method doesn’t work, you may need to seek further technical support for troubleshooting.

Run SFC Scan Command

To run an SFC scan command, you can follow these steps:

1. Press the Windows key + R to open the Run dialog box.
2. Type cmd and press Ctrl + Shift + Enter to open Command Prompt as an administrator.
3. In the Command Prompt window, type sfc /scannow and press Enter to initiate the System File Checker scan.
4. The scan will check for and repair any corrupted system files that may be causing the issue with personalized settings not responding in Windows 11.

If the SFC scan doesn’t resolve the issue, you may need to consider other troubleshooting steps or seek further assistance from a computer repair technician.

Delete Specific Registry Key

To delete a specific registry key in Windows 11, you can follow these steps:

1. Press Win + R on your keyboard to open the Run dialog box.
2. Type regedit and press Enter to open the Windows Registry Editor.
3. Navigate to the specific registry key you want to delete.
4. Right-click on the key and select Delete from the context menu.
5. Confirm that you want to delete the key.
6. Close the Registry Editor.
7. Restart your computer for the changes to take effect.

Deleting a specific registry key can sometimes resolve issues with personalized settings not responding in Windows 11.

Open File Explorer via Task Manager

If you are experiencing issues with personalized settings not responding on Windows 11, accessing File Explorer through Task Manager can help you troubleshoot and fix the problem. By following these steps, you can quickly access and navigate through your files and folders to address any issues with personalized settings.

Switch Network Connection

1. Open the Settings app by pressing Windows key + I.

2. Click on “Network & internet” from the options.

3. Scroll down to find the network you are currently connected to.

4. Click on the network name and select “Disconnect.”

5. To connect to a different network, click on “Wi-Fi” or “Ethernet” and select the network you want to connect to.

6. Enter the password if required and click “Connect.”

7. Your Windows 11 personalized settings should now respond properly with the new network connection.

F.A.Qs

How do I set up Personalization settings in Windows 10?

To set up Personalization settings in Windows 10, you can right-click anywhere on the desktop and select Personalize from the drop-down menu. This will bring up the Personalization settings where you can customize your desktop, colors, background, and more.

How do I reset my Personalization in Windows 10?

To reset your Personalization in Windows 10, you can do so by accessing Windows Settings, clicking on Personalization, going to the Themes tab, and then selecting the Windows 10 theme to apply it.

How to Fix Windows 10 You don’t have permission to save

In this article, I will discuss how to fix the issue of “You don’t have permission to save” in Windows 10.

Assign Full Control to Administrators and Current Users

Windows security settings

1. Right-click on the file or folder that is giving you the permission error and select “Properties” from the context menu.

2. In the Properties window, go to the “Security” tab and click on the “Edit” button.

3. Next, click on “Add” and type in “Administrators” in the text box to add the Administrators group to the list of users.

4. Select “Administrators” from the list of groups or users and check the box next to “Full Control” under the “Allow” column.

5. Click “Apply” and then “OK” to save the changes and close the Properties window.

Change Ownership or Unblock Target Files

To change ownership of a file in Windows 10, right-click on the file and select Properties. Go to the Security tab and click on Advanced. Next, click on Change next to the owner’s name. Enter the name of the new owner and click OK. Check the box that says Replace owner on subcontainers and objects and click Apply.

If you are unable to save files due to permission issues, you can unblock them by right-clicking on the file and selecting Properties. In the General tab, check the box next to Unblock and click Apply.

If you continue to experience issues, check your antivirus software settings to ensure it is not blocking the file. You can also try running the program as an administrator by right-clicking on it and selecting Run as administrator.

Run Applications as Administrator

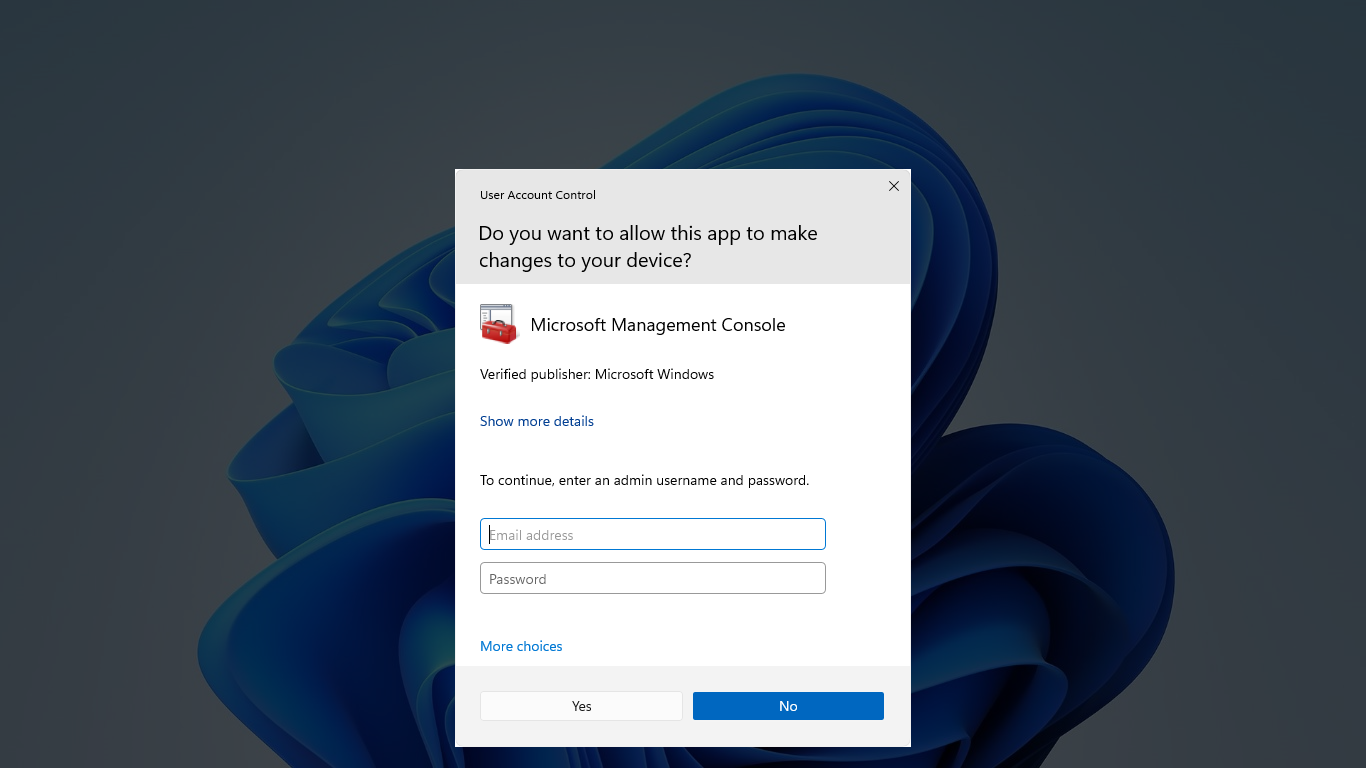
Windows UAC prompt

To run applications as an administrator in Windows 10 and fix the “You don’t have permission to save” error, follow these steps.

First, locate the application you want to run as an administrator. Right-click on the application icon and select Run as administrator from the context menu. This will give the application the necessary permissions to save files and make changes to your system.

If you’re having trouble finding the Run as administrator option, you can also go to the application’s properties by right-clicking on the icon and selecting Properties. In the Compatibility tab, check the box that says Run this program as an administrator and click Apply.

Another way to run applications as an administrator is to use the built-in User Account Control settings in Windows 10. Go to the Control Panel, click on User Accounts, and then Change User Account Control settings. Move the slider to the bottom to never notify and save changes.

By running applications as an administrator, you can bypass permission issues and save files without encountering the “You don’t have permission to save” error in Windows 10.

Utilize System File Checker and Reset Apps

  • Open Command Prompt as an administrator by searching for it in the Start menu, right-clicking on it, and selecting “Run as administrator.”
  • Type “sfc /scannow” in the Command Prompt window and press Enter.
  • Wait for the System File Checker to scan and repair any corrupted system files.
  • Restart your computer after the process is complete.

Reset Apps

  • Open Settings by clicking on the Start menu and selecting the gear icon.
  • Go to “Apps” in the Settings menu.
  • Scroll down and find the app that is giving you permission issues.
  • Click on the app and select “Advanced options.”
  • Scroll down and click on the “Reset” button to reset the app’s permissions and settings.
  • Restart your computer after resetting the app.

Disable User Account Control or Antivirus Software

Windows UAC prompt

To disable User Account Control:
1. Open the Control Panel.
2. Click on “User Accounts.”
3. Click on “Change User Account Control settings.”
4. Move the slider to the lowest setting.
5. Click “OK” to save the changes.
6. Restart your computer for the changes to take effect.

To disable antivirus software:
1. Locate the antivirus software icon in the system tray.
2. Right-click on the icon and look for an option to disable or turn off the software.
3. Follow the prompts to disable the antivirus temporarily.
4. Try to save the file again to see if the issue is resolved.
5. Remember to re-enable the antivirus software after you are done with your task.

Opt for an Alternate Save Location

If you are getting an error message saying “You don’t have permission to save” in Windows 10, you can try opting for an alternate save location to resolve the issue.

First, navigate to the file or folder you are trying to save and right-click on it.

Next, select “Properties” from the menu that appears.

Go to the “Security” tab and click on “Edit” to change the permissions.

By selecting a different location to save the file, you may be able to bypass any permission issues you are encountering.

Remember to choose a location where you have the necessary permissions to save files.

FAQ

Why does it say you don t have permission to save in this location?

It says you don’t have permission to save in this location because of Windows or Mac permissions and user access rights. This could be due to the file, folder, or location being set to ”read-only” to prevent accidental changes.

Why is word saying I don’t have permission to save?

The reason Word is saying “I don’t have permission to save” could be because the program is not being run as administrator. To resolve this issue, try running the program as an administrator.

How do I get permission from administrator to save a file?

To get permission from an administrator to save a file, you can adjust folder permissions by right-clicking on the folder where you want to save the file, selecting Properties, switching to the Security tab, choosing your username from the list, clicking on Edit, ticking the Allow checkbox next to Full control, and then hitting Apply followed by OK.

How do I get access denied save files in Windows 10?

To get access denied save files in Windows 10, you need to first take ownership of the file and folder, then adjust the permissions accordingly. If the files are encrypted, you may need to decrypt them. Additionally, you can try adding your account to the administrator group if you are denied access to a folder.

Can’t Open PDF on Android Phone: Easy Fix Guide

Having trouble opening PDF files on your Android phone? Here is an easy fix guide to help you resolve the issue.

Launching PDF Files on Android and iPhone

PDF icon

To launch PDF files on your Android or iPhone, try these easy fixes. For Android users, download a PDF viewer app from Google Play Store if your phone doesn’t have one pre-installed. For iPhone users, use the Adobe Acrobat app from the App Store to open PDF files. If you’re having trouble opening a PDF on Android, try clearing the cache and data of the app you’re using to open the file. On iPhone, make sure you have enough storage space available to open the PDF.

If you’re still facing issues, try downloading the PDF to your device and opening it from there. Following these steps should help you easily open PDF files on your Android phone or iPhone.

Opening Normal and Password-Protected PDFs

To open a normal PDF on your Android phone, simply download the file and then locate it in your device’s storage. Tap on the file to open it using a PDF reader app installed on your phone. If you don’t have a PDF reader, you can download one from the Google Play Store such as Adobe Acrobat or Google Docs.

If you are trying to open a password-protected PDF, you will need to enter the password to access the file. Make sure you have the correct password before trying to open the PDF. Some PDF readers may prompt you to enter the password before opening the file.

If you are still having trouble opening a password-protected PDF, try using a different PDF reader app or opening the file on a different device such as a computer. This can help determine if the issue is with the file itself or your Android phone’s capabilities.

Accessing PDFs Without Downloading Apps

  • Clear the cache and data of the PDF viewer app:
    • Go to Settings on your Android phone.
    • Find and tap on Apps & notifications.
    • Locate the PDF viewer app and tap on it.
    • Tap on Storage & cache.
    • Tap on Clear cache and Clear data.
  • Use a different PDF viewer app:
    • Go to the Google Play Store on your Android phone.
    • Search for a different PDF viewer app.
    • Install the new app and try opening the PDF file with it.

Opening PDF ZIP Files and Greyed-Out PDFs

To open PDF ZIP files on your Android phone, you first need to download a file manager app from the Google Play Store. Once you have the app installed, locate the PDF ZIP file in your file manager.

Tap on the file to unzip it, and then locate the PDF file within the extracted folder. Tap on the PDF file to open it with your preferred PDF viewer app.

If you are experiencing issues with greyed-out PDFs on your Android phone, try clearing the cache and data of the PDF viewer app. This can help resolve any temporary glitches causing the PDFs to appear greyed out.

Alternatively, you can try opening the greyed-out PDFs in a different PDF viewer app to see if the issue persists. Make sure to update your PDF viewer app to the latest version available on the Google Play Store to ensure compatibility with your Android phone.

Alternatives to Acrobat Reader for Mobile Devices

If you’re looking for an alternative to Adobe Acrobat Reader for your Android phone, there are a few options you can consider. One popular choice is Google PDF Viewer, which is a lightweight app that allows you to view PDF files with ease. Another great option is Foxit PDF Reader & Converter, which offers a variety of features such as annotation tools and the ability to convert files to different formats. Lastly, you can also try Xodo PDF Reader & Editor, which has a user-friendly interface and allows you to edit PDF files directly on your mobile device. Give these alternatives a try if you’re having trouble opening PDF files on your Android phone.

Enhancing PDF Reading Experience on Android

To enhance your PDF reading experience on your Android phone, try using a reliable PDF reader app like Adobe Acrobat Reader. This app allows you to easily open and view PDF files on your device. If you’re having trouble opening a PDF, make sure the file is not corrupted or encrypted.

Additionally, clear the cache and data of the PDF reader app you are using to resolve any technical issues. You can also try downloading the PDF file again or opening it in a different app to see if that helps.

If the problem persists, check for software updates on your Android device as outdated software can sometimes cause compatibility issues with PDF files. Alternatively, you can try converting the PDF file to a different format like JPEG, which may be easier to open on your phone.

F.A.Q.

Why PDF files are not opening in my phone?

PDF files are not opening on your phone because many Android devices do not have a built-in feature for opening PDF files, and your PDF files may be corrupted due to reasons such as virus attacks or hardware damage.

How do I get my phone to read PDF files?

To get your phone to read PDF files, download and install Acrobat Reader from the Google Play Store. Launch the app, select Files from the bottom menu bar, locate your PDF file on your Android, and choose it to start reading. Adjust viewing and scrolling settings as needed.

Why wont my iPhone open PDF files?

My iPhone won’t open PDF files because I don’t have the necessary viewing software downloaded to my device. PDFs require specific software to view, and without it, the files will appear greyed out on the iPhone.

How do I open a PDF in my mobile browser?

To open a PDF in your mobile browser, you can install a PDF reader app like SwifDoo PDF for Android. Once installed, you can browse your phone to select the PDF file you want to view. Alternatively, you can also use Google Chrome and search for Google Docs to open and view PDF files.