Fix Dell Inspiron DVD Drive Not Working Windows 10

In this article, I will discuss how to fix the Dell Inspiron DVD drive not working on Windows 10.

Recognizing Symptoms

If you are experiencing any of these symptoms, it is important to troubleshoot the issue promptly. Check the Device Manager to see if the DVD drive is being detected by the system. You can also try updating the device driver or running the Hardware and Devices troubleshooter in Windows 10.

Another common fix is to check the Windows Registry for any issues related to the DVD drive. You can also try using the built-in Windows troubleshooter to automatically fix any problems with the drive. If all else fails, you may need to contact Dell technical support for further assistance.

Identifying the Cause

Dell Inspiron DVD drive not working

To identify the cause of your Dell Inspiron DVD drive not working on Windows 10, first, check if the device is properly connected to your computer. If the connections are secure and the issue persists, check the Device Manager to see if there are any exclamation marks or error messages next to the DVD drive.

If the DVD drive is not showing up in the Device Manager, you may need to update the device driver or run a troubleshooter to diagnose and fix any issues.

Additionally, you can check the Windows Registry to see if there are any entries that may be causing the problem. Sometimes, incorrect registry settings can prevent the DVD drive from functioning properly.

Steps to Resolution

  • Open Device Manager by pressing Win+X and selecting it from the list
  • Expand the category for DVD/CD-ROM drives
  • Right-click on the DVD drive and select Update Driver
  • Choose Search automatically for updated driver software
  • Follow the on-screen instructions to complete the driver update process

Check DVD Drive Connection

  • Power off your Dell Inspiron laptop
  • Remove the DVD drive from the laptop
  • Clean the connectors on the DVD drive and in the laptop
  • Reconnect the DVD drive securely
  • Power on your laptop and check if the DVD drive is detected

Run Hardware Troubleshooter

  • Open Settings by pressing Win+I
  • Go to Update & Security
  • Select Troubleshoot from the left pane
  • Click on Hardware and Devices and run the troubleshooter
  • Follow the on-screen instructions to fix any detected issues

Updating Device Drivers and BIOS

To fix the Dell Inspiron DVD drive not working in Windows 10, a common solution is to update the device drivers and BIOS. This can help ensure that the DVD drive is compatible with the operating system and running smoothly.

To update the device drivers, go to the Device Manager by right-clicking on the Start menu and selecting it. Look for the DVD drive under the “DVD/CD-ROM drives” section, right-click on it, and select “Update driver.” You can choose to search automatically for updated driver software or browse your computer for driver software.

To update the BIOS, visit the Dell support website and enter your service tag or model number to find the latest BIOS update for your specific Dell Inspiron model. Follow the instructions on the website to download and install the BIOS update.

After updating the device drivers and BIOS, restart your computer to apply the changes. This may resolve the issue with the DVD drive not working on your Dell Inspiron in Windows 10.

Configuring Auto-Play and DMA Settings

To configure Auto-Play and DMA settings on your Dell Inspiron DVD drive in Windows 10, follow these steps:

1. Adjust Auto-Play settings:
– Open Control Panel and click on “AutoPlay.”
– Choose the desired action for different types of media.
– Save changes.

2. Enable DMA settings:
– Press the Windows key + X and select “Device Manager.”
– Expand “IDE ATA/ATAPI controllers” and right-click on the DVD drive.
– Go to “Properties” and click on the “Advanced Settings” tab.
– Check the box to enable DMA if available.

3. Restart your computer:
– After making these changes, restart your system to apply the settings properly.

By configuring Auto-Play and DMA settings, you can troubleshoot your Dell Inspiron DVD drive not working in Windows 10 efficiently.

Utilizing Dell’s Diagnostic Tools

To fix your Dell Inspiron DVD drive not working on Windows 10, you can utilize Dell’s diagnostic tools to troubleshoot the issue quickly and efficiently.

Firstly, ensure that the DVD drive is properly connected to your laptop and that the drivers are up to date.

Next, open Dell’s diagnostic tools by searching for “Dell SupportAssist” in the Windows search bar and running a scan on the optical disc drive.

If any issues are detected, follow the on-screen instructions to resolve them.

Additionally, you can try updating the firmware of the DVD drive through Dell’s website to ensure compatibility with Windows 10.

By using Dell’s diagnostic tools, you can easily identify and fix any problems with your Inspiron’s DVD drive, allowing you to enjoy your favorite movies and software without any interruptions.

Restoring System to Default Settings

To restore your Dell Inspiron system to default settings, follow these steps:

1. Click on the Start button and select Settings.
2. In the Settings window, click on Update & Security.
3. Select Recovery from the left menu.
4. Under Reset this PC, click on Get started.
5. Choose Remove everything to restore your system to default settings.
6. Follow the on-screen instructions to complete the process.

Restoring your system to default settings can help resolve issues with your DVD drive not working on Windows 10 by eliminating any potential software conflicts or errors.

Accessing Additional Resources and Support

To access additional resources and support for fixing your Dell Inspiron DVD drive not working on Windows 10, you can start by reaching out to technical support for assistance. They can provide guidance specific to your issue and help troubleshoot any problems you may be experiencing.

Additionally, you can try performing a System Restore to revert your system back to a previous state where the DVD drive was working properly. This can help resolve any software conflicts that may be causing the issue.

If the problem persists, you can also check for any updates for your operating system or device drivers related to the DVD drive. Make sure your Windows is up to date and the drivers are properly installed.

It’s also recommended to check the Device Manager in Windows to see if the DVD drive is recognized and functioning correctly. You can access the Device Manager by right-clicking on the Windows icon and selecting it from the context menu.

FAQs

How do I fix Windows 10 not recognizing my DVD?

To fix Windows 10 not recognizing your DVD, you can start by checking the CD/DVD drive name in Device Manager, using the Hardware and Devices troubleshooter, resetting the computer power, and checking the drive cable connections for desktop tower computers.

Why isn’t my DVD playing on my Dell laptop?

Your DVD may not be playing on your Dell laptop due to outdated or corrupted drivers for the optical drive, or issues with the Dell-provided playback software. Try updating or reinstalling the drivers, and uninstalling and reinstalling the playback software. If the issue persists, consider performing a Windows System Restore or restoring your computer to factory defaults.

Why is my DVD drive not detecting discs?

Your DVD drive may not be detecting discs because the data surface may be damaged. Check for scratches or other damage on the disc that may be preventing it from being read properly.

How do I get my computer to recognize my DVD drive?

To get your computer to recognize your DVD drive, you can start by checking if the drive is recognized in BIOS/System Setup. Then, try running the Hardware and Devices troubleshooter and the Microsoft CD/DVD Fix it troubleshooter. Lastly, update or reinstall the driver for the optical drive.

NVIDIA Control Panel Missing Display Settings Fix

Having trouble locating display settings in your NVIDIA Control Panel? Here’s a quick fix to help you find them.

Identifying the Cause of Missing Services

To identify the cause of missing services in NVIDIA Control Panel, you should first check if the display drivers are properly installed and up to date. Open Device Manager by pressing Windows key + X and selecting Device Manager. Look for any yellow exclamation marks next to the display adapter, which indicates driver issues. If the drivers are fine, check for any conflicting software or third-party applications that may be causing the settings to disappear. Uninstall any unnecessary programs or recent updates that might be interfering with the NVIDIA Control Panel. Additionally, ensure that your system meets the minimum requirements for the Control Panel to function properly.

Essential Steps for Reinstallation

  • Uninstall NVIDIA Control Panel through Control Panel settings
    • Open Control Panel by searching for it in the Windows search bar
    • Click on Programs and then Programs and Features
    • Find NVIDIA Control Panel in the list of installed programs
    • Right-click on NVIDIA Control Panel and select Uninstall
    • Follow the on-screen prompts to complete the uninstallation process
  • Download the latest version of NVIDIA Control Panel from the official website
    • Open a web browser and go to the NVIDIA official website
    • Navigate to the Drivers section
    • Select your Graphics Card model and operating system
    • Click on Download to start downloading the latest version of NVIDIA Control Panel
  • Install the downloaded NVIDIA Control Panel software
    • Locate the downloaded NVIDIA Control Panel setup file
    • Double-click on the file to start the installation process
    • Follow the on-screen instructions to install the NVIDIA Control Panel software
    • Restart your computer after the installation is complete

Updating Display Adapter Drivers

To update your display adapter drivers, follow these steps:

1. Open Device Manager by pressing Windows key + X and selecting it from the list.
2. Expand the Display adapters category and right-click on your NVIDIA graphics card.
3. Select Update driver and choose Search automatically for updated driver software.
4. Follow the on-screen instructions to complete the update process.

Updating your display adapter drivers can help resolve issues with missing display settings in the NVIDIA Control Panel. Make sure to regularly check for updates to ensure optimal performance.

Best Practices to Prevent Issues

To prevent issues with missing display settings in the NVIDIA Control Panel, follow these best practices:

1. Ensure your graphics card drivers are up to date by regularly checking for updates on the NVIDIA website or using GeForce Experience.
2. Restart your computer after installing driver updates to apply the changes effectively.
3. Check for conflicts with other software that may be affecting the display settings.
4. Reset the NVIDIA Control Panel settings to default if you continue to experience issues.

FAQs

Why did my Nvidia disappear?

Your Nvidia may have disappeared due to a corrupt driver. Try updating or reinstalling the video drivers as they may not have installed or updated properly.

Why has my Nvidia control panel gone?

Your Nvidia control panel may have disappeared due to driver issues, such as an outdated, non-compatible, or corrupted graphics card driver or Nvidia display driver. This can cause a control panel error.

How do I restart Nvidia services?

To restart Nvidia services, you can open the run menu by pressing the windows icon + r buttons on your keyboard, type in “services,” locate “NVIDIA GeForce Experience Service” in the list, then right-click and choose the start or restart option.

How do I restore my Nvidia control panel?

To restore your Nvidia control panel settings, you can simply right-click on your desktop and select Nvidia Control Panel. From there, navigate to Manage 3D Settings and click on Restore Defaults in the upper-right corner.

Maxtor External Hard Drive Not Working Windows 10/11 Fix

Having trouble with your Maxtor external hard drive not working on Windows 10/11? Let’s discuss some fixes.

Verify Hard Drive State and Connection

To verify the hard drive state and connection of your Maxtor external hard drive not working on Windows 10/11, start by checking if the device is properly connected to your computer. Make sure the USB cable is securely plugged in and try using a different USB port to rule out any connection issues.

Next, open Disk Management by right-clicking on the Start button and selecting “Disk Management.” Look for your Maxtor external hard drive in the list of connected drives. If it appears, but shows as unallocated or with a different status, there may be an issue with the drive.

You can also run a CHKDSK scan by opening Command Prompt as an administrator and typing “chkdsk [drive letter]: /f /r” where [drive letter] is the assigned letter for your Maxtor external hard drive. This will check for and attempt to repair any errors on the drive.

If the hard drive still does not work after these steps, consider trying the drive on another computer to see if the issue is with your PC. If all else fails, you may need to consider data recovery options to retrieve important files stored on the Maxtor external hard drive.

Change USB Ports and Adjust BIOS Settings

Step Description
1 Change USB Ports
2 Adjust BIOS Settings

Update or Reinstall Disk and USB Drivers

Maxtor external hard drive disk and USB drivers.

1. Update Disk and USB Drivers:
– Press the Windows key + X on your keyboard and select Device Manager.
– Locate the Disk drives and Universal Serial Bus controllers sections.
– Right-click on the Maxtor external hard drive and USB drivers, then select Update driver.
– Follow the on-screen instructions to complete the update process.

2. Reinstall Disk and USB Drivers:
– Press the Windows key + X on your keyboard and select Device Manager.
– Locate the Disk drives and Universal Serial Bus controllers sections.
– Right-click on the Maxtor external hard drive and USB drivers, then select Uninstall device.
– Restart your computer to automatically reinstall the drivers.

3. Test the Maxtor External Hard Drive:
– After updating or reinstalling the drivers, reconnect the Maxtor external hard drive to your computer.
– Check if the issue has been resolved and if the drive is now working properly on Windows 10/11.

Check and Repair Disk Errors

If CHKDSK does not resolve the issue, you can also try using the Disk Management tool in Windows. Right-click on the Start button and select “Disk Management. ” Look for your Maxtor external hard drive, right-click on it, and choose “Properties. ” Go to the “Tools” tab and click on “Check” under Error checking.

Follow the on-screen instructions to scan and repair any disk errors.

Rebuild Master Boot Record (MBR)

Maxtor external hard drive icon

To rebuild the Master Boot Record (MBR) on your Maxtor external hard drive in Windows 10/11, follow these steps:

1. First, connect your Maxtor external hard drive to your computer.

2. Press the Windows key + X on your keyboard to open the Power User menu.

3. Select “Command Prompt (Admin)” from the menu.

4. In the Command Prompt window, type “diskpart” and press Enter.

5. Next, type “list disk” and press Enter to display a list of all disks connected to your computer.

6. Identify your Maxtor external hard drive from the list (it will typically be labeled as “Disk 1” or a similar number).

7. Type “select disk X” (replace X with the number of your Maxtor drive) and press Enter.

8. Now, type “clean” and press Enter to remove all partitions from the disk.

9. Type “create partition primary” and press Enter to create a new primary partition on the disk.

10. Finally, type “format fs=ntfs quick” and press Enter to format the partition with the NTFS file system.

Format Hard Drive Correctly

To format your Maxtor external hard drive correctly, follow these steps:

1. Connect the Maxtor external hard drive to your Windows 10/11 computer.

2. Open File Explorer and locate the Maxtor drive.

3. Right-click on the drive icon and select Format.

4. Choose the desired file system (such as NTFS or exFAT) and allocation unit size.

5. Make sure to check the box for Quick Format if you want to speed up the process.

6. Click Start to begin formatting the Maxtor external hard drive.

7. Wait for the process to complete and then safely eject the drive from your computer.

Update Windows Operating System

To update your Windows operating system, follow these steps:

1. Check for Updates: Click on the Start menu, then go to Settings > Update & Security > Windows Update. Click on Check for updates and install any available updates.

2. Restart Your Computer: After the updates have been installed, restart your computer to apply the changes.

3. Check Device Manager: Press the Windows key + X and select Device Manager. Look for any yellow exclamation marks next to your Maxtor external hard drive. If you see one, right-click on the device and select Update driver.

4. Reconnect the External Hard Drive: Disconnect and reconnect your Maxtor external hard drive to see if it is now recognized by your computer.

By updating your Windows operating system, you may be able to resolve any compatibility issues causing your Maxtor external hard drive not to work on Windows 10/11.

FAQ

How do I fix my Maxtor hard drive?

To fix your Maxtor hard drive, you can try disabling USB power-saving mode, upgrading the device driver, checking for errors using CHKDSK utility, rebuilding the MBR of the external drive, and formatting the drive to the correct file system.

How do I fix an unresponsive hard drive?

To fix an unresponsive hard drive, start by inspecting it for physical damage, running a CHKDSK scan, using antivirus and anti-malware tools, reinstalling drivers, and formatting the disk if necessary.

How do I recover data from Maxtor external hard drive?

To recover data from a Maxtor external hard drive, you can use the Seagate/Maxtor Manager software on your Windows computer. Simply open the software, click on Backup, then select Restore Files and browse to the location of your backed up files to recover them.

Fix Greyed Out Secure Boot on Acer Laptop

Having trouble with a greyed out Secure Boot option on your Acer laptop? Let’s troubleshoot the issue together.

Set Administrator Password

To set the administrator password on an Acer laptop and fix the greyed out Secure Boot issue, follow these steps:

1. Restart the laptop and enter the BIOS by pressing the appropriate function key during boot-up.
2. Use the arrow keys to navigate to the “Security” tab.
3. Find the option to set the administrator password and select it.
4. Enter a strong password and confirm it.
5. Save the changes and exit the BIOS.
6. Restart the laptop and check if the Secure Boot option is no longer greyed out.

By setting the administrator password, you can successfully enable the Secure Boot feature on your Acer laptop and enhance its network security.

Disable Fast Boot

1. Turn on your Acer laptop and repeatedly press the F2 key to access the UEFI firmware settings.

2. Use the Arrow keys to navigate to the “Boot” tab.

3. Look for the Fast Boot option and disable it.

4. Save your changes and exit the UEFI settings.

5. Restart your laptop and check if the Secure Boot option is now accessible.

Disabling Fast Boot should allow you to modify the Secure Boot settings on your Acer laptop and resolve the greyed out issue.

Restore BIOS to Factory Defaults

Step Instructions
1 Turn off your Acer laptop and then turn it back on.
2 Press the appropriate key to enter the BIOS settings. This is usually F2 or DEL, but it can vary depending on your Acer laptop model.
3 Navigate to the “Exit” tab in the BIOS settings.
4 Select the option to “Restore Defaults” or “Load Setup Defaults.”
5 Confirm the action and save your changes.
6 Exit the BIOS settings and restart your Acer laptop.

After following these steps, your Acer laptop’s BIOS settings should be restored to factory defaults, and you may find that the Secure Boot option is no longer greyed out.

Update BIOS

To update the BIOS on your Acer laptop and fix the greyed out Secure Boot option, follow these steps:

Step 1: Go to the Acer website and download the latest BIOS update for your specific laptop model.

Step 2: Save the BIOS update file to a USB drive.

Step 3: Restart your laptop and press the specified function key (usually F2 or F12) to access the BIOS setup.

Step 4: Navigate to the BIOS update section and select the option to update from a USB drive.

Step 5: Follow the on-screen instructions to complete the BIOS update process.

After updating the BIOS, restart your laptop and check if the Secure Boot option is now accessible. This should resolve the issue of it being greyed out. If you encounter any difficulties during the update process, refer to the Acer support website for troubleshooting tips.

FAQ

How do I fix greyed out Secure Boot?

To fix greyed out Secure Boot, you can try resetting the password, saving the changes in BIOS, restarting the system, and re-entering BIOS. This should help resolve the issue.

How do I enable Secure Boot on Acer BIOS?

To enable Secure Boot on an Acer BIOS, go to the System Configuration menu, then navigate to BIOS/Platform Configuration (RBSU), select Server Security, and choose Secure Boot Settings. From there, select Secure Boot Enforcement and choose the Enabled option to enable Secure Boot.

Why can’t I enable Secure Boot?

You can’t enable Secure Boot because the administrator password is not set, incorrect BIOS security settings are in place, or the BIOS is outdated. Restoring BIOS settings to factory defaults may help resolve the issue.

Why are options greyed out in BIOS?

Options are greyed out in BIOS because of various factors such as having Secure Boot or TPM enabled, as well as issues with Modern Standby supported systems that prevent switching from UEFI to Legacy BIOS.

Accidentally Deleted Laptop Speakers Fix

In my experience, accidentally deleting laptop speakers can be a frustrating issue to deal with.

Preparation Steps

Laptop being accidentally deleted

First, check if the laptop speakers are actually deleted or just disabled. Right-click on the speaker icon in the taskbar and select “Playback devices.” Look for your laptop speakers in the list and make sure they are enabled. If they are disabled, right-click on them and select “Enable.”

If the speakers are not showing up in the playback devices list, you may need to reinstall the audio driver. Go to the device manager by right-clicking on the Start button and selecting “Device Manager.” Look for “Sound, video and game controllers” and expand the list. Find the audio device (usually Realtek or Toshiba) and right-click on it. Select “Uninstall device” and restart your laptop. Windows 10 should automatically reinstall the driver.

If reinstalling the driver does not work, you can try a system restore to a point before the speakers were deleted. Type “System Restore” in the Windows search bar and select the option. Follow the prompts to restore your laptop to a previous state.

If none of the above steps work, you may need to check for hardware issues. Connect headphones to your laptop and see if you can hear sound. If you can, the issue may be with the laptop speakers themselves. Consider taking your laptop to a professional for further inspection.

In summary, to fix accidentally deleted laptop speakers:
-Check if the speakers are disabled in playback devices.
-Reinstall the audio driver in the device manager.
-Perform a system restore to a point before the speakers were deleted.
-Check for hardware issues by connecting headphones.

Initial Troubleshooting Methods

  • Check the Volume Levels
    • Make sure the volume on the laptop and in the application you are using is turned up.
  • Restart the Laptop
    • Close all applications and restart the laptop to see if that resolves the issue.
  • Update Audio Drivers
    • Go to the Device Manager and check for any updates for the audio drivers.
    • If updates are available, download and install them.
  • Check for Muted Sound
    • Make sure the sound is not muted either on the laptop or in the application.

Advanced Recovery Options

If the speakers are disabled, you can enable them by right-clicking on the speaker icon in the taskbar and selecting “Sounds.” Then, go to the “Playback” tab, right-click on the speakers, and select “Enable.”

If the speakers have a driver issue, you can update the driver by right-clicking on the speakers in Device Manager and selecting “Update driver.” You can choose to search automatically for updated driver software or browse your computer for driver software.

Another option is to restore your system to a previous point before the speakers were deleted. You can do this by typing “System Restore” in the search bar and selecting “Create a restore point.” Then, click on “System Restore” and follow the on-screen instructions to choose a restore point.

If none of these options work, you can try reinstalling the audio driver for your laptop. You can download the driver from the manufacturer’s website and install it on your laptop.

In some cases, the speakers may have been accidentally deleted due to a malware infection. You can run a full scan of your laptop using antivirus software to remove any malware that may be causing the issue.

If you are still unable to fix the issue, you may need to contact technical support for further assistance. They may be able to provide additional troubleshooting steps or recommend a professional repair service.

Finalizing the Restoration Process

To finalize the restoration process for accidentally deleted laptop speakers, follow these steps:

First, make sure that your laptop is powered on and connected to the internet.

Next, go to the device manager by right-clicking on the Start button and selecting “Device Manager” from the context menu.

Once in the device manager, locate the “Sound, video and game controllers” section and expand it to see a list of audio devices.

Look for your laptop speakers, which may be listed as “Realtek High Definition Audio” or a similar name.

If you do not see your speakers listed, right-click on any device and select “Scan for hardware changes” to try and detect them.

If your speakers still do not appear, you may need to download and install the latest drivers for your audio device.

Go to the manufacturer’s website (such as Toshiba for Toshiba laptops) and search for the latest drivers for your specific model.

Download the drivers and follow the on-screen instructions to install them on your laptop.

Once the drivers are installed, restart your laptop to complete the installation process.

After restarting, check to see if your laptop speakers are now working properly.

If they are still not working, you may need to troubleshoot further or seek professional help.

By following these steps, you can finalize the restoration process for accidentally deleted laptop speakers and have your audio back up and running in no time.

Remember to regularly update your drivers and keep your laptop in good working condition to prevent future issues.

For more information and troubleshooting tips, consult the manufacturer’s website or contact customer support for assistance.

Stay on top of your laptop’s audio performance and enjoy uninterrupted sound quality for all your activities.

Frequently Asked Questions

How do I reinstall a deleted audio device?

To reinstall a deleted audio device, you can navigate to Audio inputs and outputs, right-click on the audio source name, and select Uninstall Device. After it is removed, right-click on Audio inputs and outputs and choose Scan for hardware changes to reinstall the inbuilt drivers.

How do I reinstall speakers on my laptop Windows 10?

To reinstall speakers on your laptop running Windows 10, you can update the driver for your sound card or audio device. Simply select and hold (or right-click) the listing for the device, choose Update driver, then Browse my computer for drivers, and select the audio device you want to update. Follow the on-screen instructions to complete the installation process.

BIOHD4 Error Code Boot Test Failed HP Fix

Having trouble with the BIOHD4 error code on your HP computer? Learn how to fix the boot test failed issue in this article.

Repairing Boot Configuration Data

To repair the Boot Configuration Data on your HP computer after encountering a BIOHD4 Error Code Boot Test Failed, follow these steps:

First, boot your computer using a Windows 7 installation disk or a system repair disk.

Navigate to the System Recovery Options menu by selecting your language preferences and clicking on “Repair your computer.”

Next, choose the operating system you want to repair and select “Command Prompt” from the list of recovery tools.

In the Command Prompt window, type the following command: bootrec /rebuildbcd and press Enter. This command will scan for Windows installations on your computer and allow you to add them to the Boot Configuration Data.

After the scanning process is complete, follow the on-screen instructions to add the Windows installations to the Boot Configuration Data.

Once the process is finished, type exit in the Command Prompt window to close it.

Finally, restart your computer and check if the BIOHD4 Error Code Boot Test Failed issue has been resolved.

Running a CHKDSK Scan

Running a CHKDSK Scan
Description CHKDSK (Check Disk) is a Windows utility that checks the integrity of your hard drive and fixes any errors it finds.
How to Run CHKDSK 1. Press the Windows key + X on your keyboard to open the Power User menu.
2. Click on Command Prompt (Admin) to open an elevated Command Prompt.
3. In the Command Prompt window, type “chkdsk C: /f /r” (replace C: with the drive letter you want to scan) and press Enter.
4. If prompted to schedule the scan for the next restart, type Y and press Enter.
5. Restart your computer to run the CHKDSK scan.
Results After the scan is complete, CHKDSK will display a summary of the scan results. If any errors were found and fixed, CHKDSK will report them.

Resetting Windows Components

To reset Windows components on your HP Pavilion computer after encountering the BIOHD4 Error Code Boot Test Failed, follow these steps:

1. Press the “Start” button on your keyboard, then type “cmd” in the search bar. Right-click on “Command Prompt” and select “Run as administrator.”

2. In the Command Prompt window, type sfc /scannow and press Enter. This will initiate a System File Checker scan to repair any corrupt system files.

3. After the scan is complete, restart your computer and check if the BIOHD4 error persists.

4. If the issue continues, return to the Command Prompt window and type dism /online /cleanup-image /restorehealth and press Enter. This command will repair the Windows image to resolve any underlying system issues.

5. Restart your computer once again and see if the error has been resolved. If not, you may need to perform additional troubleshooting steps or seek assistance from HP support.

Contacting Support

If you are experiencing the BIOHD4 Error Code Boot Test Failed on your HP Pavilion computer, and you have tried troubleshooting on your own without success, it may be time to contact support for assistance.

Contact HP Support: The best way to get help with the BIOHD4 Error Code Boot Test Failed issue is to reach out to HP Support directly. You can contact them via phone, email, or live chat on their website.

When contacting support, make sure to have your computer’s serial number and model number on hand. This will help the support team quickly identify your device and provide you with the appropriate assistance.

If you are unable to access your computer due to the error, you can try booting in Safe Mode or using the Command-line interface to contact support. Alternatively, you can use another device to reach out for help.

Once you have contacted support, provide them with a detailed description of the issue you are facing, including any troubleshooting steps you have already taken. This will help the support team diagnose the problem more efficiently.

If the support team is unable to resolve the issue remotely, they may recommend sending your computer in for repair. Follow their instructions carefully to ensure a smooth repair process.

F.A.Q.

What is error code biohd3?

Error code biohd3 typically indicates an issue with the hard drive or the data cables connecting it to the computer. To troubleshoot, ensure all cables and connections are secure and undamaged.

What does error code Biohd 8 mean?

Error code Biohd 8 typically indicates that the HP SMART diagnostic tool has detected potential hard drive failure. This could be due to damaged connections, overheating, or firmware issues.

What is error code biohd1 on hard drive?

Error code biohd1 on a hard drive is typically caused by a malfunctioning or corrupt hard drive. This issue can also be due to corrupt registry entries in the operating system. The best solution is to purchase a new hard drive for your computer or laptop.

How to Fix The Parameter Is Incorrect Issue In Windows

In this article, I will discuss how to fix the parameter is incorrect issue in Windows.

Understanding “The Parameter Is Incorrect” Error

If you encounter “The Parameter Is Incorrect” error on Windows, it may be due to issues with the data being processed. One way to fix this error is by running the CHKDSK utility to scan and repair disk errors. To do this, open Command Prompt as an administrator by searching for it in the Start menu, then type “chkdsk /f” followed by the drive letter of the disk you want to scan. Press Enter and follow the on-screen instructions to complete the process.

Another possible solution is to check if the error is caused by a specific file or folder. Try copying the files to a different location or renaming them to see if the error persists. If the error is related to a USB flash drive, try using a different USB port or connecting it to another computer to rule out hardware issues.

In some cases, the error may be caused by a corrupted file system. To fix this, you can use the Windows built-in tool called Disk Management to format the disk or partition in question. Right-click on the Start menu and select Disk Management, then right-click on the disk or partition and choose Format. Follow the on-screen instructions to complete the process.

Common Causes of the Error

  • Corrupted files or folders
  • Improperly connected external devices
  • Outdated drivers
  • Conflicting software or programs
  • Insufficient disk space

Initial Steps: Recovering Data from Affected Drives

When dealing with the “Parameter Is Incorrect” issue in Windows, the initial step is to attempt data recovery from the affected drives. To do this:

1. Connect the affected drive to your computer. This can be a hard disk drive, USB flash drive, SD card, or any other storage device.

2. Use a reliable data recovery software to scan the drive for any recoverable files. There are many tools available online for this purpose.

3. Select the files you want to recover and follow the software’s instructions to complete the data recovery process.

If the “Parameter Is Incorrect” issue is preventing you from accessing the drive, recovering the data first can help safeguard your important files before attempting any fixes.

Solutions to Correct the Error: System and Disk Repairs

Error Type Solution
System Repair 1. Run System File Checker tool to scan and repair corrupted system files.
2. Perform a System Restore to revert back to a previous working state.
3. Use the Deployment Imaging Servicing and Management (DISM) tool to repair Windows image files.
Disk Repair 1. Run Check Disk utility to scan and fix disk errors.
2. Use Disk Cleanup tool to free up disk space and optimize performance.
3. Perform a disk defragmentation to improve disk read/write speeds.

Adjusting System Settings to Prevent the Error

Windows system settings menu

To prevent the “Parameter Is Incorrect” error in Windows, you can adjust system settings by following these steps:

1. Check the Disk Drive: Make sure your hard disk drive or external storage device is functioning properly and doesn’t have any bad sectors that could be causing the error.

2. Verify File System: Ensure that the file system of the drive is compatible with Windows. You can do this by checking the properties of the drive in File Explorer.

3. Update Device Drivers: Make sure all your device drivers are up to date, as outdated drivers can sometimes cause errors like this. You can update drivers through the Device Manager in Windows.

4. Run System File Checker: Use the built-in System File Checker tool in Windows to scan for and repair any corrupted system files that may be causing the error.

Protecting Your Drive from Future Errors

To protect your drive from future errors, it is important to regularly check for any issues and take preventive measures. One way to do this is by running a disk check on your Windows system. This will help identify and fix any potential problems before they escalate.

Another important step is to ensure that your device drivers are up to date. Outdated drivers can cause compatibility issues and lead to errors on your drive. Regularly updating your drivers can help prevent these issues from occurring.

It is also recommended to regularly back up your important files to an external storage device. This will ensure that your data is safe in case of any drive errors or failures. By backing up your files, you can easily restore them without losing any important data.

Summary and Additional Tips

If you are facing “The parameter is incorrect” issue in Windows, follow these additional tips to resolve the problem. First, try checking the file system integrity by running the command ‘chkdsk /f’ in Command Prompt. This will scan your disk for errors and fix them.

If that doesn’t work, you can check for disk errors by running the command ‘sfc /scannow’ in Command Prompt. This will scan your system files for any errors and repair them.

Another helpful tip is to update your device drivers as outdated drivers can sometimes cause this issue. You can do this by going to Device Manager, right-clicking on the device, and selecting ‘Update driver’.

Lastly, if none of the above solutions work, you can try performing a system restore to a previous point where the issue was not present. This will revert your system back to a working state and hopefully resolve the problem.

Frequently Asked Questions

How to fix the parameter is incorrect when changing drive letter?

To fix the “parameter is incorrect” error when changing drive letter, you can try removing the virtual swap partition, rebooting your computer, changing the drive letter and path, and then adding the virtual swap partition back again.

What does it mean when parameter is incorrect?

When the parameter is incorrect, it typically means that the operating system has detected issues such as bad sectors or other problems with the drive, often caused by hard drive malfunctions.

How do I fix incorrect parameter error?

To fix an incorrect parameter error, you can perform a high-level formatting or quick format in Windows. This will reset the file system of the device, making it accessible again. Simply open File Explorer, right-click on the device showing the error, and select “Format”.

2024 Best Free Hard Drive Recovery Tips

In this article, I will share the best free hard drive recovery tips for 2024.

Understanding How Hard Drives Fail

Failed hard drive

Hard drives can fail due to a variety of reasons, including physical damage, logical errors, and prolonged use. One common cause of hard drive failure is data corruption, which can occur when files become corrupted or inaccessible. This can lead to data loss, which can be devastating if important files are not backed up.

Another common reason for hard drive failure is disk formatting, which can occur accidentally or as a result of a malware infection. When a hard drive is formatted, all data on the drive is erased, making it difficult to recover. It is important to regularly back up important files to prevent data loss in the event of a hard drive failure.

One way to recover data from a failed hard drive is to use a data recovery tool such as Disk Drill. This software can help you recover lost or corrupted files from a variety of storage devices, including hard drives, solid-state drives, and memory cards. It is important to stop using the hard drive immediately after it fails to prevent further damage.

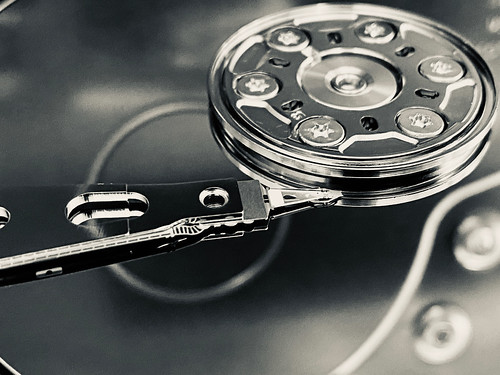
If you are unable to recover data using a data recovery tool, you may need to seek professional help. A data recovery service can help you recover data from a failed hard drive using specialized tools and techniques. They may need to open the hard drive in a cleanroom environment to prevent further damage to the drive.

Is Data Recovery Possible for Failed Drives?

Yes, data recovery is possible for failed drives in some cases. If your hard drive has crashed or failed, there are a few steps you can take to try and recover your data:

First, try using data recovery software like Disk Drill to scan the drive and attempt to retrieve your files. These programs can often recover data that has been lost due to disk formatting, corruption, or accidental deletion.

If software solutions don’t work, you may need to seek professional help. Data recovery services can often retrieve data from physically damaged drives using specialized equipment like cleanrooms and disk imaging tools.

It’s important to act quickly if you suspect a hard drive failure, as continued use of the drive can make data recovery more difficult or even impossible. Make sure to avoid further read/write operations on the drive to prevent any more data loss.

Additionally, always remember to back up your data regularly to avoid the stress of potential data loss in the future. Prevention is always better than trying to recover lost data after the fact.

Logical vs. Physical Damage: Recovery Options

When dealing with hard drive recovery, it’s important to understand the difference between logical and physical damage. Logical damage occurs when data is corrupted or lost due to issues like malware, file system errors, or accidental deletion. In contrast, physical damage involves actual hardware problems such as a damaged drive head or disk platter.

For logical damage, you may be able to recover your data using software tools or by restoring from a backup. Look for reputable programs that specialize in data recovery and follow their instructions carefully. If you have a backup, ensure it is up to date before attempting any recovery process.

In cases of physical damage, your best option may be to seek professional help from a data recovery service. These experts have the tools and knowledge to repair damaged hardware in a cleanroom environment. Attempting to fix physical damage yourself can further harm your drive and reduce the chances of successful recovery.

If you suspect physical damage but still want to try DIY recovery, be extremely cautious. Avoid using the drive to prevent further damage, and consider creating a disk image to preserve the current state of the drive before attempting any repairs.

Step-by-Step Guide to Recovering Data from Failed Drives

Step 1: Before attempting to recover data from a failed drive, make sure to stop using the drive immediately to prevent further damage.

Step 2: Download a reliable data recovery software such as Recuva, Disk Drill, or EaseUS Data Recovery Wizard. Install the software on a separate drive to avoid overwriting the lost data.

Step 3: Launch the data recovery software and follow the on-screen instructions to start the scanning process. Select the failed drive as the target location for the software to search for lost files.

Step 4: Once the scanning is complete, the software will display a list of recoverable files. Preview the files to ensure they are intact before proceeding with the recovery process.

Step 5: Select the files you want to recover and choose a safe location to save them. Avoid saving the recovered files back to the failed drive to prevent overwriting the data.

Step 6: After the recovery process is complete, make sure to back up your recovered files to prevent data loss in the future. Consider creating a disk image of the failed drive for additional protection.

Initial Damage Assessment Techniques

  • Inspect the Physical Drive:
    • Visually check for any physical damage on the hard drive.
    • Look for signs of water damage or burns on the drive.
  • Listen for Unusual Noises:
    • Power on the drive and listen for any clicking or grinding noises.
    • These noises can indicate a mechanical failure.
  • Check for Drive Recognition:
    • Connect the drive to a computer and see if it is recognized.
    • Check in Disk Management or BIOS for drive recognition.

Creating a Complete Drive Backup

To create a complete drive backup, download a reliable free hard drive recovery software onto your personal computer. Once the software is installed, open the application and select the option to create a full drive backup. Make sure to choose an external storage device with enough space to store the backup.

After selecting the external storage device, follow the on-screen instructions to start the backup process. This may take some time depending on the size of your hard drive. It is important to ensure that the backup is completed successfully before exiting the software.

Once the backup is complete, verify the backup files on the external storage device to ensure that all of your data has been successfully copied. It is recommended to perform regular backups to prevent data loss in case of a hard drive failure, ransomware attack, or other unexpected events.

Using Recovery Software for Data Retrieval

When attempting to retrieve data from a hard drive, using recovery software can be an effective solution. Make sure to follow these steps for successful data retrieval:

First, download and install a reputable data recovery software on a separate computer or external storage device to avoid further damage to the original hard drive.

Next, connect the affected hard drive to the computer where the recovery software is installed. Ensure that the computer recognizes the hard drive before proceeding with the data retrieval process.

Once the hard drive is connected, launch the data recovery software and follow the on-screen instructions to scan the drive for lost or corrupted files. Be patient, as the scanning process may take some time depending on the size of the hard drive.

After the scanning is complete, carefully review the list of recovered files and select the ones you want to retrieve. Make sure to save the recovered files to a different location to avoid overwriting any existing data on the hard drive.

Lastly, double-check the recovered files to ensure they are intact and accessible. If any files are still missing or corrupted, you may need to run the data recovery software again or seek professional help for further assistance.

Exploring Alternative Recovery Methods

When dealing with data corruption on your hard drive, one alternative recovery method is to utilize software tools designed for this purpose. These tools can help to recover lost or deleted files, even in cases of severe corruption.

If you suspect that the issue is related to a hardware failure, such as a malfunctioning hard disk drive or solid-state drive, it may be necessary to seek professional help. Attempting to recover data from a physically damaged drive on your own can cause further damage.

In cases where a power outage or ransomware attack has led to data loss, it is important to act quickly to prevent further damage. Disconnect the affected drive from the computer and seek assistance from a data recovery specialist.

For minor issues such as accidental deletion or file system corruption, using built-in tools like Disk Utility on MacOS or Check Disk on Windows can sometimes help to resolve the problem.

Checking the Recycle Bin for Lost Data

To check the Recycle Bin for lost data, follow these steps:

1. Open the Recycle Bin by double-clicking on the icon on your desktop.
2. Look through the files in the Recycle Bin to see if the lost data is there.
3. If you find the lost data, right-click on the file and select “Restore” to return it to its original location.
4. If you don’t see the lost data in the Recycle Bin, it may have been permanently deleted.
5. To recover permanently deleted files, you can use a data recovery software.

Restoring Data from Backup Solutions

If you have a backup solution in place, recovering your lost data can be relatively straightforward. The first step is to access your backup drive or service and locate the files you need to restore.

Next, carefully select the files you want to recover and ensure you have enough space on your current hard drive for the restored data.

Once you have identified the files and checked for available space, you can begin the restoration process. Depending on your backup solution, this may involve simply dragging and dropping files from the backup drive to your computer, or using a specific software interface to initiate the recovery.

Be patient during the restoration process, especially if you are dealing with a large amount of data. Allow the software or service to complete the transfer without interruption.

After the data has been successfully restored, take the time to verify that all the files are intact and accessible. It is also a good idea to create a new backup of the recovered data to prevent future loss.

Repairing Corrupted or Damaged Drives

If you are dealing with corrupted or damaged drives, there are several free methods you can try to recover your data.

One option is to try using a data recovery software such as Recuva or TestDisk. These programs can help you scan your drive and recover lost files.

Another method is to use the built-in Windows tool, Check Disk. You can run this tool by opening a command prompt and typing “chkdsk /f” followed by the drive letter you want to scan.

If your drive is physically damaged, you may need to seek professional help. However, you can try placing your hard drive in the freezer for a few hours to temporarily fix any mechanical issues.

To prevent future data loss, it’s important to back up your files regularly. Consider using an external hard drive or cloud storage for added security.

Utilizing CheckDisk for Drive Repair

CheckDisk is a powerful tool that can help repair drive issues on your computer. To utilize this tool, open a command prompt window by typing “cmd” in the search bar and selecting “Run as administrator.” Once the command prompt is open, type “chkdsk /f C:” (replace “C:” with the letter of the drive you want to repair) and press Enter.

CheckDisk will then scan the selected drive for errors and attempt to fix any issues it finds. It is important to note that running CheckDisk can take some time, so be patient and allow the process to complete.

If CheckDisk is unable to repair the drive, you may need to consider other options for data recovery. In some cases, it may be necessary to seek professional help to recover your files.

Fixing Windows Files to Repair Drive Issues

To fix Windows files and repair drive issues, run a System File Checker scan to search for and repair corrupted system files. Open Command Prompt as an administrator and type “sfc /scannow” to start the scan. Reboot your computer afterward to apply the repairs.

If the System File Checker scan doesn’t resolve the drive issues, try running a Check Disk scan. Open Command Prompt as an administrator and type “chkdsk /f C:” (replace C: with the letter of your drive) to check for and fix disk errors. Reboot your computer after the scan to complete the repairs.

In some cases, performing a Windows Update may also help resolve drive issues caused by software bugs or compatibility issues. Go to Settings > Update & Security > Windows Update and click “Check for updates” to install any available updates.

By fixing Windows files and repairing drive issues, you can prevent data loss and improve the overall performance of your computer. Regularly check and maintain your hard drive to ensure it functions properly and remains reliable for storing your important files.

Scanning for and Removing Viruses

When scanning for viruses on your hard drive, it is essential to use reliable antivirus software to ensure that your computer remains protected. Begin by running a full system scan to detect any potential threats lurking on your hard drive. It is important to update your antivirus software regularly to ensure that it can detect the latest threats.

If your antivirus software detects any viruses or malware on your hard drive, quarantine the infected files immediately to prevent them from causing further damage to your system. You can then delete or remove the infected files from your hard drive to eliminate the threat.

It is also recommended to schedule regular scans of your hard drive to proactively detect and remove any viruses or malware that may have infiltrated your system. This can help prevent potential data loss or system crashes caused by malicious software.

Preventing Future Data Loss

To prevent future data loss, it is important to regularly back up your files using an external hard drive or a cloud storage service. Set up automatic backups to ensure that your files are constantly being saved without any effort on your part.

It is also crucial to regularly check the health of your hard drive using diagnostic tools such as Self-Monitoring, Analysis and Reporting Technology (SMART). This will help you identify any potential issues before they lead to data loss.

In addition, protect your computer from power outages by using a surge protector or an uninterruptible power supply (UPS). Sudden power failures can cause data corruption and loss, so it is important to take precautions.

Avoid using your laptop or personal computer in extreme conditions, such as during a thunderstorm or in a dusty environment, as these factors can contribute to hard drive failure. Keep your computer in a clean, dry, and well-ventilated area to prevent overheating and other issues.

Lastly, be cautious when downloading files from the internet and opening email attachments, as these can contain malware that may lead to data loss. Use reliable antivirus software to protect your computer from infections and regularly update your operating system and applications to minimize security risks.

Understanding Hard Drive Failure Warning Signs

Crashed computer screen

Checking for Warning Signs: Regularly monitoring your hard drive for warning signs can help prevent potential data loss. Use diagnostic tools like SMART (Self-Monitoring, Analysis and Reporting Technology) to check the health of your hard drive. Pay attention to any error messages or warnings that pop up on your computer, as they could be early indicators of a failing drive. Backing up your important files regularly is also essential in case of hard drive failure.

Take Immediate Action: If you suspect your hard drive is failing, it’s important to take immediate action to prevent data loss. Backup all your important files to an external drive or cloud storage as soon as possible. Avoid using the computer until you have recovered your data to prevent further damage to the drive. Consider seeking professional help from a data recovery service if you are unable to retrieve your files on your own.

F.A.Qs

How can I recover my corrupted hard drive for free?

To recover your corrupted hard drive for free, you can download and install Disk Drill for Windows or Mac OS X. This software allows you to preview recoverable files for free and can recover up to 500 MB of data on the Windows version. Launch Disk Drill, select the corrupted hard drive, and click the “Search for lost data” button to begin the recovery process.

How much does it cost to recover data from a hard drive?

To recover data from a hard drive, the cost can range from $100 to $700 on average. The price varies depending on the extent of damage and the necessary steps to extract the data.

Can a hard drive be recovered?

A hard drive can only be successfully recovered at home if it has superficial damage that does not affect the internal components essential for data storage and retrieval, such as issues with the external casing.

How do I recover my entire hard drive?

To recover your entire hard drive, you can download and install data recovery software. Connect the hard drive to your computer, launch the software, select the hard drive, preview the files, and then recover them.

Oculus Rift Won’t Turn On: Easy Fixes & Troubleshooting

Having trouble getting your Oculus Rift to turn on? Here are some easy fixes and troubleshooting tips to help you out.

Charge and Check the Power Source

Power outlet with plug

Issue Possible Cause Solution
Charge Indicator Not Lighting Up Dead battery or faulty charging cable Try using a different charging cable or plug the device into a different power source
Device Not Turning On Power source issues Check if the power source is working properly and try plugging the device into a different outlet
Device Turning Off Unexpectedly Low battery or power source fluctuations Charge the device fully and make sure it is plugged into a stable power source

Examine and Clean the Proximity Sensor

Be careful not to press too hard while cleaning, as this could damage the sensor. Once the sensor is clean, try turning on your Oculus Rift again to see if the issue has been resolved.

If the problem persists, you may need to try restarting your headset or checking for any software updates that could be affecting its performance. If all else fails, consider reaching out to Oculus support for further assistance.

Reboot or Factory Reset the Device

To reboot or factory reset your Oculus Rift device, follow these steps:

Reboot the Device: Press and hold the power button on the headset for at least 10 seconds until it turns off. Then, press the power button again to turn it back on.

Factory Reset the Device: Go to the Settings menu on your Oculus app, select the device you want to reset, and then choose “Factory Reset.” Follow the on-screen instructions to complete the process.

If your Oculus Rift still won’t turn on after trying these fixes, consider contacting Oculus support for further assistance.

Update Software and Wait for Completion

To troubleshoot the issue of your Oculus Rift not turning on, start by ensuring that the software is up to date. Check for any available updates by navigating to the Settings menu and selecting the Update option. After initiating the update, wait for the process to complete before attempting to turn on your Oculus Rift again.

If updating the software does not resolve the issue, it may be helpful to restart your computer and the Oculus Rift device. This can sometimes reset any glitches or errors that are preventing the device from turning on properly. Additionally, try unplugging the device and then reconnecting it to your computer to see if that helps.

If these steps do not fix the problem, it may be necessary to contact Oculus Support for further assistance. They can provide additional troubleshooting steps or help you determine if there is a hardware issue that needs to be addressed.

Inspect Cables and Tracking Functionality

  • Check the cable connections
    • Ensure that all cables are securely plugged into the Oculus Rift headset and the computer.
    • Inspect the cables for any signs of damage, such as fraying or exposed wires.
    • Try using a different USB port on the computer to see if the issue is with the port.
  • Test the tracking functionality
    • Make sure that the Oculus Rift sensors are properly positioned and connected.
    • Check for any obstructions that may be blocking the sensors’ view of the headset.
    • Reset the tracking by unplugging and replugging the sensors.
    • Update the Oculus software to ensure that it is compatible with the sensors.

Seek Expert Support and Troubleshooting Guidance

If the issue persists, try restarting your computer and reinstalling the Oculus software.

FAQ

Why isn t my Oculus turning in?

My Oculus isn’t turning on because it may need a hard reboot. Hold down the Power button for more than 30 seconds and up to 60 seconds until you see that the LED light turns white. This method has been known to resolve the issue in many cases.

Why is my Oculus Rift not working?

Your Oculus Rift may not be working due to loose wire connections, damaged cables, or faulty connector pins. Try reseating and toggling the cable connections, checking for any physical damage, and swapping out the cables for known good ones to troubleshoot the issue.

How do you fix an Oculus that won’t turn on?

To fix an Oculus that won’t turn on, you can try doing a hard reboot by holding the power button for at least 10 seconds. This can help resolve issues like a black screen. You can also try booting using the bootloader menu.

Decline Code 43: Complete Guide for Merchants

In this guide, I will provide merchants with a comprehensive overview of Decline Code 43 and how to effectively manage and resolve this issue.

Understanding Hold Codes

Hold codes are used by issuing banks to flag suspicious or potentially fraudulent transactions. Hold Code 43 specifically refers to a decline due to suspected fraud. Merchants should be aware that hold codes can vary depending on the card network, such as Visa, Mastercard, Discover, or American Express.

It is important for merchants to understand the implications of hold codes, as they can impact the approval or decline of a transaction. If you receive a Hold Code 43, it is crucial to contact the issuing bank for more information and to verify the transaction with the customer.

Merchants should also be proactive in preventing fraud by verifying the customer’s identity and payment card information before processing a transaction. Utilizing fraud prevention tools and staying informed about the latest fraud trends can help merchants protect their business and customers.

Navigating Stolen Card Situations

If you encounter a Decline Code 43 situation, immediately contact the issuing bank to verify the payment card details. Make sure to ask for the reason behind the decline and gather all necessary information. Provide any requested documentation to the bank promptly.

If the bank confirms that the card has been reported stolen or lost, do not proceed with the transaction. Instead, advise the customer to contact their bank to resolve the issue. Additionally, retain all transaction details for your records and follow any procedures outlined by your payment processor.

Triggers and Responses for Decline Codes

  • Insufficient Funds: The customer does not have enough money in their account to cover the transaction.
  • Expired Card: The card used for the transaction has passed its expiration date.
  • Incorrect Information: The customer entered incorrect payment details, such as the wrong card number or CVV code.
  • Suspected Fraud: The transaction triggered a fraud alert from the card issuer.
  • Card Blocked: The card has been reported lost or stolen and has been blocked by the issuer.
  • System Error: There was a technical issue with the payment processing system.

Hard vs. Soft Declines: Knowing the Difference

When dealing with decline code 43, it’s important for merchants to understand the difference between hard and soft declines. Hard declines are typically due to issues with the payment card itself, such as an expired card or insufficient funds. On the other hand, soft declines are usually temporary issues that can be resolved, such as a network error or exceeded transaction limits.

It’s crucial for merchants to be able to differentiate between the two types of declines in order to effectively address the issue and provide a seamless payment experience for customers. Hard declines may require the customer to contact their bank or card issuer to resolve, while soft declines can often be resolved by simply reattempting the transaction.

Comprehensive Guide to Common Decline Codes

Decline Code Description
43 Stolen card
51 Insufficient funds
61 Exceeds withdrawal limit
65 Exceeds withdrawal frequency
78 Invalid card number

Frequently Asked Questions

What is card decline code 43?

Card decline code 43 indicates that the card has been reported as stolen. This code flags the card for pickup by the issuing bank and prevents it from being used for transactions.

What is the response code 43?

Response code 43 indicates that the customer’s card has been reported as stolen.

What is the error code 43 on a Visa card?

Error code 43 on a Visa card indicates that the card has been reported stolen and the transaction has been blocked by the issuing bank.

What are the card decline codes?

The card decline codes include codes such as “Refer to issuer,” “Invalid merchant,” “Do not honor,” and “Pick up card (fraud).”