Google Drive Backup Sync Issues Fix

Having trouble with Google Drive backup sync issues? Here’s how to fix them.

Understanding Google’s Backup and Sync Functionality

To understand Google’s Backup and Sync functionality, ensure that the application is correctly installed on your computer. Check the taskbar for the Backup and Sync icon to confirm it is running. Make sure your antivirus software, such as AVG, is not blocking the application. If you are facing issues with syncing, try restarting the application or your computer.

Access the application settings from the taskbar icon to troubleshoot any problems. Ensure you have a stable internet connection to sync your files properly.

Common Reasons for Sync Issues

  • Ensure that your device is connected to a stable internet connection.
  • Try restarting your router or modem to refresh the connection.

Clear Cache and Cookies

  • Open your web browser settings.
  • Clear your browsing data, including cache and cookies.

Update Google Drive

  • Check for any available updates for Google Drive.
  • Update the application to the latest version.

Pausing and Resuming the Sync Process

To pause the sync process in Google Drive Backup, locate the Backup and Sync icon in your system tray. Right-click on the icon and select Pause from the context menu. This will temporarily stop the syncing of your files. To resume the sync process, simply right-click on the icon again and select Resume. This will allow Backup and Sync to continue syncing your files to Google Drive.

Pausing and resuming the sync process can help troubleshoot any sync issues you may be experiencing with Google Drive Backup.

Restarting Backup and Sync

To restart Backup and Sync on your computer, follow these steps:

1. Click on the Backup and Sync icon in the system tray.

2. Select the three vertical dots in the top right corner of the window.

3. Choose “Quit Backup and Sync.”

4. Wait a few seconds, then reopen Backup and Sync from the Start menu.

5. Enter your Google Account login information when prompted.

6. Check if the synchronization issues have been resolved.

Running the App as Administrator

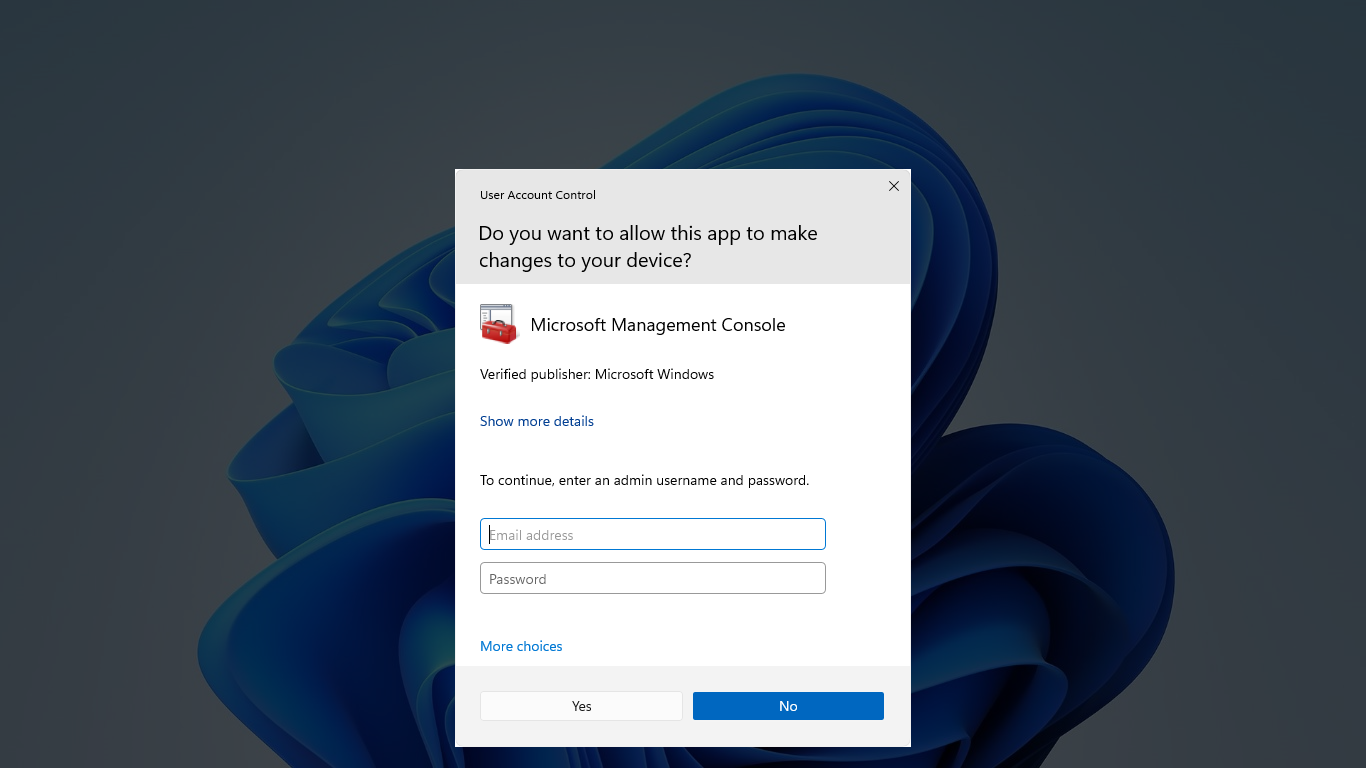
Windows UAC prompt

To run Google Drive Backup Sync as Administrator, follow these steps:

1. Right-click on the Google Drive Backup Sync icon on your desktop or in the Start menu.
2. Select “Run as administrator” from the context menu.
3. If prompted, enter your administrator credentials to proceed.
4. This will grant the program the necessary permissions to perform its tasks without any issues.

Running the app as an administrator can help resolve any permission-related problems you may encounter during the backup process. This simple workaround can ensure a smooth and successful backup sync operation.

Resigning In to Your Account

To resolve Google Drive Backup Sync issues, start by resigning into your account. This simple step can often reestablish the connection and fix any syncing problems you may be experiencing. Make sure you are connected to the internet and enter your login credentials accurately. If you are still facing issues after resigning in, consider checking your internet connection, clearing cache and cookies, or restarting your computer. Sometimes a simple logout and login can resolve many syncing issues.

Rebooting Your Device

To fix Google Drive Backup Sync issues, a quick solution is to reboot your device. This simple step can help refresh your system and resolve any temporary glitches that may be causing the problem.

Simply restart your computer or mobile device by clicking on the “Restart” button in the menu or using the power button to shut down and then turn it back on.

After rebooting, try syncing your files again to see if the issue has been resolved. If the problem persists, you may need to troubleshoot further or seek additional assistance from technical support.

Reinstalling Backup and Sync

To reinstall Backup and Sync, follow these steps:

1. Uninstall the current Backup and Sync application from your computer.

2. Download the latest version of Backup and Sync from the official Google website.

3. Install the new Backup and Sync application on your computer.

4. Sign in with your Google Account credentials to set up the application.

If you encounter any issues during the reinstallation process, make sure to check your internet connection, firewall settings, and antivirus software to ensure they are not interfering with the installation.

Adjusting Firewall and Antivirus Settings

To adjust firewall and antivirus settings for Google Drive backup sync issues, first open your antivirus program. Look for options related to firewall settings or program permissions. Make sure Google Drive is listed as a trusted application within the antivirus program. Check the firewall settings to ensure Google Drive has the necessary permissions to connect to the internet. If needed, create an exception or rule within the firewall settings to allow Google Drive to communicate.

After making these adjustments, restart your computer to apply the changes. If the sync issues persist, consider temporarily disabling the firewall or antivirus to see if that resolves the problem.

Checking and Changing Sync Folder Settings

To check and change sync folder settings in Google Drive Backup Sync, follow these steps:

1. Open Google Drive Backup Sync on your computer.
2. Click on the three dots menu icon in the top right corner.
3. Select “Preferences” from the dropdown menu.
4. Click on the “Google Drive” tab.
5. Here, you can check and change the sync settings for your folders.
6. Adjust the sync settings as needed to ensure your files are backed up properly.
7. Once you’ve made your changes, click “OK” to save them.

Identifying and Marking Unsynced Files

To identify and mark unsynced files in Google Drive, navigate to your Google Drive folder on your computer. Look for any files with a red “X” icon next to them – these are the unsynced files. Right-click on the unsynced file and select “View details. ” This will provide more information on why the file is not syncing. You can then try to troubleshoot the issue by checking your internet connection, ensuring there are no firewall or antivirus programs blocking the sync, or restarting the Google Drive application. Once the issue is resolved, the unsynced file should automatically start syncing again.

Managing Cloud Storage Space

To manage your cloud storage space effectively on Google Drive, it’s important to regularly check and delete any unnecessary files or folders. Review your files and delete any duplicates or outdated items to free up space. Additionally, consider upgrading your storage plan if you consistently run out of space. Enable file compression or use external storage options to reduce the amount of data stored on your Google Drive. Regularly syncing your files with the cloud can also help prevent storage overflow.

Solutions for Syncing Across Multiple Devices

To resolve sync issues across multiple devices on Google Drive, make sure you have the latest version of the backup and sync software installed. Check for any updates and install them if necessary. If you have AVG AntiVirus installed, make sure it is not blocking Google Drive’s connection by adding Google Drive to the exceptions list. Additionally, check your firewall settings to ensure that Google Drive is allowed to access the internet. If the problem persists, try rebooting your devices and routers to refresh the connection.

Following these steps should help in resolving any syncing issues you may encounter.

Manual Upload and Download Techniques

To manually upload files to Google Drive, open your Google Drive account and click on the “New” button. Then select “File upload” and choose the file you want to upload from your computer. For downloading files from Google Drive, right-click on the file you want to download and select “Download. ” Alternatively, you can select the file and click on the download icon in the toolbar. These manual techniques can help you troubleshoot any syncing issues you may be experiencing with Google Drive Backup Sync.

Make sure to check your internet connection, firewall settings, and available storage space to ensure smooth syncing.

F.A.Qs

Is Google discontinuing Backup and sync?

Google is discontinuing Backup and Sync.

What replaced Google backup and sync?

Google Drive for desktop has replaced Google Backup and Sync.

Why is my Google Drive not syncing?

Your Google Drive may not be syncing because there is not enough storage space in your plan to save all the source files. Upgrading your storage plan should resolve this issue.

Why did Google get rid of Backup and sync?

Google got rid of Backup and Sync in order to streamline the user experience by combining it into a single desktop app.

Why can’t I install Windows 10? Fix installation errors

Having trouble installing Windows 10? Learn how to fix common installation errors in this article.

Incompatible Hardware Issues

  • Check hardware compatibility:
    • Make sure your computer meets the minimum system requirements for Windows 10.
    • Check for any incompatible hardware devices connected to your computer.
  • Update drivers:
    • Visit the manufacturer’s website for each hardware component and download the latest drivers compatible with Windows 10.
    • Install the updated drivers and restart your computer.
  • Disable incompatible hardware:
    • If you have identified any incompatible hardware devices, disable them in the Device Manager.
    • Right-click on the device, select “Disable,” and restart your computer.

Incompatible Software Challenges

Incompatible software can often be the culprit behind installation errors when trying to install Windows 10. This can occur when certain programs on your computer are not compatible with the operating system you are trying to install.

One way to fix this issue is to uninstall any incompatible software before attempting to install Windows 10. This will help prevent any conflicts that may arise during the installation process.

Additionally, make sure to check for any updates or patches for the incompatible software that may make it compatible with Windows 10.

If you are still experiencing issues, try booting your computer from a USB flash drive with the Windows 10 installation files. This can sometimes bypass compatibility issues that arise during a traditional installation.

Installation Errors and Failures

Check System Requirements: Make sure your computer meets the minimum system requirements for Windows 10 installation. Ensure you have enough disk space and RAM for the operating system to run smoothly.

Use a Bootable USB Drive: Create a bootable USB drive with the Windows 10 installation files and use it to install the operating system. This can help avoid errors that may occur during installation from a disk.

Check Hardware Compatibility: Ensure that all your computer hardware is compatible with Windows 10. Check for driver updates or firmware upgrades that may be needed for proper installation.

Run Windows Update: Before installing Windows 10, make sure your current operating system is fully updated. This can help prevent installation errors and failures.

Disable Antivirus Software: Sometimes antivirus software can interfere with the installation process. Temporarily disable your antivirus program before installing Windows 10 to avoid any conflicts.

Partition Your Disk: If you encounter errors during installation, try partitioning your disk and installing Windows 10 on a separate partition. This can sometimes resolve installation failures.

Check for Errors: If you receive error messages during installation, note them down and look for solutions online. Microsoft’s support website is a good resource for troubleshooting installation errors.

Seek Professional Help: If you’re still unable to install Windows 10 despite trying these steps, consider seeking help from a professional technician. They may be able to diagnose and fix the issue.

Driver and Activation Problems

Check for Driver Updates: Ensure that all your device drivers are up to date before attempting to install Windows 10. Outdated drivers can cause compatibility issues during installation.

Activate Windows: Make sure you have a valid product key to activate Windows 10. Without a proper activation key, you may encounter installation errors.

Run Windows Update: Before installing Windows 10, run Windows Update on your current operating system to ensure you have all the latest patches and updates installed.

If you are still facing installation errors after trying these solutions, you may need to seek further assistance from Microsoft support or a technical expert.

Windows Update and Upgrade Issues

If you are encountering difficulties installing Windows 10, you may be experiencing some common installation errors related to Windows Update and upgrade processes. One of the most effective ways to resolve these issues is by troubleshooting and fixing any underlying problems.

Firstly, ensure that your computer meets the minimum system requirements for Windows 10 installation. Check that your hardware components, such as your CPU, RAM, and storage, are compatible with the new operating system.

If you are facing errors during the installation process, try running the Windows Update Troubleshooter to identify and resolve any update-related issues. This tool can help fix problems with Windows Update that may be preventing you from installing Windows 10 successfully.

Additionally, you can try resetting Windows Update components to clear any corrupted files or settings that might be causing installation errors. To do this, open Command Prompt as an administrator and run the necessary commands to reset Windows Update components.

Another common solution to installation errors is to perform a clean boot of your system before attempting to install Windows 10. This will help eliminate any conflicts with third-party software that could be interfering with the installation process.

For more specific error messages or issues, refer to Microsoft’s official support website for troubleshooting guides and solutions. Following these steps can help you fix installation errors and successfully install Windows 10 on your device.

Disk Partitioning and Formatting Challenges

Partitioning tool interface.

Another challenge could arise if the disk is not recognized by the system during the installation process. In this case, you may need to check the connections of the disk to ensure it is properly connected to the computer. Additionally, updating the device drivers for the disk may help resolve any recognition issues.

It is also important to ensure that the disk is set as the primary boot device in the BIOS settings. This will allow the system to boot from the disk during the installation process. You can access the BIOS settings by restarting the computer and pressing the designated key (often F2 or Delete) during startup.

Minimum Requirements Check

To ensure a successful installation of Windows 10, it is crucial to meet the minimum requirements for the operating system. Check that your computer meets the following specifications:

– A minimum of 1 gigahertz (GHz) processor or faster
– 1 gigabyte (GB) RAM for 32-bit or 2 GB for 64-bit
– 16 GB of free hard disk space for 32-bit or 20 GB for 64-bit
– DirectX 9 graphics with WDDM 1.0 driver

If your system falls short of any of these requirements, you may encounter errors during installation. Additionally, ensure that your computer is running a valid, licensed version of Windows 7 or Windows 8.1 to be eligible for the free upgrade to Windows 10.

If your system meets the minimum requirements and you are still experiencing installation errors, try the following troubleshooting steps:

– Make sure you have a stable internet connection throughout the installation process.
– Disable any antivirus software or third-party security applications that may interfere with the installation.
– Check for and install any available Windows updates before attempting to install Windows 10.
– Try creating a bootable USB flash drive with the Windows 10 installation files and boot from it to perform a clean installation.

Uninstalling Language Packs

To uninstall language packs in Windows 10, follow these steps:

1. Open the Control Panel.

2. Click on “Clock, Language, and Region.”

3. Click on “Language.”

4. Select the language pack you want to uninstall.

5. Click on “Options.”

6. Click on “Remove.”

7. Confirm that you want to uninstall the language pack.

Disabling Third-party Antivirus Software

To fix installation errors when trying to install Windows 10, one common issue could be third-party antivirus software interfering with the process. Disable any third-party antivirus software before attempting to install Windows 10. This can help prevent conflicts and allow the installation to proceed smoothly.

If you are unsure how to disable your antivirus software, you can usually find an option to do so within the program itself. Look for settings or preferences related to real-time protection or scanning and temporarily turn off these features.

After disabling the third-party antivirus software, try installing Windows 10 again. If the installation is successful, you can re-enable your antivirus software once Windows 10 is up and running.

Rebuilding the Boot Configuration Data

To fix installation errors preventing you from installing Windows 10, you may need to rebuild the Boot Configuration Data. This can help resolve issues with booting up your system and completing the installation process.

1. Start by booting your computer from a Windows installation disc or USB drive. This will allow you to access the necessary tools to rebuild the Boot Configuration Data.

2. Once you’re in the Windows Setup screen, navigate to the “Repair your computer” option. This will take you to a menu where you can access advanced troubleshooting tools.

3. Select “Troubleshoot” and then “Command Prompt.” This will open a command line interface where you can enter the commands to rebuild the Boot Configuration Data.

4. In the Command Prompt window, type the following commands:
“`
bootrec /fixmbr
bootrec /fixboot
bootrec /rebuildbcd
“`

5. After running these commands, restart your computer and see if you can now successfully install Windows 10. Rebuilding the Boot Configuration Data can often fix installation errors related to booting up the system.

Repairing Corrupted System Files

If you are facing issues with installing Windows 10 due to corrupted system files, you can try repairing the corrupted files using the System File Checker tool. This built-in tool in Windows scans for and restores corrupted system files.

To run the System File Checker tool, open Command Prompt as an administrator by searching for it in the Start menu, right-clicking on it, and selecting “Run as administrator.” Then, type in the command “sfc /scannow” and press Enter. This will initiate the scan and repair process for corrupted system files.

After the scan is complete, restart your computer and try installing Windows 10 again. If you continue to face installation errors, you may need to perform a clean installation of Windows 10 to ensure a fresh start without any corrupted files affecting the installation process.

Remember to back up your important files before performing a clean installation to avoid losing any data. You can also create a bootable USB drive with the Windows 10 installation files to easily reinstall the operating system.

Utilizing Windows Repair Services

If you are facing issues with installing Windows 10, Windows Repair Services can help fix installation errors. First, ensure that your computer meets the minimum requirements for Windows 10 installation, including sufficient disk space and compatible hardware.

Next, try running the Windows Update Troubleshooter to fix any issues with the update process. You can also check for Windows updates manually to ensure that your system is up to date.

If you continue to experience problems, run the System File Checker tool to scan and repair corrupted system files. Additionally, you can perform a clean boot to troubleshoot any software conflicts that may be causing installation errors.

If all else fails, consider using the Windows Repair Tool to automatically diagnose and fix common installation issues. Remember to back up your data before attempting any repairs to avoid potential data loss.

Running Installation in Clean Boot

To fix installation errors when trying to install Windows 10, one helpful step is to run the installation in Clean Boot mode. This will help eliminate any potential conflicts with third-party software or drivers that may be causing the installation to fail.

To run the installation in Clean Boot mode, follow these steps:

1. Press the Windows key + R to open the Run dialog box.
2. Type “msconfig” and press Enter to open the System Configuration window.
3. Go to the Services tab and check the box next to “Hide all Microsoft services.”
4. Click on “Disable all” to disable all non-Microsoft services.
5. Go to the Startup tab and click on “Open Task Manager.”
6. Disable all startup items in Task Manager.
7. Close Task Manager and click “OK” on the System Configuration window.
8. Restart your computer and try to install Windows 10 again.

By running the installation in Clean Boot mode, you can troubleshoot and fix any issues that may be preventing the installation from completing successfully. This method can help you identify and resolve any conflicts with third-party software or drivers, allowing you to successfully install Windows 10.

Addressing Common and 0xC1900101 Errors

Another common issue that can prevent Windows 10 installation is disk formatting problems. If your hard drive is not formatted correctly, it may cause errors during the installation process. Make sure to properly format your disk before attempting to install Windows 10.

If you are upgrading from Windows 7 or Windows 8.1, it is important to check for any software patches or updates that may be required for a successful installation. Additionally, ensure that your computer hardware is compatible with Windows 10.

If you are still encountering errors during the installation process, try creating a boot disk and performing a clean install of Windows 10. This can help resolve any lingering issues with your current installation.

F.A.Q.

Why I Cannot install Windows 10 on my PC?

I Cannot install Windows 10 on my PC because of various reasons, including insufficient disk space on the drive where the installation is being attempted.

Why is my program not installing Windows 10?

Your program may not be installing Windows 10 due to compatibility issues. Try running the Program Compatibility Troubleshooter in Settings > Update & Security > Troubleshoot to see if it can resolve the installation problem.

Why did Windows 10 fail to install?

Windows 10 failed to install due to a corrupted boot configuration data (BCD), causing issues with the boot process.

Why can’t I upgrade to Windows 10?

You can’t upgrade to Windows 10 because your PC may not have enough available space for the installation. Check if your machine meets the minimum requirements for Windows 10.

Can’t Access Control Panel Windows 10: 7 Ways to Fix

Having trouble accessing your Control Panel in Windows 10? Here are 7 ways to fix the issue.

Scan for Malware and Viruses

1. Use Microsoft Defender Antivirus to scan your computer for any malicious software. This built-in security tool can help identify and remove any potential threats that may be affecting your system.

2. Check for any suspicious files or programs that could be causing the issue. Look for any unfamiliar or potentially harmful files that may have been downloaded onto your computer.

3. Run a full system scan using a reputable antivirus software. This will help to detect and remove any malware or viruses that may be impacting your system’s performance.

By scanning for malware and viruses, you can ensure that your system is clean and free from any harmful software that may be causing issues with accessing Control Panel in Windows 10.

Adjust Display Settings and Resolution

Adjust Display Settings and Resolution

If you are having trouble accessing the Control Panel in Windows 10, you may need to adjust your display settings and resolution. Here are some steps you can take to fix the issue:

  1. Right-click on the desktop and select “Display settings”.
  2. Under the “Scale and layout” section, adjust the slider to change the size of text, apps, and other items.
  3. Click on “Advanced display settings” to change the resolution of your display.
  4. Try changing the resolution to a lower setting to see if that helps with accessing the Control Panel.
  5. Alternatively, you can try changing the resolution to a higher setting to see if that resolves the issue.
  6. After making any changes, click “Apply” and then “Keep changes” to save your settings.
  7. Restart your computer to apply the changes and see if you can now access the Control Panel.

Modify Registry and System Files

1. Run System File Checker: This built-in tool can scan and repair corrupted system files that may be causing issues with accessing the Control Panel.

2. Use Windows Registry Editor: You can try editing the registry to fix any errors related to the Control Panel. Be careful when making changes in the registry as it can impact system stability.

3. Reboot Your Computer: Sometimes a simple reboot can resolve issues with accessing the Control Panel in Windows 10.

4. Check for Computer Viruses: Use Microsoft Defender Antivirus to scan your system for any potential threats that may be preventing you from accessing the Control Panel.

5. Update Windows: Make sure your system is up to date by checking for the latest Windows updates. This can help resolve any bugs or issues with system files.

6. Use PowerShell: You can use PowerShell to run commands that may help in fixing issues with accessing the Control Panel.

7. Seek Help from a System Administrator: If you are unable to resolve the issue on your own, consider seeking help from a system administrator or IT professional for further assistance.

Explore Alternative Access Methods and System Repair

If you are experiencing issues accessing the Control Panel in Windows 10, there are alternative access methods you can try. One way to access the Control Panel is by using the Run dialog box. Simply press the Windows key + R on your keyboard to open the Run dialog box, then type “control” and press Enter. This will open the Control Panel.

Another way to access the Control Panel is through the Settings menu. Click on the Start menu and select Settings. From there, click on System and then About. You will see an option to access the Control Panel.

If you are still unable to access the Control Panel, you may need to repair your system files using the System File Checker tool. Open a Command Prompt as an administrator and type “sfc /scannow” and press Enter. This will scan and repair any corrupted system files.

If you suspect that a computer virus may be causing the issue, run a full system scan using your antivirus software. You can also try restarting your computer in Safe Mode to troubleshoot the issue without interference from third-party software.

By exploring these alternative access methods and system repair options, you can hopefully resolve the issue of not being able to access the Control Panel in Windows 10.

FAQs

Why can’t I access Control Panel Windows 10?

I can’t access Control Panel in Windows 10 due to possible system file corruption. To fix this issue, you can run an SFC scan by right-clicking the Start button and selecting Windows PowerShell (Admin) to run it as an administrator. Then, type in the command sfc/scannow and press Enter.

How do I force open Control Panel?

To force open Control Panel, you can use the Run command dialog box. Press Win + R, type cmd, press Ctrl + Shift + Enter to open an elevated Command Prompt, then type control panel and press Enter.

How do I restore the Control Panel in Windows 10?

To restore the Control Panel in Windows 10, you can search for it in the search box next to the Start button on the taskbar and select Control Panel (Desktop app) from the results. Then search for Recovery in the Control Panel and select Recovery > Open System Restore > Next.

How do I unblock Control Panel in Windows 10?

To unblock Control Panel in Windows 10, you need to ensure that access to control panel and settings app is enabled. Select the enabled option, click on apply, and then click on OK.

Hotmail Not Opening: Fixes for Recent Browser Issues

Having trouble accessing Hotmail due to recent browser issues? Here are some fixes to help you get back online.

Check Internet Connection

  • Restart your modem and router:
    • Unplug both your modem and router from the power source.
    • Wait for 30 seconds before plugging them back in.
    • Check if your internet connection has been restored.
  • Connect to a different network:
    • If you are using a Wi-Fi connection, try connecting to a different network to see if the issue is with your current network.
    • You can also try using an Ethernet cable to connect directly to your modem to rule out any Wi-Fi issues.
  • Run a speed test:
    • Visit a website that offers internet speed tests, such as speedtest.net.
    • Run the test to check if your internet connection speed is within the expected range.
    • If your speed is significantly lower than usual, contact your internet service provider for assistance.

Update Outlook or Browser

If you are experiencing issues with Hotmail not opening in your browser, it may be due to compatibility issues with your browser or outdated software. To fix this problem, make sure to update your Outlook or browser to the latest version.

Update your browser: If you are using Google Chrome, click on the three dots in the top right corner of the browser window. Select “Help” and then “About Google Chrome” to check for and install any available updates.

Update Outlook: If you are using Microsoft Outlook, open the program and click on “File” in the top left corner. Select “Office Account” and then “Update Options” to check for and install any available updates.

If updating your software does not resolve the issue, try clearing your browser cache and cookies. This can help to refresh your browser and solve any temporary issues that may be causing Hotmail not to open properly.

Additionally, make sure that you are entering the correct email address and password when trying to log in to your Hotmail account. If you have forgotten your password, you can reset it through the “Forgot password” link on the login page.

Repair or Remove Corrupted Emails

Email Action
Email 1 Repair
Email 2 Remove
Email 3 Repair

Clear App Cache or Browser Cache

If Hotmail is not opening on your browser, one potential fix is to clear the app cache or browser cache.

To clear the cache on your browser, open your browser settings and navigate to the option to clear browsing data. Select the option to clear cache or temporary files and cookies. This will remove any stored data that could be causing issues with accessing Hotmail.

If you are using the Hotmail app on a mobile device, you can clear the app cache by going to the settings menu on your device. Look for the option to manage apps, then find the Hotmail app and select the option to clear the cache. This will remove any temporary data stored by the app that could be causing problems.

After clearing the cache on your browser or app, try accessing Hotmail again to see if the issue has been resolved. If not, you may need to try other troubleshooting steps to fix the problem.

Check and Update Third-Party Apps

To ensure that third-party apps are not causing issues with Hotmail not opening in your browser, you should regularly check for updates. Outdated apps may not be compatible with the latest browser versions, leading to login or loading problems.

Check for updates: Open the app store on your device and look for any pending updates for third-party apps that you use to access Hotmail. Updating these apps may resolve any compatibility issues causing Hotmail not to open.

If you are using Hotmail on a computer, check for updates for your web browser. Make sure you are using the latest version to ensure smooth functionality.

Update third-party apps: Once you have identified any outdated apps, proceed to update them to the latest version available. This can help resolve any issues that may be preventing Hotmail from opening properly.

By regularly checking and updating third-party apps, you can ensure that Hotmail functions correctly in your browser without any unexpected issues. This simple step can help you avoid login problems and ensure a seamless email experience.

Reset or Recover Account Password

If you are having trouble accessing your Hotmail account due to a forgotten password, you can easily reset or recover it. Here are the steps to do so:

1. Visit the Hotmail login page and click on the “Forgot password?” link.

2. Enter your email address and follow the prompts to verify your identity.

3. You may be asked to answer security questions, enter a verification code sent to your phone or email, or provide other forms of verification.

If you are still unable to reset or recover your password, you can contact Hotmail customer support for further assistance.

Reinstall or Add Account Again

If you’re experiencing issues with Hotmail not opening in your browser, one quick fix you can try is reinstalling or adding your account again. This can help refresh the connection and resolve any potential login problems.

To reinstall your Hotmail account, first sign out of your current account. Then, delete the account from your browser settings. After that, re-add the account by entering your login credentials and following the on-screen instructions.

If you’re using a mobile device, such as an iPhone or Android, you can also try removing and re-adding your Hotmail account in the email app settings. This can help refresh the connection and resolve any login issues you may be experiencing.

By reinstalling or adding your Hotmail account again, you can potentially resolve any recent browser issues that may be preventing you from accessing your emails. If the problem persists, you may want to consider contacting Microsoft support for further assistance.

Use a VPN or Check for Software Updates

If you are having trouble opening Hotmail in your web browser, one potential fix is to use a VPN to bypass any regional restrictions or network issues that may be causing the problem. By connecting to a VPN server in a different location, you can access Hotmail with a different IP address and potentially resolve the issue.

Another solution to consider is checking for software updates on your device. Outdated software can sometimes cause compatibility issues with websites like Hotmail. Make sure your web browser, operating system, and any relevant applications are up to date to ensure smooth functionality.

It is also a good idea to clear your browser’s cache and cookies to eliminate any temporary data that may be causing conflicts with Hotmail. This can help refresh your browser and improve its performance when accessing the website.

If you are still experiencing issues with Hotmail not opening, you may want to try accessing it from a different device or network to see if the problem is localized to a specific device or connection. Additionally, reaching out to Microsoft support for further assistance may be necessary if the problem persists.

F.A.Q.

Why will my Hotmail not open?

Your Hotmail may not be opening due to corrupted cache files in the app. Try clearing the Hotmail app cache to resolve this issue.

Is there a problem with Hotmail today?

There are no current issues with Hotmail today. The last outage occurred on Wednesday, April with a duration of approximately 15 hours.

Why won’t my Hotmail load new emails?

Your Hotmail may not be loading new emails due to issues with your internet connection, inbox settings, or spam folder. Whitelisting senders, emptying the deleted items folder, updating your browser, and protecting against malware can help resolve this issue.

Event ID 6008 Fix: Unexpected System Shutdown Detected

In my experience, encountering Event ID 6008 indicating an unexpected system shutdown can be frustrating.

Symptoms and Description

Symptoms: If you are experiencing unexpected system shutdowns on your Windows computer, you may encounter Event ID 6008 in the Event Viewer. This error indicates that the system was unexpectedly shutdown without properly shutting down the operating system.

Description: When the Event ID 6008 error occurs, it can be due to various reasons such as power outages, hardware issues, overheating, or software conflicts. The error message will be logged in the Event Viewer with the date and time of the unexpected shutdown.

To fix this issue: Check the system for any overheating issues by ensuring proper ventilation and cleaning out any dust from the components. Update your device drivers and run Windows Update to ensure that your system is up to date. If the problem persists, consider checking the power supply unit and graphics card for any issues.

Common Causes

  • Turn off the computer and unplug it from the power source.
  • Open the computer case to check for dust buildup on the fans and heatsinks.
  • Clean any dust using compressed air or a soft brush.
  • Ensure that all fans are functioning properly.

Update Drivers

  • Open Device Manager by pressing Win+X and selecting Device Manager.
  • Look for any devices with a yellow exclamation mark, indicating a driver issue.
  • Right-click on the device and select Update Driver.
  • Follow the on-screen instructions to update the driver.

Check for Software Conflicts

  • Open Task Manager by pressing Ctrl+Shift+Esc.
  • Go to the Startup tab and disable any unnecessary programs that may be causing conflicts.
  • Restart the computer and check if the issue persists.

Checking Your Hardware

A computer with open hardware panel

Check the connections of your hardware components, including the power supply unit, graphics card, and CPU fan. Make sure everything is securely plugged in and functioning properly.

If you suspect any issues with your hardware, consider running diagnostic tests to identify any potential problems. Look for any error messages or warnings related to the hardware in the Windows Event Viewer.

Update your device drivers to ensure compatibility and stability. Visit the manufacturer’s website to download the latest drivers for your hardware components.

In addition, monitor the temperature of your computer components using software tools. Overheating can cause unexpected system shutdowns, so make sure your system stays within safe temperature limits.

If you continue to experience unexpected shutdowns after checking your hardware, consider seeking professional assistance to further diagnose and resolve the issue.

Rolling Back Drivers

To roll back drivers in Windows, follow these steps:

1. Press Windows key + X and select Device Manager from the menu.
2. Locate the device with the driver you want to roll back, right-click on it, and select Properties.
3. Go to the Driver tab and click on Roll Back Driver if the option is available.

If the Roll Back Driver option is grayed out or unavailable, you may need to manually download and install an older version of the driver from the manufacturer’s website. Be sure to restart your computer after rolling back the driver to apply the changes.

Updating Windows

Windows update screen

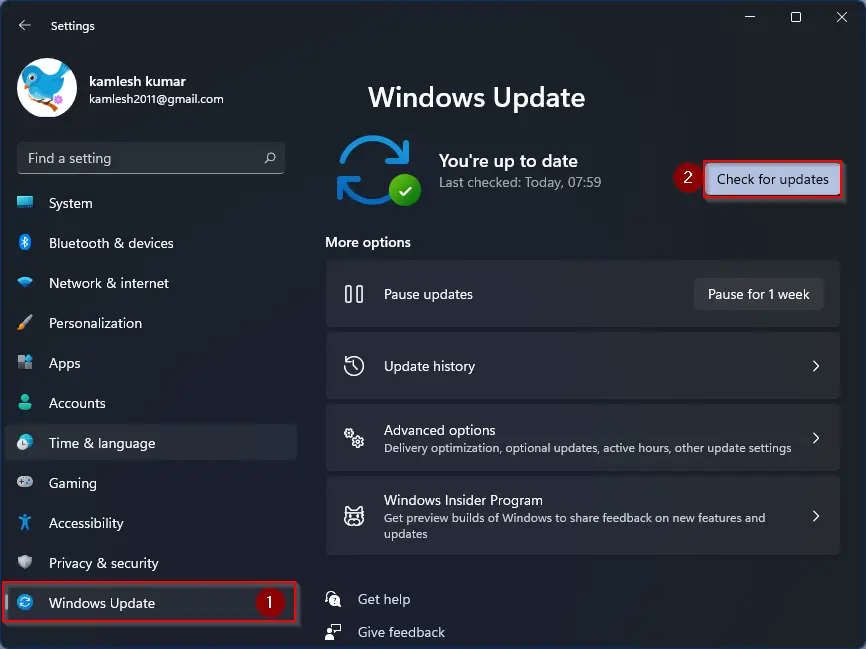
To fix the Event ID 6008 error indicating an unexpected system shutdown, a common solution is to update Windows. Ensure that your operating system is running on the latest version by checking for updates through the Windows Update feature in the Control Panel. It is important to keep your system up-to-date to prevent unexpected shutdowns and maintain system stability.

Updating Windows can help resolve compatibility issues with device drivers and fix any bugs that may be causing the unexpected shutdowns. Additionally, make sure to check the Windows Task Scheduler to ensure that no tasks are interfering with the system shutdown process.

If updating Windows does not fix the issue, consider troubleshooting other potential causes such as hardware failures or overheating. Check the power supply unit, heat sink, and other components for any signs of malfunction. It may also be helpful to run a virus scan to rule out any malware-related issues.

By keeping your system updated and addressing potential hardware issues, you can resolve the Event ID 6008 error and prevent unexpected system shutdowns in the future.

Uninstalling Feature Updates

To uninstall feature updates, follow these steps:

1. Open the Control Panel by searching for it in the Windows search bar.
2. Click on “Programs” and then select “Programs and Features.”
3. In the list of installed programs, find the feature update you want to uninstall.
4. Right-click on the update and select “Uninstall.”
5. Follow the on-screen instructions to complete the uninstallation process.

If you encounter any issues during the uninstallation process, you can refer to the Microsoft Windows library files for troubleshooting tips or contact Microsoft support for further assistance.

Additional Information and Hotfix Details

Additional Information Hotfix Details
Article Title Event ID 6008 Fix: Unexpected System Shutdown Detected
Issue Description Unexpected system shutdowns are being detected with Event ID 6008
Cause Various reasons such as power failure, hardware issues, or software conflicts
Resolution Apply the latest hotfix or updates to address the issue
Hotfix Number KB1234567

FAQs

What is Windows Event Log Code 6008?

Windows Event Log Code 6008 is used to indicate unexpected shutdowns in the system.

What is the event code 6008 in Corsair?

The event code 6008 in Corsair indicates that the previous system shutdown was unexpected.

What is event ID 600?

Event ID 600 is logged in Active Directory when a process is initiated by a different user’s authority.

Why Netflix Won’t Work on My Computer: How to Fix Issues

I’ve been having trouble getting Netflix to work on my computer lately. Here are some tips for fixing common issues.

Restart Your Computer

If Netflix isn’t working on your computer, it could be due to a variety of reasons. One simple solution to try is restarting your computer. This can help refresh the system and potentially resolve any issues that may be causing Netflix to not work properly.

First, save any work you have open and close all applications. This will ensure that you don’t lose any important data when you restart your computer.

Next, click on the Start menu and select the option to restart your computer. Allow your computer to shut down completely and then turn it back on.

Once your computer has restarted, try accessing Netflix again to see if the issue has been resolved. If Netflix still isn’t working, you may need to try other troubleshooting steps.

Restarting your computer is a quick and easy way to potentially fix issues with Netflix not working on your computer. It’s always a good idea to start with simple solutions like this before moving on to more complex troubleshooting steps.

Clear the Netflix Cookie from Your Web Browser

To clear the Netflix cookie from your web browser, follow these steps:

1. Open your web browser and go to the Netflix website.

2. Sign in to your Netflix account if you are not already signed in.

3. Locate the menu in your web browser. This is typically found in the top right corner of the browser window.

4. Click on the menu button to open the drop-down menu.

5. Look for the option that allows you to access your browser’s settings or preferences.

6. Find the section that deals with cookies or browsing data.

7. Look for an option to clear cookies or browsing data.

8. Select the option to clear cookies or browsing data.

9. Confirm that you want to clear the cookies from your web browser.

10. Close your web browser and then reopen it.

11. Go back to the Netflix website and try to access your account again.

Check Your Internet Connection

If you are connected to Wi-Fi, try restarting your router and modem. Sometimes a simple reset can fix connectivity issues. Additionally, make sure your internet service provider is not experiencing any outages in your area.

If you are using a wired connection, check the Ethernet cable to ensure it is securely connected to both your computer and the modem or router. You may also want to try using a different Ethernet port on your router or switch.

It is also a good idea to check your DNS settings. Your DNS settings translate domain names into IP addresses that your computer can understand. If your DNS settings are incorrect, it can cause connectivity issues with certain websites, including Netflix.

To check your DNS settings, go to your network settings on your computer and look for the DNS configuration. You can try using Google’s public DNS (8.8.8.8 and 8.8.4.4) or your ISP’s DNS servers.

If you are still experiencing issues, try accessing Netflix on a different device, such as a smartphone or smart TV. If Netflix works on other devices but not on your computer, the issue may be with your computer hardware or software.

In some cases, clearing your browser’s cache and cookies can help resolve connectivity issues. You can do this by going to your browser settings and clearing your browsing data.

If none of these solutions work, you may want to contact your internet service provider for further assistance. They may be able to troubleshoot the issue and provide additional guidance on how to fix the problem.

Sign Out of Netflix

1. Click on your profile icon in the top right corner of the Netflix homepage.

2. Select “Account” from the drop-down menu.

3. Scroll down to the “Settings” section and click on “Sign out of all devices”.

4. Confirm your decision to sign out and you will be logged out of Netflix on all devices.

If you are experiencing issues with Netflix on your computer, signing out and then signing back in may help resolve any glitches or errors. Remember to also check your internet connection, clear your browser cache, and make sure your browser and computer are up to date.

Restart Your Home Network

Step 1: Start by turning off your computer, smart TV, router, and any other devices connected to your home network.

Step 2: Unplug the power cords from your router and modem. Wait for about 30 seconds before plugging them back in.

Step 3: Turn on your modem first and wait for it to fully boot up. Then, turn on your router and wait for it to establish a connection.

Step 4: Once your router and modem are up and running, turn on your computer and smart TV.

By restarting your home network, you are essentially refreshing the connection between your devices and the internet. This can help resolve any network issues that may be causing Netflix to not work properly on your computer.

If restarting your home network does not fix the issue, you may want to check for any software updates on your computer or smart TV. Sometimes, outdated software can cause compatibility issues with streaming services like Netflix.

Additionally, clearing your browser’s cache and cookies can also help resolve any streaming issues. Cookies are small pieces of data stored on your computer by websites, and clearing them can sometimes fix connectivity problems with streaming services.

Improve Your Wi-Fi Signal

Another way to boost your Wi-Fi signal is by reducing interference from other devices. Avoid placing your router near electronic devices like microwaves or cordless phones that can interfere with the signal. You can also try changing the channel on your router to minimize interference from other nearby networks.

Updating your router’s firmware can also help improve your Wi-Fi signal. Check the manufacturer’s website for any available updates and follow the instructions to install them. Regularly updating your router’s firmware can help improve its performance and stability.

Consider investing in a Wi-Fi extender or a mesh network system to boost your Wi-Fi signal in areas with poor coverage. Wi-Fi extenders can help amplify your existing signal, while mesh networks can provide seamless coverage throughout your home.

If you’re still experiencing issues with your Wi-Fi signal, you may need to contact your internet service provider for assistance. They can help troubleshoot any problems with your connection and ensure that your Wi-Fi signal is strong and stable.

Contact Your Internet Service Provider

When you contact your ISP, be sure to provide them with details about the specific issue you are experiencing. This could include error messages, loading issues, or any other symptoms that may be occurring when you try to use Netflix on your computer.

Your ISP may be able to provide you with troubleshooting steps to help resolve the issue. This could involve resetting your router, checking for any network outages in your area, or making sure that your DNS settings are correct.

If your ISP is unable to resolve the issue, they may recommend contacting Netflix directly for further assistance. Netflix may be able to provide you with additional troubleshooting steps specific to their service.

By contacting your ISP, you can ensure that you are taking the necessary steps to address any connectivity issues that may be preventing Netflix from working on your computer.

Clear the Netflix App Data

To clear the Netflix app data on your computer, follow these steps:

1. First, open the Netflix app on your computer.

2. Next, navigate to the settings or preferences section of the app.

3. Look for an option that allows you to clear the app data. This may be located under a section labeled “Storage” or “Advanced settings.”

4. Click on the option to clear the app data. This will remove any cached data or temporary files that may be causing issues with the app.

5. Once the app data has been cleared, close the Netflix app and restart your computer.

6. After restarting your computer, open the Netflix app again and see if the issue has been resolved. If not, you may need to try other troubleshooting steps or contact Netflix support for further assistance.

Go to Netflix.com on a Web Browser

If Netflix is not working on your computer, one common issue could be related to your web browser. To fix this problem, try accessing Netflix on a different web browser. Open a different web browser, such as Google Chrome, Mozilla Firefox, or Microsoft Edge, and go to Netflix.com. This can help determine if the issue is specific to your current browser.

Another potential reason why Netflix is not working on your computer could be related to your internet connection. Check your internet connection by opening a new tab and navigating to a different website to see if it loads properly. If other websites are loading fine, then the issue may not be related to your internet connection.

If Netflix still does not work on your computer, try clearing your browser’s cache and cookies. In your web browser, go to the settings or preferences section and find the option to clear browsing data. Make sure to select the option to clear cookies and cache, then restart your browser and try accessing Netflix again.

Sometimes, the issue may be related to outdated browser software. Check if your web browser is up to date by going to the browser’s settings and looking for the option to update the software. Updating your browser to the latest version can often resolve compatibility issues with websites like Netflix.

If none of these solutions work, the problem may be related to your computer’s hardware or software. Try restarting your computer to see if that resolves the issue. If Netflix still does not work after restarting, you may need to troubleshoot further or seek assistance from a technical support professional.

In some cases, the issue may be related to Netflix itself or the servers that host the streaming service. Check the Netflix status page or social media accounts to see if there are any reported outages or technical issues. If Netflix is experiencing problems on their end, you may need to wait for them to resolve the issue before you can access the service on your computer.

Check for Special Characters

1. Scan the text for any unusual symbols or characters that may not be recognized by the system. Special characters like %, &, *, $, and # can sometimes cause issues with compatibility. It’s important to ensure that all text in the article is in standard alphanumeric format.

2. Use a text editor or word processing software to review the entire article. Look for any instances where special characters are used inappropriately or where they may be interfering with the functioning of the text. Make sure to remove or replace any special characters that are not necessary for the content.

3. Pay special attention to any URLs or hyperlinks within the article. Sometimes special characters can cause links to break or malfunction. Check that all URLs are properly formatted and do not contain any special characters that could be causing issues with the functionality of the links.

4. Test the article on different devices and browsers. Sometimes special characters may display differently depending on the device or browser being used. By testing the article on multiple platforms, you can identify any issues related to special characters that may be causing problems with the display or functionality of the content.

Reload the Netflix App

To reload the Netflix app, simply close the app completely and then reopen it. This can be done by clicking on the “X” button to close the app and then launching it again from your desktop or Start menu.

If the issue persists, you can also try clearing the cache and cookies on your browser. This can help remove any stored data that may be causing conflicts with the Netflix app.

To clear the cache and cookies, go to your browser’s settings and look for the option to clear browsing data. Select the option to clear cache and cookies, then restart your browser and try opening Netflix again.

Another potential solution is to restart your computer. Sometimes a simple reboot can help resolve technical issues with applications like Netflix.

If you are still experiencing issues with Netflix on your computer, you may also want to check for any software updates that may be available for your operating system or browser. Keeping your software up to date can help ensure compatibility with streaming services like Netflix.

In some cases, the issue may be related to your internet connection. Make sure your Wi-Fi is working properly and that you have a strong signal. You may also want to try restarting your router to see if that helps resolve the issue.

If none of these solutions work, you may want to contact Netflix support for further assistance. They may be able to provide additional troubleshooting steps or help you identify any underlying problems with your account or device.

Restart the Netflix App

To restart the Netflix app on your computer, follow these steps:

1. Close the Netflix app completely by exiting out of it. This will ensure that the app is fully closed and not running in the background.

2. Wait a few moments before reopening the Netflix app. This will give the app time to fully shut down before you restart it.

3. Reopen the Netflix app on your computer. You can do this by clicking on the Netflix icon or opening the app through your web browser.

4. Sign back in to your Netflix account if prompted. Sometimes logging out and logging back in can help resolve any issues with your account.

5. Try playing a video on Netflix to see if the issue has been resolved. If the app is still not working, you may need to try other troubleshooting steps.

Reset the Netflix App

To reset the Netflix app, first close the app completely. This means exiting out of the app and making sure it is not running in the background.

Next, clear the cache of the Netflix app. This can help remove any temporary files that may be causing issues. You can do this by going to the settings of the app and finding the option to clear the cache.

Once you have cleared the cache, you can also try uninstalling and reinstalling the Netflix app. Sometimes, reinstalling the app can help fix any glitches or bugs that may be causing the issue.

If resetting the app does not work, you can also try restarting your computer and your router. Sometimes, a simple restart can help resolve connectivity issues that may be affecting Netflix.

If Netflix still does not work after resetting the app and restarting your devices, you may want to check your internet connection. Make sure you have a strong and stable connection to ensure that Netflix can stream properly.

In some cases, the issue may be with the Netflix servers themselves. You can check the Netflix status page to see if there are any reported outages or issues that may be affecting the service.

Reinstall the Netflix App

1. First, uninstall the Netflix app from your computer. To do this, go to the Control Panel and select “Uninstall a program.” Find Netflix in the list of installed programs and click on it to uninstall.

2. Once the app is uninstalled, go to the official Netflix website and download the latest version of the app for your computer.

3. After downloading the app, install it on your computer by following the on-screen instructions.

4. Once the app is installed, open it and log in to your Netflix account. Your account information should still be saved, so you won’t need to re-enter it.

5. Try playing a video on Netflix to see if the issue has been resolved. If Netflix is now working on your computer, the reinstallation was successful.

Reinstalling the Netflix app can often fix issues with playback, buffering, or other problems you may be experiencing. If reinstalling the app does not resolve the issue, you may need to look into other potential causes, such as internet connectivity problems or browser settings.

Remember to regularly update the Netflix app on your computer to ensure you have the latest features and bug fixes. This can help prevent future issues with the app not working properly on your computer.

Check the Date and Time Settings

To fix issues with Netflix not working on your computer, one of the first things you should check is the date and time settings. Incorrect date and time settings can cause errors when trying to access streaming services like Netflix.

Check the date and time settings on your computer:
– Go to your computer’s settings or control panel
– Look for the date and time settings
– Make sure the date and time are correct for your time zone

If the date and time settings are incorrect, adjust them accordingly and then try accessing Netflix again. This simple fix may resolve the issue and allow you to enjoy your favorite shows and movies without any interruptions.

It’s important to regularly check and update the date and time settings on your computer to ensure that all online services work properly. By taking this simple step, you can avoid common issues like Netflix not working and enjoy a seamless streaming experience on your computer.

Test Your Internet Connection

WiFi signal strength meter

If you are experiencing issues with Netflix not working on your computer, it could be due to a poor internet connection. Check your internet speed using an online speed test tool. This will give you an idea of the download and upload speeds you are getting.

If your internet speed is below the recommended speed for streaming Netflix, you may need to contact your internet service provider to upgrade your plan.

Another common issue that can cause Netflix to not work on your computer is a problem with your Wi-Fi connection. Restart your router by unplugging it for 30 seconds and then plugging it back in. This can help reset the connection and resolve any issues.

Check your Wi-Fi signal strength on your computer. If the signal is weak, try moving closer to the router or using an Ethernet cable for a more stable connection.

If you are still experiencing issues with Netflix not working on your computer, it may be due to a DNS or name server issue. Change your DNS settings to Google’s public DNS (8.8.8.8 and 8.8.4.4) or Cloudflare’s DNS (1.1.1.1). This can help improve your internet connection and resolve any DNS-related problems.

In some cases, the issue may be with your computer hardware or software. Make sure your computer meets the minimum requirements for streaming Netflix and update your operating system and web browser to the latest versions.

Deactivate and Reactivate the Netflix App

To deactivate and reactivate the Netflix app, follow these steps:

1. First, close the Netflix app on your computer.
2. Next, open the app settings or preferences on your computer.
3. Look for the option to deactivate the app or sign out of your account.
4. Click on the deactivate or sign out option to log out of your Netflix account.
5. Once you have signed out, close the app completely.
6. Reopen the Netflix app on your computer.
7. Sign back in to your Netflix account with your username and password.
8. Try playing a video to see if the issue has been resolved.

Deactivating and reactivating the Netflix app can often help fix common issues such as playback errors, buffering problems, or login issues. If the problem persists, you may need to troubleshoot your internet connection or check for any updates to the Netflix app on your computer.

Restore Your Default Connection Settings

First, navigate to your computer’s network settings. This can usually be found in the Control Panel or System Preferences, depending on your operating system.

Next, look for an option to reset your network settings to their default configuration. This may be labeled as “Reset network settings” or something similar.

Click on this option and follow any prompts to confirm that you want to reset your network settings. Your computer will then revert back to its default network configuration.

Once the reset is complete, try accessing Netflix again to see if the issue has been resolved. If not, you may need to restart your computer or router to ensure the changes take effect.

By restoring your default connection settings, you can help troubleshoot and fix any issues that may be causing Netflix to not work properly on your computer. This simple step can often resolve connectivity issues and get you back to streaming your favorite shows and movies in no time.

Contact the Device Manufacturer

Computer with a manufacturer's contact information displayed

Alternatively, you can visit the manufacturer’s website and look for troubleshooting guides or FAQs related to Netflix compatibility. Check for software updates or patches that may address the issue. Sometimes, outdated software can cause streaming problems, so make sure your device is running the latest version.

If the issue persists, consider resetting your device to factory settings to eliminate any potential software conflicts. This should be done as a last resort, as it will erase all data on your device. Make sure to back up any important files before proceeding.

In some cases, the problem may be related to your internet connection. Check your network settings and ensure that your device is connected to a stable Wi-Fi network. You can also try restarting your router or modem to refresh the connection.

If the issue is still not resolved, reach out to Netflix customer support for further assistance. They may be able to provide additional troubleshooting steps or escalate the issue if it is related to their service.

By contacting the device manufacturer and following these steps, you should be able to resolve any issues preventing Netflix from working on your computer.

Clear the System Cache

Step Instructions
1 Close all open browser windows and applications.
2 Press Ctrl + Shift + Delete on your keyboard to open the Clear browsing data window.
3 Select the time range for which you want to clear the cache (e.g. “Last hour”, “Last 24 hours”, “All time”).
4 Check the box next to “Cached images and files” or similar option.
5 Click on the “Clear data” button to clear the cache.
6 Restart your browser and try accessing Netflix again.

If clearing the cache does not resolve the issue, you may need to try other troubleshooting steps or contact Netflix support for further assistance.

Frequently Asked Questions

Why is my Netflix not working even though it’s connected?

Your Netflix may not be working even though it’s connected due to issues with your internet connection. Check for any internet outages in your area, troubleshoot common router or modem problems, and ensure that your network settings are correct. Restart or reset your network connection if needed.

Is there a problem with Netflix UK?

There is no problem with Netflix UK at the moment.

How do I get Netflix to work on my computer?

To get Netflix to work on your computer, you can visit netflix.com using a supported web browser or download the Netflix app for Windows. Make sure your computer and browser meet the system requirements to avoid any issues.

Why is Netflix not working on PC?

Why is Netflix not working on PC?

Ensure that the Netflix app is updated on both your laptop and PC. Outdated apps can sometimes cause issues. Check the Microsoft Store on Windows or the App Store/Google Play Store on your laptop for any available updates for the Netflix app.
Oculus Rift Won’t Turn On: Easy Fixes & Troubleshooting

Having trouble getting your Oculus Rift to turn on? Here are some easy fixes and troubleshooting tips to help you out.

Charge and Check the Power Source

Power outlet with plug

Issue Possible Cause Solution
Charge Indicator Not Lighting Up Dead battery or faulty charging cable Try using a different charging cable or plug the device into a different power source
Device Not Turning On Power source issues Check if the power source is working properly and try plugging the device into a different outlet
Device Turning Off Unexpectedly Low battery or power source fluctuations Charge the device fully and make sure it is plugged into a stable power source

Examine and Clean the Proximity Sensor

Be careful not to press too hard while cleaning, as this could damage the sensor. Once the sensor is clean, try turning on your Oculus Rift again to see if the issue has been resolved.

If the problem persists, you may need to try restarting your headset or checking for any software updates that could be affecting its performance. If all else fails, consider reaching out to Oculus support for further assistance.

Reboot or Factory Reset the Device

To reboot or factory reset your Oculus Rift device, follow these steps:

Reboot the Device: Press and hold the power button on the headset for at least 10 seconds until it turns off. Then, press the power button again to turn it back on.

Factory Reset the Device: Go to the Settings menu on your Oculus app, select the device you want to reset, and then choose “Factory Reset.” Follow the on-screen instructions to complete the process.

If your Oculus Rift still won’t turn on after trying these fixes, consider contacting Oculus support for further assistance.

Update Software and Wait for Completion

To troubleshoot the issue of your Oculus Rift not turning on, start by ensuring that the software is up to date. Check for any available updates by navigating to the Settings menu and selecting the Update option. After initiating the update, wait for the process to complete before attempting to turn on your Oculus Rift again.

If updating the software does not resolve the issue, it may be helpful to restart your computer and the Oculus Rift device. This can sometimes reset any glitches or errors that are preventing the device from turning on properly. Additionally, try unplugging the device and then reconnecting it to your computer to see if that helps.

If these steps do not fix the problem, it may be necessary to contact Oculus Support for further assistance. They can provide additional troubleshooting steps or help you determine if there is a hardware issue that needs to be addressed.

Inspect Cables and Tracking Functionality

  • Check the cable connections
    • Ensure that all cables are securely plugged into the Oculus Rift headset and the computer.
    • Inspect the cables for any signs of damage, such as fraying or exposed wires.
    • Try using a different USB port on the computer to see if the issue is with the port.
  • Test the tracking functionality
    • Make sure that the Oculus Rift sensors are properly positioned and connected.
    • Check for any obstructions that may be blocking the sensors’ view of the headset.
    • Reset the tracking by unplugging and replugging the sensors.
    • Update the Oculus software to ensure that it is compatible with the sensors.

Seek Expert Support and Troubleshooting Guidance

If the issue persists, try restarting your computer and reinstalling the Oculus software.

FAQ

Why isn t my Oculus turning in?

My Oculus isn’t turning on because it may need a hard reboot. Hold down the Power button for more than 30 seconds and up to 60 seconds until you see that the LED light turns white. This method has been known to resolve the issue in many cases.

Why is my Oculus Rift not working?

Your Oculus Rift may not be working due to loose wire connections, damaged cables, or faulty connector pins. Try reseating and toggling the cable connections, checking for any physical damage, and swapping out the cables for known good ones to troubleshoot the issue.

How do you fix an Oculus that won’t turn on?

To fix an Oculus that won’t turn on, you can try doing a hard reboot by holding the power button for at least 10 seconds. This can help resolve issues like a black screen. You can also try booting using the bootloader menu.

LockAppHost.exe Windows 10: What is it and How to Fix

LockAppHost.exe is a process in Windows 10 that can sometimes cause issues for users. In this article, I will explain what LockAppHost.exe is and how to fix any problems it may be causing on your system.

File Information and Resource Intensity

File Information Resource Intensity
File Name LockAppHost.exe
File Location C:\Windows\SystemApps\Microsoft.LockApp_cw5n1h2txyewy
File Size Variable, typically around 1 MB
File Type Executable File
Resource Usage Low to Moderate

Resolving High Memory Usage Issues

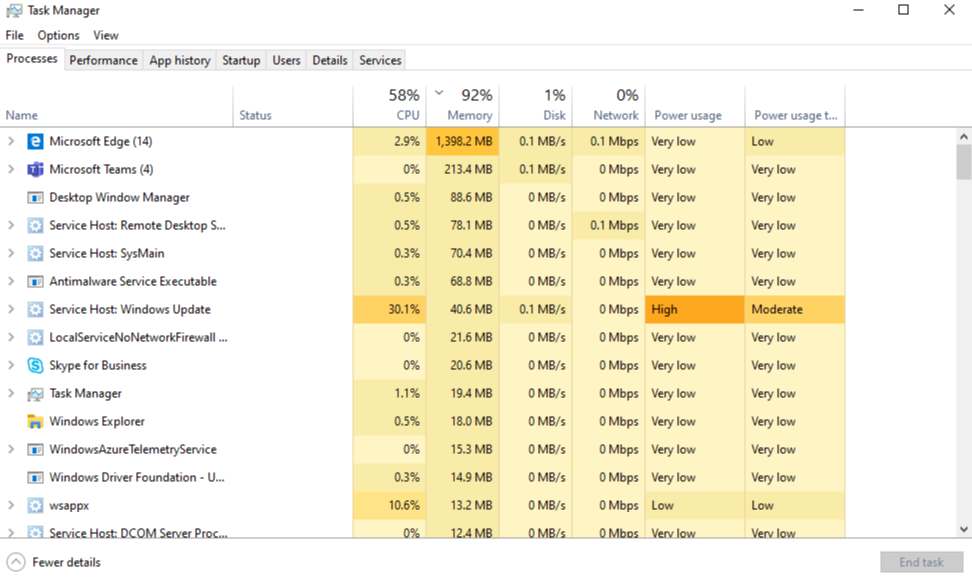
Task Manager showing high memory usage

To resolve high memory usage issues related to LockAppHost. exe in Windows 10, try closing unnecessary applications running in the background using the Task Manager. You can also scan your system for spyware, malware, or adware that may be causing the problem. Additionally, check for any available patches or updates for your operating system that could address the issue.

Make sure to run a full antivirus scan on your computer to ensure it is not infected. If the problem persists, you may need to reinstall the LockAppHost. exe file or perform a system file check.

Identifying and Removing Malware

  • Run a Full System Scan with Antivirus Software:
    • Open Antivirus Software and initiate a Full System Scan.
    • Follow the software’s instructions to remove any detected malware.
  • Use Windows Defender Offline:
    • Search for Windows Security in the Windows search bar.
    • Click on Virus & Threat Protection and select Scan Options.
    • Choose Windows Defender Offline Scan and follow the instructions.
  • Manually Remove Malware:
    • Open Task Manager by pressing Ctrl+Shift+Esc.
    • Identify any suspicious processes and End Task on them.
    • Search for LockAppHost.exe in the Windows search bar and delete any suspicious files associated with it.

Personalizing and Disabling the Lock Screen

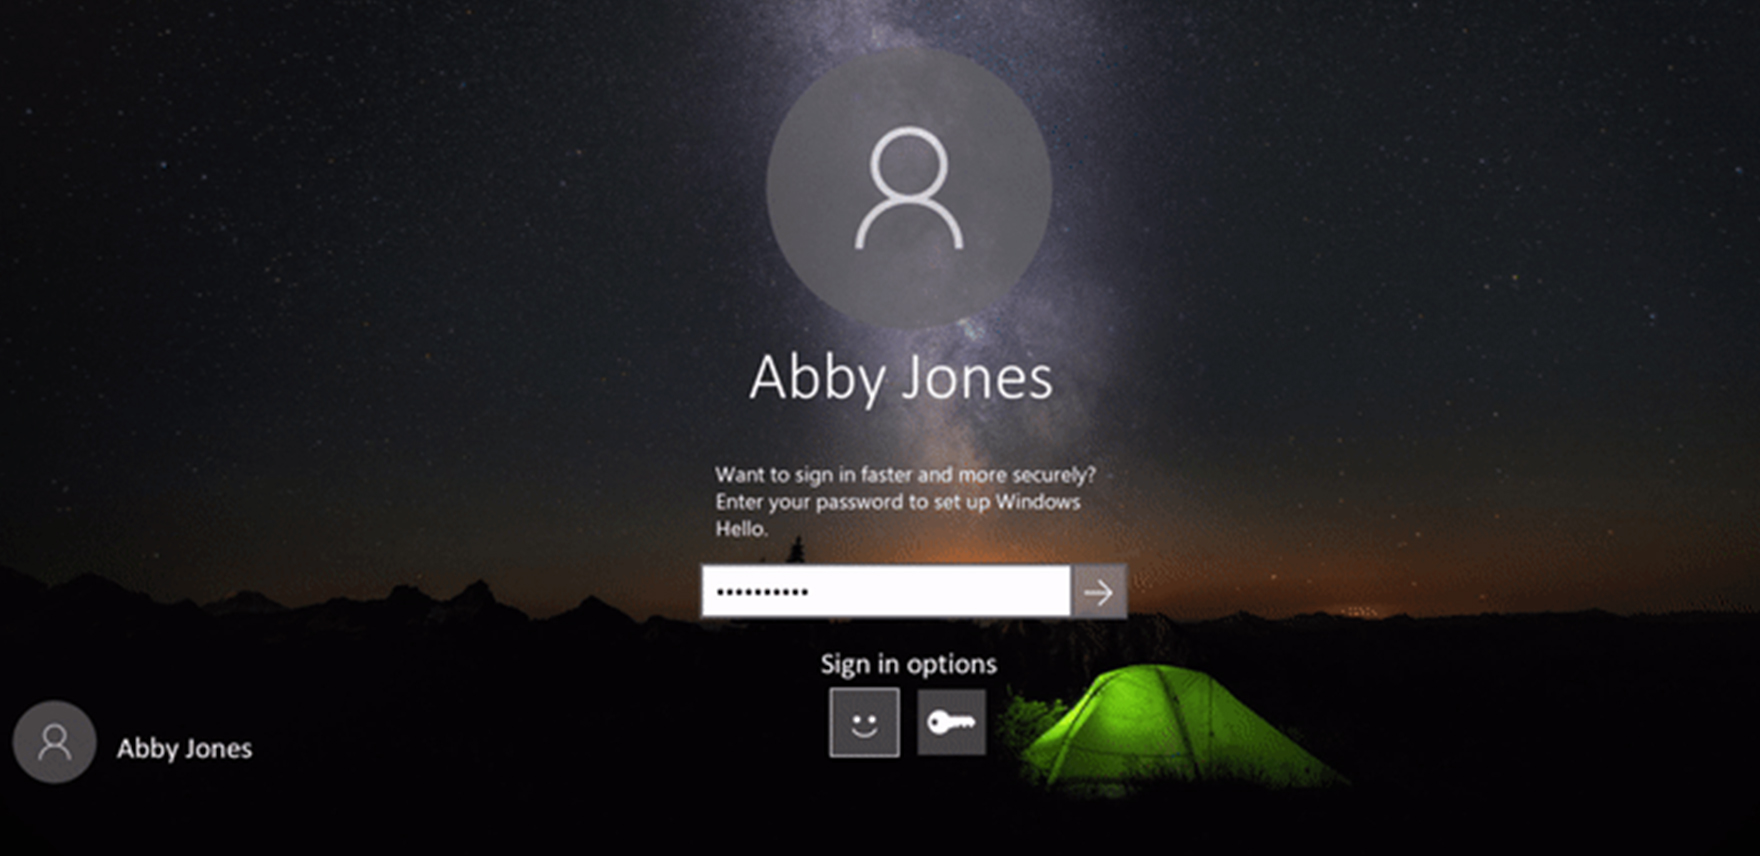
Windows lock screen customization options

To personalize or disable the lock screen in Windows 10, you can easily make changes in the settings. To personalize the lock screen, go to the Settings menu, then Personalization, and finally Lock screen. Here you can choose your desired background image or slideshow. To disable the lock screen, press the Windows key + R, type “regedit,” and hit Enter. Navigate to HKEY_LOCAL_MACHINE\SOFTWARE\Policies\Microsoft\Windows and create a new key named “Personalization. ” Then create a DWORD value named “NoLockScreen” and set it to 1.

Now your lock screen will be disabled.

FAQ

What is lock app?

Lock app is a Windows file that creates a graphical interface over the locked screen when the computer is idle for an extended period of time.

How do I lock a program in Windows 10?

To lock a program in Windows 10, you can set up parental controls for a specific user account. This will allow you to control which apps can be accessed.

How do you lock the screen on Windows 10?

To lock the screen on Windows 10, you can simply press the Windows logo key + L.

How do I remove the password from my lock screen laptop?

To remove the password from your laptop’s lock screen, you can access the settings and disable the password requirement for logging in. This will allow you to bypass the password prompt when turning on your laptop.

Fix Safari Not Responding on Mac – Top Solutions

Having Safari freeze and become unresponsive on your Mac can be frustrating. Here are the top solutions to fix this issue.

Force Quit and Restart

If Safari on your Mac is not responding, a quick fix is to force quit the browser and then restart it. To force quit Safari, press Command + Option + Esc to bring up the Force Quit Applications window. Select Safari from the list and click on the “Force Quit” button.

After force quitting Safari, click on the Apple menu in the top left corner of your screen and select Restart to reboot your Mac. Once your Mac has restarted, open Safari again and see if the issue has been resolved.

If Safari continues to not respond, you may need to clear the cache and cookies. To do this, go to the Safari menu bar and select Clear History and Website Data. Choose the time range you want to clear and click on “Clear History”.

You can also try resetting Safari by going to the Safari menu bar, selecting Reset Safari, and checking the boxes for the items you want to reset. This can help fix any underlying issues that may be causing Safari to not respond.

Clear Cache, Cookies, and History

  • Open Safari on your Mac.
  • Go to the Safari menu and select Preferences.
  • Click on the Privacy tab.
  • Click on Manage Website Data.
  • Select Remove All to clear all cookies and cache.
  • Go back to the Safari menu and select Clear History.
  • Choose the time range you want to clear and click Clear History.

Disable Extensions

1. Open Safari on your Mac.
2. Click on the Safari menu in the top-left corner of the screen.
3. Select “Preferences” from the drop-down menu.
4. Click on the “Extensions” tab.
5. Uncheck the box next to each extension to disable it.
6. Close the Preferences window.
7. Quit and re-open Safari to see if the issue is resolved.

Disabling extensions can help fix Safari not responding on your Mac by eliminating any potential conflicts or issues caused by the extensions. By following these steps, you can quickly identify if an extension is causing the problem and resolve it accordingly.

If Safari is still not responding after disabling extensions, you may want to consider clearing the cache and cookies, restarting your Mac, or updating Safari to the latest version. These additional steps can help improve the performance and responsiveness of Safari on your Mac.

Check Network Settings

Check your network connection by looking at the status next to “Connected.” If it says “Connected,” your network connection is working properly. If not, troubleshoot your network connection.

You can also check the Wi-Fi settings by selecting Wi-Fi from the list on the left side of the Network window. Make sure the Wi-Fi is turned on and connected to the correct network.

Check your DNS settings by clicking on the “Advanced” button in the Network window. Go to the DNS tab and make sure the DNS servers listed are correct. You can also add Google’s public DNS servers (8.8.8.8 and 8.8.4.4) to see if that resolves the issue.

If you’re still experiencing issues with Safari not responding, try clearing the cache and cookies. Open Safari, go to the Safari menu, and select “Clear History.” Choose the time range you want to clear and click “Clear History.”

Update and Reset

To update Safari on your Mac, click on the Apple menu in the top left corner of your screen. Select “App Store” and then click on “Updates” to check for any available updates for Safari. If there is an update, click on “Update” next to Safari to install it.

If Safari is still not responding after updating, you may need to reset it. To reset Safari, first close the browser. Then, hold down the Shift key and click on the Safari icon in the Dock to open it in Safe Mode. This will disable any extensions or plugins that may be causing the issue.

Once Safari is open in Safe Mode, go to the Safari menu and select “Clear History” to clear the cache and cookies. This can help resolve any issues with loading web pages. You can also try resetting Safari by going to the Safari menu and selecting “Reset Safari.” This will reset all settings and remove any saved data, so make sure to back up any important information before doing this.

After resetting Safari, try reopening the browser to see if the issue has been resolved. If Safari is still not responding, you may need to restart your Mac. To restart your Mac, click on the Apple menu and select “Restart.” This can help resolve any temporary issues that may be causing Safari to not respond.

Delete Preference Files

To fix Safari not responding on your Mac, one effective solution is to delete preference files. These files can sometimes become corrupted or outdated, causing issues with the browser’s performance. Here’s how you can do it:

1. Close Safari and any other open applications on your Mac.
2. Open a Finder window and navigate to the “Library” folder. You can access this folder by holding down the “Option” key on your keyboard and clicking on the “Go” menu in the Finder.
3. Locate the “Preferences” folder within the “Library” folder.
4. Look for files related to Safari, such as “com.apple.Safari.plist” or “com.apple.Safari.plist.lockfile.”
5. Select these files and move them to the trash. You may need to enter your administrator password to complete this action.
6. Empty the trash to permanently delete the preference files.
7. Restart your Mac and open Safari to see if the issue has been resolved.

By deleting these preference files, you are essentially resetting Safari to its default settings, which can often fix performance issues. If Safari is still not responding after deleting the preference files, you may need to consider other solutions such as clearing the cache or reinstalling the browser.

F.A.Q.

How do I fix unresponsive Safari on Mac?

To fix unresponsive Safari on Mac, you can force quit the application and then relaunch it. Go to the Apple logo, select Force Quit, choose Safari from the list of apps, and click Force Quit. Wait a moment before reopening Safari.

Why does my Mac keep saying application not responding?

Your Mac may be saying “application not responding” because the app is frequently unresponsive. Try reinstalling the app by uninstalling it and then reinstalling it or re-downloading it from the App Store. If it’s a built-in app like Finder, you can reinstall the operating system.

Why is my Mac saying the application Safari is not open anymore?

Your Mac may be saying the application Safari is not open anymore due to corrupted system files. To fix this error, try reinstalling or updating macOS. Connect to a strong Wi-Fi network, navigate to “System Preferences > Update Software”, and download/install any listed updates.

How do I fix corrupted Safari on my Mac?

To fix corrupted Safari on your Mac, you can try force quitting Safari, restarting your Mac, deleting Safari history, cache, and cookies, disabling Safari extensions, checking network settings, and deleting preference files.