Unveiling the Elusive Solution: Tackling the Grey Screen of Death on Windows 10
Grey Screen of Death Overview
The Grey Screen of Death is a common issue experienced by Windows 10 users. When this problem occurs, your computer screen turns grey, and you may not be able to perform any tasks.
There are several reasons why the Grey Screen of Death may occur, including graphics card driver issues, Windows updates, or problems with the operating system. To fix this issue, there are a few troubleshooting steps you can try.
First, update your graphics card driver by visiting the manufacturer’s website and downloading the latest driver for your specific model. You can also try running a Windows update to ensure your system has the latest updates installed.
If these steps don’t resolve the issue, you can try using the snipping tool to capture a screenshot of the grey screen. This can help you identify any error messages or specific causes of the problem.
In some cases, the Grey Screen of Death may be caused by a hardware issue. If you’re using a laptop, try connecting an external monitor to see if the issue persists.
Reasons Behind Grey Screen of Death on Windows 10/11
The Grey Screen of Death is a frustrating issue that can occur on Windows 10/11 PCs. This issue typically manifests as a grey background with no error messages or visible cause. If you’re experiencing this problem, there are a few potential reasons and ways to fix it.
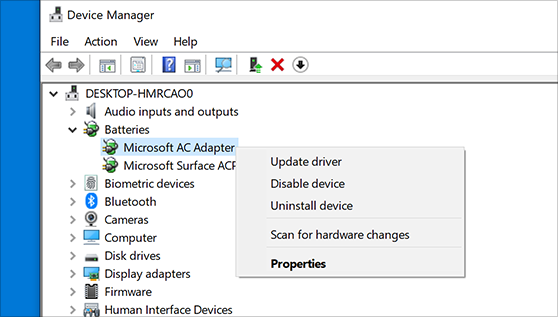
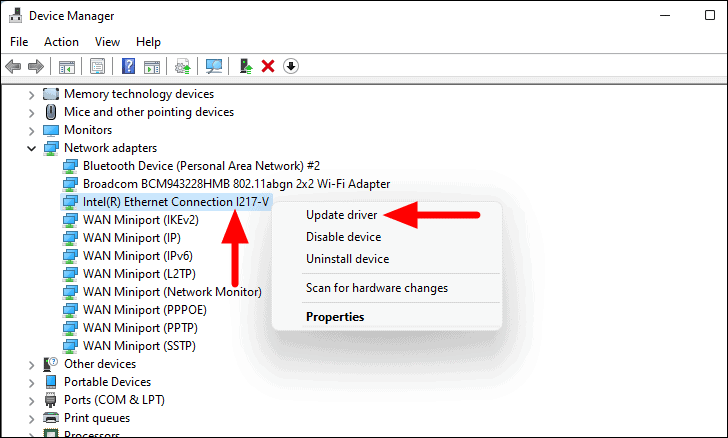
One possible cause is a faulty display driver. To fix this, update your display driver by following these steps: Go to the Start menu, open the Device Manager, expand the “Display Adapters” category, right-click on your display adapter, and select “Update driver.”
Another potential cause is an issue with the Windows lock screen background color. To fix this, change your lock screen background color by going to Settings, selecting Personalization, and choosing a different color.
If your laptop screen goes grey when it enters sleep mode, it may be due to a power management setting. To fix this, adjust your power settings by going to Control Panel, selecting Power Options, and adjusting the settings for when your computer goes to sleep.
These are just a few possible fixes for the Grey Screen of Death issue.
How to Fix Grey Screen of Death on Windows 10/11
Fixing the Grey Screen of Death on Windows 10/11 can be a frustrating experience, but there are a few ways to troubleshoot and resolve this issue.
First, try restarting your PC in Safe Mode by pressing the F8 key during startup. This will help identify if a third-party software or driver is causing the problem.
If that doesn’t work, try updating your graphics drivers. Open Device Manager, locate your graphics card, right-click on it, and select “Update driver.”
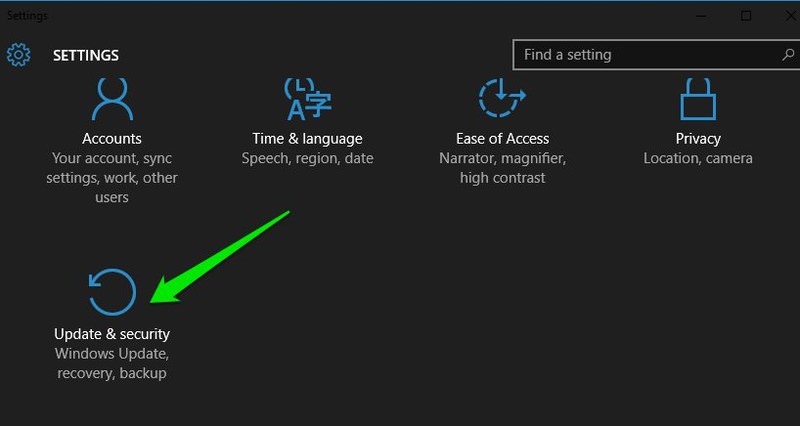
Another solution is to check for Windows updates. Click on the Start button, go to Settings, and select “Update & Security.” Click on “Check for updates” and install any available updates.
If none of these fixes work, you can use the snipping tool to take a screenshot of the grey screen and seek assistance from Microsoft support or online forums.
Enter Safe Mode
To fix the Grey Screen of Death issue on Windows 10, you can try entering Safe Mode. Safe Mode allows you to troubleshoot and fix problems with your PC’s operating system. Here’s how to do it:
1. Start by shutting down your computer completely.
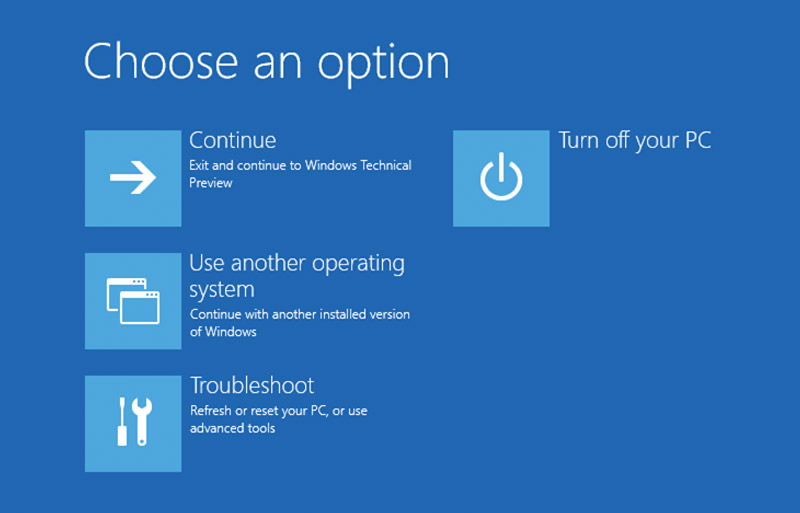
2. Turn it back on and immediately press and hold the F8 key until the Advanced Boot Options menu appears.
3. Use the arrow keys on your keyboard to highlight “Safe Mode” and press Enter.
4. Once in Safe Mode, you can try a few solutions to fix the grey screen issue. Start by updating your graphics drivers, as outdated or faulty drivers can cause screen problems.
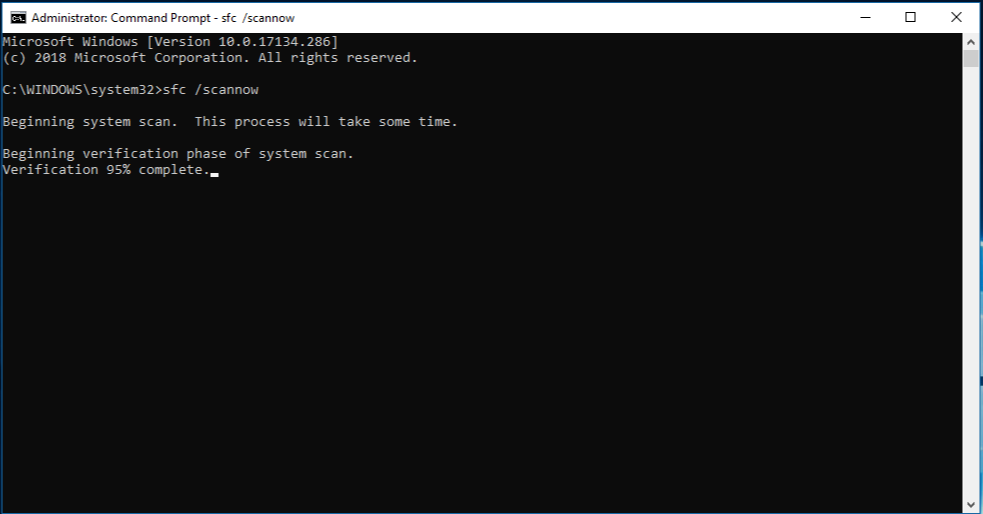
5. You can also try running a system scan using Windows Defender or a third-party antivirus program to check for any malware or viruses.
6. If the issue persists, try performing a system restore to a previous working state.
7. Finally, check for any recent Windows updates that might be causing the problem and uninstall them if necessary.
Update Graphics Driver
To fix the Grey Screen of Death issue on Windows 10, you may need to update your graphics driver. Here’s how:
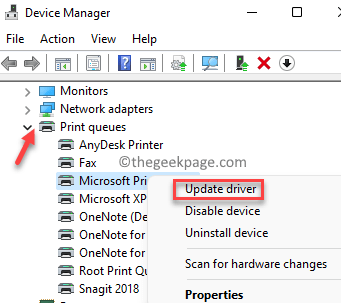
1. Press the Windows key + X and select “Device Manager” from the menu.
2. Expand the “Display adapters” category.
3. Right-click on your graphics card and select “Update driver.”
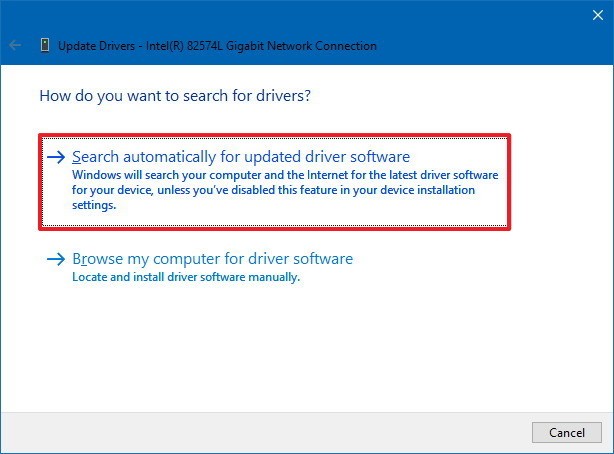
4. Choose “Search automatically for updated driver software” and follow the on-screen instructions.
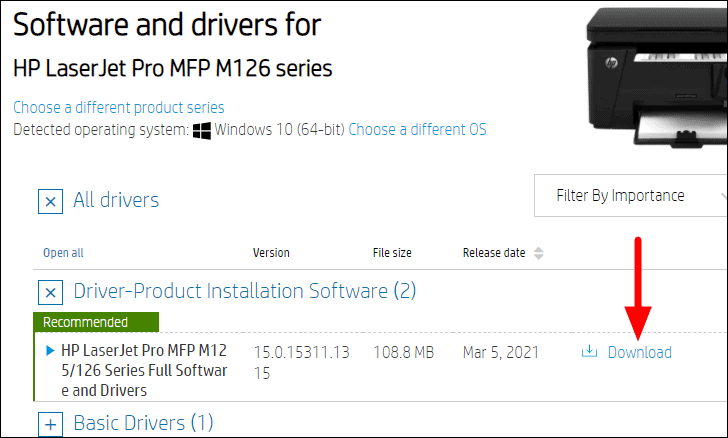
5. If Windows doesn’t find any updates, you can go to the manufacturer’s website and manually download the latest driver for your graphics card.
6. Once the driver is installed, restart your computer.
Updating the graphics driver can resolve many grey screen issues by ensuring compatibility and stability with your system. Make sure to keep your graphics driver up to date to prevent any further issues.
Disable Fast Startup
To fix the Grey Screen of Death issue on Windows 10, one potential solution is to disable Fast Startup. This feature can sometimes cause conflicts and lead to various screen issues on some PCs. Here’s how you can disable Fast Startup:
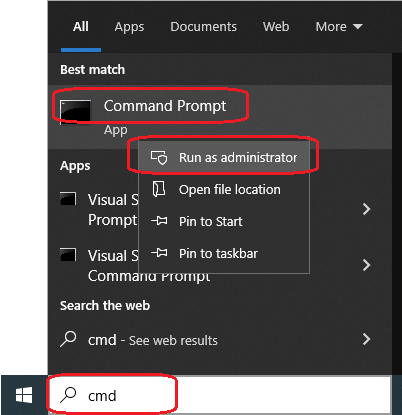
1. Click on the Start button and search for “Power Options.”
2. Open the Power Options settings.
3. On the left-hand side, click on “Choose what the power buttons do.”
4. Click on “Change settings that are currently unavailable.”
5. Scroll down to the “Shutdown settings” section and uncheck the box next to “Turn on fast startup (recommended).”
6. Click on “Save changes” to apply the settings.
Disabling Fast Startup can help resolve the Grey Screen of Death issue by preventing conflicts during shutdown and startup processes. If the problem persists, it may be necessary to explore other solutions or seek further assistance from Microsoft or other reliable sources.
Troubleshoot Hardware and Device
Troubleshooting Hardware and Device Issues with Grey Screen of Death on Windows 10
If you’re experiencing the frustrating Grey Screen of Death (GSOD) on your Windows 10 device, there are a few steps you can take to resolve the issue.
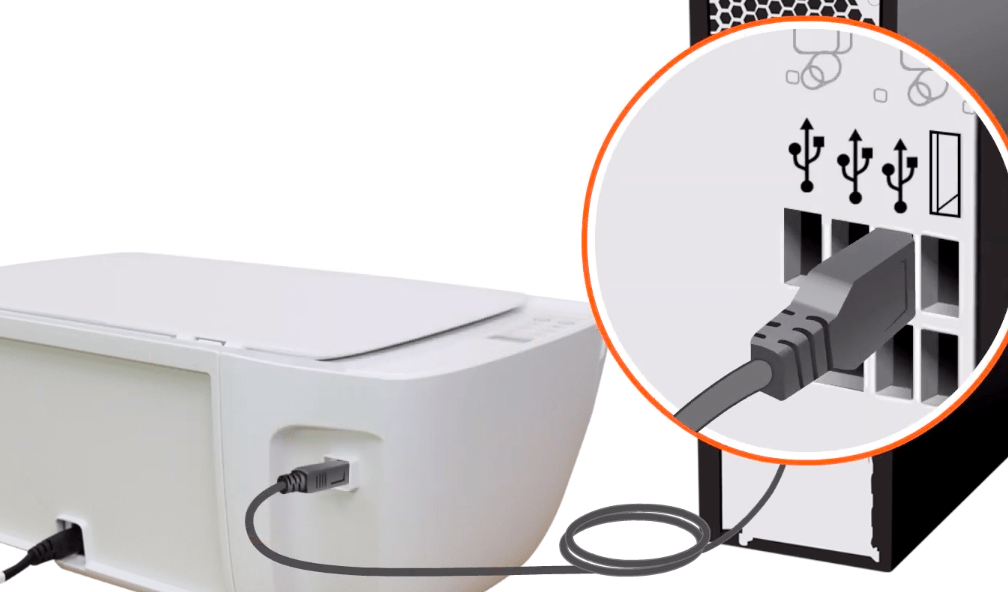
First, make sure all your hardware components, such as your monitor and laptop screen, are properly connected and functioning. Sometimes, loose cables or faulty connections can cause the grey screen problem.
Next, check for any pending Windows updates. Outdated software can often lead to compatibility issues and errors. To do this, go to Settings, click on Update & Security, and select Windows Update. Install any available updates and restart your computer.
If the issue persists, try putting your device in sleep mode and then waking it up. This can sometimes help resolve temporary glitches in the display.
If none of these steps work, it may be worth seeking professional assistance or contacting the manufacturer, especially if you’re unable to identify the exact cause of the grey screen issue. Remember to have all the necessary information, such as the make and model of your device, ready when seeking support.
For further troubleshooting tips and guidance, you can refer to reputable tech websites like Techlogitic or consult Microsoft’s support services.
Uninstall Some Programs
If you’re experiencing the Grey Screen of Death on your Windows 10 computer, you may need to uninstall some programs. This can help resolve any conflicts or compatibility issues that may be causing the problem.
To uninstall programs, follow these steps:
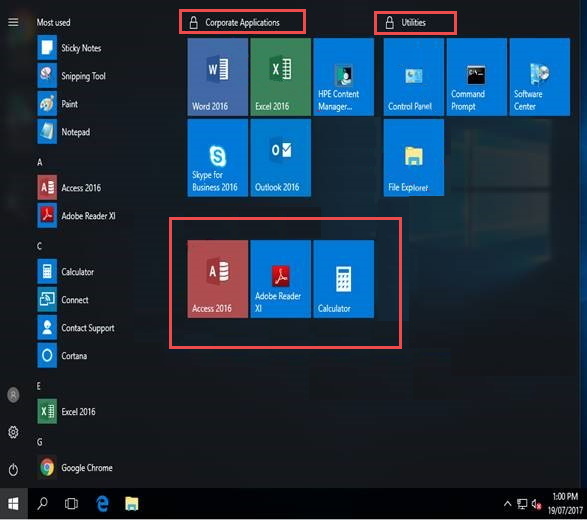
1. Press the Windows key + X on your keyboard and select “Apps and Features” from the menu.
2. In the Apps & Features window, scroll through the list of installed programs and locate the ones you want to uninstall.
3. Click on the program you want to remove and select “Uninstall”.
4. Follow the on-screen prompts to complete the uninstallation process.
Remember to only uninstall programs that you are familiar with and no longer need. Removing essential system files or programs can cause further issues.
If uninstalling programs doesn’t fix the Grey Screen of Death, you may need to seek further assistance or try other troubleshooting steps.
Hardware Issues
Hardware issues can sometimes cause the Grey Screen of Death (GSOD) on Windows 10. If your computer screen suddenly goes grey and you can’t do anything, follow these steps to fix it:
1. Check your hardware connections: Make sure all cables and peripherals are properly connected to your computer. Loose connections can cause display issues.
2. Update your graphics driver: Press the Windows key + X, then select Device Manager. Expand the Display adapters section, right-click on your graphics driver, and select Update driver. If an update is available, follow the on-screen instructions to install it.
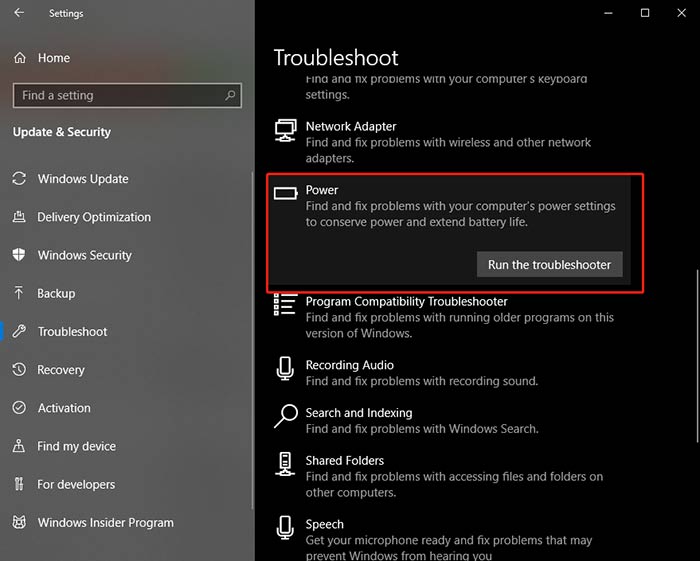
3. Run the Windows Hardware Troubleshooter: Press the Windows key + I to open Settings, then go to Update & Security > Troubleshoot. Click on Hardware and Devices, then click Run the troubleshooter. Follow the instructions to detect and fix any hardware issues.
4. Check for overheating: Overheating can cause hardware malfunctions. Ensure that your computer is properly ventilated and not overheating. Clean any dust from the vents or consider using a cooling pad.
5. Reset BIOS settings: Restart your computer and press the key indicated to enter the BIOS setup. Look for a “Restore Defaults” or “Load Optimal Defaults” option and select it to reset the BIOS settings.
If none of these steps resolve the GSOD issue, it may be necessary to contact your computer manufacturer or a professional technician for further assistance.
Faulty Graphics Card Driver
If you’re experiencing a grey screen of death on your Windows 10 device, it may be caused by a faulty graphics card driver. This issue can be frustrating and disruptive, but fortunately, there are steps you can take to fix it.
Firstly, make sure you have the latest graphics card driver installed. You can do this by visiting the manufacturer’s website and downloading the appropriate driver for your graphics card model.
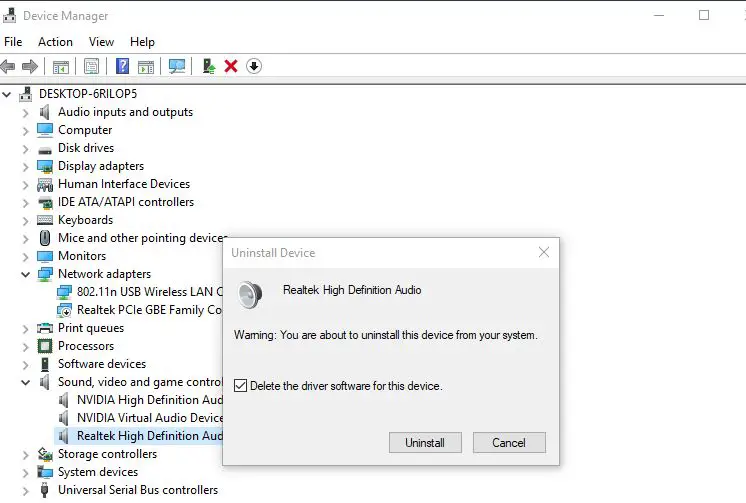
If updating the driver doesn’t resolve the issue, try uninstalling the current driver and reinstalling it. To do this, go to Device Manager, locate your graphics card, right-click on it, and select “Uninstall device.” Then, restart your computer and Windows will automatically reinstall the driver.
If the problem persists, it could indicate a hardware issue with your graphics card. In this case, contacting customer support or seeking professional assistance may be necessary.
Boot Into Safe Mode
To boot into Safe Mode on Windows 10 and fix the Grey Screen of Death, follow these steps:
1. Start by shutting down your Dell laptop completely.
2. Press the power button to turn it on and immediately press and hold the F8 key until the Advanced Boot Options menu appears.
3. Use the arrow keys to select “Safe Mode” and press Enter.
4. Once in Safe Mode, your screen will have a grey background with a cursor.
5. Now, open the Start menu and search for “Device Manager.”
6. Expand the “Display adapters” category and right-click on your graphics driver.
7. Select “Uninstall device” and follow the on-screen instructions.
8. After uninstalling the driver, restart your laptop.
9. Windows will automatically reinstall the default graphics driver.
10. Check if the Grey Screen of Death issue is resolved.
If this doesn’t fix the issue, it may be caused by other factors. Consider seeking professional help or referring to technical resources like Techlogitic for further assistance.
Run the Troubleshooter Tool
If you’re experiencing a Grey Screen of Death on your Windows 10 device, running the Troubleshooter Tool can help diagnose and resolve the issue. This tool is designed to automatically detect and fix common problems that may be causing the grey screen.
To run the Troubleshooter Tool, follow these steps:
1. Press the Windows key + I to open the Settings app.
2. Click on “Update & Security.”
3. In the left sidebar, select “Troubleshoot.”
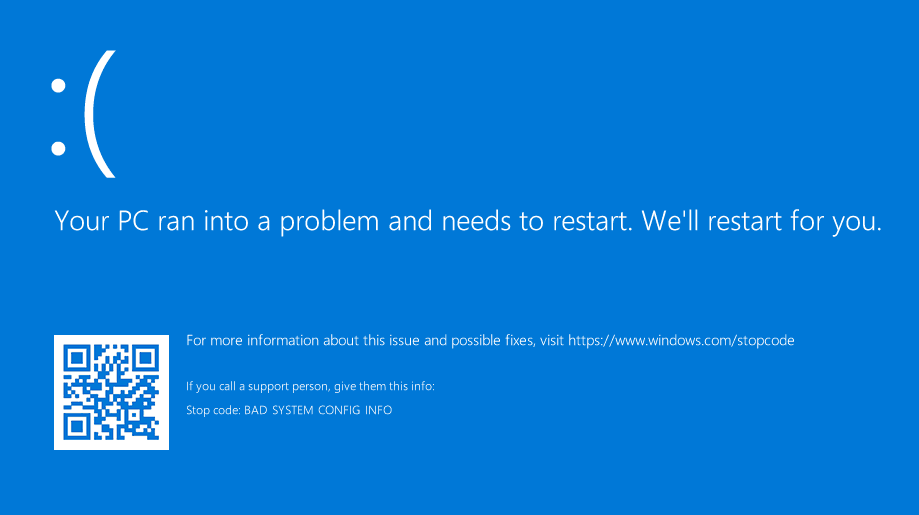
4. Under the “Find and fix other problems” section, click on “Blue Screen.”
5. Click on “Run the troubleshooter.”
The Troubleshooter Tool will analyze your system and attempt to fix any issues it finds. Once the process is complete, restart your device and check if the grey screen issue has been resolved.
Note that while the Troubleshooter Tool can help with common issues, it may not be able to fix all grey screen problems. If the issue persists, it may be necessary to seek additional assistance or explore alternative solutions.