
Discovering the mysteriously elusive Local Disk D in Windows 8 can be a perplexing experience. In this article, we delve into the depths of troubleshooting techniques to help you unveil the hidden secrets behind its disappearance.
Reasons for Local Disk D Going Missing in Windows 8
If you’re experiencing the issue of your Local Disk D going missing in Windows 8, there could be a few reasons for this.
First, check if the drive is physically connected to your computer. Ensure that the drive is properly plugged in and recognized by the system.
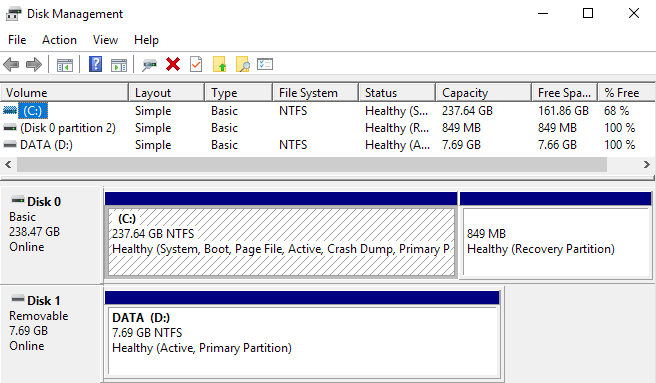
Next, try accessing the drive through Disk Management. To do this, press the Windows key + X and select “Disk Management” from the menu. Look for the missing drive in the list and check its status.
If the drive is listed but not showing up in Windows Explorer, it might have an incorrect drive letter assigned to it. Right-click on the drive and select “Change Drive Letter and Paths.” Assign a new drive letter to the missing drive.
If the drive is still not showing up, it’s possible that the drive partition is corrupted. Consider using a data recovery tool or seeking professional help to restore the missing data.
Lastly, ensure that your Windows 8 is up to date with the latest updates. Sometimes, a Windows update can cause issues with drive recognition.
How to Fix the Local Disk D Missing Issue in Windows 8
If you are experiencing the issue of a missing Local Disk D in Windows 8, here’s how you can fix it:
1. Press the Windows key + X on your keyboard and select “Computer Management” from the menu.
2. In the Computer Management window, click on “Disk Management” under the “Storage” section.
3. Look for the missing drive in the list of disks and partitions.
4. Right-click on the missing drive and select “Change Drive Letter and Paths”.
5. Click on “Add” and choose a new drive letter for the missing drive.
6. Click “OK” to save the changes.
7. Check if the missing drive is now visible in Windows Explorer.
If the above steps don’t resolve the issue, it is possible that the drive partition may be corrupted or the data may be lost. In such cases, it is recommended to seek professional data recovery services or restore from a backup.
Note: This solution is specific to Windows 8 and may not work for other versions of Windows.
Six Ways to Resolve the Local Disk D Missing Problem in Windows 8
- Open Disk Management by right-clicking on the Start button and selecting Disk Management.
- Locate the Local Disk D in the list of drives.
- If the disk shows as Offline, right-click on it and select Online.
- If the disk shows as Unallocated, right-click on it and select New Simple Volume to assign a drive letter.
- If the disk shows as a Healthy (Primary Partition), right-click on it and select Change Drive Letter and Paths. Choose a new drive letter and click OK.
- Restart your computer and check if the Local Disk D is now visible.
Method 2: Update Disk Drivers
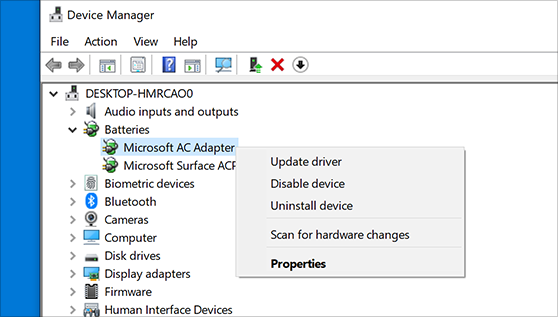
- Open Device Manager by right-clicking on the Start button and selecting Device Manager.
- Expand the Disk drives category.
- Right-click on the Local Disk D and select Update driver.
- Select Search automatically for updated driver software and follow the on-screen instructions to complete the driver update.
- Restart your computer and check if the Local Disk D is now visible.
Method 3: Run Disk Error Checking
- Open File Explorer by pressing Win+E.
- Right-click on the Local Disk D and select Properties.
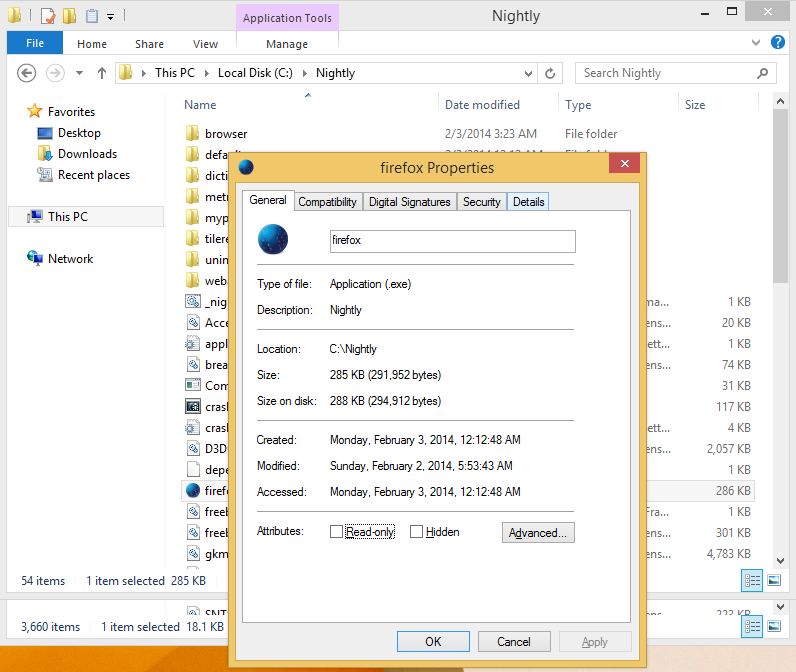
- Go to the Tools tab and click on Check under the Error checking section.
- Follow the on-screen instructions to scan and fix any errors on the disk.
- Restart your computer and check if the Local Disk D is now visible.
Method 4: Restore Missing Drive Letter
- Open Command Prompt by pressing Win+X and selecting Command Prompt (Admin).
- Type diskpart and press Enter.
- Type list volume and press Enter.
- Identify the volume number associated with the missing Local Disk D.
- Type select volume X (replace X with the volume number) and press Enter.
- Type assign letter=D and press Enter.
- Restart your computer and check if the Local Disk D is now visible.
Method 5: Perform System Restore
- Open Control Panel by right-clicking on the Start button and selecting Control Panel.
- Go to System and Security and click on System.
- Click on System protection in the left pane.
- Click on System Restore and follow the on-screen instructions to restore your computer to a previous working state.
- Restart your computer and check if the Local Disk D is now visible.
Method 6: Reinstall Windows 8
- Ensure you have a backup of all your important files.
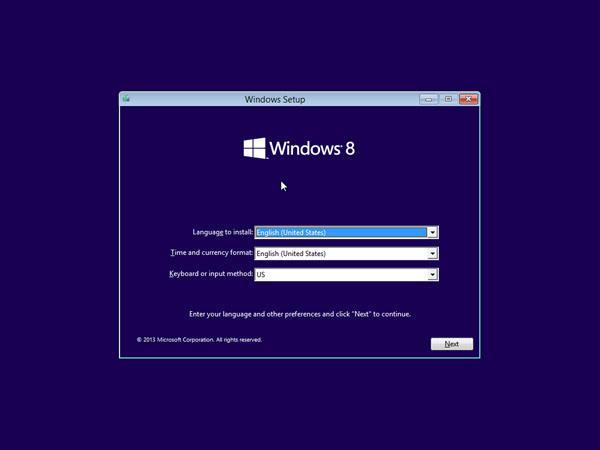
- Insert the Windows 8 installation disc or USB drive.
- Restart your computer and boot from the installation media.
- Follow the on-screen instructions to reinstall Windows 8.
- After the installation is complete, restore your files from the backup.
python

import os
def check_drive_existence(drive_letter):
drive_path = drive_letter + ":\\"
return os.path.exists(drive_path)
drive_letter = "D"
if check_drive_existence(drive_letter):
print(f"Local disk {drive_letter} exists.")
else:
print(f"Local disk {drive_letter} is missing.")
Please note that this code snippet assumes that you have appropriate permissions to access the system’s file structure. Also, keep in mind that this code only checks for the existence of the drive and does not perform any recovery or fixing actions for a missing drive.
Bonus Tip to Prevent Local Disk D from Going Missing in Windows 8
If you’re experiencing the issue of your Local Disk D going missing in Windows 8, here’s a bonus tip to help prevent it from happening again.
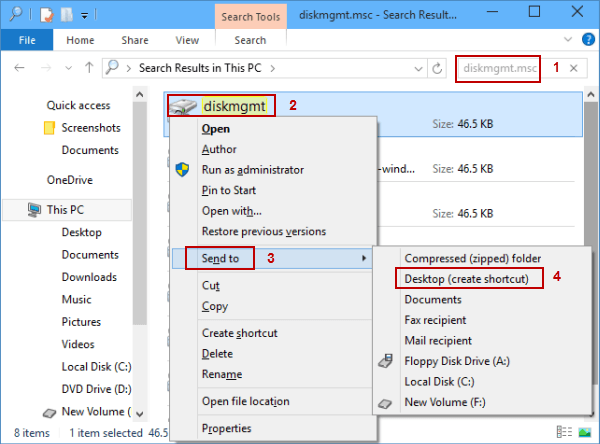
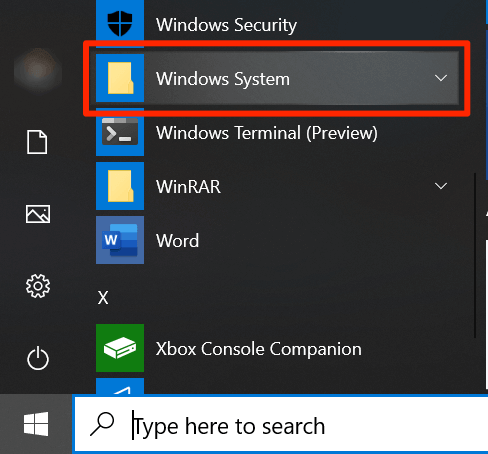
First, open the Computer Management screen by searching for it in the Windows search box and selecting the “Computer Management” option.
Once you’re in the Computer Management window, click on “Disk Management” on the left-hand side.
Look for your missing drive, in this case, Drive D, in the list of drives and partitions.
Right-click on the missing drive and select “Change Drive Letter and Paths.”
Choose a new drive letter for the missing drive, preferably one that is not already in use.
Click “OK” to save the changes.
Steps to Take When Unable to Access Eightforums.com
If you are unable to access eightforums.com, there are some steps you can take to troubleshoot the issue.
1. Clear your browser’s cache and cookies to ensure there are no conflicting data causing the problem.
2. Check if the website is down for everyone or just for you. You can use a website like isitdownrightnow.com to check the status of eightforums.com.
3. If the website is down for everyone, it may be undergoing maintenance or experiencing technical difficulties. In this case, you will need to wait until the issue is resolved.
4. If the website is only down for you, it could be due to a network issue. Try restarting your router or connecting to a different network to see if that resolves the problem.
5. If none of the above steps work, you can try accessing the website using a different browser or device.
Remember to always exercise caution when troubleshooting online issues and be mindful of security measures to protect your personal information.


