Acer Laptop Stuck on Boot Logo

If you’re experiencing the frustration of your Acer laptop being stuck on the boot logo, you’re not alone. This common issue can be caused by a variety of factors, but there are several potential solutions to try before seeking professional help.

Perform a hard reset by holding down the power button for 30 seconds to clear any temporary hardware issues.

Preliminary Troubleshooting Steps

If your Acer laptop is stuck on the boot logo, there are a few preliminary troubleshooting steps you can take to try and resolve the issue. First, try restarting the laptop by holding down the power button for 10-15 seconds until it shuts off, then turning it back on. If that doesn’t work, try booting into safe mode by pressing the F8 key repeatedly as the laptop starts up. If you are able to boot into safe mode, this may indicate a software issue, such as a recent Windows Update causing the problem.

You can try rolling back the update or using system restore to revert to a previous state. If these steps don’t work, it may be necessary to seek further technical assistance.

Diagnosing Hardware Issues

Issue Possible Cause Diagnosis Solution
Laptop stuck on boot logo Corrupted system files Run diagnostics tool to check for hardware errors Perform a system restore or reinstall the operating system
Blank screen on boot Failed hardware component Check for beeping sounds during boot, indicating hardware failure Replace faulty hardware component
Overheating and shutdown Dusty or malfunctioning cooling system Check for excessive heat and loud fan noise Clean or replace cooling system

Resolving Software and BIOS Glitches

To resolve software and BIOS glitches causing your Acer laptop to be stuck on the boot logo, try the following troubleshooting steps. First, try booting into safe mode by repeatedly pressing the F8 key as the laptop starts up. This will allow you to access the Windows operating system with minimal drivers and services, potentially bypassing the issue. If that doesn’t work, reset the BIOS settings to default by entering the BIOS menu (usually by pressing the F2 or Del key on startup) and selecting the reset option. If the issue persists, update your BIOS to the latest version available on the Acer website. If all else fails, consider performing a factory reset to restore the laptop to its original state.

Data Recovery and Prevention Measures

  • Check for Backup Files
    • Connect the Acer laptop to an external hard drive or cloud storage.
    • Search for any backup files that may have been saved prior to the boot logo issue.
  • Use Data Recovery Software
    • Download and install reputable data recovery software onto another device.
    • Connect the Acer laptop to the other device and run the data recovery software to attempt to retrieve any lost files.
  • Implement Data Prevention Measures
    • Regularly back up important files and documents to an external hard drive or cloud storage.
    • Utilize antivirus and malware protection software to prevent potential data loss from system crashes or failures.

Uninstall Segurazo Antivirus Easy Guide

Looking to uninstall Segurazo Antivirus? Follow this easy guide to remove it from your computer.

Use the built-in Windows uninstaller to remove Segurazo from your computer.

Safety and Legitimacy of Segurazo

If you are considering uninstalling Segurazo from your computer, it is important to proceed with caution. Before uninstalling the program, it is recommended to do some research and gather information about the safest and most effective way to remove it from your system. You can find helpful guides and discussions on platforms like Reddit, where users share their experiences and offer advice on uninstalling Segurazo.

Before initiating the uninstallation process, it is also important to review Segurazo’s privacy policy and understand the implications of removing the software. This will help ensure that your personal information and data are not compromised during the uninstallation process. When ready to proceed, you can use the Control Panel (Windows) to uninstall Segurazo. After uninstalling the program, it is also recommended to run a full system scan with a trusted antivirus software to ensure that no remnants of Segurazo are left on your computer.

Uninstalling Segurazo can improve your computer’s performance and security.

Step-by-Step Removal Guide

  • Open Control Panel by clicking on the Start button and then clicking on Control Panel.
  • Click on Programs and Features and locate Segurazo Antivirus in the list of installed programs.
  • Right-click on Segurazo Antivirus and select Uninstall.
  • Follow the on-screen instructions to complete the uninstallation process.

Advanced Removal Techniques

If the above methods don’t work, you may need to use the Windows Search function to locate and delete any remaining Segurazo Antivirus files. Be sure to also check for any related configuration files or folders.

Additionally, consider seeking help from online forums or communities such as Reddit, where you can find advice from others who have dealt with similar issues.

Don’t let Segurazo slow down your system – uninstall it today.

Alternatives and Prevention Measures

An antivirus program interface with alternative options and prevention measures.

To prevent similar issues in the future, be cautious when downloading software and always read the privacy policy to understand what data the program collects. Additionally, regularly scan your computer for any suspicious files or programs.

If you’re using Windows, you can uninstall Segurazo Antivirus by going to the Control Panel, then selecting “Uninstall a program” and finding Segurazo in the list. Click on it, then select “Uninstall” to remove the program from your computer.

How to Insert Key on HP Laptop Without Missing

Inserting a key on an HP laptop can be tricky, but with the right technique, it can be done smoothly without any issues.

Using the Insert Key on HP Laptops

HP laptop keyboard

To use the Insert key on HP laptops, you can follow these simple steps. First, locate the Insert key on your HP laptop’s keyboard. The Insert key is usually found in the top row of keys, near the Backspace and Delete keys. It may be labeled as “Ins” or “Insert.” Once you have located the Insert key, you can use it to toggle between insert and overwrite modes while typing.

When you want to insert text, press the Insert key to switch to insert mode. In insert mode, any text you type will be inserted at the cursor position, pushing existing text to the right. This is useful when you want to add new text without overwriting existing content.

If you accidentally switch to overwrite mode and want to go back to insert mode, simply press the Insert key again to toggle back. This will allow you to resume inserting text without overwriting anything.

It’s important to note that the behavior of the Insert key can vary depending on the software you are using. In some programs, such as word processors or text editors, the Insert key will work as described above. However, in other programs, the Insert key may have a different function or may not be used at all.

If you find that the Insert key is not working as expected in a particular program, you may need to check the program’s settings or documentation to see if there is a different way to toggle between insert and overwrite modes.

In summary, the Insert key on HP laptops can be used to toggle between insert and overwrite modes while typing. This can be a useful feature when you need to insert new text without overwriting existing content. Just locate the Insert key on your keyboard and use it to switch between modes as needed.

Location of the Insert Key on Laptop Keyboards

Close-up of laptop keyboard with insert key highlighted

Laptop Brand Insert Key Location
HP Usually located near the top-right corner of the keyboard, above the arrow keys.
Dell Found near the top-right corner of the keyboard, above the delete key.
Lenovo Located in the same position as the Dell laptop, near the top-right corner.
Asus Usually positioned near the top-right corner of the keyboard, above the backspace key.

Solutions for Insert Key Issues

  • Use compressed air to blow out any debris or dust from under the key.
  • Gently remove the key and clean it with a cotton swab and rubbing alcohol.
  • Use a can of compressed air to clean the keyboard and remove any remaining debris.

Adjust Keyboard Settings

  • Open Control Panel and select Keyboard settings.
  • Check the Repeat delay and Repeat rate settings and adjust as needed.
  • Test the key to see if the issue is resolved.

Update Keyboard Driver

  • Open Device Manager and locate the keyboard driver.
  • Right-click on the driver and select Update driver.
    Open Device Manager and locate the keyboard driver. 
 Right-click on the driver and select Update driver.
  • Follow the on-screen instructions to install any available updates.

python
# This sample code creates a tool that simulates inserting a key into an HP device

class HPDevice:
def __init__(self):
self.key_inserted = False

def insert_key(self):
self.key_inserted = True
print("Key inserted successfully")

def remove_key(self):
self.key_inserted = False
print("Key removed")

# Usage
hp_device = HPDevice()
hp_device.insert_key()
print("Key inserted status:", hp_device.key_inserted)
hp_device.remove_key()
print("Key inserted status:", hp_device.key_inserted)

This sample code creates a simple HPDevice class with methods to insert and remove a key. When the key is inserted, it updates the key_inserted attribute and prints a message. This is a basic example of a tool associated with “insert key hp.”

Conclusion and Additional Information

A laptop keyboard with a highlighted key being inserted.

In conclusion, inserting a key on an HP laptop without missing can be achieved by following the steps outlined in this article. Remember to ensure that the laptop is turned off before attempting to insert the key, and to use gentle pressure to avoid damaging the keyboard.

Additionally, it is important to regularly clean the keyboard to prevent any obstructions that may hinder the smooth insertion of keys. This can be done using a can of compressed air or a soft brush to remove any dust or debris.

If you encounter any difficulties with inserting the key, it is recommended to seek professional assistance to avoid causing further damage to the laptop.

For more information on troubleshooting keyboard issues or other technical problems, refer to the HP website or contact their customer support for assistance.

Remember to handle the key and keyboard with care to avoid any unnecessary damage.

In conclusion, follow the steps outlined in this article to insert a key on an HP laptop without missing. Regularly clean the keyboard to prevent obstructions, and seek professional assistance if you encounter any difficulties.

Solutions for External Hard Drive Keeps Restarting

Dealing with an external hard drive that keeps restarting can be frustrating. In this article, I will discuss some potential solutions to this issue.

Check the power source and cable to ensure they are functioning properly and not causing the external hard drive to restart.

Causes of External Hard Drive Disconnecting

One potential cause of the external hard drive disconnecting is a loose or faulty USB connection. Make sure the USB cable is securely plugged into both the hard drive and your computer or laptop.

If the hard disk drive is failing, it may cause the external drive to disconnect. You can check for signs of failure by listening for strange noises coming from the drive or running diagnostic tests to check for bad sectors.

Power supply issues can also lead to the external hard drive disconnecting. Make sure the power supply is working properly and providing enough power to the drive.

Additionally, issues with the operating system, device drivers, or firmware can also cause the external hard drive to disconnect.

By troubleshooting these potential causes, you can work towards finding a solution for your external hard drive disconnecting issues.

When in doubt, unplug and restart.” – Unknown

Solutions for External Hard Drive Connection Issues

External hard drive connection port and cable

If your external hard drive keeps restarting, there are a few solutions you can try to resolve the issue. First, make sure to check the USB connection and cable for any damage or loose connections. Try using a different USB port on your computer to see if the issue persists. Additionally, if you are using a USB hub, try connecting the external hard drive directly to your computer to rule out any issues with the hub.

If your external hard drive is USB 3.0 compatible, make sure that you are using a USB 3.0 port on your computer to ensure compatibility and prevent any potential connection issues. It may also be helpful to update the device driver for your external hard drive to the latest version to address any compatibility issues with your operating system.

If you are still experiencing connection issues, you can try accessing the BIOS on your computer to check if the external hard drive is being recognized. Additionally, try connecting the external hard drive to a different computer to see if the issue is specific to your system or if it is a problem with the hard drive itself.

Sometimes a fresh start is all you need.” – Unknown

Troubleshooting Steps for Hard Drive Disconnecting

  • Ensure the USB cable is securely connected to the computer and the external hard drive.
  • If using a USB hub, try connecting the hard drive directly to the computer to rule out any issues with the hub.
    Ensure the USB cable is securely connected to the computer and the external hard drive.
If using a USB hub, try connecting the hard drive directly to the computer to rule out any issues with the hub.
  • Try using a different USB port on the computer to see if the problem persists.

Update USB Drivers

  • Open Device Manager by pressing Windows Key + X and selecting Device Manager.
  • Expand the Universal Serial Bus controllers section.
  • Right-click on each USB controller and select Update driver to check for any available updates.

Check for Power Management Settings

  • Open Device Manager by pressing Windows Key + X and selecting Device Manager.
  • Expand the Universal Serial Bus controllers section.
  • Right-click on each USB controller and select Properties.
  • Go to the Power Management tab and uncheck the option that allows the computer to turn off the device to save power.

python
import subprocess

def check_disk_health(drive_letter):
result = subprocess.run(['chkdsk', drive_letter, '/f'], capture_output=True, text=True)
return result.stdout

def check_disk_space(drive_letter):
result = subprocess.run(['wmic', 'logicaldisk', 'where', f'deviceid="{drive_letter}"', 'get', 'freespace'], capture_output=True, text=True)
return result.stdout

def check_disk_temperature(drive_letter):
# Code to check disk temperature using SMART tools

def main():
drive_letter = 'E' # Replace with the drive letter of your external hard drive
disk_health = check_disk_health(drive_letter)
disk_space = check_disk_space(drive_letter)
disk_temperature = check_disk_temperature(drive_letter)

print(f"Disk Health: {disk_health}")
print(f"Disk Space: {disk_space}")
print(f"Disk Temperature: {disk_temperature}")

if __name__ == "__main__":
main()

This sample code uses Python and subprocess to run command-line tools such as chkdsk and wmic to check the health, space, and temperature of an external hard drive. You can modify and expand upon this code to create a more comprehensive troubleshooting tool for external hard drives.

Data Recovery for Faulty External Hard Drives

If the data recovery software doesn’t do the trick, consider seeking professional help. A data recovery service can often restore files from faulty external hard drives, even in cases of physical damage to the device. Look for a reputable company with experience in handling external hard drive failures.

In some cases, you may need to use a disk enclosure to access the data on your faulty external hard drive. This device allows you to connect the drive to another computer, giving you the opportunity to retrieve your files before attempting any repairs.

Fix IRQL NOT LESS OR EQUAL Windows Driver Error

Dealing with the IRQL NOT LESS OR EQUAL Windows driver error can be frustrating and disruptive. Understanding the root cause of this issue and how to fix it is crucial for maintaining a smooth and efficient computer system.

Always maintain a safe following distance from other vehicles on the road to avoid accidents.

Fix Corrupted System Files with DISM & SFC

To fix the IRQL NOT LESS OR EQUAL Windows Driver Error, you can use DISM (Deployment Image Servicing and Management) and SFC (System File Checker) to repair corrupted system files.

To start, open Command Prompt as an administrator. Then, run the following command: dism /online /cleanup-image /restorehealth. This will scan and repair any corrupted system files using Windows Update.

After DISM has completed its scan and repair, run the System File Checker tool by typing sfc /scannow into Command Prompt. This tool will scan and repair corrupted files in your operating system.

It’s important to note that both DISM and SFC may take some time to complete, so be patient and let the processes run their course.

Once both processes are finished, restart your computer and check if the IRQL NOT LESS OR EQUAL Windows Driver Error has been resolved.

If you continue to experience the error, consider seeking further troubleshooting assistance or consulting with a professional for additional support.

Perform a System Restore

Windows System Restore screen

Performing a System Restore can help to fix the IRQL NOT LESS OR EQUAL Windows Driver Error. To do this, follow these steps:

1. Open the Start menu and type “System Restore” in the search bar. Click on the System Restore option that appears in the search results.

2. Click on “Next” in the System Restore window and select a restore point that was created before the error started occurring.

3. Follow the on-screen instructions to complete the System Restore process.

Performing a System Restore can help to revert your system back to a stable state and resolve the IRQL NOT LESS OR EQUAL Windows Driver Error. If the issue persists, you may need to consider other troubleshooting steps or seek further assistance.

Update Windows & Drivers

Windows update screen

  • Check for Windows Updates
    • Open Settings by clicking on the Start button and then clicking on the gear icon
    • Click on Update & Security
    • Click on Check for updates and install any available updates
  • Update Device Drivers
    • Open Device Manager by pressing Windows key + X and selecting Device Manager
    • Expand the categories and right-click on the device you want to update
    • Select Update driver and follow the on-screen instructions

python
class Driver:
def __init__(self, name, version):
self.name = name
self.version = version

def __eq__(self, other):
return self.name == other.name and self.version == other.version

def __ne__(self, other):
return not self.__eq__(other)

driver1 = Driver("Printer", "1.0")
driver2 = Driver("Graphics Card", "2.0")

if driver1 != driver2:
print("The drivers are not equal")
else:
print("The drivers are equal")

In this sample code, we have created a simple Driver class with a name and version attribute. We have also overridden the `__eq__` and `__ne__` methods to define how the equality and inequality comparisons should be performed between Driver objects. The code then creates two Driver objects and checks if they are not equal, based on the attributes provided.

Run a Memory Test

If the memory test comes back with errors, it could be a sign of faulty RAM. Consider replacing or upgrading your memory modules to resolve the issue.

If the memory test comes back with no errors, the problem may lie with a different component of your system. It’s worth checking for outdated or incompatible device drivers, running a virus scan with up-to-date antivirus software, and ensuring that your Windows operating system is fully updated through Windows Update.

By thoroughly diagnosing and addressing potential issues with your computer’s hardware and software, you can work towards resolving the IRQL NOT LESS OR EQUAL Windows Driver Error and preventing future occurrences.

Check Storage Health

To check the storage health of your system, you can use the Windows built-in tool called CHKDSK. This tool can help identify and fix any issues with your hard drive or solid-state drive. To run CHKDSK, open a Command Prompt as an administrator by typing cmd into the Windows search bar, right-clicking on Command Prompt, and selecting “Run as administrator.” Then, type chkdsk /f and press Enter. This will schedule CHKDSK to run the next time you restart your computer.

If you suspect there may be issues with your storage health, it’s important to run CHKDSK to diagnose and potentially fix any problems. This can help resolve the IRQL NOT LESS OR EQUAL Windows driver error you may be experiencing. Additionally, running a comprehensive antivirus scan can also help identify and eliminate any potential malware or virus-related issues that could be impacting your storage health.

Regularly checking the health of your storage drives is essential for maintaining the overall performance and stability of your computer. By proactively addressing any potential issues, you can prevent more serious problems from arising in the future.

Clean Install Graphics Drivers

Next, download the latest graphics drivers from the manufacturer’s website. Make sure to choose the correct drivers for your operating system and graphics card model. Once the drivers are downloaded, you can install them by running the installer and following the on-screen instructions.

After the installation is complete, restart your computer to apply the changes. This clean installation of graphics drivers can help resolve the IRQL NOT LESS OR EQUAL Windows driver error and improve the performance of your graphics card.

Disable Third Party Services

To fix the IRQL NOT LESS OR EQUAL Windows Driver Error, you can start by disabling third-party services. To do this, open the Run dialog by pressing the Windows key + R, then type “msconfig” and hit Enter. In the System Configuration window, go to the Services tab and check the box that says “Hide all Microsoft services.” This will prevent you from accidentally disabling any essential Windows services.

Next, click on the “Disable all” button to disable all third-party services. After that, click “Apply” and then “OK” to save the changes and restart your computer.

Once your computer has restarted, check if the IRQL NOT LESS OR EQUAL error has been resolved. If so, you can then go back to the System Configuration window and enable the third-party services one by one to identify which one is causing the issue.

Determine Faulty Drivers

Next, you can use the Windows Event Viewer to check for any error logs related to the IRQL NOT LESS OR EQUAL error. Open the Event Viewer by typing “eventvwr.msc” into the Run dialog box and navigating to the Windows Logs > System section. Look for any entries with the source listed as “BugCheck” or “Event ID 41” which may indicate a faulty driver.

If you suspect a specific driver is causing the issue, you can use the Driver Verifier tool to test it. Open a command prompt with administrative privileges and type “verifier” to launch the Driver Verifier Manager. Follow the on-screen instructions to select the driver you want to test and then restart your computer. Be aware that using the Driver Verifier can cause your computer to crash if it detects a faulty driver, so use it with caution.

Finally, you can use third-party software to help diagnose and fix faulty drivers. Programs like WhoCrashed or BlueScreenView can analyze the crash dumps created by the blue screen of death and provide information about the faulty driver. Once you have identified the problematic driver, you can either update it through the Device Manager or uninstall and reinstall it to fix the IRQL NOT LESS OR EQUAL error.

Update/Reinstall Faulty Driver

To update or reinstall a faulty driver that is causing the IRQL NOT LESS OR EQUAL Windows Driver Error, follow these steps:

1. Identify the Faulty Driver: Go to Device Manager by right-clicking on the Start button and selecting it from the menu. Look for any drivers with a yellow triangle, indicating an issue.

2. Update the Driver: Right-click on the faulty driver and select “Update driver.” Choose to search automatically for updated driver software. If this doesn’t work, visit the manufacturer’s website to download and install the latest driver manually.

3. Reinstall the Driver: If updating the driver doesn’t fix the issue, right-click on the faulty driver in Device Manager and select “Uninstall device.” Then, restart your computer to automatically reinstall the driver.

If the IRQL NOT LESS OR EQUAL error persists after updating or reinstalling the driver, consider seeking further assistance or professional help to diagnose the issue.

Why Is Netflix Slow to Load? Ultimate Fixes Guide

Are you tired of waiting for Netflix to load? In this guide, we will explore the ultimate fixes for why Netflix is slow to load.

Check your internet connection: Slow loading on Netflix could be due to a weak or unstable internet connection. Make sure your Wi-Fi signal is strong and consider using an Ethernet cable for a more stable connection.

Buffering and Loading Issues on Netflix

– Slow internet connection
– Overloaded network
– Outdated device or app
– Cache and cookies buildup

If you’re experiencing buffering and loading issues on Netflix, there are a few ultimate fixes you can try to improve your streaming experience. First, check your internet connection to ensure it’s fast enough to support streaming. Restart your router and modem to refresh the connection. If that doesn’t work, try connecting your device directly to the router with an Ethernet cable to bypass any potential Wi-Fi issues.

Another common issue is an overloaded network, especially during peak usage times. Try streaming during off-peak hours to see if that improves the loading speed. Additionally, make sure your device and Netflix app are up to date. Update the app and your device’s software to the latest version to ensure optimal performance.

If you’ve been using Netflix for a while, there may be a buildup of cache and cookies that could be slowing down your streaming. Clear the cache and cookies on your device to see if that resolves the buffering and loading issues.

Netflix’s slow loading may be due to high demand and limited server capacity.

Troubleshooting Slow Netflix Loading

1. Check your internet connection to ensure it is strong and stable.

2. Close any other applications or devices using the same network to free up bandwidth.

3. Restart your router and modem to refresh the connection.

4. Clear the cache and cookies on your device to improve loading speed.

5. Update the Netflix app to the latest version to fix any bugs or issues.

6. Switch to a wired connection instead of using Wi-Fi for a more stable and faster connection.

7. Contact your internet service provider to troubleshoot any potential network issues.

8. Consider upgrading your internet plan to a higher speed if slow loading persists.

Slow Netflix loading can be caused by a poor internet connection or network congestion.

Internet Connection and Network Settings

Issue Possible Fix
Slow Internet Connection Check your internet speed using a speed test website and consider upgrading your plan if necessary.
Wi-Fi Signal Strength Move closer to your router or consider using a Wi-Fi extender to improve signal strength.
Network Congestion Try streaming during off-peak hours or consider switching to a less congested Wi-Fi channel.
Router Placement Ensure your router is placed in a central location and is not obstructed by walls or other objects.
Network Settings Check for any QoS (Quality of Service) settings on your router and prioritize streaming traffic.

javascript
const startTime = performance.now();
fetch('https://www.netflix.com')
.then(response => {
const endTime = performance.now();
const loadTime = endTime - startTime;
console.log(`Netflix took ${loadTime} milliseconds to load`);
})
.catch(error => {
console.error('Error loading Netflix:', error);
});

This code uses the `performance.now()` function to measure the time before and after making a request to the Netflix website, and then logs the time it took to load in the console. This is a very basic example and would need to be expanded and adapted to provide more comprehensive network performance monitoring for Netflix.

Clearing Cache and App Data

– Clearing the cache and app data can help resolve slow loading issues on the Netflix app.
– To clear the cache on an Android device, go to Settings > Apps > Netflix > Storage > Clear Cache.
– On an iPhone or iPad, uninstalling and reinstalling the Netflix app can achieve the same result.
– Clearing app data on Android can also be helpful by going to Settings > Apps > Netflix > Storage > Clear Data.
– For iOS devices, uninstalling and reinstalling the app will also clear the data.
– These steps can help to refresh the app and improve its performance, resulting in faster loading times.
– It’s important to note that clearing the app data will remove any downloaded titles, so be sure to re-download any content that you want to keep.

Restarting and Reinstalling Netflix

If you’re experiencing slow loading times on Netflix, restarting and reinstalling the app can help resolve the issue. First, restart your device to clear out any temporary glitches that may be causing the slow loading. If that doesn’t work, try reinstalling the Netflix app to ensure that you have the latest version and that any potential software issues are resolved.

Another thing to consider is clearing the cache on your device, as this can help improve the app’s performance. Simply go to the settings of your device, find the Netflix app, and clear the cache. Additionally, make sure that your internet connection is strong and stable, as a poor connection can lead to slow loading times. If all else fails, you may want to consider reaching out to Netflix customer support for further assistance.

Avoiding Throttling and Improving Speed

Internet speed test

– Internet speed
– Network congestion
– Streaming quality settings
– Device performance

To avoid throttling and improve speed when streaming Netflix, there are a few key steps you can take. First, check your internet speed to ensure it meets the minimum requirements for streaming. If it’s below par, consider upgrading your plan or switching to a different provider.

Next, consider network congestion. This can slow down your streaming speed, especially during peak usage times. To combat this, try streaming during off-peak hours or use a wired connection instead of Wi-Fi to improve your connection stability.

Another factor to consider is the streaming quality settings on your Netflix account. Lowering the streaming quality can improve loading times and reduce buffering, especially if your internet speed is not optimal.

Finally, assess your device performance. Older devices or those with limited processing power may struggle to stream Netflix smoothly. Consider upgrading your device or clearing out any unnecessary files and apps to free up resources for streaming.

By addressing these factors, you can avoid throttling and improve the speed of Netflix loading, ensuring a smoother and more enjoyable streaming experience.

Additional Tips and FAQs

  • Check your internet connection:
    • Ensure your internet speed meets the minimum requirements for streaming.
    • Try restarting your router or modem.
    • Consider using a wired connection instead of Wi-Fi.
  • Clear your browser’s cache:
    • Open your browser’s settings and find the option to clear your cache.
    • Clearing the cache can help improve loading times for streaming sites.
  • Disable browser extensions:
    • Some browser extensions can slow down the loading of streaming sites.
    • Try disabling extensions one by one to see if it improves the loading speed.
  • Update your device’s software:
    • Make sure your device’s operating system and apps are up to date.
    • Updates can often include performance improvements that can help with loading speeds.
  • Contact your internet service provider:
    • If you’ve tried everything and are still experiencing slow loading times, contact your ISP for further assistance.
    • They may be able to troubleshoot any issues with your connection.

How to Fix Forza Horizon 4 Crashing on PC

Having trouble with Forza Horizon 4 crashing on your PC? Let’s explore some effective solutions to fix this issue.

Update your graphics card drivers: Outdated drivers can often cause crashes in Forza Horizon 4. Visit the official website of your graphics card manufacturer and download the latest drivers for your specific model.

Check system requirements and update drivers

System requirements and update drivers image.

To fix Forza Horizon 4 crashing on your PC, it’s important to first check your system requirements and update your drivers. This will ensure that your hardware and software are compatible and up to date.

1. Check your system requirements: Make sure that your PC meets the minimum system requirements for Forza Horizon 4. This includes having the right operating system (Windows 10), a compatible processor (Intel or AMD), enough RAM (at least 8GB), and a graphics card that supports DirectX 12.

2. Update your drivers: Outdated or incompatible drivers can cause crashes in games. Update your graphics card drivers by visiting the manufacturer’s website (Nvidia or AMD) and downloading the latest drivers for your specific card model. You may also want to update other drivers like your sound card or network adapter.

3. Restart your PC: After updating your drivers, restart your PC to apply the changes and ensure that everything is running smoothly.

Ensure your PC meets the minimum system requirements for Forza Horizon 4 to avoid crashes and performance issues.

Install game patches and update Windows

First, make sure you have a stable internet connection. Connect your PC to Wi-Fi or Ethernet to ensure uninterrupted internet access.

To install game patches, open the Microsoft Store app on your PC. Search for Forza Horizon 4 and open its page. Look for any available updates and click on the “Install” button to download and install them.

Next, update your Windows operating system. Press the Windows key on your keyboard and type “Windows Update.” Open the Windows Update settings and click on “Check for updates.” If there are any updates available, click on the “Install” button to update your Windows.

Additionally, make sure your graphics drivers are up to date. Visit the website of your graphics card manufacturer (such as Nvidia or Radeon) and download the latest drivers for your specific GPU model. Install the drivers and restart your PC.

It’s also a good idea to check for any available updates for DirectX, as this is an essential component for gaming. To do this, press the Windows key + R to open the Run dialog box. Type “dxdiag” and press Enter. In the DirectX Diagnostic Tool, click on the “Display” tab and check the DirectX version. Visit the Microsoft website to download and install the latest version if needed.

Remember to restart your PC after installing updates and drivers. This helps ensure the changes take effect properly.

Update your graphics card drivers regularly as outdated drivers can cause crashes in Forza Horizon 4.

Clear standby memory and disable microphone

Task Manager

To clear standby memory and disable the microphone in Forza Horizon 4 on PC, follow these steps:

1. Clear Standby Memory:
– Press the Windows key + R to open the Run dialog box.
– Type “cmd” and press Enter to open the Command Prompt.
– In the Command Prompt, type “echo 1 > %windir%\system32\rundll32.exe advapi32.dll, ProcessIdleTasks” and press Enter.
– This will clear the standby memory and potentially fix any crashing issues caused by memory overload.

2. Disable the Microphone:
– Right-click on the speaker icon in the system tray and select “Sounds”.
– Go to the “Recording” tab.
– Right-click on the microphone you want to disable and select “Disable”.
– This will prevent any microphone-related issues from causing crashes in Forza Horizon 4.

Remember to save any changes you make and restart your PC for the changes to take effect.

If you’re still experiencing crashing issues after performing these steps, consider checking for any available updates for your graphics card (e.g., Radeon 200 series or GeForce 900 series), updating your operating system (e.g., Windows 10), or verifying the integrity of the game files. Additionally, make sure your drivers are up to date and your computer meets the minimum system requirements for Forza Horizon 4.

If the problem persists, you may want to consider contacting the game’s support team or seeking further assistance from online forums or communities dedicated to Forza Horizon 4 troubleshooting.

python
import os
import subprocess

def check_game_files():
# Check if Forza Horizon 4 game files are intact
game_folder = "C:\\Program Files\\Forza Horizon 4"
if os.path.exists(game_folder):
verify_cmd = f"DISM.exe /Online /Cleanup-image /Scanhealth"
process = subprocess.Popen(verify_cmd, shell=True, stdout=subprocess.PIPE, stderr=subprocess.PIPE)
output, error = process.communicate()
if process.returncode == 0:
print("Game files are intact.")
else:
print("Game files are corrupted. Attempting repair...")
repair_cmd = f"DISM.exe /Online /Cleanup-image /Restorehealth"
subprocess.call(repair_cmd, shell=True)
else:
print("Forza Horizon 4 game folder not found.")

def update_display_drivers():
# Update display drivers to the latest version
print("Updating display drivers...")
# Code to update display drivers goes here

def check_system_requirements():
# Check if the PC meets the minimum system requirements for Forza Horizon 4
print("Checking system requirements...")
# Code to check system requirements goes here

def fix_forza_crashing():
print("Fixing Forza Horizon 4 crashing...")

check_game_files()
update_display_drivers()
check_system_requirements()

print("Fixing complete.")

fix_forza_crashing()

Add Forza Horizon 4 as an exception to antivirus

Antivirus settings page

To fix Forza Horizon 4 crashing on PC, you may need to add the game as an exception to your antivirus software. Here’s how:

1. Open your antivirus software.
2. Look for the settings or options menu.
3. Find the section related to exclusions or exceptions.
4. Add the Forza Horizon 4 game folder as an exception. This is typically located in the installation directory of the game.
5. Save the changes and exit the antivirus settings.

By adding Forza Horizon 4 as an exception, you are allowing the game to bypass the antivirus scans and potential false positives that may trigger crashes. This can help resolve crashing issues and improve the game’s performance.

Remember to keep your antivirus software up to date and regularly scan your system for any potential threats. Adding the game as an exception does not mean compromising your computer’s security, as long as you are downloading games and updates from reliable sources.

If you continue to experience crashing issues after adding Forza Horizon 4 as an exception, consider checking for any available patches or updates for the game. It’s also a good idea to ensure that your PC meets the minimum system requirements for the game, including compatible hardware and software.

If you’re still having trouble, you may want to seek further assistance from the game’s support team or community forums, where other players may have encountered and resolved similar issues.

Perform a clean boot and check for hard drive errors

Windows boot screen

Performing a clean boot and checking for hard drive errors can help resolve the issue of Forza Horizon 4 crashing on your PC. Here’s how you can do it:

1. Clean boot:
– Press the Windows key + R to open the Run dialog box.
– Type “msconfig” (without quotes) and press Enter.
– In the System Configuration window, go to the Services tab.
– Check the “Hide all Microsoft services” box and click on “Disable all”.
– Go to the Startup tab and click on “Open Task Manager”.
– In the Task Manager, disable all the startup items.
– Close the Task Manager and click on OK in the System Configuration window.
– Restart your computer.

2. Check for hard drive errors:
– Press the Windows key + X and choose “Command Prompt (Admin)”.
– In the command prompt window, type “chkdsk C: /f” (without quotes) and press Enter.
– Replace “C:” with the drive letter where Forza Horizon 4 is installed.
– If prompted, type “Y” and press Enter to schedule a disk check on the next restart.
– Restart your computer.

Performing a clean boot helps identify if any third-party software or services are causing conflicts. Checking for hard drive errors ensures that any potential issues with the storage device are resolved.

Reset or reinstall Forza Horizon 4

If you are experiencing frequent crashes while playing Forza Horizon 4 on your PC, there are a few steps you can take to try and fix the issue. One option is to reset or reinstall the game. This can help resolve any software bugs or conflicts that may be causing the crashes. Here’s how you can do it:

1. Reset Forza Horizon 4:
– Open the Start menu and go to Settings.
– Click on Apps, then Apps & features.
– Scroll down and find Forza Horizon 4 in the list of installed apps.
– Click on it and select Advanced options.
– Under Reset, click on the Reset button.
– Confirm the action and wait for the process to complete.
– Once done, launch the game and see if the crashes have been resolved.

2. Reinstall Forza Horizon 4:
– Open the Start menu and go to Settings.
– Click on Apps, then Apps & features.
– Scroll down and find Forza Horizon 4 in the list of installed apps.
– Click on it and select Uninstall.
– Follow the on-screen instructions to uninstall the game completely.
– After uninstalling, go to the Microsoft Store and search for Forza Horizon 4.
– Click on the Install button to reinstall the game.
– Launch the game and check if the crashes still occur.

Copy/Paste Error in TeamViewer

In my experience with TeamViewer, I encountered a significant issue – the copy/paste error.

Access Issues and Solutions

Error message on computer screen

If you are experiencing copy/paste errors in TeamViewer, there are a few potential solutions you can try.

First, make sure that both the host and client computers are running the latest version of TeamViewer. Updates often include bug fixes and improvements that can resolve access issues.

If you’re using Windows 10, try restarting the TeamViewer service:
1. Press the Windows key + R to open the Run dialog box.
2. Type “services.msc” and press Enter to open the Services window.
3. Scroll down and find “TeamViewer” in the list.
4. Right-click on “TeamViewer” and select Restart.

If the issue persists, it may be related to clipboard settings.

Try the following:
1. On the host computer, open TeamViewer and go to the “Extras” menu.
2. Click on “Options” and go to the “Advanced” tab.
3. Under “Advanced settings for connections to this computer,” check the box for “Share clipboard” and click “OK.”

If you are still unable to copy/paste, it could be due to security settings or antivirus software blocking the feature.

Here’s what you can do:
1. Temporarily disable any antivirus software or firewall on both the host and client computers.
2. If you’re using a password manager, try disabling it temporarily as well.
3. Check your clipboard whitelist settings in TeamViewer and make sure the necessary applications (such as Microsoft Outlook) are allowed.

Understanding the Blockage

To begin, it is important to check if the issue is specific to TeamViewer or if it occurs with other applications as well. If the problem is isolated to TeamViewer, follow these steps:

1. Check the clipboard settings: Open TeamViewer and navigate to the “Extras” menu. Select “Options” and go to the “Advanced” tab. Ensure that the “Sync clipboard” option is enabled.

2. Restart TeamViewer: Close TeamViewer completely and reopen it. This simple step can often resolve minor software glitches.

3. Check for conflicting applications: Some applications, such as password managers or antivirus software, can interfere with the clipboard functionality. Temporarily disable any such programs and see if the issue persists.

If the problem occurs with multiple applications, including TeamViewer, follow these steps:

1. Restart the computer: A simple reboot can resolve temporary software issues and refresh the system.

2. Update operating system and applications: Ensure that you are using the latest version of Microsoft Windows and TeamViewer. Outdated software can sometimes cause compatibility issues.

3. Scan for malware: Run a thorough scan of your computer using reliable antivirus software. Malware infections can disrupt normal system functions, including the clipboard.

Resolving Access Problems

If you are experiencing access problems in TeamViewer due to a copy/paste error, there are a few steps you can take to resolve the issue.

First, make sure that you have the latest version of TeamViewer installed on your computer. Updates often include bug fixes and improvements that can address common issues.

Next, check your clipboard settings. Sometimes, copy/paste errors can be caused by clipboard conflicts with other programs or settings. To resolve this, open TeamViewer and go to the “Extras” menu, then select “Options.” In the Options window, navigate to the “Advanced” tab and ensure that the “Sync clipboard” option is selected.

If the issue persists, try restarting your computer. This can help refresh system processes and resolve any temporary glitches that may be causing the copy/paste error.

If none of these steps resolve the issue, you may want to consider reaching out to TeamViewer support for further assistance. They can provide more specific troubleshooting steps tailored to your specific situation.

Effective Solutions for Unblocking

  • Restarting the TeamViewer application: Sometimes, a simple restart can resolve the copy/paste error. Close the application and reopen it to see if the problem persists.
  • Updating TeamViewer to the latest version: Check if there are any available updates for TeamViewer. Updating to the latest version can often fix bugs and errors, including the copy/paste issue.
  • Checking clipboard settings: Ensure that the clipboard settings in TeamViewer are properly configured. Go to the options or preferences menu and verify that the “Clipboard synchronization” feature is enabled.
  • Restarting the computer: A system restart can sometimes clear any temporary glitches or conflicts that may be causing the copy/paste error.
  • Disabling antivirus or firewall temporarily: Antivirus software or firewalls may sometimes interfere with the clipboard functionality. Temporarily disabling them can help identify if they are the root cause of the problem.
  • Adjusting clipboard synchronization settings: In TeamViewer, try changing the clipboard synchronization settings to alternative options like “Text only” or “File transfer.” Experimenting with different settings may help resolve the issue.
  • Reinstalling TeamViewer: If all else fails, uninstalling and reinstalling TeamViewer can often eliminate any underlying issues that may be causing the copy/paste error.

iPhone Sound Troubleshooting & Fixes

Having trouble with the sound on your iPhone? Here are some troubleshooting tips and fixes.

Adjusting Sound Settings

To adjust sound settings on your iPhone, follow these steps:

1. Start by unlocking your iPhone and navigating to the home screen.

2. Locate the “Settings” app and tap on it to open.

3. In the Settings menu, scroll down and look for the “Sounds & Haptics” option. Tap on it to access the sound settings.

4. Here, you will find various options to adjust different sound settings on your iPhone. Let’s explore a few of them:

a. Ringer and Alerts: This section allows you to control the volume of your ringer and alert sounds. You can use the slider to adjust the volume to your desired level.

b. Text Tone: Tap on this option to choose a different sound for incoming text messages. You can select from the pre-installed tones or even choose a custom sound from your Library.

c. Ringtone: Similar to the Text Tone option, you can select a different ringtone for incoming calls. Again, you can choose from the pre-installed options or pick a custom ringtone from your Library.

d. Vibration: In this section, you can customize the vibration patterns for calls, texts, and alerts. You can select from various pre-set patterns or even create a custom vibration by tapping on the Create New Vibration option.

e. FaceTime Ringtone: If you use FaceTime for video calls, you can set a specific ringtone for incoming FaceTime calls in this section.

f. Sound and Vibration Patterns: This option allows you to set specific sound and vibration patterns for different events like Calendar alerts, AirDrop, and more.

5. After making any changes to the sound settings, make sure to test them by playing a sample sound or receiving a test call or message. This will ensure that the adjustments you made are to your liking.

Remember, if you’re having trouble with sound on your iPhone, checking and adjusting these settings can often resolve the issue. If the problem persists, you may need to explore other troubleshooting options or seek further assistance from Apple Support.

Troubleshooting Sound Issues

If you’re experiencing sound issues on your iPhone, don’t worry, there are several troubleshooting steps you can try to fix the problem. Follow these instructions to get your sound back up and running:

1. Check the volume settings: Make sure that the volume on your iPhone is turned up and not muted. To adjust the volume, use the volume buttons on the side of your device. You can also check the Control Center by swiping down from the top right corner of the screen and ensuring that the volume slider is not all the way down.

2. Restart your iPhone: Sometimes, a simple restart can resolve sound issues. Press and hold the power button until you see the “slide to power off” option. Slide it to turn off your device, then press and hold the power button again to turn it back on.

3. Check for software updates: Outdated software can sometimes cause sound problems. Make sure that your iPhone is running the latest version of iOS. Go to Settings > General > Software Update and follow the prompts if an update is available.

4. Clean the speaker and ports: Dust and debris can accumulate in the speaker or charging port, causing sound problems. Use a soft brush or toothbrush to gently clean these areas. Be careful not to damage any components.

5. Disable Bluetooth: If you have connected your iPhone to a Bluetooth device, such as headphones or a car stereo, check if the sound issue persists when Bluetooth is turned off. Go to Settings > Bluetooth and toggle the switch to off.

6. Check audio settings in apps: If you’re experiencing sound issues with a specific app, check the audio settings within that app. Look for options to adjust the volume or mute settings.

7. Reset all settings: If none of the above steps have resolved the sound problem, you can try resetting all settings on your iPhone. This will not erase your data, but it will reset all settings to their default values. Go to Settings > General > Reset > Reset All Settings. Note that you will need to reconfigure any personalized settings you had previously.

8. Contact Apple Support: If you’ve tried all the troubleshooting steps and are still experiencing sound issues, it may be necessary to contact Apple Support for further assistance. They can provide more specific guidance based on your device model and situation.

Controlling iPhone Volume

To control the volume on your iPhone, follow these simple steps:

1. Adjust the volume using the physical buttons: On the side of your iPhone, you will find two buttons – the volume up button and the volume down button. Press the volume up button to increase the volume and the volume down button to decrease it. You can do this while playing music, watching videos, or during calls.

2. Adjust the volume in Settings: If you prefer to control the volume through the settings, you can do so by following these steps:

a. Open the Settings app on your iPhone.
b. Scroll down and tap on “Sounds & Haptics” or “Sounds.”
c. Under the “Ringers and Alerts” section, you will find a slider labeled “Change with Buttons.” Toggle this switch on to allow the physical buttons to control the volume.
d. You can also adjust the volume for different apps or system sounds by selecting them individually in the settings.

3. Use the Control Center: The Control Center is a convenient way to access various settings on your iPhone, including volume control. To access the Control Center, swipe down from the top right corner (on iPhone X and newer models) or swipe up from the bottom of the screen (on older models). In the Control Center, you will find a volume slider that you can adjust by swiping up or down.

4. Adjust the volume during a call: When you are on a call, you can adjust the call volume separately from the media volume. To do this, simply press the volume up or volume down buttons during the call. You can also use the on-screen slider that appears when you press the volume buttons during a call.

Remember, if you are experiencing volume issues on your iPhone, make sure to check if the volume is turned up, the silent switch is off, and any connected accessories are properly connected. If the issue persists, you may need to restart your iPhone or update its software to fix any software-related issues.

python
import pyaudio
import wave

def record_audio(file_name, duration):
# Set parameters for audio recording
format = pyaudio.paInt16
channels = 1
sample_rate = 44100
chunk = 1024

audio = pyaudio.PyAudio()

# Open the stream and start recording
stream = audio.open(format=format,
channels=channels,
rate=sample_rate,
input=True,
frames_per_buffer=chunk)

print("Recording started...")
frames = []

# Record audio for the specified duration
for i in range(int(sample_rate / chunk * duration)):
data = stream.read(chunk)
frames.append(data)

# Stop recording and save the audio file
print("Recording finished.")
stream.stop_stream()
stream.close()
audio.terminate()

wave_file = wave.open(file_name, 'wb')
wave_file.setnchannels(channels)
wave_file.setsampwidth(audio.get_sample_size(format))
wave_file.setframerate(sample_rate)
wave_file.writeframes(b''.join(frames))
wave_file.close()

def play_audio(file_name):
# Open the audio file for playback
wave_file = wave.open(file_name, 'rb')

audio = pyaudio.PyAudio()

# Open a stream and start playing the audio
stream = audio.open(format=audio.get_format_from_width(wave_file.getsampwidth()),
channels=wave_file.getnchannels(),
rate=wave_file.getframerate(),
output=True)

print("Playing audio...")
data = wave_file.readframes(1024)

while data:
stream.write(data)
data = wave_file.readframes(1024)

# Stop playing audio
print("Playback finished.")
stream.stop_stream()
stream.close()
audio.terminate()

# Usage example:
record_audio("recorded_audio.wav", 5)
play_audio("recorded_audio.wav")

This sample code demonstrates recording audio for a specified duration using the PyAudio library in Python. It then saves the recorded audio to a WAV file and plays it back using the same library.

Managing Sound Options

Issue Possible Fix
No sound from iPhone speaker 1. Check if the mute switch on the side of the iPhone is turned on.
2. Increase the volume using the volume buttons on the side of the iPhone.
3. Ensure that Do Not Disturb mode is not enabled.
4. Restart the iPhone.
5. Check if any debris is blocking the speaker.
6. Update the iOS software to the latest version.
No sound during calls 1. Make sure the volume is turned up during the call.
2. Check if the call is not being routed to a Bluetooth device.
3. Disable Bluetooth if not in use.
4. Check if the call audio is not being directed to a connected headset or headphones.
5. Try using the speakerphone option during the call.
6. Reset network settings on the iPhone.
No sound in apps or media 1. Increase the volume using the volume buttons on the side of the iPhone.
2. Check if the app or media player is not muted within its settings.
3. Ensure that the ringer volume is not turned off.
4. Restart the iPhone.
5. Update the problematic app or reinstall it.
6. Reset all settings on the iPhone.

Troubleshooting Tips for DVD CD Writer Not Working

Having trouble with your DVD/CD writer? Look no further! I’ve got some troubleshooting tips that will get your writer up and running in no time.

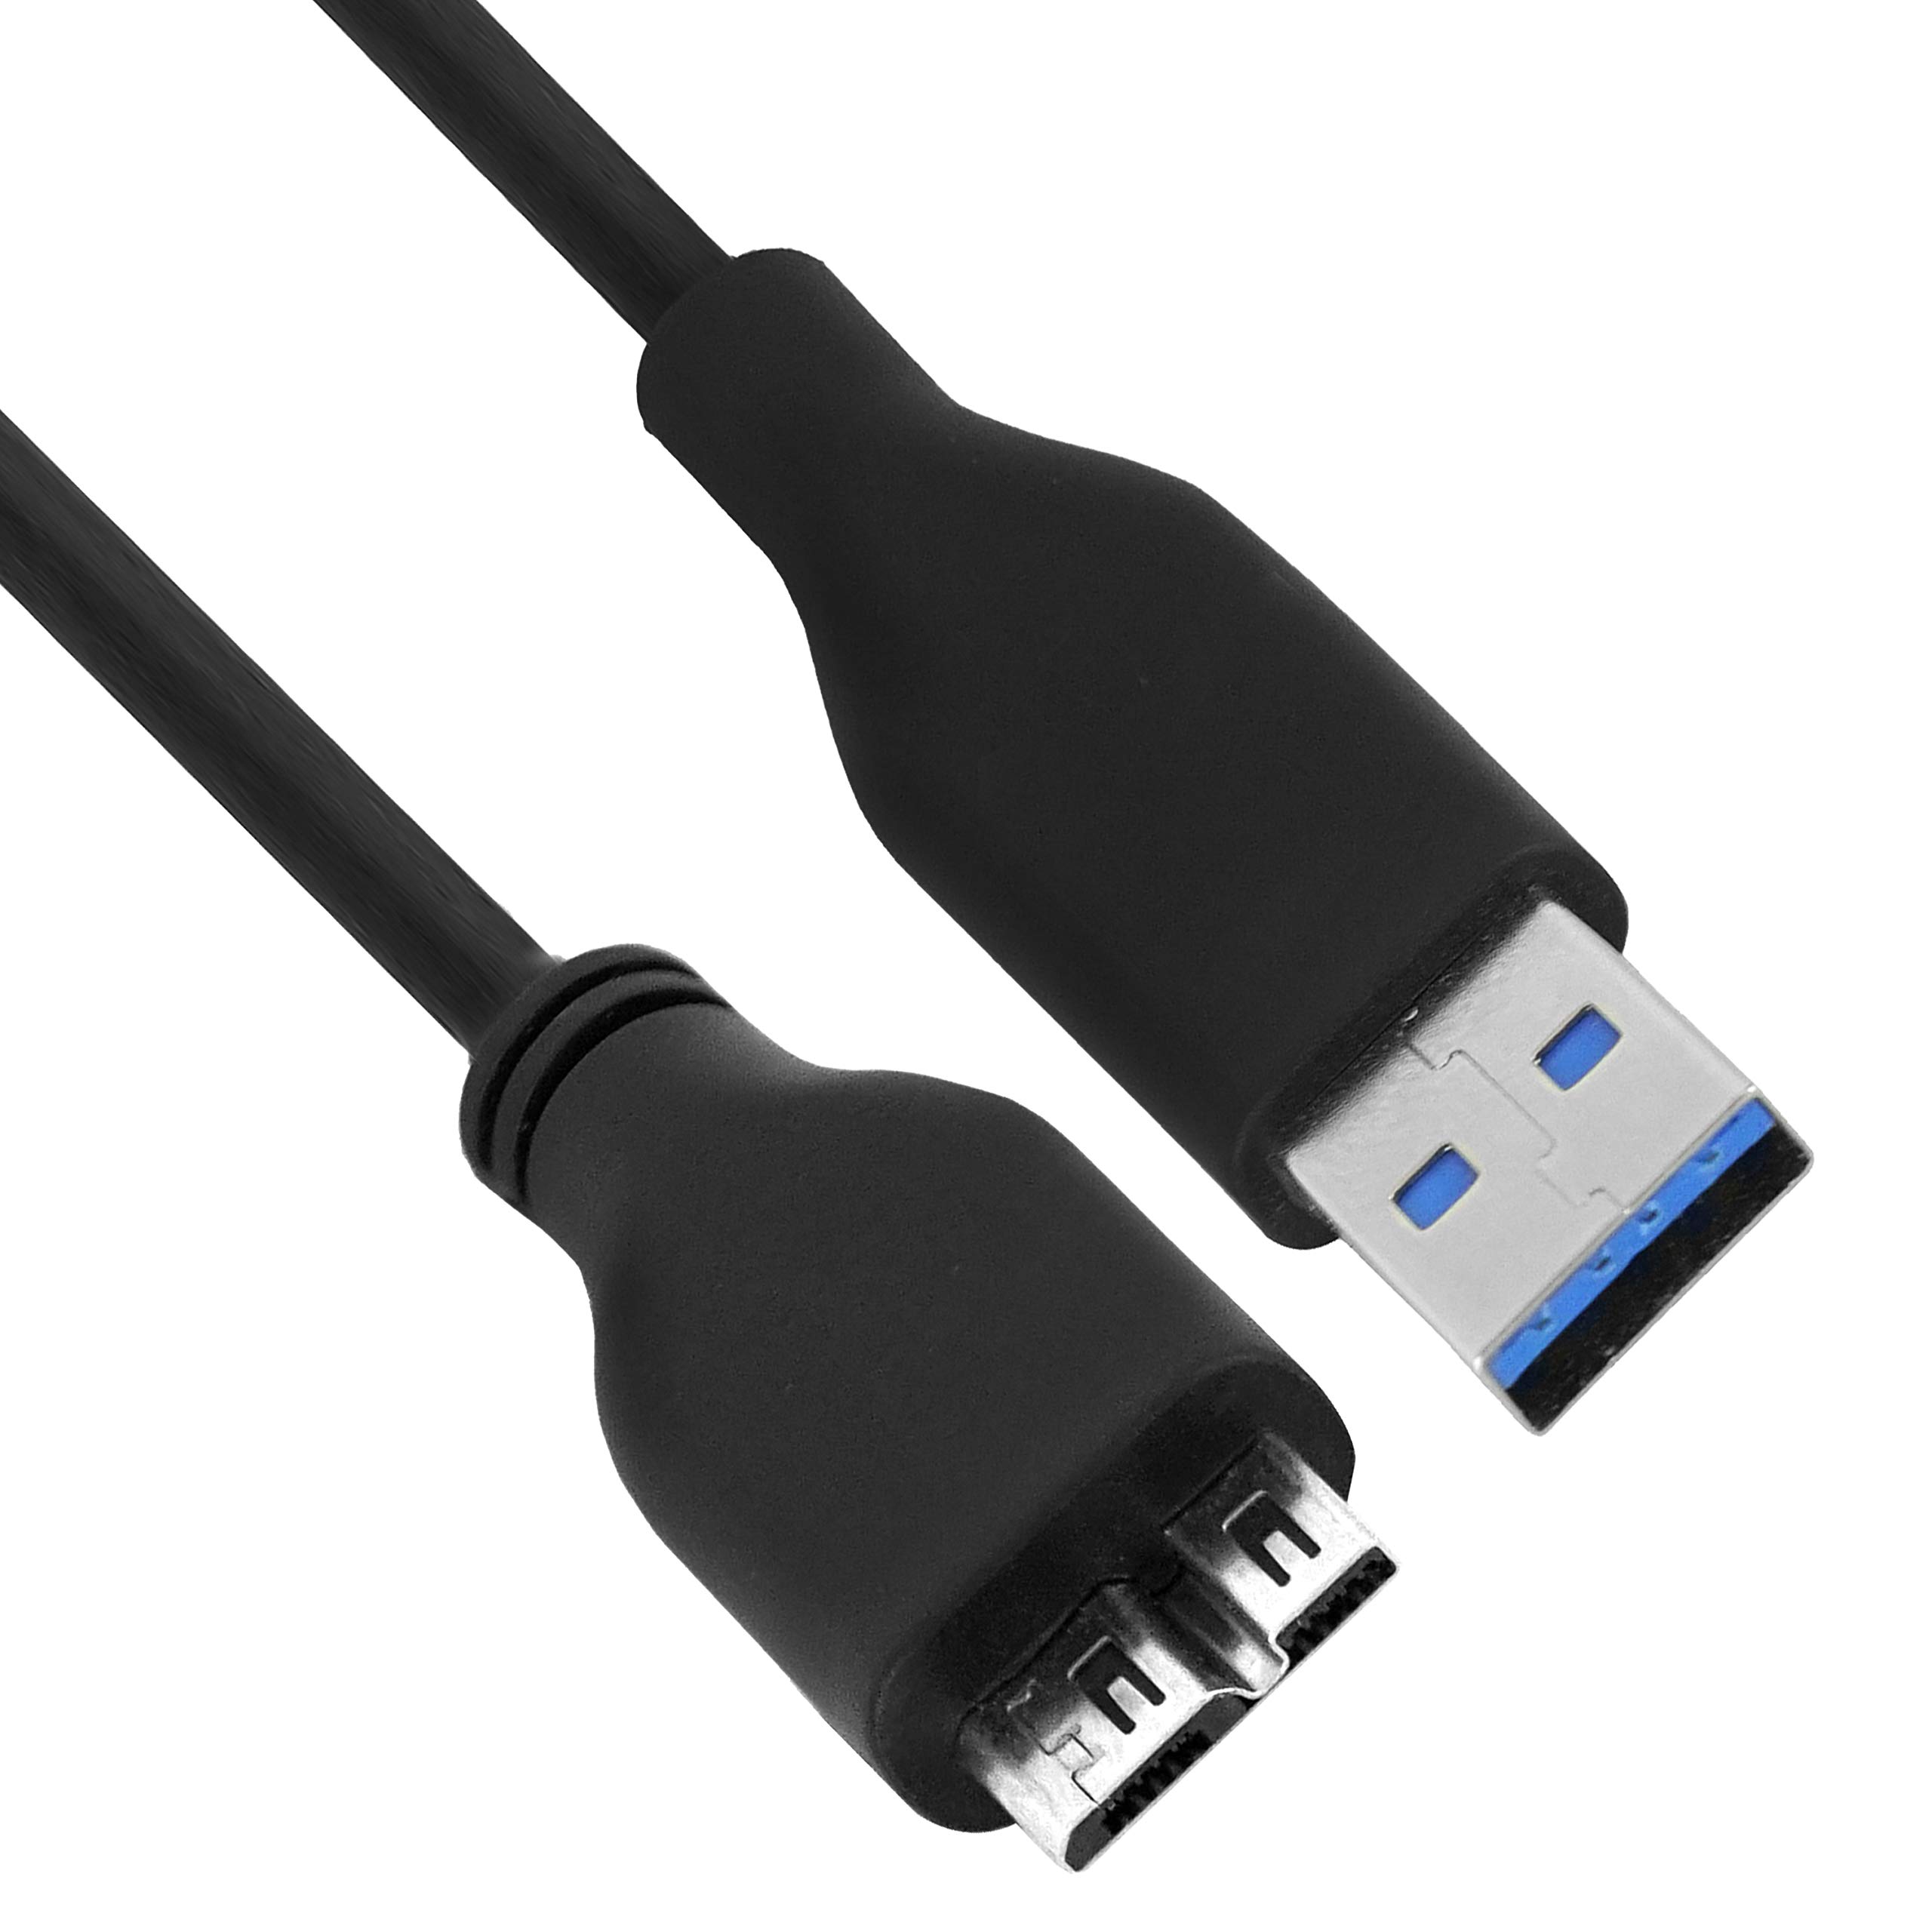
Check the connections: Ensure that the DVD/CD writer is properly connected to the computer. Make sure the cables are securely plugged in and there are no loose connections.

Removing Virtual Drive Software

If you are experiencing issues with your DVD or CD writer not working, it could be due to virtual drive software installed on your computer. Virtual drive software creates virtual CD/DVD drives on your system, which can sometimes interfere with the functionality of your physical DVD/CD writer. To resolve this issue, you will need to remove the virtual drive software from your computer. Here’s how you can do it:

1. Open the Control Panel in Windows. You can do this by searching for “Control Panel” in the Windows search bar and selecting it from the results.
2. In the Control Panel, navigate to the “Programs” or “Programs and Features” section.
3. Look for the virtual drive software that you have installed on your computer. It might be listed as Daemon Tools or any other similar software.
4. Once you find the software, right-click on it and select “Uninstall” from the context menu.
5. Follow the on-screen instructions to complete the uninstallation process.

After removing the virtual drive software, restart your computer and check if the DVD/CD writer is working properly. If the issue persists, you may need to troubleshoot further or seek professional assistance.

Sometimes the simplest solution is the most effective – try cleaning the lens of your DVD/CD writer before assuming it’s broken.

python
import pycdio

def check_cd_drives():
drives = pycdio.get_devices()
if not drives:
print("No CD/DVD drives found.")
else:
print("Found the following CD/DVD drives:")
for drive in drives:
print(drive)

check_cd_drives()

To run this code, you'll need to have the `pycdio` library installed. You can install it using the following command:

pip install pycdio

This code will list the CD/DVD drives detected on your system if any are found. It utilizes the `get_devices` function from the `pycdio` library to retrieve the drive information.

Again, please note that this code is just a basic example and may not address complex issues. It is always recommended to consult appropriate documentation or seek professional assistance to troubleshoot problems with DVD or CD writers.

Checking BIOS/UEFI Settings and Updating Chipset Firmware

To troubleshoot a DVD/CD writer that is not working, it is important to check the BIOS/UEFI settings and update the chipset firmware.

To begin, access the BIOS/UEFI settings by restarting your computer and pressing the necessary key (usually displayed during the boot process). Once in the BIOS/UEFI settings, navigate to the “Advanced” or “Configuration” section and look for options related to the optical disc drive or CD-ROM. Ensure that the drive is enabled and set as the primary boot device if necessary.

Next, update the chipset firmware by visiting the manufacturer’s website and downloading the latest firmware for your specific motherboard model. Follow the provided instructions to install the firmware update, which may involve running an .exe file or using a specific tool.

After updating the firmware, it is also recommended to check for any available driver updates. Open the Device Manager by pressing the Windows key + X and selecting “Device Manager” from the menu. Expand the “DVD/CD-ROM drives” category, right-click on your optical disc drive, and select “Update driver.” Choose the option to search automatically for updated driver software and let Windows update the driver if any updates are found.

In addition, make sure that Windows is up to date by going to the Settings menu, selecting “Update & Security,” and clicking on “Windows Update.” If there are any available updates, download and install them.

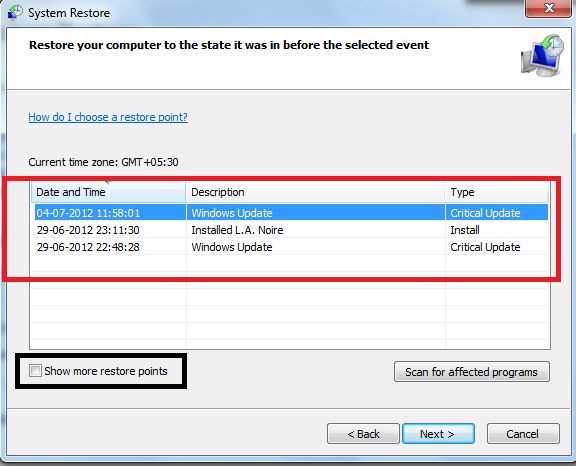
If the DVD/CD writer still does not work after these steps, it may be necessary to perform a system restore to a previous point when the drive was working properly. Open the Control Panel, search for “System Restore,” and follow the prompts to restore your system to a previous state.

Technology can be fickle, and even the most reliable devices can malfunction at times.

Editing Windows Registry to Resolve CD Drive Issues

To resolve CD drive issues, you can edit the Windows Registry. Here’s how:

1. Press the Windows key + R to open the Run dialog box.
2. Type “regedit” and press Enter to open the Windows Registry Editor.
3. In the left pane, navigate to the following location:
HKEY_LOCAL_MACHINE\SYSTEM\CurrentControlSet\Control\Class\{4D36E965-E325-11CE-BFC1-08002BE10318}
4. Look for the “UpperFilters” and “LowerFilters” entries in the right pane. If they exist, right-click on each entry and select “Delete” from the context menu.
5. Close the Registry Editor and restart your computer.

This process removes any potentially conflicting filters that may be causing issues with your CD drive. After restarting, check if the CD drive is working properly.

Note: Editing the Windows Registry can be risky, so it’s crucial to back up your registry before making any changes. If you are not comfortable with this process, it’s recommended to seek assistance from a qualified technician.

Troubleshooting DVD Movie Playback on Windows 10

If you’re experiencing issues with DVD movie playback on Windows 10, there are a few troubleshooting tips you can try to resolve the problem. Here are some steps you can take:

1. Check device connections: Ensure that your DVD/CD writer is properly connected to your computer. Make sure the cables are securely plugged in, and if you’re using an external writer, check that it’s powered on.

2. Update device drivers: Outdated or corrupt device drivers can cause playback issues. Go to the manufacturer’s website and download the latest drivers for your DVD/CD writer.

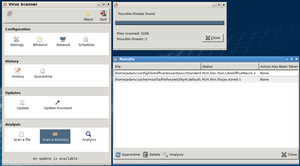
3. Check for software conflicts: Sometimes, other software on your computer can interfere with DVD playback. Close any unnecessary programs running in the background and temporarily disable antivirus software to see if it makes a difference.

4. Use a different media player: If the issue persists, try playing the DVD with a different media player. Windows 10 comes with Windows Media Player, or you can try third-party options like VLC Media Player or Media Player Classic.

5. Clean the disc: Dust, fingerprints, or scratches on the DVD can affect playback. Use a soft cloth to gently clean the disc from the center to the edge. Avoid using harsh chemicals or abrasive materials that could damage the disc.

6. Check for software updates: Make sure your operating system and media player software are up to date. Windows 10 regularly releases updates that may address DVD playback issues.

7. Install codec packs: Some DVDs require specific codecs to play correctly. Install a codec pack like K-Lite Codec Pack to ensure you have the necessary codecs for DVD playback.

8. Try using an optical disc image: If all else fails, you can create an optical disc image of the DVD and play it from your hard drive. Use software like Daemon Tools to create the image and then mount it as a virtual drive.

Common Symptoms and Resolutions for DVD/CD Drive Problems

Common Symptoms and Resolutions for DVD/CD Drive Problems

If your DVD/CD drive is not working properly, there are a few common symptoms you may encounter. Here are some troubleshooting tips to help you resolve these issues:

1. Drive not recognized by the computer:
– Check the connections: Ensure that the drive is properly connected to the motherboard and power supply. Make sure the cables are securely plugged in.
– Update device drivers: Open the Device Manager and look for any exclamation marks or error messages next to the DVD/CD drive. If there are any issues, update the device driver by right-clicking on the drive and selecting “Update driver.”
– Check for patches and updates: Make sure your operating system is up to date. Check the manufacturer’s website for any firmware or driver updates specifically for your DVD/CD drive.

2. Drive not reading discs:
– Clean the disc: Use a soft, lint-free cloth to clean the disc and remove any smudges or fingerprints.
– Try different discs: Test the drive with different CDs or DVDs to determine if the issue is with specific discs or the drive itself.
– Check for physical damage: Inspect the disc and drive for any scratches or physical damage that may prevent it from being read.

3. Slow burning or writing speeds:
– Check for software conflicts: Some third-party software or background processes can interfere with the burning process. Close any unnecessary programs before attempting to burn a disc.
– Update burning software: If you are using third-party burning software, make sure it is up to date. Check the manufacturer’s website for any available updates.
– Adjust burning settings: In your burning software, try reducing the burning speed or changing the disc format to see if it improves the writing speed.

Troubleshooting Bad or Dirty CDs

A scratched or dirty CD.

If cleaning the CD doesn’t solve the problem, try using a different CD drive or computer to see if the issue persists. This will help determine if the problem is with the CD itself or the CD drive.

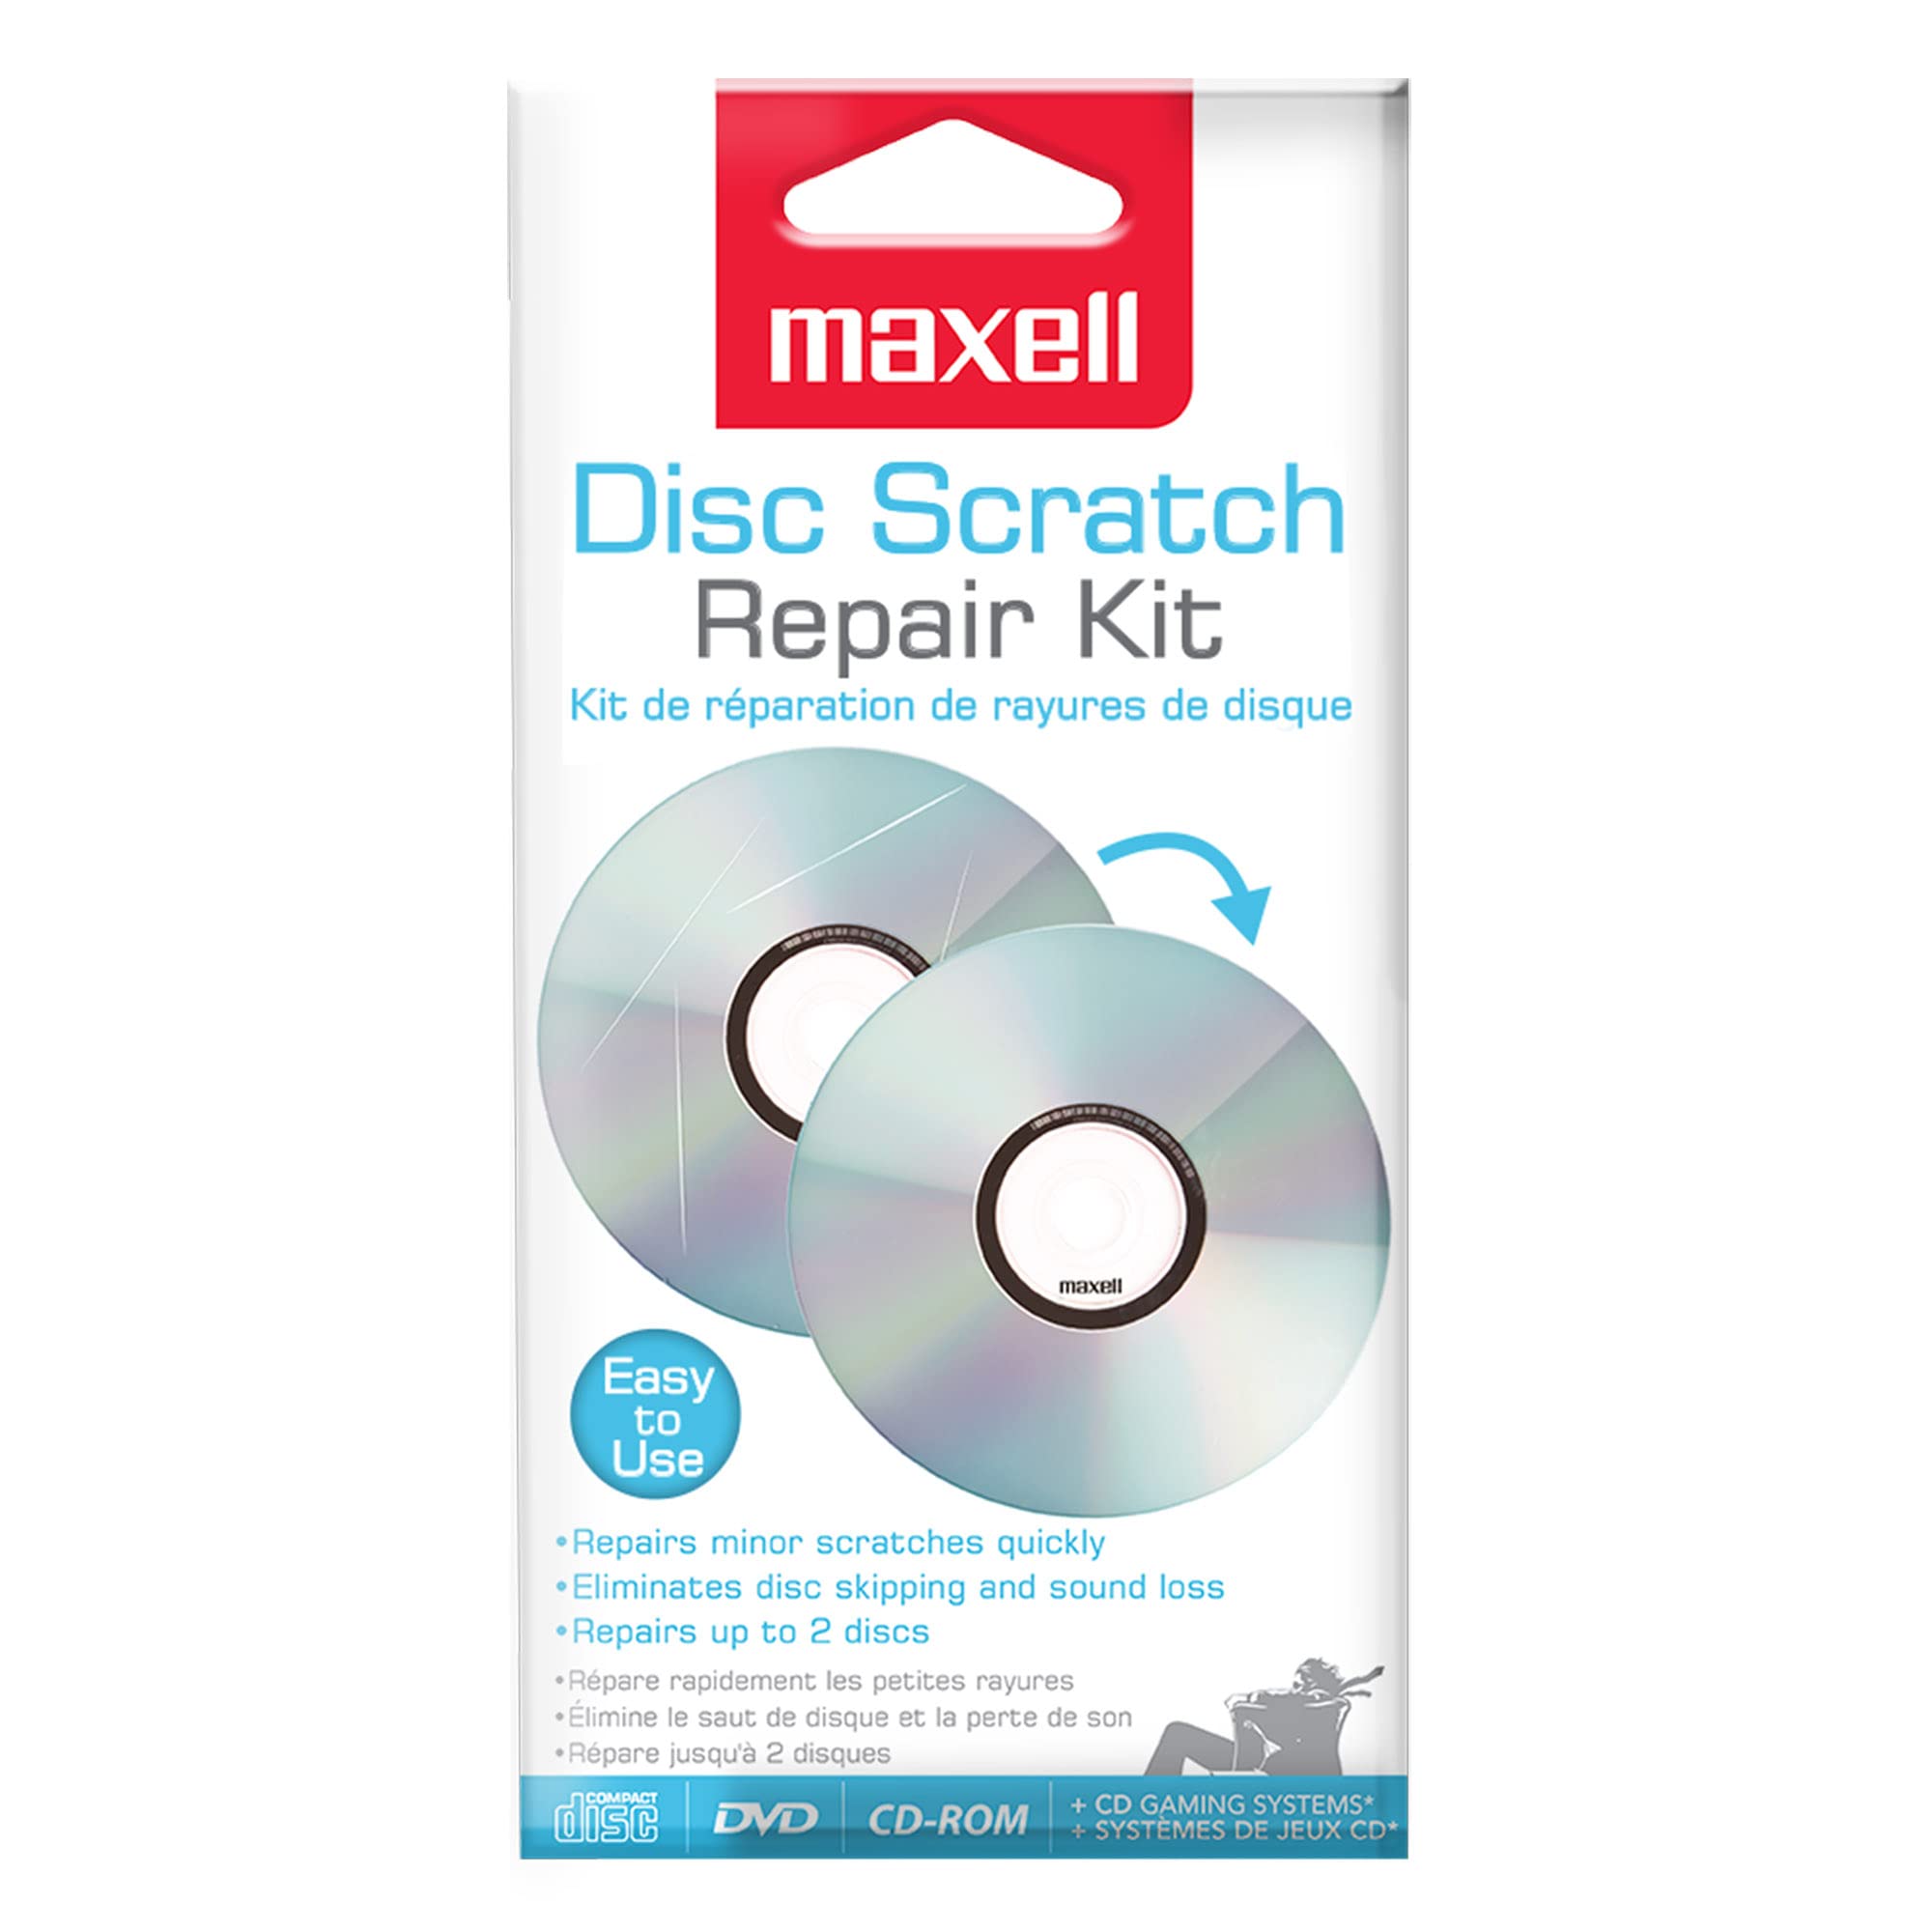
If the CD still doesn’t work, you can try using a disk repair kit, which can help fix minor scratches and improve readability. Follow the instructions provided with the kit carefully.

Another troubleshooting step is to update the device driver for your CD drive. To do this, open the Control Panel in Windows, navigate to the Device Manager, locate your CD drive under the “DVD/CD-ROM drives” section, and right-click to select “Update driver.” Follow the prompts to complete the update.

In some cases, a patch or software update may be available for your CD drive. Check the manufacturer’s website or support page for any available updates and install them accordingly.

If you’re unable to resolve the issue using the above steps, you can try creating a disk image of the CD and then accessing it through File Explorer. This can sometimes bypass any physical issues with the CD itself. To create a disk image, use a program like Daemon Tools or similar software. Once the disk image is created, you can mount it as a virtual drive and access the contents.

If all else fails, it may be necessary to seek professional help or consider replacing the CD if it is severely damaged. Remember to always back up important data and files.

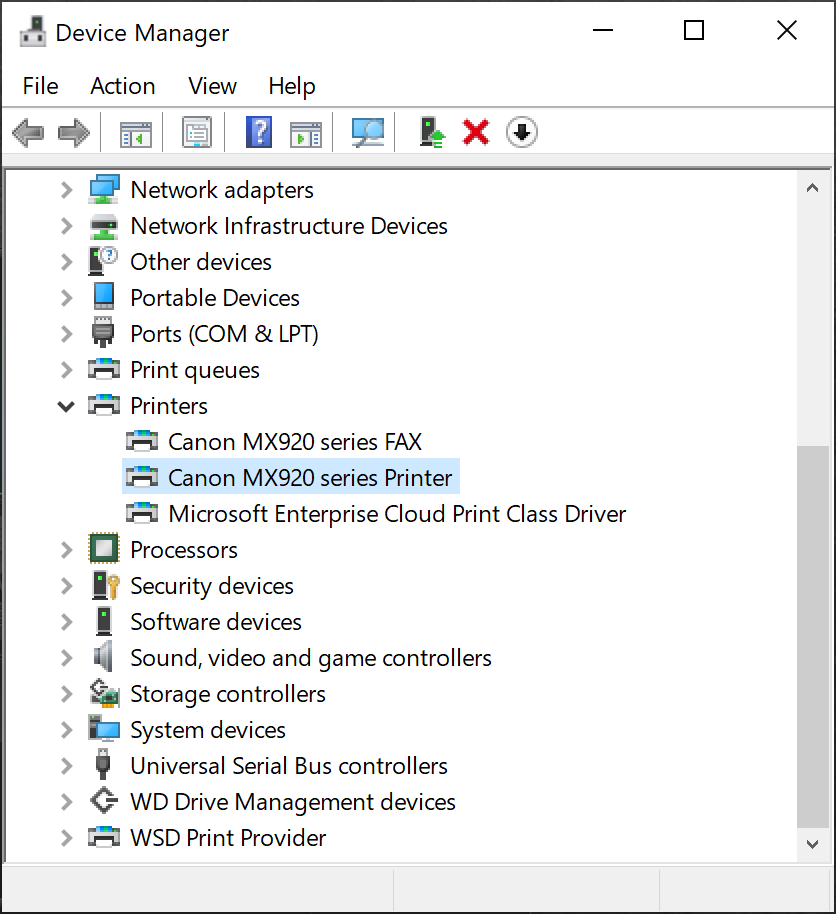
Checking Device Manager and Resolving CD Drive Corruption

A computer screen displaying the Device Manager interface.

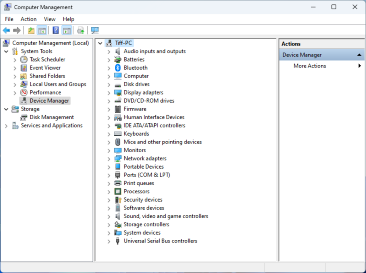
To check for CD drive corruption, you can start by accessing the Device Manager on your Windows computer. Here’s how:

1. Open the Control Panel by right-clicking on the Windows Start menu and selecting it from the menu.
2. In the Control Panel, search for “Device Manager” and click on it to open.
3. In the Device Manager window, expand the “DVD/CD-ROM drives” category to see the list of CD drives installed on your computer.

If you notice any exclamation marks or error icons next to your CD drive, it indicates a problem with the device. To resolve the corruption, follow these steps:

1. Right-click on the problematic CD drive and select “Uninstall” from the context menu.
2. Confirm the uninstallation when prompted.
3. Restart your computer to allow Windows to reinstall the CD drive.

After the restart, check if the CD drive is working properly. If not, you can try updating the driver software for the CD drive. Here’s how:

1. Go back to the Device Manager and right-click on the CD drive.
2. Select “Update driver” from the context menu.
3. Choose the option to automatically search for updated driver software.
4. Follow the on-screen instructions to complete the driver update process.

Once the driver update is finished, restart your computer and test the CD drive again. If the issue persists, you may need to consider other troubleshooting steps or seek technical assistance.