Constant Blue Circle Windows 10 Spinning Issue Fix

Are you experiencing the frustrating constant blue circle spinning issue on Windows 10? Let’s find a fix for this annoying problem.

Change Mouse Settings and Processes

Mouse settings menu

If you are experiencing constant blue circle spinning issues on Windows 10, it may be helpful to check for any background processes that are using up system resources. Open the Task Manager by pressing Ctrl + Shift + Esc, then go to the “Processes” tab and look for any programs that are using a high amount of CPU or memory. You can end these processes by right-clicking on them and selecting “End task”.

Another potential solution is to run CHKDSK to check for any bad sectors on your hard drive. To do this, open a Command Prompt window as an administrator by pressing the Windows key and typing “cmd”. Then, type “chkdsk /f” and press Enter. This will scan your hard drive for errors and fix any issues it finds.

Perform System and Software Checks

  • Check for Windows updates
    • Open Settings by pressing Windows key + I
    • Click on Update & Security
    • Click on Check for updates
    • Install any available updates
  • Run a system scan
    • Open Command Prompt as an administrator by searching for it in the start menu, right-clicking, and selecting Run as administrator
    • Type sfc /scannow and press Enter
    • Wait for the scan to complete and follow any instructions given
  • Check for software conflicts
    • Open Task Manager by pressing Ctrl+Shift+Esc
    • Go to the Startup tab
    • Disable any unnecessary startup programs
    • Restart your computer

Update or Uninstall Drivers and Software

To fix the constant blue circle spinning issue on Windows 10, you can try updating or uninstalling drivers and software that may be causing the problem.

To update drivers, go to Device Manager and right-click on the device you want to update. Select “Update driver” and follow the on-screen instructions.

If updating drivers doesn’t work, you can try uninstalling them. Right-click on the device in Device Manager and select “Uninstall device.” Restart your computer and Windows will reinstall the driver automatically.

For software, go to Control Panel and select “Uninstall a program.” Find the software causing the issue, right-click on it, and select “Uninstall.”

After updating or uninstalling drivers and software, restart your computer to see if the blue circle spinning issue has been resolved.

Execute System File and Virus Scans

Running a system file check can help repair corrupted system files that may be contributing to the spinning blue circle. To do this, open Command Prompt as an administrator by searching for it in the Start menu, right-clicking on it, and selecting “Run as administrator.” Then, type “sfc /scannow” and hit Enter.

Additionally, performing a virus scan can help detect and remove any malware that might be causing the issue. Use a reliable antivirus software to scan your computer thoroughly and remove any malicious files it finds.

By executing system file and virus scans, you can troubleshoot and potentially resolve the constant blue circle spinning issue on Windows 10.

Utilize Windows Recovery and Command Prompt Tools

Once in Command Prompt, you can run various commands to fix the issue. First, try running the System File Checker tool by typing “sfc /scannow” and pressing Enter. This will scan and repair any corrupted system files that may be causing the problem.

If the System File Checker tool doesn’t resolve the issue, you can also try running the Deployment Image Servicing and Management tool by typing “DISM /Online /Cleanup-Image /RestoreHealth” and pressing Enter. This tool will scan and repair any Windows image corruption that may be causing the spinning blue circle problem.

If these steps don’t work, you can also try using the Bootrec tool to repair the master boot record. Type “bootrec /fixmbr” and “bootrec /fixboot” one at a time and press Enter after each command.

After running these commands, restart your computer and see if the spinning blue circle issue has been fixed. If not, you may need to consider other troubleshooting steps or seek further assistance.

Adjust or Reset System Hardware

Additionally, you can restart your computer to see if that clears up the spinning blue circle. If that doesn’t work, you can try resetting the hardware settings on your computer to default by going to the Control Panel and selecting the System and Security option.

If the issue persists, you may need to update your drivers or BIOS to ensure compatibility with Windows 10. You can do this by going to the manufacturer’s website for your hardware and downloading the latest drivers.

Another option is to run a disk check to see if there are any bad sectors on your hard drive causing the issue. You can do this by opening File Explorer, right-clicking on your hard drive, selecting Properties, going to the Tools tab, and clicking on Check.

Explore Advanced Repair or Reset Options

If the problem persists, you can try repairing corrupted system files using the System File Checker tool. Open Command Prompt as an administrator and run the command “sfc /scannow”. You can also reset your PC to its factory settings by going to Settings > Update & Security > Recovery > Reset this PC.

FAQ

How do I fix a blue loading circle that keeps spinning on Windows 10?

To fix a blue loading circle that keeps spinning on Windows 10, you can try disabling the Mouse Pointer Location feature.

How do I get rid of the blue circle on my computer?

To get rid of the blue circle on your computer, access the ScreenPad Control Panel settings, navigate to Window Control, and toggle off Cursor Locator. This should make the circle disappear.

Why does blue circle keep spinning?

The blue circle keeps spinning because something is happening in the background that is not visible.

Why does the little circle keeps spinning on my computer?

The little circle keeps spinning on your computer because it is a visual indicator that your computer is busy processing a task. This typically occurs when the computer is performing a task that requires a significant amount of resources.

Fortnite PC: Fix FPS Drops & Stutters

In this guide, I will provide tips and solutions to fix FPS drops and stutters in Fortnite on PC.

Verify Game Integrity and Update Files

Verify Game Integrity and Update Files: To fix FPS drops and stutters in Fortnite on PC, start by verifying the integrity of the game files. Open the Epic Games Launcher, go to Library, click on the three dots next to Fortnite, and select Verify. This will ensure that all game files are correct and up to date.

Additionally, make sure to update your graphics card drivers to the latest version. Go to the manufacturer’s website, download the latest drivers, and install them on your system. Keeping your graphics card drivers updated can help improve game performance and stability.

Optimize Graphics and System Settings

  • Lower In-Game Graphics Settings:
    • Open Fortnite and go to Settings.
    • Lower the graphics settings such as resolution, textures, shadows, effects, and post-processing to improve FPS.
    • Apply the changes and restart the game.
  • Update Graphics Drivers:
    • Open Device Manager by pressing Windows key + X.
    • Expand the Display adapters category.
    • Right-click on your graphics card and select Update driver.
    • Follow the on-screen instructions to update the driver.
  • Adjust System Settings:
    • Open Control Panel and go to System and Security.
    • Click on Power Options and select High performance.
    • Disable Background Apps by going to Settings > Privacy > Background apps.

Manage Background Processes and Power Plan

Manage Background Processes: To fix FPS drops and stutters in Fortnite on PC, it’s crucial to manage background processes efficiently. Close any unnecessary applications running in the background to free up system resources. You can use Task Manager to identify and end these processes easily. Consider disabling any startup programs that may be consuming resources unnecessarily.

Power Plan: Adjusting your power plan settings can also have a significant impact on performance. Set your power plan to High Performance to ensure your PC is using its full capabilities when running Fortnite. Avoid using power-saving modes as they can limit the performance of your system. Make sure your PC is plugged in while gaming to avoid any power-related issues.

Enhance Connection and Performance Priority

To enhance connection and performance in Fortnite PC, first ensure your Windows is up to date. Next, check for any background tasks that may be causing FPS drops and stutters. Consider overclocking your CPU for a boost in performance, but be cautious not to overdo it.

If you are experiencing FPS drops, try lowering your in-game settings such as resolution or texture quality. Make sure your computer hardware meets the recommended requirements for Fortnite. Disable any unnecessary programs running in the background to free up resources.

Joining a Discord server closer to your location can reduce latency issues. Updating your device drivers can also help improve performance. Consider adjusting your network settings to prioritize Fortnite traffic.

FAQ

How do I fix FPS drops in Fortnite PC?

To fix FPS drops in Fortnite PC, you can try the following steps:
– Verify your game files
– Enable Fortnite performance mode (Beta)
– Keep your computer cool
– Update your graphics drivers
– Disable background programs
– Defragment your hard drive
– Change the Power Mode for Windows PC.

Why is my FPS dropping when I have a good PC?

My FPS is dropping despite having a good PC, and this could be due to issues with the graphics card drivers. The FPS is reliant on the processing power of the graphics card and the refresh rate of the monitor. Inadequate software support can lead to a decrease in FPS even with a high-quality GPU.

Why is my FPS so low in Fortnite with a good PC?

Your FPS in Fortnite may be low on a good PC due to software and operating system taking up valuable system resources needed for rendering frames. Adjusting system settings and updating software can help free up resources for a higher FPS.

Why is Fortnite so choppy on my PC?

Fortnite is choppy on your PC due to improper game settings causing lag issues, such as FPS drops or internet lags. Check and adjust your graphics settings in the game by going to Settings > Video Settings.

High End PC Games Stuttering – Tips & Fixes

In this article, I will discuss common causes of stuttering in high end PC games and provide tips and fixes to help improve performance.

Understanding Game Stutter Causes

Game stutter in high-end PC games can be frustrating, but understanding the causes can help you find solutions. One common reason for game stutter is overclocking, which can lead to instability and cause games to stutter. Lag in video games can also be a culprit, as it creates delays in the gameplay that can result in stuttering.

Issues with hardware components, such as a slow solid-state drive or a weak power supply unit, can also cause high-end PC games to stutter. Ensuring that your hardware is up to par and properly optimized can help prevent stuttering issues.

Another potential cause of game stutter is program optimization. If a game is not optimized properly, it can lead to stuttering during gameplay. Be sure to check for updates and patches that may improve the game’s performance.

If you are experiencing game stutter, try troubleshooting your system to identify any potential issues. Check for updates to your graphics card drivers, make sure your computer hardware meets the game’s requirements, and close any unnecessary background processes that may be causing interruptions.

Updating Graphics Drivers and In-Game Settings

  • Update Graphics Drivers
    • Open Device Manager by right-clicking on the Start button and selecting it from the menu.
    • Expand the Display adapters category.
    • Right-click on your graphics card and select Update driver.
    • Choose Search automatically for updated driver software.
    • Restart your computer after the update is complete.
  • Adjust In-Game Settings
    • Open the game settings menu.
    • Lower graphics settings such as texture quality, shadows, and anti-aliasing.
    • Disable V-Sync and motion blur.
    • Check for any unnecessary background processes that may be running while playing the game.

Optimizing PC Performance for Gaming

If you’re experiencing stuttering while playing high-end PC games, there are several tips and fixes that can help optimize your PC performance for gaming.

Check your PC’s specifications to ensure they meet the minimum requirements for the game you are playing. Upgrading your hardware, such as your GPU or RAM, may be necessary to prevent stuttering.

Monitor your CPU and GPU temperatures while gaming. Overheating can cause performance issues. Make sure your cooling system is working efficiently and consider cleaning any dust buildup in your PC.

Close any unnecessary background processes that may be using up CPU or RAM resources. This can help free up more power for your game to run smoothly.

Update your graphics drivers to the latest version. Outdated drivers can cause performance issues and stuttering in games. Visit the manufacturer’s website to download and install the latest drivers for your GPU.

Adjust your in-game settings to lower the graphics quality if your PC is struggling to run the game smoothly. Lowering the resolution or disabling certain graphics features can help improve performance.

Consider overclocking your CPU or GPU if you are comfortable with the process. This can help boost performance, but be cautious as it can also lead to instability if not done correctly.

Repairing System Files to Improve Stability

Repairing System Files: Sometimes, the stuttering issue in high-end PC games can be attributed to corrupted system files. To address this, you can use the System File Checker tool in Windows to scan and repair these files. Open Command Prompt as an administrator by searching for it in the Start menu, then type “sfc /scannow” and hit Enter. This will scan your system files and automatically fix any issues it finds.

It’s also a good idea to check for updates for your operating system. Updates often include bug fixes and improvements that can help with performance issues. To check for Windows updates, go to Settings > Update & Security > Windows Update.

Another important step is to update your graphics card drivers. Outdated drivers can cause performance issues, including stuttering in games. Visit the website of your GPU manufacturer (like NVIDIA or AMD) to download and install the latest drivers for your specific card.

If you suspect that your hard drive might be the cause of the stuttering, consider running a disk check to scan for errors. Open Command Prompt as an administrator and type “chkdsk /f” followed by the letter of the drive you want to check (e.g. C:). This will scan and fix any errors it finds on the drive.

Frequently Asked Questions

How do I fix game stuttering on my high end PC?

To fix game stuttering on a high-end PC, it is recommended to update drivers and software, optimize in-game settings, monitor system temperatures, close resource-heavy background programs, consider system setup, and ensure a balance between CPU and GPU usage.

Why is my PC stuttering on every game?

Your PC may be stuttering on every game because it lacks sufficient RAM. This can cause games to stutter or crash, especially if there is not enough video RAM. Utilizing virtual RAM can help alleviate this issue.

Are stutters caused by GPU or CPU?

Stutters are typically caused by high CPU or GPU usage, often due to overloaded RAM.

Why does my high end PC feel laggy?

Your high end PC may feel laggy due to various reasons such as insufficient cooling leading to thermal throttling, slow internet speed causing high pings in multiplayer games, or background apps consuming processing power. Consider cleaning fans, improving ventilation, upgrading your home network, and closing unnecessary background apps to address the lag issue.

Troubleshoot WMI Provider Host High CPU Win7 Issues

Having trouble with WMI Provider Host High CPU usage on your Windows 7 computer? Let’s troubleshoot the issue together.

Understanding WMI Provider Host

Windows Task Manager icon

WMI Provider Host can sometimes cause high CPU usage on Win7 systems, leading to performance issues. To troubleshoot this problem, you can follow these steps:

First, open Task Manager by pressing Ctrl + Shift + Esc or right-clicking on the taskbar and selecting Task Manager.

Next, navigate to the Processes tab and locate the WMI Provider Host process (WmiPrvSE.exe).

Check the CPU usage of the WMI Provider Host process. If it is consuming a high amount of CPU, it may be causing the performance issues.

To resolve this, you can try restarting the WMI service by following these steps:
1. Open a command prompt with administrative privileges by searching for cmd in the Start menu, right-clicking on Command Prompt, and selecting Run as administrator.
2. Type the following command and press Enter: net stop winmgmt
3. After the service has stopped, type the following command and press Enter: net start winmgmt

Check if the CPU usage of the WMI Provider Host process has decreased after restarting the service. If the issue persists, you may need to further investigate or seek additional assistance.

Diagnosing High CPU Usage Through Task Manager

Process Name CPU Usage (%)
WMI Provider Host 90%
System Idle Process 5%
Chrome.exe 3%
svchost.exe 2%

Troubleshooting and Fixing Techniques

To troubleshoot and fix WMI Provider Host high CPU issues on Windows 7, follow these steps:

1. Use Task Manager to identify the process causing high CPU usage. Right-click on the taskbar and select Task Manager. Look for WmiPrvSE.exe under the Processes tab.

2. Restart the Windows Management Instrumentation service. Press Win + R, type services.msc, and hit Enter. Locate Windows Management Instrumentation, right-click on it, and select Restart.

3. Check for Windows updates. Go to Control Panel > Windows Update and check for any available updates. Install them and restart your computer.

If the issue persists, you can try running a system file checker scan by typing “sfc /scannow” in the Command Prompt. You can also use the Performance Monitor tool to monitor CPU usage and identify any other processes causing high CPU consumption.

Monitoring and Analyzing WMI Activity

Computer screen showing WMI activity logs

  • Use performance monitoring tools to track WMI activity and identify any spikes in CPU usage.
  • Open Task Manager by pressing Ctrl+Shift+Esc and navigate to the Performance tab to monitor CPU usage.
  • Use Event Viewer to check for any WMI-related errors or warnings that could be causing high CPU usage.
  • Open Event Viewer by pressing Win+R and typing eventvwr.msc to access the logs.
  • Monitor WMI queries and responses using tools like WMI Explorer or PowerShell scripts to identify any problematic queries.
  • Use WMI Explorer to browse WMI namespaces and classes, and run test queries to check for any errors.

F.A.Qs

What is the use of WmiPrvSE?

The use of WmiPrvSE is to act as a Windows Instrument Management (WMI) Provider Host, which is essential for maintaining the functionality of various applications and systems on a computer within the Microsoft Windows operating system.

Why is my WMI provider host using so much CPU?

Your WMI provider host is using a significant amount of CPU because it is likely performing tasks such as system monitoring or data retrieval for system management applications.

How do I fix 100% CPU usage?

To fix 100% CPU usage, you can try rebooting your PC. This can clear out temporary files and potentially resolve any slowdown in long-running processes that may be causing the issue.

Windows 7 Very Slow Startup Fix – Top Tips to Speed Up

Are you frustrated by the slow startup of your Windows 7 computer? Here are some top tips to help speed up the process.

Check External Devices

1. Disconnect all external devices such as USB flash drives, printers, scanners, and external hard drives from your computer.

2. Restart your computer to see if the startup speed improves. If it does, you can start reconnecting the devices one by one to identify which one is causing the slowdown.

3. Update device drivers for external devices by going to the Control Panel, selecting Device Manager, right-clicking on the device, and selecting Update Driver Software.

4. Check Event Viewer for any error messages related to external devices that could be causing the slow startup. Go to Start menu, type “Event Viewer” in the search box, and look for any critical errors.

Disable Unnecessary Startup Programs

  • Open Task Manager by pressing Ctrl+Shift+Esc
  • Click on the Startup tab at the top of the window
  • Identify any programs that are set to Enabled that you do not need to start up with Windows
  • Right-click on the program and select Disable
  • Repeat for all unnecessary startup programs
  • Restart your computer to apply the changes

Use Boot Performance Diagnostics

Windows boot performance diagnostics

Boot Performance Diagnostics is a tool in Windows 7 that can help you pinpoint the exact cause of your slow startup. To access this tool, go to the Control Panel, then click on “System and Security,” followed by “Administrative Tools.” From there, select “View Event Logs” under “Performance Information and Tools.”

Once you have opened the Event Viewer, navigate to “Applications and Services Logs,” then “Microsoft,” “Windows,” and finally “Diagnosis-Performance.” Here, you will find a list of recent boot events, along with detailed information about each one.

Look for any warnings or errors that may be causing your slow startup. Common culprits include outdated drivers, software conflicts, or disk fragmentation. By identifying and addressing these issues, you can significantly improve your boot time.

After addressing the issues identified by Boot Performance Diagnostics, restart your computer and check if the startup speed has improved. Repeat this process as needed until you achieve the desired results.

In addition to using Boot Performance Diagnostics, consider other optimization techniques such as defragmenting your hard drive, updating device drivers, and disabling unnecessary startup programs. By taking a proactive approach to optimizing your system, you can enjoy a faster and more efficient Windows 7 startup experience.

Run Performance Troubleshooter

Once you’ve launched the Performance Troubleshooter, follow the on-screen instructions to scan your system for any issues that may be impacting its performance. The troubleshooter will then provide you with recommendations on how to improve your system’s startup speed.

In addition to running the Performance Troubleshooter, you can also try **defragmenting** your hard drive. Fragmented files can slow down the boot process, so defragmenting your drive can help optimize its performance.

Another tip to speed up your Windows 7 startup is to check for any unnecessary startup programs. To do this, open the **Control Panel** and navigate to the **System Configuration** tool. From there, you can disable any programs that you don’t need to run at startup, which can help speed up the boot process.

If you’re still experiencing slow startup times after running the Performance Troubleshooter and optimizing your startup programs, you may want to consider performing a **System Restore**. This will revert your system back to a previous state when it was working properly, which can help resolve any issues that may be causing the slow startup.

Defragment Your Hard Disk

Fragmentation can slow down the boot process, so it’s important to defragment your hard disk to optimize performance.

To defragment your hard drive in Windows 7, go to the Control Panel, select System and Security, then Administrative Tools, and finally Defragment your hard drive.

You can also schedule automatic defragmentation to ensure your hard disk stays optimized.

Regularly defragmenting your hard disk is a simple way to speed up your Windows 7 startup and improve overall system performance.

Run Disk Cleanup and Delete Temporary Files

To speed up your Windows 7 startup time, one of the first steps you should take is to Run Disk Cleanup and Delete Temporary Files. These files can accumulate over time and slow down your system’s performance.

Disk Cleanup is a built-in tool in Windows that helps you free up space on your hard drive by removing unnecessary files such as temporary internet files, error reports, and recycle bin contents. To access Disk Cleanup, simply type “Disk Cleanup” in the search bar of your Start menu and select the tool from the search results.

Once Disk Cleanup is open, you can select the files you want to delete and then click on the “OK” button to remove them from your system. This can help free up valuable space on your hard drive and improve the overall performance of your computer.

In addition to running Disk Cleanup, it’s also important to regularly delete temporary files from your system. These files are created by various programs and can take up space on your hard drive, leading to slower startup times. To delete temporary files, simply type “%temp%” in the search bar of your Start menu and press Enter.

This will open the Temp folder, where you can select all the files and folders inside and delete them. Make sure to skip any files that are currently in use, as deleting them could cause issues with your system. By regularly running Disk Cleanup and deleting temporary files, you can help speed up the startup time of your Windows 7 computer.

Scan for Viruses and Malware

To ensure that your Windows 7 startup is not being slowed down by viruses and malware, it is important to regularly scan your system for any potential threats. This can help improve the speed and overall performance of your computer.

1. Use a reputable antivirus software: Install and regularly update a trusted antivirus program to scan for and remove any viruses or malware that may be causing your system to slow down during startup.

2. Perform a full system scan: Schedule regular full system scans to thoroughly check all files and folders on your computer for any malicious software that could be affecting your startup speed.

3. Enable real-time protection: Enable real-time protection in your antivirus software to actively monitor your system for any potential threats in real-time, helping to prevent slowdowns during startup.

4. Scan external devices: Be sure to scan any external devices, such as USB flash drives, before connecting them to your computer to prevent the spread of viruses and malware that could impact your startup speed.

By regularly scanning for viruses and malware on your Windows 7 system, you can help ensure that your computer starts up quickly and efficiently, without any unnecessary slowdowns caused by malicious software.

Upgrade Memory and Install an SSD

Upgrade Memory: One of the most effective ways to speed up your Windows 7 startup is to upgrade your computer’s memory. Increasing the RAM can significantly improve the speed and performance of your system. Make sure to check your computer’s specifications to determine the type and amount of memory that is compatible with your device.

Install an SSD: Another way to speed up your Windows 7 startup is to replace your traditional hard drive with a Solid State Drive (SSD). SSDs are much faster and more efficient than HDDs, resulting in quicker boot times and overall system performance. Before installing an SSD, make sure to back up your important files and prepare for a fresh installation of Windows 7.

Combining Memory Upgrade and SSD Installation: For the best results, consider upgrading your memory and installing an SSD together. This dual approach can significantly enhance the speed and efficiency of your Windows 7 startup. With increased memory and the faster storage provided by an SSD, your computer will boot up quicker and run smoother.

Fix System Issues with Windows Boot Genius

If you are experiencing slow startup issues with Windows 7, one effective solution is to use a powerful tool like Windows Boot Genius to fix system issues. This software can help identify and repair various problems that may be causing your computer to boot slowly.

First, download and install Windows Boot Genius on your computer. Follow the on-screen instructions to complete the installation process.

Once the software is installed, launch Windows Boot Genius and run a full system scan. This will help identify any underlying issues that are causing your computer to start up slowly.

After the scan is complete, follow the recommended solutions provided by Windows Boot Genius to fix the system issues. This may involve repairing corrupted files, cleaning up disk space, or optimizing system settings.

In addition to using Windows Boot Genius, you can also try other tips to speed up your Windows 7 startup. This includes disabling unnecessary startup programs, cleaning up temporary files, and defragmenting your hard drive.

FAQ

How do I fix slow startup in Windows 7?

Windows 7 is starting slow, how can you fix it? Here are nine ways to solve the issue.

How can I make Windows 7 startup faster?

To make Windows 7 startup faster, you can disable unnecessary startup programs, optimize your computer’s startup settings, and consider upgrading your hardware if needed.

Why is Windows 7 suddenly so slow?

Windows 7 may suddenly become slow due to factors such as insufficient disk space or system memory, as well as running too many programs simultaneously. Restarting the PC can help to refresh the system and potentially improve performance.

How do I fix Windows 7 stuck at startup?

To fix Windows 7 stuck at startup, you can try accessing the repair mode by pressing the F8 key before the Windows loading logo appears. Select the “Repair Your Computer” option and follow the prompts to troubleshoot and repair the issue.

Fix Windows 7 Starter Slow Boot

If you are experiencing slow boot times on your Windows 7 Starter operating system, there are several troubleshooting steps you can take to improve performance.

Symptoms and Scenarios

Symptoms of a slow boot in Windows 7 Starter may include a prolonged loading time when starting up your computer, delays in accessing programs or files, and overall sluggish performance. These issues can be frustrating, but there are steps you can take to improve your system’s speed and efficiency.

One common scenario that may lead to slow boot times is a cluttered Windows Registry. Over time, the registry can become filled with unnecessary or outdated entries, which can slow down the boot process. To address this issue, clean up your registry by using a reputable registry cleaner tool to remove any invalid or obsolete entries.

Another possible cause of slow boot times in Windows 7 Starter is a build-up of temporary files or unnecessary programs running in the background. To remedy this, use the Disk Cleanup tool to remove temporary files and uninstall any unused programs from your system. You can access the Disk Cleanup tool by searching for it in the Start menu.

Additionally, a fragmented hard drive can contribute to slow boot times in Windows 7 Starter. To address this issue, run the Disk Defragmenter tool to optimize the layout of files on your hard drive. You can access the Disk Defragmenter tool by searching for it in the Start menu.

If you are still experiencing slow boot times after following these steps, it may be helpful to check the Event Viewer for any error messages or warnings that could indicate a hardware or software issue. The Event Viewer can provide valuable insight into what may be causing the slowdown and help you troubleshoot the problem further.

Causes and Why It’s Slow

Causes Why It’s Slow
Too many startup programs These programs consume resources and slow down the boot process.
Fragmented hard drive Fragmentation can cause delays in accessing files needed during boot.
Outdated drivers Old drivers may not be optimized for performance, leading to slow boot times.
Insufficient RAM Not enough memory can result in slow boot times as the system struggles to load all necessary files.

Resolution Strategies

Windows 7 boot screen

1. Disable Unnecessary Startup Programs: To improve the boot time of Windows 7 Starter, you can disable unnecessary startup programs that might be slowing down the system. To do this, go to the Task Manager by pressing Ctrl + Shift + Esc, click on the Startup tab, and disable any programs that you don’t need to start with Windows.

2. Clean up Disk Space: Another way to speed up the boot time of Windows 7 Starter is to clean up disk space. Use the built-in Disk Cleanup tool to remove temporary files, system files, and other unnecessary data that might be taking up space on your hard drive.

3. Check for Malware and Viruses: Malware and viruses can also slow down the boot time of your system. Run a full system scan using your antivirus software to check for any malicious programs that might be causing the slowdown.

4. Update Device Drivers: Outdated or corrupt device drivers can also cause slow boot times. Make sure to update your device drivers regularly to ensure that your hardware is running smoothly.

5. Use System Restore: If you recently installed a new program or driver that is causing the slow boot time, you can use System Restore to revert your system to a previous state. This can help you undo any changes that might be affecting the boot time of Windows 7 Starter.

Performance Troubleshooting and Cleanup

To troubleshoot and clean up performance issues causing slow boot times in Windows 7 Starter, follow these steps:

1. Check for Malware: Run a full system scan using your preferred antivirus software to ensure that malware is not causing the slow boot.

2. Disable Startup Programs: Open the Task Manager by pressing Ctrl + Shift + Esc, go to the Startup tab, and disable any unnecessary programs from starting up with Windows.

3. Clean up Disk Space: Use the Disk Cleanup tool to remove temporary files, old system files, and other unnecessary data that may be taking up space and slowing down the boot process.

4. Defragment Your Hard Drive: Use the built-in Disk Defragmenter tool to optimize the layout of files on your hard drive, which can improve boot times.

5. Update Device Drivers: Make sure all your device drivers are up to date by visiting the manufacturer’s website or using Windows Update to download the latest versions.

6. Check for Windows Updates: Ensure that your system is up to date with the latest patches and hotfixes from Microsoft to address any known performance issues.

7. Disable Visual Effects: Go to System Properties > Advanced system settings > Performance settings and choose the option to adjust for best performance to disable unnecessary visual effects that may be slowing down boot times.

8. Clean up the Registry: Use a trusted registry cleaner to scan for and fix any errors or unnecessary entries in the Windows Registry that may be impacting performance.

Optimizing Startup and System Partition

To optimize startup and system partition in Windows 7 Starter for faster boot times, reduce the number of startup programs and services running on your computer. This can be done by accessing the System Configuration utility. Press the Windows key + R, type “msconfig” and hit Enter. Navigate to the “Startup” tab and uncheck unnecessary programs.

Defragment your hard drive to improve the efficiency of data retrieval during boot-up. Open the Start menu, type “Disk Defragmenter” and select the program. Choose the disk you want to defragment and click “Defragment Disk.”

Consider disabling unnecessary visual effects that can slow down your system’s boot time. Right-click on “Computer,” select “Properties,” click on “Advanced system settings,” go to the “Performance” section and choose “Adjust for best performance.”

Check for Windows updates regularly to ensure that your system is running smoothly and efficiently. Go to the Control Panel, click on “Windows Update,” and select “Check for updates.”

Optimize your system partition by removing temporary files, unused applications, and clearing the recycle bin. This can free up valuable disk space and improve overall system performance.

Advanced Solutions and Hotfix Information

  • Check for Windows Updates:
    • Open Control Panel by clicking on the Start menu and selecting Control Panel.
    • Click on System and Security.
    • Click on Windows Update and check for any available updates.
    • Install any updates that are available and restart your computer.
  • Run System Maintenance Troubleshooter:
    • Open Control Panel by clicking on the Start menu and selecting Control Panel.
    • Click on System and Security.
    • Click on Security and Maintenance.
    • Under the Maintenance section, click on Start maintenance.
    • Follow the on-screen prompts to complete the troubleshooting process.
  • Apply Hotfixes:
    • Visit the Microsoft Support website and search for any hotfixes related to slow boot issues in Windows 7 Starter.
    • Download and install any applicable hotfixes.
      Visit the Microsoft Support website and search for any hotfixes related to slow boot issues in Windows 7 Starter.
Download and install any applicable hotfixes.
    • Restart your computer after installing the hotfixes.

Conclusion and More Tips

Conclusion: In conclusion, if you are experiencing slow boot times with Windows 7 Starter, there are several troubleshooting steps you can take to improve the situation. By following the tips outlined in this article, you should be able to significantly decrease the time it takes for your system to boot up and start running smoothly again.

More Tips: In addition to the tips provided in this article, you may also want to consider checking for any Windows updates that may be available. Keeping your operating system up to date can help improve overall performance and fix any bugs or issues that may be causing slow boot times. Additionally, you may want to consider running a disk cleanup and defragmentation to optimize your system’s performance.

FAQ

How can I speed up my Windows 7 starter?

To speed up your Windows 7 Starter, you can increase your RAM, disable startup programs, change search indexing, and defrag your hard drive.

Why is Windows 7 suddenly so slow?

Windows 7 may be suddenly slow due to insufficient disk space or system memory, as well as having too many programs open at once. Restarting your PC can often help improve performance.

How much RAM do I need for Windows 7 starter?

To run Windows 7 Starter, you will need at least 1 gigabyte (GB) of RAM for the 32-bit version and 2 GB of RAM for the 64-bit version.

Troubleshoot Very Slow Firefox Loading

Having trouble with slow loading on Firefox? Let’s troubleshoot the issue together.

Optimize Page Loading Speed

Additionally, limit the number of tabs you have open at once as each tab requires resources to load. Consider updating your browser to the latest version to ensure you have access to any performance improvements that have been made.

If you are still experiencing slow loading times, try disabling hardware acceleration in Firefox. This feature can sometimes cause issues with certain hardware configurations.

Lastly, make sure your internet connection is stable and running at an adequate speed. Slow loading times can also be caused by a poor internet connection.

Fine-Tune Firefox Settings

Setting Description
1. Clear Cache Clearing the cache can help speed up Firefox by removing temporary files that may be slowing down the browser.
2. Disable Extensions Some extensions can slow down Firefox, so disabling them can help improve performance.
3. Update Firefox Make sure you are using the latest version of Firefox, as updates often include performance improvements.
4. Disable Hardware Acceleration Turning off hardware acceleration can help if you are experiencing slowdowns or crashes.
5. Adjust Content Process Limit Increasing the content process limit can help improve performance, especially if you have a lot of tabs open.
6. Refresh Firefox Refreshing Firefox can reset it to its default settings and can help fix performance issues.

Manage Add-Ons and Themes

If you suspect that ad blocking software is causing the slow loading, try disabling it temporarily to see if there is any improvement. You can also use the Task Manager on Windows to identify any processes using a lot of resources and close them if necessary.

Another helpful tool is NoScript, which allows you to control what scripts are allowed to run on web pages. Additionally, make sure your computer is free from spyware, viruses, or malware that could be impacting Firefox’s performance.

By troubleshooting these potential issues and managing your add-ons and themes, you can help speed up Firefox’s loading time and improve your browsing experience.

Enhance Performance through Updates

To enhance performance and troubleshoot very slow Firefox loading, start by updating the browser to the latest version. Check for updates by clicking on the menu button, then Help, and finally About Firefox. Updates often contain fixes for bugs and improvements that can boost speed.

If you have add-ons or extensions installed, try disabling them one by one to see if any are causing the slow loading. Ad blocking extensions like UBlock Origin can sometimes slow down browsing speed. Additionally, make sure your computer is free from spyware, viruses, and malware by running a full system scan with a reliable antivirus program.

Clear your browser cache and cookies regularly to improve loading times. If the issue persists, consider checking your computer’s task manager to see if there are any processes hogging resources. Closing unnecessary tabs and programs can also help speed up Firefox loading times.

By keeping your browser and system updated, monitoring resource usage, and troubleshooting potential issues, you can enhance Firefox performance and enjoy faster loading times.

FAQ

Why is Firefox so slow all of a sudden?

Firefox is slow all of a sudden because it may be loading too many extensions when starting up, causing it to use more system resources and slow down its speed.

Is Firefox slow 2023?

Firefox is not slow in 2023.

How do I fix Firefox slow loading?

To fix slow loading in Firefox, you can reset the browser by removing buggy add-ons or setting changes. This will delete add-ons, themes, and download history, and return settings to default. Visit “about:support” and click Refresh Firefox to do this.

Why does Firefox lag so much?

Firefox lags so much because it may accumulate too much data or trying to view too many pages simultaneously. Basic maintenance and updating the browser and add-ons can usually fix lag issues with Firefox.

Fix High Memory Usage Task Manager Windows 10/11

In this article, I will discuss how to fix high memory usage in Task Manager on Windows 10/11.

Understanding High Memory Usage

Understanding High Memory Usage: When experiencing high memory usage in Task Manager on Windows 10 or 11, it’s important to identify the culprit. Look for any programs or processes consuming a large amount of memory. Check for memory leaks or inefficient coding in applications that may be causing the issue. Consider restarting your computer to free up memory and close unnecessary programs running in the background. Monitor your memory usage regularly to catch any spikes or abnormal behavior.

If the problem persists, you may need to investigate further or seek professional help.

Symptoms and Causes of High Memory Usage

Symptoms of high memory usage in Windows 10/11 can include sluggish performance, freezing, and error messages related to low memory. Causes may include running too many programs simultaneously, memory leaks in applications, malware infections, or outdated hardware drivers.

Common symptoms of high memory usage include slow performance, freezing, and error messages related to low memory. High memory usage can be caused by running too many programs simultaneously, memory leaks in applications, malware infections, or outdated hardware drivers.

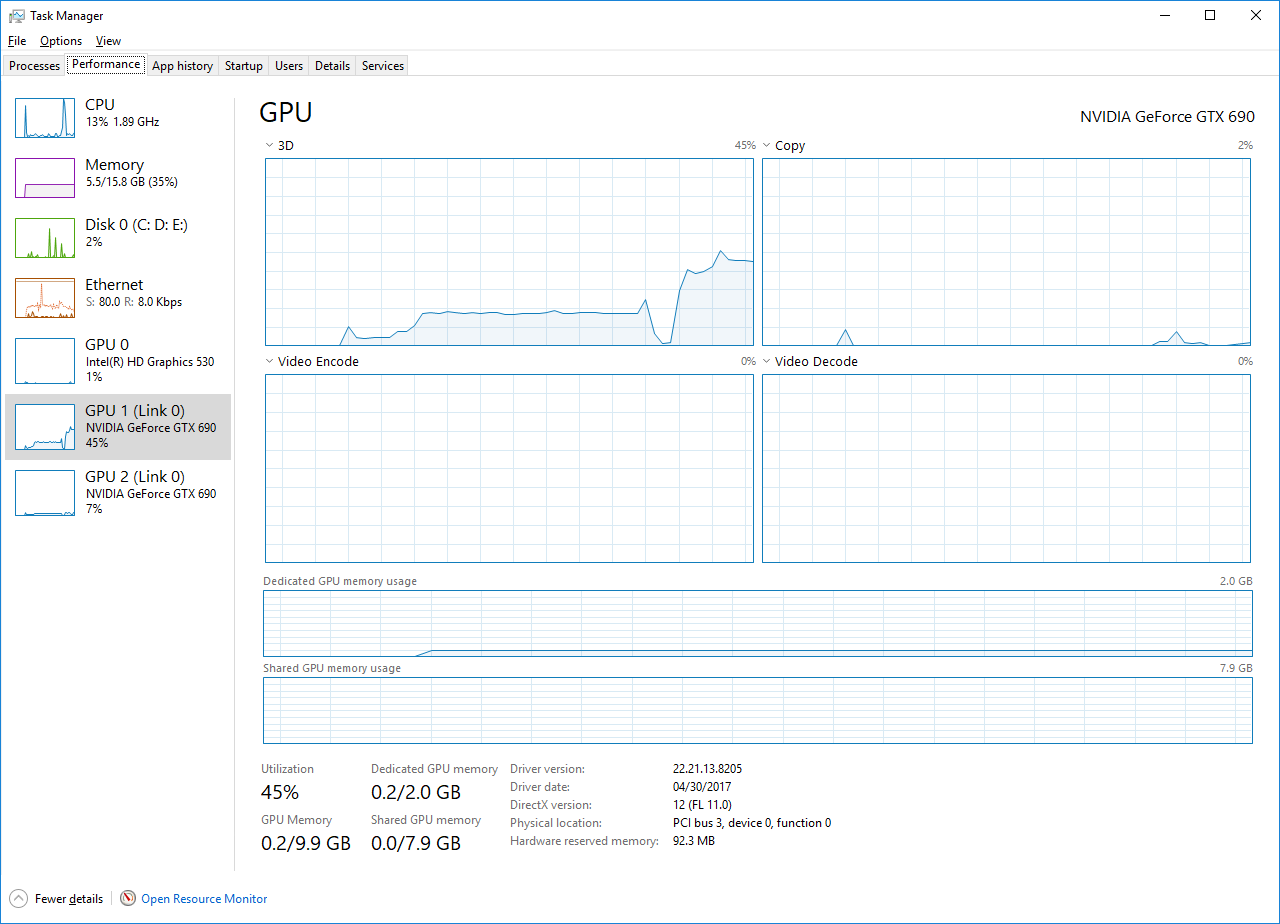
If you notice your computer is slow or unresponsive, check the Task Manager to identify which processes are using the most memory. Look for any programs that are using an unusually high amount of memory and consider closing them to free up memory resources.

Memory leaks can occur when a program fails to release memory it no longer needs, leading to an increase in memory usage over time. Updating the application or restarting your computer can help resolve memory leaks.

Malware infections can also cause high memory usage. Run a full system scan using an antivirus program to check for any malicious software that may be using up system resources.

Outdated hardware drivers can also contribute to high memory usage. Update your drivers to ensure compatibility with the latest software updates and optimize memory management on your system.

By identifying the symptoms and causes of high memory usage in Windows 10/11, you can take steps to fix the issue and improve the performance of your computer.

Closing Unnecessary Programs and Applications

Task Manager with multiple unnecessary programs highlighted

  • Open Task Manager by pressing Ctrl+Shift+Esc
    • Alternatively, you can right-click on the taskbar and select “Task Manager” from the menu
  • Click on the “Processes” tab to see a list of all running programs and applications
  • Sort the list by memory usage by clicking on the “Memory” column header
  • Identify any programs or applications using a large amount of memory
  • Right-click on the program or application and select “End Task” to close it
  • Repeat this process for any other programs or applications that are using a significant amount of memory
  • Check the Task Manager again to see if memory usage has decreased

Managing Startup Programs

To manage startup programs in Windows 10/11 and fix high memory usage, you can use the Task Manager. Press Ctrl + Shift + Esc to open Task Manager. Go to the “Startup” tab to see which programs are set to launch at startup. Disable unnecessary programs by right-clicking on them and selecting “Disable.” This can help reduce memory usage and improve system performance.

Another way to manage startup programs is by using the Windows Registry. Press Win + R to open the Run dialog box, then type “regedit” and press Enter. Navigate to HKEY_CURRENT_USER\Software\Microsoft\Windows\CurrentVersion\Run and HKEY_LOCAL_MACHINE\SOFTWARE\Microsoft\Windows\CurrentVersion\Run to see startup programs. Delete the keys of programs you don’t want to launch at startup.

If you suspect a computer virus causing high memory usage, run a full antivirus scan using a reliable antivirus program. Additionally, you can use tools like Windows Defender or third-party antivirus software to remove any malicious files causing the issue.

Ensure your system is up to date by installing the latest Windows updates. These updates often include patches and fixes that can help optimize memory management and resolve memory-related issues. Regularly check for updates through the Windows Update settings.

Adjusting for Best Performance

Task Manager performance tab.

To adjust for best performance in Windows 10/11 Task Manager, follow these steps:

1. Disable Startup Programs: Open Task Manager, go to the Startup tab, and disable unnecessary programs from starting up with your computer.

2. Check Resource Usage: Monitor which programs are using the most memory and CPU in Task Manager’s Processes tab.

3. Update Drivers: Ensure all your drivers are up to date by checking for updates on the manufacturer’s website.

4. Adjust Virtual Memory: Go to System Properties > Advanced System Settings > Performance Settings > Advanced > Virtual Memory, and adjust the paging file size.

5. Scan for Malware: Run a full system scan with your antivirus software to check for any potential malware causing high memory usage.

6. Clean up Disk: Use Disk Cleanup to remove unnecessary files and free up space on your hard drive.

Defragmenting Hard Drives

Defragmenting your hard drive can help improve memory usage in Task Manager on Windows 10/11. To defragment your hard drive:

First, open the Start menu and type “Defragment and Optimize Drives” in the search bar. Press Enter to open the Disk Defragmenter tool.

Next, select the drive you want to defragment and click on “Optimize.” This will rearrange the data on your drive to make it more efficient.

Wait for the process to complete, which may take some time depending on the size and fragmentation level of your drive.

Once the defragmentation is done, check Task Manager again to see if memory usage has improved. Repeat this process regularly to keep your hard drive optimized.

Defragmenting your hard drive can help speed up your computer and reduce memory usage, so make it a part of your regular maintenance routine.

Increasing Virtual Memory

Virtual memory settings icon

To increase virtual memory on Windows 10/11, you can follow these steps:

1. Right-click on “This PC” or “My Computer” and select “Properties.”
2. In the System Properties window, go to the “Advanced” tab.
3. Under the Performance section, click on “Settings.”
4. In the Performance Options window, go to the “Advanced” tab.
5. Under the Virtual Memory section, click on “Change.”
6. Uncheck the box that says “Automatically manage paging file size for all drives.”
7. Select the drive where you want to increase the virtual memory.
8. Click on “Custom size” and enter a higher value for the initial and maximum size.
9. Click “Set” and then “OK” to save the changes.
10. Restart your computer for the changes to take effect.

Disabling Superfetch Service

Windows Services window

To disable the Superfetch service and fix high memory usage in Task Manager on Windows 10/11, follow these steps:

1. Press the Windows key + R to open the Run dialog box.

2. Type “services.msc” and hit Enter to open the Services window.

3. Scroll down and locate the Superfetch service in the list.

4. Right-click on Superfetch and select Properties.

5. In the General tab, change the Startup type to Disabled.

6. Click Apply and then OK to save the changes.

7. Restart your computer for the changes to take effect.

Disabling Superfetch can help reduce high memory usage in Task Manager on Windows 10/11.

Conducting Full-System Scans for Viruses

It is recommended to use a reliable antivirus software to perform a thorough scan of your system. Make sure the antivirus program is up-to-date to detect the latest threats.

After initiating the scan, allow the antivirus software to complete the process. This may take some time depending on the size of your system and the number of files being scanned.

Once the scan is complete, review the results to see if any viruses or malware were detected. Take appropriate action to remove or quarantine any threats found to improve your system’s performance.

Modifying Registry Settings

To modify Registry settings, open the Registry Editor by pressing Windows key + R and typing “regedit” in the Run dialog box. Navigate to HKEY_LOCAL_MACHINE\SYSTEM\CurrentControlSet\Control\Session Manager\Memory Management. Look for ClearPageFileAtShutdown and set its value to 1 to clear the page file on shutdown. You can also adjust the PagedPoolSize and PoolUsageMaximum values to optimize memory usage.

Expanding Physical Memory

RAM memory chips

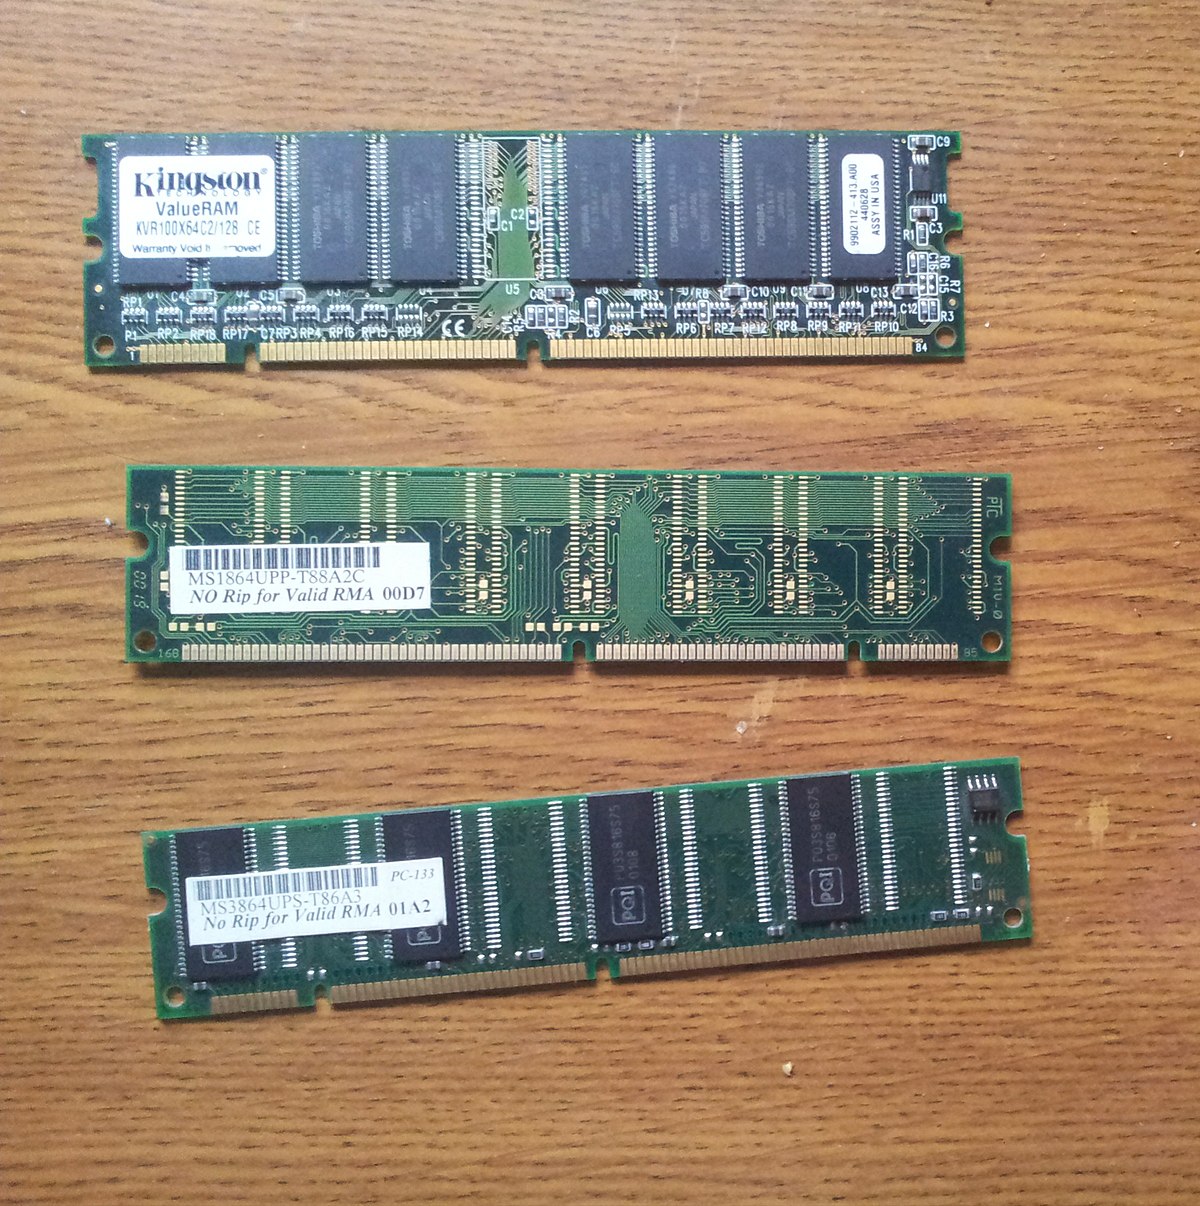
To expand physical memory on Windows 10/11 and fix high memory usage in Task Manager, you can try adding more RAM to your computer. Increasing the amount of RAM will help improve overall system performance and reduce memory usage. Make sure to check your computer’s specifications to ensure compatibility with the new RAM.

Another way to expand physical memory is by using a USB drive as ReadyBoost. Insert a USB drive into your computer and configure it as ReadyBoost to help increase the available memory. This can be an effective solution for systems with limited RAM.

Additionally, you can try optimizing your computer’s virtual memory settings. Adjust the virtual memory settings in Control Panel to allocate more space on your hard drive for virtual memory. This can help manage memory usage more efficiently.

If you are still experiencing high memory usage after trying these methods, consider running a diagnostic scan for malware and viruses. Use a reliable antivirus program to scan your computer and remove any malicious software that may be causing high memory usage. Regularly scan your system to prevent future issues.

By expanding physical memory and following these steps, you can effectively fix high memory usage in Task Manager on Windows 10/11.

Reinstalling or Rolling Back Windows

To reinstall Windows: First, back up all your important files to avoid losing any data. Then, insert the Windows installation disk or USB drive and restart your computer. Follow the on-screen instructions to reinstall Windows. Remember to activate Windows once the installation is complete.

To roll back Windows: Go to Settings > Update & Security > Recovery. Click on ‘Get started’ under ‘Go back to the previous version of Windows 10/11’. Follow the instructions to roll back to the previous version. Keep in mind that this option is only available for a limited time after updating Windows.

If you are still experiencing high memory usage after reinstalling or rolling back Windows, consider checking for any malware using a reliable antivirus program and optimizing your system by removing unnecessary startup programs and disabling any unnecessary services.

Preventative Tips for High Memory Usage

To prevent high memory usage in Windows 10/11, follow these preventative tips:

1. Close unnecessary programs and browser tabs to free up memory.
2. Check for malware using Windows Defender or another antivirus program.
3. Update your drivers and Windows to ensure compatibility and performance.
4. Disable startup programs that consume memory unnecessarily.
5. Use the Task Manager to monitor memory usage and identify resource-intensive processes.
6. Adjust virtual memory settings to optimize memory usage.
7. Clear temporary files and cache to free up space.
8. Consider upgrading your RAM if memory usage remains high.

FAQs

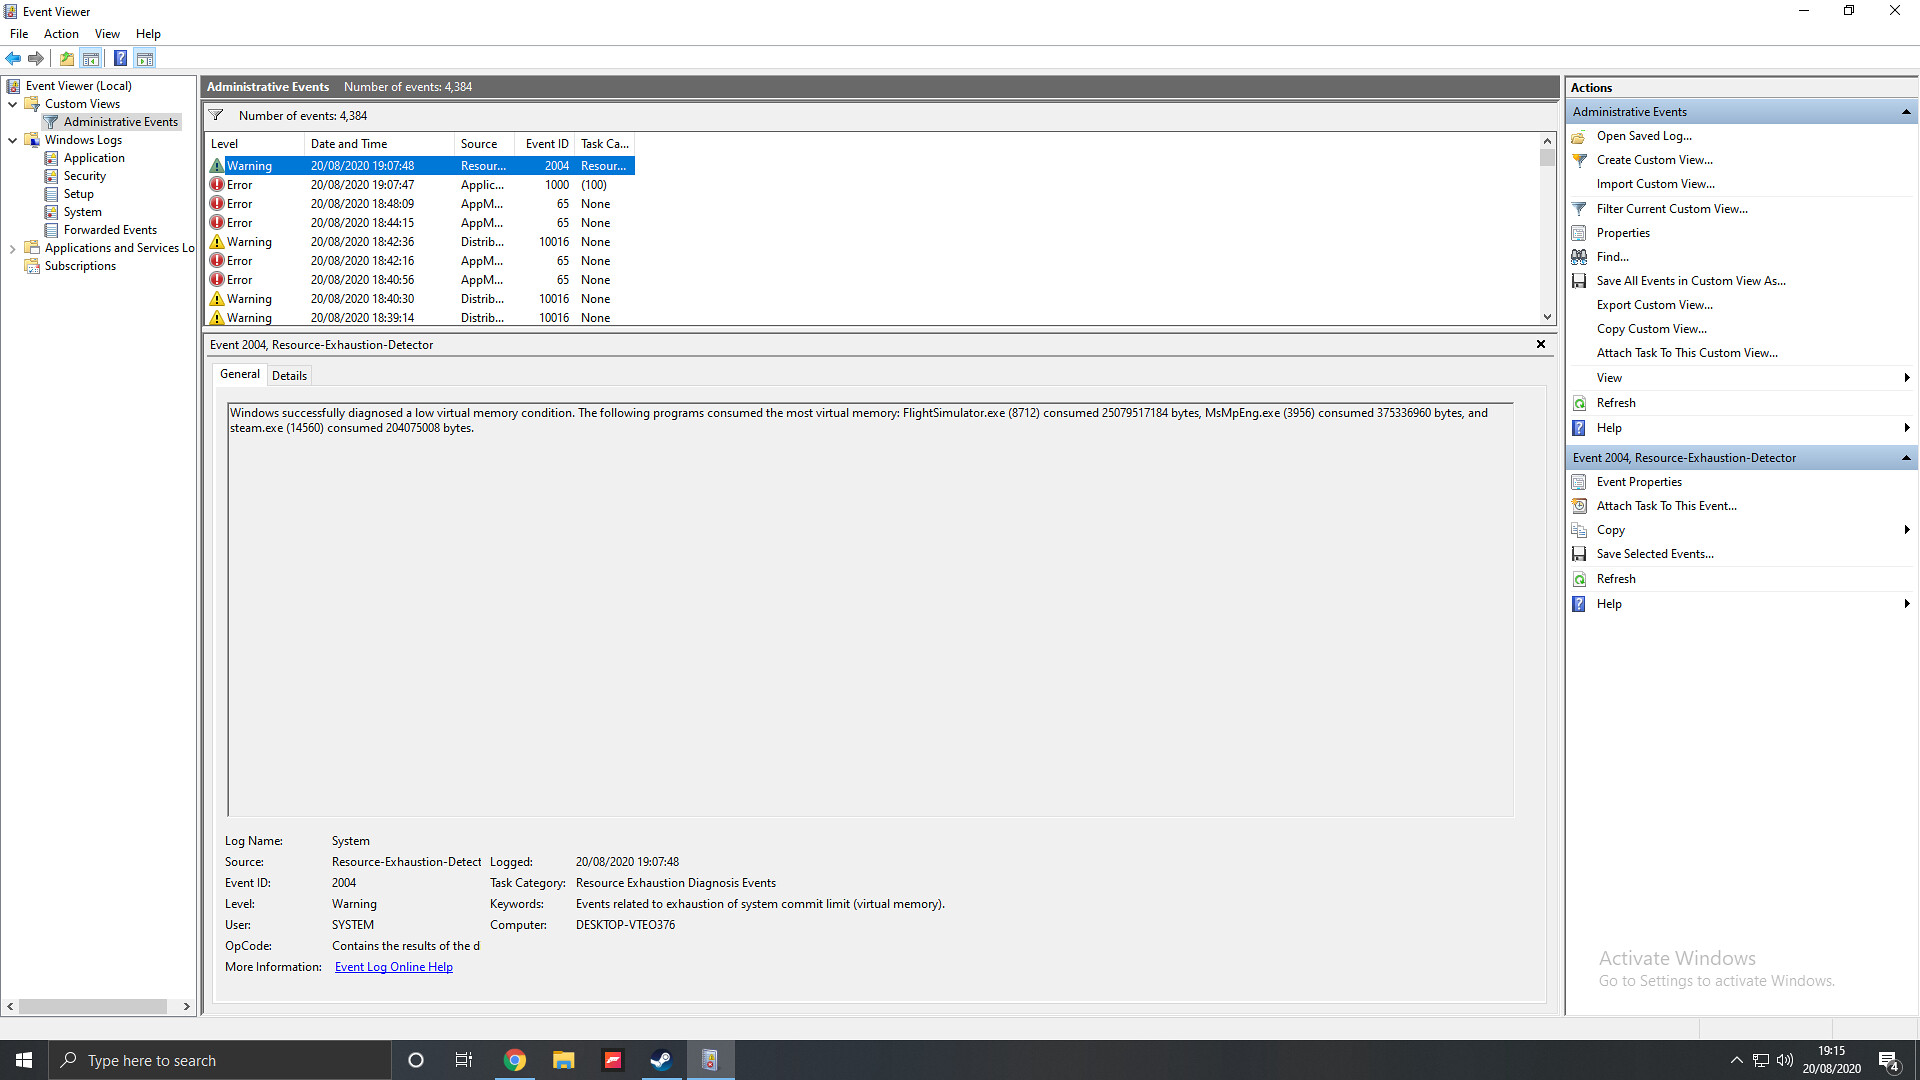
How do I fix high memory usage in Task Manager?

To fix high memory usage in Task Manager, you can start by closing excessive programs, reducing the number of startup programs, checking if Superfetch is disabled, selecting best performance options, defragging your hard drives, increasing total paging file size, releasing virtual memory by setting a registry hack, and conducting a full-system scan.

Why is my RAM usage so high when nothing is running?

Your RAM usage is high even when nothing is running because it is being used for caching recently-accessed disk data and storing kernel data structures like filesystem metadata to prevent them from being re-generated when needed.

Why is my memory showing 100 in Task Manager?

Your memory is showing 100 in Task Manager because there may be malware or unnecessary background processes causing your hard drive to run at full speed needlessly.

Is 40 percent memory usage normal?

It is considered normal for RAM usage to be around 30% to 50% when idle in Task Manager.

Computer Freezes Watching YouTube Videos Fix

Are you experiencing computer freezes while watching YouTube videos? Here are some fixes to help resolve this frustrating issue.

Update or Reinstall Graphics Card Driver

To update or reinstall your graphics card driver, follow these steps:

1. Update Graphics Card Driver:
– Go to the manufacturer’s website and search for the latest driver for your specific graphics card model.
– Download and install the driver according to the instructions provided on the website.
– Restart your computer to apply the changes.

2. Reinstall Graphics Card Driver:
– Press Windows key + X and select Device Manager.
– Expand the Display adapters category, right-click on your graphics card, and select Uninstall device.
– Follow the on-screen instructions to uninstall the driver.
– Restart your computer and Windows will automatically reinstall the driver.

3. Test YouTube Videos:
– After updating or reinstalling the graphics card driver, test if the issue of computer freezing while watching YouTube videos is resolved.
– If the issue persists, consider checking other factors such as internet connection, browser settings, or YouTube settings.

Run Troubleshooter or Clean Boot State

Computer troubleshooter tool

  • Open Settings by pressing Windows key + I
  • Click on Update & Security
  • Go to Troubleshoot tab
  • Scroll down and click on Playing Audio
  • Run the troubleshooter and follow the instructions

Clean Boot State

  • Open Task Manager by pressing Ctrl+Shift+Esc
  • Click on File
  • Select Run New Task
  • Type msconfig and press Enter
  • Go to Services tab and check Hide all Microsoft services
  • Click on Disable all
  • Go to Startup tab and click on Open Task Manager
  • Disable all startup items
  • Restart your computer

Clear Browser Cache or Disable Hardware Acceleration

To fix computer freezes while watching YouTube videos, one common solution is to clear your browser cache. This can help resolve any issues caused by corrupted or outdated data stored in your browser. To clear your browser cache, follow these steps:

1. Open your browser settings and navigate to the section where you can clear your browsing data.
2. Select the option to clear your cache and make sure to also clear any cookies and browsing history if needed.
3. Restart your browser after clearing the cache to ensure the changes take effect.

Another potential solution is to disable hardware acceleration in your browser. This feature can sometimes cause compatibility issues with certain websites, including YouTube. To disable hardware acceleration:

1. Open your browser settings and look for the option to disable hardware acceleration.
2. Toggle the setting to turn off hardware acceleration and then restart your browser to apply the changes.
3. Test watching YouTube videos again to see if the freezing issue has been resolved.

Perform System Scans or Update Adobe Flash Player

Action Description
Perform System Scans Regularly scan your computer for viruses, malware, and other threats that could be causing it to freeze. Use a reliable antivirus software and run full system scans to detect and remove any malicious programs.
Update Adobe Flash Player Outdated versions of Adobe Flash Player can cause issues with streaming videos on websites like YouTube. Make sure to check for updates regularly and install them to ensure smooth playback of videos.

F.A.Q.

Why do YouTube videos keep freezing my computer?

YouTube videos may be freezing your computer due to outdated web browsers or accumulated cache and cookies. Updating your browser and regularly clearing your cache can help improve functionality and resolve freezing issues.

Why does my computer freeze when watching videos?

Your computer may freeze when watching videos due to various reasons such as driver issues, hardware problems, display resolutions, codes, or corrupted files.

Why does my PC crash when I watch YouTube?

Your PC may crash when you watch YouTube if the graphics card is not compatible with your web browser or if there is a virus invading your system causing windows file system or user profile corruption.

Why is Chrome freezing when I watch YouTube videos?

Chrome is freezing when you watch YouTube videos because the data on the browser can clog up the video output. To resolve this issue, clear Chrome’s data by clicking on “Customize and Control” in the top-right menu of Chrome.

Fix Slow Windows 10 Boot Up

Are you tired of waiting for your Windows 10 computer to boot up? Let’s explore some ways to fix slow boot times and get your system up and running faster.

Disable Fast Startup and High-Impact Startup Processes

To disable high-impact startup processes, open Task Manager by pressing Ctrl + Shift + Esc. Go to the “Startup” tab and disable any programs that have a high startup impact by right-clicking on them and selecting “Disable.”

These steps can help speed up the boot process of your Windows 10 computer.

Update Graphics Card Drivers

To update your graphics card drivers, first open the Device Manager by pressing the Windows key + X and selecting “Device Manager.” Look for the “Display adapters” section and right-click on your graphics card. Select “Update driver” from the context menu and choose to search automatically for updated driver software. If Windows doesn’t find any updates, visit the manufacturer’s website to download and install the latest drivers manually.

Once the new drivers are installed, restart your computer and check if the slow boot issue has been resolved. Updating drivers can often improve overall system performance and stability. If you continue to experience slow boot times, consider checking for other factors such as malware, startup programs, or hardware issues that may be affecting your computer’s performance. Regular maintenance and troubleshooting can help keep your system running smoothly.

Optimize Virtual Memory and Hard Drive

  • Adjust Virtual Memory Settings
    • Open Control Panel and click on System and Security.
    • Click on System and then Advanced system settings.
    • Under the Advanced tab, click on Settings under the Performance section.
    • Go to the Advanced tab again and click on Change under the Virtual Memory section.
    • Uncheck the box that says Automatically manage paging file size for all drives.
    • Select the Custom size option and set the Initial size and Maximum size to the recommended values (found in the same window).
    • Click OK to apply the changes.
  • Defragment and Optimize Hard Drive
    • Open File Explorer and right-click on the C: drive.
    • Select Properties and go to the Tools tab.
    • Under the Optimize and defragment drive section, click on Optimize.
    • Select the drive you want to optimize and click on Analyze.
    • If optimization is needed, click on Optimize to defragment the drive.

Perform a Clean Install of Windows 10

Next, restart your computer and boot from the USB drive. Press the necessary key (usually F2, F12, or Del) during boot up to access the BIOS settings. Change the boot order to prioritize the USB drive. Save the changes and exit the BIOS settings.

Follow the on-screen instructions to begin the Windows 10 installation process. When prompted, select “Custom: Install Windows only (advanced)” to perform a clean install. Choose the drive where you want to install Windows and format it to erase all existing data.

Continue with the installation process and let Windows set up your system. You may need to enter your product key during the installation. Once Windows is installed, make sure to install all necessary drivers for your hardware components.

After completing the installation, your Windows 10 should boot up faster without the clutter and issues that may have been causing the slow boot up.

Remove Viruses and Malware

Next, check your Task Manager to see if any suspicious programs are running in the background. You can access the Task Manager by pressing Ctrl + Shift + Esc on your keyboard. Look for any unfamiliar processes or applications and end them if necessary.

If your computer is still slow to boot up after running a scan and closing any suspicious programs, consider checking for malware that may be embedded in your operating system. Use a malware removal tool to scan for and remove any hidden threats.

Additionally, you can optimize your boot up time by disabling unnecessary startup programs. To do this, right-click on the taskbar and select Task Manager. Go to the Startup tab and disable any programs that you don’t need to run at startup.

Upgrade to SSD for Faster Startup

SSD upgrade kit

Upgrade to a Solid-state drive (SSD) for faster startup: Upgrading your hard disk drive (HDD) to an SSD can significantly improve your Windows 10 boot-up time. SSDs are faster and more efficient than traditional HDDs, allowing for quicker access to your operating system and applications.

To upgrade to an SSD: First, back up all your important files and data. Then, open your computer and locate the HDD. Remove it and replace it with the new SSD.

After installing the SSD: Install Windows 10 on the new drive. You can do this by creating a bootable USB drive with the Windows installation files.

Once Windows is installed on the SSD: Your computer will now boot up faster and run more smoothly. Enjoy the improved performance of your system with the new SSD.

Utilize System File Checker for Updates Issues

To utilize System File Checker for update issues in Windows 10:

First, open the Command Prompt as an administrator by searching for “cmd” in the Windows search bar, right-clicking on Command Prompt, and selecting “Run as administrator.”

Next, type the command “sfc /scannow” and press Enter. This will initiate a system scan to check for and repair any corrupted system files.

Wait for the scan to complete, which may take some time depending on the size of your system files and the speed of your computer.

Once the scan is finished, restart your computer to apply any repairs that were made by the System File Checker.

By using the System File Checker, you can address update issues that may be causing slow boot-up times in Windows 10. It is a useful tool for troubleshooting system performance and ensuring that your operating system functions properly.

FAQs

Why does my Windows 10 computer take so long to boot up?

Your Windows 10 computer may be taking a long time to boot up due to missing or corrupted system files. You can easily check and repair these files using the Windows System File Checker Tool.

Why does my PC take so long to get running from boot up?

Your PC may be taking a long time to get running from boot up due to a full boot drive, too many programs starting alongside Windows, or aging hardware. Apply solutions to pinpoint the specific issue.

Why is my computer so slow all of a sudden Windows 10?

Your computer is running slow all of a sudden on Windows 10 because there may be too many programs running at once, malware or virus infections, hardware issues, high memory usage, and other factors that are affecting your PC’s performance.

Why is my computer suddenly so slow to start?

Your computer is suddenly slow to start because there may be issues with your RAM, disk drive space, hard drive, background programs, or startup programs.