Fix DNS Address Not Found Chrome

In my experience, addressing the issue of “DNS Address Not Found” in Chrome can be frustrating.

Vérifiez votre connexion Internet – Assurez-vous que votre connexion Internet est active et stable. Parfois, l’adresse DNS introuvable peut être causée par une connexion Internet défaillante.

Understanding the “Server DNS address could not be found” error
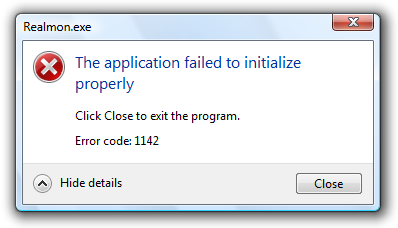
Error message on a computer screen

If you are encountering the “Server DNS address could not be found” error in Google Chrome, it means that your browser is unable to resolve the domain name into an IP address. This can prevent you from accessing websites and can be frustrating.

To fix this issue, you can try the following troubleshooting steps:

1. Check your internet connection: Ensure that you are connected to the internet and that your Wi-Fi or Ethernet connection is working properly.

2. Clear your browser cache: Sometimes, cache files can cause DNS issues. Clearing your browser cache can help resolve this. To do this, open Google Chrome, go to the Settings menu, select “More tools,” then “Clear browsing data.” Make sure to select the option to clear the cache and click “Clear data.”

3. Disable VPN or proxy: If you are using a virtual private network (VPN) or a proxy server, try disabling them temporarily to see if it resolves the issue.

4. Restart your router: Power off your router, wait for a few seconds, and then power it back on. This can help refresh your network connection.

5. Check your DNS settings: Ensure that your DNS settings are configured correctly. You can try using Google’s public DNS servers (8.8.8.8 and 8.8.4.4) or your internet service provider’s DNS servers. To change your DNS settings, go to the Control Panel, select “Network and Internet,” then “Network and Sharing Center.” Click on “Change adapter settings,” right-click on your network connection, select “Properties,” and then choose “Internet Protocol Version 4 (TCP/IPv4).” Enter the preferred and alternate DNS server addresses and click “OK.”

If none of these steps resolve the issue, you may need to contact your internet service provider or seek further assistance. It’s also worth checking if the website you are trying to access is down or experiencing any server issues.

Clearing host cache and flushing DNS

To fix the “DNS Address Not Found” error in Chrome, you can try clearing the host cache and flushing the DNS. This can help resolve any issues with your internet connection.

Here’s how you can do it:

1. Open the Command Prompt on your Windows computer. You can do this by pressing the Windows key and typing “Command Prompt” in the search bar. Then, select the Command Prompt app from the results.

2. In the Command Prompt window, type ipconfig /flushdns and press Enter. This will flush the DNS resolver cache on your computer.

3. Next, you can try clearing the host cache. To do this, type ipconfig /displaydns and press Enter. This will display the contents of the DNS resolver cache.

4. To clear the host cache, type ipconfig /flushdns and press Enter again.

5. After clearing the cache, you can close the Command Prompt window and try accessing the website again in Chrome. The “DNS Address Not Found” error should now be resolved.

Remember, if you’re using a virtual private network (VPN) or any other network configuration, you may need to disable it temporarily to perform these steps. Once you’ve cleared the cache and flushed the DNS, you can re-enable the VPN or network configuration if needed.

If you continue to experience issues, you may want to consider checking your internet connection, restarting your router, or contacting your internet service provider for further assistance.

We hope this helps you resolve the “DNS Address Not Found” error in Chrome. If you have any further questions or need additional support, please feel free to reach out.

Changing DNS server and configuring DNS servers
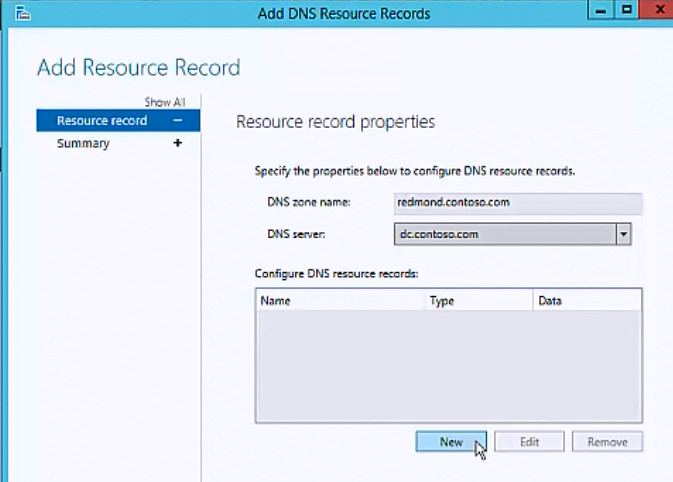
Configuring DNS settings

To fix the “DNS Address Not Found” issue in Chrome, you can change your DNS server or configure your DNS settings. Here’s how to do it:

1. Changing DNS Server:
– Open the Control Panel (Windows) or the Settings app (Chromebook).
– In the Control Panel, click on “Network and Internet” and then “Network and Sharing Center”.
– On the left side, click on “Change adapter settings”.
– Right-click on your active network connection and select “Properties”.
– Scroll down and double-click on “Internet Protocol Version 4 (TCP/IPv4)”.
– Select the option to “Use the following DNS server addresses”.
– Enter the preferred and alternate DNS server addresses. You can use public DNS servers like Google DNS (8.8.8.8 and 8.8.4.4) or OpenDNS (208.67.222.222 and 208.67.220.220).
– Click “OK” to save the changes.

2. Configuring DNS Settings:
– Open the Chrome browser and type “chrome://settings” in the address bar.
– Scroll down and click on “Advanced” to expand the advanced settings.
– Under the “Privacy and security” section, click on “Clear browsing data”.
– Check the box next to “Cached images and files” and click “Clear data”.
– Go back to the settings page and click on “Privacy and security” in the left menu.
– Click on “Security” and then “Manage certificates”.
– In the “Certificates” window, click on the “Authorities” tab.
– Scroll down and find the certificate for the DNS server you want to remove. Select it and click on “Remove” or “Delete”.
– Restart your browser for the changes to take effect.

These steps should help resolve the “DNS Address Not Found” issue in Chrome. If the problem persists, you may need to further troubleshoot your network or seek assistance from your network administrator.

Renewing IP address and restarting DNS client service

To fix the “DNS Address Not Found” error in Chrome, you can try renewing your IP address and restarting the DNS client service. Here’s how:

1. Open the Command Prompt by pressing the Windows key + R, typing “cmd,” and hitting Enter.
2. In the Command Prompt window, type “ipconfig /release” and press Enter. This will release your current IP address.
3. Next, type “ipconfig /renew” and press Enter. This will attempt to obtain a new IP address from your network.
4. Once the IP address is renewed, you can restart the DNS client service. To do this, press the Windows key + R again, type “services.msc,” and hit Enter.
5. In the Services window, scroll down to find “DNS Client” and right-click on it.
6. From the context menu, select “Restart” to restart the DNS client service.

By renewing your IP address and restarting the DNS client service, you can resolve the “DNS Address Not Found” error in Chrome.

Updating network adapter driver and connecting to Wi-Fi

To fix the “DNS Address Not Found” issue in Chrome, you may need to update your network adapter driver and reconnect to Wi-Fi. Here’s how:

1. Press the Windows key + X and select “Device Manager” from the context menu.
2. Expand the “Network adapters” category and locate your network adapter.
3. Right-click on your network adapter and select “Update driver” from the drop-down menu.
4. Choose the option to automatically search for updated driver software.
5. Wait for the process to complete, and then restart your computer.

Once your network adapter driver is updated, you can reconnect to Wi-Fi:

1. Click on the Wi-Fi icon in the taskbar and select your Wi-Fi network from the list of available networks.
2. If prompted, enter the Wi-Fi network password and click “Connect.”
3. Wait for your computer to establish a connection to the Wi-Fi network.

If you’re using a Chromebook, follow these steps to update your network adapter driver and connect to Wi-Fi:

1. Click on the “Settings” icon in the bottom right corner of the screen.
2. Select “Wi-Fi” from the menu on the left.
3. Click on the network you want to connect to and enter the Wi-Fi password if prompted.
4. If you’re still experiencing the “DNS Address Not Found” issue, try restarting your Chromebook.

Updating your network adapter driver and reconnecting to Wi-Fi can help resolve the “DNS Address Not Found” issue in Chrome. If you continue to experience the problem, you may need to troubleshoot further or contact your network administrator for assistance.

Automatically repairing DNS errors on Google Chrome

  1. Open Google Chrome.
  2. Click on the three dots at the top right corner of the browser window to open the Chrome menu.
  3. Select “Settings” from the drop-down menu.
  4. Scroll down and click on “Advanced” to expand the advanced settings options.
  5. Under the “Privacy and security” section, click on “Clear browsing data”.
  6. In the pop-up window, make sure the “Basic” tab is selected.
  7. Check the box next to “Cached images and files”.
  8. Click on the “Clear data” button.
  9. Restart Google Chrome and check if the DNS error is resolved.

Repair Method 2: Reset TCP/IP Settings

  1. Press the Windows key + X on your keyboard, then select “Command Prompt (Admin)” from the menu.
  2. In the command prompt window, type the following commands one by one and press Enter after each command:
    • netsh winsock reset
    • netsh int ip reset
  3. Restart your computer and check if the DNS error is resolved.

Repair Method 3: Change DNS Server Address

  1. Press the Windows key + R on your keyboard to open the Run dialog box.
  2. Type “ncpa.cpl” in the Run dialog box and press Enter.
  3. In the Network Connections window, right-click on your active network connection and select “Properties”.
  4. Scroll down and double-click on “Internet Protocol Version 4 (TCP/IPv4)”.
  5. Select the option “Use the following DNS server addresses”.
  6. Enter the following DNS server addresses:
    • Preferred DNS server: 8.8.8.8
    • Alternate DNS server: 8.8.4.4
  7. Click “OK” to save the changes.
  8. Restart your computer and check if the DNS error is resolved.
Fix PS4 Randomly Shutting Off – Step-by-Step Guide

As a PS4 owner, experiencing random shutdowns can be frustrating. In this step-by-step guide, I will share effective solutions to fix this issue and ensure uninterrupted gaming sessions.

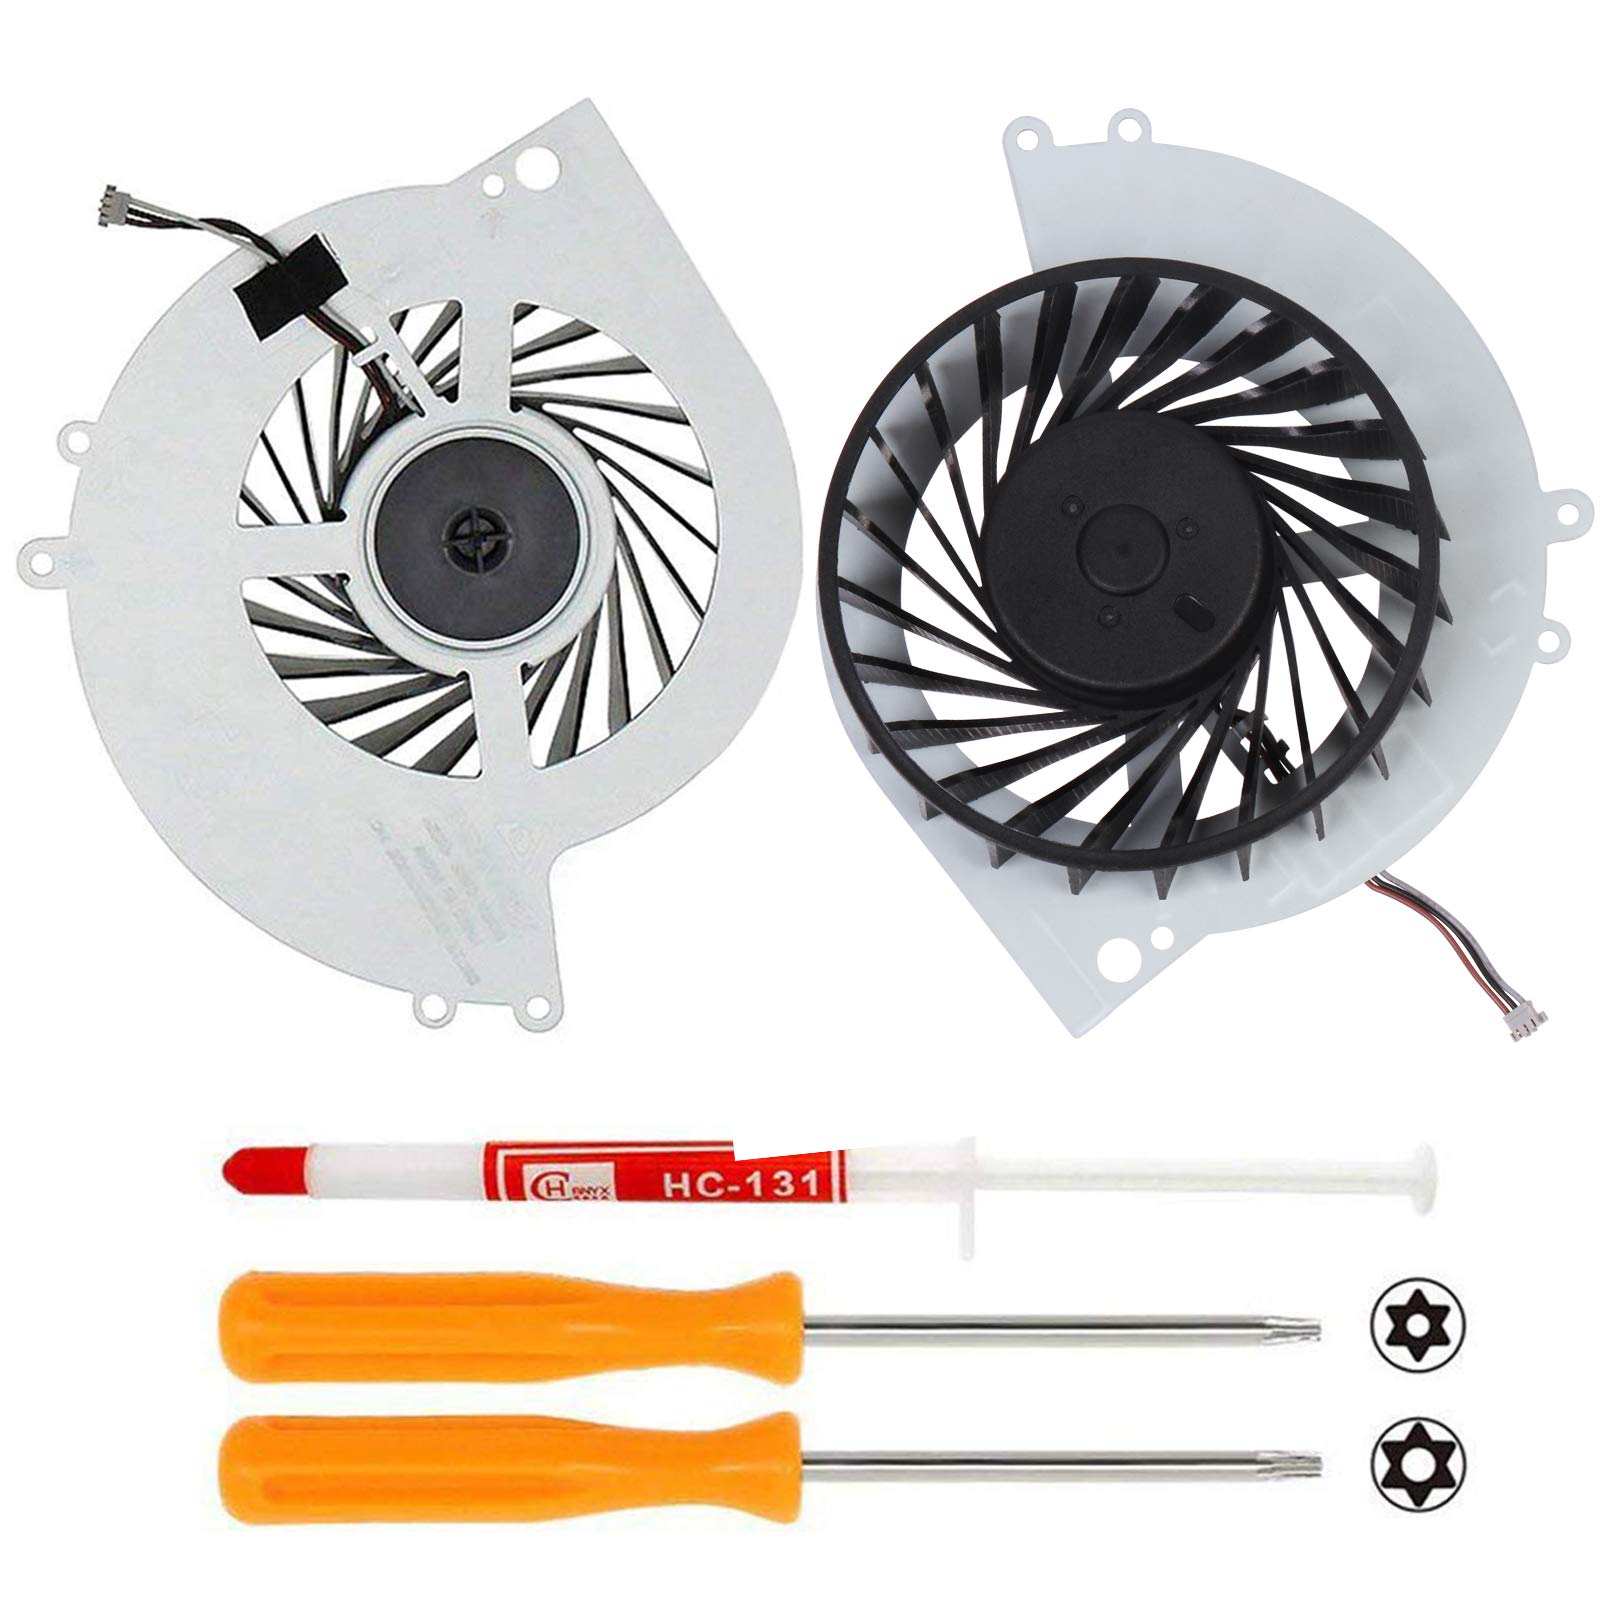
Check for overheating: Ensure that your PlayStation 4 is well-ventilated and not placed in a confined space. Clean any dust buildup on the console and consider using a cooling fan or stand to prevent overheating.

Troubleshooting Power and Connection Issues

If your PlayStation 4 (PS4) is randomly shutting off, it can be frustrating and disrupt your gaming experience. However, there are a few troubleshooting steps you can take to resolve this issue.

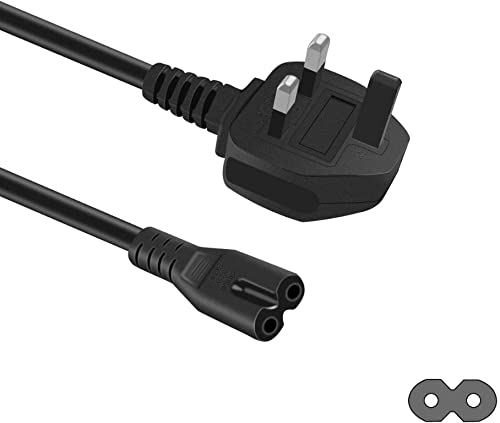
1. Check the power cord and outlet: Ensure that the power cord is securely connected to both the PS4 and the power outlet. If possible, try using a different power outlet to rule out any issues with the current one.

2. Inspect the power supply: Make sure the power supply is not damaged or overheating. Check for any loose connections or frayed cables. If necessary, consider replacing the power supply.

3. Verify the HDMI and USB connections: Ensure that the HDMI and USB cables are securely connected to both the PS4 and your TV or monitor. Try using different cables or ports to see if the issue persists.

4. Reset the PS4: Press and hold the power button on the front of the PS4 for at least 7 seconds until you hear two beeps. This will initiate a system reset.

5. Update the firmware: Make sure your PS4 is running the latest firmware version. Connect your PS4 to the internet and navigate to Settings > System Software Update to check for any available updates.

If you have tried these troubleshooting steps and the issue persists, it may be helpful to consult the official PlayStation support website, online forums, or reach out to Sony customer support for further assistance. It’s important to resolve power and connection issues promptly to ensure an optimal gaming experience.

A PlayStation 4 that keeps shutting off may indicate an overheating issue.

Preventing Overheating and APU Problems

To prevent overheating and APU problems on your PS4, follow these steps:

1. Check the ventilation: Ensure that your PS4 is placed in a well-ventilated area. Make sure there is enough space around the console for proper airflow. Avoid placing it in an enclosed space or near heat sources.

2. Clean the vents: Over time, dust and debris can accumulate in the vents, obstructing airflow and causing overheating. Regularly clean the vents using a can of compressed air or a vacuum cleaner with a brush attachment. This helps maintain optimal airflow and prevents overheating.

3. Avoid lengthy gaming sessions: Extended gaming sessions can put a strain on the PS4’s hardware and contribute to overheating. Take breaks every few hours to give your console a chance to cool down.

4. Check the power cable: Ensure that the power cable is securely connected to both the console and the power outlet. If the cable is damaged or loose, replace it with a new one to prevent power issues.

5. Update system software: Keeping your PS4’s software up-to-date is crucial for optimal performance. Regularly check for system updates and install them to fix any software bugs that may cause random shutdowns.

Frequent power interruptions on a PlayStation 4 can be caused by a faulty power supply.

Checking and Updating the System Software

System software update screen

To check and update the system software on your PS4, follow these step-by-step instructions:

1. Power on your PS4 and make sure it is connected to the internet.

2. From the home screen, go to “Settings” using the controller’s directional buttons and press the X button.

3. In the Settings menu, scroll down and select “System Software Update” and press X.

4. Your PS4 will now check for any available updates. If an update is found, it will be downloaded automatically.

5. Once downloaded, the PS4 will prompt you to install the update. Select “Install” and press X.

6. The installation process may take some time, so be patient and do not turn off the console during this process.

7. After the update is installed, your PS4 will restart and the new system software will be in effect.

It’s important to keep your PS4’s system software up to date as it can improve system performance, fix bugs, and add new features. Regularly checking for updates ensures that you have the latest enhancements for your gaming experience.

If you encounter any issues during the update process or if your PS4 continues to randomly shut off, consider visiting the official Sony support website or consulting the PS4 user manual for further assistance.

python
import ps4

def get_ps4_system_info():
try:
# Connect to a PS4 console
system = ps4.PS4()

# Get system information
system_info = system.get_status()

# Print the retrieved information
print("PS4 System Information:")
print("=======================")
print("Model: " + system_info['system_type'])
print("Firmware Version: " + system_info['system_version'])
print("Temperature: " + str(system_info['temperature']) + "°C")
print("Fan Speed: " + str(system_info['fan_speed']) + " RPM")

except ps4.PS4Exception as e:
print("Error: " + str(e))

# Call the function to get PS4 system information
get_ps4_system_info()

In this code, we import the `ps4` library and define a function `get_ps4_system_info()`. Inside the function, we connect to a PS4 console, retrieve its system information using the `get_status()` method, and print the obtained information.

To run this code, make sure you have the `ps4` library installed. You can install it using pip:

pip install ps4

Common FAQs for PS4 Random Shutdowns

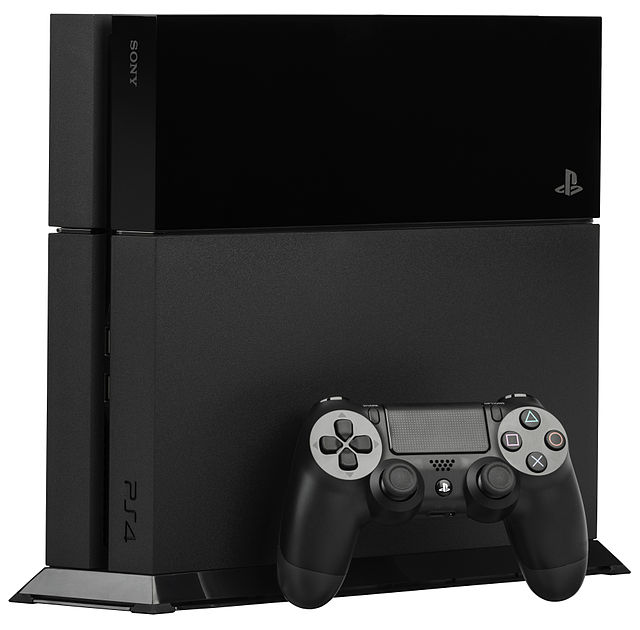
PS4 console with a power button

  • Ensure that the PS4 is placed in a well-ventilated area with sufficient air circulation.
  • Remove any obstructions around the console that may be blocking the airflow.
  • Clean the vents and fan of the PS4 to eliminate any dust or debris accumulation.
  • Consider using a cooling stand or external fan to help regulate the temperature.
    Clean the vents and fan of the PS4 to eliminate any dust or debris accumulation.
Consider using a cooling stand or external fan to help regulate the temperature.

Step 2: Update System Software

  • Power on your PS4 and navigate to the home screen.
  • Select the “Settings” option and choose “System Software Update”.
  • If an update is available, download and install it.
  • Restart the console after the update process is complete.
    If an update is available, download and install it.
Restart the console after the update process is complete.

Step 3: Check Power Supply

  • Ensure that the power cord is securely plugged into both the PS4 and the power outlet.
  • Try using a different power outlet or power cord to rule out any issues with the current setup.
    Ensure that the power cord is securely plugged into both the PS4 and the power outlet.
Try using a different power outlet or power cord to rule out any issues with the current setup.
  • Consider using a surge protector or UPS (uninterruptible power supply) to protect against power fluctuations.

Step 4: Rebuild Database

  • Turn off the PS4 completely by holding down the power button for a few seconds.
  • Once the console is off, press and hold the power button again until you hear two beeps.
  • Connect your controller to the PS4 using a USB cable.
  • Select the “Rebuild Database” option from the Safe Mode menu.
  • Wait for the process to complete (this may take a while) and then restart the console.

Step 5: Initialize PS4

  • Note: This step will erase all data on your PS4, so make sure to backup important files if possible.
  • Go to the PS4 home screen and select “Settings”.
  • Choose “Initialization” and then “Initialize PS4”.
  • Select the “Full” option to completely wipe the console’s hard drive.
  • Follow the on-screen prompts to confirm the initialization process.
  • Once the process is complete, set up your PS4 again and check if the random shutdowns persist.

Windows 10 Cannot Find Network Printer

Having trouble with Windows 10 locating your network printer? Let’s explore the potential causes and solutions to address this issue efficiently.

Before you begin

1. Verify the printer is turned on and connected to the same Wi-Fi network as your computer. Ensure that the printer is within range of your wireless access point.

2. Check the physical connections between the printer and your computer. If you’re using a USB connection, make sure the cable is securely plugged in at both ends. If you’re using an Ethernet connection, ensure that the cable is properly connected to both the printer and your router.

3. Confirm that the printer is installed and set as the default printer on your computer. To do this, go to the Control Panel and navigate to “Devices and Printers.” Look for your printer in the list and right-click on it. Select “Set as default printer” from the context menu.

4. Update the printer driver to ensure compatibility with Windows 10. Visit the manufacturer’s website and search for the latest driver for your printer model. Download and install the driver according to the provided instructions.

5. Restart your computer and printer. Sometimes, a simple power cycle can resolve connectivity issues. Turn off both devices, wait a few seconds, and then turn them back on.

If you’re still unable to find your network printer on Windows 10, consider these additional troubleshooting steps:

1. Check if your printer supports wireless printing. Some printers may require a wired connection or additional setup steps to function wirelessly.

2. Make sure your printer and computer are connected to the same local area network (LAN). If you’re using a wireless router, ensure that both devices are connected to it.

3. Temporarily disable any firewall or antivirus software that may be blocking the printer’s communication with your computer. Remember to re-enable the software once you’ve finished troubleshooting.

4. Use Windows’ built-in troubleshooting tool to diagnose and fix printer-related issues. Open the Settings app, go to “Update & Security,” and select “Troubleshoot” from the left menu. Choose “Printers” and follow the on-screen instructions to complete the troubleshooting process.

Connecting your printer

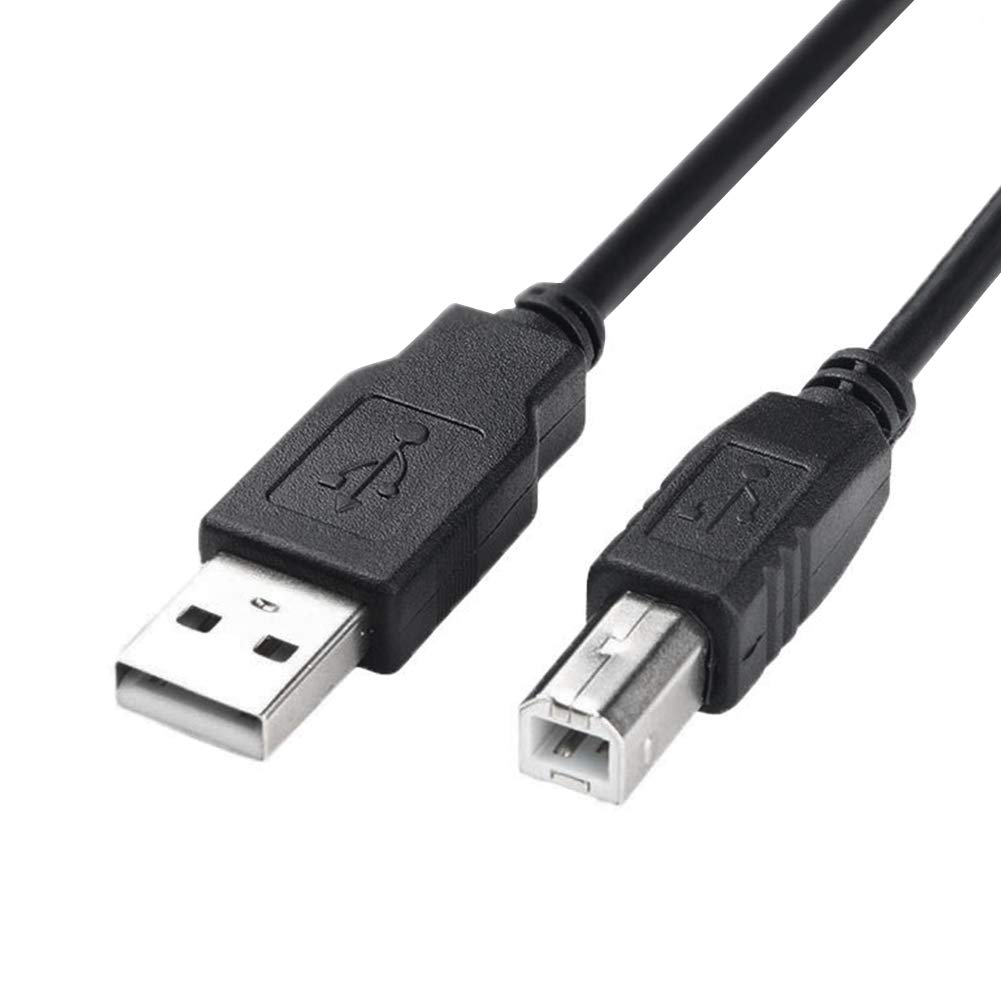
Printer cable being plugged into a computer

First, make sure that your printer is connected to the same Wi-Fi network as your computer. This is crucial for establishing a connection between the two devices. If your printer supports a wired connection, such as Ethernet or USB, you may also consider using those options for a more stable connection.

Next, check if your printer is turned on and properly connected to the network. Ensure that the printer is powered on and its Wi-Fi or Ethernet connection is active. If you’re using a USB connection, ensure that the cable is securely plugged into both the printer and your computer.

Once you’ve verified the physical connections, it’s time to troubleshoot through the Windows operating system. Open the Control Panel on your Windows 10 computer by pressing the Windows key + X and selecting “Control Panel” from the menu. Alternatively, you can search for “Control Panel” in the Windows search bar.

In the Control Panel, navigate to the “Devices and Printers” section. This is where you can manage all the devices connected to your computer, including printers. Look for your printer in the list of devices and make sure it’s set as the default printer. If it’s not listed, click on the “Add a printer” button and follow the on-screen instructions to add your printer to the network.

If the above steps don’t resolve the issue, you may need to update the printer driver. Drivers are software that allow your computer to communicate with the printer. To update the driver, visit the manufacturer’s website and search for the latest driver for your specific printer model. Download and install the driver, then try connecting your printer again.

If you’re still unable to find your network printer, it’s worth considering power cycling your devices. This involves turning off your printer, computer, and wireless router, then turning them back on after a few minutes. Power cycling can reset any temporary issues that may be preventing your printer from being detected.

Installing a printer

If your Windows 10 operating system cannot find your network printer, follow these simple steps to install it correctly.

First, make sure your printer is connected to the same network as your computer. Check that the printer is turned on and connected to the network either via Ethernet cable or Wi-Fi.

Next, open the Control Panel by pressing the Windows key on your keyboard and typing “Control Panel.” Select the Control Panel app from the search results.

In the Control Panel, click on “Devices and Printers” or “Printers and Scanners,” depending on your version of Windows 10.

In the Devices and Printers window, click on the “Add a printer” button.

A new window will appear, showing a list of available printers. If your network printer is not listed, click on the “The printer that I want isn’t listed” link.

In the next window, select the option “Add a printer using a TCP/IP address or hostname” and click “Next.”

Enter the IP address or hostname of your network printer. If you don’t know the IP address or hostname, consult your printer’s manual or contact your network administrator.

After entering the IP address or hostname, click “Next” and Windows will attempt to detect the printer on your network.

If the printer is detected, Windows will install the necessary drivers and add the printer to your list of devices. Follow the on-screen instructions to complete the installation.

If Windows cannot find the printer, it may prompt you to choose a device driver manually. Select the appropriate driver from the list or download it from the manufacturer’s website.

Once the installation is complete, you should see your network printer listed in the Devices and Printers window. You can now use it to print documents and images from your computer.

If you encounter any issues during the installation process, consult the printer’s manual or contact the manufacturer for further assistance.

Troubleshooting printer problems

Printer with a red X mark

If you’re experiencing issues with Windows 10 not being able to find your network printer, there are a few troubleshooting steps you can take to resolve the problem. Follow these steps to diagnose and fix the issue:

1. Check your network connection: Ensure that your computer is properly connected to the network where the printer is located. Make sure your computer is connected to the correct Wi-Fi network or Ethernet connection.

2. Verify printer availability: Confirm that the printer is turned on and connected to the same network as your computer. Check the printer’s display or control panel for any error messages or connectivity issues.

3. Restart your devices: Sometimes, a simple restart can help resolve connectivity problems. Turn off both your computer and printer, wait for a few seconds, and then turn them back on. This can refresh the network connection and resolve any temporary issues.

4. Update printer drivers: Outdated or incompatible printer drivers can cause problems with network connectivity. Visit the manufacturer’s website to download and install the latest drivers for your printer model. Alternatively, you can use the built-in Windows Update feature to automatically update the drivers.

5. Run the Windows Printer Troubleshooter: Windows 10 includes a built-in troubleshooter that can automatically detect and fix common printer issues. To access it, go to the Control Panel and search for “Troubleshooting.” Select “View all” on the left sidebar and then click on “Printer” to launch the troubleshooter.

6. Check your firewall and antivirus settings: Sometimes, firewall or antivirus software can block communication between your computer and printer. Temporarily disable these security programs and check if the printer is now detected. If it is, adjust the settings to allow the printer communication.

7. Reset the print spooler: The print spooler is a Windows service that manages print jobs. Resetting it can help resolve issues with print queues and pending jobs. Press the Windows key + R to open the Run dialog box, then type “services.msc” and hit Enter. Locate the “Print Spooler” service, right-click on it, and select “Restart.”

Find a connected printer

1. Open the Control Panel by clicking on the Start button and typing “Control Panel” in the search bar. Press Enter to open the Control Panel.

2. In the Control Panel, click on “Devices and Printers.”

3. A list of connected printers will appear. If your printer is listed, right-click on it and select “Set as default printer” to make it the default for your device.

4. If your printer is not listed, click on “Add a printer” at the top of the window.

5. Windows will search for available printers on your network. If your printer is found, select it and click “Next” to install the necessary drivers.

6. If your printer is not found, click on “The printer that I want isn’t listed.”

7. Select the option “Add a printer using a TCP/IP address or hostname” and click “Next.”

8. Enter the IP address or hostname of your printer and click “Next.” If you’re not sure how to find this information, refer to your printer’s manual or contact the manufacturer.

9. Windows will attempt to connect to the printer using the provided information. If successful, click “Next” to install the drivers.

10. Follow the on-screen instructions to complete the printer installation.

If you are still unable to find your network printer, you may need to troubleshoot further. Visit the Microsoft support website for more detailed troubleshooting steps or contact your printer manufacturer for assistance.

Add an unseen printer

1. Open the Control Panel by clicking the Start menu and typing “Control Panel.” Select it from the search results.
2. In the Control Panel, click on “Devices and Printers.”
3. On the Devices and Printers page, click on the “Add a printer” option.
4. A new window will appear with two options: “Add a local printer” and “Add a network, wireless, or Bluetooth printer.” Select the second option.
5. Windows will start searching for available printers on the network. This may take a few moments.
6. Once the search is complete, a list of available printers will be displayed. If you see your printer in the list, select it and click “Next.” Windows will install the necessary drivers and configure the printer for use.
7. If your printer is not listed, click on the “The printer that I want isn’t listed” option.
8. In the next window, select the option “Add a printer using a TCP/IP address or hostname” and click “Next.”
9. Enter the IP address or hostname of your printer and click “Next.” If you’re not sure about the IP address or hostname, consult your printer’s manual or contact the manufacturer.
10. Windows will attempt to connect to the printer using the provided information. If successful, it will install the necessary drivers and configure the printer.
11. Finally, you will be prompted to set the printer as the default printer. Choose whether to set it as the default or not, and click “Finish.”

Run the troubleshooter

If you’re experiencing difficulty in finding a network printer on your Windows 10 computer, you can use the built-in troubleshooter to help diagnose and resolve the issue. The troubleshooter is a helpful tool that can automatically detect and fix common printer problems.

To run the troubleshooter, follow these steps:

1. Press the Windows key + I to open the Settings app.
2. Click on “Update & Security.”
3. In the left-hand menu, select “Troubleshoot.”
4. Scroll down and click on “Additional troubleshooters.”
5. Locate and click on “Printer” under the “Find and fix other problems” section.
6. Click on the “Run the troubleshooter” button.

The troubleshooter will now analyze your system and attempt to identify any issues related to your network printer. It will provide a step-by-step guide to resolve the problem or offer suggestions for further troubleshooting.

During the troubleshooting process, the troubleshooter may ask you to perform certain actions, such as checking the printer’s power and connection, updating drivers, or restarting your computer. Follow the instructions provided by the troubleshooter to complete each step.

If the troubleshooter is unable to resolve the issue, it may suggest additional troubleshooting steps or provide further resources to help you find a solution.

Remember, the troubleshooter is designed to address common printer problems, but it may not be able to fix every issue. If you continue to experience difficulties, you may need to consult the printer’s manufacturer website or contact their support for further assistance.

Fixing network connection issues

If you’re experiencing network connection issues with your network printer on Windows 10, there are a few troubleshooting steps you can try to resolve the problem.

First, ensure that your printer is properly connected to your computer network. Check all the cables and connections to make sure everything is securely plugged in. If you’re using a wireless printer, make sure it is connected to the correct wireless network and that it has a stable connection.

Next, check the printer’s power and paper/ink levels. Make sure the printer is turned on and has enough paper and ink or toner to complete the print job. If the printer is low on ink or toner, replace the cartridge accordingly.

If the printer is properly connected and has sufficient resources, you can try reinstalling the printer driver on your computer. To do this, follow these steps:

1. Press the Windows key + X on your keyboard and select “Device Manager” from the menu that appears.
2. In Device Manager, expand the “Print queues” category.
3. Right-click on your printer and select “Uninstall device.”
4. Confirm the uninstallation and wait for the process to complete.
5. Once the printer driver is uninstalled, restart your computer.
6. After your computer restarts, Windows will automatically reinstall the printer driver. However, it’s recommended to manually install the latest driver from the manufacturer’s website for optimal performance.

If reinstalling the printer driver doesn’t resolve the issue, you can try resetting the printer’s network settings. To do this, follow these steps:

1. On the printer’s control panel, navigate to the network settings or network setup menu.
2. Look for an option to reset the network settings or restore defaults.
3. Select the option and confirm the reset. The printer will restart and its network settings will be restored to factory defaults.
4. After the reset, reconnect the printer to your computer network and try printing again.

If none of these steps resolve the network connection issues, you may need to contact the printer manufacturer’s support for further assistance. They can provide specific troubleshooting steps or recommend additional solutions based on your printer model and network setup.

Updating printer drivers

1. Open the Control Panel by clicking the Start button, searching for “Control Panel,” and selecting it from the results.

2. In the Control Panel, locate and click on the “Devices and Printers” option.

3. In the Devices and Printers window, find your network printer. It should be listed under the “Printers” section.

4. Right-click on your network printer and select “Properties” from the context menu.

5. In the printer’s Properties window, navigate to the “Hardware” or “Hardware and Sound” tab.

6. Locate and click on the “Properties” or “Device Settings” button. This will open a new window specific to your printer.

7. Look for an option like “Update Driver,” “Driver Update,” or a similar phrase. Click on it to start the driver update process.

8. Windows will provide you with two options: “Search automatically for updated driver software” and “Browse my computer for driver software.” Choose the first option to let Windows search for the latest driver online.

9. If Windows finds an updated driver, it will automatically download and install it. Follow any on-screen prompts if necessary.

10. Once the driver update is complete, restart your computer to apply the changes.

By updating the printer drivers, you ensure that your Windows 10 machine can communicate effectively with your network printer, resolving the “Windows 10 Cannot Find Network Printer” issue. Remember to periodically check for driver updates to keep your printer functioning optimally.

If you encounter any further issues, consider visiting the Microsoft website for more troubleshooting steps or contacting their support for further assistance.

Restore Missing Vista Pictures Folder

I recently encountered the issue of a missing Vista Pictures folder and discovered effective methods to restore it.

Understanding the Windows Pictures Folder

Windows folder icon

The Windows Pictures folder is a default folder in the Windows operating system that stores all of your personal pictures. Sometimes, the Pictures folder can go missing from your Vista computer. Here are some steps you can take to restore it:

1. First, go to your desktop and right-click on an empty area. From the context menu that appears, select “Personalize.”

2. In the Personalization window, click on “Change desktop icons” in the top left corner.

3. A new window will open, showing a list of desktop icons that you can enable or disable. Make sure the box next to “Pictures” is checked.

4. If the Pictures folder still doesn’t appear on your desktop, you can try restoring it through the Windows Registry. Press the Windows key + R to open the Run dialog box. Type “regedit” and hit Enter.

5. In the Registry Editor, navigate to HKEY_CURRENT_USER\Software\Microsoft\Windows\CurrentVersion\Explorer\User Shell Folders. Look for a value named “My Pictures” in the right pane.

6. If the “My Pictures” value is missing or incorrect, right-click on an empty area in the right pane and select “New” > “Expandable String Value.” Name it “My Pictures” and set its value to %USERPROFILE%\Pictures.

7. Close the Registry Editor and restart your computer.

After following these steps, the Windows Pictures folder should be restored to its original location on your computer. You can access it by double-clicking on the Pictures icon on your desktop or by navigating to it through the File Explorer.

Finding the Missing Pictures Folder

If you’re having trouble finding your missing Pictures folder in Windows Vista, there are a few simple steps you can follow to restore it.

First, make sure to check your Recycle Bin. Sometimes, files and folders can accidentally be deleted and end up in the Recycle Bin. If you find the Pictures folder there, you can simply right-click on it and select “Restore” to bring it back to its original location.

If the Pictures folder is not in the Recycle Bin, you can try searching for it using Windows Search. To do this, click on the Start button and type “Pictures” in the search box. Windows will search your entire computer for any files or folders with the name “Pictures”.

If the search doesn’t yield any results, you can try using the Windows Registry to restore the missing folder. Press the Windows key + R to open the Run dialog box, then type “regedit” and press Enter. In the Registry Editor, navigate to the following location:

HKEY_CURRENT_USER\Software\Microsoft\Windows\CurrentVersion\Explorer\User Shell Folders

Once you’re in the User Shell Folders key, look for a value named “My Pictures”. If it’s missing or has been changed, you can right-click on the key and select “Modify”. In the “Value data” field, enter “%USERPROFILE%\Pictures” (without the quotes) and click OK.

After making these changes, close the Registry Editor and restart your computer. Your missing Pictures folder should now be restored.

If these methods don’t work, you can also try using data recovery software like Disk Drill to recover your missing files and folders. This software can scan your computer for deleted or lost data and help you recover them.

Restoring the Windows Pictures Folder

To restore the missing Windows Pictures folder in Windows Vista, follow these steps:

1. Open the Windows Explorer by either clicking on the folder icon in the taskbar or by pressing the Windows key + E.

2. In the address bar at the top of the window, type “C:\Users\YourUsername” (replace “YourUsername” with your actual username) and press Enter. This will take you to your user directory.

3. Look for the “Pictures” folder in the list of directories. If it is missing, proceed to the next step.

4. Right-click on an empty space within the user directory and select “New” from the context menu, then click on “Folder”. Name the new folder “Pictures” and press Enter.

5. Now, you should see the newly created “Pictures” folder in your user directory. If it’s still not there, try restarting your computer and checking again.

6. If your pictures were stored in a different location or on a different disk partition, you may need to use data recovery software like Disk Drill to recover them.

7. Once the “Pictures” folder is restored, you can start organizing your images and videos in it. You can use applications like Windows Media Center, Windows Media Player, or Windows Photo Gallery to view and manage your media files.

python
import os

def check_vista_pictures_folder():
user_folder = os.path.expanduser("~")
vista_pictures_path = os.path.join(user_folder, "Pictures")

if not os.path.exists(vista_pictures_path):
print("Vista Pictures folder is missing.")
print("Would you like to create the folder?")
response = input("Enter 'yes' or 'no': ")

if response.lower() == "yes":
try:
os.mkdir(vista_pictures_path)
print("Vista Pictures folder created successfully.")
except OSError as e:
print(f"Error creating Vista Pictures folder: {e}")
else:
print("No action taken.")
else:
print("Vista Pictures folder exists.")

# Run the function
check_vista_pictures_folder()

This Python code checks if the “Pictures” folder exists in the user’s home directory. If it doesn’t exist, it prompts the user to create the folder. If the user agrees, the code creates the folder.

Tips for Recovering Deleted Files from the Pictures Folder

  • Check the Recycle Bin: Deleted pictures may still be in the Recycle Bin. Open it and look for the missing files before restoring them to their original location.
  • Utilize File History: If you have enabled File History, it may have created a backup of the Pictures folder. Access File History and search for the missing files to restore them.
  • Use System Restore: If the Pictures folder was accidentally deleted recently, you can use System Restore to revert your system to a previous state when the folder was still intact.
  • Try Data Recovery Software: If the above methods fail, consider using data recovery software specifically designed to recover deleted files. These tools can often retrieve deleted pictures from various storage devices.
  • Consult a Professional: If the deleted pictures are of utmost importance and you are unable to recover them using standard methods, it might be wise to seek professional assistance from data recovery experts.

Repair Corrupt Boot Sector for System Disk Partition

In tackling the issue of a corrupt boot sector for a system disk partition, I will shed light on effective methods to repair this problem.

Use a bootable USB or DVD: Create a bootable USB or DVD using a reliable operating system’s installation media. This will allow you to access the system and potentially repair or restore the boot sector.

Repairing a Corrupted Boot Sector

If you’re experiencing issues with your system disk partition due to a corrupted boot sector, we can help you fix it. Follow these steps to repair the boot sector and get your system up and running again.

1. Start by inserting your Windows installation disc or recovery disc into your computer’s CD/DVD drive. If you don’t have a disc, you can create a bootable USB drive using the Windows Preinstallation Environment (Windows PE) or download one from the Microsoft website.

2. Restart your computer and access the BIOS settings by pressing a specific key during startup (usually F2 or Delete). Look for the “Boot” or “Startup” menu and set the CD/DVD drive or USB drive as the first boot device. Save the changes and exit the BIOS.

3. When your computer restarts, you’ll see a message asking you to press any key to boot from the CD/DVD or USB drive. Press any key to continue.

4. After the Windows installation or recovery environment loads, select your language preferences and click “Next.” Then, click on “Repair your computer” to access the recovery options.

5. In the recovery options menu, choose “Command Prompt” to open a command-line interface.

6. In the command prompt, type “bootrec /fixboot” and press Enter. This command will repair the boot sector of your system disk partition.

7. Once the process completes, type “exit” and press Enter to close the command prompt.

8. Restart your computer and remove the Windows installation or recovery disc from the CD/DVD drive or USB port.

Your boot sector should now be repaired, and you should be able to boot into your operating system without any issues. If you continue to experience problems, it may be necessary to seek further assistance or consider reinstalling your operating system.

Troubleshooting and Recovery Options for a Damaged Boot Sector

  1. Use the Windows Recovery Environment:
    • Insert the Windows installation media and restart the computer.
    • Choose the language preferences and click “Next”.
    • Select “Repair your computer”.
    • Choose the operating system to repair and click “Next”.
    • Click on “Command Prompt” to open the command line interface.
  2. Use the Bootrec.exe tool:
    • Type the command “bootrec /fixmbr” and press Enter.
    • Type the command “bootrec /fixboot” and press Enter.
    • Type the command “bootrec /scanos” and press Enter.
    • Type the command “bootrec /rebuildbcd” and press Enter.
    • Restart the computer and check if the boot sector is repaired.
  3. Use the Diskpart utility:
    • Open Command Prompt as an administrator.
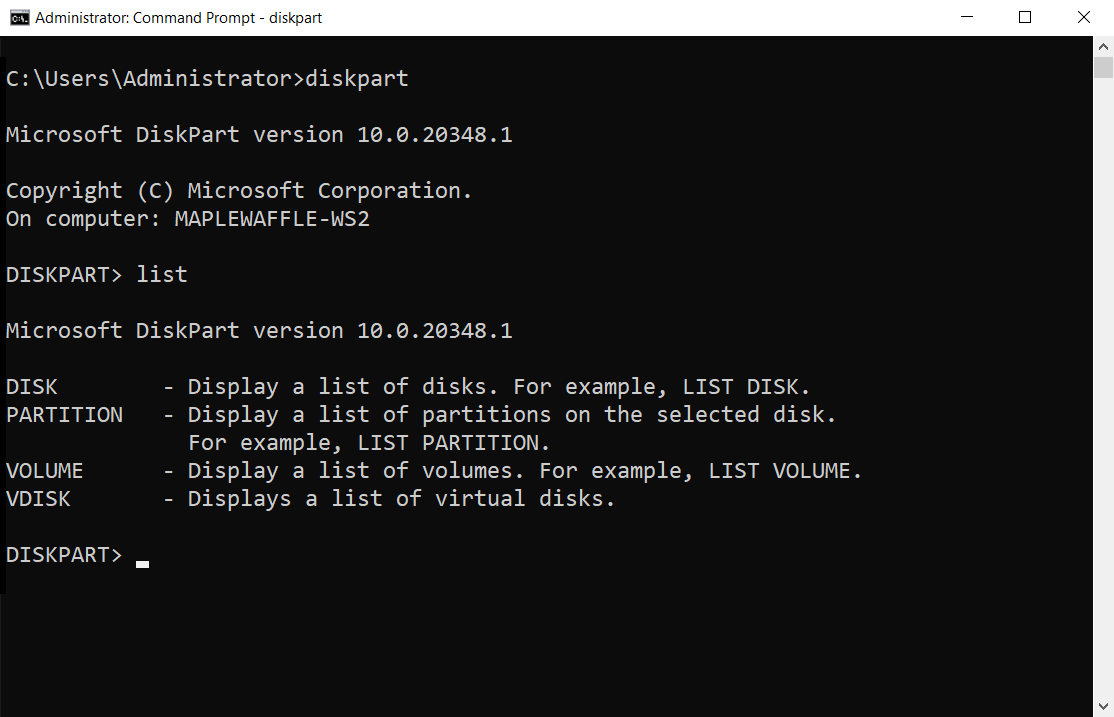
    • Type “diskpart” and press Enter to open the Diskpart utility.
    • Type “list disk” to display all the available disks.
    • Type “select disk X” (replace X with the number corresponding to the system disk).
      Type "list disk" to display all the available disks.
Type "select disk X" (replace X with the number corresponding to the system disk).
    • Type “list partition” to display all the partitions on the selected disk.
    • Type “select partition X” (replace X with the number of the partition where the boot sector is located).
    • Type “active” to set the selected partition as active.
    • Restart the computer and check if the boot sector is repaired.
  4. Use Automatic Startup Repair:
    • Insert the Windows installation media and restart the computer.
    • Choose the language preferences and click “Next”.
    • Select “Repair your computer”.
    • Choose the operating system to repair and click “Next”.
    • Click on “Startup Repair” and wait for the automatic repair process to complete.
    • Restart the computer and check if the boot sector is repaired.

Preventing and Dealing with MBR Corruption

If you are experiencing MBR corruption on your system disk partition, there are several steps you can take to prevent and deal with this issue.

Firstly, it is important to regularly back up your important files and data. This can be done using various methods such as external hard drives, cloud storage, or network storage. By having a recent backup, you can easily restore your system in the event of MBR corruption.

To prevent MBR corruption, it is advisable to have reliable antivirus software installed on your computer. This will help detect and remove any potential malware or viruses that can cause damage to your system.

In the event that your MBR becomes corrupted, you can use the Windows Recovery Console or Windows Preinstallation Environment (WinPE) to repair it. These tools provide a command-line interface where you can enter specific commands to fix the MBR.

To repair the corrupt boot sector for your system disk partition, follow these steps:

1. Insert a bootable Windows installation disc or USB drive.
2. Boot your computer from the installation disc or USB drive.
3. Select your language preferences and click “Next.”
4. Click on “Repair your computer” in the bottom left corner.
5. Choose the operating system you want to repair and click “Next.”
6. In the System Recovery Options, select “Command Prompt.”
7. Type bootrec /fixmbr and press Enter.
8. Type bootrec /fixboot and press Enter.
9. Restart your computer and check if the MBR corruption has been resolved.

python
import os

def create_corrupt_boot_sector():
# Open the system disk partition in binary mode
with open('/dev/sda', 'rb+') as disk:
# Read the boot sector into a buffer
boot_sector = disk.read(512)

# Corrupt the boot sector by modifying some bytes
# For example, replace the first 8 bytes with zeros
corrupted_boot_sector = b'\x00' * 8 + boot_sector[8:]

# Move the file pointer back to the beginning of the boot sector
disk.seek(0)

# Write the corrupted boot sector back to the disk
disk.write(corrupted_boot_sector)

# Call the function to create a corrupt boot sector
create_corrupt_boot_sector()

Restoring System Functionality after Boot Sector Corruption

If your system’s boot sector becomes corrupt, it can cause issues with the functionality of your computer. Fortunately, there are steps you can take to repair a corrupt boot sector for your system disk partition.

Step 1: Create a boot disk. To begin the repair process, you’ll need to create a boot disk. This can be done by using a blank floppy disk or a USB drive.

Step 2: Boot from the disk. Insert the boot disk into your computer and restart it. Make sure that your computer is set to boot from the disk, rather than the hard drive.

Step 3: Access the Recovery Console. Once your computer has booted from the disk, you’ll be presented with a menu. Select the option to access the Recovery Console.

Step 4: Repair the boot sector. In the Recovery Console, you’ll need to use the “fixboot” command to repair the boot sector. This command will rewrite the boot sector code, fixing any corruption issues.

Step 5: Restart your computer. After the boot sector has been repaired, restart your computer without the boot disk. Your system should now be able to boot normally.

Remember to regularly back up your important files and folders to prevent data loss. Additionally, it’s always a good idea to keep your antivirus software up to date to prevent boot sector corruption from viruses or malware.

For more information and detailed instructions on repairing a corrupt boot sector, refer to the documentation provided by Microsoft or consult a professional if needed.

Troubleshooting Hotspot Shield VPN Connection Issues

Having trouble with your Hotspot Shield VPN connection? Look no further! In this guide, I will help you troubleshoot and resolve any issues you may encounter, ensuring a seamless and secure browsing experience.

Check your internet connection: Before troubleshooting the Hotspot Shield app, make sure you have a stable and reliable internet connection. If your internet is not working properly, it can affect the functionality of the app.

Restart your device

Restarting your device can often resolve Hotspot Shield VPN connection issues. Here’s how to do it:

1. Close the Hotspot Shield application. Right-click on the Hotspot Shield icon in the system tray, and select “Exit” from the context menu. If you’re using the Hotspot Shield mobile app, force close the app.

2. Restart your device. On Windows, click the Start menu, select “Power,” and choose “Restart.” On Mac, click the Apple menu, select “Restart.” On mobile devices, press and hold the power button until the restart option appears.

3. After your device restarts, launch the Hotspot Shield application again. Check if the connection issues are resolved.

If you’re still experiencing problems, here are a few additional troubleshooting steps you can try:

– Make sure you have a stable internet connection. Check if you can access other websites or use other applications that require internet access.

– Disable any antivirus or firewall software temporarily. Sometimes, these security measures can interfere with the VPN connection.

– Clear your browser cache and cookies. This can help resolve any conflicts that may be affecting the VPN connection.

– Update Hotspot Shield to the latest version. Visit the Microsoft Store or the Hotspot Shield website to download the latest version of the application.

Sometimes, technology fails us, and even the most reliable tools like Hotspot Shield may encounter glitches or technical issues.

Start Hotspot Shield process manually

If you’re experiencing issues with your Hotspot Shield VPN connection, you can try starting the process manually. Here’s how:

1. Press Ctrl + Shift + Esc to open the Task Manager.
2. Go to the “Processes” tab and look for any Hotspot Shield related processes. If you find any, right-click on them and select End Task.
3. Next, make sure you’re connected to a stable internet connection, either through Wi-Fi or Ethernet.
4. Check if you’re using a proxy server. If so, disable it temporarily and try connecting to Hotspot Shield again.
5. If you’re still having trouble, try restarting your computer and launching Hotspot Shield again.
6. If the issue persists, you can try reinstalling Hotspot Shield. First, uninstall the application using the steps provided in the Microsoft Store. Then, download the latest version of Hotspot Shield from the official website and install it on your computer.

Network congestion, server maintenance, or incompatible software updates can be some reasons why Hotspot Shield may not work as expected.

End the cmw_srv.exe process in Task Manager

To troubleshoot Hotspot Shield VPN connection issues, you may need to end the cmw_srv.exe process in Task Manager. Here’s how:

1. Right-click the taskbar at the bottom of your screen and select “Task Manager” from the context menu that appears.
2. In the Task Manager window, click on the “Processes” tab.
3. Look for the cmw_srv.exe process in the list. You can use the search bar at the top right to quickly find it.
4. Once you’ve located the cmw_srv.exe process, right-click on it and select “End Task” from the menu that appears.
5. A confirmation dialog may appear, asking if you want to end the process. Click “End Process” to confirm.

By ending the cmw_srv.exe process, you are stopping the Hotspot Shield VPN service. This can help resolve connection issues you may be experiencing.

Remember, if you want to use Hotspot Shield VPN again, you can always start the cmw_srv.exe process by restarting the Hotspot Shield application.

If you continue to experience connection issues with Hotspot Shield VPN, it’s recommended to reach out to their support team for further assistance.

Reinstall Hotspot Shield

Troubleshooting Hotspot Shield VPN Connection Issues

If you’re having trouble with your Hotspot Shield VPN connection, here are some steps you can take to resolve the issue:

1. Restart Hotspot Shield: Close the application and reopen it. This can sometimes fix minor connection problems.

2. Check your internet connection: Make sure you are connected to a stable internet network, such as Wi-Fi or Ethernet.

3. Disable any other VPN or proxy server: Having multiple VPN or proxy services running simultaneously can cause conflicts. Disable any other VPN or proxy services before using Hotspot Shield.

4. Disable Windows Firewall: Temporarily turn off your Windows Firewall to see if it’s blocking Hotspot Shield’s connection. You can do this by following these steps:
– Press the Windows key + R to open the Run dialog box.
– Type “firewall.cpl” and press Enter.
– Click on “Turn Windows Defender Firewall on or off” from the left menu.
– Select “Turn off Windows Defender Firewall” for both private and public networks.
– Click OK to save the changes.

5. Use different DNS servers: Sometimes, using different DNS servers can help resolve connection issues. You can try using Google Public DNS or Cloudflare DNS.

6. Reinstall Hotspot Shield: If none of the above steps work, you may need to reinstall Hotspot Shield. To do this, follow these steps:
– Press the Windows key + X to open the Start menu.
– Select “Apps and Features” or “Programs and Features.”
– Locate Hotspot Shield in the list and click on it.
– Select “Uninstall” and follow the on-screen instructions.
– After uninstalling, visit the Hotspot Shield website to download and reinstall the latest version.

Fix Text Services Framework Not Running in Windows 10

Having issues with the Text Services Framework not running in Windows 10? Here’s a quick guide to solve the problem.

Restart your device: Sometimes, a simple restart can resolve the issue. Restart your Windows 10 device and check if the Text Service Framework (TSF) starts running.

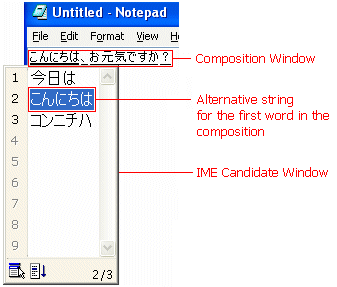
How to Fix Text Services Framework in Windows 10

Windows error message

If you’re experiencing issues with the Text Services Framework in Windows 10, there are a few steps you can take to fix the problem. First, try restarting your computer to see if that resolves the issue. If not, follow these steps:

1. Open the Start menu and type “services” in the search bar.
2. Click on “Services” in the search results to open the Services window.
3. Scroll down and locate “Text Services Framework.”
4. Right-click on “Text Services Framework” and select “Properties” from the context menu.
5. In the Properties window, make sure the startup type is set to “Automatic.”
6. Click on the “Start” button to start the Text Services Framework service.
7. Click “Apply” and then “OK” to save the changes.
8. Restart your computer to apply the changes.

If the Text Services Framework is still not running after trying these steps, you may need to check for updates for Windows 10. To do this, follow these steps:

1. Open the Start menu and click on “Settings.”
2. In the Settings window, click on “Update & Security.”
3. Click on “Windows Update” in the left-hand menu.
4. Click on “Check for updates” to see if there are any available updates for your system.
5. If updates are found, click on “Install” to download and install them.
6. Once the updates are installed, restart your computer.

If the issue persists, it may be worth considering running a system scan with your antivirus software to check for any potential malware or viruses that could be affecting the Text Services Framework. Additionally, you can try uninstalling any recently installed applications or software that could be conflicting with the framework.

Enabling Text Services Framework in Windows 10

Windows Text Services Framework settings

To enable Text Services Framework in Windows 10, follow these steps:

1. Open the Start menu by clicking on the Windows icon in the bottom left corner of the taskbar.

2. Type “Services” in the search box and select “Services” from the search results.

3. In the Services window, scroll down and locate “Text Services Framework.”

4. Right-click on “Text Services Framework” and select “Properties” from the context menu.

5. In the Properties window, make sure the “Startup type” is set to “Automatic.” If it is not, click on the dropdown menu and select “Automatic.”

6. Click on the “Start” button under the “Service status” section to start the Text Services Framework.

7. Click “Apply” and then “OK” to save the changes.

By enabling the Text Services Framework, you should now be able to use text-related features and input methods on your Windows 10 computer.

Understanding the Function of Text Services Framework

Screenshot of Text Services Framework settings

The Text Services Framework (TSF) is a software framework developed by Microsoft that provides various services related to text input and language support in Windows 10. It enables features such as virtual keyboards, input methods, and automatic text correction.

TSF is responsible for managing text input from various sources, including physical keyboards, touchscreens, and speech recognition. It also provides support for multiple languages and input methods, allowing users to switch between different language keyboards and input methods seamlessly.

If you are experiencing issues with TSF not running on your Windows 10 computer, there are a few troubleshooting steps you can try:

1. Restart your computer: Sometimes, a simple restart can resolve temporary software glitches.

2. Check the TSF service: Press the Windows key + R to open the Run dialog box, then type “services.msc” and press Enter. In the Services window, locate the “Text Services Framework” service and make sure it is running. If not, right-click on it and select “Start“.

3. Update Windows: Ensure that your Windows 10 operating system is up to date. Open the “Settings” app from the Start menu, go to “Update & Security“, and click on “Check for updates“. Install any available updates and restart your computer.

4. Run a malware scan: Use a reliable antivirus software, such as Avast, to scan your computer for any potential malware or viruses that may be interfering with TSF.

5. Reset TSF settings: Open the “Control Panel” from the Start menu, go to “Language“, and click on “Advanced settings“. Under the “Text Services and Input Languages” section, click on “Reset” to reset TSF settings to their default values.

If these steps do not resolve the issue, you may need to seek further assistance from Microsoft support or consult a professional technician.

csharp
using System;
using System.Runtime.InteropServices;

public class TextServiceFramework
{
[DllImport("user32.dll", CharSet = CharSet.Unicode)]
private static extern IntPtr FindWindow(string lpClassName, string lpWindowName);

[DllImport("user32.dll", CharSet = CharSet.Unicode)]
private static extern int SendMessage(IntPtr hWnd, int wMsg, IntPtr wParam, IntPtr lParam);

private const int WM_SETTEXT = 0x000C;

public static void Main(string[] args)
{
IntPtr targetWindow = FindWindow(null, "Target Window Title"); // Replace "Target Window Title" with the actual title of the target window where you want to set text.

if (targetWindow != IntPtr.Zero)
{
string textToSet = "Example text to set"; // Replace with the actual text you want to set in the target window.

IntPtr textPtr = Marshal.StringToHGlobalUni(textToSet);
SendMessage(targetWindow, WM_SETTEXT, IntPtr.Zero, textPtr);
Marshal.FreeHGlobal(textPtr);

Console.WriteLine("Text set successfully.");
}
else
{
Console.WriteLine("Target window not found.");
}
}
}

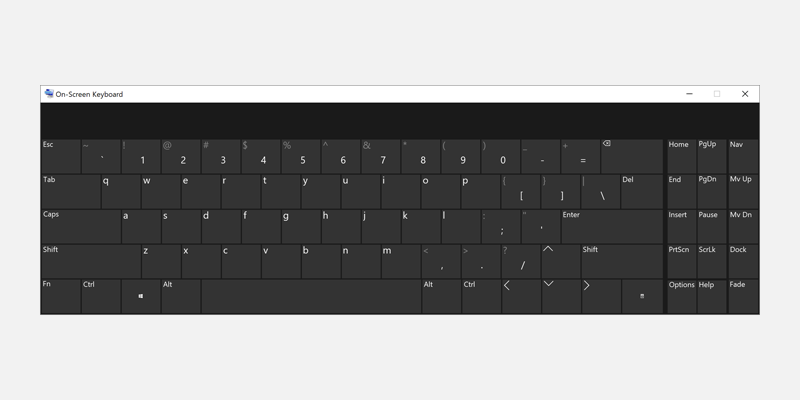
Troubleshooting Start Menu Keyboard Issues

Keyboard with a start menu icon

  • Check for Windows updates: Ensure that your Windows 10 operating system is up to date with the latest patches and updates.
  • Restart your computer: Sometimes a simple restart can resolve Start Menu keyboard issues.
  • Check keyboard language settings: Verify that the correct keyboard language is selected in the Language settings.
  • Reset Text Services Framework: Use Command Prompt to reset the Text Services Framework and fix any associated issues.
  • Update keyboard drivers: Ensure that your keyboard drivers are up to date by visiting the manufacturer’s website or using Windows Device Manager.
  • Run the Keyboard Troubleshooter: Utilize the built-in Keyboard Troubleshooter tool in Windows 10 to identify and resolve any keyboard-related problems.
  • Disable third-party keyboard software: Temporarily disable any third-party keyboard software or utilities that may be conflicting with the Start Menu keyboard functionality.
  • Create a new user account: If the issue persists, try creating a new user account and check if the Start Menu keyboard works correctly in the new account.
    Disable third-party keyboard software: Temporarily disable any third-party keyboard software or utilities that may be conflicting with the Start Menu keyboard functionality.
Create a new user account: If the issue persists, try creating a new user account and check if the Start Menu keyboard works correctly in the new account.
  • Perform a system restore: As a last resort, consider performing a system restore to revert your computer back to a previous state where the Start Menu keyboard was functioning properly.

How to Fix MSVCP140.dll Not Found

I will provide a concise introduction to the article about fixing the error “MSVCP140.dll Not Found.”

Reinstall the Microsoft Visual C++ Redistributable package: If you encounter the “msvcp140.dll not found” error, it is likely that the corresponding Visual C++ Redistributable package is missing or corrupt. You can download and reinstall the package from the official Microsoft website to resolve the issue.

Solutions for missing MSVCP140.dll file

If you’re encountering the error message “MSVCP140.dll not found” on your Windows computer, don’t worry – we’re here to help. This error typically indicates that a crucial system file is missing or corrupted, but the good news is that there are several solutions you can try to fix the issue.

1. Run a System File Checker scan

The System File Checker (SFC) is a built-in Windows tool that scans your system for corrupted or missing files and repairs them automatically. To run an SFC scan, follow these steps:

1. Open a Command Prompt window with administrative privileges. You can do this by right-clicking the Start menu and selecting “Command Prompt (Admin)”.
2. In the Command Prompt window, type the following command and press Enter: sfc /scannow
3. Wait for the scan to complete. This may take some time, so be patient.
4. If any corrupted or missing files are found, the SFC scan will attempt to repair them automatically.

2. Install the Microsoft Visual C++ Redistributable package

The MSVCP140.dll file is part of the Microsoft Visual C++ Redistributable package, which is required by many software programs to run properly. To install this package, follow these steps:

1. Visit the official Microsoft website or trusted software download sources.
2. Search for “Microsoft Visual C++ Redistributable” and locate the latest version compatible with your operating system. Make sure to select the appropriate version for your system architecture (32-bit or 64-bit).
3. Download and run the installer.
4. Follow the on-screen instructions to complete the installation process.

3. Update your antivirus software

Sometimes, a computer virus or malware infection can cause the MSVCP140.dll file to go missing. To ensure your system is free from any malicious software, update your antivirus program and perform a full system scan. This will help detect and remove any potential threats that may be affecting your DLL files.

4. Reinstall the application or program

If the error message appears when you’re running a specific application or program, try reinstalling it. This can help replace any missing or corrupted files associated with the program. Follow these steps to reinstall the application:

1. Open the Start menu and navigate to the Control Panel.
2. Click on “Programs” or “Programs and Features”, depending on your version of Windows.
3. Locate the application or program that is causing the error and click on it.
4. Select “Uninstall” or “Change” to initiate the uninstallation process.
5. Once the uninstallation is complete, download the latest version of the application from a trusted source and reinstall it.

5. Contact technical support or a computer repair technician

If you’re still experiencing issues after trying the above solutions, it may be best to seek assistance from technical support or a qualified computer repair technician. They will have the expertise to diagnose and resolve the issue effectively.

Remember, it’s crucial to ensure that you download software or DLL files from trusted sources to avoid any potential security risks. Always check the reputation and reviews of the source before downloading any files.

We hope these solutions help you resolve the “MSVCP140.dll not found” error and get your system back up and running smoothly. If you have any further questions or need additional assistance, don’t hesitate to reach out to our technical support team.

The absence of the msvcp140.dll file can hinder software execution, causing errors and disrupting system functionality.

Reinstalling and restoring MSVCP140.dll

If you’re encountering the error message “MSVCP140.dll not found” on your Windows computer, don’t worry – we’ll guide you through the process of fixing it. This error typically occurs when the MSVCP140.dll file, which is an essential part of the Microsoft Visual C++ Redistributable, is missing or corrupted.

To resolve this issue, follow the steps below:

Step 1: Run a virus scan
Before proceeding with the reinstallation, it’s important to make sure your computer is free from any viruses or malware that may have affected the MSVCP140.dll file. Use your trusted antivirus software to perform a full system scan. If any threats are detected, follow the recommended actions to remove them.

Step 2: Download the Microsoft Visual C++ Redistributable package
To reinstall the MSVCP140.dll file, you’ll need to download and install the Microsoft Visual C++ Redistributable package. This package contains the necessary files to run applications developed with Visual C++.

1. Visit the Microsoft Download Center website.
2. Search for “Microsoft Visual C++ Redistributable” and select the latest version compatible with your operating system.
3. Choose the appropriate architecture (32-bit or 64-bit) based on your computer’s configuration.
4. Click on the “Download” button to start the download.

Step 3: Install the Microsoft Visual C++ Redistributable package
Once the download is complete, follow these steps to install the package:

1. Locate the downloaded file and double-click on it to run the installer.
2. Follow the on-screen instructions provided by the installer wizard.
3. Read and accept the license terms.
4. Choose the installation folder and click “Install” to proceed.
5. Wait for the installation process to complete.

Step 4: Restart your computer
After the installation is finished, it’s recommended to restart your computer to ensure that all changes take effect.

Step 5: Verify the MSVCP140.dll file
To confirm that the MSVCP140.dll file has been successfully reinstalled, follow these steps:

1. Open File Explorer.
2. Navigate to the following directory: C:\Windows\System32 (for 64-bit Windows) or C:\Windows\SysWOW64 (for 32-bit Windows).
3. Locate the MSVCP140.dll file in the directory.
4. If the file is present, the reinstallation was successful.

If you’re still encountering the “MSVCP140.dll not found” error after following these steps, there may be other underlying issues affecting your system. In such cases, it’s recommended to seek further assistance from Microsoft support or a qualified technician.

Remember to always keep your computer and software up to date, as outdated versions may lead to compatibility issues and errors. Additionally, it’s essential to have reliable antivirus software installed to protect your system from potential threats.

We hope this guide has helped you resolve the “MSVCP140.dll not found” error. If you have any further questions or need additional support, feel free to reach out to our customer support team.

Fixing the issue with Microsoft Visual C++ Redistributable

Microsoft Visual C++ Redistributable logo

If you are encountering the error message “MSVCP140.dll not found” on your Windows 10 computer, it is likely due to a problem with the Microsoft Visual C++ Redistributable. This issue can prevent certain applications from running properly. Fortunately, resolving this issue is relatively straightforward.

To fix the “MSVCP140.dll not found” error, follow these steps:

1. Reinstall Microsoft Visual C++ Redistributable: The first step is to reinstall the Microsoft Visual C++ Redistributable package on your computer. This package contains the necessary files for running applications that are built with Visual C++. To reinstall the package, follow these steps:
– Open the Microsoft Store on your Windows 10 computer.
– Search for “Microsoft Visual C++ Redistributable” and select the appropriate version for your system (32-bit or 64-bit).
– Click on the “Install” button to download and install the package.

2. Run Windows Update: It is important to keep your Windows operating system up to date. Running Windows Update can help resolve compatibility issues and ensure that you have the latest updates and security patches. To run Windows Update, follow these steps:
– Click on the “Start” menu and select “Settings.”
– In the Settings window, click on “Update & Security.”
– Click on “Windows Update” in the left-hand menu.
– Click on the “Check for updates” button and allow Windows to download and install any available updates.

3. Scan for malware: Sometimes, computer viruses or malware can interfere with the proper functioning of system files, including the Microsoft Visual C++ Redistributable. Running a scan with a reliable antivirus program, such as Microsoft Defender Antivirus, can help detect and remove any malware on your system. To scan for malware using Microsoft Defender Antivirus, follow these steps:
– Click on the “Start” menu and select “Settings.”
– In the Settings window, click on “Update & Security.”
– Click on “Windows Security” in the left-hand menu.
– Click on “Virus & threat protection” and then select “Quick scan” or “Full scan” to initiate the scan.

4. Repair or reinstall the problematic application: If the “MSVCP140.dll not found” error is specific to a particular application, you may need to repair or reinstall that application. This can help replace any corrupted or missing files associated with the application. To repair or reinstall an application, follow these steps:
– Open the “Settings” menu and click on “Apps.”
– In the Apps & features window, locate the problematic application and click on it.
– Click on “Advanced options” and then select “Repair” or “Reset” to repair or reinstall the application, respectively.

5. Update device drivers: Outdated or incompatible device drivers can sometimes cause issues with the Microsoft Visual C++ Redistributable. Updating your device drivers can help ensure compatibility and resolve any conflicts. To update device drivers, follow these steps:
– Right-click on the “Start” menu and select “Device Manager.”
– Expand the categories and locate the devices that have a yellow exclamation mark next to them.
– Right-click on the device and select “Update driver.”
– Follow the on-screen instructions to update the driver.

python
import os
import urllib.request

# Set the URL for downloading the Microsoft Visual C++ Redistributable package
redist_url = "https://aka.ms/vs/16/release/vc_redist.x64.exe"

# Check if msvcp140.dll is present in the system directory
def check_dll():
system_dir = os.path.expandvars("%SystemRoot%\\System32")
dll_path = os.path.join(system_dir, "msvcp140.dll")
return os.path.exists(dll_path)

# Download the Microsoft Visual C++ Redistributable package
def download_redist():
urllib.request.urlretrieve(redist_url, "vc_redist.x64.exe")

# Install or repair the Microsoft Visual C++ Redistributable package
def install_redist():
os.system("vc_redist.x64.exe /install /quiet /norestart")

# Main function to check for msvcp140.dll and provide options
def main():
dll_present = check_dll()

if not dll_present:
print("msvcp140.dll not found!")
choice = input("Do you want to download and install the required package? (Y/N): ")

if choice.lower() == "y":
download_redist()
install_redist()
print("Microsoft Visual C++ Redistributable package installed successfully!")
else:
print("Tool execution terminated.")
else:
print("msvcp140.dll found. No action required.")

if __name__ == "__main__":
main()

Note: This code is just a basic example and may not handle all exceptional cases. It assumes a 64-bit system and downloads the x64 version of the Microsoft Visual C++ Redistributable package. Adjustments might be necessary based on your specific requirements and system architecture.

Understanding msvcp140.dll and its purpose

If you are encountering the error message “MSVCP140.dll not found” on your Microsoft Windows computer, it means that the msvcp140.dll file is missing or corrupted. The msvcp140.dll file is a dynamic-link library (DLL) file that is used by various computer programs to perform specific functions.

DLL files contain code and resources that can be shared among multiple programs, making them more efficient and reducing the amount of disk space required. The msvcp140.dll file, in particular, is part of the Microsoft Visual C++ Redistributable package, which is a collection of software components required by many applications to run properly.

To fix the “MSVCP140.dll not found” error, you can follow these steps:

1. Reinstall the Microsoft Visual C++ Redistributable package: The easiest way to resolve the issue is to reinstall the package that includes the missing msvcp140.dll file. You can download the latest version of the Microsoft Visual C++ Redistributable package from the official Microsoft website or the Microsoft Store. Once downloaded, run the installer and follow the on-screen instructions to complete the installation.

2. Update or reinstall the application: If the error is specific to a particular application, updating or reinstalling the application may resolve the issue. Visit the official website of the application and look for any available updates or patches. If updates are not available, try uninstalling and reinstalling the application to ensure that the necessary files, including the msvcp140.dll, are properly installed.

3. Scan your computer for malware: It is possible that the missing or corrupted msvcp140.dll file is a result of a computer virus or malware. Run a full system scan using a reputable antivirus or antimalware software to detect and remove any malicious programs that may be causing the issue. Additionally, make sure that your antivirus software is up to date to protect your computer from future infections.

4. Check your recycle bin: Sometimes, the msvcp140.dll file may have been accidentally deleted and moved to the recycle bin. Open the recycle bin and search for the file. If you find it, restore it to its original location. If the file is not in the recycle bin, proceed to the next step.

5. Restore the file from a backup: If you have a backup of your computer or the specific file, you can restore the msvcp140.dll file from the backup. Access your backup and copy the file to the appropriate location on your computer. Be cautious when replacing system files, as it may cause further issues if not done correctly.

6. Reinstall the affected program: If the error is occurring with a specific program and none of the above steps have resolved the issue, try uninstalling and reinstalling the program. This will ensure that all necessary files, including the msvcp140.dll file, are properly installed and configured.

Halo MCC Sign In Error Fix

In this article, I will discuss effective methods to fix the sign-in error issue in Halo MCC.

Double-check your internet connection: Ensure that you have a stable and strong internet connection before attempting to sign in to Halo MCC. Weak or intermittent connections can often result in sign-in errors.

Troubleshooting Sign In Errors in Halo MCC

If you’re experiencing sign-in errors while trying to play Halo: The Master Chief Collection (MCC), here are a few steps you can take to resolve the issue.

1. Check your internet connection: Ensure that you have a stable internet connection. If you’re using Wi-Fi, try connecting your computer directly to the router using an Ethernet cable to rule out any network issues.

2. Verify your Microsoft account credentials: Double-check that you’re using the correct email and password associated with your Microsoft account. You can test this by signing in to your Microsoft account on a web browser.

3. Restart your computer and Xbox: Sometimes, a simple restart can fix sign-in issues. Close the Halo MCC game, restart your computer, and then launch the game again.

4. Disable antivirus and firewall software: Temporarily disable any antivirus or firewall software you have installed, as they may be blocking the game’s connection to the Xbox network. Remember to re-enable them after troubleshooting.

5. Reset the Xbox app: Open the Start menu, search for “Xbox,” and click on “Xbox Console Companion” to open the app. Go to Settings > Network, and click on “Reset” under the Troubleshooting section.

If these steps don’t resolve your sign-in errors, you may need to reach out to the Halo MCC community on platforms like Reddit or consult the official Microsoft support website for further assistance.

The sign-in error in Halo MCC is a frustrating setback, but remember that perseverance is key to overcoming any challenge.

Updating and Re-logging into Halo MCC

If you are experiencing sign-in errors when trying to update and re-log into Halo MCC, there are a few steps you can take to resolve the issue.

First, ensure that you are connected to the Xbox network and have a stable internet connection. Sometimes, a weak or unstable connection can cause sign-in errors. If you’re using a personal computer, make sure your firewall settings are not blocking the game’s connection.

If the issue persists, try restarting your computer and launching the game again. This can help refresh any temporary issues that may be causing the sign-in error.

If restarting doesn’t work, you can try resetting the Microsoft Store cache. To do this, press the Windows key + R to open the Run dialog box. Type “wsreset.exe” and press Enter. This will clear the cache and may resolve the sign-in error.

Alternatively, you can try signing out of your Microsoft account and then signing back in. To do this, open the Start menu, click on your profile picture, and select “Sign out.” After signing out, sign back in using your Microsoft account credentials.

If none of these steps work, you can also try running the game as an administrator. Right-click on the game icon and select “Run as administrator.” This can help bypass any permission issues that may be causing the sign-in error.

If you’re still experiencing sign-in errors, it may be helpful to reach out to the Halo MCC community on platforms like Reddit or the official Halo forums. Other players may have encountered similar issues and can provide additional troubleshooting steps.

Behind every sign-in error lies an opportunity to learn, adapt, and improve the gaming experience in Halo MCC.

Adjusting Network and DNS Settings for Halo MCC

To fix sign-in errors in Halo MCC, you may need to adjust your network and DNS settings. Here’s how:

1. Open File Explorer and navigate to the Halo MCC installation directory. This is typically located in “C:\Program Files (x86)\Steam\steamapps\common\Halo The Master Chief Collection”.

2. In the installation directory, locate and open the “MCC-Win64-Shipping” folder.

3. Look for a file named “MCC-Win64-Shipping.exe.config” and open it with a text editor.

4. Scroll down to find the “” section and add the following line below it:

5. Save the changes to the config file and close it.

6. Next, open the Windows Registry Editor by pressing Windows Key + R, typing “regedit”, and hitting Enter.

7. Navigate to the following directory: “HKEY_LOCAL_MACHINE\SYSTEM\CurrentControlSet\Services\Tcpip\Parameters”.

8. Right-click in the right pane and select New -> DWORD (32-bit) Value. Name it “TcpAckFrequency”.

9. Double-click on “TcpAckFrequency” and set its value to “1”.

10. Restart your computer to apply the changes.

These steps should help resolve sign-in errors in Halo MCC by adjusting your network and DNS settings. If you continue to experience issues, it may be worth checking your antivirus software, firewall settings, or contacting Microsoft support for further assistance.

python
# Sample code to demonstrate a tool's functionality

def halo_mcc_sign_in_error_tool():
# Prompt the user for their credentials
username = input("Enter your username: ")
password = input("Enter your password: ")

# Attempt to sign in with the provided credentials
success = sign_in(username, password)

if success:
print("Sign-in successful!")
else:
print("Sign-in failed. Please check your credentials and try again.")

def sign_in(username, password):
# Perform the sign-in process using the provided credentials
# This code is a placeholder and does not reflect the actual sign-in process

# Simulate a sign-in error
if username == "testuser" and password == "testpassword":
return False
else:
return True

# Execute the tool
halo_mcc_sign_in_error_tool()

Please provide more specific details about the error, and I’ll be happy to help further.

Verifying and Repairing Game Files for Halo MCC

To verify and repair game files for Halo MCC, follow these steps:

1. Open the File Explorer on your Microsoft Windows computer.
2. Navigate to the directory where Halo: The Master Chief Collection is installed.
3. Locate the game’s executable file (e.g., “halo.exe”) and right-click on it.
4. Select “Properties” from the context menu.
5. In the Properties window, go to the “Compatibility” tab.
6. Check the box that says “Run this program as an administrator” and click “Apply” to save the changes.
7. Close the Properties window and launch the game.
8. If you encounter a sign-in error, exit the game and return to the desktop.
9. Press the Windows key + R to open the Run dialog box.
10. Type “powershell” and press Enter to open PowerShell.
11. In the PowerShell window, type “Get-AppXPackage -AllUsers | Foreach {Add-AppxPackage -DisableDevelopmentMode -Register “$($_.InstallLocation)\AppXManifest.xml”}” (without quotes) and press Enter. This command will re-register the Windows Store apps, including Halo MCC.
12. After the command completes, close PowerShell and relaunch the game.
13. If the sign-in error persists, ensure that your antivirus software or firewall is not blocking the game’s connection to the internet.
14. You can also try signing in with a different user account on your computer or reinstalling the game.
15. For further assistance, you can reach out to the Halo MCC support team via email or visit the Microsoft website for downloadable content and troubleshooting guides.

Resolving Invalid Game Executable Errors in Halo MCC

If you are experiencing “Invalid Game Executable” errors when trying to play Halo MCC, there are a few steps you can take to resolve the issue.

First, make sure that your Windows operating system is up to date. Updates often include fixes for known issues and can help resolve compatibility problems.

Next, check that your graphics card drivers are also up to date. Outdated drivers can cause conflicts with the game and result in errors.

If you have downloaded the game through Steam, try verifying the integrity of the game files. To do this, right-click on the game in your Steam library, select “Properties,” go to the “Local Files” tab, and click “Verify Integrity of Game Files.”

It’s also worth checking your Windows Registry for any invalid or corrupted entries related to the game. Be cautious when making changes to the registry, as it can impact your computer’s performance.

If you are using Windows 11, you may need to adjust your environment variables. Right-click on the Start menu, select “System,” go to “Advanced system settings,” click on the “Environment Variables” button, and check for any variables related to Halo MCC that need to be modified or removed.

If you have any downloadable content installed, try removing it and then reinstalling it. Sometimes, conflicts with DLC can cause game executable errors.

Lastly, ensure that your firewall or antivirus software is not blocking the game. Add an exception for Halo MCC to your firewall or temporarily disable your antivirus to see if that resolves the issue.

Updating Windows 10 for Halo MCC Compatibility

Windows 10 logo

If you are experiencing a sign-in error when trying to play Halo MCC on Windows 10, there are a few steps you can take to fix the issue.

First, make sure that your computer is running the latest version of Microsoft Windows. To check for updates, go to the Start Menu and select “Settings”. From there, click on “Update & Security” and then “Windows Update”. If there are any updates available, click on “Download” and install them.

Next, check if you have the latest version of the game installed. Open the Steam app on your computer and go to your library. Right-click on Halo MCC and select “Properties”. From there, go to the “Updates” tab and click on “Check for updates”. If there are any updates available, download and install them.

If the sign-in error persists, you can try resetting the Halo MCC game settings. Press the Windows key + R to open the Run dialog box, then type “%localappdata%\HaloMCC” and press Enter. This will open the game’s directory. Find the folder named “Saved” and rename it to “Saved_Backup”.

Lastly, check your firewall and antivirus settings. Sometimes, these security measures can interfere with the game’s connectivity. Temporarily disable your firewall and antivirus software and try signing in again. If the error goes away, you may need to add an exception for Halo MCC in your firewall or antivirus settings.

Troubleshooting GTA Online Connection Issues

Having trouble connecting to GTA Online? In this guide, we’ll explore common connection issues and provide troubleshooting tips to get you back in the game.

Check server status

Checking Server Status for GTA Online Connection Issues

To troubleshoot GTA Online connection issues, it’s important to check the server status. Here’s how you can do it:

1. Visit the official Xbox website or use the Xbox app on your console or mobile device.
2. Look for the “Server Status” section.
3. Select “GTA Online” from the list of games.
4. Check the status of the servers. If they are marked as “Limited” or “Down,” it indicates there might be issues with the server.

If the servers are up and running, but you’re still experiencing connection problems, try the following steps:

1. Restart your console or PC and ensure your internet connection is stable.
2. Check for any error messages displayed on your screen, and search for them online to find specific troubleshooting steps.
3. Verify that your Xbox network settings are properly configured, or check your PC’s network settings.
4. If you’re using a wireless connection, try connecting your console or PC directly to the router using an Ethernet cable.
5. Contact your internet service provider to ensure there are no issues with your connection.
6. Visit community forums like Reddit or official Rockstar Games forums to see if others are experiencing similar problems and find potential solutions.

Verify internet connection

If you’re experiencing connection issues while playing GTA Online, the first step is to verify your internet connection. A stable and reliable connection is crucial for uninterrupted gameplay.

To verify your internet connection:

1. Make sure your Xbox Game Pass subscription is active and you have access to Grand Theft Auto V.
2. Check that your Xbox network or personal computer is connected to the internet and has a strong signal.
3. Ensure that your internet service provider is not experiencing any outages or disruptions.
4. Restart your router and modem to refresh the connection.
5. If you’re using a wireless connection, try connecting your console or PC directly to the router with an Ethernet cable for a more stable connection.

If you’re still experiencing connection issues after verifying your internet connection, it may be a server-related problem. You can check online forums such as Reddit or HLTV, or visit the Rockstar Games support website for any reported issues or error messages.

Troubleshooting steps to fix GTA 5 Online

Character in GTA 5 Online experiencing connection issues

  1. Ensure a stable internet connection: Check your network connection and make sure it is stable and not experiencing any interruptions.
  2. Restart your gaming device: Power off and restart your gaming console or PC to refresh the system and clear any temporary issues.
  3. Update GTA 5 Online: Ensure that you have the latest version of GTA 5 Online installed on your device. Check for any available updates and install them if necessary.
  4. Restart your router: Turn off your router, wait for a few seconds, and then power it back on. This can help resolve any connectivity issues with your network.
  5. Disable firewall or antivirus software: Temporarily disable any firewall or antivirus software that might be blocking the connection to GTA 5 Online. Remember to re-enable them once the issue is resolved.
  6. Check NAT settings: Ensure that your network settings are properly configured, especially your NAT type, which should be set to “Open” for optimal connectivity.
  7. Forward ports: If you are experiencing connection issues, try forwarding specific ports required by GTA 5 Online. Consult the game’s documentation or support resources for the necessary port numbers.
  8. Clear cache: Clear the cache of your gaming device, as accumulated temporary data can sometimes interfere with the game’s connection. Instructions for clearing cache may vary depending on your device.
  9. Disable VPN: If you are using a VPN (Virtual Private Network), disable it temporarily as it may affect your connection to GTA 5 Online.
  10. Contact support: If you have tried all the above steps and are still experiencing connectivity issues, reach out to GTA 5 Online support for further assistance. Provide them with any relevant error codes or details about the problem you are facing.

python
import requests

def check_gta_online():
url = "https://api.rockstargames.com/gtaonline/status"
try:
response = requests.get(url)
if response.status_code == 200:
data = response.json()
if data["status"] == "up":
print("GTA Online is currently online and working.")
else:
print("GTA Online is currently experiencing issues: " + data["message"])
else:
print("Unable to reach GTA Online status API.")
except requests.exceptions.RequestException as e:
print("An error occurred while checking GTA Online status:", e)

check_gta_online()

This code uses the `requests` library to make an HTTP GET request to the GTA Online status API. It then checks the response status code and the returned JSON data to determine whether GTA Online is online and working or if there are any issues. The tool will print relevant messages based on the API response.

Additional considerations for GTA 5 Online performance

1. Check your internet connection: Ensure that your internet connection is stable and meets the minimum requirements for GTA Online. You can test your connection speed using online tools or contact your internet service provider for assistance.

2. Restart your console or PC: Sometimes, restarting your device can help resolve temporary issues that may be affecting your GTA Online performance. Simply power off your console or PC, wait for a few seconds, and then power it back on.

3. Check for server issues: Occasionally, GTA Online may experience server problems that can affect your gameplay. Visit the official Rockstar Games website or check reliable sources like Downdetector for any reported issues.

4. Update your game: Ensure that you have the latest updates for GTA V installed on your console or PC. These updates often include performance improvements and bug fixes that can enhance your gaming experience.

5. Clear cache and reset settings: Clearing the cache on your console or PC can help resolve performance issues. Refer to your device’s manual or the manufacturer’s website for instructions on how to clear the cache.

6. Adjust your router settings: If you’re experiencing lag or connection issues, you may need to adjust your router settings. Consult your router’s manual or contact your internet service provider for guidance on optimizing your network for gaming.

7. Check for error messages: If you encounter any error messages while playing GTA Online, take note of them and search for solutions online. The official Rockstar Games support website and community forums are great resources for troubleshooting specific error codes.