LockAppHost.exe Windows 10: What is it and How to Fix

LockAppHost.exe is a process in Windows 10 that can sometimes cause issues for users. In this article, I will explain what LockAppHost.exe is and how to fix any problems it may be causing on your system.

File Information and Resource Intensity

File Information Resource Intensity
File Name LockAppHost.exe
File Location C:\Windows\SystemApps\Microsoft.LockApp_cw5n1h2txyewy
File Size Variable, typically around 1 MB
File Type Executable File
Resource Usage Low to Moderate

Resolving High Memory Usage Issues

Task Manager showing high memory usage

To resolve high memory usage issues related to LockAppHost. exe in Windows 10, try closing unnecessary applications running in the background using the Task Manager. You can also scan your system for spyware, malware, or adware that may be causing the problem. Additionally, check for any available patches or updates for your operating system that could address the issue.

Make sure to run a full antivirus scan on your computer to ensure it is not infected. If the problem persists, you may need to reinstall the LockAppHost. exe file or perform a system file check.

Identifying and Removing Malware

  • Run a Full System Scan with Antivirus Software:
    • Open Antivirus Software and initiate a Full System Scan.
    • Follow the software’s instructions to remove any detected malware.
  • Use Windows Defender Offline:
    • Search for Windows Security in the Windows search bar.
    • Click on Virus & Threat Protection and select Scan Options.
    • Choose Windows Defender Offline Scan and follow the instructions.
  • Manually Remove Malware:
    • Open Task Manager by pressing Ctrl+Shift+Esc.
    • Identify any suspicious processes and End Task on them.
    • Search for LockAppHost.exe in the Windows search bar and delete any suspicious files associated with it.

Personalizing and Disabling the Lock Screen

Windows lock screen customization options

To personalize or disable the lock screen in Windows 10, you can easily make changes in the settings. To personalize the lock screen, go to the Settings menu, then Personalization, and finally Lock screen. Here you can choose your desired background image or slideshow. To disable the lock screen, press the Windows key + R, type “regedit,” and hit Enter. Navigate to HKEY_LOCAL_MACHINE\SOFTWARE\Policies\Microsoft\Windows and create a new key named “Personalization. ” Then create a DWORD value named “NoLockScreen” and set it to 1.

Now your lock screen will be disabled.

FAQ

What is lock app?

Lock app is a Windows file that creates a graphical interface over the locked screen when the computer is idle for an extended period of time.

How do I lock a program in Windows 10?

To lock a program in Windows 10, you can set up parental controls for a specific user account. This will allow you to control which apps can be accessed.

How do you lock the screen on Windows 10?

To lock the screen on Windows 10, you can simply press the Windows logo key + L.

How do I remove the password from my lock screen laptop?

To remove the password from your laptop’s lock screen, you can access the settings and disable the password requirement for logging in. This will allow you to bypass the password prompt when turning on your laptop.

Fix Safari Not Responding on Mac – Top Solutions

Having Safari freeze and become unresponsive on your Mac can be frustrating. Here are the top solutions to fix this issue.

Force Quit and Restart

If Safari on your Mac is not responding, a quick fix is to force quit the browser and then restart it. To force quit Safari, press Command + Option + Esc to bring up the Force Quit Applications window. Select Safari from the list and click on the “Force Quit” button.

After force quitting Safari, click on the Apple menu in the top left corner of your screen and select Restart to reboot your Mac. Once your Mac has restarted, open Safari again and see if the issue has been resolved.

If Safari continues to not respond, you may need to clear the cache and cookies. To do this, go to the Safari menu bar and select Clear History and Website Data. Choose the time range you want to clear and click on “Clear History”.

You can also try resetting Safari by going to the Safari menu bar, selecting Reset Safari, and checking the boxes for the items you want to reset. This can help fix any underlying issues that may be causing Safari to not respond.

Clear Cache, Cookies, and History

  • Open Safari on your Mac.
  • Go to the Safari menu and select Preferences.
  • Click on the Privacy tab.
  • Click on Manage Website Data.
  • Select Remove All to clear all cookies and cache.
  • Go back to the Safari menu and select Clear History.
  • Choose the time range you want to clear and click Clear History.

Disable Extensions

1. Open Safari on your Mac.
2. Click on the Safari menu in the top-left corner of the screen.
3. Select “Preferences” from the drop-down menu.
4. Click on the “Extensions” tab.
5. Uncheck the box next to each extension to disable it.
6. Close the Preferences window.
7. Quit and re-open Safari to see if the issue is resolved.

Disabling extensions can help fix Safari not responding on your Mac by eliminating any potential conflicts or issues caused by the extensions. By following these steps, you can quickly identify if an extension is causing the problem and resolve it accordingly.

If Safari is still not responding after disabling extensions, you may want to consider clearing the cache and cookies, restarting your Mac, or updating Safari to the latest version. These additional steps can help improve the performance and responsiveness of Safari on your Mac.

Check Network Settings

Check your network connection by looking at the status next to “Connected.” If it says “Connected,” your network connection is working properly. If not, troubleshoot your network connection.

You can also check the Wi-Fi settings by selecting Wi-Fi from the list on the left side of the Network window. Make sure the Wi-Fi is turned on and connected to the correct network.

Check your DNS settings by clicking on the “Advanced” button in the Network window. Go to the DNS tab and make sure the DNS servers listed are correct. You can also add Google’s public DNS servers (8.8.8.8 and 8.8.4.4) to see if that resolves the issue.

If you’re still experiencing issues with Safari not responding, try clearing the cache and cookies. Open Safari, go to the Safari menu, and select “Clear History.” Choose the time range you want to clear and click “Clear History.”

Update and Reset

To update Safari on your Mac, click on the Apple menu in the top left corner of your screen. Select “App Store” and then click on “Updates” to check for any available updates for Safari. If there is an update, click on “Update” next to Safari to install it.

If Safari is still not responding after updating, you may need to reset it. To reset Safari, first close the browser. Then, hold down the Shift key and click on the Safari icon in the Dock to open it in Safe Mode. This will disable any extensions or plugins that may be causing the issue.

Once Safari is open in Safe Mode, go to the Safari menu and select “Clear History” to clear the cache and cookies. This can help resolve any issues with loading web pages. You can also try resetting Safari by going to the Safari menu and selecting “Reset Safari.” This will reset all settings and remove any saved data, so make sure to back up any important information before doing this.

After resetting Safari, try reopening the browser to see if the issue has been resolved. If Safari is still not responding, you may need to restart your Mac. To restart your Mac, click on the Apple menu and select “Restart.” This can help resolve any temporary issues that may be causing Safari to not respond.

Delete Preference Files

To fix Safari not responding on your Mac, one effective solution is to delete preference files. These files can sometimes become corrupted or outdated, causing issues with the browser’s performance. Here’s how you can do it:

1. Close Safari and any other open applications on your Mac.
2. Open a Finder window and navigate to the “Library” folder. You can access this folder by holding down the “Option” key on your keyboard and clicking on the “Go” menu in the Finder.
3. Locate the “Preferences” folder within the “Library” folder.
4. Look for files related to Safari, such as “com.apple.Safari.plist” or “com.apple.Safari.plist.lockfile.”
5. Select these files and move them to the trash. You may need to enter your administrator password to complete this action.
6. Empty the trash to permanently delete the preference files.
7. Restart your Mac and open Safari to see if the issue has been resolved.

By deleting these preference files, you are essentially resetting Safari to its default settings, which can often fix performance issues. If Safari is still not responding after deleting the preference files, you may need to consider other solutions such as clearing the cache or reinstalling the browser.

F.A.Q.

How do I fix unresponsive Safari on Mac?

To fix unresponsive Safari on Mac, you can force quit the application and then relaunch it. Go to the Apple logo, select Force Quit, choose Safari from the list of apps, and click Force Quit. Wait a moment before reopening Safari.

Why does my Mac keep saying application not responding?

Your Mac may be saying “application not responding” because the app is frequently unresponsive. Try reinstalling the app by uninstalling it and then reinstalling it or re-downloading it from the App Store. If it’s a built-in app like Finder, you can reinstall the operating system.

Why is my Mac saying the application Safari is not open anymore?

Your Mac may be saying the application Safari is not open anymore due to corrupted system files. To fix this error, try reinstalling or updating macOS. Connect to a strong Wi-Fi network, navigate to “System Preferences > Update Software”, and download/install any listed updates.

How do I fix corrupted Safari on my Mac?

To fix corrupted Safari on your Mac, you can try force quitting Safari, restarting your Mac, deleting Safari history, cache, and cookies, disabling Safari extensions, checking network settings, and deleting preference files.

Fix Apex Legends Unable to Connect EA Servers PC

Having trouble connecting to the EA servers on Apex Legends for PC? Let’s discuss how to fix this issue.

Restarting Methods for Improved Connectivity

Restart Your PC: One of the simplest methods to try when facing connectivity issues with EA servers on Apex Legends is to restart your PC. This can help refresh the system and potentially resolve any temporary glitches or conflicts affecting your connection.

Clear DNS Cache: To clear the DNS cache on your PC, open Command Prompt and type “ipconfig /flushdns” and hit Enter. This can help resolve any DNS-related issues that might be causing connectivity problems with EA servers.

Reset Network Settings: Go to Control Panel > Network and Sharing Center > Change adapter settings. Right-click on your network adapter, select “Disable,” wait a few seconds, then right-click again and select “Enable.” This can help reset your network connection and improve connectivity to EA servers.

Clearing Cache and Changing DNS Settings

Clearing cache and changing DNS settings

Step Instructions
1 Clear Cache
1. Close Apex Legends and Origin.
2. Press Windows Key + R to open the Run dialog box.
3. Type in %ProgramData% and press Enter.
4. Delete the Origin folder.
2 Change DNS Settings
1. Press Windows Key + R to open the Run dialog box.
2. Type in ncpa.cpl and press Enter.
3. Right-click on your network connection and select Properties.
4. Select Internet Protocol Version 4 (TCP/IPv4) and click Properties.
5. Select “Use the following DNS server addresses” and enter the following DNS servers: 8.8.8.8 and 8.8.4.4 (Google’s public DNS servers).

Optimizing Your Gaming Experience

  1. Check your internet connection
    • Make sure you are connected to the internet
    • Restart your router or modem
    • Try using a wired connection instead of Wi-Fi
  2. Update your game and Origin client
    • Open Origin client
    • Check for updates for both the game and the client
    • Download and install any available updates
  3. Disable background applications
    • Open Task Manager by pressing Ctrl+Shift+Esc
    • End any unnecessary background processes
    • Close any programs that may be using up bandwidth

Understanding Connectivity Issues

If you are experiencing connectivity issues when trying to connect to EA servers on your PC while playing Apex Legends, there are a few potential solutions to try. First, ensure that your internet connection is stable and working properly. You can do this by checking your Wi-Fi or Ethernet connection settings in your Control Panel.

If your internet connection is fine, try restarting your router or modem to refresh the connection. Additionally, clearing your DNS cache can sometimes help resolve connectivity issues. You can do this by opening Command Prompt as an administrator and entering the command “ipconfig /flushdns”.

If the issue persists, you may want to check for any firewall or antivirus software that may be blocking the connection to EA servers. Temporarily disabling these programs can help identify if they are the cause of the problem.

F.A.Q.

How do I fix Apex Legends unable to connect to EA servers?

To fix Apex Legends unable to connect to EA servers, you can try restarting your router by turning it off and unplugging it. Additionally, restarting your platform may help. Consider switching to a different Domain Name System (DNS) as well.

Why is apex not connecting to my computer?

Apex is not connecting to your computer because there may be a need to update your drivers or software. Ensure both are up to date before attempting to connect again.

Why can’t i connect to EA servers on PC?

You can’t connect to EA servers on PC possibly due to reasons such as weak internet connection, offline EA servers, incorrect date and time settings, ISP interference, or account issues. To resolve this issue and ensure a stable connection, you can try some fixes and checks.

Why is EA com unable to connect to Apex code net?

EA com is unable to connect to Apex code net because there are connectivity issues to EA servers. This issue can only be resolved by EA deploying a hotfix on their servers. In the meantime, restarting your computer/console and router may help temporarily resolve the issue.

How to Uninstall uTorrent Web from Mac

In this article, I will discuss how to uninstall uTorrent Web from a Mac computer.

Understanding uTorrent and Removal Considerations

When it comes to uninstalling uTorrent Web from your Mac, it’s important to understand the process and any considerations that may come up.

First, locate the uTorrent Web application on your Mac. You can do this by opening Finder and searching for “uTorrent Web” in the search bar. Once you find the application, you can proceed with the uninstallation process.

Drag the uTorrent Web icon to the Trash to remove the application from your Mac. Alternatively, you can right-click on the uTorrent Web icon and select “Move to Trash.”

After moving the application to the Trash, remember to empty the Trash to complete the uninstallation process. This will permanently delete the uTorrent Web application from your Mac.

Additionally, you may want to use a cleaning tool like CleanMyMac X to ensure that all associated files and caches are removed from your system.

Manual Uninstallation Steps

  • Quit uTorrent Web if it is currently running
  • Delete the uTorrent Web application from the Applications folder
  • Remove any associated files and folders from Library
  • Empty the Trash to permanently delete all uTorrent Web files

Using Specialized Uninstallers

To uninstall uTorrent Web from your Mac using a specialized uninstaller, you can follow these steps:

1. Download and install a reliable uninstaller program such as CleanMyMac X.

2. Open the uninstaller program and locate the uTorrent Web application in the list of installed programs.

3. Select uTorrent Web and follow the on-screen instructions to uninstall it completely from your Mac.

Once the uninstallation process is complete, you can double-check by searching for any leftover files or folders related to uTorrent Web using the Finder or Spotlight search on your Mac. Make sure to empty the Trash to permanently remove any remaining components of the application.

By using a specialized uninstaller like CleanMyMac X, you can ensure a thorough and efficient removal of uTorrent Web from your Mac, freeing up space and avoiding any potential issues with the application in the future.

Addressing Uninstallation Issues

To uninstall uTorrent Web from your Mac, you may encounter some issues that prevent a smooth removal process. One common problem is when the application is still running in the background, which can prevent it from being uninstalled.

To address this issue, first make sure uTorrent Web is not currently open on your Mac. You can do this by checking the menu bar at the top of your screen for the uTorrent Web icon. If it is there, right-click on the icon and select “Quit” to close the application.

Next, navigate to your Applications folder using Finder. Locate the uTorrent Web application icon and drag it to the Trash. Once you have moved the application to the Trash, right-click on the Trash icon and select “Empty Trash” to permanently delete uTorrent Web from your Mac.

If you are still encountering issues with the uninstallation process, you can try using Spotlight to search for any remaining uTorrent Web files on your Mac. Type “uTorrent Web” into the Spotlight search bar and delete any additional files or folders associated with the application.

FAQs

How do I remove uTorrent Web from my Mac?

To remove uTorrent Web from your Mac, simply drag the app to the Trash from the Applications folder and then empty the Trash.

How do I disable uTorrent Web?

To disable uTorrent Web, you can end all related processes in Task Manager and then back up the Registry before making any changes.

How do I stop uTorrent from opening on startup Mac?

To stop uTorrent from opening on startup on a Mac, you can go to the Preferences window, click on the General tab, and uncheck the box next to “Start uTorrent when I start my Mac”. Then, close the Preferences window.

What is uTorrent web for Mac?

uTorrent Web for Mac is a browser-based torrent client that enables users to download torrents directly online. Once installed, it operates within a new tab of the user’s preferred browser (such as Chrome, Firefox, or Opera) and permits the downloading of various file types to a selected folder.

Fixing Black Screen on Windows 10 – Ultimate Guide

Having trouble with a black screen on your Windows 10 computer? Check out this ultimate guide for fixing the issue.

Causes of the Black Screen Issue

One common cause of the black screen issue on Windows 10 is a corrupt Windows Registry. This can happen due to software conflicts or malware infections. Another cause could be a problem with the graphics driver, which may need to be updated or reinstalled. Issues with Windows updates can also lead to a black screen problem, especially if the update was not installed correctly.

It is also possible that the black screen is caused by a malfunctioning hardware component, such as the graphics card or monitor. Running Windows in Safe Mode can help determine if the issue is related to a software conflict or a hardware problem.

If you are unable to access the desktop, try using Task Manager by pressing Ctrl + Shift + Esc to identify any unresponsive programs that may be causing the black screen. You can also try restarting Windows Explorer by pressing Ctrl + Shift + Esc, then selecting File > Run new task and entering “explorer.exe”.

Check Cables and Connections

  • Ensure all cables are properly connected and secure.
  • Check for any visible damage or wear on the cables.
  • Try using a different cable or port to rule out any issues with the current connection.
  • Restart the computer after re-connecting the cables to see if the issue is resolved.

Wake Up Your Display with Windows Key Sequence

To wake up your display when facing a black screen on Windows 10, you can use a Windows key sequence. Press Windows key + Ctrl + Shift + B simultaneously to refresh your display driver and possibly resolve the black screen issue. This key sequence sends a signal to the graphics driver to reset the display.

If the black screen persists, try using the Ctrl + Alt + Delete key combination to bring up the Task Manager. From here, you can troubleshoot any unresponsive programs that may be causing the issue.

Additionally, you can try booting into Safe Mode by pressing the Windows key + R to open the Run dialog, then type “msconfig” and hit Enter. In the System Configuration window, go to the Boot tab and check the box next to Safe boot. Restart your computer to boot into Safe Mode and troubleshoot further.

By using these keyboard shortcuts and troubleshooting steps, you can potentially fix the black screen issue on Windows 10 without the need for complicated solutions.

Repair in Safe Mode

Windows Safe Mode screen

1. Restart your Windows 10 computer and repeatedly press the F8 key until the Advanced Boot Options menu appears.
2. Select “Safe Mode” from the list of options and press Enter.
3. Once in Safe Mode, press the Windows key + R to open the Run dialog box.
4. Type “msconfig” and press Enter to open the System Configuration utility.
5. Go to the “Boot” tab and check the box next to “Safe boot” under Boot options.
6. Click “Apply” and then “OK” to save the changes.
7. Restart your computer and it will boot into Safe Mode.
8. In Safe Mode, run a full system scan with your antivirus software to check for any malware.
9. You can also use System Restore to revert your system to a previous point before the black screen issue.
10. After completing the necessary repairs, restart your computer normally to exit Safe Mode.

Update or Reinstall Video and Device Drivers

First, right-click on the Start button and select Device Manager. Locate your display adapter under the Display adapters section. Right-click on it and select Update driver. Follow the on-screen instructions to search for updated drivers online.

If updating the drivers doesn’t solve the problem, you may need to reinstall the drivers. Right-click on the display adapter in Device Manager and select Uninstall device. Restart your computer, and Windows will automatically reinstall the drivers.

Updating or reinstalling video and device drivers can often resolve black screen issues on Windows 10 and improve overall system performance.

Restore System to a Previous Version

To restore your system to a previous version in Windows 10 and potentially fix the black screen issue, you can follow these steps:

1. Press the Windows key + I to open the Settings menu.

2. Select “Update & Security” from the options.

3. Click on “Recovery” in the left panel.

4. Under “Go back to the previous version of Windows 10,” click on “Get started.”

5. Follow the on-screen instructions to complete the process.

By restoring your system to a previous version, you may be able to resolve the black screen problem.

Scan for Malware or Viruses

To ensure that a black screen on Windows 10 is not caused by malware or viruses, scan your computer using reputable antivirus software such as Malwarebytes or Windows Defender. Run a full system scan to detect any potential threats that could be causing the black screen issue.

If the antivirus scan detects any malware or viruses, follow the recommended steps to remove them from your system immediately. Once the threats have been eliminated, restart your computer and check if the black screen issue persists.

It is important to regularly scan your computer for malware and viruses to prevent any future issues that could lead to a black screen on Windows 10. Make sure to keep your antivirus software up to date and perform scans on a regular basis to maintain the security of your system.

If the black screen issue continues even after malware and viruses have been removed, you may need to explore other troubleshooting methods to fix the problem.

Address Black Screen Issues in Laptops and Software

If you are experiencing a black screen issue on your Windows 10 laptop or software, there are a few troubleshooting steps you can take to resolve the issue.

1. Check your display settings: Make sure your display settings are correct and that your monitor is connected properly.

2. Restart your computer: Sometimes a simple restart can fix the black screen problem.

3. Update your graphics driver: Outdated graphics drivers can cause black screen issues. Update your drivers to the latest version.

If none of these steps work, you can try booting into Safe Mode to troubleshoot further. Press Ctrl + Alt + Delete to bring up the Task Manager, then go to File > Run new task and type in “msconfig” to open the System Configuration window. Go to the Boot tab and check the box for Safe boot, then restart your computer.

Hopefully, these steps will help you fix the black screen issue on your Windows 10 laptop or software.

Preventing Future Black Screen Problems

To prevent future black screen problems on Windows 10, it’s important to regularly update your system. Make sure to regularly check for Windows updates through the Settings menu to ensure your system is running smoothly. In addition, keep your antivirus software up to date and regularly scan your system for malware.

Another way to prevent black screen issues is to avoid downloading suspicious files or clicking on unknown links online. Be cautious when installing new software and always download from trusted sources. If you encounter a black screen, try using Ctrl + Alt + Delete to access the Task Manager and troubleshoot the issue.

Lastly, be mindful of your computer’s sleep settings and avoid leaving it in sleep mode for extended periods of time.

F.A.Q.

Why is my computer turning on but the screen is black?

Your computer is turning on, but the screen is black because there may be loose or faulty cables connected to your monitor. Another possibility is that you may not be using the correct source input on your display.

Can the black screen of death be fixed?

The black screen of death can potentially be fixed by performing a hard reset on your Windows device. This can be done by restarting the computer using the power button until it turns off, and then restarting it.

How do I permanently fix my black screen?

To permanently fix a black screen issue on Windows 10, you can try troubleshooting steps such as checking hardware connections, updating graphics drivers, running system diagnostics, or performing a system restore. If these steps do not work, you may need to consider contacting technical support for further assistance.

Why am I stuck on a black screen?

You are stuck on a black screen because there may be an interrupted connection between your computer and its display monitor. This could be caused by the cable being dislodged from its port on either the computer case or the monitor.

How to Fix Chrome Error 101 Connection Reset

Having trouble with Chrome Error 101 Connection Reset? Here are some solutions to help fix the issue.

Understanding the Error

When encountering Chrome Error 101 Connection Reset, it is important to understand the potential causes of this issue. This error typically occurs when there is a problem with the connection between the browser and the website server.

One common reason for this error is a problem with the network connection. Check your internet connection to ensure it is stable and working properly. Additionally, issues with the website server, such as high traffic or maintenance, can also lead to this error.

Another possible cause of Chrome Error 101 is a problem with the browser itself. Try clearing your browser cache and cookies to see if this resolves the issue. If you are using a proxy server, make sure it is configured correctly and not causing any conflicts.

It is also important to ensure that your browser and operating system are up to date. Check for any available updates for Google Chrome and your operating system to ensure that you are running the latest versions.

If you continue to experience Chrome Error 101 Connection Reset, you may want to try using a different browser to see if the issue persists. Additionally, running a malware scan on your computer can help rule out any potential security threats causing the error.

Check Your Internet Connection and Restart Router

  • Check Your Internet Connection:
    • Make sure your computer is connected to the internet by opening a new tab and trying to load a website.
    • If you are not able to load any websites, check your Wi-Fi connection or Ethernet cable to ensure it is properly connected.
  • Restart Router:
    • Unplug your router from the power source and wait for 30 seconds.
    • Plug your router back in and wait for it to fully reboot.
    • Once the router has restarted, try loading the website again to see if the error is resolved.

Verify VPN and Proxy Settings

2. Disable VPN and Proxy: If you are using a VPN or proxy, try disabling them temporarily to see if that resolves the connection reset error. Sometimes these settings can interfere with the network connection.

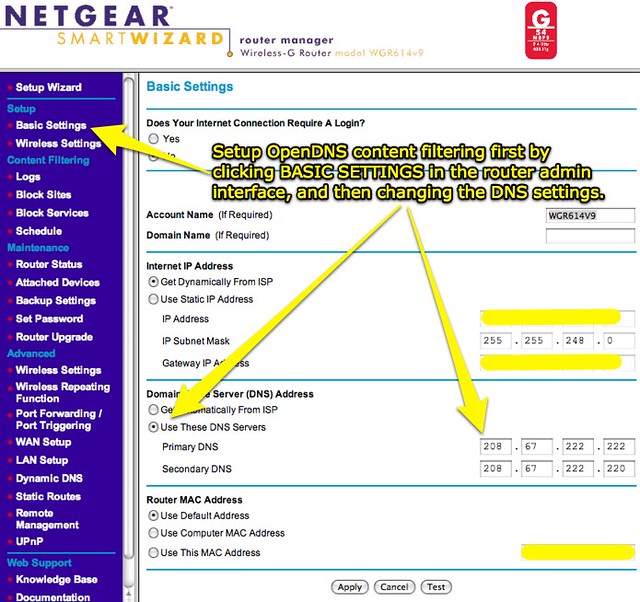
3. Check Network Settings: Ensure that your network settings are configured correctly. Check your IP address, DNS settings, and network configuration to make sure everything is in order.

4. Restart Browser and Computer: Sometimes a simple restart of your web browser and computer can fix the connection reset error. Close Chrome, restart your computer, and then try accessing the website again.

5. Clear Browser Cache: Clearing your browser cache can also help resolve connection issues. Go to your browser settings, clear the cache, and then try reloading the website.

6. Update Browser: Make sure you are using the latest version of Google Chrome. Updating your browser to the latest version can often fix bugs and errors that may be causing the connection reset problem.

7. Disable Antivirus and Firewall: Your antivirus software or firewall may be blocking the connection to the website. Try disabling them temporarily and see if that resolves the error.

8. Contact Your Network Administrator: If you are on a network, contact your network administrator to check if there are any restrictions or settings that may be causing the connection reset error.

9. Test on Different Network: If possible, try accessing the website from a different network to see if the error persists. This will help determine if the issue is specific to your current network.

Reset TCP/IP and Winsock Catalog

To reset TCP/IP and Winsock Catalog to fix Chrome Error 101 Connection Reset, follow these steps:

1. Open Command Prompt with administrative privileges by searching for “cmd” in the Windows Start menu, right-clicking on Command Prompt, and selecting “Run as administrator.”

2. In the Command Prompt window, type the following commands one by one and press Enter after each:
netsh int ip reset
netsh winsock reset

3. Restart your computer to apply the changes.

4. After the restart, open Google Chrome and check if the Error 101 Connection Reset issue has been resolved.

5. If the issue persists, you may need to clear your browser cache and cookies. In Chrome, click on the three dots in the top right corner, go to “More tools,” and select “Clear browsing data.” Choose the time range and the data you want to clear, then click on “Clear data.”

6. Additionally, check for any proxy settings that might be causing the connection reset error. Go to Chrome Settings, scroll down to the bottom, click on “Advanced,” and under the “System” section, click on “Open your computer’s proxy settings.” Make sure no proxy server is enabled.

7. If the error still persists, consider running a full antivirus scan to check for any malware that could be interfering with your connection.

By resetting TCP/IP and Winsock Catalog, clearing browser data, and checking proxy settings, you should be able to troubleshoot and fix Chrome Error 101 Connection Reset.

Clear Browser Cache and Cookies

To fix Chrome Error 101 Connection Reset, one of the first steps you can take is to clear your browser cache and cookies. This can help resolve any issues related to outdated or corrupted data stored on your browser.

1. Clear Cache:
To clear your browser cache in Chrome, click on the three dots in the top-right corner of the browser window. Select “More tools” and then “Clear browsing data.” Make sure the “Cached images and files” box is checked and click on “Clear data.”

2. Clear Cookies:
To clear cookies in Chrome, go to the same menu as above and select “Cookies and other site data.” Check the box next to it and then click on “Clear data.”

By clearing your cache and cookies, you are essentially starting fresh with your browsing session, which can often fix connection issues like Error 101.

Remember to also check for any extensions or plugins that may be causing the error and disable them temporarily to see if that resolves the issue.

If you continue to experience Error 101 Connection Reset after clearing your cache and cookies, you may want to consider other troubleshooting steps or reaching out to your internet service provider for further assistance.

Disable Antivirus and Firewall Temporarily

Step 1: Locate your antivirus software icon in the system tray or open the program from your computer’s Start menu. Look for an option to temporarily disable the antivirus protection.

Step 2: Follow the prompts to turn off the antivirus software temporarily. Make sure to set a reminder to re-enable the protection once you have resolved the error.

Step 3: Next, disable the firewall on your computer. Go to the Control Panel on Windows and look for the Firewall settings. Turn off the firewall temporarily to see if it resolves the Chrome Error 101 Connection Reset.

By temporarily disabling your antivirus and firewall software, you can troubleshoot and potentially fix the error without any interference from these security programs.

Update or Reinstall Your Browser

When updating your browser, make sure you are connected to the internet. Open your browser and look for the settings option. Navigate to the help section and check for updates. Follow the on-screen instructions to update your browser to the latest version.

If updating doesn’t fix the issue, you may need to reinstall your browser. To do this, first uninstall the current version of your browser from your computer. Go to the Control Panel (Windows) or Applications (Mac) and find your browser in the list of installed programs. Click on the browser and select uninstall.

After uninstalling the browser, download the latest version from the official website. Install the new browser following the on-screen instructions. Once the installation is complete, try accessing the website again to see if the error is resolved.

Updating or reinstalling your browser can often fix Chrome Error 101 Connection Reset. Make sure to keep your browser up to date to avoid similar connection issues in the future.

Contact Your Internet Service Provider

Provide them with as much detail as possible, including when the error occurs and any specific websites you are having trouble accessing. This information can help them better understand the root cause of the problem and provide a solution tailored to your situation.

Ask if there are any known outages in your area or if there are any maintenance activities that could be affecting your connection. Your ISP may be able to provide you with real-time updates on the status of their network and when you can expect the issue to be resolved.

It’s also a good idea to inquire about any recent changes to your internet connection or network settings that could be contributing to the error. Your ISP may be able to walk you through any necessary adjustments to get your connection back up and running smoothly.

By contacting your Internet Service Provider, you can ensure that you are taking the necessary steps to address Chrome Error 101 Connection Reset and get back to browsing the web without interruptions.

FAQ

How do I fix error 101 in Chrome?

To fix error 101 in Chrome, you can try the following solutions:
1. Check the website and browser/system compatibility.
2. Verify and adjust the proxy settings.
3. Clear the browser cache.
4. Delete Winsock catalog entries.
5. Restart the router.
6. Temporarily disable the firewall and antivirus programs.

What is connection reset 101?

Connection reset 101 is an error code that occurs when a browser is unable to establish a connection with a website, often due to issues with the internet connection.

How do I fix my Chromebook connection was reset?

To fix a Chromebook connection that was reset, you can start by checking your internet connection, clearing your browser cache, resetting your router, disabling your proxy server, VPN, antivirus software, and firewall software, and resetting the TCP/IP settings.

How do I get rid of connection reset error?

To get rid of a connection reset error, you can start by checking the website’s functionality, your network connection, clearing your cache, and examining your VPN, firewall, antivirus, proxy settings, and TCP/IP settings.

Skype Echo Sound Test Troubleshooting

In troubleshooting Skype’s echo sound test, there are a few common issues that users may encounter.

Introduction to Echo Test Calls

If you are experiencing audio feedback issues during Skype calls, an Echo Sound Test can help troubleshoot the problem. To perform an Echo Test Call on Skype, simply call the Skype Echo / Sound Test Service. This service will play a sound and then ask you to repeat it back. This allows you to test the audio quality of your headphones, microphone, and loudspeaker. If you hear an echo during the test call, it could indicate a problem with echo suppression and cancellation settings on your computer or in Skype itself. Be sure to check these settings and adjust as needed.

Making Your Test Call

  • Ensure your microphone and speakers are properly connected
  • Check for any background noise that may interfere with the test
  • Adjust your microphone volume to an appropriate level
  • Choose a quiet location for the test call
  • Follow the instructions provided by the Skype Echo Sound Test
  • Test your audio settings before starting the call
  • Speak clearly and at a normal volume during the test
  • Listen carefully to the playback of your voice
  • Repeat the test if necessary to ensure accurate results
  • Contact Skype support if you continue to experience issues

Troubleshooting Call Quality Issues

If you are experiencing call quality issues during a Skype Echo Sound Test, check your headphones first. Make sure they are properly plugged in and functioning correctly. Avoid using loudspeakers during the test, as this can cause audio feedback and echo. If the issue persists, try adjusting the echo suppression and cancellation settings in Skype. If you are still having trouble, consider using a different plug-in for your headphones or contacting Skype support for further assistance.

Addressing Screen Sharing and Call Forwarding Problems

To troubleshoot screen sharing and call forwarding problems on Skype, first ensure that your audio settings are correctly configured. Run the Skype Echo Sound Test to check if your microphone and speakers are working properly. If you’re experiencing echo during the test, adjust the volume levels of your microphone and speakers. Additionally, make sure that no other applications are using your microphone. If you’re still having issues, try restarting Skype or your computer.

If you’re having trouble with screen sharing, check your internet connection and make sure that Skype has permission to access your screen. Update your Skype app to the latest version to ensure that any bugs causing the issue have been fixed. If the problem persists, try using a different device or contacting Skype support for further assistance. Addressing these common problems can help improve your overall Skype experience.

Frequently Asked Questions

How do I stop Skype from echoing?

To stop Skype from echoing, make sure to use a headset or headphones and adjust Skype’s audio settings accordingly. Another option is to use an external microphone and enable Echo Cancellation in the sound settings.

Why do I hear my own voice echo in Skype?

I hear my own voice echo in Skype because the problem may be with the device of the person I’m calling. I can ask them to turn down their playback volume and check my own audio settings to troubleshoot the issue.

Why is Skype echo sound test not working?

The Skype echo sound test may not be working due to issues with your audio configurations. Make sure your external equipment is connected correctly and check if your computer’s sound function is functioning properly.

How to Fix Error 1723 DLL Missing Windows Installer

In this article, I will discuss how to fix Error 1723 DLL Missing in Windows Installer.

Use Hidden Administrator Account

Windows login screen

To fix Error 1723 DLL Missing Windows Installer, you can try using the Hidden Administrator Account. To access this account, open the command prompt with administrative privileges. Type “net user administrator /active: yes” and press Enter. Log out of your current account and log in as the Administrator. Navigate to the directory where the DLL file is missing and try reinstalling the software.

Once you have fixed the issue, remember to disable the Administrator account by typing “net user administrator /active: no” in the command prompt.

Adjust Temp Folder Permissions

Steps Instructions
Step 1 Open the Windows Explorer and navigate to the Temp folder located at C:\Users\Your_Username\AppData\Local\Temp
Step 2 Right-click on the Temp folder and select Properties
Step 3 Go to the Security tab and click on the Edit button
Step 4 Click on the Add button and type in “Everyone” in the object name field
Step 5 Click on Check Names and then OK
Step 6 Check the Full Control box under Allow for the Everyone group
Step 7 Click Apply and then OK to save the changes

Set Proper Permissions

To set proper permissions for the missing DLL file error, you need to ensure that you have the necessary access rights. Firstly, navigate to the directory where the DLL file is located. Right-click on the file and select “Properties. ” Go to the “Security” tab and click on “Edit. ” Ensure that your user account has full control over the file by checking the appropriate boxes.

Click “Apply” and then “OK” to save the changes. This should resolve the error 1723 DLL missing Windows installer issue.

Reregister Windows Installer

1. Open the Command Prompt as an administrator.
2. Type msiexec /unregister and press Enter.
3. Then, type msiexec /regserver and press Enter.

These commands will re-register the Windows Installer service and should resolve the Error 1723 DLL Missing issue.

FAQ

What is system error 1723?

System error 1723 is a Windows Installer package issue where a required DLL cannot be run during installation. It is recommended to contact support personnel or the package vendor for assistance.

How do I fix error 1723 in QuickBooks?

To fix error 1723 in QuickBooks, you can adjust the security settings for your Windows username to grant Full Control access, then proceed with reinstalling QuickBooks Desktop.