
Are you experiencing issues with your Windows 10 Night Light not turning off? Here’s how to fix it.
Reinstalling the Graphics Driver
To reinstall the graphics driver, first open the Device Manager by right-clicking on the Start menu and selecting “Device Manager” from the context menu. Once in the Device Manager, expand the “Display adapters” section and right-click on your graphics card. Select “Uninstall device” and check the box that says “Delete the driver software for this device. ” After the uninstallation is complete, restart your computer. Windows will automatically reinstall the graphics driver upon reboot. If the issue persists, you may need to manually download and install the latest driver from the manufacturer’s website.
Updating the Graphics Driver
To fix the issue of Windows 10 Night Light not turning off, one possible solution is to update the graphics driver. First, press the Windows key + X to open the Start menu and select Device Manager. Then, expand the Display adapters section and right-click on your graphics card. Choose Update driver from the context menu and select Search automatically for updated driver software.
Follow the on-screen instructions to complete the update. Updating the graphics driver can resolve compatibility issues that may be causing the Night Light feature to malfunction. After updating the driver, restart your computer and check if the Night Light feature is now working properly. If not, further troubleshooting may be necessary.
Adjusting Clock Settings
To adjust the clock settings on your Windows 10, follow these steps:
1. First, click on the Start button and select Settings.
2. Then, choose Time & Language from the list of options.
3. Next, click on Date & Time from the menu on the left-hand side.
4. From there, you can manually adjust the time and date settings as needed.
5. If you’re having trouble with the Night Light feature, you can also adjust the color temperature settings here.
6. Once you’ve made your adjustments, close the settings window and check to see if the issue has been resolved.
Resetting Night Light Settings
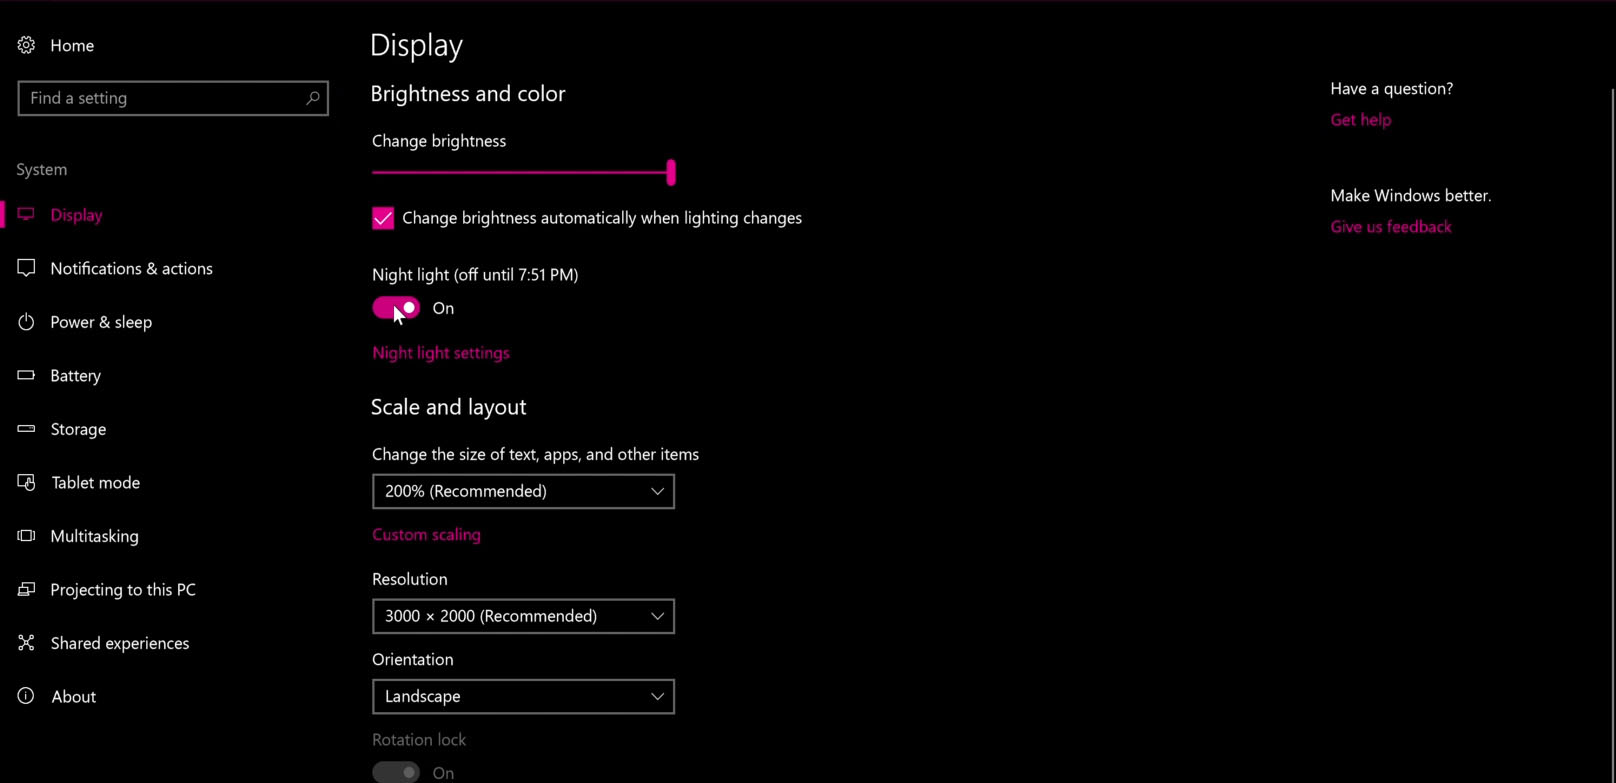
If your Windows 10 Night Light won’t turn off, you may need to reset the Night Light settings. To do this, first, go to the “Settings” menu by clicking on the Start button and then the gear icon. Then, select “System” and “Display. ” Next, click on “Night Light settings” and toggle the Night Light switch off. If the Night Light is still on, you can try resetting the Night Light settings by opening the “Settings” menu again, selecting “System,” “Display,” and then “Advanced display settings. ” From there, click on “Display adapter properties for Display 1,” go to the “Color management” tab, and click “Restore defaults.
” This should reset the Night Light settings and fix the issue.
Disabling Location Services
To disable location services on Windows 10, follow these steps. First, go to the Start menu and select Settings. Then, choose Privacy and select Location. Next, toggle the “Location access for this device” to Off.
If prompted, confirm your choice. This should disable location services on your Windows 10 device, allowing you to troubleshoot the issue with Night Light. If you continue to experience problems with Night Light not turning off, you may need to explore other potential solutions. Keep in mind that Windows 10 updates and user account control settings can also impact the functionality of Night Light.
Consider checking for updates and adjusting user account control settings if necessary.


