
Intertwined in a digital dance, Windows 10 and its users sometimes find themselves caught in an unexpected loop. Discover the remedy to the perplexing issue of Windows 10’s persistent restoration of the previous version of Windows, as we unravel the mystery and guide you towards a seamless resolution.
Methods to fix the Windows 10 “Restoring your previous version of Windows” loop
If you find yourself stuck in the “Restoring your previous version of Windows” loop in Windows 10, there are a few methods you can try to fix the issue.
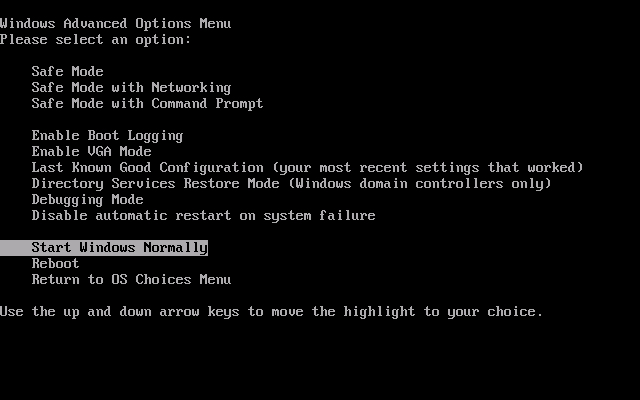
Method 1: Use the Windows Rollback option. Restart your computer and repeatedly press the F8 key until the Advanced Boot Options menu appears. Select “Repair Your Computer” and then choose “Troubleshoot.” From there, select “Advanced options” and then “Windows Rollback.” Follow the on-screen instructions to complete the process.
Method 2: Try using a system restore point. Restart your computer and repeatedly press the F8 key until the Advanced Boot Options menu appears. Select “Repair Your Computer” and then choose “Troubleshoot.” From there, select “Advanced options” and then “System Restore.” Select a restore point from an earlier date and follow the on-screen instructions to restore your computer to that point.
Remember to backup your important files before attempting any of these methods.
How to restore old versions of Windows
If you are facing a “Restoring Previous Version of Windows” loop on your Windows 10 PC or laptop, here are some steps you can follow to fix it:
1. Boot your computer into Safe Mode by restarting and pressing the F8 key repeatedly until the Advanced Boot Options menu appears.
2. Select “Safe Mode” from the menu and press Enter.
3. Once in Safe Mode, open the Start menu and type “System Restore” in the search bar.
4. Select “Create a restore point” from the results and click on “System Restore” in the System Properties window.
5. In the System Restore window, click “Next” and select a restore point from before the issue occurred.
6. Follow the on-screen instructions to complete the system restore process.
7. After the restore is complete, your computer should reboot and hopefully no longer be stuck in the loop.
Note: If you don’t have any previous restore points or if the above steps don’t work, you can try using a third-party software like MiniTool ShadowMaker or MiniTool Partition Wizard to restore your computer to an earlier state. Just make sure to follow the instructions provided by the software and have a backup of your important files before proceeding.
Troubleshooting steps for the “Restoring to a previous version of Windows” stuck issue
- Restart your computer:
- Press the Ctrl, Alt, and Delete keys simultaneously to open the Security Options menu.
- Select Restart from the menu.
- Disconnect all external devices:
- Unplug any USB drives, external hard drives, printers, or other devices connected to your computer.
- Restart your computer and check if the issue persists.

- Boot into Safe Mode:
- Restart your computer and repeatedly press the F8 key while it is booting up.
- Select Safe Mode from the Advanced Boot Options menu.
- Use System Restore:
- Press the Windows key and type “System Restore” in the search bar.
- Select Create a restore point from the search results.

- In the System Properties window, click on the System Restore button.
- Follow the on-screen instructions to restore your computer to a previous working state.
- Perform a Startup Repair:
- Insert your Windows installation disc or USB drive and restart your computer.
- Press any key to boot from the disc or drive when prompted.
- Choose your language preferences and click Next.
- Click on Repair your computer.
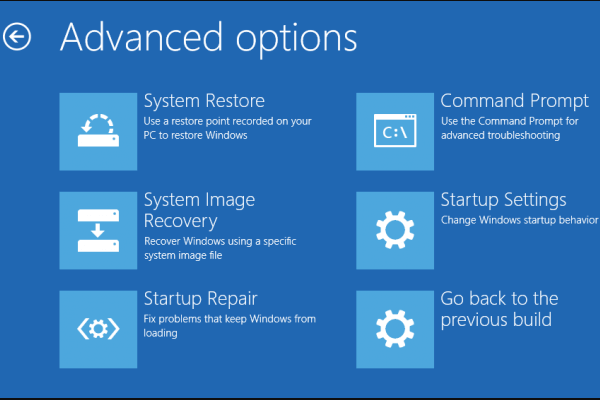
- Select Troubleshoot, then Advanced options, and finally Startup Repair.
- Follow the on-screen instructions to repair your startup files.
- Perform a System Reset:
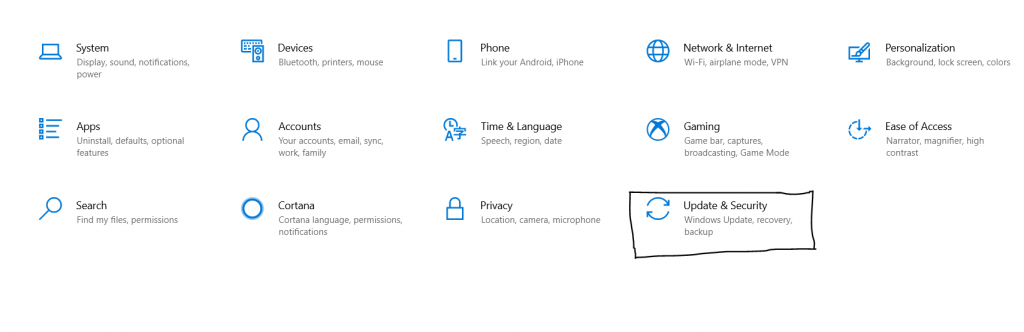
- Press the Windows key and go to Settings.
- Click on Update & Security.
- Select Recovery from the left-hand menu.
- Under the Reset this PC section, click on the Get started button.
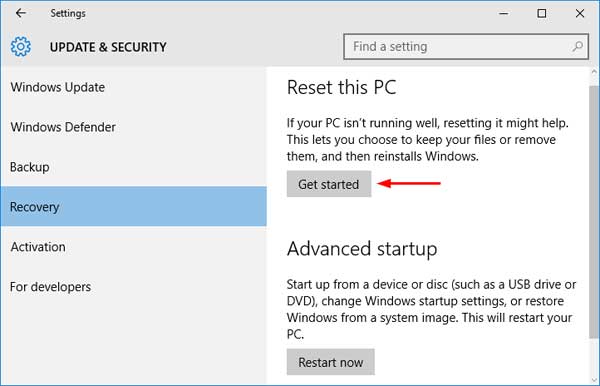
- Choose the appropriate reset option and follow the on-screen instructions to reset your computer.
powershell

# Check for the registry key related to the loop

if (Test-Path "HKLM:\SOFTWARE\Microsoft\Windows\CurrentVersion\WindowsUpdate\OSUpgrade\Rollback")

{

    # Delete the registry key to break the loop

    Remove-Item -Path "HKLM:\SOFTWARE\Microsoft\Windows\CurrentVersion\WindowsUpdate\OSUpgrade\Rollback" -Force
# Restart the computer to apply the changes
Restart-Computer -Force
}
Please note that modifying the Windows registry can be risky, so it’s important to exercise caution. Make sure to run this script with administrative privileges and understand the potential consequences before proceeding.
Remember, this code is just a sample and might not fully resolve the issue in every case. It’s always recommended to consult official Windows support resources or seek assistance from a qualified professional to address complex system issues.
Solutions to resolve the Windows 10 restoring previous version loop
If you are experiencing a Windows 10 restoring previous version loop, there are several solutions you can try to resolve this issue.
One possible solution is to use the System Restore feature to revert your computer back to an earlier date when it was functioning properly. To do this, follow these steps:
1. Restart your computer and press the F8 key repeatedly during startup.
2. Select “Repair your computer” from the menu.
3. Choose “System Restore” and select a restore point from before the issue occurred.
4. Follow the on-screen instructions to complete the restoration process.
If System Restore doesn’t work, another option is to use the System Image Backup tool to recover your computer. Here’s how:
1. Create a system image backup of your computer using a tool like MiniTool ShadowMaker or Windows’ built-in backup tool.
2. Boot your computer using a Windows installation media.
3. Select “Repair your computer” and navigate to the “System Image Recovery” option.
4. Choose the system image you created and follow the prompts to restore your computer.
These solutions should help you resolve the Windows 10 restoring previous version loop and get your computer back up and running.
All-round protection for your computer data
Are you experiencing a frustrating Windows 10 restoring previous version of Windows loop? Don’t worry, we’re here to help.
If you find yourself stuck in this loop, try these steps to fix the issue:
1. Boot your computer into Safe Mode by following these steps: [insert instructions].
2. Once in Safe Mode, open the Command Prompt by pressing [insert instructions].
3. In the Command Prompt, type “sfc /scannow” and press Enter. This will scan and repair any corrupted system files.
4. If the issue persists, you can try using the System Restore feature. Type “rstrui.exe” in the Command Prompt and press Enter. Follow the on-screen instructions to restore your computer to a previous date.
5. If none of the above solutions work, you may need to perform a clean installation of Windows 10.
Remember, it’s always a good idea to back up your important files before attempting any troubleshooting steps.
Tips to prevent or address the Windows 10 restoring previous version problem
- Disable Automatic Updates
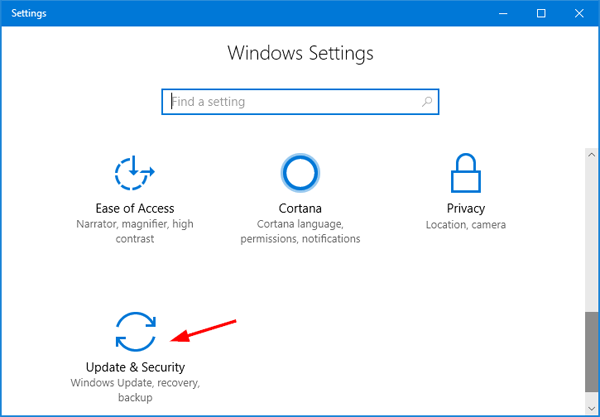
- Press the Windows key + I to open the Settings app.
- Click on Update & Security.
- Choose Windows Update from the left-hand menu.
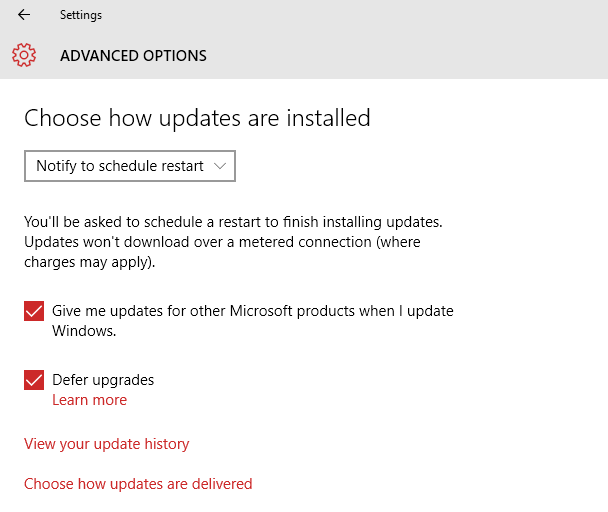
- Click on Advanced options.
- Under the Choose how updates are installed section, select Notify to schedule restart.
- Run Windows Update Troubleshooter
- Press the Windows key + I to open the Settings app.
- Click on Update & Security.
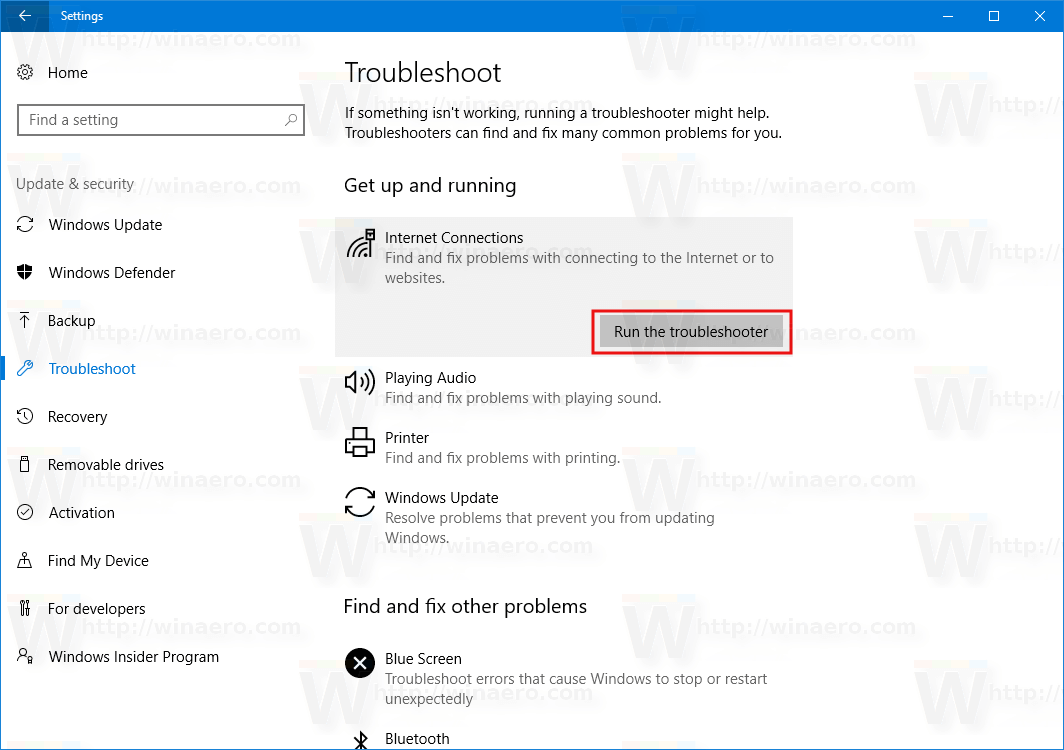
- Choose Troubleshoot from the left-hand menu.
- Scroll down and click on Windows Update.
- Click on Run the troubleshooter.
- Follow the on-screen instructions to complete the troubleshooting process.
- Delete Software Distribution Folder
- Press Windows key + R to open the Run dialog box.
- Type %windir%\SoftwareDistribution and press Enter.
- Select all the files and folders inside the Software Distribution folder, and then press Delete.
- Confirm the deletion and close the File Explorer.
- Perform a System Restore
- Press the Windows key and search for Create a restore point.
- Click on the System Properties button in the search results.
- Under the System Protection tab, click on the System Restore button.
- Follow the on-screen instructions to choose a restore point and restore your system.

- Perform a Clean Windows 10 Installation
- Create a backup of your important files and documents.
- Download the Windows 10 installation media from the official Microsoft website.
- Follow the on-screen instructions to perform a clean installation of Windows 10.
- Restore your files and documents from the backup.
Frequently asked questions about restoring previous versions of Windows
Sure! Here is an example of an HTML table about frequently asked questions about restoring previous versions of Windows:
“`html
Windows 10 Restoring Previous Version of Windows Loop Fix – FAQ
| Question | Answer |
|---|---|
| What is the “Restoring Previous Version of Windows” loop? | In some cases, when upgrading or updating Windows 10, the system may get stuck in a loop where it tries to restore a previous version of Windows but fails to complete the process. |
| Why does the loop occur? | The loop can be triggered by various factors, such as incompatible drivers, missing system files, or conflicts with installed software. |
| How can I fix the “Restoring Previous Version of Windows” loop? | There are several methods you can try to fix this issue, including using the Startup Repair tool, performing a System Restore, or using the DISM and SFC commands in Command Prompt. |
| Will I lose my data during the fix? | In most cases, your personal files will be preserved. However, it’s always recommended to back up your important data before attempting any troubleshooting steps. |
| Can I prevent this loop from happening in the future? | To minimize the chances of encountering the loop, ensure that your system is up to date, install compatible drivers and software, and regularly create system backups. |
“`
You can customize the table’s appearance by modifying the CSS styles.


