Chrome Repair Tool

Introducing the Chrome Repair Tool: A comprehensive solution for optimizing and fixing issues in the Chrome browser.

Clear your browsing data: Use the Chrome repair tool to clear your browsing history, cache, and cookies regularly. This can help resolve issues related to slow loading pages, browser crashes, and other performance-related problems.

Overview of Chrome Cleanup Tool

Chrome Cleanup Tool is a valuable tool offered by Google to help users keep their Chrome browser clean and free from malware and unwanted software. It scans your browser for malicious programs that may have been unintentionally installed and provides a simple and effective way to remove them.

To use the Chrome Cleanup Tool, follow these steps:

1. Open Google Chrome and go to the Chrome Cleanup Tool website.
2. Click on the “Download now” button to download the tool.
3. Once downloaded, run the tool by double-clicking on the downloaded file.
4. The tool will automatically scan your browser and detect any malicious software.
5. If any threats are found, click on the “Remove” button to eliminate them from your system.

It’s important to note that the Chrome Cleanup Tool focuses specifically on removing software that affects the Chrome browser. It doesn’t address issues related to the operating system or other software on your computer.

By regularly using the Chrome Cleanup Tool, you can ensure that your browsing experience remains secure and free from unwanted software. It’s a quick and reliable solution to keep your Chrome browser running smoothly.

Remember to exercise caution while browsing the internet and only download software from trusted sources. If you encounter any suspicious websites or receive error messages, it’s recommended to run the Chrome Cleanup Tool to eliminate any potential threats.

Stay protected and enjoy a safer online experience with the Chrome Cleanup Tool.

Troubleshooting Chrome crashes

First, download and install the Chrome Repair Tool from the Microsoft website. Once installed, launch the tool and follow these steps:

1. Scan for malware: Malware can often cause browser crashes. Use the tool to scan your computer for any potential malware or adware that may be affecting Chrome’s performance.

2. Disable browser extensions: Browser extensions can sometimes conflict with Chrome and cause crashes. Open the Chrome menu, go to “More tools,” and select “Extensions.” Disable any extensions that you suspect may be causing the crashes, then relaunch Chrome and see if the issue persists.

3. Clear browsing data: Accumulated browsing data, such as cookies and cache, can also lead to crashes. In Chrome, go to the “Settings” menu, click on “Privacy and security,” and select “Clear browsing data.” Choose the relevant options and click “Clear data” to remove unnecessary data.

4. Update Chrome: Outdated software can have bugs that cause crashes. Check for any available updates for Chrome by going to the “Settings” menu, clicking on “About Chrome,” and allowing Chrome to check for updates. If updates are available, install them and relaunch the browser.

If you’re still experiencing crashes after following these steps, it may be worth considering other factors such as your operating system, computer hardware, or any recent changes you’ve made to your system. Remember to stay vigilant against fraud and always download software from trusted sources.

With the Chrome Repair Tool, you can quickly troubleshoot and resolve crashes, ensuring a smooth browsing experience.

Removing malware and adware

To access the Chrome Repair Tool, follow these steps:

1. Open Google Chrome on your computer.

2. Click on the three-dot menu icon in the top-right corner of the browser window.

3. From the drop-down menu, select “Settings.”

4. Scroll down and click on “Advanced” to expand additional settings.

5. Under the “Reset and clean up” section, click on “Clean up computer.”

The Chrome Repair Tool will scan your computer for malware and adware. If any threats are detected, it will prompt you to remove them.

Follow the on-screen instructions to remove the detected threats.

Additionally, you can further enhance your browsing experience by installing browser extensions like UBlock Origin, which blocks unwanted ads and prevents adware from infecting your browser. Regularly updating your browser and operating system, avoiding suspicious downloads and websites, and being cautious while clicking on unknown links can also help prevent malware and adware infections.

By taking proactive measures to remove malware and adware and implementing preventive measures, you can enjoy a safer and more secure browsing experience on Google Chrome.

python
from selenium import webdriver

def clear_chrome_cache():
# Set the path to your Chrome driver executable
chrome_driver_path = '/path/to/chromedriver'

# Create a Chrome WebDriver instance
driver = webdriver.Chrome(chrome_driver_path)

# Open Chrome's settings page
driver.get('chrome://settings/clearBrowserData')

# Wait for the settings page to load
driver.implicitly_wait(10)

# Find and click the "Clear data" button
clear_data_button = driver.find_element_by_css_selector('[data-test-action="clearBrowsingDataCommit"]')
clear_data_button.click()

# Close the WebDriver
driver.quit()

# Call the function to clear Chrome's cache
clear_chrome_cache()

Dealing with popups, toolbars, and start pages

  • Stay protected: Use security software to prevent popups, toolbars, and start pages from infiltrating your browser.
  • Update your browser: Keep your Chrome browser up to date to ensure it has the latest security features and fixes for vulnerabilities.
  • Disable unwanted extensions: Remove or disable any unnecessary or suspicious extensions that may be causing popups, toolbars, or unwanted start pages.
  • Clear cache and cookies: Regularly clear your browser’s cache and cookies to remove any stored data that may be linked to popups, toolbars, or unwanted start pages.
  • Reset browser settings: If you’re still experiencing issues, reset your Chrome browser settings to their default values to eliminate any unwanted changes made by popups, toolbars, or start pages.
  • Scan for malware: Run a thorough scan using reputable antivirus or anti-malware software to detect and remove any malicious programs causing popups, toolbars, or start pages.
  • Be cautious: Avoid clicking on suspicious ads, downloading unknown files, or visiting untrustworthy websites to minimize the risk of encountering popups, toolbars, or unwanted start pages.
  • Enable popup blocker: Activate the built-in popup blocker in Chrome to prevent intrusive popups from appearing while browsing.
  • Customize startup pages: Set your preferred start pages in Chrome settings to avoid being redirected to unwanted start pages.
  • Seek professional help: If all else fails, consider seeking assistance from a trusted tech support professional to resolve persistent popup, toolbar, or start page issues.

Alternatives to Chrome Cleanup Tool

Tool Description Price
CCleaner A popular system optimization tool that can clean up browser cache, cookies, temporary files, and other junk files. It also offers registry cleaning and software uninstallation features. Free (Pro version available)
Malwarebytes An anti-malware tool that can detect and remove various types of malware, including browser hijackers and potentially unwanted programs (PUPs). It can also scan for and remove adware. Free (Premium version available)
Avast Cleanup A system optimization tool that can clean up browser data, optimize system performance, and fix issues related to browser extensions. It also offers a feature to update outdated software. Free (Premium version available)
AdwCleaner A specialized tool for removing adware, browser hijackers, and potentially unwanted programs (PUPs). It scans and cleans the system, targeting specific types of unwanted software. Free
Glary Utilities A comprehensive system maintenance tool that includes features for cleaning up browser data, fixing registry errors, optimizing system performance, and managing startup programs. Free (Pro version available)

Fix WhatsApp Download Failed Error

Having trouble downloading WhatsApp on your device? This article provides effective solutions to fix the common issue of WhatsApp download failed error.

Check your internet connection: Ensure that you have a stable internet connection before attempting to download anything on WhatsApp. Poor connectivity can often lead to download failures.

Checking internet connection and device storage

If you are experiencing a “WhatsApp Download Failed Error,” there are a few things you can check to troubleshoot the issue. First, ensure that you have a stable internet connection. Connect to a reliable Wi-Fi network or check your mobile data connection.

Next, check your device storage. Make sure you have enough space available to download and install the WhatsApp application. You can do this by going to your device settings and checking the storage or memory section.

If you are using an Android device, make sure that the Google Play Store is up to date. Open the Play Store app and go to the “My apps & games” section to check for any available updates. Updating the Play Store may help resolve any software-related issues.

If you are still encountering the error, try clearing the cache of the Google Play Store and Google Play Services. To do this, go to your device settings, then find the “Apps” or “Applications” section. Look for Google Play Store and Google Play Services, and tap on each one to access their respective settings. From there, select “Storage” and choose the “Clear cache” option.

Another helpful step is to restart your device. This can help refresh the system and resolve any temporary issues that may be causing the error.

If none of these steps resolve the issue, it may be worth considering reinstalling WhatsApp. Before doing so, ensure that you have backed up your chat history and media files. You can do this by going to WhatsApp settings, selecting “Chats,” and then “Chat backup.” Once you have backed up your data, uninstall WhatsApp from your device and then reinstall it from the Google Play Store or the App Store for iOS devices.

If you continue to experience the “WhatsApp Download Failed Error,” it is recommended to reach out to WhatsApp support for further assistance. They may be able to provide additional troubleshooting steps specific to your device and situation. Your feedback is important, and it can help improve the overall user experience.

Failure is simply the opportunity to begin again, this time more intelligently.” – Henry Ford

Updating WhatsApp to the latest version

To update WhatsApp to the latest version, follow these steps:

1. Open the WhatsApp application on your device.
2. Go to the settings menu by tapping on the three dots in the top right corner.
3. Scroll down and select “Help” from the options.
4. Tap on “App info” or “About” to view information about the app.
5. Look for the “Update” button and tap on it.
6. If an update is available, you will be redirected to the app store or download page.
7. Follow the prompts to download and install the latest version of WhatsApp.
8. Once the update is complete, open the app and sign in with your credentials.

Updating WhatsApp ensures that you have access to the latest features and security improvements. It is important to regularly update your apps to enhance performance and protect your data.

If you encounter any issues during the update process, try the following troubleshooting steps:

1. Check your internet connection: Make sure you are connected to a stable Wi-Fi or cellular network.
2. Clear app cache: Go to your device’s settings, select “Apps” or “Applications,” find WhatsApp, and clear the cache.
3. Restart your device: Sometimes, a simple restart can resolve temporary software glitches.
4. Uninstall and reinstall: If all else fails, uninstall WhatsApp, restart your device, and then reinstall the app from the app store.

If you continue to experience issues or receive error messages while updating WhatsApp, consider contacting the WhatsApp support team for further assistance. They can provide specific guidance based on your device and software version. Your feedback is also valuable in helping the developers improve the app for future updates.

Verifying date and time settings

Calendar and clock settings

To fix the WhatsApp Download Failed Error, it’s important to ensure that your device’s date and time settings are accurate. Incorrect date and time settings can cause issues with downloading and installing applications, including WhatsApp.

To verify your date and time settings on Android, follow these steps:
1. Open the Settings app on your device.
2. Scroll down and tap on “System” or “System & Device” (depending on your device).
3. Tap on “Date & time” or “Date & Time settings.”
4. Make sure that the “Automatic date & time” or “Use network-provided time” option is enabled. This will allow your device to automatically sync its date and time with the network.

If the automatic date and time setting is already enabled, you can try toggling it off and on again to refresh the settings.

On iOS devices, you can verify the date and time settings by following these steps:
1. Open the Settings app on your iPhone or iPad.
2. Tap on “General” and then “Date & Time.”
3. Enable the “Set Automatically” option. This will ensure that your device’s date and time are automatically set based on your location and network.

If the “Set Automatically” option is already enabled, try disabling and enabling it again to refresh the settings.

By verifying and ensuring that your device’s date and time settings are accurate, you can resolve the WhatsApp Download Failed Error and other related issues.

Clearing cache and data

To clear cache and data on WhatsApp and fix the “Download Failed Error,” follow these steps:

1. Open your WhatsApp application on your Android device.

2. Tap on the “Settings” option, usually represented by three vertical dots in the top right corner of the screen.

3. From the drop-down menu, select “Storage and Data.”

4. Under the “Storage and Data” menu, you will find the “Manage Storage” option. Tap on it.

5. Here, you will see a list of all your conversations and their corresponding storage sizes. Scroll through and identify the conversation that is causing the “Download Failed Error.”

6. Tap on the conversation to open it and then tap on the “Clear Data” button. This will remove all the data associated with that particular conversation, including media files.

7. If the “Download Failed Error” persists, you can also try clearing the cache of the WhatsApp application. To do this, go back to the “Storage and Data” menu and tap on the “Clear Cache” button.

8. Once you have cleared the data and cache, close the WhatsApp application completely and then reopen it.

9. Try downloading the file again. If the issue persists, it may be worth restarting your device and trying once more.

Clearing cache and data on WhatsApp can help resolve various issues, including the “Download Failed Error.”

Managing media permission on mobile

If you’re encountering the “WhatsApp Download Failed Error” on your mobile device, it might be due to media permission issues. Follow these steps to manage media permissions and resolve the error:

1. Open your device’s Settings.
2. Scroll down and tap on “Apps” or “Applications.”
3. Locate and select “WhatsApp” from the list of installed apps.
4. Tap on “Permissions” or “App Permissions.”

For Android devices:

5. Ensure that the “Storage” permission is enabled. This allows WhatsApp to save and access media files on your device.
6. If the permission is disabled, toggle the switch to enable it.

For iOS devices:

5. Make sure that “Photos” permission is granted to WhatsApp. This allows the app to save and access media files in your device’s Photos app.
6. If the permission is disabled, tap on “Photos” and select “Read and Write” access.

After adjusting the media permissions, try downloading the media file again on WhatsApp. This should resolve the “Download Failed Error.” If the issue persists, you may need to check your network connection or contact WhatsApp support for further assistance.

Remember to regularly update WhatsApp and your device’s operating system to ensure optimal performance and compatibility.

Note: If you’re experiencing any other issues with WhatsApp or any other app, refer to the app’s support documentation or reach out to their support team for assistance.

Ensuring sufficient space on micro SD card

If you are encountering the “WhatsApp Download Failed Error” on your Android device, it could be due to insufficient space on your micro SD card. To fix this issue, follow these steps:

1. Check available space: Go to your device’s settings and navigate to the storage section. Here, you can see how much space is remaining on your micro SD card.

2. Delete unnecessary files: If your micro SD card is running out of space, it’s essential to remove any unnecessary files or data. This could include old photos, videos, or unused applications. Delete any files you no longer need.

3. Move media files to internal storage: WhatsApp tends to store media files such as photos, videos, and voice messages on the micro SD card by default. To free up space, you can move these files to your device’s internal storage.

4. Clear WhatsApp cache: Cached data can take up a significant amount of space on your micro SD card. To clear WhatsApp’s cache, go to your device’s settings, find the “Apps” or “Applications” section, locate WhatsApp, and select “Clear cache.”

5. Uninstall and reinstall WhatsApp: If the above steps don’t resolve the issue, you can try uninstalling and reinstalling WhatsApp. This process will remove any corrupted or problematic files that may be causing the download failed error.

By ensuring sufficient space on your micro SD card, you can prevent the WhatsApp download failed error and enjoy a smoother experience when using the app.

Bonus tip: WhatsApp data management tool

  • Efficiently manage your WhatsApp data with this tool
  • Easily resolve the “Download Failed” error on WhatsApp
  • Organize and optimize your media files on WhatsApp
  • Quickly locate and delete unwanted files to free up storage space
  • Safely backup your important WhatsApp conversations and media
  • Streamline your WhatsApp data management process
  • Ensure smooth downloading and sharing of media on WhatsApp
  • Enhance your overall WhatsApp experience
  • Effortlessly recover lost or deleted WhatsApp files
  • Stay organized and avoid clutter in your WhatsApp chats

How to Fix Printer Driver Unavailable Error

Having trouble with a printer driver unavailable error? Let’s explore effective solutions to fix this issue and get your printer back up and running smoothly.

Causes of the “Driver is Unavailable” Error

If you’re encountering the “Driver is Unavailable” error when trying to print, there are a few common causes to consider.

Firstly, it’s possible that the driver for your printer is outdated or missing. This can occur if you recently upgraded your operating system to Windows 10 or Windows 11, as the new update may not be compatible with your current printer driver. To resolve this, you can try updating the driver through Windows Update or by visiting the printer manufacturer’s website for the latest driver version.

Another possible cause is a corrupted driver installation. If the printer driver was not installed properly or if certain files are missing or damaged, it can lead to the “Driver is Unavailable” error. To fix this, you can reinstall the printer driver using the following steps:

1. Press the Windows key on your keyboard to open the Start menu and type “Control Panel”. Press Enter to open the Control Panel.

2. In the Control Panel, locate and click on “Devices and Printers”.

3. Find your printer in the list of devices and right-click on it.

4. From the context menu, select “Properties”.

5. In the Properties window, go to the “Hardware” tab and click on “Properties” again.

6. In the new window, click on the “Driver” tab and then select “Uninstall”.

7. Follow the on-screen instructions to complete the uninstallation process.

8. Once the driver is uninstalled, download the latest driver from the printer manufacturer’s website and install it.

After reinstalling the driver, restart your computer and check if the “Driver is Unavailable” error is resolved. If you continue to experience issues, it may be helpful to consult the printer manufacturer’s support website or contact their customer support for further assistance.

Solutions to Fix the Driver Unavailable Error

  • Restart the Printer Spooler Service:
    1. Press Win + R to open the Run dialog box.
    2. Type services.msc and press Enter.
    3. In the Services window, scroll down and find the Print Spooler service.
    4. Right-click on it and select Restart.
    5. Wait for the service to restart and check if the driver unavailable error is resolved.
  • Update or Reinstall the Printer Driver:
    1. Press Win + X and select Device Manager.
    2. In the Device Manager window, expand the Print queues category.
    3. Right-click on your printer and select Update driver.
    4. Choose the option to Search automatically for updated driver software.
    5. If an update is found, follow the on-screen instructions to install it.
    6. If no update is found or the error persists, right-click on the printer again and select Uninstall device.
    7. Restart your computer and let Windows reinstall the printer driver automatically.
  • Run the Printer Troubleshooter:
    1. Press Win + I to open the Settings app.
    2. Go to Update & Security and click on Troubleshoot in the left sidebar.
    3. Scroll down and click on Printer under Find and fix other problems.
    4. Click on Run the troubleshooter and follow the instructions provided.
    5. Wait for the troubleshooter to identify and fix any issues with the printer driver.
    6. Restart your computer and check if the error is resolved.
  • Uninstall Recent Windows Updates:
    1. Press Win + I to open the Settings app.
    2. Go to Update & Security and click on Windows Update in the left sidebar.
    3. Click on View update history and then on Uninstall updates.
    4. In the Installed Updates window, locate and right-click on the most recent Windows update.
    5. Select Uninstall and follow the on-screen instructions.
    6. Restart your computer and check if the driver unavailable error is resolved.
  • Run System File Checker:
    1. Press Win + X and select Command Prompt (Admin).
    2. In the Command Prompt window, type sfc /scannow and press Enter.
    3. Wait for the scanning and verification process to complete.
    4. If any corrupted system files are found, the tool will attempt to repair them automatically.
    5. Restart your computer and check if the error is resolved.

Changing UAC Settings and Admin Account Verification

UAC settings and admin account verification

To change the User Account Control (UAC) settings and admin account verification to fix the “Printer Driver Unavailable” error, follow these steps:

1. Open the Start menu and search for “Control Panel.”

2. Click on the Control Panel icon to open it.

3. In the Control Panel window, locate and click on “User Accounts.”

4. On the User Accounts page, click on “Change User Account Control settings.”

5. A slider will appear with different levels of UAC settings. Move the slider to the desired level of security.

6. If prompted by the UAC, click “Yes” to continue.

7. To disable admin account verification, uncheck the box next to “Use User Account Control (UAC) to help protect your computer.”

8. Click on the “OK” button to save the changes.

9. Restart your computer to apply the new UAC settings and admin account verification changes.

By following these steps, you can customize the UAC settings and disable admin account verification, which may help resolve the “Printer Driver Unavailable” error on your Windows 10 or Windows 11 computer.

Keep in mind that changing these settings may impact the security of your computer, so it’s important to choose a level that balances security and convenience.

If you continue to experience issues with your printer driver, consider updating or reinstalling the printer driver software. You can visit the manufacturer’s website (such as Epson, Hewlett-Packard, or Microsoft) to download the latest driver for your printer model.

If the issue persists, you may need to troubleshoot further or seek additional support from the printer manufacturer or a professional technician.

python
def check_driver_availability(driver_name):
# Simulating a scenario where a driver is unavailable
available_drivers = ["Driver A", "Driver B", "Driver C"]

if driver_name in available_drivers:
print(f"The {driver_name} driver is available.")
else:
print(f"The {driver_name} driver is unavailable.")

# Usage example
driver_name = "Driver A"
check_driver_availability(driver_name)

In this example, we have a function `check_driver_availability` that takes a `driver_name` as input. It simulates a scenario where a list of available drivers is stored (represented by the `available_drivers` list). If the specified `driver_name` is found in the list, it is considered available, and a message indicating its availability is printed. Otherwise, a message stating that the driver is unavailable is printed.

Reinstalling Printer Drivers

To reinstall printer drivers and fix the “Printer Driver Unavailable” error on your Microsoft Windows computer, follow these steps:

1. Open the Control Panel by clicking on the Start menu and typing “Control Panel” in the search bar. Then, click on the Control Panel app that appears in the search results.

2. In the Control Panel, click on “Devices and Printers” or “Printers and Scanners” (depending on your version of Windows).

3. Locate your printer in the list of devices. Right-click on it and select “Remove Device” or “Uninstall”.

4. Confirm the uninstallation by clicking “Yes” or “OK” in the pop-up window.

5. After uninstalling the printer, you’ll need to reinstall the drivers. Visit the manufacturer’s website (e.g., Epson, HP) and search for your printer model.

6. Look for the “Downloads” or “Support” section on the website and find the appropriate driver for your printer and operating system. Download and save the driver file to your computer.

7. Once the driver file is downloaded, locate it on your computer and double-click on it to start the installation process.

8. Follow the on-screen instructions to install the printer driver. Make sure to select the correct options and settings for your printer.

9. Once the driver installation is complete, reconnect your printer to the computer using a USB cable or via Wi-Fi, if applicable.

10. Power on your printer and wait for Windows to detect it. It should automatically install the newly installed driver.

11. After the printer is detected and installed, try printing a test page or a document to ensure that the issue has been resolved.

If the “Printer Driver Unavailable” error persists, you may need to troubleshoot further or seek assistance from the printer manufacturer’s support team.

Updating Windows OS and Printer Drivers

To fix the “Printer Driver Unavailable” error, you may need to update your Windows OS and printer drivers. Follow these steps to do so:

1. Update Windows OS:
– Click on the Windows icon in the bottom-left corner of your screen.
– In the search box, type “Windows Update” and select it from the search results.
– Click on “Check for updates” and wait for Windows to search for available updates.
– If any updates are found, click on “Install now” to download and install them.
– After the updates are installed, restart your computer.

2. Update printer drivers:
– Press the Windows key + R to open the Run dialog box.
– Type “devmgmt.msc” and press Enter to open the Device Manager.
– In the Device Manager window, expand the “Print queues” category.
– Right-click on your printer and select “Update driver” from the context menu.
– Choose the option to automatically search for updated driver software.
– Follow the on-screen instructions to complete the driver update process.
– Once the driver update is finished, restart your computer.

After updating both your Windows OS and printer drivers, the “Printer Driver Unavailable” error should be resolved. If the issue persists, you may need to troubleshoot further or contact your printer manufacturer for assistance.

Resolving Printer Driver Issues with Driver Support

Step Description
1 Uninstall the current printer driver
2 Download the latest driver from the manufacturer’s website
3 Install the new driver on your computer
4 Restart your computer and printer
5 Test the printer to see if the issue is resolved
6 Contact customer support if the problem persists

By following these steps, you should be able to fix the “Printer Driver Unavailable” error and get your printer working properly again.

Troubleshoot & Fix Surface Keyboard Not Working

Having trouble with your Surface keyboard? Don’t worry, I’ve got you covered. In this guide, we’ll delve into troubleshooting tips and effective solutions to get your Surface keyboard working seamlessly again.

Troubleshooting Surface Keyboard Connectivity Issues

If you’re experiencing issues with your Surface keyboard not working, follow these steps to troubleshoot and fix the problem.

1. Check the battery level: Ensure that the keyboard has sufficient power by checking the battery level. To do this, press the Fn key and the Caps Lock key simultaneously. If the Caps Lock LED light does not turn on, replace the batteries.

2. Reconnect the keyboard: Sometimes, the keyboard may lose its connection with the Surface device. To reconnect it, follow these steps:
– Turn off the keyboard.
– Remove any cables or accessories connected to the Surface device.
– Turn off the Surface device.
– Wait for a few seconds, then turn on the Surface device and the keyboard.
– Allow them to connect automatically.

3. Update Windows: Keeping your Windows operating system up to date can resolve compatibility issues and software bugs. To update Windows, follow these steps:
– Go to Start and select Settings.
– Select Update & Security.
– Click on Windows Update.
– Select Check for updates and install any available updates.
– Restart your Surface device after the updates are installed.

4. Check for firmware updates: Microsoft periodically releases firmware updates that can improve the performance and compatibility of your Surface device. To check for firmware updates, follow these steps:
– Go to Start and select Settings.
– Select Update & Security.
– Click on Windows Update.
– Select Check for updates.
– If there are any firmware updates available, install them and restart your Surface device.

5. Check keyboard settings: Ensure that the keyboard settings are configured correctly. To access the keyboard settings, follow these steps:
– Go to Start and select Settings.
– Select Devices.
– Click on Typing.
– Make sure the correct keyboard layout and language are selected.

6. Troubleshoot Bluetooth: If you’re using a wireless keyboard, make sure that Bluetooth is enabled and functioning properly. To troubleshoot Bluetooth, follow these steps:
– Go to Start and select Settings.
– Select Devices.
– Click on Bluetooth & devices.
– Ensure that Bluetooth is turned on and your keyboard is paired with the Surface device.

7. Clean the keyboard: Dust, dirt, and grime can affect the keyboard’s performance. Clean the keyboard using a soft, lint-free cloth and a keyboard cleaning solution. Avoid using excessive moisture and never spray cleaning solution directly onto the keyboard.

If you’ve followed these troubleshooting steps and your Surface keyboard is still not working, consider contacting Microsoft Support or visiting a Microsoft Store for further assistance.

Common Causes and Solutions for Surface Keyboard Problems

Computer keyboard

  • Interference: Check for any nearby devices that may be causing interference with the keyboard signal. Move away from such devices or turn them off.
  • Low battery: Ensure that the keyboard batteries are not running low. Replace them if necessary.
  • Disconnected Bluetooth: Verify that the Surface device and the keyboard are properly paired via Bluetooth. Reconnect them if needed.
  • Outdated drivers: Update the device drivers for your Surface and keyboard to ensure compatibility and optimal performance.
  • Physical damage: Inspect the keyboard for any physical damage or debris that may be obstructing normal functionality. Clean or repair as necessary.
  • Software conflicts: Check for any conflicting software or applications that may be causing issues with the keyboard. Temporarily disable or uninstall them to troubleshoot.
  • Firmware update: Ensure that your Surface device and keyboard have the latest firmware updates installed. Update if available.
  • Restart: Sometimes a simple restart can resolve temporary glitches. Restart your Surface device and see if the keyboard starts functioning normally.
  • Resetting Bluetooth: Reset the Bluetooth settings on your Surface device and keyboard to establish a fresh connection.
  • Seek professional assistance: If the keyboard problems persist despite trying the above solutions, consider reaching out to Microsoft Support or an authorized service center for further assistance.

Steps to Fix Surface Keyboard Not Working

1. Restart your Surface device: Sometimes, a simple restart can resolve minor software glitches that may be causing the keyboard to stop working. To restart your Surface, press and hold the power button until the Shutdown options menu appears. Then, select Restart.

2. Check for Windows updates: Keeping your operating system up to date is crucial for optimal device performance. To check for updates, go to Settings > Windows Update and click on Check for updates. If any updates are available, download and install them.

3. Clean the keyboard and connections: Dust and dirt can accumulate on the keyboard and connections over time, causing issues with functionality. Use a soft, lint-free cloth to gently clean the keyboard and the connectors on your Surface device. Be careful not to apply excessive pressure or use any liquids.

4. Remove and reattach the keyboard: Detaching and reattaching the keyboard can help establish a secure connection. To do this, gently pull the keyboard away from the Surface device and then reattach it firmly until you hear a click. Ensure that the connectors are aligned properly.

5. Update or reinstall the keyboard driver: Outdated or corrupted keyboard drivers can lead to keyboard malfunctions. To update the driver, go to Device Manager, expand the Keyboard section, right-click on the keyboard driver, and select Update driver. If updating doesn’t work, you can try uninstalling the driver and then restarting your Surface to automatically reinstall it.

6. Disable and re-enable the keyboard: Disabling and re-enabling the keyboard can reset the connection and resolve temporary issues. To do this, go to Device Manager, expand the Keyboard section, right-click on the keyboard driver, and select Disable device. After a few seconds, right-click on the driver again and choose Enable device.

7. Perform a UEFI firmware update: The UEFI firmware controls the essential functions of your Surface device, including the keyboard. Updating the firmware can address compatibility issues and improve performance. Visit the Microsoft website and download the latest firmware update for your specific Surface model. Follow the instructions provided to install the update.

8. Contact Microsoft Support: If none of the above steps resolve the issue, it’s advisable to seek assistance from Microsoft Support. They have dedicated experts who can provide further guidance and troubleshooting steps tailored to your specific situation.

Resolving Surface Keyboard Bugs and Unlocking Issues

  • Restart the Surface device:

    • Press and hold the power button for at least 10 seconds.
    • Release the power button and wait for the device to turn off.
      Press and hold the power button for at least 10 seconds.
Release the power button and wait for the device to turn off.
    • Press the power button again to turn on the Surface device.
  • Check the battery level:

    • Make sure the keyboard has sufficient battery power.
    • If the battery is low, replace it or charge the keyboard.
  • Reconnect the keyboard:

    • Detach the keyboard from the Surface device.
    • Wait for a few seconds.
    • Reattach the keyboard firmly to the Surface device.
  • Update or reinstall the keyboard driver:

    • Open Device Manager by pressing Win+X and selecting Device Manager.
    • Expand the Keyboards category.
    • Right-click on the Surface keyboard driver and select Update driver or Uninstall device.
    • If updating, follow the on-screen instructions to complete the process.
    • If uninstalling, restart the Surface device and let the driver reinstall automatically.
  • Check for Windows updates:

    • Open Settings by pressing Win+I.
    • Go to Update & Security.
    • Click on Check for updates and install any available updates.
    • Restart the Surface device after the updates are installed.
  • Run the Keyboard Troubleshooter:

    • Open Control Panel by searching for it in the Start menu.
    • Go to Troubleshooting.
    • Click on View all on the left side of the window.
    • Select Keyboard from the list and follow the on-screen instructions to run the troubleshooter.
  • Perform a system restore:

    • Open Control Panel.
    • Go to Recovery.
    • Click on Open System Restore.
    • Follow the on-screen instructions to restore your system to a previous state when the keyboard was working correctly.

Helpful Methods to Resolve Surface Keyboard Malfunctions

If you’re experiencing issues with your Surface Keyboard not working, there are several helpful methods you can try to resolve the problem. Follow these steps to troubleshoot and fix the issue:

1. Check the connection: Ensure that your Surface Keyboard is properly connected to your device. If you’re using a wireless keyboard, make sure it’s turned on and the batteries are not low. If it’s a wired keyboard, ensure that the USB cable is securely plugged into the USB port.

2. Restart your Surface: Sometimes, a simple restart can resolve keyboard malfunctions. Restart your Surface device and see if the keyboard starts working again.

3. Update Windows: Keeping your Windows operating system up to date can help resolve compatibility issues and software bugs that may be causing the keyboard problem. To update Windows, go to Settings > Update & Security > Windows Update and click on “Check for updates.”

4. Update device drivers: Outdated or corrupted device drivers can also cause keyboard malfunctions. To update your device drivers, go to Device Manager (search for it in the Start menu), expand the “Keyboards” category, right-click on your keyboard driver, and select “Update driver.”

5. Run the Keyboard Troubleshooter: Windows 10 and Windows 11 have a built-in Keyboard Troubleshooter that can automatically detect and fix common keyboard issues. To run the troubleshooter, go to Settings > Update & Security > Troubleshoot > Keyboard > Run the troubleshooter.

6. Clean the keyboard: If your keyboard is physically dirty or has debris stuck between the keys, it may cause malfunctions. Gently clean the keyboard using a soft, lint-free cloth and compressed air if necessary.

7. Try an external keyboard: If none of the above methods work, you can try connecting an external keyboard to your Surface device to see if it functions properly. This will help determine if the issue is with the Surface Keyboard or your device.

If you’ve tried all these methods and your Surface Keyboard still isn’t working, you may need to contact Microsoft Support or visit a Microsoft Store for further assistance. They can help diagnose and resolve any hardware-related issues with your keyboard.

Fix Minecraft Internal Exception Java.io.IOException

In my experience with Minecraft, encountering the “Fix Minecraft Internal Exception Java.io.IOException” error has been a common issue.

Check your internet connection: If you encounter a java.io.IOException error while playing Minecraft, make sure that you have a stable internet connection. Unstable or slow internet can cause issues with game data transfer.

Understanding the Internal Exception: java.io.ioexception error

Understanding the Internal Exception: java.io.IOException

The Internal Exception: java.io.IOException error in Minecraft occurs when there is a problem with reading or writing data to and from the game. This error can be frustrating, but there are a few steps you can take to fix it.

First, check your internet connection. Make sure you are connected to a stable and reliable network. If you are using Wi-Fi, try connecting to a wired connection for better stability.

Next, try restarting your computer and your router. Sometimes, a simple restart can resolve connectivity issues.

If the error persists, try the following troubleshooting steps:

1. Clear the Minecraft cache:
– Press the Windows key + R to open the Run dialog box.
– Type “%appdata%” and press Enter. This will open the Roaming folder.
– Locate the “.minecraft” folder and delete it.
– Restart Minecraft and see if the error is resolved.

2. Disable antivirus and firewall temporarily:
– Open the Control Panel and navigate to the “System and Security” section.
– Click on “Windows Defender Firewall” and turn it off.
– Disable any third-party antivirus software temporarily.
– Launch Minecraft and check if the error persists.

3. Update Java:
– Visit the official Java website and download the latest version of Java.
– Install the update and restart your computer.
– Launch Minecraft and see if the error is fixed.

4. Reinstall Minecraft:
– Uninstall Minecraft from your computer using the Uninstaller or Control Panel.
– Download the latest version of Minecraft from the official website.
– Install Minecraft and check if the error is resolved.

If none of these steps work, it may be helpful to seek further assistance from the Minecraft community or contact Mojang Support.

In the world of Minecraft, even an IOException can’t stop the adventure.

Troubleshooting the Internal Exception: java.io.ioexception error

Troubleshooting the Internal Exception: java.io.IOException Error

If you are experiencing the Internal Exception: java.io.IOException error while playing Minecraft, there are a few steps you can take to resolve it.

First, ensure that your internet connection is stable and not experiencing any issues. Check if other devices on your network are able to connect to the internet without any problems.

Next, try restarting your computer and your router. This can help refresh the network connection and resolve any temporary issues.

If the issue persists, it may be due to a software conflict or a problem with your firewall settings. Temporarily disable any antivirus software or firewall that you have installed and see if the error still occurs. If the error goes away, you may need to add an exception for Minecraft in your firewall settings.

Another troubleshooting step is to clear the Minecraft cache. To do this, go to the Minecraft installation folder and delete the “cache” folder. This can help resolve any conflicts or corrupted files that may be causing the error.

If none of these steps work, you can try reinstalling Minecraft to ensure that all the game files are intact and not corrupted. Before reinstalling, make sure to back up any important worlds or mods that you have.

If the issue persists after following these steps, it may be helpful to reach out to the Minecraft community forums or support for further assistance. They may be able to provide more specific troubleshooting steps based on your setup and configuration.

Reinstalling Minecraft to fix the error

If you are experiencing the “Internal Exception Java.io.IOException” error in Minecraft, reinstalling the game can often resolve the issue. Follow these steps to reinstall Minecraft on your computer:

1. Close Minecraft and ensure that it is not running in the background.
2. Click on the “Start” button in the taskbar and select “Control Panel” from the context menu.
3. In the Control Panel, click on “Programs” or “Programs and Features” depending on your version of Windows.
4. Locate Minecraft in the list of installed programs and select it.
5. Click on the “Uninstall” button at the top of the window.
6. Follow the prompts to uninstall Minecraft from your computer.
7. Once the uninstallation is complete, visit the official Minecraft website and download the latest version of the game.
8. Run the installer and follow the on-screen instructions to reinstall Minecraft.
9. After the installation is finished, launch Minecraft and check if the “Internal Exception Java.io.IOException” error still persists.

Reinstalling Minecraft can help resolve various software-related issues, including this specific error. If you continue to experience problems, you may want to consider checking for any software conflicts, updating your Java installation, or contacting Minecraft support for further assistance.

java
import java.io.File;
import java.io.IOException;

public class MinecraftIOTool {
public static void main(String[] args) {
// Example code for handling IOException in Minecraft Java

// Specify the path to the file you want to read/write
String filePath = "path/to/your/file.txt";

// Create a File object using the specified file path
File file = new File(filePath);

try {
// Perform file-related operations that may throw IOException
if (file.exists()) {
System.out.println("File already exists at " + filePath);
} else {
// Create a new file
boolean created = file.createNewFile();
if (created) {
System.out.println("File created at " + filePath);
} else {
System.out.println("Failed to create file at " + filePath);
}
}
} catch (IOException e) {
// Handle IOException
System.out.println("An IOException occurred: " + e.getMessage());
e.printStackTrace();
}
}
}

In this sample code, we are checking if a file exists at the specified path and creating a new file if it doesn’t exist. If an `IOException` occurs during any file-related operations, it will be caught in the `catch` block, and an error message will be printed along with the stack trace. You can modify this code to suit your specific requirements or expand it to include additional functionality related to Minecraft file handling.

Enabling the Java Native Sandbox for error resolution

To resolve the “Fix Minecraft Internal Exception Java.io.IOException” error, you can enable the Java Native Sandbox. This will help prevent any potential software conflicts or issues that may be causing the error.

To enable the Java Native Sandbox, follow these steps:

Step 1: Open the Control Panel on your Windows computer.

Step 2: In the Control Panel, search for “Java” and click on the Java icon.

Step 3: In the Java Control Panel, go to the “Security” tab.

Step 4: Under the “Security Level” section, click on the “Edit Site List” button.

Step 5: In the Exception Site List window, click on the “Add” button.

Step 6: Enter the URL of the Minecraft server or website where you are experiencing the error.

Step 7: Click on the “OK” button to save the changes.

By enabling the Java Native Sandbox, you are allowing the necessary permissions for the Minecraft game to run smoothly without encountering the “Java.io.IOException” error.

If you continue to experience the error after enabling the Java Native Sandbox, it is recommended to check for any software bugs, update your Java software, or contact Minecraft support for further assistance.

Changing DNS settings to resolve the error

DNS settings interface

To fix the Minecraft Internal Exception Java.io.IOException error, you can try changing your DNS settings.

1. Open the Control Panel. You can do this by clicking the Start button and typing “Control Panel” in the search bar.

2. Click on “Network and Internet” and then “Network and Sharing Center.”

3. On the left side of the window, click on “Change adapter settings.”

4. Right-click on the network connection you are using for Minecraft and select “Properties” from the context menu.

5. In the Properties window, scroll down and select “Internet Protocol Version 4 (TCP/IPv4)” and click on the “Properties” button.

6. In the next window, select the option to “Use the following DNS server addresses.”

7. Enter the following DNS server addresses:
– Preferred DNS server: 8.8.8.8
– Alternate DNS server: 8.8.4.4

8. Click “OK” to save the changes.

9. Restart your computer and try launching Minecraft again.

Changing your DNS settings can help resolve network-related issues that may be causing the Java.io.IOException error in Minecraft. By using Google’s public DNS servers, you can improve your connection and potentially fix the problem.

Power cycling the router to fix Minecraft issues

To fix Minecraft issues related to the internal exception java.io.IOException, power cycling your router can often resolve the problem. Follow these steps:

1. Locate your router’s power cable and unplug it from the power source.
2. Wait for at least 10 seconds to ensure that the router is completely powered off.
3. Plug the power cable back into the router and wait for it to fully power on. This may take a few minutes.
4. Once the router is powered on, launch Minecraft and check if the internal exception java.io.IOException error persists.

Power cycling the router helps to refresh the network connection and resolve any temporary issues that may be causing the error. If the error still occurs after power cycling, you may need to explore other troubleshooting steps or consider contacting your internet service provider for further assistance.

Allowing Minecraft through Windows Firewall for error resolution

Windows Firewall settings

To fix the “Minecraft Internal Exception Java.io.IOException” error, you may need to allow Minecraft through the Windows Firewall. Follow these steps to resolve the issue:

1. Press the Windows key on your keyboard and type “Windows Firewall” in the search bar. Click on “Windows Firewall” from the search results.

2. In the Windows Firewall window, click on “Allow an app or feature through Windows Firewall” on the left side of the screen.

3. Click on the “Change settings” button. If prompted for administrator permission, click “Yes” to continue.

4. Scroll down the list of apps and features until you find “Java(TM) Platform SE binary” or “Java(TM) Platform.” Check the box next to it to allow Java through the firewall.

5. If you cannot find Java in the list, click on the “Allow another app” button. Navigate to the folder where Java is installed (usually in the “Program Files” or “Program Files (x86)” directory) and select “javaw.exe” or “java.exe.”

6. Click “Add” to add Java to the allowed apps list. Then, click “OK” to save the changes.

By allowing Minecraft through the Windows Firewall, you should be able to resolve the “Minecraft Internal Exception Java.io.IOException” error and play the game without any issues.

Switching to another DNS server to resolve the error

Switching to another DNS server can help resolve the “Fix Minecraft Internal Exception Java.io.IOException” error. The Domain Name System (DNS) is responsible for translating domain names into IP addresses, allowing your computer to connect to websites and servers. If the DNS server you are currently using is experiencing issues or is not responding properly, it can cause errors like the one you are experiencing in Minecraft.

To switch to another DNS server on Windows, follow these steps:

1. Open the Control Panel by clicking on the Start menu and typing “Control Panel” in the search bar. Press Enter to open it.
2. In the Control Panel, click on “Network and Internet” and then “Network and Sharing Center.”
3. On the left side of the window, click on “Change adapter settings.”
4. Right-click on the network connection you are using (e.g., Wi-Fi or Ethernet) and select “Properties.”
5. In the Properties window, scroll down and select “Internet Protocol Version 4 (TCP/IPv4).” Click on the “Properties” button.
6. In the Internet Protocol Version 4 (TCP/IPv4) Properties window, select the option “Use the following DNS server addresses.”
7. Enter the preferred and alternate DNS server addresses. You can use public DNS servers like Google’s DNS (8.8.8.8 and 8.8.4.4) or any other reliable DNS server you prefer. Make sure to write down your current DNS server addresses in case you need to revert the changes.
8. Click on “OK” to save the changes and close the windows.

After switching to a new DNS server, restart your computer and try launching Minecraft again. This should help resolve the “Fix Minecraft Internal Exception Java.io.IOException” error by ensuring a proper connection to the game servers.

Updating the Minecraft Launcher for error resolution

If you’re experiencing the error “Internal Exception Java.io.IOException” while playing Minecraft, updating the Minecraft Launcher can help resolve the issue. Follow these steps to update your launcher:

1. Open the Minecraft Launcher on your computer.
2. Click on the “Settings” icon in the top-right corner of the launcher.
3. In the Settings menu, click on “About Minecraft” in the left-hand sidebar.
4. The launcher will check for updates and automatically download and install any available updates.
5. Once the update is complete, restart your computer and launch Minecraft again.

Updating the Minecraft Launcher ensures that you have the latest version of the game, which often includes bug fixes and improvements. This can help resolve the “Internal Exception Java.io.IOException” error and enhance your overall gameplay experience.

If you continue to encounter the error after updating the launcher, you may need to troubleshoot further or seek additional assistance. Consider reaching out to the Minecraft community forums or contacting Minecraft support for further guidance.

Clearing the DNS cache to fix Minecraft issues

To fix Minecraft issues related to the “Internal Exception Java.io.IOException” error, you can try clearing the DNS cache on your computer. The DNS cache stores information about previously visited websites, and clearing it can help resolve connectivity problems. Here’s how you can do it:

1. Press the Windows key on your keyboard to open the Start menu.
2. Type “Command Prompt” in the search bar.
3. Right-click on “Command Prompt” and select “Run as administrator.”
4. In the Command Prompt window, type the following command and press Enter: ipconfig /flushdns
5. Wait for the process to complete, and you should see a message confirming the DNS cache has been flushed.

By clearing the DNS cache, you are essentially refreshing the stored information, which can help resolve any conflicts or outdated entries that might be causing issues with Minecraft. This simple step can often fix connectivity problems and improve your gaming experience.

If you continue to experience issues after clearing the DNS cache, you may want to consider other troubleshooting steps, such as checking your internet connection, updating Minecraft, or contacting your internet service provider for assistance.

Disabling server’s resource pack to resolve the error

To resolve the “Fix Minecraft Internal Exception Java.io.IOException” error, you can try disabling the server’s resource pack. Here’s how:

1. Open the Minecraft game and go to the main menu.
2. Click on “Options” and then select “Resource Packs”.
3. Find the resource pack that is causing the error and click on the arrow next to it to move it to the “Inactive” section.
4. Restart the Minecraft game and join the server again to see if the error is resolved.

If disabling the resource pack doesn’t fix the issue, you can try a few more troubleshooting steps. First, make sure you have a stable internet connection and check if other online games or applications are working properly. If the issue persists, try restarting your computer and router to refresh the network connection.

Additionally, you can check if there are any software conflicts causing the error. Disable any antivirus or firewall software temporarily and see if that resolves the issue. You can also try running Minecraft as an administrator by right-clicking on the game’s icon and selecting “Run as administrator” from the context menu.

If none of these steps work, it’s possible that the error is caused by a software bug or an issue with the server itself. In this case, you may need to contact the server administrator or seek further assistance from the Minecraft community.

Decreasing the render distance in Minecraft settings to fix the error

To fix the “Minecraft Internal Exception Java.io.IOException” error, you can try decreasing the render distance in your Minecraft settings. This can help alleviate any issues related to network connectivity and reduce the strain on your computer.

To do this, follow these steps:

1. Launch Minecraft and go to the main menu.
2. Click on “Options” and then “Video Settings.”
3. Look for the “Render Distance” option and reduce it to a lower value, such as 8 or 12 chunks.
4. Click “Done” to save the changes.

By decreasing the render distance, you are limiting the amount of data that needs to be transmitted and processed, which can help prevent potential network errors and improve overall performance.

If the error persists, you may also want to check your internet connection, restart your router, or consider reinstalling Minecraft. Additionally, it’s always a good idea to keep your game and Java up to date to ensure compatibility and avoid any known bugs or issues.

Troubleshooting Tips for Outlook Not Loading Emails

Having trouble with Outlook not loading your emails? Here are some troubleshooting tips to help you resolve the issue.

Troubleshooting Outlook email loading issues

Outlook loading screen

If you’re experiencing issues with Outlook not loading your emails, there are a few troubleshooting tips you can try to resolve the problem.

1. Check your internet connection: Ensure that you have a stable internet connection and that you can access other websites or online services. If you’re using Wi-Fi, try restarting your router or connecting to a different network.

2. Clear your browser cache: If you’re accessing Outlook.com through a web browser, clearing your cache can help resolve loading issues. To do this, open your browser settings, navigate to the privacy or history section, and clear your browsing data.

3. Disable add-ons or extensions: Certain browser add-ons or extensions can interfere with the loading of Outlook. Try disabling them temporarily and see if the issue persists.

4. Disable email filtering: Some email filtering programs or settings may prevent Outlook from loading emails properly. Check your email filtering settings or temporarily disable any third-party email filtering software.

5. Check for any service outages: Occasionally, there may be service outages with Outlook.com or your email provider. Check the Microsoft Outlook status page or contact your email provider for any known issues.

6. Use the Task Manager: If Outlook freezes or becomes unresponsive while loading emails, you can use the Task Manager on Windows to force close the program. Press Ctrl+Shift+Esc to open the Task Manager, locate Outlook in the list of processes, and click “End Task.”

7. Restart Outlook: Sometimes a simple restart of the Outlook application can resolve loading issues. Close Outlook completely and reopen it to see if the problem is resolved.

Remember, if you’re unable to resolve the issue on your own, you can always reach out to Microsoft support for further assistance.

References:
– Outlook.com
– Email filtering
– Task Manager (Windows)
– Internet access
– Wi-Fi
– Router (computing)
– Web browser

Checking for junk mail and filters

Checking for Junk Mail and Filters

If you’re experiencing issues with Outlook not loading emails, it’s important to check for junk mail and filters that may be affecting your email delivery. Junk mail filters are designed to identify and block spam emails, but sometimes they can mistakenly flag legitimate emails as junk. Here are some troubleshooting tips to help you resolve this issue:

1. Check your Junk Email folder: Outlook automatically moves suspected junk emails to the Junk Email folder. Start by checking this folder to see if any legitimate emails have been mistakenly marked as junk. If you find any, right-click on the email and select Not Junk to move it back to your Inbox.

2. Review your email filters: Outlook allows you to set up filters to automatically sort incoming emails into specific folders. These filters can sometimes divert important emails away from your Inbox. To check your filters, go to the Ribbon and click on the View tab. Then, click on View Settings and select Filter Email. Make sure there are no filters set up that may be causing emails not to load.

3. Whitelist important senders: If you’re consistently missing emails from specific senders, it’s possible that their emails are being blocked. To ensure you receive emails from these senders, add them to your Whitelist. Simply right-click on an email from the sender, select Junk, and then choose Never Block Sender.

4. Check your internet connection: Outlook requires a stable internet connection to load emails. Make sure you have a reliable internet access and that your Internet Service Provider is not experiencing any outages. Additionally, check your router and modem to ensure they are functioning properly.

Verifying internet connection and Outlook status

Verifying Internet Connection: Before troubleshooting Outlook not loading emails, it’s important to verify your internet connection. A stable and reliable internet connection is crucial for accessing your emails. To check your internet connection, follow these steps:

1. Open your preferred web browser and navigate to a web page. If the page loads successfully, it indicates that your internet connection is working fine. If not, try restarting your modem and router, or contact your internet service provider for further assistance.

2. Make sure you are connected to the correct wireless network. Sometimes, your device might be connected to a different network, causing connectivity issues. Check your Wi-Fi settings and select the appropriate network.

3. Ensure that your device’s wireless capability is turned on. Most laptops and mobile devices have a physical switch or a key combination to enable or disable wireless connectivity.

Verifying Outlook Status: Once you have confirmed a stable internet connection, you can proceed to check the status of your Microsoft Outlook. Follow these steps:

1. Launch Microsoft Outlook on your computer.

2. Check the status of your Outlook account in the bottom-right corner of the application window. If it shows “Connected” or “Online,” your Outlook is functioning properly. If it shows “Disconnected” or “Offline,” you need to reconnect your Outlook.

3. To reconnect, go to the “File” menu on the menu bar and click on “Work Offline” to toggle it off. This should restore your connection to the Outlook servers.

4. If the issue persists, you can try restarting Outlook or your entire computer.

By verifying your internet connection and Outlook status, you can quickly identify and resolve any issues that may be preventing Outlook from loading your emails.

Restarting Outlook and repairing the profile

If you are experiencing issues with Outlook not loading emails, there are a few troubleshooting steps you can take to resolve the problem. One common solution is to restart Outlook and repair the profile. Here’s how you can do it:

1. Restart Outlook: Sometimes, simply restarting the application can resolve temporary glitches. Close Outlook and reopen it to see if the issue is resolved.

2. Repair the Outlook profile: If restarting Outlook didn’t work, you can try repairing the profile. To do this, follow these steps:

– Close Outlook if it’s open.
– Press the Windows key + R to open the Run dialog box.
– Type “control mlcfg32.cpl” and press Enter. This will open the Mail Setup dialog box.
– In the Mail Setup dialog box, click on the “Show Profiles” button.
– Select your Outlook profile and click on “Properties“.
– In the Mail Setup – Outlook dialog box, click on the “Email Accounts” button.
– Select your email account and click on “Repair“. Follow the on-screen instructions to complete the repair process.
– Once the repair is complete, close all the dialog boxes and relaunch Outlook.

By restarting Outlook and repairing the profile, you can often resolve issues with emails not loading. If the problem persists, you may need to further investigate or seek assistance from technical support.

Managing email attachments and rules

Email with attachments and rules.

Topic Description
Managing Email Attachments Learn how to handle email attachments effectively in Outlook.
1. Opening Attachments Understand various methods to open email attachments securely.
2. Saving Attachments Learn how to save email attachments to your computer or cloud storage.
3. Removing Attachments Discover how to remove attachments from emails to reduce file size.
Rules in Outlook Explore the use of rules in Outlook to automate email management.
1. Creating Rules Learn how to create custom rules to automatically categorize or forward emails.
2. Editing and Deleting Rules Understand how to modify and delete existing rules in Outlook.
3. Managing Rule Execution Discover how to prioritize and control the execution order of rules.

Resolving Outlook not sending or receiving emails

A screenshot of the Outlook application with an error message.

If you’re experiencing issues with Outlook not sending or receiving emails, there are a few troubleshooting tips you can try to resolve the problem.

First, make sure you have a stable internet connection. Check if you’re connected to the internet and try accessing other websites to ensure your connection is working properly.

Next, check if Outlook is in online mode. Sometimes, Outlook may be set to work in offline mode, which prevents it from sending or receiving emails. To switch to online mode, click on the “Send/Receive” tab in the Ribbon and click on the “Work Offline” button to toggle it off.

If the issue persists, try restarting Outlook. Close the program completely and reopen it to see if that resolves the problem.

You can also try running Outlook in safe mode, which disables any add-ins or extensions that might be causing the issue. To do this, press the Windows key + R to open the Run dialog box, then type “outlook.exe /safe” and click OK.

If none of these steps work, you may need to repair your Outlook installation. Open the Control Panel and go to “Programs and Features” (or “Add or Remove Programs” on older versions of Windows). Find Microsoft Office in the list of installed programs, right-click on it, and select “Change” or “Repair”. Follow the on-screen instructions to repair your installation.

If you’re using a Microsoft account to sign in to Outlook, make sure your password is correct. Sometimes, an incorrect password can prevent Outlook from sending or receiving emails.

Lastly, make sure your email account settings are configured correctly. Check the account settings in Outlook to ensure the incoming and outgoing server settings match the settings provided by your email provider.

DIFxDriverPackageInstall Error 1610154566 – Fix Windows 10 Installation Issues

Having trouble installing Windows 10 due to the DIFxDriverPackageInstall Error 1610154566? Here’s how to fix this installation issue efficiently.

Understanding the DIFxDriverPackageInstall Error 1610154566

Error message on a computer screen

If you encounter the DIFxDriverPackageInstall Error 1610154566 during a Windows 10 installation, there are a few steps you can take to resolve the issue.

1. Check for Windows Updates: Make sure your Windows 10 operating system is up to date. Go to the Windows Update section in the Control Panel or Settings app to check for any available updates. Install them and then try the installation again.

2. Update Device Drivers: Outdated or incompatible device drivers can cause installation errors. Visit the manufacturer’s website for each hardware component connected to your computer and download the latest drivers. Install these drivers and then attempt the installation once more.

3. Disable Antivirus Software: Sometimes, antivirus software can interfere with the installation process. Temporarily disable any antivirus software you have running on your system and then try the installation again. Remember to re-enable your antivirus software once the installation is complete.

4. Run the Installation as Administrator: Running the installation with administrator privileges can help resolve certain errors. Right-click on the installation file and select “Run as administrator” from the context menu. Follow the prompts to complete the installation.

5. Clean Boot: Performing a clean boot can help identify any conflicts with third-party software components. To do this, open the System Configuration utility by typing “msconfig” in the Windows search bar and selecting it from the results. In the General tab, choose “Selective startup” and uncheck the box next to “Load startup items.” Then, go to the Services tab, check the box next to “Hide all Microsoft services,” and click “Disable all.” Apply the changes and restart your computer. Try the installation again in this clean boot state.

6. Contact Microsoft Support: If you have tried all the above steps and are still experiencing the DIFxDriverPackageInstall Error 1610154566, it may be necessary to contact Microsoft Support for further assistance. They can provide you with specific troubleshooting steps tailored to your situation.

Solutions for resolving DIFxDriverPackageInstall Error 1610154566

  • Update Windows: Ensure that your Windows operating system is up to date to avoid compatibility issues.
  • Check System Requirements: Verify that your computer meets the minimum system requirements for installing the desired driver package.
  • Scan for Malware: Run a thorough scan using reliable antivirus software to eliminate any malware that might be interfering with the installation process.
  • Disable Third-Party Antivirus: Temporarily disable any third-party antivirus or security software as it may be blocking the driver installation.
  • Run Troubleshooters: Utilize built-in troubleshooters like the Windows Update troubleshooter or the Hardware and Devices troubleshooter to identify and resolve any underlying issues.
  • Clean Boot: Perform a clean boot to start Windows with minimal drivers and startup programs, eliminating potential conflicts during installation.
  • Remove Conflicting Drivers: Uninstall any conflicting drivers or software that might be hindering the installation process.
  • Temporarily Disable Firewall: Temporarily disable the Windows Firewall or any third-party firewall software to rule out any firewall-related issues.
    Remove Conflicting Drivers: Uninstall any conflicting drivers or software that might be hindering the installation process.
Temporarily Disable Firewall: Temporarily disable the Windows Firewall or any third-party firewall software to rule out any firewall-related issues.
  • Reinstall the Application: If the error occurs during the installation of a specific application, try uninstalling and reinstalling it to resolve any corrupted files.
  • Perform a System Restore: If all else fails, consider performing a system restore to revert your computer back to a previous working state.

Tips for preventing DIFxDriverPackageInstall Error 1610154566

Windows error message

1. Ensure compatibility: Before installing any software or driver on your Windows 10 system, make sure it is compatible with your operating system version. Check the software or driver’s system requirements to ensure a smooth installation process.

2. Update Windows: Keeping your Windows 10 system up to date is crucial for preventing installation errors. Regularly check for updates and install any available patches or fixes from Microsoft. This can help resolve any compatibility issues and improve system stability.

3. Disable third-party software: Some third-party software components can interfere with the installation process and trigger errors like DIFxDriverPackageInstall Error 1610154566. To prevent this, temporarily disable any antivirus, firewall, or other security software before installing the desired software or driver.

4. Uninstall conflicting programs: If you encounter the error during installation, it may be due to conflicting programs already installed on your system. Use the Control Panel (Windows) or Finder (MacOS) to uninstall any applications that may be causing conflicts. This will help create a clean installation environment.

5. Run installation as an administrator: To avoid permission-related issues, always run the installation as an administrator. Right-click on the installation file and select “Run as administrator” to ensure you have the necessary privileges to install the software or driver.

6. Check for hardware issues: Faulty hardware, such as a malfunctioning USB port or graphics card, can also cause installation errors. Before proceeding with the installation, perform basic hardware checks and ensure that all components are functioning properly.

7. Use a reliable source: Download software or drivers from official sources or trusted websites. Avoid downloading from unknown or unreliable sources, as this increases the risk of encountering errors or installing malicious software.

8. Troubleshoot with manufacturer support: If you continue to experience DIFxDriverPackageInstall Error 1610154566 or other installation issues, consider reaching out to the software or driver manufacturer’s support. They can provide specific troubleshooting steps or offer alternative solutions to resolve the error.

16 Tips to Minimize Video Buffering and Fix Streaming Issues

I will share 16 effective tips to minimize video buffering and resolve streaming issues.

Quick fixes for buffering while streaming

1. Check your internet connection: Ensure that you have a stable internet connection by connecting your device to a reliable Wi-Fi network or using an Ethernet cable for a wired connection.

2. Close unnecessary applications: Close any background processes or applications that may be using your internet bandwidth, as they can cause buffering issues.

3. Restart your streaming device: If you’re experiencing buffering on a Smart TV, smartphone, or tablet, try restarting the device to refresh its settings and clear any temporary glitches.

4. Upgrade your streaming quality: Lower the video quality to 720p or even 480p if you’re experiencing buffering on high-definition videos. This reduces the data needed for streaming and can improve playback.

5. Pause and let it buffer: Pause the video and allow it to buffer for a few minutes before resuming playback. This allows the video to load ahead, reducing the chances of buffering interruptions.

6. Update your streaming application: Ensure that you have the latest version of the streaming application installed on your device. Updates often include performance improvements and bug fixes.

7. Optimize your router settings: Adjust your router’s settings to prioritize streaming traffic. Look for Quality of Service (QoS) settings or enable a “gaming mode” if available.

8. Disable other devices on your network: If multiple devices are connected to your Wi-Fi network, disconnect any unnecessary devices to free up bandwidth for your streaming device.

9. Clear your browser cache: If you’re streaming through a web browser, clear your cache and cookies regularly to ensure smooth playback.

10. Check for firmware updates: If you’re using a router or modem, check for firmware updates from the manufacturer’s website. Updated firmware can improve overall network performance.

11. Reposition your Wi-Fi router: Ensure that your router is placed in a central location and away from obstructions. This helps optimize the Wi-Fi signal strength in your home.

12. Try a different streaming service: If you’re consistently experiencing buffering issues with a particular streaming service, try using a different one to see if the problem persists.

13. Upgrade your internet plan: If you frequently stream high-definition videos or have multiple devices connected, consider upgrading your internet plan to a higher speed or bandwidth.

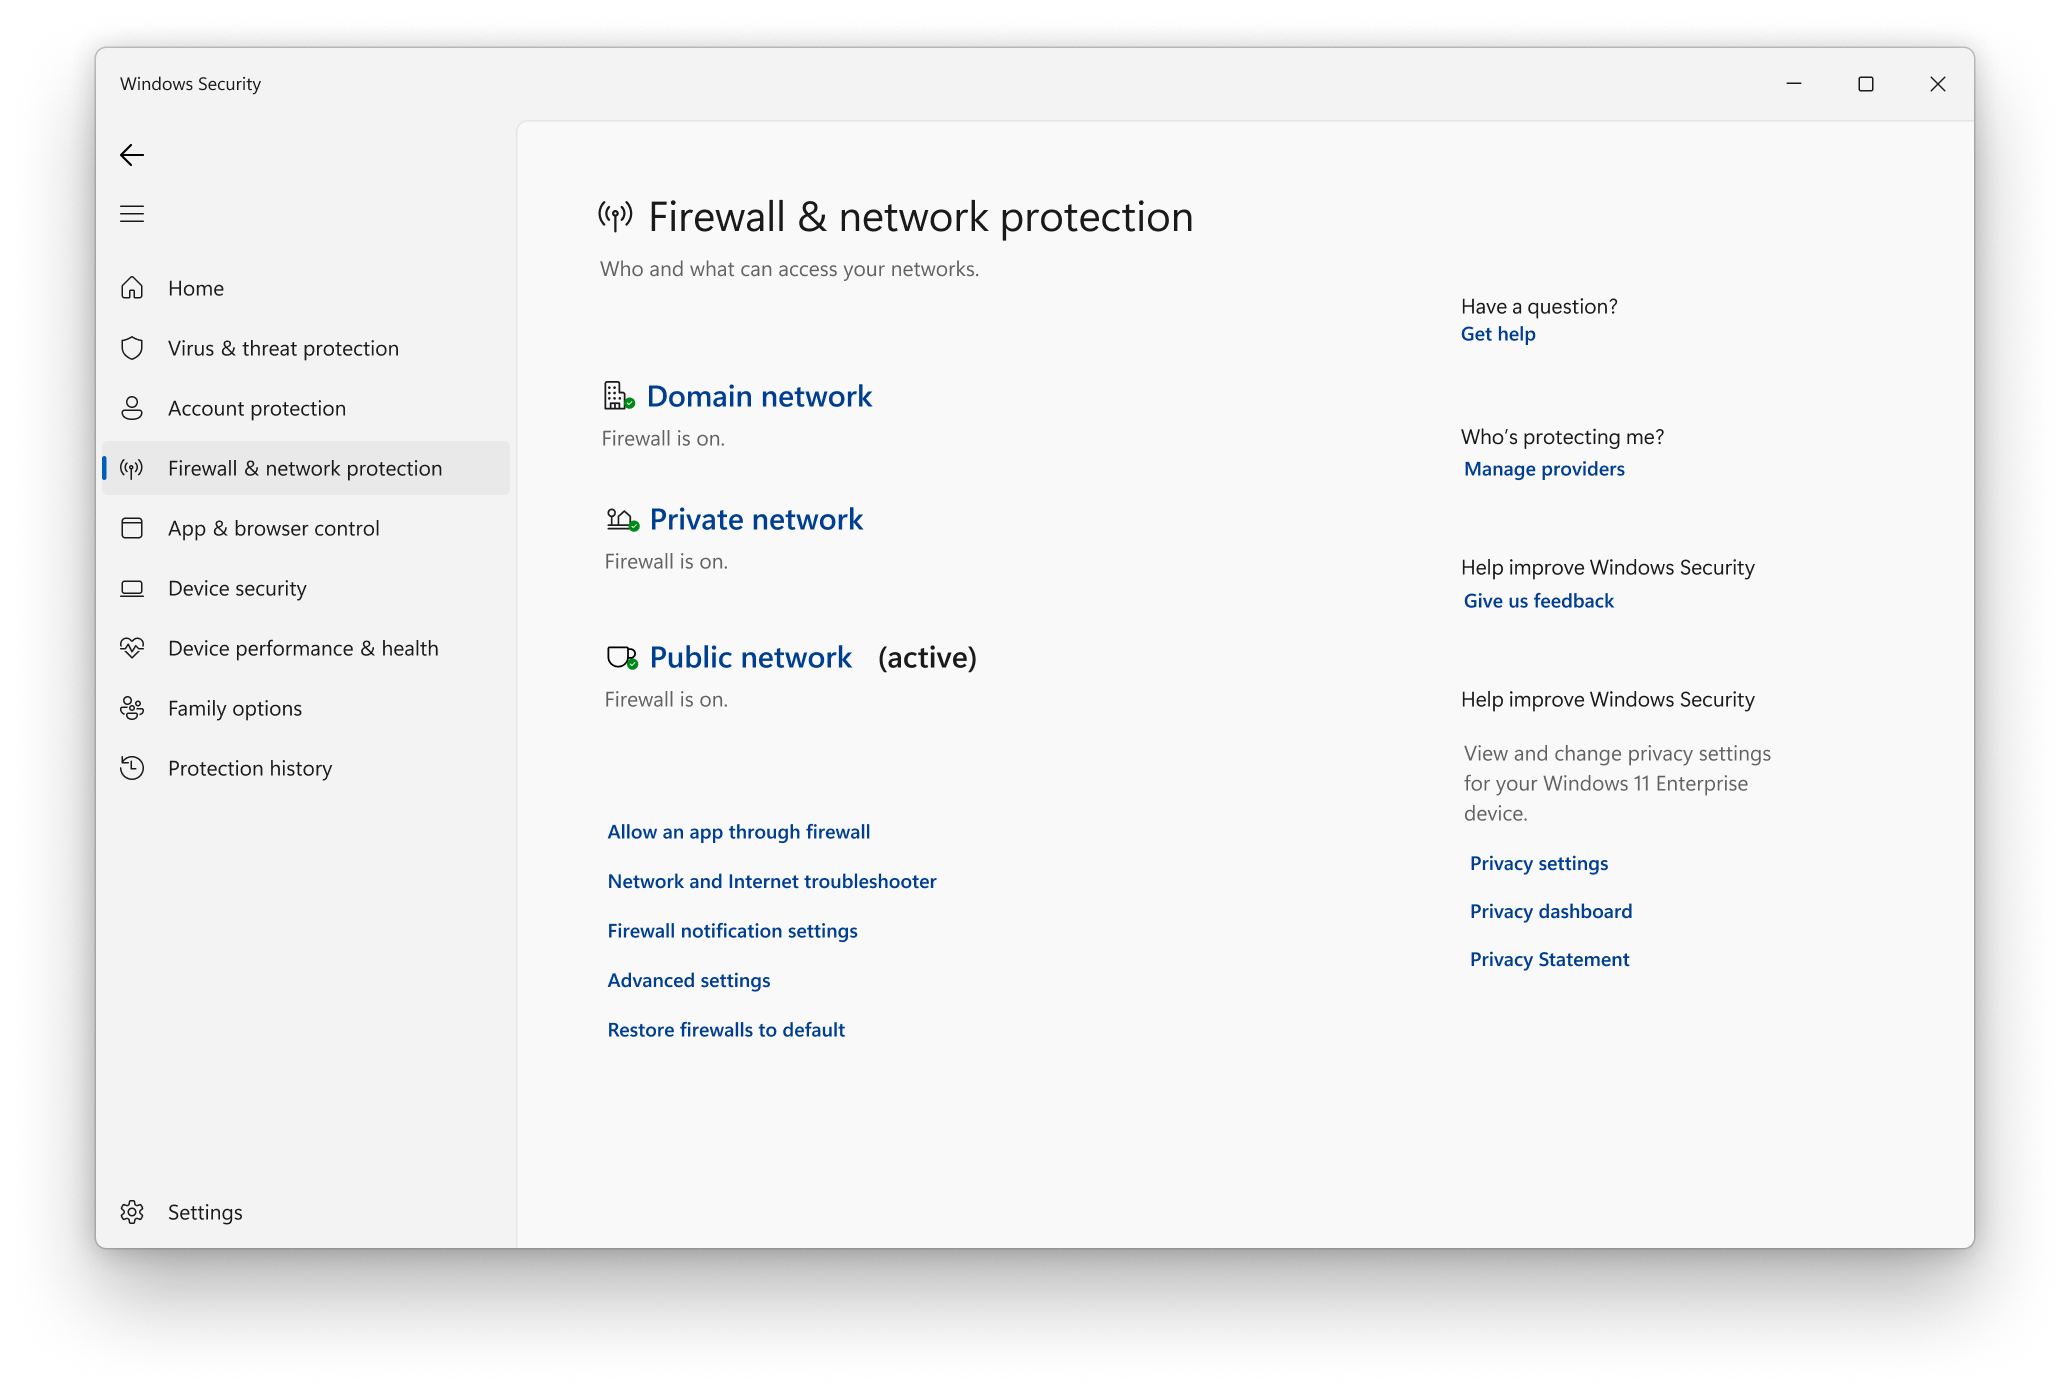
14. Scan for malware: Run a malware scan on your device using reliable antivirus software like Avast to ensure that your system is not compromised and causing buffering issues.

15. Use a mesh network: If you have a large home or areas with weak Wi-Fi coverage, consider using a mesh network to extend your Wi-Fi signal and reduce buffering.

16. Contact your internet service provider: If you’ve tried everything and are still experiencing buffering issues, reach out to your internet service provider for assistance. They can troubleshoot any network-related problems.

Best satellite internet plans for streaming

Internet Provider Plan Download Speed Upload Speed Data Cap Price
HughesNet Gen5 10 GB 25 Mbps 3 Mbps 10 GB $59.99/mo
Viasat Unlimited Bronze 12 12 Mbps 3 Mbps 40 GB $70/mo
Exede Liberty 12 12 Mbps 3 Mbps 12 GB $50/mo
Starlink Beta Plan 100 Mbps 20 Mbps Unlimited $99/mo
WildBlue Essential 10 10 Mbps 1 Mbps 10 GB $69.99/mo

How to Stop Buffering on a Smart TV

If you’re experiencing buffering issues while streaming videos on your Smart TV, there are a few steps you can take to minimize buffering and improve your streaming experience. Here are some tips to help you fix buffering issues on your Smart TV:

1. Check your internet connection: Ensure that your Smart TV is connected to a stable and high-speed internet connection. If possible, try using an Ethernet cable instead of a wireless connection for a more reliable connection.

2. Optimize your Wi-Fi: If you’re using a wireless network, make sure your Smart TV is close to your wireless router to get a stronger signal. You can also try resetting your router or using a different wireless channel to avoid interference.

3. Close unnecessary applications: Close any unused applications or programs running in the background on your Smart TV. These applications can consume bandwidth and slow down your streaming.

4. Update your Smart TV software: Check for any available software updates for your Smart TV and install them. Updating your TV’s software can improve its performance and fix any known issues.

5. Clear cache and cookies: Clearing the cache and cookies on your Smart TV can help improve its performance and reduce buffering. Refer to your TV’s user manual or settings menu to find the option to clear cache and cookies.

6. Reduce video quality: If you’re experiencing frequent buffering, try lowering the video quality settings on your streaming app. Lower resolutions, such as 720p, require less bandwidth and can help reduce buffering issues.

7. Restart your Smart TV: Sometimes, a simple restart can resolve buffering issues. Turn off your Smart TV, unplug it from the power source, wait for a few seconds, and then plug it back in. Turn on your TV and try streaming again.

8. Connect to a different network: If possible, try connecting your Smart TV to a different wireless network or use a mobile hotspot to see if the buffering issue persists. This can help determine if the problem is with your home network.

Remember, buffering issues can also be caused by factors outside of your control, such as the streaming service’s server or network congestion. If you’ve tried these tips and are still experiencing buffering problems, you may want to contact your internet service provider or the streaming service for further assistance.

Enjoy uninterrupted streaming on your Smart TV!

Turn it off and turn it back on

If you’re experiencing video buffering or streaming issues, a simple solution is to turn off your device and then turn it back on. This can help refresh the system and resolve any temporary glitches that may be causing the problem.

To do this, follow these steps:

1. Power off your device: Locate the power button on your device, whether it’s a computer, smartphone, tablet, or television. Press and hold the power button until you see the option to power off. Select “Power off” to shut down your device completely.

2. Wait for a few seconds: Once your device is powered off, wait for about 10-15 seconds before proceeding to the next step. This will ensure that any remaining processes or background tasks are fully stopped.

3. Power on your device: Press and hold the power button again to turn on your device. Wait for it to boot up and establish a connection with the network.

4. Resume streaming: Once your device is back on, open the streaming application or website you were using and try playing the video again. Hopefully, the buffering or streaming issues will be resolved.

Remember, turning off and on your device is a basic troubleshooting step that can help in many situations. It’s a quick and easy way to refresh your device’s system and network connection, potentially fixing any temporary issues that were causing video buffering or streaming problems.

If the issue persists, you may want to explore other tips and solutions to minimize video buffering and fix streaming issues.

Make sure no applications are running in the background

To ensure smooth video streaming and minimize buffering issues, it is important to make sure no applications are running in the background. These background processes can consume valuable resources and interfere with your streaming experience.

To stop background applications on your device, follow these steps:

1. On a computer or tablet, press Ctrl+Shift+Esc to open the Task Manager. On a mobile device, swipe up from the bottom of the screen and then swipe left or right to find the app switcher.

2. In the Task Manager or app switcher, look for any unnecessary applications or processes that are running. These could include web browsers, messaging apps, or other software that you are not actively using.

3. Select the application or process and click on the End Task or Close button to stop it from running.

By closing these background applications, you can free up system resources and ensure a smoother streaming experience. Remember to also check for any updates for your streaming media platform or web browser, as these updates can often resolve buffering issues.

Additionally, it is important to have a stable internet connection for smooth streaming. Make sure you are connected to a reliable wireless router or modem, and that your device is within range. You can also try restarting your router or modem to refresh the connection.

If you continue to experience buffering issues, you may want to check your internet speed using websites such as Speedtest.net. A slow internet connection can cause buffering problems, especially when streaming high-definition videos like those on Netflix or YouTube. Consider upgrading your internet plan or contacting your internet service provider for assistance.

Disconnect other devices from the network

Disconnecting other devices from the network can help minimize video buffering and fix streaming issues. When multiple devices are connected to the same network, they can compete for bandwidth, causing slower streaming speeds. To ensure a smooth streaming experience, follow these steps:

1. Disconnect any unnecessary devices from your network. This includes smartphones, tablets, gaming consoles, and smart home devices.

2. If you’re streaming on a computer, close any unnecessary applications or background processes that may be using up bandwidth.

3. Put other devices, such as televisions or tablets, into sleep mode while streaming to free up bandwidth.

4. Restart your router to refresh the network connection and clear any potential issues.

5. Make sure that your operating system and streaming app are up to date. Updates often include bug fixes and performance improvements.

6. If you’re experiencing buffering issues with a specific streaming service like Netflix, YouTube, or Hulu, try using a different mobile app or web browser to access the service.

7. Check your internet speed using a tool like Speedtest.net to ensure you have a fast enough connection for streaming high-definition video.

8. Consider reducing the display resolution of your streaming device. Lower resolutions require less bandwidth and can help prevent buffering.

9. If you’re streaming wirelessly, ensure that your device is within range of the wireless LAN and that there are no physical obstructions.

10. Disable any cloud computing services or automatic downloads that may be using up bandwidth in the background.

11. Disconnect any devices that may be causing interference in the ISM radio band, such as cordless telephones or microwave ovens.

12. Reset your IP address by turning off your router for a few minutes and then turning it back on.

13. Clear the data buffer of your streaming app. This can help resolve buffering issues that may be caused by a temporary glitch.

14. If possible, connect your streaming device directly to your router using an Ethernet cable. This can provide a more stable and faster connection.

15. Consider using a mesh networking system to improve your home’s Wi-Fi coverage and reduce the chances of buffering.

16. If all else fails, reach out to your internet service provider for assistance. They may be able to troubleshoot any network issues that could be causing buffering problems.

Switch your router to 5 GHz

Switching your router to 5 GHz can help minimize video buffering and fix streaming issues. By utilizing the 5 GHz frequency, you can experience faster and more reliable internet access, especially when streaming high-definition videos or using applications that require a stable connection.

To switch your router to 5 GHz, follow these steps:

1. Open your router’s settings page. You can usually access this by typing your router’s IP address into your web browser.

2. Locate the wireless settings section. This may be labeled as “Wireless,” “Wi-Fi,” or something similar.

3. Look for an option to switch between 2.4 GHz and 5 GHz frequencies. Select the 5 GHz option.

4. Save the changes and wait for your router to reboot.

By switching to 5 GHz, you can avoid interference from other devices that may be using the common 2.4 GHz frequency. This can help improve your streaming experience by reducing buffering and ensuring a smoother playback.

Additionally, make sure your devices are connected to the 5 GHz network. You can do this by selecting the appropriate network name (SSID) in your device’s Wi-Fi settings. Keep in mind that not all devices support 5 GHz, so check your device’s specifications or consult the manufacturer’s website if you’re unsure.

In some cases, you may need to adjust the channel settings on your router to further optimize your connection. Experiment with different channels to find the one that offers the best performance.

Remember to keep your router’s firmware up to date, as manufacturers often release updates that can improve performance and fix bugs. Check the manufacturer’s website regularly for any available updates.

Switching your router to 5 GHz can be an effective solution to minimize video buffering and fix streaming issues. Enjoy uninterrupted streaming and a seamless online experience with this simple adjustment.

Upgrade your internet service

1. Check your internet speed: Use an online speed test to determine if your current internet service meets the recommended speed for streaming.

2. Upgrade your plan: If your internet speed is below the recommended level, consider upgrading your plan to a higher speed option.

3. Connect to a wired network: For the most stable connection, use an Ethernet cable to connect your device directly to your router.

4. Optimize your Wi-Fi: If you prefer a wireless connection, make sure your router is placed in a central location, away from obstructions, and use a strong password to secure your network.

5. Reduce network congestion: Limit the number of devices connected to your network while streaming to avoid bandwidth issues.

6. Close unnecessary applications: Shut down any background processes or applications that may be using up your bandwidth.

7. Clear your browser cache: Regularly clearing your browser cache can help improve streaming performance.

8. Update your streaming app: Make sure you’re using the latest version of your streaming application to access the latest performance improvements.

9. Disable hardware acceleration: In some cases, disabling hardware acceleration in your streaming app’s settings can help with buffering issues.

10. Restart your device: Sometimes a simple restart can resolve streaming issues by clearing temporary glitches.

11. Check for software updates: Keep your operating system and streaming app up to date to ensure compatibility and performance improvements.

12. Use a different browser or device: If you’re experiencing buffering on one browser or device, try switching to another to see if the issue persists.

13. Use a wired connection for high-definition video: When streaming high-definition content, prioritize a wired connection for a smoother experience.

14. Consider a mesh network: If you have a large home or multiple floors, a mesh network can provide better coverage and reduce buffering in different areas.

15. Scan for malware: Run a scan using trusted antivirus software like Avast to ensure your device is not infected with malware that may affect streaming performance.

16. Contact your internet service provider: If you’ve tried all the above tips and are still experiencing buffering issues, reach out to your internet service provider for further assistance.

Upgrade your internet service today and enjoy uninterrupted streaming of your favorite content.

Delete your browser cache and temporary files

To minimize video buffering and fix streaming issues, it’s important to ensure that your browser cache and temporary files are regularly cleared. These files can build up over time and affect your streaming experience. Here’s how you can delete them:

1. For Google Chrome users:
– Click on the three-dot menu icon in the top-right corner of the browser window.
– Select “Settings” from the drop-down menu.
– Scroll down and click on “Privacy and security” in the left sidebar.
– Under the “Privacy and security” section, click on “Clear browsing data.”
– Check the boxes next to “Cached images and files” and “Cookies and other site data.”
– Click on the “Clear data” button to delete these files.

2. For Mozilla Firefox users:
– Click on the three-bar menu icon in the top-right corner of the browser window.
– Select “Options” from the drop-down menu.
– In the left sidebar, click on “Privacy & Security.”
– Scroll down to the “Cookies and Site Data” section.
– Click on the “Clear Data” button.
– Check the boxes next to “Cached Web Content” and “Cookies and Site Data.”
– Click on the “Clear” button to delete these files.

3. For Microsoft Edge users:
– Click on the three-dot menu icon in the top-right corner of the browser window.
– Select “Settings” from the drop-down menu.
– Scroll down and click on “Privacy, search, and services” in the left sidebar.
– Under the “Clear browsing data” section, click on “Choose what to clear.”
– Check the boxes next to “Cached images and files” and “Cookies and other site data.”
– Click on the “Clear” button to delete these files.

Regularly clearing your browser cache and temporary files will help improve your streaming experience by ensuring that your browser has the most up-to-date data. This can help prevent buffering and other streaming issues.

Reduce the video quality

To minimize video buffering and fix streaming issues, reducing the video quality can greatly help. When streaming media, such as videos, over the internet, the quality of the video can have a significant impact on buffering and streaming performance.

Lowering the video quality can reduce the amount of data that needs to be transferred, resulting in a smoother streaming experience. Here’s how you can do it:

1. Adjust the video quality settings: Many streaming platforms, like YouTube and Hulu, allow you to manually select the video quality. Look for the settings or gear icon on the video player and choose a lower quality option, such as 480p or 720p, instead of 1080p or higher.

2. Use a mobile app: If you’re experiencing buffering issues on a mobile device, consider using a dedicated app for streaming instead of the browser. These apps often have built-in optimization features that can automatically adjust the video quality based on your internet connection.

3. Check your internet connection: Slow internet speeds can also contribute to buffering issues. Make sure you have a stable and fast internet connection. If possible, connect your device directly to the router using an Ethernet cable or position yourself closer to the wireless router to improve signal strength.

4. Close background processes: Other applications or processes running on your device can consume bandwidth, leading to buffering. Close any unnecessary background processes or applications to free up resources for streaming.

Remember, reducing the video quality may result in a slightly lower resolution or image quality, but it can significantly improve streaming performance. Experiment with different quality settings to find the right balance between video quality and smooth streaming.

Download content instead of streaming

1. Check your internet connection: Make sure you have a stable and fast internet connection. Consider upgrading your plan if necessary.

2. Choose lower resolutions: Higher resolutions like 1080p require more bandwidth. Opt for lower resolutions if you’re experiencing buffering issues.

3. Close unnecessary applications: Background processes can consume bandwidth and affect streaming quality. Close any unused applications to free up resources.

4. Use a wired connection: Wireless connections can be more prone to interference. Connect your device directly to the router using an Ethernet cable for a more stable connection.

5. Restart your devices: Sometimes a simple restart can resolve buffering issues. Restart your computer, tablet, or smartphone and try streaming again.

6. Disable sleep mode: Sleep mode can interrupt streaming. Adjust your device settings to prevent it from going into sleep mode while streaming.

7. Update your router firmware: Outdated router firmware can cause connectivity issues. Check for updates on your router manufacturer’s website.

8. Close other devices: If multiple devices are connected to the same network, they may be using bandwidth and causing buffering. Disconnect or disable unused devices.

9. Clear your browser cache: Cached data can slow down streaming. Clear your browser cache regularly to improve performance.

10. Consider mesh networking: Mesh networking systems can improve Wi-Fi coverage and reduce buffering in larger homes or offices.

11. Try a different device: If you’re experiencing buffering on one device, try streaming on a different device to see if the issue persists.

12. Limit other internet activities: Avoid downloading large files or running bandwidth-intensive applications while streaming to prioritize streaming quality.

13. Disable ad-blockers: Some ad-blockers can interfere with streaming. Temporarily disable them to see if it improves your streaming experience.

14. Optimize your video player: Adjust your video player settings for smoother streaming. Look for options like hardware acceleration or buffer size adjustment.

15. Consider using a VPN: A VPN can sometimes improve streaming performance by bypassing network congestion or accessing region-restricted content.

16. Download content for offline viewing: If buffering issues persist, consider downloading the videos instead. This way, you can watch them without interruptions.

Turn off your VPN

If you’re experiencing video buffering or streaming problems, one possible solution is to turn off your VPN. While VPNs can provide security and privacy benefits, they can also impact your internet speed and cause buffering when streaming videos. By disabling your VPN, you can potentially improve your streaming experience.

To turn off your VPN, follow these steps:

1. Locate the VPN software or app on your device.
2. Open the VPN software or app.
3. Look for the option to disconnect or turn off the VPN connection.
4. Click on the option to disable the VPN.
5. Wait for the VPN to disconnect and confirm that it is turned off.

Once your VPN is turned off, try streaming the video again and check if the buffering issue has been resolved. If the problem persists, there may be other factors contributing to the buffering, such as a slow internet connection or network congestion.

If you still encounter buffering after turning off your VPN, consider the following tips to further minimize buffering and improve your streaming experience:

– Check your internet connection: Ensure that you have a stable and fast internet connection. You can test your internet speed using online tools or contacting your internet service provider.
– Close unnecessary applications: Close any background processes or applications that might be consuming bandwidth and affecting your streaming performance.
– Restart your device: Sometimes, a simple restart can resolve temporary glitches or issues that may be causing buffering.
– Clear your browser cache: Clearing your browser’s cache can help improve streaming performance by removing temporary files and data that may be slowing down your connection.
– Close other devices on your network: If multiple devices are connected to your network and using bandwidth, it can impact your streaming quality. Consider disconnecting or pausing downloads on other devices while streaming.
– Adjust video quality settings: Lowering the video quality settings can reduce the amount of data being transferred and minimize buffering. Look for options like “Quality” or “Resolution” in the video player settings.
– Use a wired connection: If possible, connect your device directly to your router using an Ethernet cable for a more stable and reliable internet connection.
– Update your software and drivers: Ensure that your device’s software, including your operating system and streaming applications, are up to date. Outdated software can sometimes cause compatibility issues and affect streaming performance.

You’ve run out of premium mobile data

16 Tips to Minimize Video Buffering and Fix Streaming Issues

1. Check your internet connection: Ensure you have a stable and reliable internet connection. If possible, connect your device to a wireless LAN for better performance.

2. Optimize your network: Make sure your router is placed in an optimal location and not obstructed. Additionally, consider upgrading your internet plan for higher bandwidth.

3. Close unnecessary applications: Shut down any background processes or applications that may be using up your device’s central processing unit and random-access memory.

4. Clear cache and cookies: Regularly clear your browser’s cache and cookies to improve streaming performance and prevent loading issues.

5. Update your software: Keep your application software and device firmware up to date to ensure compatibility with the latest streaming technologies.

6. Choose a lower display resolution: Adjust the video quality settings to a lower resolution if you experience frequent buffering. This can help reduce the strain on your internet connection.

7. Pause the video to buffer: Allow the video to buffer for a few moments before playing it to ensure a smooth playback experience.

8. Disable auto-play: Turn off the auto-play feature on streaming platforms to prevent videos from automatically starting and potentially causing buffering issues.

9. Limit simultaneous connections: If multiple devices are using your internet connection, limit the number of simultaneous connections to prioritize streaming quality.

10. Use an Ethernet connection: If possible, connect your device directly to your router using an Ethernet cable for a more stable and reliable internet connection.

11. Disable VPN or proxy: Virtual Private Networks (VPNs) and proxies can sometimes interfere with streaming. Temporarily disable them to see if it improves buffering.

12. Check for background downloads: Ensure there are no ongoing downloads on your device that may be consuming your internet bandwidth and causing buffering.

13. Disable ad-blockers: Some ad-blockers can interfere with video streaming. Try disabling them temporarily to see if it resolves buffering issues.

14. Restart your device: Sometimes a simple restart can resolve buffering problems. Turn off your device, wait a few seconds, and then turn it back on.

15. Contact your internet service provider: If you consistently experience buffering despite trying the above tips, reach out to your internet service provider to check for any network issues.

16. Consider machine learning: Advanced technologies like machine learning can analyze your streaming patterns and optimize your internet connection for smoother playback. Explore options that offer this capability.

With these tips, you can minimize video buffering and enjoy uninterrupted streaming on your favorite platforms like YouTube or W (British TV channel). Say goodbye to the frustration of waiting for videos to load and experience seamless entertainment on your iPhone or other devices.

Your phone needs a reset

Resetting Your Phone to Minimize Video Buffering and Fix Streaming Issues

Is your phone constantly buffering while you’re trying to stream videos? Don’t worry, we’ve got you covered. One effective solution is to reset your phone. This simple step can help resolve many streaming issues and minimize buffering interruptions.

To reset your phone, follow these steps:

1. Android: Go to Settings > System > Reset options. Tap on “Erase all data (factory reset)” and confirm your selection. Note that this will erase all data on your phone, so make sure to back up your important files and contacts beforehand.
iOS: Go to Settings > General > Reset. Tap on “Erase All Content and Settings” and confirm your selection. Remember to back up your data before proceeding.

2. After resetting, set up your phone again and connect to your Wi-Fi network.

3. Launch the streaming app and try playing a video. You should notice a significant improvement in buffering and streaming quality.

If resetting your phone didn’t completely resolve the issue, here are a few additional tips to consider:

1. Check your internet connection: Ensure that you have a stable and fast internet connection. A slow or unreliable connection can lead to buffering problems. You can try restarting your modem or router to improve the connection.

2. Close unnecessary apps: Background processes and applications can consume valuable resources, leading to buffering issues. Close any unnecessary apps running in the background to free up memory and processing power.

3. Update your streaming app: Make sure you are using the latest version of the streaming app. Developers often release updates that address buffering and streaming problems.

4. Reduce video quality: If you’re experiencing buffering on a slow connection, try lowering the video quality settings in the streaming app. This will help reduce the demand on your internet bandwidth.

5. Clear app cache: Over time, app cache can accumulate and affect the performance of your streaming app. Clearing the cache can help resolve buffering issues. Go to Settings > Apps (or Application Manager) > [Streaming App]. Tap on “Clear Cache.”

Your phone’s software needs an update

Ensure your phone’s software is up to date to minimize video buffering and fix streaming issues.

1. Open your phone’s settings and navigate to the software update section.

2. Check for any available updates and install them.

3. Restart your phone after the update is complete.

4. Clear the cache of the streaming app you’re using by going to the app settings and selecting “clear cache.”

5. Close any other apps running in the background that may be using up your phone’s resources.

6. Check your internet connection. Make sure you have a strong and stable connection.

7. If you’re using Wi-Fi, try moving closer to your router or consider using a wired connection.

8. Restart your router by unplugging it for a few seconds and then plugging it back in.

9. If you’re using mobile data, check if you have a strong signal and consider switching to a different network if available.

10. If possible, connect your phone to a high-speed network for better streaming performance.

11. Reduce the quality of the video you’re streaming. Lower resolutions require less bandwidth.

12. Close any other devices connected to your network that may be using up bandwidth.

13. Disable any VPN or proxy services that may be slowing down your connection.

14. Try using a different streaming app or website to see if the issue persists.

15. If you’re experiencing buffering while watching YouTube videos, try clearing the app’s cache and disabling any ad blockers.

16. If all else fails, contact your internet service provider for further assistance.

Your streaming app needs an update

1. Check your internet access: Ensure you have a stable and fast internet connection for uninterrupted streaming.

2. Update your application software: Keep your streaming app up to date to benefit from the latest bug fixes and optimizations.

3. Optimize your computer network: Prioritize your streaming device’s network traffic to minimize buffering and interruptions.

4. Consider the Internet of Things: Ensure that other devices connected to your network are not consuming excessive bandwidth, causing buffering issues.

5. Verify your Domain Name System (DNS) settings: Switch to a faster DNS server to improve streaming performance.

6. Evaluate your television’s settings: Adjust the picture quality settings on your TV to optimize streaming performance.

7. Optimize your router: Position your router in a central location and ensure it has the latest firmware to enhance streaming speed and reliability.

8. Optimize your tablet or smartphone: Close unnecessary background apps and clear cache to free up resources for smooth streaming.

9. Check your device’s processing power: Ensure your device has sufficient processing power to handle high-resolution streaming.

10. Optimize internet video settings: Adjust the streaming quality settings within your app to match your internet connection speed.

11. Minimize interruptions: Disable any notifications or alarms that may interrupt your streaming session.

12. Check your bandwidth: Make sure you have sufficient bandwidth to support high-quality streaming without buffering.

13. Ensure a stable connection to the World Wide Web: Avoid streaming during peak hours or use a wired connection for a more stable experience.

14. Restart your device: A simple restart can resolve temporary issues that may cause buffering or streaming problems.

15. Clear temporary files: Regularly clear your device’s cache and temporary files to optimize streaming performance.

16. Consider cloud computing: Explore streaming services that utilize cloud servers for faster and more reliable streaming.

Plan your streaming for non-peak hours

1. Choose non-peak hours: Stream during off-peak times when internet traffic is lower, such as early morning or late at night.

2. Check your network: Ensure your computer, tablet, or smartphone is connected to a stable and reliable internet network.

3. Optimize your router: Position your router centrally and away from interference sources like walls or other electronic devices.

4. Close bandwidth-consuming apps: Close any unnecessary background processes or apps that may consume bandwidth and cause buffering issues.

5. Upgrade your internet plan: Consider upgrading your internet plan to a higher bandwidth if you frequently experience buffering problems.

6. Clear your cache: Clear your browser cache regularly to free up space and improve streaming performance.

7. Disable hardware acceleration: If experiencing buffering on a computer, disable hardware acceleration in your browser settings.

8. Use a wired connection: Whenever possible, connect your device directly to the router using an Ethernet cable for a more stable connection.

9. Limit concurrent streaming: Avoid streaming on multiple devices simultaneously to reduce strain on your network.

10. Adjust video quality: Lower the video quality settings on streaming platforms to reduce buffering and ensure smoother playback.

11. Update your device: Keep your computer, tablet, or smartphone up to date with the latest software and firmware updates for optimal performance.

12. Disable ad-blockers: Some ad-blockers can interfere with streaming, so try disabling them temporarily to see if it improves buffering.

13. Switch browsers: If you’re experiencing buffering on one browser, try using a different browser to see if it resolves the issue.

14. Restart your device: Occasionally, restarting your device can help clear any temporary glitches and improve streaming performance.

15. Optimize Wi-Fi settings: Adjust your Wi-Fi settings, such as channel selection or transmission power, for better signal strength and coverage.

16. Contact your ISP: If buffering issues persist, contact your internet service provider (ISP) to troubleshoot and ensure there are no network-related problems.

Upgrade your router

Upgrade Your Router

Is your video constantly buffering and causing streaming issues? It might be time to upgrade your router. A slow or outdated router can hinder your internet experience, especially when it comes to video streaming. Follow these tips to minimize buffering and fix streaming issues:

1. Check your internet speed: Use an online speed test tool to determine your current internet speed. If it’s below the recommended speed for streaming, consider upgrading your plan.

2. Upgrade your router: Investing in a new router can significantly improve your internet connection and reduce buffering. Look for routers with the latest technology and higher bandwidth capabilities.

3. Optimize router placement: Place your router in a central location, away from obstructions and interference from other devices. This ensures better signal strength and coverage throughout your home.

4. Update router firmware: Regularly check for firmware updates from the router manufacturer’s website and install them to enhance performance and security.

5. Secure your network: Protect your network with a strong password to prevent unauthorized access, which can slow down your internet speed.

6. Reduce interference: Keep your router away from other electronics, such as cordless phones and microwaves, which can interfere with the router’s signal.

7. Enable Quality of Service (QoS): If your router supports it, enable QoS to prioritize video streaming traffic, ensuring a smoother streaming experience.

8. Use a wired connection: Whenever possible, connect your streaming device directly to the router using an Ethernet cable. This eliminates any wireless interference and provides a more stable connection.

9. Close unnecessary background processes: Close any applications or processes running in the background that might be consuming bandwidth and affecting your streaming quality.

10. Limit connected devices: If you have multiple devices connected to your network, disconnect any unnecessary ones to free up bandwidth for streaming.

11. Clear your browser cache: Regularly clear your browser’s cache and cookies to optimize performance while streaming videos online.

12. Consider a mesh network: If you have a large home or multiple floors, a mesh network system can improve Wi-Fi coverage and eliminate dead spots.

13. Upgrade your internet plan: If you consistently experience buffering issues, consider upgrading to a higher-speed internet plan that can better handle video streaming.

14. Use an ad-blocker: Ads can consume bandwidth and slow down your streaming experience. Install an ad-blocker on your browser or streaming device to minimize interruptions.

15. Reduce video quality: Lowering the video quality can reduce buffering issues, especially if you have a slower internet connection. Most streaming platforms allow you to adjust the video quality settings.

16. Restart your router: Sometimes a simple router reboot can resolve temporary issues and improve your streaming experience.

Upgrade your router today to enjoy seamless video streaming without buffering. With these tips, you’ll be able to fix streaming issues and optimize your internet connection for a smooth and uninterrupted streaming experience.

Connect your streaming devices using Ethernet instead of Wi-Fi

One of the most effective ways to minimize video buffering and fix streaming issues is by connecting your streaming devices using Ethernet instead of relying on Wi-Fi. By using an Ethernet cable to directly connect your device to your router, you can ensure a stable and reliable connection for uninterrupted streaming.

Why choose Ethernet over Wi-Fi?

While Wi-Fi is convenient and allows for wireless connectivity, it can sometimes be prone to interference and signal dropouts, leading to buffering and streaming issues. Ethernet, on the other hand, provides a direct and dedicated connection to your router, resulting in faster and more reliable data transfer.

How to connect your devices using Ethernet

1. Locate the Ethernet port on your streaming device. This is typically found on the back or side of the device.
2. Connect one end of the Ethernet cable to the Ethernet port on your streaming device.
3. Connect the other end of the Ethernet cable to an available Ethernet port on your router.
4. Once connected, your streaming device should automatically detect the Ethernet connection and prioritize it over Wi-Fi.

Additional tips for optimizing your Ethernet connection

– If your router is located far from your streaming device, consider using a longer Ethernet cable or using Ethernet extenders to bridge the distance.
– Ensure that your Ethernet cable is in good condition and not damaged, as this can affect the quality of the connection.
– If you have multiple streaming devices, consider connecting them all via Ethernet to avoid congestion on your Wi-Fi network.
– Restart your router and streaming device to refresh the connection and clear any potential issues.

By connecting your streaming devices using Ethernet, you can enjoy smoother and buffer-free streaming. Take advantage of this reliable and stable connection option to enhance your streaming experience.

Sources:
– Microsoft.com
– Router (computing)
– Ethernet cable

No Bootable Device After BIOS Update – Fix & Recovery

Having a “no bootable device” error after a BIOS update can be a frustrating experience. In this article, we will explore the necessary steps to fix and recover from this issue.

Check the boot order in BIOS settings: Ensure that the bootable device (usually the hard drive or SSD) is set as the first priority in the boot order. This will allow your computer to detect and boot from the correct device.

Privacy & Transparency in BIOS Updates

Microsoft is committed to ensuring your privacy and providing transparent updates for your BIOS. We understand the frustration of encountering a “No Bootable Device” error after a BIOS update and are here to help you fix and recover from this issue.

1. Check the Boot Order: Start by checking the boot order in your BIOS settings. Ensure that your hard drive or solid-state drive (SSD) is set as the primary boot device. This will ensure that your system boots from the correct drive.

2. Verify UEFI Compatibility: If you’re using Windows 10 or a modern operating system, make sure your system is running in UEFI mode rather than the legacy BIOS mode. UEFI offers improved security and performance benefits.

3. Update Firmware: It’s crucial to keep your motherboard’s firmware up to date. Visit the manufacturer’s website, such as Asus or Dell, and download the latest BIOS update for your specific model. Follow the instructions provided to safely update your motherboard’s firmware.

4. Master Boot Record (MBR) vs. GUID Partition Table (GPT): Ensure that your hard drive or SSD is partitioned using the correct format. For modern systems, it is recommended to use GPT partitioning, as it supports larger drives and offers better compatibility with UEFI.

5. Recovering from a Failed BIOS Update: If you’re experiencing issues after a failed BIOS update, you can try to recover by using a bootable USB drive. Create a bootable USB with a compatible operating system, such as Ubuntu, and use it to access your system and potentially fix any boot-related problems.

6. Seek Professional Assistance: If you’ve tried the above steps and are still unable to resolve the “No Bootable Device” error, it may be best to seek professional assistance. Reach out to the manufacturer’s support team or consult a qualified technician who specializes in BIOS-related issues.

At Microsoft, we prioritize your privacy and strive to provide transparent and helpful support for BIOS updates.

An updated BIOS is the key to unlocking your device’s full potential and ensuring its smooth operation.

PC Not Booting after BIOS Update: Recovery and Repair Methods

  1. Check Boot Order
    • Restart the computer and enter the BIOS settings by pressing the designated key (such as F2 or Delete) during startup.
      Check Boot Order
Restart the computer and enter the BIOS settings by pressing the designated key (such as F2 or Delete) during startup.
    • Navigate to the “Boot” or “Boot Order” section within the BIOS menu.
    • Ensure that the hard drive or SSD containing the operating system is listed as the first boot device.
    • If necessary, use the arrow keys to move the boot device to the top of the list.
    • Save the changes and exit the BIOS settings.
      If necessary, use the arrow keys to move the boot device to the top of the list.
Save the changes and exit the BIOS settings.
  2. Reset BIOS to Default Settings
    • Turn off the computer and unplug it from the power source.
    • Locate the CMOS battery on the motherboard.
      Turn off the computer and unplug it from the power source.
Locate the CMOS battery on the motherboard.
    • Remove the CMOS battery and wait for approximately 5 minutes.
    • Reinsert the CMOS battery and make sure it is properly seated.
    • Plug the computer back into the power source and turn it on.
  3. Perform a BIOS Recovery
    • Visit the manufacturer’s website and download the latest BIOS update for your specific computer model.
    • Create a bootable USB drive or CD/DVD with the BIOS update file.
      Visit the manufacturer's website and download the latest BIOS update for your specific computer model.
Create a bootable USB drive or CD/DVD with the BIOS update file.
    • Insert the bootable USB drive or CD/DVD into the computer.
    • Restart the computer and enter the BIOS settings.
    • Navigate to the “BIOS Recovery” or “BIOS Flashback” section within the BIOS menu.
    • Select the option to update or recover the BIOS.
      Navigate to the "BIOS Recovery" or "BIOS Flashback" section within the BIOS menu.
Select the option to update or recover the BIOS.
    • Follow the on-screen prompts to select the BIOS update file from the bootable device.
    • Wait for the BIOS recovery process to complete.
    • Restart the computer.
  4. Consult Manufacturer Support
    • If the above methods do not resolve the issue, contact the manufacturer’s support team for further assistance.
    • Provide them with detailed information about the problem and the steps you have already taken.
      If the above methods do not resolve the issue, contact the manufacturer's support team for further assistance.
Provide them with detailed information about the problem and the steps you have already taken.
    • Follow their instructions for any additional troubleshooting or repair methods.

Accessing Data When BIOS Update Failed

If your BIOS update failed and you’re now facing the issue of a “No Bootable Device” error, don’t worry. We have some steps that can help you fix and recover your system.

First, make sure your computer is powered off. Then, follow these steps:

1. Check your hard drive connections: Open up your computer and ensure that the cables connecting your hard drive to the motherboard are securely plugged in. Sometimes, a loose connection can cause booting issues.

2. Reset your BIOS settings: Locate the CMOS battery on your motherboard and remove it for a few minutes. This will reset your BIOS settings to their default values. After a few minutes, reinsert the battery and power on your computer.

3. Update your BIOS using a USB drive: If the previous steps didn’t solve the issue, you can try updating your BIOS through a USB drive. Visit the manufacturer’s website and download the latest BIOS update for your specific model. Follow their instructions to create a bootable USB drive and update the BIOS.

4. Contact the manufacturer: If you’ve followed all the steps above and the issue persists, it’s best to reach out to your computer manufacturer’s support team. They will be able to provide further assistance and guidance.

Remember, BIOS updates can sometimes be tricky, so it’s important to follow instructions carefully and ensure that your computer is compatible with the update.

If you have any further questions or need additional help, feel free to consult online communities like Reddit or search for solutions on Google.

python
# Sample code outline
import os

def update_bios():
# Add code to update the BIOS firmware
pass

def check_bootable_device():
# Add code to check for bootable devices
pass

def main():
# Add code to handle user inputs and execute the required functionality
pass

if __name__ == "__main__":
main()

This basic outline defines a structure for your tool, including placeholder functions for updating BIOS firmware and checking bootable devices.

Troubleshooting No Bootable Device Issues

If you are experiencing a “No Bootable Device” error after a BIOS update, follow these troubleshooting steps to fix and recover your system.

First, ensure that all external devices, such as USB drives or memory cards, are disconnected from your computer. Sometimes, these devices can interfere with the boot process.

Next, check your BIOS settings to ensure that the correct boot order is selected. To access the BIOS setup, restart your computer and press the designated key (usually displayed during startup) to enter the BIOS menu. Once inside the BIOS, navigate to the “Boot” or “Boot Order” section and make sure that the device containing your operating system is set as the first boot option. Save any changes made.

If the issue persists, it may be related to the Master Boot Record (MBR) or partitioning on your disk. You can attempt to repair the MBR by using the Windows 10 installation media. Insert the installation media and restart your computer. During startup, press the key to access the boot menu and select the installation media. Choose “Repair your computer” and then “Troubleshoot.” From there, select “Command Prompt” and enter the following commands:

bootrec /fixmbr
bootrec /fixboot
bootrec /rebuildbcd

These commands will repair the MBR and rebuild the boot configuration data.

If you have a solid-state drive (SSD) with NVM Express (NVMe) technology, ensure that your BIOS is configured to support NVMe drives. Some older BIOS versions may not have this capability, resulting in the “No Bootable Device” error. Check the manufacturer’s website for BIOS updates specific to your computer model and install any available updates.

In some cases, the issue may be specific to certain computer models. For example, Asus laptops have been known to encounter this error after a BIOS update. Visit the manufacturer’s support website and search for any known issues or solutions related to your specific model.

If none of the above steps resolve the issue, it is possible that the BIOS update was not successful or compatible with your system. Contact your computer manufacturer’s support for further assistance or consider seeking help from online communities like Reddit or Google forums, where other users may have encountered similar issues.

Fixing Boot Device Not Found Error

If you recently updated your BIOS and are now encountering the “No Bootable Device” error, there are a few straightforward steps you can take to resolve this issue and get your computer up and running again.

First, ensure that all external devices, such as USB drives or external hard drives, are disconnected from your computer. Sometimes, the BIOS may be trying to boot from one of these devices instead of your primary boot device.

Next, restart your computer and enter the BIOS setup by pressing the appropriate key during startup (this key varies depending on your computer manufacturer, but it is typically displayed on the screen during boot). Once in the BIOS setup, navigate to the “Boot” or “Boot Options” section.

Within the “Boot” menu, locate the “Boot Mode” or “Boot Priority” option. Ensure that the correct boot mode is selected (UEFI or Legacy) and that your primary boot device, typically your hard drive or SSD, is listed as the first boot option. Save any changes made in the BIOS setup and exit.

If the issue persists, it may be necessary to check the physical connections of your hard drive or SSD. Ensure that the drive is securely connected to the motherboard and that all cables are properly seated.

If you are still experiencing the “No Bootable Device” error after trying the above steps, it is possible that your boot device may have been corrupted. In this case, you may need to reinstall your operating system or restore from a backup.

Remember to regularly backup your important files to prevent data loss in the event of a boot device failure.

Please note that these instructions are general guidelines and may vary depending on your specific computer model and BIOS version. For more detailed and personalized instructions, we recommend referring to the documentation provided by your computer manufacturer.

Recovering Data from Unbootable PC


No Bootable Device After BIOS Update – Fix & Recovery


No Bootable Device After BIOS Update – Fix & Recovery

Step Description
Step 1 Check the boot order in BIOS settings to ensure the proper device is selected as the primary boot option.
Step 2 Try booting from a bootable USB or DVD to see if the system recognizes the device and allows you to access your data.
Step 3 If step 2 fails, remove the hard drive from the unbootable PC and connect it to another working computer as a secondary drive.
Step 4 Access the data on the unbootable hard drive from the working computer and copy the important files to a safe location.
Step 5 Once the data is recovered, reinsert the hard drive into the original unbootable PC and attempt to restore the system using a recovery disk or a fresh installation of the operating system.
Step 6 If all else fails, consider seeking the assistance of a professional data recovery service to retrieve your files.


Creating a Bootable Drive and Data Recovery for Crashed Computers

To create a bootable drive and recover data from a crashed computer after a BIOS update, follow these simple steps:

1. Prepare a USB drive: Connect a USB drive with sufficient storage capacity to your personal computer. Make sure it is empty, or back up any important data before proceeding.

2. Download a bootable drive creation tool: Visit the Microsoft website and download the Media Creation Tool. This tool will help you create a bootable drive to fix the “No Bootable Device” issue.

3. Create a bootable drive: Open the downloaded Media Creation Tool and follow the on-screen instructions to create a bootable USB drive. Make sure to select the correct version of Microsoft Windows that matches your crashed computer.

4. Access BIOS/UEFI settings: Restart your crashed computer and repeatedly press the key displayed on the screen to enter the BIOS/UEFI settings. The key varies depending on the manufacturer (e.g., Acer, Dell) and the model (e.g., Acer Aspire, Dell Optiplex). Consult the user manual or the manufacturer’s website for more information.

5. Change boot order: In the BIOS/UEFI settings, locate the “Boot” or “Boot Order” section. Use the arrow keys to move the USB drive to the top of the boot order list. Save the changes and exit the BIOS/UEFI settings.

6. Insert the bootable drive: Insert the bootable USB drive into the crashed computer and restart it. The computer should now boot from the USB drive.

7. Follow recovery options: Once the computer boots from the USB drive, you will be presented with recovery options. Select the appropriate option to troubleshoot and recover your crashed computer. You may need to refer to Microsoft’s official documentation for specific recovery steps.

8. Recover data: If your primary goal is to recover data from the crashed computer, select the data recovery option provided in the recovery menu. Follow the on-screen instructions to retrieve your important files and documents.

Remember to back up your recovered data to an external storage device or cloud storage to prevent future data loss.