Bought game on Steam not in library – How to fix

Have you purchased a game on Steam only to find it missing from your library? Here’s how to fix that.

Verify Game License and Ownership

To verify game license and ownership for a game purchased on Steam but not appearing in your library, first check your purchase history on the Steam website. If the game is listed there, try restarting Steam to refresh your library. If the game still doesn’t show up, contact Steam support for assistance. They may be able to help verify your ownership and restore the game to your library. It’s important to provide any relevant information or proof of purchase when reaching out to Steam support.

Review Hidden Games and Library Folders

  • Open Steam and log into your account
    • Click on Steam in the top-left corner of the screen
    • Select Settings from the drop-down menu
    • Go to the Downloads tab
    • Click on Steam Library Folders
  • Check for Hidden Games
    • In the Steam Library Folders window, make sure there are no additional library folders listed
    • If there are, select the folder and click Remove Library Folder
    • Close and re-open Steam to see if the game appears in your library

Complete Purchase and Network Checks

To fix the issue of a game purchased on Steam not appearing in your library, start by making sure the purchase was completed successfully. Check your email for a confirmation of the purchase and verify the transaction in your Steam account. If the purchase was successful, try refreshing your library by logging out and back into your Steam account. If the game still doesn’t show up, check your network connection to ensure it is stable and not causing any issues with syncing your library. You can also try restarting your computer and Steam client to see if that resolves the issue.

If the problem persists, reach out to Steam support for further assistance.

Seek Assistance from Steam Support

Submit a ticket to Steam Support detailing the issue and they should be able to help you resolve the problem. It is important to provide as much information as possible in your ticket to expedite the process. Additionally, you can also try searching for solutions on forums like Reddit, as other users may have encountered the same issue and found a solution.

F.A.Q.

Why is a game missing from my Steam Library?

A game missing from your Steam Library may be due to the game being installed on your computer, but not owned by your account or no longer accessible through Family Sharing. Check if you have multiple Steam accounts to see if this is the issue.

Why can’t I download the game I bought on Steam?

It seems like you are unable to download the game you bought on Steam. This issue could be due to bandwidth settings. To fix this, go to Steam settings, select ‘Downloads’, then ‘Limit Bandwidth’ to adjust your settings based on your internet speed.

Why are my downloaded games not showing up on Steam?

Your downloaded games may not be showing up on Steam because the game files have been moved or stored in a custom location that Steam cannot detect. To resolve this issue, you can manually add the existing game folders to the Steam client using Steam Manager.

Where do I find my purchased games on Steam?

To find your purchased games on Steam, you can log in to your Steam account through the Steam application. Click your profile name in the upper right hand corner and select “Account Details.” From there, click on “View purchase history” to see a list of your Steam Store transactions, Market purchases, and in-game items or currency purchases.

How to Fix HDD Changed from NTFS to RAW

In this article, I will discuss how to fix an HDD that has changed from NTFS to RAW.

Symptoms and Causes of Disk Displaying as RAW

When a hard disk drive changes from NTFS to RAW, it can be a frustrating experience. Some common symptoms of this issue include an error message stating that the disk needs to be formatted before use, or the disk simply showing up as RAW in the file system.

This change can be caused by various factors, such as data corruption, bad sectors on the disk, improper system shutdowns, or even a virus infection. Additionally, incorrect disk management or partitioning processes can also contribute to the disk displaying as RAW.

To diagnose the problem, you can use the CHKDSK command in the command-line interface to check the disk for errors and attempt to repair them. Open Command Prompt by pressing Windows Key + R, then type cmd.exe and press Enter. In the Command Prompt window, type chkdsk /f X: (replace X with the letter of the RAW disk) and press Enter.

Another possible solution is to use a third-party tool like EaseUS Partition Master to recover and repair the RAW disk. This software can help you recover lost data, fix file system errors, and convert the disk back to NTFS.

If the issue persists after attempting these solutions, it may be necessary to seek professional help to recover the data on the disk and repair any underlying hardware issues that may be causing the problem.

Effective Methods for Resolution

  • Use CMD to Convert RAW to NTFS:

    • Press Win + R to open the Run dialogue box.
    • Type cmd and press Ctrl + Shift + Enter to run Command Prompt as administrator.
    • Type chkdsk /f G: (replace G: with the drive letter of the RAW HDD) and press Enter.
    • Type chkdsk /r G: and press Enter.
  • Use Data Recovery Software:

    • Download and install a reliable data recovery software program.
    • Run the software and select the RAW HDD as the target drive.
    • Follow the software instructions to recover and save your data to a different storage device.
  • Format RAW HDD to NTFS:

    • Open Disk Management by pressing Win + X and selecting Disk Management.
    • Right-click on the RAW HDD and select Format.
    • Choose NTFS as the file system and follow the on-screen instructions to format the drive.

Data Recovery and Conversion Strategies

When dealing with a hard disk drive that has changed from NTFS to RAW, it is crucial to act quickly to recover your data and convert the drive back to its original state.

First, try using a data recovery tool such as EaseUS Partition Master to retrieve any valuable information from the RAW drive. This software can help you recover lost or inaccessible files and folders.

If the data recovery tool is unable to retrieve your files, you may need to convert the RAW drive back to NTFS. To do this, you can use the Command Prompt on Windows. Open the Command Prompt as an administrator and type “diskpart” to enter the Diskpart utility.

Once in Diskpart, follow these steps:

1. Type “list volume” to display all the volumes on your computer.
2. Identify the RAW drive by looking at the “Type” column.
3. Type “select volume X” (replace X with the volume number of the RAW drive).
4. Type “format fs=ntfs quick” to convert the RAW drive back to NTFS.

After the conversion process is complete, your hard disk drive should be back to its original state and you should be able to access your files again.

FAQ

Why is my hard disk showing RAW instead of NTFS?

Your hard disk is showing RAW instead of NTFS because the system does not recognize the file structure on the partition. This could be due to the drive being formatted for a different system, like Mac®, or if the partition has become corrupted.

Why is my hard drive suddenly RAW?

Your hard drive may suddenly become RAW due to various reasons such as an unsupported file system, damaged file system structure, or being part of a spanned volume or RAID.

How to restore NTFS from RAW?

To restore NTFS from RAW, you can format the RAW partition using Disk Management. Simply right-click on the RAW partition, select Format, choose to perform a quick format, and confirm the action.

How do I fix a RAW hard drive format?

To fix a RAW hard drive format, you can access Disk Management by right-clicking on “This PC” and choosing Manage. From there, select your RAW partition or disk, right-click, and choose Format. Select a file system (such as NTFS) and give it a name. Click Start to begin formatting the drive.

Troubleshoot Very Slow Firefox Loading

Having trouble with slow loading on Firefox? Let’s troubleshoot the issue together.

Optimize Page Loading Speed

Additionally, limit the number of tabs you have open at once as each tab requires resources to load. Consider updating your browser to the latest version to ensure you have access to any performance improvements that have been made.

If you are still experiencing slow loading times, try disabling hardware acceleration in Firefox. This feature can sometimes cause issues with certain hardware configurations.

Lastly, make sure your internet connection is stable and running at an adequate speed. Slow loading times can also be caused by a poor internet connection.

Fine-Tune Firefox Settings

Setting Description
1. Clear Cache Clearing the cache can help speed up Firefox by removing temporary files that may be slowing down the browser.
2. Disable Extensions Some extensions can slow down Firefox, so disabling them can help improve performance.
3. Update Firefox Make sure you are using the latest version of Firefox, as updates often include performance improvements.
4. Disable Hardware Acceleration Turning off hardware acceleration can help if you are experiencing slowdowns or crashes.
5. Adjust Content Process Limit Increasing the content process limit can help improve performance, especially if you have a lot of tabs open.
6. Refresh Firefox Refreshing Firefox can reset it to its default settings and can help fix performance issues.

Manage Add-Ons and Themes

If you suspect that ad blocking software is causing the slow loading, try disabling it temporarily to see if there is any improvement. You can also use the Task Manager on Windows to identify any processes using a lot of resources and close them if necessary.

Another helpful tool is NoScript, which allows you to control what scripts are allowed to run on web pages. Additionally, make sure your computer is free from spyware, viruses, or malware that could be impacting Firefox’s performance.

By troubleshooting these potential issues and managing your add-ons and themes, you can help speed up Firefox’s loading time and improve your browsing experience.

Enhance Performance through Updates

To enhance performance and troubleshoot very slow Firefox loading, start by updating the browser to the latest version. Check for updates by clicking on the menu button, then Help, and finally About Firefox. Updates often contain fixes for bugs and improvements that can boost speed.

If you have add-ons or extensions installed, try disabling them one by one to see if any are causing the slow loading. Ad blocking extensions like UBlock Origin can sometimes slow down browsing speed. Additionally, make sure your computer is free from spyware, viruses, and malware by running a full system scan with a reliable antivirus program.

Clear your browser cache and cookies regularly to improve loading times. If the issue persists, consider checking your computer’s task manager to see if there are any processes hogging resources. Closing unnecessary tabs and programs can also help speed up Firefox loading times.

By keeping your browser and system updated, monitoring resource usage, and troubleshooting potential issues, you can enhance Firefox performance and enjoy faster loading times.

FAQ

Why is Firefox so slow all of a sudden?

Firefox is slow all of a sudden because it may be loading too many extensions when starting up, causing it to use more system resources and slow down its speed.

Is Firefox slow 2023?

Firefox is not slow in 2023.

How do I fix Firefox slow loading?

To fix slow loading in Firefox, you can reset the browser by removing buggy add-ons or setting changes. This will delete add-ons, themes, and download history, and return settings to default. Visit “about:support” and click Refresh Firefox to do this.

Why does Firefox lag so much?

Firefox lags so much because it may accumulate too much data or trying to view too many pages simultaneously. Basic maintenance and updating the browser and add-ons can usually fix lag issues with Firefox.

Fix Vertical and Horizontal Lines on Laptop Screen

Learn how to fix vertical and horizontal lines on your laptop screen with these simple steps.

Identifying the Causes Behind Screen Lines

To identify the causes behind screen lines on your laptop, you first need to determine whether the lines are vertical or horizontal. Vertical lines are typically caused by a faulty graphics card or display resolution settings. Horizontal lines, on the other hand, can be a result of issues with the video cable or the monitor itself.

Start by checking the video cable connecting your laptop to an external monitor. Make sure it is securely plugged in and not damaged. If the issue persists, try using a different cable to rule out any potential cable problems.

Next, update your graphics card driver to ensure it is functioning properly. Go to the manufacturer’s website to download the latest driver for your specific graphics card model.

If you are using an external monitor, check the refresh rate settings on your laptop. Adjusting the refresh rate can sometimes fix screen line issues.

If you have ruled out these common causes and the problem still persists, it may be time to seek professional help or contact technical support for further troubleshooting.

Updating Graphics and Adjusting Screen Resolution

To update graphics and adjust screen resolution on your laptop, start by right-clicking on your desktop and selecting “Display settings” from the context menu. Here, you can adjust the resolution to see if that resolves the issue with vertical and horizontal lines on your screen.

Next, update your graphics driver by going to the manufacturer’s website and downloading the latest driver for your specific graphics card. Install the driver and restart your computer to see if the lines have disappeared.

If you are using an external monitor, make sure the HDMI or VGA cable is securely connected to both the laptop and the monitor. Check the cable for any visible damage that may be causing interference with the display.

If the issue persists, try booting into safe mode to see if the lines are still present. This can help determine if the problem is software-related.

Finally, if none of these steps work, consider contacting technical support for further troubleshooting or repair options.

Cleaning Techniques and Cable Management

  • Turn off your laptop and unplug it from the power source.
  • Use a microfiber cloth to gently wipe the screen in a circular motion.
  • Avoid using harsh chemicals or cleaning solutions as they may damage the screen.

Cable Management:

  • Check the cables connecting your laptop to an external monitor or power source.
  • Ensure the cables are securely plugged in and not loose or damaged.
    Check the cables connecting your laptop to an external monitor or power source.
Ensure the cables are securely plugged in and not loose or damaged.
  • Organize the cables neatly to prevent them from getting tangled or pulled on.

Advanced Repair Solutions for Persistent Lines

For persistent vertical and horizontal lines on your laptop screen, advanced repair solutions may be necessary to resolve the issue. One effective method is to update your device drivers to ensure they are compatible with your system. To do this, go to the manufacturer’s website and download the latest drivers for your graphics card.

If updating the drivers does not solve the problem, you can try adjusting the display settings on your computer. Right-click on the desktop, select “Display Settings,” and then adjust the resolution to see if that helps eliminate the lines on the screen.

If the issue persists, you may need to check the physical connections of your laptop to ensure there are no loose cables or faulty connections. Make sure all cables are securely connected to the correct ports on your laptop and monitor.

Additionally, you can try connecting your laptop to an external monitor via HDMI to see if the lines appear on the external display as well. This can help determine if the problem is with the laptop screen itself or the graphics card.

F.A.Q.

Why there is a straight line on my laptop screen?

There is a straight line on your laptop screen because it could be caused by overheating of the components or software issues like a corrupted driver.

How do I fix my line down screen?

To fix a line down screen, you can try restarting your device. Restarting can help eliminate any glitches causing the issue and improve the performance of your device. Simply restart your device and see if the horizontal lines disappear.

How do I get rid of a line on my laptop screen?

To get rid of a line on your laptop screen, you can try adjusting the monitor’s refresh rate or updating your device drivers.

Why is there a vertical line on my monitor?

There is a vertical line on your monitor due to potential hardware failure, including issues with the monitor’s cable, video card, or LCD panel.

Stop Windows Script Error Messages Fix

Are you tired of constantly encountering annoying script error messages on your Windows computer? Let’s explore how to fix this issue and put an end to the frustration.

Appearance and Causes of Script Errors

Computer screen with error message pop-up

When a script error occurs, it can disrupt the functionality of the web page and cause frustration for the user. Errors may appear as messages that mention a specific line of code or script file that is causing the issue. This can help in identifying the root cause of the problem.

To fix script errors, start by checking for updates to your web browser. Make sure you are using the latest version of your browser, such as Microsoft Edge or Google Chrome. Additionally, disable any unnecessary browser plugins or extensions that may be conflicting with the website’s code. It’s also a good idea to clear your browser’s cache and cookies to ensure a fresh browsing experience.

Disabling Script Error Notifications

To disable script error notifications in Windows:

First, open your web browser, whether it’s Microsoft Edge, Google Chrome, Firefox, or Safari.

Next, locate the settings or options menu in your browser.

Look for the section related to browser security or advanced settings.

Find the option to disable script error notifications.

Uncheck the box or toggle the setting to turn off these notifications.

Save your changes and close the settings menu.

Now, restart your browser for the changes to take effect.

Clearing Temporary Internet Files and Resetting Apps

  • Open Internet Explorer.
  • Click on Tools menu.
  • Select Internet Options.
  • Under Browsing history, click Delete.
  • Check the box next to Temporary Internet Files.
  • Click Delete.

Resetting Apps

  • Open Settings.
  • Click on Apps.
  • Select Apps & features.
  • Scroll down to find the app causing the error.
  • Click on the app.
  • Click on Advanced options.
  • Click Reset.
  • Confirm the reset.

Updating Problematic Applications

To stop Windows Script Error Messages, one of the first steps you can take is to update any problematic applications on your system. Check for any available updates for your web browser, such as Firefox, Safari, or Microsoft Edge, as outdated browsers can often trigger script errors. Updating your browser can help improve browser security and compatibility with the latest web design standards.

Another important update to consider is your operating system. Make sure you have the latest Windows Update installed on your computer to address any issues related to scripts or other errors. Keeping your operating system up to date can also improve overall system stability and performance.

In addition to browser and operating system updates, it’s a good idea to check for any available updates for plug-ins or extensions that you have installed on your browser. Outdated plug-ins can sometimes cause script errors when interacting with certain websites or web pages.

By regularly updating your browser, operating system, and plug-ins, you can minimize the occurrence of Windows Script Error Messages and ensure a smoother browsing experience.

F.A.Qs

How do I get rid of script error pop up?

To get rid of script error pop-ups, you can disable script debugging in Internet Options, delete browser cache, update the problematic app, and disable third-party antivirus software and extensions.

Why do I keep getting a script error message on my computer?

I keep getting a script error message on my computer because the website or program showing the error has a minimum requirement that my computer doesn’t meet or a script error was corrected through an update that I never received. It is important to keep Windows up to date and update third-party programs to avoid script errors.

How do I get rid of JavaScript error message?

To get rid of a JavaScript error message, ensure you are using the latest version of the software, clear your cache, test in a private browsing window, use a supported browser, and disable any ad blockers.

How do I get rid of Windows script error?

To get rid of Windows script error, you can start by returning the default registry value of .VBS, deleting registry values after Userinit.exe, and running System File Checker.

How to detect and remove spyware on my Mac

In this article, I will discuss how to detect and remove spyware on my Mac computer.

Identifying and Removing Suspicious Apps

To identify and remove suspicious apps on your Mac, start by checking your Applications folder for any unfamiliar programs. Look for any apps that you don’t remember installing or that seem suspicious.

Next, use a reliable anti-malware software like Malwarebytes to scan your Mac for spyware. This tool can help detect any malicious software that may be hiding on your system.

If you notice any strange behavior on your Mac such as pop-up ads, browser redirects, or sudden performance issues, these could be signs of spyware. In this case, it’s important to run a thorough scan of your system with Malwarebytes.

Remove any apps that you suspect to be spyware immediately. You can do this by dragging the app to the trash and emptying it. Make sure to also empty your trash to completely remove the app from your Mac.

Updating Operating Systems and Software

To ensure your Mac is protected from spyware, it is essential to regularly update your operating system and software. Make sure to regularly check for updates in the MacOS App Store and install them promptly to patch any security vulnerabilities. Additionally, keep your web browser up to date to prevent any potential exploits from being used by spyware.

Regularly updating your iOS devices is also crucial, as spyware can target iPhones and iPads through various means such as malicious mobile apps or phishing attacks. By keeping your iOS devices updated, you can minimize the risk of spyware infections.

In addition to updating your operating systems, it is important to regularly scan your Mac for any signs of spyware. Consider using reputable anti-spyware tools such as CleanMyMac X to detect and remove any malicious software that may have infiltrated your system.

By staying vigilant and proactive in updating your operating systems and software, you can significantly reduce the risk of spyware infections on your Mac and other Apple devices.

Utilizing Spyware Detection Tools

  1. Download a reputable spyware detection tool
    • Research and choose a reputable spyware detection tool
      Download a reputable spyware detection tool
Research and choose a reputable spyware detection tool
    • Download the software from a trusted source
  2. Install the spyware detection tool on your Mac
    • Follow the installation instructions provided by the software
    • Ensure the software is fully installed and updated
      Follow the installation instructions provided by the software
Ensure the software is fully installed and updated
  3. Run a full system scan with the spyware detection tool
    • Select the option for a full system scan
    • Let the scan run completely to detect any spyware on your Mac
  4. Review the scan results and remove any detected spyware
    • Review the list of detected spyware and select the option to remove them
    • Follow any additional instructions provided by the software for removing spyware

Preventing Future Spyware Infections

To prevent future spyware infections on your Mac, there are a few key steps you can take. First, be cautious when downloading any software or files from the internet. Always verify the source and ensure that you are downloading from a reputable website.

Additionally, keep your MacOS and any applications up to date with the latest patches and updates. This will help to patch any security vulnerabilities that could be exploited by spyware.

Be mindful of what permissions you grant to apps on your Mac. Only provide necessary permissions and revoke any that you feel are unnecessary.

Consider using a reliable antivirus software that includes spyware detection capabilities. Regularly scan your Mac for any potential threats and remove them promptly.

Lastly, avoid clicking on suspicious links or pop-up ads that could potentially lead to spyware infections. Be cautious when browsing the web and only visit trusted websites.

Frequently Asked Questions

How can I tell if my Mac has spyware?

To determine if your Mac has spyware, look out for signs such as slow operating speed, changes in your browser’s homepage or extensions, an increase in ads or pop-ups, security alerts without scanning your Mac, and your contacts receiving spam from your accounts.

How do I clean spyware off my Mac?

To clean spyware off your Mac, you can start by using Activity Monitor to identify any malicious apps. Next, boot into safe mode, uninstall any suspicious apps, reset and verify your browser, clean up extensions to remove adware and viruses, and remove any Mac malware from your Login Items.

How do I check for suspicious activity on my Mac?

To check for suspicious activity on your Mac, you can open Activity Monitor in the Utilities folder. Look for processes with high CPU usage and quit them if necessary. If you notice any other suspicious processes, you can search them on Google to see if they are associated with malware.

How do I know if my Mac is being monitored by my laptop?

To find out if your Mac is being monitored by your laptop, you can open the Activity Monitor by using the Command + Spacebar shortcut to open Spotlight Search, typing Activity Monitor, and pressing Enter. Look through the list for any unfamiliar programs or processes that may indicate monitoring software. To stop a program or process, double click on it and then click Quit.

Microsoft Account Security Code Email Spam – Trust Issues

I recently received numerous spam emails claiming to be security codes from Microsoft. This has raised serious trust issues regarding the security of my Microsoft account.

Exploring Additional Assistance

If you are still experiencing issues with receiving the Microsoft Account Security Code email, there are other avenues you can explore for assistance. One option is to try receiving the security code through text messaging instead of email. This can help bypass any potential issues with your email provider or spam filters.

Another option is to utilize the Microsoft Authenticator mobile app for generating security codes. This can provide an additional layer of security for your account and ensure that you always have access to the necessary codes.

If you continue to have trust issues with the security code emails, consider updating your password to improve security. Make sure to choose a strong password that is not easily guessable.

Lastly, if you are still unable to receive the security code emails, reach out to Microsoft customer support for further assistance. They may be able to provide additional information or help troubleshoot any issues with your account.

Diverse Assistance Options

  • Contact Microsoft Support:
    • Go to the Microsoft website and navigate to the Support section.
    • Choose the option to contact support either through chat, email, or phone.
    • Explain your issue with receiving security code email spam.
    • Follow the instructions provided by the support representative to resolve the issue.
  • Check Email Filters:
    • Log in to your email account where you are receiving the security code email spam.
    • Go to the settings or options section and look for email filters.
    • Review the filters to see if any have been set up to automatically mark these emails as spam.
    • Adjust or remove any filters that may be causing the issue.
  • Update Security Settings:
    • Access your Microsoft account settings.
    • Look for the security options and review them for any suspicious changes.
    • Change your password and enable two-factor authentication for added security.
    • Review the recent activity on your account to check for any unauthorized access.

Troubleshooting with Command Prompts

If you are experiencing issues with receiving your Microsoft Account Security Code email spam, you can troubleshoot using Command Prompts. First, open Command Prompt by searching for it in the Start menu. Next, type ipconfig /flushdns and press Enter to clear your DNS cache. Then, type netsh int ip reset and press Enter to reset your TCP/IP stack.

Finally, restart your computer and try accessing your Microsoft Account again. If the issue persists, consider using alternative methods such as receiving the security code through text messaging or using the mobile app.

Final Thoughts on Resolving Issues

Microsoft Account security settings page

Final Thoughts: Trust is the foundation of any relationship, including the one you have with your Microsoft account. To resolve security code email spam and trust issues, ensure that your email address is secure and regularly check for any unauthorized activity. Strengthen your password by using a combination of letters, numbers, and special characters.

Keep your personal information private and never share sensitive details over the phone or email. If you receive suspicious messages, contact Microsoft directly through their official telephone number to verify the authenticity of the communication. Stay informed and continuously update your knowledge on online security practices. Provide feedback to Microsoft if you encounter any issues to help improve their services.

F.A.Qs

Why do I keep getting emails from Microsoft with a code?

I keep getting emails from Microsoft with a code because it is likely that I am signing into my Microsoft account from a new device or browser or resetting my Microsoft account password.

Why am i getting Microsoft verification codes i didn t request?

You are receiving Microsoft verification codes you did not request because someone may be trying to access your account, or there may have been an error in entering the phone/email during a sign-in attempt. It is also possible that the delivery of a code requested previously was delayed.

Why did I receive a Microsoft account security code?

I received a Microsoft account security code because Microsoft may ask for additional proof of identity when signing in to ensure it’s really me. This code is sent to one of the email addresses or phone numbers linked to my account for verification purposes.

Why do I keep getting a code for my Microsoft account?

I keep getting a code for my Microsoft account because someone may be trying to access my account without permission or there could be a glitch in the system. To address this issue, I should check my account activity for any suspicious sign-in attempts or devices.

Troubleshoot DISM Not Running Windows 10 Fixes

In this article, we will discuss troubleshooting solutions for when DISM is not running on Windows 10.

Understanding DISM and Its Functions

DISM (Deployment Image Servicing and Management) is a command-line tool used to service and prepare Windows images. It can be used to repair corrupted system files, perform Windows updates, and more. If DISM is not running on Windows 10, there are several fixes you can try. First, make sure you are running the command prompt as an administrator.

You can also try running the Windows Update Troubleshooter to fix any issues with Windows Update. If DISM is still not working, you may need to check for corrupted system files using the System File Checker tool. Additionally, disabling any antivirus software temporarily may help resolve the issue.

Common Issues and Failures with DISM

  • Open Command Prompt as an administrator
  • Run the command sfc /scannow to scan and repair system files
  • Wait for the process to complete and restart your computer

Run Windows Update Troubleshooter

  • Open Settings and go to Update & Security
  • Click on Troubleshoot and select Windows Update
  • Follow the on-screen instructions to run the troubleshooter

Reset Windows Update Components

  • Open Command Prompt as an administrator
  • Run the following commands in order: net stop wuauserv, net stop cryptSvc, net stop bits, net stop msiserver
  • Run the command ren C:\Windows\SoftwareDistribution SoftwareDistribution.old
  • Restart the services by running: net start wuauserv, net start cryptSvc, net start bits, net start msiserver

Disabling Antivirus or Security Programs

If you are encountering issues with DISM not running on Windows 10, one possible solution is to temporarily disable your antivirus or security programs. These programs can sometimes interfere with system processes and prevent DISM from functioning properly.

To disable your antivirus or security program, locate the software icon in your system tray or open the program from your desktop. Look for an option to temporarily disable or turn off the program.

Once the antivirus or security program is disabled, try running DISM again to see if the issue is resolved. If DISM runs successfully without the antivirus or security program enabled, you may need to add an exception for DISM in the program settings to prevent future issues.

Adjusting Proxy Settings

To adjust proxy settings on Windows 10, follow these steps:

1. Open the Settings app by pressing Windows key + I.

2. Go to Network & Internet, then click on Proxy from the left-hand menu.

3. Toggle the switch under Use a proxy server to On.

4. Enter the IP address of your proxy server and the port number in the respective fields.

5. You can also set up exceptions for specific addresses by scrolling down to the Manual proxy setup section.

Adjusting proxy settings can help troubleshoot issues with DISM not running properly on Windows 10. Make sure to double-check all the information entered to avoid any errors.

Utilizing Windows Update Troubleshooter

This tool will automatically scan for and fix any problems related to Windows Update. If the issue persists, you can also try running the DISM tool itself. Open Command Prompt as an administrator by searching for “cmd” in the Start menu, then right-clicking and selecting “Run as administrator.”

Once Command Prompt is open, type the following command:

DISM /Online /Cleanup-Image /RestoreHealth

This command will repair any corruption in the Windows image. After running this command, restart your computer and check if the issue is resolved.

Performing DISM Commands in Clean Boot
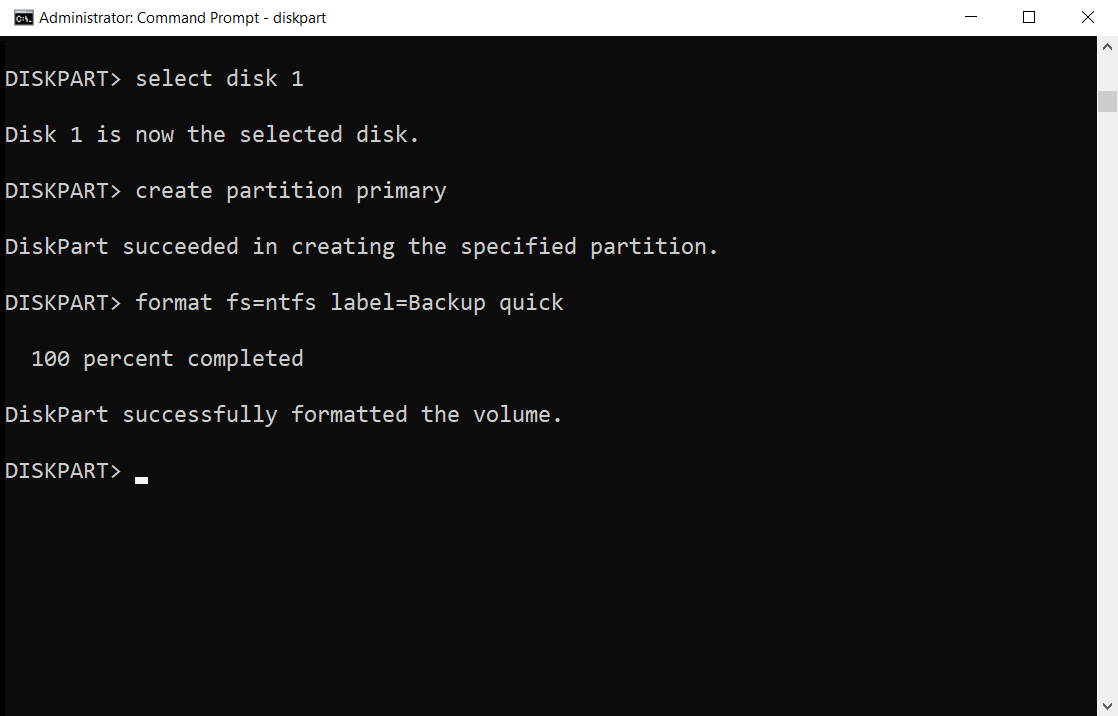
Command Prompt in Clean Boot

Performing DISM commands in Clean Boot can help troubleshoot issues when DISM is not running on Windows 10. To do this, first, boot your computer into Clean Boot mode by typing “msconfig” in the Windows search bar, selecting “System Configuration,” and checking the “Selective startup” option under the General tab. Next, go to the Services tab and check “Hide all Microsoft services,” then click “Disable all. ” Finally, go to the Startup tab and click “Open Task Manager,” then disable all startup items. After completing these steps, you can open Command Prompt as an administrator and run DISM commands to repair any issues with your Windows operating system.

This process can help resolve various errors and problems with your system.

Modifying the Install.wim File

Windows File Explorer icon

To troubleshoot DISM not running on Windows 10, you can try modifying the Install. wim file. This file is crucial for the Windows Imaging Format and Windows Preinstallation Environment. To do this, mount the Install. wim file using the DISM command-line interface. Once mounted, you can make necessary changes, such as adding or removing device drivers.

This can help resolve issues related to operating system corruption or package manager failures. After modifying the Install. wim file, unmount and commit the changes. Make sure to take precautions such as disabling antivirus software to prevent any interference.

Cleaning Up System Image Components

To clean up system image components, you can use the Deployment Image Servicing and Management (DISM) tool. This can help resolve issues with DISM not running on Windows 10.

First, open an elevated Command Prompt by searching for “cmd” in the Start menu, right-clicking, and selecting “Run as administrator.”

Next, run the command “dism /online /cleanup-image /startcomponentcleanup” to clean up system image components.

Then, you can also run the command “dism /online /cleanup-image /restorehealth” to repair any corrupted system files.

If DISM still does not run after cleaning up system image components, you may need to consider other troubleshooting steps or seek further assistance.

Resetting Windows Update Services

To reset Windows Update services, follow these steps:

1. Stop Windows Update services by typing the following commands in Command Prompt:
– net stop wuauserv
– net stop cryptSvc
– net stop bits
– net stop msiserver

2. Rename the SoftwareDistribution and Catroot2 folders by running these commands:
– ren C:\Windows\SoftwareDistribution SoftwareDistribution.old
– ren C:\Windows\System32\catroot2 Catroot2.old

3. Restart the Windows Update services:
– net start wuauserv
– net start cryptSvc
– net start bits
– net start msiserver

After completing these steps, try running DISM again to see if the issue is resolved. Resetting Windows Update services can help resolve various update-related problems on Windows 10.

Recovering Lost or Deleted Data

Recovery software interface

To recover lost or deleted data in Windows 10, you can try using the Command Prompt utility DISM. If DISM is not running properly, there are a few fixes you can try. First, run the System File Checker tool to scan and repair corrupted system files. Open Command Prompt as an administrator and type “sfc /scannow” to start the process. If that doesn’t work, you can use the Deployment Image Servicing and Management tool to repair the Windows image.

Run Command Prompt as an administrator and type “DISM /Online /Cleanup-Image /RestoreHealth” to initiate the repair. If you’re still experiencing issues with DISM, you may need to reinstall Windows 10 to resolve the problem.

F.A.Q.

Why is DISM command not working?

The DISM command may not be working due to interference from antivirus software or a security program on your system. Try disabling or temporarily uninstalling these programs before attempting the DISM scan again to see if it resolves the issue.

How do I know if DISM is working?

To determine if DISM is working, you can run a quick check by opening Command Prompt as an administrator and entering the command: DISM /Online /Cleanup-Image /CheckHealth.

How do I fix corrupted DISM?

To fix corrupted DISM, you can open an elevated Command Prompt and run the command DISM /online /cleanup-image /restorehealth. If the scan fails, try running it in Safe Mode.

How do I activate DISM?

To activate DISM, you need to send an SMS to USSD code 121 with the syntax SIM<20 digit new SIM card number of your new SIM>. The message should be sent from your existing mobile number. After that, you will receive an SMS for confirmation which you should respond to by 1.

Windows 10 Realtek Audio Crackling Fix

In this article, I will discuss how to fix crackling audio issues on Windows 10 with Realtek audio drivers.

Strategies to Fix Audio Crackling: Changing Audio Format and Processor State

Realtek Audio settings icon

  • Right-click on the Speaker icon in the system tray and select Playback devices.
  • In the Sound window, select your Realtek Audio device and click on Properties.
  • Go to the Advanced tab and change the Default Format to a different value, such as 16 bit, 44100 Hz (CD Quality).
  • Click Apply and then OK to save the changes.

Changing Processor State

  • Press Windows key + R to open the Run dialog box.
  • Type powercfg.cpl and press Enter to open the Power Options window.
  • Click on Change plan settings next to your selected power plan.
  • Click on Change advanced power settings.
  • Expand the Processor power management section and set both the Minimum processor state and Maximum processor state to 100%.
  • Click Apply and then OK to save the changes.

Deactivating Audio Enhancements, Exclusive Mode, and ATI HDMI Audio

To fix crackling audio on Windows 10 Realtek, you can try deactivating Audio Enhancements, Exclusive Mode, and ATI HDMI Audio. To deactivate these settings, first right-click on the speaker icon in the taskbar and select “Playback devices. ” Then, right-click on your default playback device and choose “Properties. ” Go to the “Advanced” tab and uncheck the boxes for Audio Enhancements and Exclusive Mode. Next, go to the “Driver” tab and disable the ATI HDMI Audio driver if it’s listed. After making these changes, click “Apply” and “OK” to save the settings.

Restart your computer to see if the crackling issue has been resolved.

Advanced Solutions: Uninstalling Drivers and Editing the Registry

To fix Realtek audio crackling on Windows 10, advanced solutions like uninstalling drivers and editing the registry may be necessary. To uninstall drivers, go to Device Manager, locate your Realtek audio driver, right-click, and select “Uninstall device. ” Then, restart your computer to let Windows reinstall the driver. Editing the registry can also help. Press the Windows key + R to open the Run dialog, type “regedit” and press Enter. Navigate to HKEY_LOCAL_MACHINE\SOFTWARE\Microsoft\Windows\CurrentVersion\Run, find the Realtek audio driver entry, right-click, and delete it.

Preventive Measures and Final Thoughts on Audio Issues

Preventive Measures: To avoid future audio crackling issues on your Windows 10 Realtek system, regularly update your drivers by visiting the Realtek website or using Device Manager. Additionally, ensure your audio settings are properly configured in the Control Panel to optimize sound quality. Avoid overclocking your system or running demanding software in the background while using audio applications to prevent interference.

Final Thoughts: If you continue to experience audio crackling after following the fix, consider checking for any BIOS updates or adjusting your system’s power supply. It may also be helpful to check for any external factors, such as nearby electronic devices causing interference with your speakers. If all else fails, seek assistance from a professional technician to diagnose and resolve any underlying hardware issues that may be causing the crackling sound.

FAQ

Why does Realtek audio keep crackling?

Realtek audio keeps crackling because the sound drivers may not be installed correctly, affecting the sound quality. One solution is to remove and reinstall the drivers to fix the crackling issue.

How do I fix the crackling sound on Windows 10?

To fix the crackling sound on Windows 10, you can try changing the system’s sound format, updating your sound drivers, running the audio troubleshooter, and disabling any active audio enhancements.

How do I fix Realtek audio on Windows 10?

To fix Realtek audio on Windows 10, you can update the driver through Device Manager. Open Device Manager, expand the Sound, video, and game controllers category, right-click Realtek High Definition Audio, and select Update driver. Then choose to search automatically for the driver. After Windows 10 updates the driver, restart your PC to apply the changes.

Why is my Realtek audio glitching?

Your Realtek audio may be glitching due to a driver issue, specifically conflicts with preinstalled Microsoft drivers. This can often be easily resolved.

Fix WDF_VIOLATION MSI Blue Screen Error

In this article, I will discuss how to fix the WDF_VIOLATION MSI Blue Screen error.

Update Device Drivers

Device manager window

If Windows does not find any updates, you can visit the manufacturer’s website to download the latest driver manually. Make sure to choose the driver that is compatible with your operating system. After downloading the driver, double-click on the file to install it.

Once the installation is complete, restart your computer to apply the changes. Check if the WDF_VIOLATION MSI Blue Screen Error has been resolved. Updating device drivers can often fix blue screen errors caused by outdated or incompatible drivers. If the issue persists, consider running a system file checker scan or scanning your computer for malware.

Use Driver Verifier

By running Driver Verifier, you can force drivers to perform illegal operations, triggering a blue screen if an issue is found. This can help you identify the specific driver causing the WDF_VIOLATION error on your system.

To use Driver Verifier, open a Command Prompt window with administrative privileges and type “verifier” to launch the Driver Verifier Manager. Follow the on-screen instructions to select drivers for verification and reboot your computer to start the testing process.

After running Driver Verifier and encountering the blue screen error again, you can analyze the dump file generated to determine the problematic driver. This will allow you to take the necessary steps to update or uninstall the driver causing the WDF_VIOLATION error.

Using Driver Verifier can be a valuable tool in troubleshooting blue screen errors like WDF_VIOLATION, helping you identify and resolve driver-related issues on your personal computer.

Repair System Files

System File Repair Method
wdfilter.sys Run System File Checker (SFC) scan
wdcsam64.sys Use Deployment Image Servicing and Management (DISM) tool
wdcsam64.sys Perform a Windows Update to replace corrupt files

Boot Windows in Safe Mode

Windows boot screen

1. Restart your computer and press F8 before the Windows logo appears.

2. Select “Safe Mode” from the boot options menu using the arrow keys on your computer keyboard.

3. Press Enter to start Windows in Safe Mode with minimal drivers and services running.

In Safe Mode, you can troubleshoot the WDF_VIOLATION MSI Blue Screen Error by checking for malware or viruses, updating device drivers, or uninstalling recently installed software.

Remember to reboot your computer in normal mode after fixing the error in Safe Mode to ensure that changes take effect.

Perform a System Restore

  • Open the Start menu and type “system restore” in the search bar.
  • Select “Create a restore point” from the search results.
  • Click on the “System Restore” button and follow the on-screen instructions to choose a restore point before the WDF_VIOLATION MSI Blue Screen Error occurred.
  • Click “Next” and then “Finish” to start the system restore process.
  • Wait for the system restore process to complete and restart your computer.

Disable USB Ports in BIOS

To fix the WDF_VIOLATION MSI Blue Screen Error, you can try disabling the USB ports in the BIOS. This can help troubleshoot the issue and potentially resolve the error.

To disable the USB ports in the BIOS:
1. Restart your computer and enter the BIOS settings. This can usually be done by pressing a key like F2, F10, or Del during the boot process.
2. Navigate to the “Advanced” or “Integrated Peripherals” section in the BIOS menu.
3. Look for an option related to USB ports or controllers.
4. Disable the USB ports by selecting the appropriate option and saving the changes before exiting the BIOS.

After disabling the USB ports, restart your computer and see if the WDF_VIOLATION MSI Blue Screen Error persists. This simple step can sometimes help in resolving the issue and getting your computer back up and running smoothly.

F.A.Qs

How do I fix WDF violation error?

To fix a WDF violation error, you can update device drivers, use Driver Verifier, repair system files, boot Windows in Safe mode, or reset Windows.

Why is Windows 11 blue screen when shutting down?

Windows 11 may display a blue screen when shutting down due to a variety of reasons, such as software issues like incompatible driver updates or hardware problems like overheating caused by CPU overclocking.