C Windows rescache Delete Windows Files Folder Hit Uninstalling

In this article, I will discuss how to delete Windows files folder hit uninstalling in C Windows rescache.

Removing Rescache for Easier Mod Application

To remove Rescache for easier mod application, follow these steps:

Navigate to the C Windows rescache folder on your computer. Locate the Windows Files folder within the rescache folder.

Right-click on the Windows Files folder and select “Delete” from the dropdown menu. Confirm the deletion when prompted.

Once the Windows Files folder has been deleted, you can now proceed with uninstalling the application or mod that requires the removal of Rescache.

After uninstalling the application or mod, make sure to clear any remaining files or data related to Rescache to ensure a clean removal process.

By removing Rescache, you can streamline the mod application process and avoid any potential conflicts or errors that may arise from having outdated or unnecessary files on your system.

Additional Assistance and Options

  • Check for system restore points to revert back to a previous state before the deletion
  • Use a third-party software to clean up and optimize your system
  • Consult with a professional technician for advanced assistance
  • Consider reinstalling the operating system if necessary
  • Backup important files and perform a factory reset as a last resort

Understanding Rescache: Vendor, Version, and Signatures

When it comes to understanding Rescache in C Windows, it is important to know about the vendor, version, and signatures associated with it. The Rescache is a feature that helps improve performance by caching resources in memory.

Vendor: The vendor of Rescache refers to the company or organization that developed the feature. This information can be helpful when troubleshooting issues or seeking support.

Version: The version of Rescache indicates which iteration of the feature is being used. Updating to the latest version can often resolve bugs or security vulnerabilities.

Signatures: Signatures are unique identifiers that help verify the authenticity of files or resources. Checking signatures can help ensure that the Rescache files are legitimate and have not been tampered with.

Understanding these aspects of Rescache can be useful when managing or troubleshooting Windows files and folders. It is recommended to regularly update and maintain the Rescache to optimize system performance and security.

Identifying and Handling Rescache Executable Issues

When encountering Rescache executable issues in C Windows, it is important to identify and handle them promptly. One common method to resolve these issues is by deleting the Windows Files folder. To do this, follow these steps:

Open the Windows File Explorer and navigate to the location of the Windows Files folder.

Right-click on the folder and select “Delete” from the dropdown menu.

Confirm the deletion when prompted.

After deleting the Windows Files folder, you may also consider uninstalling any problematic programs that could be causing the Rescache executable issues. To uninstall a program:

Open the Control Panel and navigate to the “Programs and Features” section.

Locate the program causing issues in the list of installed programs.

Right-click on the program and select “Uninstall” to remove it from your system.

F.A.Q.

Which files can be deleted from C drive?

Which files can be deleted from C drive?

Recycle bin files, Windows Update Cleanup files, upgrade log files, device driver packages, temporary internet files, and temporary files are some types of files that can be removed from the C drive.

What is Windows folder in my C drive?

The Windows folder in your C drive is where the Windows operating system is stored.

How do I clean my user folder in Windows 10?

To clean your user folder in Windows 10, you will need to log in with an administrator account, navigate to Control Panel, then System, Advanced System Settings, and click on Settings under User Profile. From there, select the user profile you want to clean and delete it. Windows 10 is a Microsoft operating system commonly used on personal computers and tablets.

Fix Acer Laptop Won’t Start Up – Top 6 Solutions

Having trouble getting your Acer laptop to start up? Check out these top 6 solutions to fix the issue.

Identify the Cause

To identify the cause of your Acer laptop not starting up, first check if the AC adapter is properly connected and the battery is charged. If the laptop still won’t start, try booting into Safe Mode by pressing the F8 key during startup. If Safe Mode doesn’t work, check the BIOS settings to ensure the correct boot order. Additionally, try removing any connected USB devices or external storage to rule out any conflicts. If the laptop is stuck in hibernation mode, press the power button to wake it up.

If all else fails, consider performing a factory reset as a last resort.

Perform a Power Reset

Acer laptop power button

If the power reset doesn’t work, try booting into Safe Mode by pressing F8 repeatedly when starting up the laptop. From Safe Mode, you can troubleshoot any software conflicts or errors that may be preventing your Acer laptop from starting up normally.

Check the hardware components of your laptop to ensure everything is properly connected and functioning. Sometimes, loose connections or faulty hardware can cause startup problems. Make sure all cables, memory modules, and hard drives are securely in place.

Check BIOS and Boot Settings

To check the BIOS and boot settings on your Acer laptop, start by restarting your laptop. As soon as it begins to boot up, press the BIOS key repeatedly until the BIOS screen appears. Here, you can check if the boot order is set correctly. Make sure the hard drive is listed as the first boot option. If not, use the arrow keys to move it to the top of the list.

Additionally, you can reset the BIOS settings to default by selecting the appropriate option in the BIOS menu. This can sometimes resolve startup issues. Once you have made any necessary changes, save and exit the BIOS to restart your laptop and see if it boots up properly.

Checking and adjusting the BIOS and boot settings can often resolve startup problems on Acer laptops. If this does not fix the issue, you may need to explore other solutions.

Boot in Safe Mode

To boot your Acer laptop in Safe Mode, follow these steps:

1. Turn off your laptop completely.

2. Press the power button to turn it back on.

3. As soon as the Acer logo appears, press and hold the F8 key repeatedly.

4. This will bring up the Advanced Boot Options menu.

5. Use the arrow keys to select “Safe Mode” and press Enter.

6. Your laptop will now boot into Safe Mode, allowing you to troubleshoot any issues.

If your Acer laptop won’t start up, Safe Mode can help you diagnose and fix the problem.

Inspect Battery and Charger

Inspect the battery of your Acer laptop to ensure it is properly connected and charged. Check the charger to make sure it is functioning correctly and plugged in securely. Look for any signs of damage or wear on the battery or charger that may be causing the startup issue.

If the battery and charger appear to be in good condition, try using a different power source or outlet to rule out any electrical issues. Make sure the power adapter is providing the necessary voltage and current to charge the battery and power the laptop.

If the battery or charger is faulty, consider replacing them with genuine Acer parts to ensure compatibility and reliability. Regularly clean the battery contacts and charger ports to prevent dust or debris from interfering with the connection. This simple maintenance step can help prevent startup problems in the future.

Reinsert or Replace CMOS Battery

To reinsert or replace the CMOS battery on your Acer laptop, follow these steps:

1. Power off your laptop and disconnect the AC adapter.

2. Locate the CMOS battery on your laptop’s motherboard. It is usually a round, silver battery.

3. Carefully remove the CMOS battery from its slot.

4. If reinserting, ensure the battery is properly aligned and gently push it back into place.

5. If replacing, take note of the battery model and purchase a compatible replacement.

6. Insert the new battery into the slot and make sure it is secure.

By reinserting or replacing the CMOS battery, you may resolve startup issues on your Acer laptop and get it running smoothly again.

Cool Down and Clean Your Laptop

A laptop being cleaned with a microfiber cloth

Cool Down and Clean Your Laptop: If your Acer laptop won’t start up, it could be due to overheating or dust accumulation. Make sure to cool down your laptop by turning it off and letting it rest for a few minutes. Then, clean the vents and fan using compressed air to remove any dust or debris that may be blocking airflow. Additionally, wipe down the exterior of the laptop with a soft, dry cloth to remove any dirt or grime that could be causing issues. This simple maintenance step can help improve the performance and longevity of your laptop.

Apply New Thermal Paste

To fix an Acer laptop that won’t start up, applying new thermal paste can help resolve overheating issues that may be causing the problem. Start by turning off the laptop and unplugging it from the power source. Next, remove the back panel of the laptop to access the internal components. Look for the CPU and GPU, which are the main components that generate heat. Carefully clean off the old thermal paste using isopropyl alcohol and a lint-free cloth. Apply a small amount of new thermal paste to the center of the CPU and GPU, then reassemble the laptop.

Make sure the new thermal paste is evenly spread and not excessive. This simple solution can help improve the laptop’s cooling system and get it up and running again.

Verify Monitor and RAM Functionality

Acer laptop screen displaying RAM and monitor test results

Component Functionality
Monitor Check for any physical damage to the screen or cables. Connect an external monitor to see if the laptop displays on an external screen. Adjust brightness settings on the laptop.
RAM Verify that the RAM modules are properly seated in their slots. Try reseating the RAM modules or swapping them out with known working ones. Use diagnostic tools to test the RAM for errors.

Seek Professional Assistance

1. Check the power source: Make sure your laptop is properly plugged in and the power source is working.

2. Perform a hard reset: Remove the battery and unplug the power cord, then hold down the power button for 30 seconds before reconnecting the power source.

3. Try booting in safe mode: Restart your laptop and press F8 repeatedly to access safe mode and troubleshoot any startup issues.

4. Run a system restore: Use a USB flash drive with a system restore image to restore your laptop to a previous working state.

5. Update your BIOS: Visit the Acer website and download the latest BIOS update for your laptop model.

6. Seek professional help:

FAQ

How do I force restart my Acer laptop?

To force restart your Acer laptop, you can press and hold the power button to shut down the system and then power it on again.

Where is the reset button on a Acer computer?

The reset button on an Acer computer can be found by pressing Alt + F10 during the startup process to access the recovery environment. From there, you can select the option to reset your PC and follow the on-screen instructions to reset your Acer laptop to factory settings.

Why my laptop is not starting after pressing power button?

My laptop may not be starting after pressing the power button due to various reasons such as a memory issue, video card problem, or processor error. To troubleshoot, try removing any residual electricity by taking out the battery, disconnecting the power adapter, and holding the power button for 30 seconds. Reconnect the power adapter, wait 30 seconds, and then attempt to turn on the system.

What to do when Acer laptop is not responding?

When Acer laptop is not responding, you can try power resetting the computer, checking the battery status, and removing external storage devices. You can also test the computer with an external monitor, enter WinRE for Automatic Repair, enable Safe Mode for troubleshooting, or reset the BIOS.

Troubleshoot Windows 10 sound issues

In this article, I will discuss troubleshooting tips for fixing sound issues on Windows 10.

Before You Begin

First, make sure that your sound card is properly connected to your computer and functioning correctly. Check the connections to ensure that everything is securely plugged in.

Next, check for any updates that may be available for Windows 10. Sometimes patches or updates can resolve sound problems, so it’s important to make sure your system is up to date.

If you are using USB headphones or speakers, try switching to a different USB port to see if that resolves the issue. Sometimes a different port can make a difference.

Additionally, check the volume settings on your computer. Make sure that the volume is not muted and that it is turned up to an appropriate level.

If you are still experiencing issues, you may need to update your device drivers. Go to the Device Manager in the Control Panel and look for any yellow exclamation marks, which indicate a problem with a driver.

Check Audio Connections

Audio cables being plugged into a computer's sound card

Next, right-click on the sound icon in the taskbar and select “Open Sound settings” to access the audio settings. Check that the correct output device is selected and the volume is turned up.

If you’re using HDMI to connect to external speakers or a TV, make sure the HDMI cable is properly connected and that the correct output device is selected in the sound settings.

If you’re still experiencing sound issues, try updating or reinstalling the audio device driver through the Device Manager in the Control Panel. Make sure to restart your computer after updating the driver.

If the problem persists, consider performing a System Restore to a point when the sound was working properly. This can help resolve any software conflicts that may be causing the issue.

Restart Your System

Windows restart button

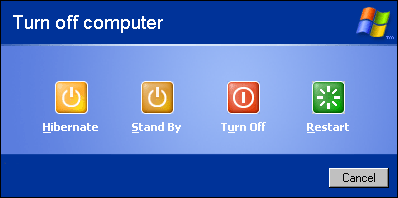
1. Click on the “Start” menu located on the taskbar.
2. Select the “Power” option.
3. Choose “Restart” to reboot your personal computer.

Restarting your system can help resolve sound issues by refreshing the system and restarting any processes or drivers that may be causing the problem.

It is recommended to also check for any updates for your sound card or device drivers, as outdated drivers can sometimes cause sound problems. You can do this by accessing the Control Panel in Windows 10 and checking for updates in the Device Manager.

If restarting your system does not resolve the sound issues, you may need to consider other troubleshooting steps such as checking your sound settings, ensuring your speakers or headphones are properly connected, or running a system restore to a previous point where the sound was working correctly.

Update and Check for Updates

Step Description
1 Update Windows 10 to the latest version. Go to Settings > Update & Security > Windows Update and click on Check for updates.
2 Check for driver updates. Go to Device Manager, right-click on the sound driver, and select Update driver.
3 Run Windows Troubleshooter for sound problems. Go to Settings > Update & Security > Troubleshoot and run the Audio troubleshooter.
4 Check for updates for audio software or applications that may be causing sound issues. Visit the manufacturer’s website for updates.

Restart Windows Audio Services

Windows logo with a speaker icon

Step 1: Press Windows key + R to open the Run dialog box.

Step 2: Type services.msc and press Enter to open the Services window.

Step 3: Scroll down and locate Windows Audio in the list of services.

Step 4: Right-click on Windows Audio and select Restart from the context menu.

Step 5: Wait for the service to restart and then close the Services window.

Run Automatic Audio Troubleshoot

To run an automatic audio troubleshoot on Windows 10, start by opening the Control Panel. Click on “Troubleshooting” and then select “Hardware and Sound.” Next, click on “Playing Audio” under the Sound category. This will launch the troubleshooter to help identify and fix any sound issues on your computer.

If the troubleshooter detects any problems, follow the on-screen instructions to resolve them. If the issue persists, you may need to update your audio drivers.

Updating your audio drivers can often fix sound issues on Windows 10. To do this, go to the Start menu and type “Device Manager” in the search bar. Expand the “Sound, video, and game controllers” category, right-click on your audio device, and select “Update driver.”

Choose to search automatically for updated driver software and follow the prompts to complete the update process.

If updating the audio drivers does not resolve the problem, try restarting your computer. Sometimes a simple reboot can fix sound issues by refreshing the system. If the problem still persists, you may need to consider other troubleshooting methods or seek further assistance from technical support.

Review Sound Settings and Audio Format

When troubleshooting sound issues on Windows 10, it’s important to check your sound settings and audio format. To do this, right-click on the speaker icon in the taskbar and select “Open Sound settings.” Here, you can adjust the volume, choose the output device, and troubleshoot any issues with playback.

Next, check the audio format by going to the “Sound Control Panel” and selecting the playback device. Click on “Properties” and go to the “Advanced” tab. Make sure the correct audio format is selected and try changing it to see if that resolves the issue.

If you’re still experiencing sound problems, try updating your device driver. Go to the Device Manager, locate your sound device under “Sound, video and game controllers,” right-click on it, and select “Update driver.” Follow the on-screen instructions to install any available updates.

It’s also a good idea to check for any software conflicts by opening the Task Manager and closing any unnecessary applications that might be using the sound output. Additionally, make sure that the sound icon in the taskbar is not muted and that the volume slider is set to an audible level.

By reviewing your sound settings and audio format, you can often pinpoint the source of the issue and troubleshoot Windows 10 sound problems effectively.

Disable Audio Enhancements

To do this, right-click on the sound icon in the taskbar and select Playback devices. Then, right-click on your default playback device and choose Properties.

Next, go to the Enhancements tab and check the box that says Disable all sound effects. Click Apply and then OK to save the changes.

By disabling audio enhancements, you can eliminate any potential software conflicts or issues that may be affecting your sound output.

Update Installed Audio Drivers

Speaker icon with a computer screen and update symbol.

1. Right-click on the Start menu icon and select “Device Manager” from the context menu.
2. In the Device Manager window, expand the “Sound, video and game controllers” category.
3. Right-click on your audio device and select “Update driver.”
4. Choose the option to search automatically for updated driver software.
5. If Windows finds a newer driver, follow the on-screen instructions to install it.
6. Restart your computer to apply the changes.

Updating audio drivers can help resolve sound issues on your Windows 10 PC. If you continue to experience problems, consider checking for software updates for your audio application or checking the sound settings in the Control Panel.

F.A.Qs

How do I fix troubleshoot audio in Windows 10?

To troubleshoot audio issues in Windows 10, you can launch the troubleshooter from audio Settings by selecting Start, then Settings, followed by System, Sound, and Troubleshoot common sound problems. From there, you can select Output devices or Input devices to address the issue.

How can I reset the sound in Windows 10?

To reset the sound in Windows 10, you can navigate to the Sound settings in the System section of the Settings menu. From there, go to the App volume and device preferences under Advanced Sound Options and select Reset to the Microsoft Recommended defaults.

Why does my PC suddenly have no sound?

Your PC suddenly has no sound because there may be issues with your hardware connections, audio settings, audio device, or drivers. Check these components to troubleshoot the problem.

How do I get rid of error sound on Windows 10?

To get rid of the error sound on Windows 10, you can navigate to the Hardware and sound settings, then select Notifications under Windows and choose (None) from the Sounds drop-down menu.

Failed to create dump file error during creation fix.

In my experience, encountering a “Failed to create dump file” error during creation can be frustrating.

Diagnose and Clean RAM

Step 1: Check for any physical issues with the RAM sticks by opening your computer and ensuring they are properly seated.

Step 2: Use the Windows Memory Diagnostic tool to check for any memory-related problems by typing “Windows Memory Diagnostic” in the Start menu search bar.

Step 3: Run a scan using the System File Checker tool to check for corrupted system files by opening Command Prompt as an administrator and typing “sfc /scannow”.

If the issue persists after these steps, it may be necessary to clean the RAM modules. To do this, follow these instructions:

Step 1: Power off your computer and disconnect all cables.

Step 2: Open your computer case and locate the RAM modules.

Step 3: Carefully remove the RAM modules from their slots and use a soft, dry cloth to gently clean the gold contacts on the modules.

Step 4: Reinsert the RAM modules back into their slots, ensuring they are securely seated.

Once you have diagnosed and cleaned the RAM, restart your computer and check if the “Failed to create dump file” error has been resolved. If the issue persists, consider seeking help from a professional or using diagnostic tools such as the Event Viewer to gather more information about the error.

Manage System Files with DISM and SFC Scans

Command Description
dism /online /cleanup-image /restorehealth Repairs the Windows image using Windows Update as a source
sfc /scannow Scans and repairs corrupted system files

Uninstall Cleanup Software

  • Uninstall any cleanup software that may be interfering with the dump file creation

BIOS Update Techniques

One common issue that users may encounter when trying to create a dump file is the “Failed to create dump file” error. If you are facing this problem, one potential solution is to update your BIOS.

Updating your BIOS can help resolve various system-related issues, including errors that prevent dump file creation. Here are some techniques to successfully update your BIOS:

1. Identify your current BIOS version: Check your computer’s documentation or manufacturer’s website to find out the current version of your BIOS.

2. Download the latest BIOS update: Visit the manufacturer’s website and download the latest BIOS update for your specific model.

3. Create a backup: Before proceeding with the BIOS update, make sure to back up all your important files to prevent any data loss in case something goes wrong during the update process.

4. Follow the manufacturer’s instructions: Each manufacturer may have specific instructions on how to update the BIOS. Follow these instructions carefully to avoid any potential issues.

5. Restart your computer: Once the BIOS update is complete, restart your computer to apply the changes. Check if the “Failed to create dump file” error is resolved.

If the issue persists, you may need to seek further assistance from the manufacturer or a professional technician to diagnose and fix the problem.

System Restore and Repair Options

First, try using System Restore to revert your system to a previous point in time:
– Open the Start menu and type “System Restore”
– Follow the on-screen instructions to select a restore point

If System Restore doesn’t work, you can use System File Checker to scan and repair corrupted system files:
– Open a Command Prompt window as an administrator by typing “cmd.exe” in the Start menu
– Type “sfc /scannow” and press Enter to start the scan

Another option is to create a system image using Windows 10 or Windows 11:
– Open the Control Panel and select “Backup and Restore”
– Follow the prompts to create a system image

By utilizing these System Restore and Repair Options, you may be able to fix the “Failed to create dump file” error and get your system back up and running smoothly.

F.A.Qs

How to fix dump file creation failed due to error during dump creation?

To fix dump file creation failed due to error during dump creation, consider uninstalling any third-party cleanup applications on your computer that may be interfering with the dump file creation process.

How do I manually create a memory dump?

To manually create a memory dump, you can go to Startup and Recovery settings, select Complete memory dump from the dropdown menu, and adjust the dump file path if necessary.

What is a dump error?

A dump error is when all available information stored in memory at the time of an error is collected by the system and saved into a file, such as a blue screen of death (BSOD) in Windows. This file can then be analyzed by a support engineer to identify the cause of the error.

Xbox One Won’t Open Settings Troubleshoot Fix

Are you having trouble opening the settings on your Xbox One console? Let’s troubleshoot and find a fix for this issue.

Initiating a Restart or Power Cycle

Xbox One power button

To initiate a restart or power cycle on your Xbox One to troubleshoot the issue of settings not opening, follow these steps:

First, press and hold the Xbox button on the console for at least 10 seconds until it powers off completely. This will perform a hard reset.

Next, unplug the power cord from the back of the console and wait for about a minute before plugging it back in.

After reconnecting the power cord, press the Xbox button on the console to turn it back on.

If the issue persists, you can also try clearing the cache on your Xbox One. To do this, go to Settings > System > Storage > Clear local saved games.

If clearing the cache does not resolve the issue, you may need to perform a factory reset on your console. This will erase all data, so make sure to back up any important information before proceeding.

Verifying Xbox Live Server Status

Xbox Live server status page.

To verify the Xbox Live server status, you can visit the official Xbox Live status page on the Xbox website. This page will show you if there are any ongoing issues with the servers that could be causing your Xbox One to have trouble opening settings.

If the Xbox Live status page shows that the servers are up and running, but you are still experiencing issues with your Xbox One settings, you can try restarting your console to see if that resolves the problem.

Another option is to check for any system updates that may be available for your Xbox One. Sometimes, a software update can fix bugs or glitches that are preventing you from accessing certain settings on your console.

If neither of these steps work, you may want to reach out to Xbox support for further assistance. They may be able to provide you with more specific troubleshooting steps based on the issue you are experiencing.

Testing Network Connections

Ethernet cable plugged into a router

  • Check network cables for any loose connections
  • Restart your router and modem
  • Ensure your Xbox One is connected to the correct Wi-Fi network
  • Try connecting your Xbox One to the Internet using an ethernet cable
  • Test the network connection on another device to see if the issue is with your Xbox One or network

Ensuring Account and Purchase Verification

To ensure account and purchase verification on your Xbox One, make sure you are signed in with the correct account that has the necessary permissions to access settings. If you are experiencing issues with verification, try signing out and then signing back in to refresh the account information.

Another step to troubleshoot account and purchase verification issues is to clear the cache on your Xbox One. This can help resolve any temporary glitches that may be affecting the verification process. Additionally, check your internet connection to ensure it is stable and not causing any disruptions in account verification.

If you are still experiencing problems with account and purchase verification, contact Xbox support for further assistance. They can provide guidance on resolving any issues related to account settings and verification on your Xbox One.

Updating or Resetting the Console

To update or reset the console to fix the issue of Xbox One not opening settings, follow these steps:

First, try restarting the console by holding down the power button for 10 seconds until it completely shuts off. Then, turn it back on and check if the settings can now be accessed.

If restarting doesn’t work, try updating the console by connecting to the internet and checking for any available system updates. Make sure the console is connected to a stable internet connection to successfully download and install any updates.

If updating doesn’t resolve the issue, you may need to perform a factory reset. This will erase all data on the console, so make sure to back up any important information beforehand. To reset the console, go to Settings > System > Console info & updates > Reset console.

After resetting, set up the console again and check if the settings can now be opened without any issues.

FAQ

Why is my Xbox not letting me open anything?

Your Xbox may not be letting you open anything because it may need to be reset. Press and hold the Xbox button on your console for about 10 seconds to turn it off completely, then turn it back on and try opening the game or app again to see if the issue is resolved.

How do you reset an unresponsive Xbox One?

To reset an unresponsive Xbox One, you can hold down the Xbox button on the front of the console for about 10 seconds to shut it down completely. After that, unplug the power cable, plug it back in, and then press the Xbox button to turn it back on.

How do I fix my Xbox One not loading anything?

To fix your Xbox One not loading anything, you can try restarting or resetting your console, downloading and updating the Offline System Update file (OSU1), restoring your console to factory defaults, or ultimately getting it repaired if necessary.

Fix ASUS Laptop Screen Flickering Troubleshooting Windows 10IPS 4K Display

In this article, I will discuss troubleshooting tips for fixing ASUS laptop screen flickering on Windows 10 IPS 4K display.

Adjust the Screen Refresh Rate

1. Right-click on the desktop and select “Display settings.”
2. Scroll down and click on “Advanced display settings.”
3. Under “Refresh rate,” click on the drop-down menu and select the desired refresh rate. Choose a refresh rate that is supported by your monitor to prevent flickering issues.
4. Click “Apply” to save the changes and then click “Keep changes” to confirm the new refresh rate.

If you notice that the screen flickering persists after adjusting the refresh rate, you may need to troubleshoot further or seek technical support. Remember to always double-check the compatibility of the refresh rate with your display to avoid any potential issues.

Update Graphics Card Drivers

  • Open Device Manager by right-clicking on the Start button and selecting it from the menu.
  • Expand the Display adapters category to find your graphics card.
  • Right-click on your graphics card and select Update driver.
  • Choose Search automatically for updated driver software and follow the on-screen instructions to complete the update process.

Remove Incompatible Applications

ASUS laptop with multiple application icons.

1. Open the Control Panel by searching for it in the Windows search bar.

2. Click on “Programs” and then “Programs and Features.”

3. Look through the list of installed applications and identify any software that may be incompatible or causing conflicts with the display.

4. Select the incompatible application and click on “Uninstall.”

5. Follow the prompts to complete the uninstallation process.

If the screen flickering persists after removing incompatible applications, consider checking for any updates for your display drivers. You can do this by:

1. Right-click on the Start menu and select “Device Manager.”

2. Expand the “Display adapters” category.

3. Right-click on your display adapter and select “Update driver.”

4. Choose to search automatically for updated driver software.

5. Follow the prompts to install any available updates.

After updating the display drivers, restart your laptop to see if the screen flickering issue has been resolved. If the problem continues, you may need to seek further technical support or consider contacting ASUS for assistance.

Enable VSync Technology

To enable VSync:
1. Right-click on your desktop and select “Display settings.”
2. Scroll down and click on “Graphics settings.”
3. Under “Choose an app to set preference,” select the application causing the screen flickering.
4. Click on “Options” and choose “High performance.”
5. Check the box next to “Enable VSync” to turn it on.

Enabling VSync can help reduce screen flickering on your ASUS laptop’s IPS 4K display, providing a smoother and more stable viewing experience. It’s a simple yet effective solution to address screen flickering issues on Windows 10.

FAQs

How do I fix my Asus monitor from flickering?

To fix your Asus monitor from flickering, change the setting to Performance, then turn off the monitor for 3-5 minutes before turning it back on. This should resolve the flicker issue.

Why is my Asus laptop screen flickering?

Your Asus laptop screen may be flickering due to an outdated graphics card driver or incompatible applications. To troubleshoot this issue, you can start by updating your graphics card driver and checking for any incompatible applications.

Why is my laptop screen suddenly flickering?

Your laptop screen is suddenly flickering most likely due to issues with the display drivers. To address this, you can update your display driver by starting your PC in safe mode, uninstalling the current display adapter, and then checking for driver updates. To do this, start your PC in safe mode and access the Device Manager to make these changes.

Why is my screen flickering and glitching?

Your screen is flickering and glitching because there may be loose connections between your monitor cable and graphics card ports. Additionally, outdated or incompatible graphics drivers could be causing the issue. Finally, background programs putting strain on your graphics card may also be a factor.

Troubleshoot Dropbox File Sharing Problems

Having trouble with Dropbox file sharing? Let’s troubleshoot those problems together.

Managing Shared Folder Permissions

To manage shared folder permissions in Dropbox, first, log in to your account and locate the shared folder in question. Click on the folder to open it. Next, click on the “Share” button located at the top of the page. From there, you can add or remove people from the shared folder and adjust their permission levels. Make sure to double-check the settings to ensure that the right people have the appropriate access to the folder. If you encounter any issues with shared folder permissions, refer to Dropbox’s FAQ section or contact their customer support for further assistance.

Resolving Conflicts with Nested Shared Folders

Dropbox shared folder icon

  • Step 1: Check for any conflicting files or folders within nested shared folders.
    • Look for any files or folders with similar names that may be causing conflicts.
    • Rename any conflicting files or folders to avoid further issues.
  • Step 2: Merge any duplicate files or folders within the shared folders.
    • Compare the contents of each duplicate file or folder.
    • Keep the most up-to-date or relevant version and discard the duplicates.
  • Step 3: Reset permissions for the nested shared folders.
    • Check the permissions settings for each folder and ensure they are correctly set.
    • Adjust permissions as needed to allow for seamless file sharing.

Troubleshooting Missing Share Options

If you are experiencing missing share options in Dropbox, there are a few troubleshooting steps you can take to resolve the issue. First, make sure you are logged into your Dropbox account on the correct computer. Check your internet connection to ensure it is stable and working properly. If the share options are still missing, try clearing your browser’s cache and cookies. You can also try disabling any ad blocking or browser extensions that may be interfering with the Dropbox interface.

If the issue persists, try accessing Dropbox from a different web browser or device to see if the share options appear. Make sure you are using the most up-to-date version of the Dropbox application software. If you are still having trouble, contact Dropbox support for further assistance.

Addressing Ownership Changes in Shared Folders

To address ownership changes in shared folders on Dropbox, make sure to check the folder permissions. You can do this by right-clicking on the folder and selecting “Sharing options. ” From there, you can view who has access to the folder and what level of permission they have. If ownership has been mistakenly changed, you can easily change it back by clicking on the “Share” button and selecting the folder owner. Additionally, ensure that all members have the correct email addresses linked to their Dropbox accounts to avoid any confusion with ownership changes. Lastly, communicate with all folder members to confirm any changes and prevent further issues.

Correcting File and Folder Access Issues

To correct file and folder access issues in Dropbox, ensure that the appropriate permissions are set for the files and folders in question. Check the sharing settings to make sure that the right people have access. If the issue persists, try re-inviting users to the shared folder or sharing the files again.

If you are still experiencing problems, clear your cache and cookies or try accessing Dropbox from a different web browser. Update your browser or disable any ad-blocking extensions that may be interfering with the sharing process.

If all else fails, contact Dropbox support for further assistance with resolving file sharing issues.

Understanding and Fixing Sharing Invitations Problems

If you are experiencing issues with sharing invitations on Dropbox, there are a few steps you can take to troubleshoot and resolve the problem.

First, ensure that you are logged into your Dropbox account and that you have the correct permissions to share files. Check your email address to make sure it is accurate and that you are using the correct email format when sending invitations.

If the recipient is not receiving the sharing invitation, ask them to check their spam or junk folder. Sometimes, emails from file sharing services can get caught in these filters. Ask the recipient to add Dropbox to their whitelist to prevent this from happening in the future.

If the issue persists, try sending the sharing invitation from a different browser or device to see if that resolves the problem. Clear your browser cache and cookies to eliminate any potential issues related to stored data.

F.A.Qs

Why won’t my Dropbox let me share files?

It seems like your Dropbox may not be letting you share files because the settings within a shared folder have been changed by the folder owner or the team admin has disabled the ability to share links with people outside the team.

Is Dropbox good for file sharing?

Is Dropbox good for file sharing?

Yes, Dropbox Transfer is a useful tool for sharing large files that do not require collaboration or editing by recipients. It allows you to easily send files stored in your Dropbox account without the need for recipients to have their own Dropbox account.

Why is my Dropbox not syncing with other users?

Your Dropbox may not be syncing with other users due to network settings or firewall issues. Check your firewall, security, and antivirus settings, as well as network restrictions to troubleshoot the problem.

Why can’t people access my Dropbox link?

People can’t access your Dropbox link because the owner of the folder has set view-only access, which means you cannot share it with other members.

Destiny 2 Error Code Weasel Fix & Help

In this article, I will discuss how to fix and get help for the Destiny 2 error code Weasel.

Understanding Error Code Weasel

Error Code Weasel in Destiny 2 typically occurs due to connectivity issues with the game servers. To fix this issue, try restarting your router and console or PC. Make sure your internet connection is stable and not being interrupted by other devices.

If the problem persists, check if Destiny 2 servers are down by visiting the official Bungie website or Reddit forums. You can also try clearing the cache on your console or PC and resetting your IP address.

Make sure your game is up to date with the latest patches and updates.

Quick Troubleshooting Steps

Error code pop-up message

  • Check Server Status:
    • Visit the official Destiny 2 server status page to see if there are any ongoing issues.
    • If servers are down, wait for Bungie to resolve the issue before trying to reconnect.
  • Restart Game and Console:
    • Close Destiny 2 and shut down your console.
    • Wait for a few minutes before turning your console back on and relaunching the game.
  • Check Network Connection:
    • Ensure your internet connection is stable and working properly.
    • Try connecting to a different network to see if the issue persists.
  • Clear Cache:
    • Clear the cache on your console by following the manufacturer’s instructions.
    • Clearing the cache can help resolve any temporary data issues causing the error.
      Clear the cache on your console by following the manufacturer's instructions.
Clearing the cache can help resolve any temporary data issues causing the error.
  • Update Game and Console:
    • Make sure both Destiny 2 and your console are running the latest software updates.
    • Updating the game and console can fix any compatibility issues causing the error.

Advanced Solutions for Persistent Issues

If you’re experiencing the persistent Destiny 2 error code Weasel, there are advanced solutions you can try to fix the issue. One common fix is to reset your internet connection by power cycling your router and modem. This can help refresh your IP address and resolve any network issues causing the error.

Another solution is to clear the cache on your console or PC. This can help eliminate any corrupted data that may be causing the error code Weasel. You can also try verifying the integrity of your game files on platforms like Steam or Battle.net.

If these steps don’t work, you can try reaching out to the Destiny 2 community on Reddit or forums for additional help and advice.

Exploring Similar Error Codes

If you are experiencing the Destiny 2 Error Code Weasel, you may also encounter similar error codes such as Baboon, Currant, or Chicken. These errors usually indicate a connection issue or server problem.

To fix the Weasel error code, try the following steps:

1. Check your internet connection and make sure it is stable.
2. Restart your router and console or PC.
3. Clear the cache on your system.
4. Update your game and console software.

If the issue persists, you may need to contact Destiny 2 support for further assistance. Keep an eye on official forums and social media for any updates on server issues that may be causing the error code.

F.A.Qs

How do I fix error code weasel?

To fix error code Weasel, power cycle your PC or console by shutting it down, waiting 30 seconds, and then restarting it.

How do you fix the weasel in Destiny 2 Xbox?

To fix the weasel error in Destiny 2 on Xbox, unplug the power cable from the router, modem, or gateway for 5 minutes. If you have both a router and a modem, unplug the power cable from both devices. Then, press and hold the Xbox button on your console for 10 seconds or until it turns off. Wait for 2 minutes before turning it back on.

What is the error code weasel and anteater?

The error code ‘WEASEL’ and ‘ANTEATER’ may indicate a routing issue between your ISP and the game servers.

Why do I keep getting error code Destiny 2?

I keep getting error code Destiny 2 because there may be a single root issue causing the repeated disconnects, such as corrupted data in the installation or network instability.

Fix USB Device Not Recognized Error on Windows 10

Having trouble with a “USB Device Not Recognized” error on your Windows 10 computer? Let’s explore how to fix this issue quickly and easily.

Symptoms and Causes

Symptoms: Look out for error messages, missing devices in File Explorer, or exclamation marks in Device Manager.

Causes: The error could be caused by outdated or corrupt device drivers, issues with the USB port or cable, conflicts with other software, or even hardware problems.

If you are experiencing this error, try updating your device drivers, checking your USB ports and cables, and troubleshooting any software conflicts. If the issue persists, you may need to seek further assistance or consider seeking professional help for hardware issues.

Restart Your Computer

Windows restart button

To restart your computer, click on the Start menu and select the Power icon. Choose the Restart option from the context menu that appears. Alternatively, you can press the Ctrl + Alt + Delete keys on your keyboard to bring up the security options menu, then select Restart.

Once your computer has restarted, plug in the USB device again and see if the error message persists. If the problem continues, you may need to troubleshoot further by checking the device driver, USB hardware, or any recent updates that may have caused the issue.

Try a Different USB Port or Computer

If your USB device is not being recognized on Windows 10, a simple solution to try is to plug it into a different USB port or connect it to a different computer. Sometimes the issue may be with the specific port you are using, so switching to a different one can help troubleshoot the problem.

It’s possible that the USB port you are currently using is not functioning properly, which can prevent your device from being recognized. By trying a different port or computer, you can determine if the issue lies with the device itself or the port you are using.

If after trying different ports and computers your USB device is still not being recognized, you may need to further investigate the issue by checking for any hardware or driver issues that could be causing the problem.

Uninstall and Reinstall USB Device

USB device unplugged and plugged back in

To uninstall and reinstall a USB device on Windows 10, follow these steps:

1. Open the Device Manager by pressing Windows key + X and selecting Device Manager from the menu.

2. Expand the Universal Serial Bus controllers section.

3. Right-click on the USB device that is not being recognized and select Uninstall device.

4. Disconnect the USB device from your computer.

5. Restart your computer.

6. Reconnect the USB device to your computer. Windows should automatically reinstall the device.

7. If the device is still not recognized, try plugging it into a different USB port.

8. If the issue persists, try using the USB device on another computer to determine if the problem is with the device itself.

Update Windows and Drivers

Windows update screen.

1. Update Windows: Make sure your operating system is up to date by checking for Windows Updates. Go to Settings > Update & Security > Windows Update and click on “Check for updates.”

2. Update Drivers: Similarly, update your device drivers by going to Device Manager. Right-click on the Start menu and select Device Manager. Look for any devices with a yellow exclamation mark next to them, right-click, and select “Update driver.”

3. Reboot: After updating Windows and drivers, restart your computer to apply the changes.

By keeping your system and drivers up to date, you can often resolve issues like the “USB Device Not Recognized” error on Windows 10. If the problem persists, consider troubleshooting the specific USB device or checking for hardware issues.

Adjust USB Settings and Power Management

1. Open Device Manager by pressing Windows key + X and selecting Device Manager from the menu.

2. Expand the “Universal Serial Bus controllers” section.

3. Right-click on each USB Root Hub and select Properties.

4. Go to the Power Management tab and uncheck the box that says “Allow the computer to turn off this device to save power.”

5. Click OK and repeat this process for all USB Root Hubs.

6. Restart your computer and check if the error persists.

Install Latest Chipset Drivers

To fix the “USB Device Not Recognized” error on Windows 10, it is important to install the latest chipset drivers for your motherboard. These drivers help your computer communicate properly with USB devices and can often resolve issues like this.

First, determine the manufacturer and model of your motherboard. Visit the manufacturer’s website and navigate to the support or downloads section. Look for the latest chipset drivers for your specific motherboard model and download them to your computer.

Next, install the downloaded chipset drivers by double-clicking on the installation file and following the on-screen instructions. Once the installation is complete, restart your computer to apply the changes.

After restarting, plug in the USB device that was not being recognized and check if the error has been resolved. If the issue persists, try using a different USB port on your computer or testing the USB device on another computer to rule out any hardware problems.

By ensuring that your chipset drivers are up to date, you can often resolve USB device recognition issues on Windows 10.

Prevent Future USB Recognition Errors

A USB cable with a warning symbol.

  • Update USB Drivers:
    • Open Device Manager by pressing Windows Key + X and selecting Device Manager.
    • Expand the Universal Serial Bus controllers section.
    • Right-click on each USB Root Hub and select Update driver.
    • Follow the on-screen instructions to complete the update process.
  • Disable USB Selective Suspend:
    • Open Power Options by pressing Windows Key + X and selecting Power Options.
    • Click on Change plan settings next to your selected power plan.
    • Click on Change advanced power settings.
    • Expand USB settings and USB selective suspend setting.
    • Select Disabled for both On battery and Plugged in options.
    • Click Apply and OK to save changes.
  • Use a Powered USB Hub:
    • Connect your USB devices to a powered USB hub instead of directly to your computer.
    • Make sure the powered USB hub has enough power to support all connected devices.

FAQs

How do I fix my USB device not recognized?

To fix a USB device not recognized, you can try restarting your computer, using a different port, updating Windows and drivers, changing root hub settings, and disabling fast startup. If the issue persists, try connecting the USB device to a different computer to see if it is recognized.

Why wont my USB port recognize a device?

Your USB port may not recognize a device due to a faulty port. Try plugging the device into another USB port on your laptop. Restarting your laptop and reconnecting the USB device can also help resolve the issue.

Why is my phone saying USB device not recognized?

Your phone is saying “USB device not recognized” because there may be a software incompatibility issue or a loose connection in the port. Check to see if the USB cable is damaged or incompatible with your device, and ensure that both ends of the cable fit securely into their ports. If needed, try using a different cable.

How do I ignore a USB device not recognized?

To ignore a USB device not recognized, you can go to Settings on your computer, select Devices, then uncheck the option to be notified of issues connecting to USB devices.

Fix Windows 7 Starter Slow Boot

If you are experiencing slow boot times on your Windows 7 Starter operating system, there are several troubleshooting steps you can take to improve performance.

Symptoms and Scenarios

Symptoms of a slow boot in Windows 7 Starter may include a prolonged loading time when starting up your computer, delays in accessing programs or files, and overall sluggish performance. These issues can be frustrating, but there are steps you can take to improve your system’s speed and efficiency.

One common scenario that may lead to slow boot times is a cluttered Windows Registry. Over time, the registry can become filled with unnecessary or outdated entries, which can slow down the boot process. To address this issue, clean up your registry by using a reputable registry cleaner tool to remove any invalid or obsolete entries.

Another possible cause of slow boot times in Windows 7 Starter is a build-up of temporary files or unnecessary programs running in the background. To remedy this, use the Disk Cleanup tool to remove temporary files and uninstall any unused programs from your system. You can access the Disk Cleanup tool by searching for it in the Start menu.

Additionally, a fragmented hard drive can contribute to slow boot times in Windows 7 Starter. To address this issue, run the Disk Defragmenter tool to optimize the layout of files on your hard drive. You can access the Disk Defragmenter tool by searching for it in the Start menu.

If you are still experiencing slow boot times after following these steps, it may be helpful to check the Event Viewer for any error messages or warnings that could indicate a hardware or software issue. The Event Viewer can provide valuable insight into what may be causing the slowdown and help you troubleshoot the problem further.

Causes and Why It’s Slow

Causes Why It’s Slow
Too many startup programs These programs consume resources and slow down the boot process.
Fragmented hard drive Fragmentation can cause delays in accessing files needed during boot.
Outdated drivers Old drivers may not be optimized for performance, leading to slow boot times.
Insufficient RAM Not enough memory can result in slow boot times as the system struggles to load all necessary files.

Resolution Strategies

Windows 7 boot screen

1. Disable Unnecessary Startup Programs: To improve the boot time of Windows 7 Starter, you can disable unnecessary startup programs that might be slowing down the system. To do this, go to the Task Manager by pressing Ctrl + Shift + Esc, click on the Startup tab, and disable any programs that you don’t need to start with Windows.

2. Clean up Disk Space: Another way to speed up the boot time of Windows 7 Starter is to clean up disk space. Use the built-in Disk Cleanup tool to remove temporary files, system files, and other unnecessary data that might be taking up space on your hard drive.

3. Check for Malware and Viruses: Malware and viruses can also slow down the boot time of your system. Run a full system scan using your antivirus software to check for any malicious programs that might be causing the slowdown.

4. Update Device Drivers: Outdated or corrupt device drivers can also cause slow boot times. Make sure to update your device drivers regularly to ensure that your hardware is running smoothly.

5. Use System Restore: If you recently installed a new program or driver that is causing the slow boot time, you can use System Restore to revert your system to a previous state. This can help you undo any changes that might be affecting the boot time of Windows 7 Starter.

Performance Troubleshooting and Cleanup

To troubleshoot and clean up performance issues causing slow boot times in Windows 7 Starter, follow these steps:

1. Check for Malware: Run a full system scan using your preferred antivirus software to ensure that malware is not causing the slow boot.

2. Disable Startup Programs: Open the Task Manager by pressing Ctrl + Shift + Esc, go to the Startup tab, and disable any unnecessary programs from starting up with Windows.

3. Clean up Disk Space: Use the Disk Cleanup tool to remove temporary files, old system files, and other unnecessary data that may be taking up space and slowing down the boot process.

4. Defragment Your Hard Drive: Use the built-in Disk Defragmenter tool to optimize the layout of files on your hard drive, which can improve boot times.

5. Update Device Drivers: Make sure all your device drivers are up to date by visiting the manufacturer’s website or using Windows Update to download the latest versions.

6. Check for Windows Updates: Ensure that your system is up to date with the latest patches and hotfixes from Microsoft to address any known performance issues.

7. Disable Visual Effects: Go to System Properties > Advanced system settings > Performance settings and choose the option to adjust for best performance to disable unnecessary visual effects that may be slowing down boot times.

8. Clean up the Registry: Use a trusted registry cleaner to scan for and fix any errors or unnecessary entries in the Windows Registry that may be impacting performance.

Optimizing Startup and System Partition

To optimize startup and system partition in Windows 7 Starter for faster boot times, reduce the number of startup programs and services running on your computer. This can be done by accessing the System Configuration utility. Press the Windows key + R, type “msconfig” and hit Enter. Navigate to the “Startup” tab and uncheck unnecessary programs.

Defragment your hard drive to improve the efficiency of data retrieval during boot-up. Open the Start menu, type “Disk Defragmenter” and select the program. Choose the disk you want to defragment and click “Defragment Disk.”

Consider disabling unnecessary visual effects that can slow down your system’s boot time. Right-click on “Computer,” select “Properties,” click on “Advanced system settings,” go to the “Performance” section and choose “Adjust for best performance.”

Check for Windows updates regularly to ensure that your system is running smoothly and efficiently. Go to the Control Panel, click on “Windows Update,” and select “Check for updates.”

Optimize your system partition by removing temporary files, unused applications, and clearing the recycle bin. This can free up valuable disk space and improve overall system performance.

Advanced Solutions and Hotfix Information

  • Check for Windows Updates:
    • Open Control Panel by clicking on the Start menu and selecting Control Panel.
    • Click on System and Security.
    • Click on Windows Update and check for any available updates.
    • Install any updates that are available and restart your computer.
  • Run System Maintenance Troubleshooter:
    • Open Control Panel by clicking on the Start menu and selecting Control Panel.
    • Click on System and Security.
    • Click on Security and Maintenance.
    • Under the Maintenance section, click on Start maintenance.
    • Follow the on-screen prompts to complete the troubleshooting process.
  • Apply Hotfixes:
    • Visit the Microsoft Support website and search for any hotfixes related to slow boot issues in Windows 7 Starter.
    • Download and install any applicable hotfixes.
      Visit the Microsoft Support website and search for any hotfixes related to slow boot issues in Windows 7 Starter.
Download and install any applicable hotfixes.
    • Restart your computer after installing the hotfixes.

Conclusion and More Tips

Conclusion: In conclusion, if you are experiencing slow boot times with Windows 7 Starter, there are several troubleshooting steps you can take to improve the situation. By following the tips outlined in this article, you should be able to significantly decrease the time it takes for your system to boot up and start running smoothly again.

More Tips: In addition to the tips provided in this article, you may also want to consider checking for any Windows updates that may be available. Keeping your operating system up to date can help improve overall performance and fix any bugs or issues that may be causing slow boot times. Additionally, you may want to consider running a disk cleanup and defragmentation to optimize your system’s performance.

FAQ

How can I speed up my Windows 7 starter?

To speed up your Windows 7 Starter, you can increase your RAM, disable startup programs, change search indexing, and defrag your hard drive.

Why is Windows 7 suddenly so slow?

Windows 7 may be suddenly slow due to insufficient disk space or system memory, as well as having too many programs open at once. Restarting your PC can often help improve performance.

How much RAM do I need for Windows 7 starter?

To run Windows 7 Starter, you will need at least 1 gigabyte (GB) of RAM for the 32-bit version and 2 GB of RAM for the 64-bit version.