Microsoft(C) Register Server 32 bit CPU usage high troubleshoot help

In this article, I will provide troubleshooting tips to help resolve high CPU usage issues with Microsoft Register Server on a 32-bit system.

Syntax and Usage

If you are experiencing high CPU usage on your 32-bit Microsoft Register Server, follow these troubleshooting steps:

First, check for any third-party applications or background processes that may be contributing to the high CPU usage. Close any unnecessary programs to see if that resolves the issue.

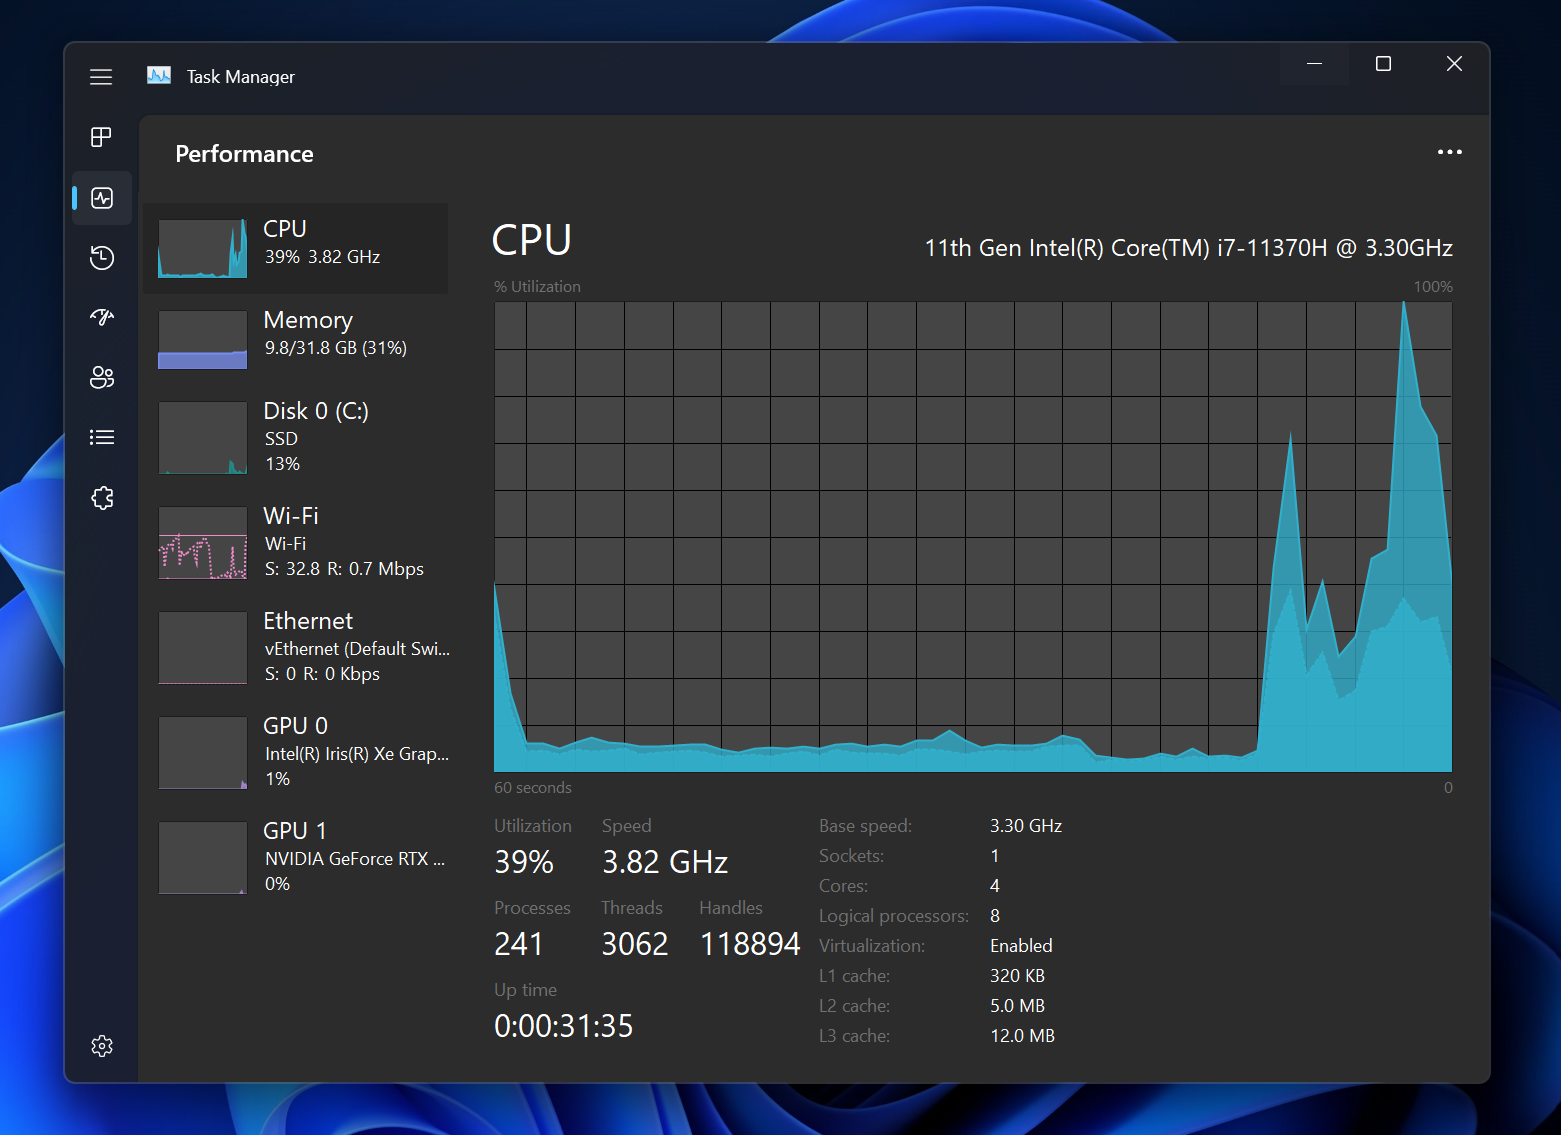
Next, try restarting the Microsoft Register Server process to see if that helps alleviate the high CPU usage. This can be done by accessing the Task Manager, locating the process, and ending it.

If restarting the process does not work, you can try re-registering the Microsoft Register Server using the Command Prompt. Open the Command Prompt as an administrator and enter the following command: regsvr32 /u path_to_dll_file.dll. This will unregister the DLL file associated with the Register Server.

After unregistering the DLL file, re-register it using the following command: regsvr32 path_to_dll_file.dll. This may help resolve any issues causing the high CPU usage.

If the problem persists, you can try checking for any errors in the Windows Registry that may be affecting the Microsoft Register Server. Use the Registry Editor to navigate to the appropriate keys and make any necessary corrections.

It is also recommended to check for any updates or patches from Microsoft that may address known issues with the Register Server. Keeping your system up to date can help prevent high CPU usage and other performance issues.

If all else fails, you may need to consider uninstalling and reinstalling the Microsoft Register Server to resolve the high CPU usage problem. Be sure to back up any important data before proceeding with the uninstallation.

Resolving Errors and Best Practices

Resolving Errors: When dealing with high CPU usage on a 32-bit Microsoft Register Server, there are a few troubleshooting steps you can take to address the issue. First, check for any error messages that may give you a clue as to what is causing the high CPU usage. Look for any specific error codes or messages that can point you in the right direction.

Check Registry Settings: It’s important to review and verify the Microsoft Register Server settings in the Windows Registry. Make sure that all entries are correct and that there are no conflicts or errors present. Use the Windows Registry Editor to navigate to the appropriate keys and check for any abnormalities.

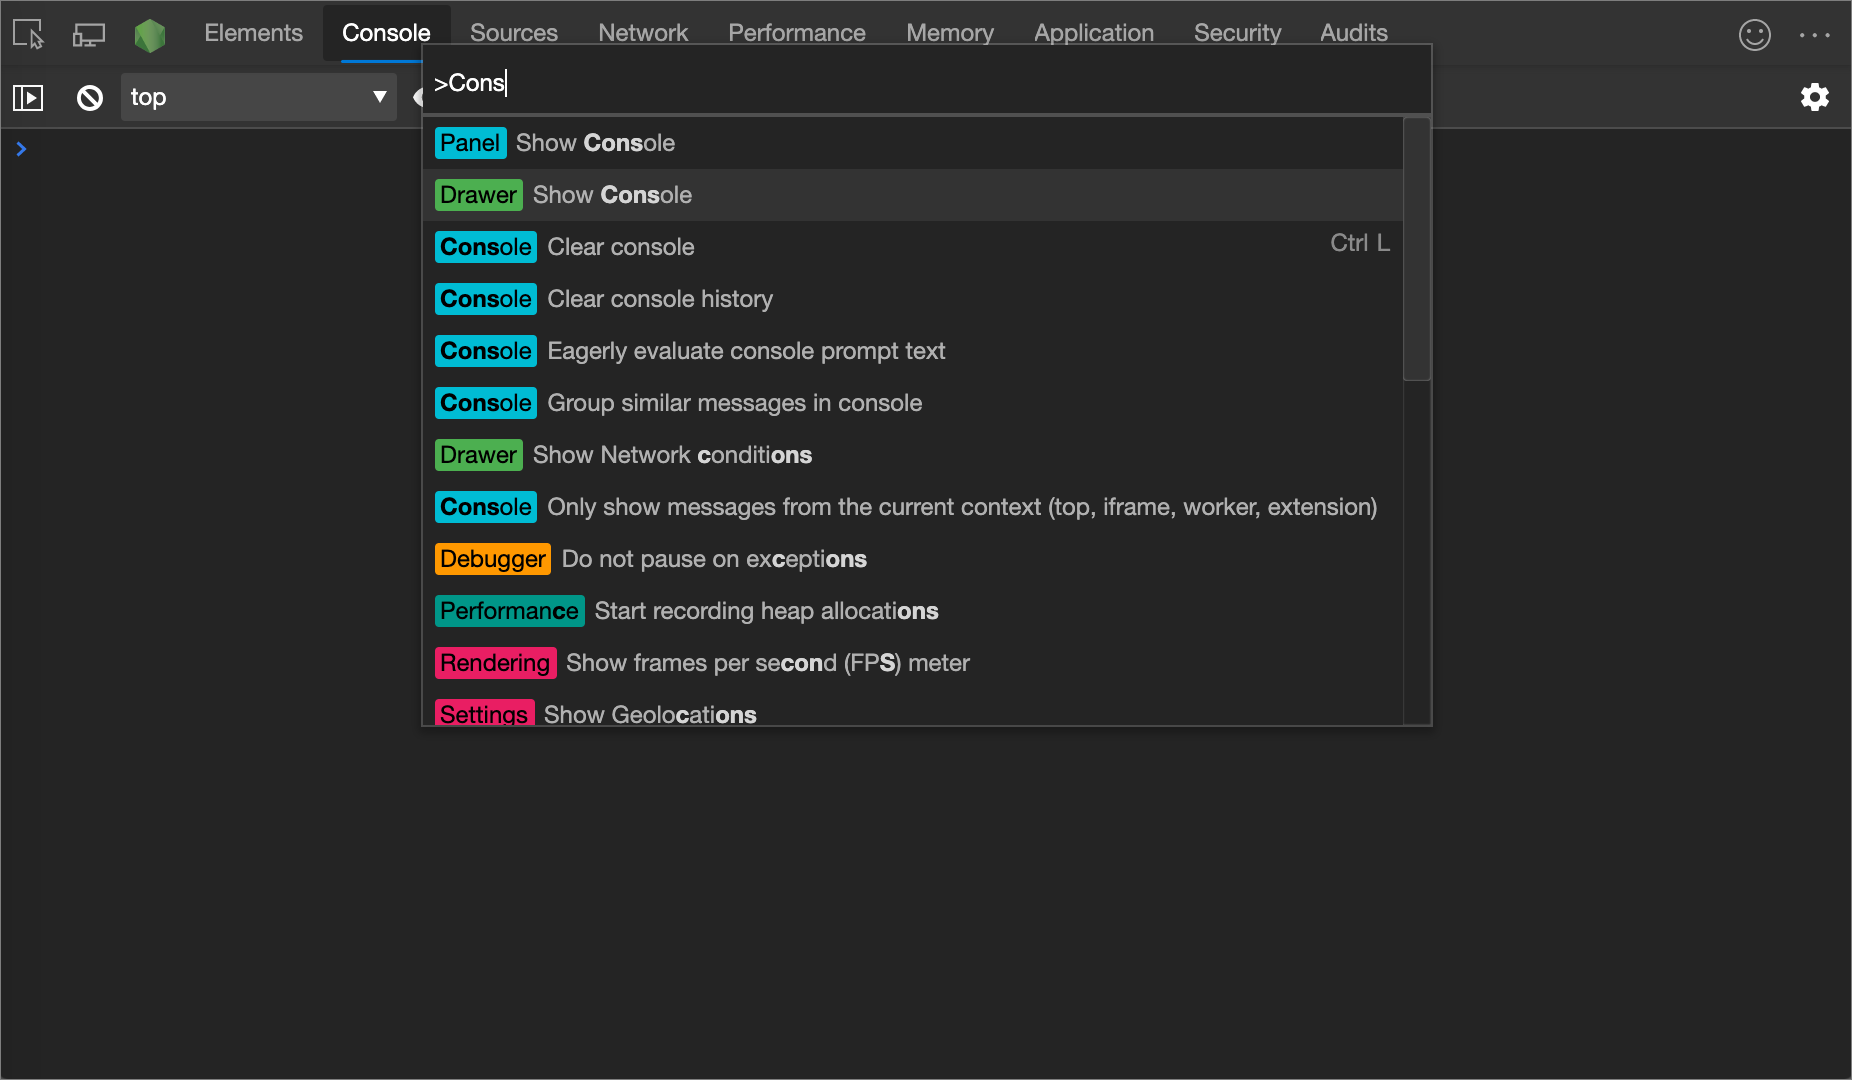
Utilize Command-Line Interface: The Command-Line Interface can be a powerful tool in troubleshooting high CPU usage issues. Use the command prompt to run diagnostic tools, check system processes, and identify any potential conflicts that may be causing the problem. Be sure to use the appropriate syntax and commands for the best results.

Review Environment Variables: Check the environment variables on your system to ensure that they are properly configured. Make sure that the paths are correct, and there are no conflicts with other variables that could be impacting the CPU usage. Verify that all settings are in line with the requirements for the Microsoft Register Server.

Uninstall Unnecessary Programs: If you suspect that a specific program or application is causing the high CPU usage, consider uninstalling it. Use the Control Panel or a third-party uninstaller tool to remove any unnecessary software that may be contributing to the issue. Be sure to follow the proper uninstallation procedures to avoid any conflicts.

Update System Drivers: Outdated or corrupted system drivers can also cause high CPU usage on a 32-bit Microsoft Register Server. Make sure that all your drivers are up to date by visiting the manufacturer’s website or using a driver update tool. This can help resolve any compatibility issues and improve system performance.

Seek Professional Help: If you have tried all the troubleshooting steps and the high CPU usage issue persists, it may be time to seek professional help. Contact Microsoft TechNet or a qualified IT professional who can provide further assistance in resolving the problem. They may have additional tools and resources to help diagnose and fix the issue.

Understanding Regsvr32.exe Information

  • Run a full system scan using your preferred antivirus software to check for any malware that may be causing the high CPU usage.
  • Remove any malware that is found during the scan to eliminate the potential cause of the issue.

Update Windows

  • Check for Windows updates and install any pending updates to ensure that your system is running the latest software.
  • Restart your computer after installing updates to apply the changes and see if the high CPU usage persists.

Check for Corrupted System Files

  • Run the System File Checker tool by opening Command Prompt as an administrator and typing “sfc /scannow” to scan for and repair any corrupted system files.
  • Follow the on-screen instructions to complete the scan and repair process, then restart your computer to see if the issue is resolved.

Additional Resources and References

One valuable resource to consider is Microsoft TechNet, which provides in-depth technical information and troubleshooting guides for various Microsoft products. Additionally, exploring forums and online communities dedicated to Windows operating systems may offer insights and solutions from other users who have encountered similar issues.

If you are dealing with high CPU usage on a 32-bit system, it might be beneficial to review information on 32-bit computing and how it differs from 64-bit computing. Understanding the limitations and capabilities of your system architecture can help pinpoint potential causes of the CPU usage issue.

In some cases, the problem may be related to compatibility issues with specific operating systems. Familiarizing yourself with the nuances of different Windows editions, such as Windows 7, Windows 8, Windows Vista, Windows XP, and Windows 10, can provide valuable context for troubleshooting.

Cmd.exe can be a useful tool for investigating CPU usage and running diagnostic commands in the Windows environment. Learning how to navigate the command line interface and execute commands related to system performance can help identify potential culprits causing high CPU usage.

If you encounter error messages or encounter issues related to HRESULT codes, it can be helpful to reference Microsoft’s documentation on Component Object Model (COM) errors and how to interpret and resolve them.

Exploring the use of Environment variables and their impact on system performance can also provide insights into optimizing CPU usage. Understanding how variables are set and utilized within the Windows environment can help troubleshoot issues related to resource allocation.

FAQs

How do I register for regsvr32?

To register for regsvr32, you need to find the dll you want to register or unregister. Then, go to the Start button and select Run. In the run box, type the command regsvr32 or regsvr32 /u. Highlight the dll, drag it to the run box, drop it after regsvr32 or regsvr32 /u, and select Go.

How do I register a 32-bit DLL in 64-bit Windows?

To register a 32-bit DLL in 64-bit Windows, you can open Command Prompt as an administrator and use the command “regsvr32 ” to register the DLL file.

Where is regsvr32.exe located in Windows 10?

Regsvr32.exe is located in the %systemroot%\System32 folder in Windows 10.

Fix iPhone Won’t Turn On

Having trouble with your iPhone not turning on? Here are some tips to help you fix the issue.

Charge Your Battery

To fix an iPhone that won’t turn on, the first step is to ensure that the device has enough battery power. Connect your iPhone to a charger using the original charging cable and plug it into a power source. Make sure the charger is working properly and the outlet is supplying power.

If your iPhone does not show any sign of charging, try a different charger and outlet to rule out any issues with the charging equipment.

Once the iPhone is connected to a charger, leave it to charge for at least 15-30 minutes. Check the screen periodically to see if the charging icon appears. If the battery was completely drained, it may take some time for the device to show any signs of life.

If the iPhone still does not turn on after charging it for a while, try performing a hard reset by pressing and holding the power button and the volume down button simultaneously until the Apple logo appears on the screen.

If the hard reset does not work, there may be a more serious issue with the device that requires professional assistance. Contact Apple Support or visit an authorized service center to diagnose and repair the problem.

Restart or Force Restart

To restart your iPhone, simply press and hold the power button until the “Slide to power off” slider appears. Slide the slider to turn off your iPhone, then press and hold the power button again until the Apple logo appears.

If a regular restart doesn’t work, you can try a force restart instead. For iPhone XR, iPhone 12 Pro, iPhone XS, iPhone 14, iPhone 12, iPhone 11, iPhone SE (1st generation), iPhone 13, iPhone SE (2nd generation), or any newer models, quickly press and release the volume up button, then do the same with the volume down button. Finally, press and hold the side button until you see the Apple logo.

For iPhone 11 Pro and earlier models, including iPhone SE (3rd generation), quickly press and release the volume up button, then do the same with the volume down button. Finally, press and hold the power button until the Apple logo appears.

After restarting or force restarting your iPhone, check to see if it turns on properly. If it still won’t turn on, you may need to try other troubleshooting steps or seek assistance from Apple support.

Troubleshoot Hardware or Display Issues

Issue Possible Solution
Dead Battery Charge your iPhone for at least 30 minutes before attempting to turn it on.
Hardware Damage Inspect your iPhone for any physical damage and take it to a professional for repair if necessary.
Software Glitch Try force restarting your iPhone by holding down the power and home buttons simultaneously for 10 seconds.
Display Issue Check if the display is functioning properly by connecting your iPhone to a computer and checking for any error messages.

Update or Restore iOS

Once connected, open iTunes and select your device from the list of available devices. Then, choose the option to update or restore your iPhone depending on your specific situation. If you choose to update, iTunes will download and install the latest iOS version on your device.

If updating doesn’t fix the issue and your iPhone still won’t turn on, you can try restoring your device to its factory settings. This will erase all data on your iPhone, so make sure you have a backup of your important information before proceeding.

To restore your iPhone, select the “Restore” option in iTunes and follow the on-screen instructions to complete the process. Once the restoration is complete, your iPhone should restart and hopefully turn on without any issues.

If these steps don’t work, it may be a hardware problem that requires professional repair. Contact Apple Support or visit an authorized service provider for further assistance.

Enter Recovery or DFU Mode

To enter Recovery Mode or DFU Mode on your iPhone, follow these steps. First, connect your iPhone to a computer using a USB cable.

Next, press and release the Volume Up button quickly, followed by the Volume Down button. Then, press and hold the Side (or Power) button until the Apple logo appears on the screen.

After the Apple logo appears, continue holding the Side button, and when the Recovery Mode or DFU Mode screen appears, release the button.

In Recovery Mode, you can restore your iPhone using iTunes on a computer. In DFU Mode, you can perform more advanced troubleshooting and restoration options.

Prevent Slowdown and Overheating

  • Keep your iPhone updated with the latest software to prevent bugs and issues that can cause slowdown.
  • Close background apps and clear cache regularly to prevent overheating from excessive usage.
  • Avoid exposing your iPhone to direct sunlight or high temperatures to prevent overheating.
  • Use a protective case that allows for proper ventilation to prevent overheating during use.
  • Avoid running multiple heavy apps simultaneously to prevent slowdown and overheating.
  • Limit usage of power-hungry features like GPS and Bluetooth to prevent overheating and conserve battery life.

Frequently Asked Questions

Why is my iPhone screen black and not turning on?

Your iPhone screen may be black and not turning on due to physical damage, a malfunctioning app, system glitches, or a failed iOS update.

How do you restart an unresponsive iPhone?

To restart an unresponsive iPhone, you can quickly press the volume up button, then the volume down button, and finally press the power button.

Why did my iPhone randomly turn off and won’t turn back on?

Your iPhone may have randomly turned off and won’t turn back on due to various reasons such as a glitch in the system, software issues, battery problems, or water damage.

How do I force my dead iPhone to turn on?

To force your dead iPhone to turn on, hold down the side button for a few seconds until you see the Apple logo. This should hopefully restart your iPhone and get it working again.

Reset PS3 Disc Drive Repair Guide

In this guide, I will provide step-by-step instructions on how to reset and repair the disc drive on a PS3 console.

Fixing the PS3 Disc Reader

PS3 disc reader fixing tools.

To fix the PS3 disc reader, first, you need to locate the small white gear on the disc drive. Use a screwdriver to turn the gear **clockwise** until the disc tray fully extends.

Next, locate the small screw on the right side of the disc drive and tighten it with a screwdriver to ensure that the disc tray is aligned properly.

If the issue persists, you may need to clean the lens of the disc reader. Use a soft cloth to gently wipe the lens in a **circular motion** to remove any dust or debris.

If you are still experiencing issues with the disc reader, try using a disc cleaning kit or contacting PlayStation support for further assistance.

Resolving Disc Reading Issues After an Update

PlayStation 3 console with a disc inserted

  • Check for System Updates:

    • Go to the Settings menu on your PS3.
    • Select System Update to check for any available updates.
    • Download and install any updates that are available.
  • Restart the PS3:

    • Turn off the PS3 by holding down the power button for a few seconds.
    • Unplug the power cable from the back of the PS3.
    • Wait for a few minutes, then plug the power cable back in and turn on the PS3.
  • Clean the Disc:

    • Remove the disc from the PS3.
    • Use a soft, lint-free cloth to gently wipe the disc from the center to the outer edge.
    • Make sure there are no scratches or dirt on the disc.

Troubleshooting Non-Reading Discs in PS3

PS3 disc drive slot

If your PS3 is having trouble reading discs, try cleaning the disc first. Wipe it gently with a soft cloth and try again. If that doesn’t work, try rebooting your PS3 by holding down the power button until it beeps twice.

If the problem persists, you may need to reset the disc drive. To do this, turn off your PS3 and remove the hard drive cover. Locate the screw near the disc drive and unscrew it counterclockwise to remove the drive.

Carefully clean the lens with a soft cloth and reassemble the drive. Turn on your PS3 and try inserting a disc again. If the issue continues, you may need to contact PlayStation customer support for further assistance.

Ensuring Smooth Disc Reading Operations

PS3 disc drive

Step Description
1 Power off the PS3 console and unplug all cables.
2 Remove the hard drive cover on the PS3 console.
3 Locate the disc drive and carefully remove it from the console.
4 Open the disc drive and clean the laser lens with a soft cloth.
5 Check for any obstructions in the disc drive and remove them.
6 Reassemble the disc drive and place it back into the console.
7 Power on the PS3 console and test the disc reading operation.

F.A.Q.

Why is my PlayStation 3 not reading discs?

Your PlayStation 3 is not reading discs because the disc reader may be sensitive to scratches and fingerprints. Try cleaning the disc with a microfiber cloth or try using a different disc if the issue persists.

How do I fix my PS3 disc error?

To fix your PS3 disc error, you should first check your disc for scratches or debris. Cleaning the disc may resolve the issue. If the disc is severely damaged, you may need to purchase a new one. Additionally, the laser on your console may be dirty or need replacing, in which case you should contact Sony Customer Support for assistance.

How do I fix my blocked disc tray on PS3?

To fix a blocked disc tray on a PS3, you can try removing the rubber foot underneath the PlayStation to access a small hole with a screw. Unscrew it to detach the black plastic deck with the PS3 logo, which may help resolve the issue.

How do I manually reset my PS3?

To manually reset your PS3, you can restore the system software to its default settings.

Lenovo Laptop Keyboard Not Typing Issue Fix

In this article, I will discuss some troubleshooting steps to fix the Lenovo laptop keyboard not typing issue.

Identifying the Cause

Lenovo laptop keyboard issue icon

To identify the cause of your Lenovo laptop keyboard not typing issue, you first need to check if the keyboard is physically damaged. Inspect the keys for any signs of wear and tear or debris that may be hindering proper functionality.

If the keyboard appears to be in good condition, the next step is to check the device drivers. Open Device Manager by pressing Windows key + X, then select Device Manager. Look for the keyboard driver under the “Keyboards” section and ensure it is up to date. If not, try updating the driver to see if that resolves the issue.

Another common cause of keyboard issues is a software bug. Perform a system scan to check for any software errors or bugs that may be affecting the keyboard functionality.

If the problem persists, you may want to try a system restore to a previous point where the keyboard was working properly. Go to Control Panel, search for “Recovery,” and select “Open System Restore”. Follow the on-screen instructions to restore your system to a previous state.

Basic Troubleshooting Steps

  • Check for Physical Damage:
    • Inspect the keyboard for any visible physical damage such as cracked keys or liquid spills.
    • If there is damage, consider replacing the keyboard or seeking professional repair.
  • Restart Your Laptop:
    • Save any work you have open and restart your laptop.
    • Often, a simple restart can resolve keyboard issues.
  • Update Keyboard Drivers:
    • Open Device Manager by pressing Windows Key + X and selecting it from the list.
    • Expand the Keyboards section, right-click on your keyboard, and select Update driver.
    • Follow the on-screen instructions to update the driver.
  • Check Keyboard Settings:
    • Open Control Panel and go to Hardware and Sound.
    • Click on Keyboard and make sure the keyboard settings are correct.
    • Adjust settings as needed.
  • Use On-Screen Keyboard:
    • If the physical keyboard is not working, use the On-Screen Keyboard to type.
    • Open the On-Screen Keyboard by searching for it in the Windows search bar.

Updating or Reinstalling Drivers

To update or reinstall drivers on your Lenovo laptop to fix the keyboard not typing issue, follow these steps:

1. Identify the drivers: Go to the Device Manager by right-clicking on the Start button and selecting it. Look for the keyboard drivers under the “Keyboards” section.

2. Update drivers: Right-click on the keyboard driver and select “Update driver.” Follow the on-screen instructions to complete the update process.

3. Reinstall drivers: If updating the drivers doesn’t work, uninstall the keyboard driver by right-clicking on it and selecting “Uninstall device.” Then, restart your laptop to automatically reinstall the driver.

Remember to check Lenovo’s official website for any driver updates specific to your laptop model. This should resolve the keyboard not typing issue on your Lenovo laptop.

If the problem persists, consider contacting Lenovo customer support for further assistance.

Advanced Solutions and System Restore

If you are experiencing the Lenovo laptop keyboard not typing issue, there are advanced solutions that you can try to resolve the problem. One option is to perform a system restore to a point in time when the keyboard was working properly.

To do this, go to the Control Panel on your Windows 10 device and search for “Recovery.” Click on “Open System Restore” and follow the on-screen instructions to restore your system to an earlier point.

Another troubleshooting step you can take is to check for any software bugs or driver issues that may be causing the problem. Make sure your device drivers are up to date and consider uninstalling any recent software that could be interfering with the keyboard functionality.

If the keyboard issue persists, you can try using an external keyboard or virtual keyboard to see if the problem is specific to the built-in keyboard on your Lenovo laptop.

Additionally, you can try resetting your laptop to factory settings as a last resort to fix the typing problem. Remember to back up any important data before performing a factory reset to prevent data loss.

Frequently Asked Questions

Why is my Lenovo laptop keyboard not typing?

Your Lenovo laptop keyboard may not be typing due to an outdated keyboard driver. Visit the Lenovo Support website, enter your laptop’s details, download and install the latest keyboard driver, then restart your laptop to see if the issue is resolved.

How do I enable typing on my Lenovo laptop?

To enable typing on your Lenovo laptop, you can unlock the keyboard by pressing the ‘Fn’ key along with any other key.

Why is my laptop keyboard not typing?

Your laptop keyboard may not be typing because it could be disconnected, the computer may be frozen, or the wireless connection may have been disrupted.

Why is my Lenovo keyboard locked?

Your Lenovo keyboard may be locked due to keyboard shortcuts that were accidentally activated. To unlock it, press and hold the ‘FN’ key and simultaneously press the ‘Scroll Lock’ key along with any other key. Release all keys at once to reset the keyboard.

Fix Windows 10 Volume Icon Not Working – Solutions

In this article, I will discuss solutions to fix the Windows 10 volume icon not working.

Restarting Windows Explorer and Audio Services

Windows task manager restarting services.

To restart Windows Explorer and Audio Services, follow these steps:

1. Restart Windows Explorer:
– Press Ctrl + Shift + Esc to open Task Manager.
– In the Task Manager window, locate Windows Explorer under the list of processes.
– Right-click on Windows Explorer and select Restart from the context menu.

2. Restart Audio Services:
– Press Win + R to open the Run dialog box.
– Type services.msc and press Enter to open the Services window.
– Scroll down and locate Windows Audio and Windows Audio Endpoint Builder services.
– Right-click on each of these services and select Restart from the context menu.

By restarting both Windows Explorer and Audio Services, you can resolve issues related to the volume icon not working in Windows 10. If the problem persists, you may need to further troubleshoot the issue or seek assistance from Microsoft support.

Remember to save any work you have open before restarting Windows Explorer, as this may close open windows and programs. Additionally, make sure your audio devices are properly connected and configured in the Sound settings in the Control Panel.

Following these steps should help you fix the volume icon not working in Windows 10 and ensure that you can adjust your audio settings without any issues.

Updating and Checking Audio Drivers

Speaker icon with a red X symbol

To update and check your audio drivers in Windows 10, follow these steps:

1. Open Device Manager: Press the Windows key + X and select Device Manager from the menu that appears.

2. Locate the Audio Drivers: Expand the “Sound, video and game controllers” category to find your audio drivers.

3. Update the Drivers: Right-click on the audio driver and select “Update driver” from the context menu. Follow the on-screen instructions to update the driver.

4. Check for Driver Issues: After updating, right-click on the audio driver again and select “Properties.” Go to the “Driver” tab and click on “Driver Details” to check if there are any issues.

5. Reinstall the Drivers: If there are issues with the driver, you can try reinstalling it. Right-click on the audio driver and select “Uninstall device.” Restart your computer and Windows will automatically reinstall the driver.

Remember to restart your computer after updating or reinstalling the audio drivers to apply the changes.

Using the Audio Troubleshooter

  • Open Settings by pressing Windows key + I.
    • Select Update & Security.
    • Click on Troubleshoot in the left pane.
    • Scroll down and select Playing Audio.
    • Click on Run the troubleshooter and follow the on-screen instructions.

Enabling Volume Icon and Adjusting Settings

To enable the volume icon and adjust settings in Windows 10, follow these steps:

1. Check System Icons: Right-click on the taskbar and select ‘Taskbar settings.’ Scroll down to the ‘Notification area’ section and click on ‘Turn system icons on or off.’ Make sure the volume icon is set to ‘On.’

2. Restart Windows Explorer: Press Ctrl + Shift + Esc to open Task Manager. Locate ‘Windows Explorer’ under the ‘Processes’ tab, right-click on it, and select ‘Restart.’

3. Reboot Your Computer: Sometimes a simple reboot can fix issues with the volume icon not working correctly. Save any unsaved work and restart your computer.

4. Check Device Drivers: Make sure your sound device drivers are up to date. Right-click on the Start menu and select ‘Device Manager.’ Expand the ‘Sound, video and game controllers’ section, right-click on your sound device, and choose ‘Update driver.’

5. Use the Troubleshooter: Windows 10 has a built-in troubleshooter that can help identify and fix problems with the volume icon. Go to ‘Settings’ > ‘Update & Security’ > ‘Troubleshoot’ and run the ‘Playing Audio’ troubleshooter.

6. Modify Registry Settings: If the volume icon still doesn’t work, you can try modifying the registry. Press Win + R, type ‘regedit,’ and press Enter. Navigate to ‘HKEY_LOCAL_MACHINE\SOFTWARE\Microsoft\Windows\CurrentVersion\Policies\Explorer’ and make sure the ‘HideSCAVolume’ value is set to ‘0.’

7. Create a New Shortcut: In File Explorer, navigate to ‘C:\Users\%username%\AppData\Roaming\Microsoft\Internet Explorer\Quick Launch\User Pinned\TaskBar.’ Create a new shortcut for ‘sndvol.exe’ and pin it to the taskbar.

F.A.Q.

Why can’t I turn on volume icon?

You can’t turn on the volume icon because it may be disabled in the system settings. Try going to the Taskbar menu and selecting the option to turn system icons on or off. Make sure the Volume control toggle is set to ON, then restart Windows to see if the icon reappears in the taskbar.

How do I turn my system icons on or off volume disabled?

To turn system icons on or off, including volume, you can press the Windows Key + S and search for “icons” or go to Settings, Personalization, Taskbar, Turn system icons on or off. Make sure the Volume icon is switched on.

Why won’t my computer let me turn up my volume?

Your computer may not let you turn up the volume due to potential hardware issues related to outdated or malfunctioning audio drivers. Ensure that your audio driver is up to date, and if necessary, update it. If this doesn’t solve the problem, try uninstalling and reinstalling the audio driver, or use the generic audio driver that comes with Windows.

How do I restore the volume control icon on my taskbar?

To restore the volume control icon on your taskbar, you can right-click on the empty area of the taskbar, then select “Taskbar settings” and scroll down to the “Notification area” section.

Battery Icon Keeps Disappearing in Windows 10 – Restore it

Have you noticed that the battery icon keeps disappearing in Windows 10? It can be frustrating, but there is a way to restore it.

Show the Battery Icon on Taskbar

To show the battery icon on the taskbar in Windows 10, follow these steps:

1. Right-click on the taskbar.
2. Select “Taskbar settings” from the context menu that appears.
3. Scroll down and click on “Turn system icons on or off.”
4. Toggle the switch next to “Power” to the on position.

If the battery icon keeps disappearing, you can also try running the System File Checker tool to scan for and repair any corrupted system files. To do this, open the Start menu and type “cmd.” Right-click on Command Prompt and select “Run as administrator.” Then, type “sfc /scannow” and press Enter.

Disable and Re-enable Battery Hardware

Battery hardware icon

To disable and re-enable the battery hardware in Windows 10, you can follow these steps:

1. Open Device Manager by right-clicking on the Start menu and selecting it from the context menu.

2. Expand the Batteries section and right-click on Microsoft ACPI-Compliant Control Method Battery.

3. Click on Disable device and then click Yes to confirm.

4. Right-click on the disabled device again and choose Enable device.

5. Check if the battery icon has reappeared in the system tray.

If the battery icon still does not show up, you may need to restart your computer for the changes to take effect. This simple process can help restore the missing battery icon in Windows 10 and ensure that you can easily keep track of your device’s power status.

Update Windows and Run System Checks

  • Check for updates: Open Settings by pressing Windows key + I. Go to Update & Security and click on Check for updates.
  • Install updates: If updates are available, click on Download and Install to update Windows to the latest version.

Run System Checks

  • Run Windows Troubleshooter: Open Settings and go to Update & Security. Click on Troubleshoot and select Windows Update to run the troubleshooter.
  • Scan for malware: Use a reliable antivirus software to scan your computer for any malware or viruses that may be causing issues with the battery icon.

Scan for Hardware Changes

Device Manager window

1. Right-click on the Start button and select “Device Manager” from the menu.
2. In Device Manager, click on the “Action” menu and select “Scan for hardware changes.”
3. This will prompt Windows to search for any changes in your computer’s hardware configuration.
4. If the battery icon does not reappear after scanning for hardware changes, try restarting your computer to see if that resolves the issue.

By scanning for hardware changes, you may be able to restore the missing battery icon in Windows 10. This process can help refresh your system’s recognition of hardware components, potentially resolving any display issues. If the problem persists, you may need to further investigate potential software or driver issues that could be causing the icon to disappear.

FAQ

Why has my battery icon disappeared?

Your battery icon may have disappeared due to issues with the battery driver or software conflicts. To troubleshoot, start by checking for Windows updates. Go to Start, then Settings, and click on Windows Update.

Why is the battery symbol not showing up on Windows 10?

The battery symbol may not be showing up on Windows 10 because the Power toggle in the Notification area settings is turned off. To fix this, go to Start > Settings > Personalization > Taskbar, then select which icons appear on the taskbar and turn on the Power toggle.

How do I fix my battery not detected?

To fix a battery not detected issue, you can try the following steps:
– Plug in your laptop
– Restart your laptop
– Update Windows
– Run a built-in troubleshooter
– Check the battery’s device status in Device Manager
– Update the battery’s device drivers.

Why power icon is disabled in Windows 10?

The power icon may be disabled in Windows 10 if it is not set to show icon and notifications in the Notification Area Icons settings. To enable it, right-click on the clock on the taskbar, select Customize Notification Icons, ensure the Power option is set to Show icon and notifications, and make sure the Power option is turned on in the system icons settings.

PS3 NAT Type 3 – Change and Fix Connection Issues

If you’re experiencing connection issues on your PS3 due to NAT Type 3, this article will guide you through changing and fixing the problem.

Accessing PlayStation Network

To change and fix connection issues with PS3 NAT Type 3, you can access the PlayStation Network by adjusting your router settings. Make sure to enable UPnP to allow the console to communicate properly with the network. Check if any firewall settings are blocking the connection and ensure that the ports required for PlayStation Network are open. By making these changes, you can improve your online gaming experience.

Adjusting NAT Type Settings

PlayStation console menu

To adjust your NAT Type settings on your PS3, access your router’s settings through a web browser. Locate the Port Forwarding section and open the ports required by your PS3 for online gaming. Enable UPnP to allow the PS3 to automatically open the necessary ports. Check for firmware updates for your router to ensure optimal performance.

Once these settings are adjusted, you should experience a better connection for online gaming.

Solutions and Answers

  • Access your router settings
  • Locate the NAT Type settings
  • Change NAT Type from 3 to 2

Enable UPnP

  • Access your router settings
  • Locate the UPnP settings
  • Enable UPnP

Port Forwarding

  • Access your router settings
  • Locate the Port Forwarding settings
  • Forward ports for PS3

Static IP Address

  • Assign a static IP address to your PS3
  • Access your router settings
  • Assign the static IP address to your PS3

Additional Queries for Enhanced Gaming

PS3 gaming console

1. Check your router settings to ensure proper port forwarding for the PS3.

Make sure to enable Universal Plug and Play (UPnP) to allow the console to communicate with the network easily.

2. Monitor your upload and download speeds to ensure they meet the requirements for online gaming.

Adjust your settings accordingly to optimize your connection for a better gaming experience.

3. Review your firewall settings to make sure they are not blocking the PS3 from connecting to the internet.

Consider adjusting your firewall settings to allow for seamless online gameplay.

FAQs

How do I change my NAT type 3 on PS3?

To change your NAT type on PS3, you can access the XMB, go to Settings, then Network Settings, and finally Settings and Connection Status List. From there, check your UPnP settings and NAT type. Make sure UPnP is enabled on your PS3 to potentially change your NAT type.

Is NAT type 3 good for gaming?

Is NAT Type 3 good for gaming?

NAT Type 3, also known as Strict NAT, is not ideal for gaming as it imposes strong restrictions that can limit the device’s ability to connect to other devices or game servers.

Why am I getting NAT type 3?

You are getting NAT type 3 because your network may have restrictions in place or closed ports that limit external connections. NAT Type 3 is the most restrictive and can cause connectivity issues. To resolve this, check your router settings or consult your ISP for assistance.

api ms win crt runtime l1 0 dll Missing Error Fix

In my search for a solution to the api-ms-win-crt-runtime-l1-0.dll missing error, I have compiled a comprehensive guide to help you fix this issue efficiently.

Installation and Launching Issues

Firstly, ensure that your Windows operating system is up to date by running Windows Update. This will help ensure that you have the latest patches and updates installed on your system.

Next, check if you have Microsoft Visual C++ installed on your computer. This software is often required for applications that use dynamic-link libraries like api-ms-win-crt-runtime-l1-1-0.dll.

If you do not have Microsoft Visual C++ installed, you can download it from the Microsoft website and install it on your computer.

Once you have installed Microsoft Visual C++, you may need to register the api-ms-win-crt-runtime-l1-1-0.dll file. To do this, open a command prompt with administrative privileges and run the following command:

regsvr32 api-ms-win-crt-runtime-l1-1-0.dll

After registering the file, try launching the application again to see if the issue has been resolved.

If you are still experiencing issues, you may need to reinstall the application that is giving you the error. To do this, uninstall the application from your computer and then reinstall it.

Update via Windows Update

To fix the api ms win crt runtime l1 0 dll missing error, you can update your Windows system using Windows Update. This error is often caused by missing or corrupted system files, which can be resolved by installing the necessary updates.

Here’s how to update your Windows system:

1. Click on the Start menu and select Settings.
2. Go to Update & Security.
3. Click on Windows Update.
4. Check for updates and install any available updates for your system.

Updating your Windows system can help replace any missing or corrupted files, including the api ms win crt runtime l1 0 dll file, which should resolve the error you are experiencing.

If updating your Windows system does not fix the issue, you may also consider reinstalling the Microsoft Visual C++ Redistributable package. This package includes the necessary runtime components to run applications developed with Visual C++ on a computer that does not have Visual C++ installed.

Download and Repair Visual C++ Redistributable

  • Download Visual C++ Redistributable:
    • Go to the official Microsoft website.
    • Look for the Visual C++ Redistributable package that matches your system architecture (x86 or x64).
    • Download the package and save it to your computer.
  • Install Visual C++ Redistributable:
    • Locate the downloaded file and double-click on it to start the installation process.
    • Follow the on-screen instructions to complete the installation.
    • Restart your computer to apply the changes.
  • Repair Visual C++ Redistributable:
    • Go to the Control Panel on your computer.
    • Click on “Programs and Features” or “Add/Remove Programs”.
    • Locate the Visual C++ Redistributable package in the list of installed programs.
    • Right-click on the package and select “Repair”.
    • Follow the on-screen instructions to repair the installation.

Automatic and Manual DLL Update

Windows update process.

To update the api ms win crt runtime l1 0 dll file, there are two methods you can use: Automatic and Manual updates.

Automatic Update:
If you prefer a quick and easy way to update DLL files, the automatic update method is recommended. You can use software tools like DLL-Files Fixer or Driver Booster to automatically scan for missing or outdated DLL files on your system and download the necessary updates.

Manual Update:
If you prefer a more hands-on approach, you can manually update the api ms win crt runtime l1 0 dll file by following these steps:
1. Go to the official Microsoft website and search for the latest version of the api ms win crt runtime l1 0 dll file.
2. Download the file that matches your system architecture (x86 or x64).
3. Once the file is downloaded, locate the current api ms win crt runtime l1 0 dll file on your system. This can usually be found in the System32 or SysWOW64 folder in the Windows directory.
4. Copy the downloaded api ms win crt runtime l1 0 dll file and paste it into the same directory where the old file is located.
5. If prompted to overwrite the existing file, confirm the action.
6. Restart your computer to apply the changes.

By following these steps, you should be able to update the api ms win crt runtime l1 0 dll file and resolve any missing error issues you may be experiencing. Remember to always back up your files before making any changes to your system.

Whether you choose the automatic or manual update method, keeping your DLL files up to date is essential for the smooth operation of your computer and applications.

Copying DLL Files from Another PC

To fix the api ms win crt runtime l1 0 dll missing error, you can try copying the DLL files from another PC. Here’s how:

First, locate a PC that has the api-ms-win-crt-runtime-l1-1-0.dll file. This file is usually found in the System32 or SysWOW64 folder within the Windows directory.

Next, connect to the PC either through a network connection or by physically transferring the file using a USB drive or other storage device.

Once you have access to the PC with the DLL file, locate the api-ms-win-crt-runtime-l1-1-0.dll file in the System32 or SysWOW64 folder.

Copy the api-ms-win-crt-runtime-l1-1-0.dll file to the same location on your own PC. This will replace any missing or corrupted files that may be causing the error.

After copying the DLL file, restart your computer to apply the changes.

Try running the program or application that was showing the api ms win crt runtime l1 0 dll missing error. The issue should now be resolved with the copied DLL file in place.

FAQ

How do I fix the API MS Win CRT runtime i1 1 0 DLL?

To fix the API MS Win CRT runtime dll error, you can try updating your Windows system. Go to Start > Control Panel > Windows Updates, check for and install all available updates, then restart your computer. Repeat this process until no more updates are available.

How do I fix a DLL error?

To fix a DLL error, you can reinstall the program that is causing the issue. This should properly install and register the DLL file again, potentially resolving the error.

How to install DLL files?

To install DLL files, you can open Command Prompt as an administrator and use the command REGSVR32 followed by the path to the DLL file.

Troubleshoot USB Port Not Working on Laptop or PC

Having trouble with a USB port on your laptop or PC? Here are some tips to troubleshoot the issue.

Identifying Symptoms

To identify symptoms of a USB port not working on your laptop or PC, start by checking for any physical damage to the port or the USB device you are trying to connect. Look for any bent pins, debris, or dust that may be obstructing the connection.

Next, test the USB port with a different device to see if the issue lies with the port itself or the device you are trying to connect. If the port works with another device, the problem may be with the original device’s USB hardware.

If the USB port still does not work, check for any error messages or notifications on your computer that may indicate a problem with the port.

You can also check the device manager on your computer to see if the USB port is recognized and functioning properly. Look for any yellow exclamation points next to the USB device, which may indicate a driver issue.

If you are still unable to identify the problem, consider updating the device drivers or BIOS on your computer. Sometimes, outdated drivers can cause connectivity issues with USB ports.

Checking for Physical Damage

When troubleshooting a USB port that is not working on your laptop or PC, the first step is to check for physical damage. Inspect the USB port for any signs of debris, dust, or contamination that may be blocking the connection.

Use compressed air to clean out the USB port and remove any obstructions. Be careful not to damage the port further by using excessive force or inserting foreign objects.

Check the USB cable for any visible damage or fraying. If the cable appears to be damaged, try using a different cable to see if that resolves the issue.

Inspect the USB port for any bent or broken pins that may be causing a poor connection. If you notice any damage to the pins, consider contacting a professional for repair.

Adjusting Power Management Settings

To adjust power management settings for your USB port, follow these steps:

Step 1: Go to the Control Panel on your computer.

Step 2: Click on “Power Options” and then select “Change plan settings” for your current power plan.

Step 3: Choose “Change advanced power settings” and look for the USB settings.

Step 4: Expand the USB settings and make sure that the USB selective suspend setting is disabled.

Step 5: Save the changes and restart your computer.

Restarting Your Computer

To restart your computer, follow these steps:

1. Save any work you have open on your computer.

2. Click on the Start menu in the bottom left corner of your screen.

3. Select the power icon and choose Restart.

After your computer restarts, check to see if the USB port is now working properly. If not, you may need to troubleshoot further to determine the cause of the issue.

Reinstalling and Updating USB Drivers

USB port with a red X mark

Step Description
1 Unplug the USB device from the port
2 Open Device Manager by right-clicking on the Start button and selecting Device Manager
3 Locate the Universal Serial Bus controllers section and expand it
4 Right-click on the USB driver that is causing issues and select Uninstall device
5 Restart your computer
6 Windows will automatically reinstall the USB driver
7 If the issue persists, visit the manufacturer’s website to download and install the latest USB drivers

Running Hardware Troubleshooter

To troubleshoot a USB port not working on your laptop or PC, you can run the Hardware Troubleshooter in Windows. This can help identify and fix any issues with the USB port.

1. Press the Windows key + I to open Settings.

2. Click on Update & Security.

3. Select Troubleshoot from the left pane.

4. Scroll down and click on Hardware and Devices.

5. Click on Run the troubleshooter and follow the on-screen instructions.

If the troubleshooter identifies any issues with the USB port, it will attempt to fix them automatically. After running the troubleshooter, try connecting your USB device again to see if the problem has been resolved. If not, you may need to consider other troubleshooting steps or seek further assistance.

Booting into Safe Mode with Networking

To troubleshoot a USB port not working on your laptop or PC, one effective step is to boot into Safe Mode with Networking. This mode loads only essential drivers, which can help isolate and resolve the issue with the USB port.

To boot into Safe Mode with Networking:

1. Restart your computer.
2. As your computer is booting up, press F8 repeatedly until the Advanced Boot Options menu appears.
3. Select “Safe Mode with Networking” using the arrow keys and then press Enter.
4. Once in Safe Mode, test the USB port to see if it is working properly.
5. If the USB port works in Safe Mode, the issue may be related to a software conflict or driver problem.
6. You can try updating or reinstalling the device driver for the USB port to see if that resolves the issue.

Note: If the USB port still does not work in Safe Mode, the problem may be related to hardware issues such as a faulty USB port, motherboard problem, or power supply unit.

By booting into Safe Mode with Networking, you can troubleshoot the USB port issue effectively and potentially identify the cause of the problem.

Performing a System Reset

1. Power off your laptop or PC completely.

2. Disconnect the power supply unit and remove the battery (if possible).

3. Press and hold the power button for about 30 seconds to drain any residual power.

4. Reconnect the power supply unit (and battery if removed) and power on your device.

5. Check if the USB port is now working properly. If not, try connecting a different device to see if the issue persists.

Performing a system reset can sometimes resolve issues related to USB ports not working on your laptop or PC. If the problem continues, it may be necessary to seek further assistance or consider replacing the USB hardware.

Frequently Asked Questions

How do I fix my computer port not working?

To fix a computer port not working, you can start by checking for physical damage on the USB ports or cables. Resetting the BIOS to factory defaults and running a hardware diagnostic test can also help identify and resolve the issue. Additionally, testing the USB device on another computer and checking for errors in the Windows Device Manager can provide further insight. Running the Windows hardware troubleshooter may also help in troubleshooting and fixing the problem.

Why are my ports not working?

Your ports may not be working because they could be disabled in the system BIOS/UEFI settings. Restart your computer and access the BIOS/UEFI settings to ensure that USB settings are enabled.

How do I fix a broken port on my computer?

Fixing a broken port on your computer involves identifying the issue through basic troubleshooting steps such as inspecting for visible damage, trying different ports or devices, updating drivers or BIOS, and checking system settings.

Why are the ports on the back of my PC not working?

The ports on the back of your PC may not be working due to a specific device or all devices being faulty. Try connecting various USB devices to determine the root cause. Additionally, ensure you have the latest drivers installed for your motherboard’s USB controller.

HTML5 Player Not Working in Chrome? Fix it Now

Having trouble with your HTML5 player not working in Chrome? Let’s find a solution now.

Reasons Why Videos Are Not Playing

If videos are not playing in the HTML5 player on Chrome, there could be several reasons for this issue. One common reason is outdated Adobe Flash Player. Make sure to update it to the latest version to ensure compatibility. Additionally, check if there are any browser extensions causing conflicts with the player. Disable them and try again.

Another possible cause could be corrupted cache files. Clear the browser cache and cookies to see if that resolves the problem. It’s also important to ensure that JavaScript is enabled in your browser settings. Without JavaScript, the player may not function properly.

If you are still facing issues, try disabling hardware acceleration in Chrome. This feature can sometimes interfere with video playback. Lastly, check for any malware on your computer that could be affecting the player. Run a thorough scan to eliminate any potential threats.

Update Your Browser

Browser Current Version Recommended Version How to Update
Google Chrome 79 Latest version Update Chrome
Mozilla Firefox 72 Latest version Update Firefox
Microsoft Edge 44 Latest version Update Edge

F.A.Qs

Why is HTML5 video not playing in Chrome?

HTML5 video may not be playing in Chrome due to the hardware acceleration setting being enabled. Disable this setting by going to Chrome settings, selecting “Advanced,” then “System,” and unchecking the box for “Use hardware acceleration when available.” Relaunch Chrome and try playing the video again.

How do I enable HTML5 in Chrome?

To enable HTML5 in Chrome, simply ensure that the website you are trying to access is using HTML5 correctly and that the features are supported by your version of Chrome. HTML5 is already enabled by default in Chrome.

Why is HTML5 video not displaying?

HTML5 video is not displaying because your browser does not support the HTML5 format codecs or is missing some video codecs.

Why is my HTML5 file not working?

Your HTML5 file may not be working due to browser compatibility issues. This can occur if the browser version you are using does not support the HTML5 video codec used on the website.