Fix ERR_SSL_BAD_RECORD_MAC_ALERT Error on Android

In troubleshooting the ERR_SSL_BAD_RECORD_MAC_ALERT error on Android, it is important to understand the potential causes and solutions for this issue.

Understanding the Causes

Another possible cause is a software bug in the browser or the operating system. In some cases, outdated software versions may not be able to handle the SSL handshake properly, leading to the error.

Additionally, network issues such as a poor Wi-Fi connection or a problem with the network interface controller can also trigger the ERR_SSL_BAD_RECORD_MAC_ALERT error. Ensuring a stable internet connection is crucial when troubleshooting this error.

It is important to check for any recent updates or patches that may have been released for your Android device or the browser you are using. Keeping your software up to date can help resolve compatibility issues that may be causing the error.

Update Operating System and Browser

To fix the ERR_SSL_BAD_RECORD_MAC_ALERT error on your Android device, make sure to update both your operating system and browser to the latest versions. Outdated software can often lead to compatibility issues and security vulnerabilities.

Start by checking for any available updates for your Android operating system. Go to your device’s settings, navigate to “System” or “About Phone,” and look for the “Software Update” option. Download and install any available updates to ensure your device is running the latest version.

Next, update your web browser to the newest version. Whether you’re using Google Chrome, Firefox, or another browser, head to the Google Play Store and search for your browser app. If an update is available, click on “Update” to download and install the latest version.

Updating your operating system and browser can help resolve the ERR_SSL_BAD_RECORD_MAC_ALERT error by ensuring that your device has the latest security patches and bug fixes. This will also improve the overall performance and stability of your device while browsing the internet.

Make it a habit to regularly check for updates for both your operating system and browser to avoid encountering similar errors in the future. Keeping your software up-to-date is crucial for maintaining a secure and efficient browsing experience on your Android device.

Antivirus and Firewall Settings

Make sure your antivirus software and firewall are not blocking the SSL connection. You can do this by temporarily disabling them and trying to access the website again. If the error disappears, you will need to adjust the settings to allow SSL connections.

Check for any updates or patches for your antivirus software and firewall. Outdated software can sometimes cause compatibility issues with SSL connections. Make sure you are using the latest version to prevent any errors.

Ensure that your antivirus software and firewall are configured correctly. Check the settings to see if there are any restrictions or rules that could be causing the ERR_SSL_BAD_RECORD_MAC_ALERT error. Adjust the settings as needed to allow SSL connections.

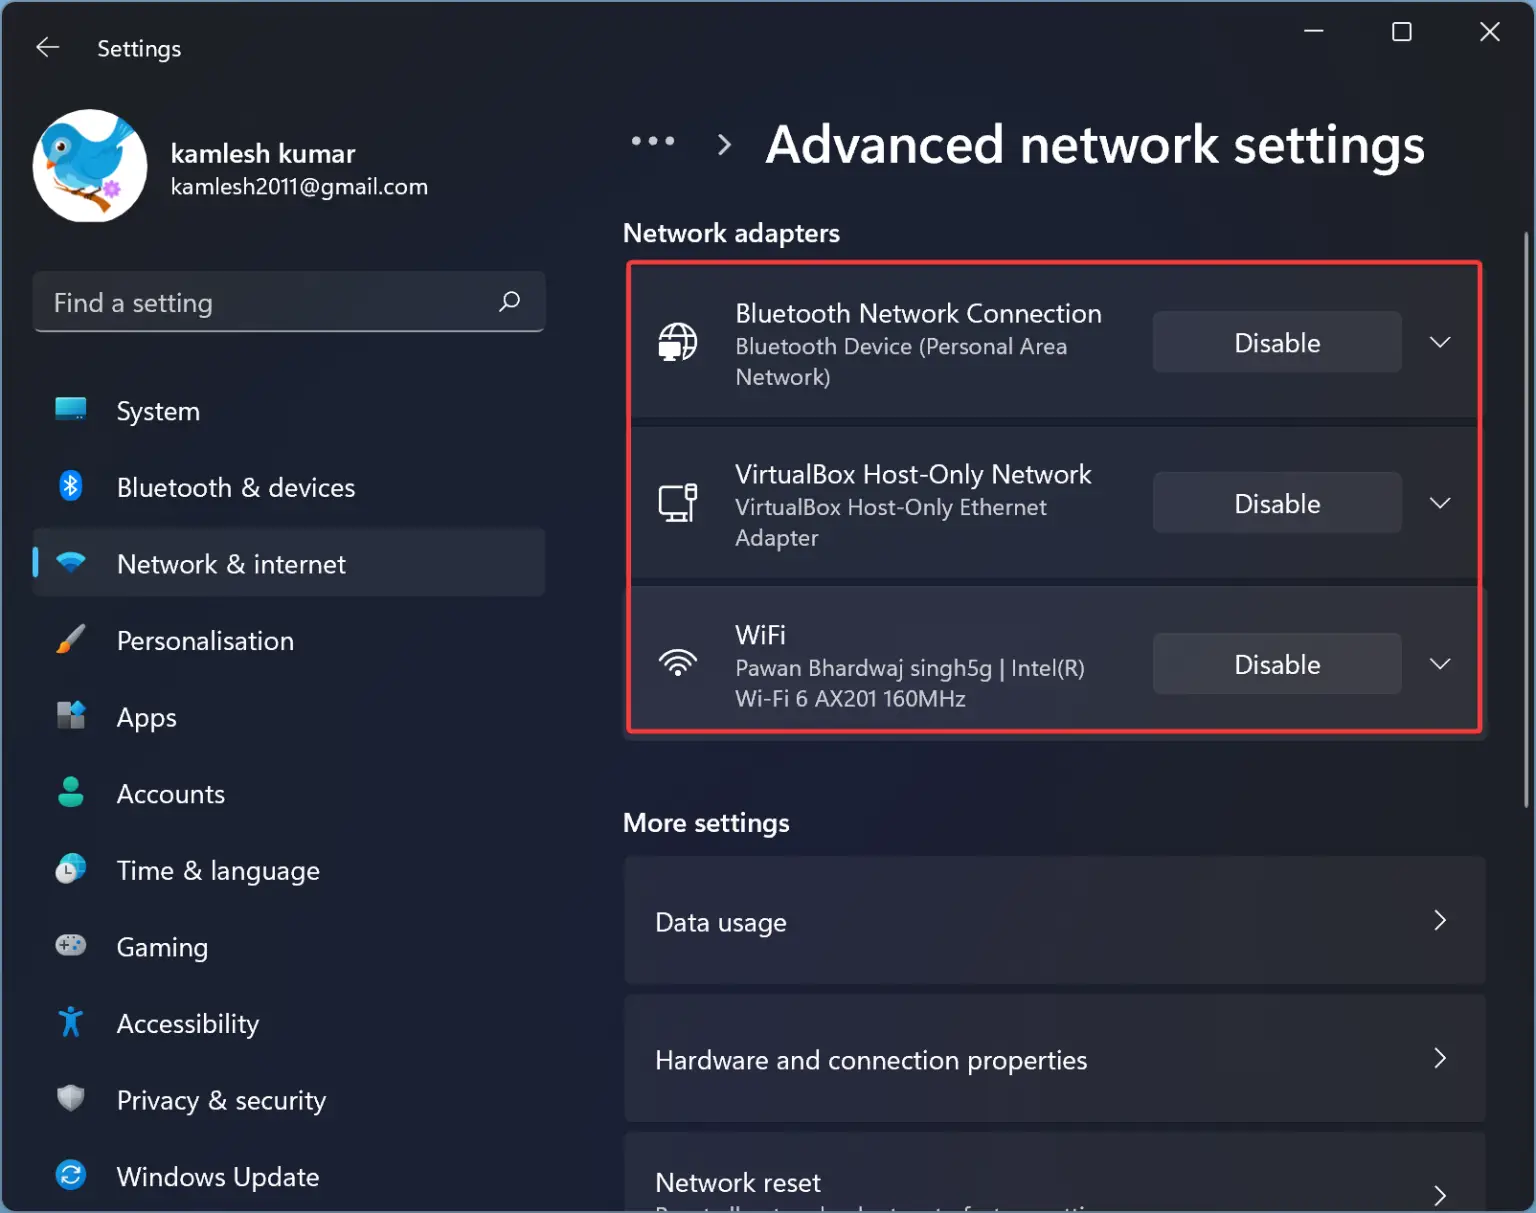
Adjust Network Adapter or Disable Killer Network Card

Network adapter settings menu

Step Instructions
1 Go to Settings on your Android device.
2 Tap on Wi-Fi or Network settings.
3 Find the network adapter settings or Killer Network Card settings.
4 Adjust the settings or disable the Killer Network Card.
5 Restart your device and try accessing the website again.

Router Configuration and MTU Optimization

To fix ERR_SSL_BAD_RECORD_MAC_ALERT error on Android, it is important to optimize your router configuration and adjust the Maximum Transmission Unit (MTU) settings.

Firstly, access your router settings by typing the router’s IP address into your web browser’s address bar. Look for the MTU settings within the configuration options.

Next, adjust the MTU value to 1400 or lower. This can help prevent fragmentation issues that may be causing the SSL error on your Android device.

After making the changes, save the settings and restart your router to apply the new MTU value.

It is also recommended to update your router’s firmware to ensure it is running the latest version, as outdated firmware can sometimes cause SSL errors.

By optimizing your router configuration and adjusting the MTU settings, you can effectively fix the ERR_SSL_BAD_RECORD_MAC_ALERT error on your Android device.

Disable Advanced Streaming or Prioritization Features

To do this, navigate to your device’s settings and look for any options related to advanced streaming or prioritization features. Once you locate these settings, disable them and then try to access the website again to see if the error has been resolved.

If the error persists, you may need to consider other troubleshooting steps such as clearing your browser cache, updating your browser or operating system, or checking for any software bugs that could be causing the issue.

By disabling advanced streaming or prioritization features, you can potentially eliminate one possible cause of the ERR_SSL_BAD_RECORD_MAC_ALERT error on your Android device.

Importance of a Reliable Host

A reliable host is crucial when encountering the ERR_SSL_BAD_RECORD_MAC_ALERT error on Android. Ensure that your hosting provider is up-to-date and has the necessary security measures in place. This error can often be caused by issues with the server’s SSL/TLS configuration, so having a reliable host can help prevent such errors from occurring.

In addition, a reliable host can provide support and guidance in resolving any issues related to SSL/TLS configurations. Make sure to communicate with your hosting provider if you encounter this error to get the necessary assistance.

Furthermore, a reliable host can offer regular updates and patches to ensure that your server is running smoothly and securely. Stay informed about any updates or patches released by your hosting provider to prevent errors like ERR_SSL_BAD_RECORD_MAC_ALERT.

Conclusion and Prevention Tips

    Conclusion and Prevention Tips

  • Update your Android device
  • Clear browsing data
  • Check your SSL/TLS settings
  • Disable Chrome flags
  • Reset Chrome settings

F.A.Qs

What is a bad record Mac alert?

A bad record Mac alert is an error message indicating that a secure connection could not be established. This can be caused by incorrect date or time settings on the device.

How do I fix SSL error in Chrome?

To fix SSL errors in Chrome, you can start by setting the correct system date, time, and region, clearing Chrome’s cache and cookies, disabling the QUIC Protocol, extensions, and security tools temporarily, removing your system’s hosts file, clearing SSL State, and lower your internet security and privacy level.

Fix Safari Can’t Establish Secure Connection Error

In this article, I will discuss how to fix the Safari can’t establish secure connection error.

Identifying the Error and Its Causes

To identify the error and its causes in the “Fix Safari Can’t Establish Secure Connection Error” article, start by checking for common issues such as outdated Safari browser or incorrect system time settings.

Check Safari Version: Make sure you are using the latest version of Safari to ensure compatibility and security updates.

Verify System Time: Check the system time on your device to ensure it is correct. Incorrect time settings can cause security certificate errors.

Clear Browser Cache: Clearing the browser cache can resolve issues related to outdated or corrupted data stored in the browser.

When encountering the “Safari Can’t Establish Secure Connection Error,” it could be due to an expired or invalid security certificate.

Check Security Certificate: Verify the validity of the security certificate on the website you are trying to access. An expired or invalid certificate can trigger the error message.

Disable Browser Extensions: Browser extensions can sometimes interfere with secure connections. Disable any extensions and try accessing the website again.

If the error persists, consider checking the website’s URL to ensure it is correctly typed and does not contain any errors.

Verify URL: Double-check the URL for accuracy, making sure there are no typos or mistakes in the address.

If the issue continues, it may be helpful to try accessing the website using a different network connection, such as switching from Wi-Fi to a mobile data connection.

Verifying Web Address and System Settings

To fix the Safari can’t establish secure connection error, one of the first steps you should take is to verify the web address and system settings. Start by checking the URL of the website you are trying to access. Make sure it begins with “HTTPS” instead of “HTTP” for a secure connection.

Next, check the system settings on your MacOS device. Go to the Apple menu, then select “System Preferences” and click on “Security & Privacy.” Ensure that the settings are configured correctly to allow secure connections.

If you are still experiencing the error, consider clearing your browser cache. This can help refresh the data stored in your browser and potentially resolve any issues with accessing secure websites.

Another important step is to check your Wi-Fi connection. Make sure you are connected to a secure network and that the signal strength is strong. Weak or unstable connections can cause issues with establishing secure connections.

Additionally, check for any browser extensions that may be interfering with the connection. Disable any extensions that may be causing the problem and try accessing the website again.

By verifying the web address and system settings, clearing your browser cache, checking your Wi-Fi connection, and disabling any problematic browser extensions, you can troubleshoot and fix the Safari can’t establish secure connection error.

Adjusting Browser and Network Configurations

Screenshot of browser settings and network configurations

  • Clear Browser Cache and Cookies:
    • Open Safari browser.
    • Click on Safari in the top menu bar.
    • Select Clear History and choose the desired time range.
    • Check the box for Clear History and click Clear History.
    • Go to Safari in the top menu bar again.
    • Select Preferences and go to the Privacy tab.
    • Click on Manage Website Data and remove all cookies and data.
  • Reset Network Settings:
    • Go to System Preferences on your Mac.
    • Click on Network.
    • Choose your network connection and click on Advanced.
    • Go to the TCP/IP tab.
    • Click on Renew DHCP Lease.
    • Click on OK to save the changes.
  • Disable Proxy Server:
    • Open Safari browser.
    • Click on Safari in the top menu bar.
    • Select Preferences and go to the Advanced tab.
    • Click on Change Settings next to Proxies.
    • Uncheck any boxes for Proxy Server and click OK.
    • Restart Safari to apply the changes.

Managing Browser Data and Extensions

To manage browser data and extensions in Safari, you can start by clearing the cache and cookies. This can help resolve issues related to the secure connection error. To do this, go to Safari’s preferences by clicking on the Safari menu in the top left corner of your screen. Then, select “Clear History and Website Data” and choose the time range you want to clear.

Next, you can disable any browser extensions that might be causing the error. To do this, go to Safari’s preferences again and select the “Extensions” tab. From there, you can disable or remove any extensions that you suspect might be causing the issue.

In addition to clearing the cache and disabling extensions, you can also check for any outdated certificates that might be causing the secure connection error. To do this, go to Safari’s preferences and select the “Privacy” tab. From there, click on “Manage Website Data” and search for any outdated certificates that need to be removed.

If you are still experiencing the secure connection error after following these steps, you may need to check your system’s date and time settings. Make sure that your Mac’s date and time are correct, as an incorrect time zone or date can sometimes cause issues with establishing a secure connection.

By managing browser data and extensions in Safari, you can effectively troubleshoot and resolve the “Safari Can’t Establish Secure Connection” error. Clearing the cache and cookies, disabling extensions, checking for outdated certificates, and verifying your system’s date and time settings can all help in resolving this issue.

FAQs

Why is Safari not opening some websites?

Safari may not be opening some websites due to possible server issues, temporary unavailability, or firewall restrictions on corporate networks.

Why does Safari keep saying connection not secure?

Safari keeps saying “connection not secure” because the website’s certificate is either expired, illegitimate, or using an outdated TLS version.

How do you fix a secure connection Cannot be established?

A concise answer to fixing a secure connection that cannot be established is to first check your internet connection, clear your browser’s cache, cookies, and temporary files, update the SSL certificate on your server, temporarily disable antivirus or firewall programs that may be blocking access, and try using a different web browser.

Fix BattlEye Service Not Running问题resolved

I recently had an issue with the BattlEye service not running, but I was able to find a solution and resolve the problem.

Run as Administrator

Windows UAC prompt

To fix the BattlEye Service Not Running issue, you may need to run the game as an administrator. This will give the game the necessary permissions to access all the required files and services.

To run the game as an administrator, simply right-click on the game’s shortcut or executable file and select “Run as administrator” from the context menu. This will launch the game with elevated privileges, potentially resolving any BattlEye Service issues.

If running the game as an administrator does not solve the problem, you can also try reinstalling BattlEye. To do this, navigate to the game’s installation directory and locate the BattlEye folder. Inside the folder, you should find an executable file called “Install_BattlEye.exe.” Run this file as an administrator to reinstall BattlEye.

Additionally, you can try verifying the integrity of the game files. This can help identify and fix any corrupted or missing files that may be causing the BattlEye Service Not Running issue. To verify the game files, open the game’s launcher or platform (e.g., Steam, Epic Games Store) and look for an option to verify or repair game files.

If none of these solutions work, you may need to contact the game’s support team for further assistance. They may have specific troubleshooting steps or updates that can help resolve the BattlEye Service Not Running problem.

Verify Game File Integrity

Step Description
1 Launch the game client (e.g. Steam, Epic Games Launcher).
2 Go to the game’s properties or settings.
3 Look for an option to verify game file integrity.
4 Click on the verify game files or similar button.
5 Wait for the process to complete and fix any corrupt files.
6 Restart the game client and check if the issue is resolved.

Update Device Drivers

  • Open Device Manager by pressing Win+X and selecting Device Manager
  • Expand the category for the device you want to update
  • Right-click on the device and select Update driver
  • Choose to search automatically for updated driver software
  • Follow the on-screen instructions to complete the update process

Scan for Viruses and Malware

Start by running a full scan of your computer using a reputable antivirus program. This will help identify and remove any malicious software that may be causing the issue.

Once the scan is complete, make sure to update your antivirus program and perform regular scans to prevent future infections. It is also a good idea to enable real-time protection to stop malware in its tracks before it can cause harm.

If the issue persists after scanning for viruses and malware, you may need to manually start the BattlEye service. To do this, open the Task Manager by pressing Ctrl + Shift + Esc, then navigate to the Services tab.

Look for the BattlEye service in the list of services and right-click on it. Select Start from the context menu to manually start the service. If the service starts successfully, you should no longer encounter the “BattlEye Service Not Running”问题resolved error.

Finally, make sure to keep your operating system and all software up to date to prevent security vulnerabilities that could be exploited by malware.

FAQ

Why is BattlEye not working?

BattlEye may not be working due to potential unknown software blocking it or issues within your operating system. It is recommended to seek assistance from your device manufacturer or a PC support team to troubleshoot and resolve the issue.

How do I manually launch BattlEye?

To manually launch BattlEye, you can open the Start Menu, search for “msc,” and press Enter to launch the program. From there, select BattlEye Services and press “Start this Service.” Confirm it is running by checking the Processes tab in Task Manager.

How do I uninstall and reinstall BattlEye?

To uninstall and reinstall BattlEye, you can use the official BattlEye uninstaller available at https://www.battleye.com/downloads/UninstallBe.exe. After uninstalling, restart your PC and then reinstall your game to ensure BattlEye is properly installed.

How do I fix BattlEye error in Destiny 2?

To fix the BattlEye error in Destiny 2, you can try disabling conflicting software, updating Windows, checking file integrity, updating GPU drivers, restarting your PC, re-installing Destiny 2, or waiting for a patch from Bungie.

Fix Git Credential Manager Windows Password Issue

In this article, I will discuss how to resolve the Git Credential Manager Windows password issue.

Configuring Credential Helper for Password Storage

Git credentials configuration screen

To configure the Git Credential Helper for password storage on Windows, follow these steps:

1. First, open a command-line interface on your Windows system.

2. Next, run the following command to enable credential caching for HTTPS connections: git config –global credential.helper cache.

3. Then, set the credential helper to use the Git Credential Manager for Windows with the command: git config –global credential.helper manager.

4. Finally, test the configuration by attempting to push or pull from a Git repository that requires authentication. You should be prompted to enter your credentials, which will then be securely stored by the Git Credential Manager.

Understanding HTTP(S) Authentication in Git

To understand HTTP(S) authentication in Git, it’s important to know how it works within the context of your operating system. For Windows users facing password issues with Git Credential Manager, make sure to check your Git configuration settings to ensure the correct authentication method is being used. If you’re encountering issues with HTTPS authentication, try updating your Git Credential Manager to the latest version to resolve any compatibility issues. Additionally, clearing your Git credentials cache can sometimes help with authentication problems. Understanding how Git interacts with authentication protocols can help troubleshoot and fix password issues on Windows systems.

Solutions to Prevent Repeated Credential Prompts

Git credential prompt dialog box.

  • Clear Git credentials from Windows Credential Manager:

    • Open Control Panel.
    • Click on User Accounts.
    • Click on Credential Manager.
    • Under Windows Credentials, locate any credentials related to Git.
    • Delete the credentials associated with Git.
  • Enable Git Credential Manager Cache:

    • Open Git Bash.
    • Run the command git config –global credential.helper cache.
    • This will cache your credentials for a specified period of time.
  • Use Personal Access Tokens (PAT) instead of passwords:

    • Generate a Personal Access Token from your Git provider.
    • Replace your password with the Personal Access Token in Git.
    • This will prevent repeated credential prompts.

Generating Personal Access Tokens for Enhanced Security

To enhance security when using Git, it is recommended to generate personal access tokens. This can help resolve any password issues that may arise when using Git Credential Manager on Windows. To generate a personal access token, follow these steps:

1. Go to your GitHub account and navigate to Settings.

2. Click on Developer settings, then select Personal access tokens.

3. Click Generate new token, enter a description, select the scopes or permissions needed, and click Generate token.

F.A.Q.

How do I fix my Git credentials?

To fix your Git credentials, you can install the Git Credential Manager for Windows, obtain a Personal Access Token, add your credentials to the Windows Credential Manager, and then use your preferred tool to clone your repository.

How to reset password in Git credential manager for windows?

To reset a password in Git credential manager for Windows, you can go to Control Panel, then navigate to User Accounts and Credential Manager. Look for the Git credentials in the list, update the password, and then you should be able to use Git commands without any error messages.

How do I remove Git credential Manager from Windows?

To remove Git Credential Manager from Windows, you can uninstall it through the Control Panel. Simply open Control Panel, go to Programs and Features, find “Git Credential Manager”, and click on “Remove”.

What is the difference between Git credential Manager and Windows credential Manager?

The difference between Git credential Manager and Windows credential Manager is that Git credential Manager provides multi-factor authentication support for specific platforms like Visual Studio Team Services, Team Foundation Server, and GitHub, while Windows credential Manager offers single-factor authentication support for any HTTP enabled Git repository on Windows.

Fix Kaspersky Error 1306 Uninstalling Software

In this article, I will discuss how to fix Kaspersky Error 1306 when uninstalling software.

Introduction to the Issue

When encountering Kaspersky Error 1306 while uninstalling software, it typically indicates a typographical error in the uninstall command. This error can prevent the software from being removed successfully, causing frustration for users. To fix this issue, double-check the uninstall command to ensure accuracy and correct any typos. Additionally, make sure you have administrative privileges to uninstall the software properly. If the error persists, consider reaching out to Kaspersky Lab for further assistance.

Causes and Solutions

Cause Solution
Corrupted installation files Reinstall the software using a clean installation file
Conflicting software Uninstall any conflicting software before installing Kaspersky
Insufficient permissions Run the installer as an administrator
Registry errors Use a registry cleaner tool to fix any errors

Step-by-Step Troubleshooting Guide

  • Save any open files and close all open programs
  • Restart your computer
  • Attempt to uninstall the software again

Step 2: Use Kaspersky’s removal tool

  • Download Kaspersky’s removal tool from their official website
  • Run the removal tool on your computer
  • Follow the on-screen instructions to uninstall the software

Step 3: Check for conflicting programs

  • Open Task Manager by pressing Ctrl+Shift+Esc
  • Look for any programs that may be conflicting with the uninstallation process
  • End any processes that are causing conflicts

Step 4: Reinstall Kaspersky

  • Download the latest version of Kaspersky from their official website
  • Install the software on your computer
  • Attempt to uninstall the software again

Feedback and Further Assistance

If you are still experiencing issues after attempting to uninstall Kaspersky software and receiving Error 1306, it is important to seek feedback and further assistance. Contact Kaspersky Lab’s customer support for personalized guidance on resolving this issue. Provide details of the error message and steps you have taken so far to uninstall the software. Their team will be able to provide specific solutions tailored to your situation.

F.A.Qs

How do I fix Kaspersky installation error?

To fix Kaspersky installation error, you may need to ensure that your computer meets the system requirements, uninstall any previous versions of Kaspersky, temporarily disable any conflicting software, and then try reinstalling the application. Additionally, you can reach out to Kaspersky customer support for further assistance.

How do I fix Kaspersky database out of date?

To fix a Kaspersky database that is out of date, you can update the anti-virus databases by clicking “Update now” or download the latest version of the image.

Why Kaspersky is not installing in Windows 10?

Kaspersky is not installing in Windows 10 because the application version is incompatible with the new operating system. To resolve this issue, you can download the kavremover tool for Kaspersky applications and then reinstall the software.

Download AVG Remover Tool for Complete Anti-Virus Removal

Looking to completely remove AVG antivirus from your computer? Download the AVG Remover Tool for a thorough and effective uninstallation process.

Using the Uninstall Tool

To completely remove AVG AntiVirus from your computer, you can use the AVG Remover Tool. First, download the tool from the AVG website. Once the download is complete, locate the file and double-click to run the installer.

Follow the on-screen instructions to complete the installation process. After the tool is installed, go to the Start menu and locate the AVG Remover Tool. Right-click on the tool and select “Run as administrator” to ensure full access.

Once the tool is open, select AVG AntiVirus from the drop-down list of installed programs. Click on the “Uninstall” button to start the removal process. You may need to confirm your decision through the User Account Control prompt.

The tool will then uninstall AVG AntiVirus from your computer, including all related files and registry entries. Once the process is complete, restart your computer to finalize the removal. You can now safely install another antivirus software or use your computer without any antivirus protection.

Reinstallation of AVG Products

AVG product icons

If you’re looking to reinstall AVG products on your computer, the first step is to completely remove any existing antivirus software. To do this, download the AVG Remover Tool from the official AVG website.

Once downloaded, double-click on the file to run the remover tool. Follow the on-screen instructions to complete the removal process. This will ensure that there are no conflicts with the new installation.

After successfully removing the previous antivirus software, you can proceed with downloading and installing the latest version of AVG products. Make sure to download the software from the official AVG website to avoid any potential malware or security risks.

Once the download is complete, double-click on the installer file to begin the installation process. Follow the on-screen instructions to complete the installation and set up your new AVG products.

After installation, make sure to run a full system scan to ensure that your computer is protected from any potential threats. If you encounter any issues during the installation or have any questions, refer to the FAQ section on the AVG website for assistance.

Removal from the Start Menu

To remove AVG Anti-Virus from the Start Menu, follow these steps:

1. Click on the Start menu located at the bottom left corner of your screen.
2. Locate the AVG program in the list of installed applications.
3. Right-click on the AVG program to reveal a drop-down menu of options.
4. Select “Uninstall” from the drop-down menu.
5. Follow the on-screen instructions to complete the removal process.
6. Restart your computer to ensure the changes take effect.

If you encounter any issues during the removal process, refer to the FAQ section on the AVG website for troubleshooting tips. It’s important to completely remove all traces of the anti-virus program to prevent any potential conflicts with other security software on your computer.

Troubleshooting Tactics

  • Restart your computer: Sometimes a simple restart can resolve any issues you may be experiencing.
  • Ensure you have administrator privileges: You need to have the proper permissions to use the AVG Remover Tool.
  • Temporarily disable other security software: Conflicts with other antivirus programs can cause issues with the removal process.
  • Download the latest version: Make sure you are using the most up-to-date version of the AVG Remover Tool.
  • Run the tool in Safe Mode: This can help prevent any interference from other programs while removing AVG.
  • Check for any error messages: This can provide clues as to what may be causing issues with the removal process.
  • Contact support: If all else fails, reach out to AVG for assistance with using the remover tool.

Frequently Asked Questions

How do I completely remove AVG?

To completely remove AVG, you can right-click the Windows Start icon, select Apps and Features, choose AVG Internet Security, and then click Uninstall twice. If prompted by User Account Control, click Yes.

Why can’t I Uninstall AVG AntiVirus?

You can’t uninstall AVG AntiVirus through the Start menu because it may cause issues. Instead, it is recommended to use the AVG Uninstall Tool to completely remove all AVG AntiVirus files from your PC while running Windows in Safe Mode. Instructions can be found in the article “Using the AVG Uninstall Tool.”

What happens when I Uninstall AVG?

When you Uninstall AVG, the AVG Uninstall Tool will remove all AVG Internet Security files from your PC while Windows is running in Safe Mode. It’s important to note that if you have a paid subscription, uninstalling the application will not automatically cancel your subscription.

Windows Security Center Service Can’t Be Started Fix

In my experience, fixing the issue of the Windows Security Center service not starting can be frustrating.

Symptoms and Solutions Overview

Symptoms: If the Windows Security Center Service can’t be started, you may encounter error messages or pop-up ads indicating a security issue on your computer. Your antivirus software may not be functioning properly, leaving your system vulnerable to malware and infections.

Solutions Overview: To fix this issue, try restarting the Windows Security Center Service in safe mode. First, boot your computer into safe mode by pressing F8 during the boot process. Once in safe mode, open cmd.exe from the start menu. Type “services.msc” and press Enter to open the Services window. Look for “Security Center” in the list, right-click on it, and select Start from the context menu.

If the issue persists, check the Microsoft Knowledge Base for more information on troubleshooting this problem. Your keyboard shortcuts and knowledge of Windows services may also come in handy during this process. If all else fails, seek feedback from Microsoft or consult a professional for further assistance.

Ensure Correct Configuration of Security Center

Windows Security Center interface

To fix the issue of the Windows Security Center service not being able to start, it is crucial to ensure that the Security Center is correctly configured.

First, double-click on the Security Center icon in the system tray to open it. Check if your antivirus software is active and up to date to prevent any malware infections.

Next, navigate to the Start menu and type “services.msc” in the search bar. Double-click on the Windows Security Center service and set it to start automatically.

If the service still cannot be started, try running the Command Prompt as an administrator by typing “cmd.exe” in the search bar and selecting “Run as administrator.” Enter the command “net start wscsvc” to manually start the service.

Repair the WMI Repository and Check Service Properties

Step Description
1 Press Windows key + R to open the Run dialog box.
2 Type “services.msc” and press Enter to open the Services window.
3 Scroll down and locate “Security Center” in the list of services.
4 Right-click on “Security Center” and select Properties.
5 Make sure the Startup type is set to Automatic and the Service status is Running.
6 If the Service status is not Running, click on Start to start the service.
7 If the issue persists, you may need to repair the WMI repository.
8 Press Windows key + X and select Command Prompt (Admin) to open an elevated Command Prompt.
9 Run the command “winmgmt /verifyrepository” to check the WMI repository for inconsistencies.
10 If any inconsistencies are found, run the command “winmgmt /salvagerepository” to repair the WMI repository.

Run Antivirus and System File Checker

To fix the issue of the Windows Security Center Service not being able to start, you can try running an antivirus scan to check for any potential infections that may be causing the problem. Additionally, running the System File Checker tool can help identify and repair any corrupted system files that could be impacting the service.

1. Run an antivirus scan: Use your preferred antivirus software to scan your computer for any malware or viruses that may be preventing the Security Center Service from starting.

2. Run System File Checker: Press the Windows key + R to open the Run dialog box, then type “sfc /scannow” and press Enter. This will initiate a scan of your system files and repair any issues that are found.

After completing these steps, restart your computer and check if the Windows Security Center Service is now able to start without any issues. If the problem persists, you may need to seek further assistance from Microsoft support or consult their knowledge base for additional troubleshooting steps.

Enable Necessary Services and Use Action Center

Enable Necessary Services: To fix the issue of Windows Security Center service not starting, make sure that all necessary services are enabled on your computer. Open the Services snap-in by pressing the Windows key + R, typing “services.msc”, and hitting Enter. Look for the Security Center service and double-click on it. Set the startup type to Automatic and click on Start to initiate the service.

Use Action Center: Another way to resolve the problem is by using the Action Center in Windows. Click on the Start button, type “Action Center” in the search bar, and open the Action Center. Check for any messages or alerts related to the Security Center service and follow the recommended actions to fix the issue.

If the problem persists, consider checking for any malware infections, performing a system restore, or seeking further assistance from Microsoft support.

Troubleshoot with Safe Mode and Clean Boot State

Windows Safe Mode and Clean Boot State.

If you are unable to start the Windows Security Center service, you can try troubleshooting the issue by using Safe Mode and Clean Boot State.

Safe Mode: Restart your computer and press F8 before the Windows logo appears. Select Safe Mode from the boot options menu. In Safe Mode, try starting the Windows Security Center service to see if it works without any interference from third-party software.

Clean Boot State: Press the Windows key + R, type “msconfig” in the Run dialog box, and press Enter. In the System Configuration window, go to the Services tab and check the box next to “Hide all Microsoft services.” Click Disable All, then go to the Startup tab and click Open Task Manager. Disable all startup items, then restart your computer and try starting the Windows Security Center service.

By using Safe Mode and Clean Boot State, you can troubleshoot and potentially fix issues with the Windows Security Center service not starting.

Additional Help and Recommendations

  • Check for Windows Updates:
    • Open Settings by pressing Windows key + I.
    • Click on Update & Security.
    • Click on Check for updates and install any available updates.
  • Run Windows Defender Offline Scan

    • Open Windows Security by clicking on the shield icon in the taskbar.
    • Click on Virus & threat protection.
    • Scroll down and click on Scan options.
    • Click on Windows Defender Offline scan and follow the on-screen instructions.
  • Check for Malware:

    • Run a full system antivirus scan using Windows Security or a third-party antivirus software.
    • If any malware is detected, follow the recommended steps to remove it.

Frequently Asked Questions

How to fix the Windows Security Center service cannot be started?

To fix the issue of the Windows Security Center service not starting, you can try changing the startup type to Automatic (delayed start) in the Security Center settings. Then, click Start and click OK to apply the changes. Check if the Security Center can now be started.

How do I fix Windows security unable to open?

To fix Windows security unable to open, you can try running the Windows Security Troubleshooter or resetting the Windows Security app in the Settings menu.

How do I fix Windows Defender Cannot be started?

To fix Windows Defender Cannot be started, you can check and set Windows Defender service to start automatically, disable third-party security programs, modify the WinDefend registry value, run the System File Checker utility, or perform a Windows repair reinstall.

How do I force Windows security to enable?

To force Windows security to enable, you can click on the Windows logo, open the Windows Security application, check for any installed antivirus programs, and then select the Virus & threat protection option.

Fix MSN Security Certificate Error

Today I will discuss how to fix the MSN security certificate error.

Symptoms and Error Messages

Symptoms of an MSN Security Certificate Error may include seeing a warning message such as “There is a problem with this website’s security certificate” when trying to access certain websites or email services. This error message can appear on various web browsers, including Internet Explorer 11 or Microsoft Edge, and may indicate an issue with the website’s security certificate.

Other symptoms may include being unable to access certain secure websites, receiving security warnings, or encountering issues with email services. These problems can be caused by issues with the website’s security certificate, domain name system settings, or network configurations.

If you encounter an MSN Security Certificate Error, try clearing your browser’s cache and cookies, or try accessing the website using a different web browser. If the issue persists, check your computer’s date and time settings to ensure they are accurate. Additionally, make sure your web browser is up to date and that your operating system is running the latest updates.

If you continue to experience issues with security certificate errors, consider contacting the website’s administrator or IT support for further assistance. It may be necessary to update security certificates, adjust network settings, or troubleshoot other potential causes of the error.

Causes and Reasons for Errors

1. Expired or Invalid Certificate: Ensure that the security certificate being used is not expired or invalid. Check the expiration date and validity of the certificate.

2. Incorrect System Date and Time: Make sure that the date and time settings on your system are accurate. Incorrect date and time settings can lead to security certificate errors.

3. Untrusted Certificate Authority: If the certificate is issued by an untrusted certificate authority, the browser may flag it as unsecure. Verify the certificate authority and ensure it is trusted.

4. Incorrect DNS Configuration: Issues with the Domain Name System (DNS) configuration can also cause security certificate errors. Check the DNS settings to ensure they are correct.

5. Self-Signed Certificates: Self-signed certificates are not inherently trusted by browsers. Consider obtaining a certificate from a trusted certificate authority to avoid errors.

6. Browser Compatibility: Some browsers may have specific requirements for security certificates. Make sure the certificate is compatible with the browser being used.

7. Network Connectivity Issues: Problems with network connectivity, such as a slow or unstable connection, can also lead to security certificate errors. Check the network connection for any issues.

If you encounter a security certificate error, consider these potential causes and take appropriate steps to resolve the issue.

Resolution and Fixes

  • Check Date and Time Settings:
    • Ensure that the date and time on your device are correct.
    • If they are not correct, adjust them to the current date and time.
  • Clear Browser Cache:
    • Open your web browser.
    • Go to the settings or preferences menu.
    • Find the option to clear cache and cookies.
    • Select this option to clear the cache.
  • Update Browser:
    • Check for any updates available for your web browser.
    • If there are updates, install them to ensure you are using the latest version.
  • Disable Antivirus Software:
    • Temporarily disable your antivirus software.
    • Try accessing MSN again to see if the security certificate error is resolved.
  • Check Security Settings:
    • Review the security settings in your web browser.
    • Ensure that SSL and TLS are enabled.
    • If they are not enabled, turn them on and save the changes.

Alternative Solutions and Workarounds

One alternative solution to fix the MSN security certificate error is to check the date and time on your computer. An incorrect date or time can cause the error to occur. Make sure that the date and time are set correctly on your system.

If the date and time are correct, another workaround is to clear the cache and cookies in your web browser. Sometimes, cached data can cause issues with security certificates. Clearing the cache and cookies can help resolve the error.

If clearing the cache and cookies does not work, you can try accessing the MSN website using a different web browser. Switching to a different browser such as Microsoft Edge or Internet Explorer 11 may help bypass the security certificate error.

Another solution is to update your web browser to the latest version. Outdated browsers may have compatibility issues with security certificates. Updating to the latest version can help resolve the error.

Advanced Options: Using Professional Tools

When facing an MSN security certificate error, utilizing professional tools can help resolve the issue efficiently.

1. Check the date and time settings on your computer. Incorrect settings can cause certificate errors.

2. Clear your browser’s cache and cookies to ensure that the certificate error is not due to a corrupted file.

3. Update your operating system to the latest version, especially if you are using Windows 10, Windows 7, or Windows Vista.

4. Use Microsoft Office tools like Microsoft Outlook to troubleshoot any certificate errors related to email services.

5. If the error persists, consider seeking assistance from your network administrator or IT support team for further troubleshooting.

By utilizing advanced options and professional tools, you can effectively address the MSN security certificate error and ensure secure browsing on the World Wide Web.

Additional Information and Comparisons

Comparison Additional Information
Security Certificate Error Occurs when the security certificate presented by a website is not trusted or expired
Fixing the Error Can be fixed by updating your browser, adjusting your computer’s date and time settings, or contacting the website’s administrator
Importance of Security Certificates Security certificates help ensure that the website you are accessing is secure and legitimate

Seeking Further Assistance and Alternatives

If you are still experiencing the MSN Security Certificate Error after trying the solutions mentioned earlier, it may be necessary to seek further assistance or explore alternative options.

Consult Microsoft Support: Reach out to Microsoft for specific guidance on resolving the security certificate error on your system. They may have additional troubleshooting steps or updates available to address the issue.

Consider Using a Different Browser: If the error persists on your current browser, try accessing MSN on a different browser to see if the problem is browser-specific.

Check for Updates: Make sure your operating system, web browser, and security software are all up to date. Sometimes, updating these programs can resolve security certificate errors.

If the error continues to persist, consider seeking assistance from a professional IT technician who can provide further insight and assistance in resolving the issue.

Frequently Asked Questions

How do I fix invalid security certificate?

To fix an invalid security certificate, you should ensure that SSL is installed, diagnose the issue with a web SSL checker, renew your SSL certificate, change all URLs to HTTPS, update your browser or OS version, install an intermediate certificate, and generate a new Certificate Signing Request.

How do I access my security certificate?

To access your security certificate, you can open the Certificate Manager by typing “certmgr.msc” in the search box of the Start menu and pressing “Enter”.

Why is Outlook asking for security certificate?

Outlook is asking for a security certificate because the SSL/TLS certificate installed on the mail server is either invalid or has expired.

Why am I getting a security certificate warning?

You are receiving a security certificate warning because the SSL certificate is signed by a certificate authority that is not trusted by your browser or because the certificate was issued by the server itself.

Remove Annoying Audio Ads Playing in Background

Tired of annoying audio ads playing in the background while browsing the web? Here’s how to remove them for good.

Uninstall Suspicious Applications from Windows

To remove annoying audio ads playing in the background on Windows, start by uninstalling any suspicious applications that may be causing the issue. Here’s how:

1. Open the Control Panel on your Windows computer.
2. Click on “Programs” and then “Programs and Features”.
3. Look for any unfamiliar or suspicious applications that you don’t remember installing.
4. Right-click on the suspicious application and select “Uninstall”.
5. Follow the on-screen instructions to complete the uninstallation process.
6. After uninstalling the suspicious application, restart your computer to apply the changes.

If the annoying audio ads persist, you may need to run a scan with an antivirus software like Malwarebytes to detect and remove any potential threats. Make sure to keep your antivirus software updated to stay protected against the latest threats.

Additionally, you can check your web browsers for any unwanted browser extensions or add-ons that may be causing the issue. Open your web browser, go to the settings or extensions menu, and remove any suspicious extensions.

Manually Remove Unwanted Scheduled Tasks

1. Open the Control Panel on your Windows computer.
2. Click on “Administrative Tools” and then select “Task Scheduler.”
3. In the Task Scheduler window, navigate to the Task Scheduler Library on the left-hand side.
4. Look through the list of tasks to identify any suspicious or unwanted tasks that may be related to the audio ads.
5. Right-click on the task you want to remove and select “Delete.”
6. Confirm the deletion of the task when prompted.

7. Repeat this process for any other unwanted scheduled tasks that may be causing the audio ads to play.

If you suspect that the unwanted tasks are related to malware or adware, it is recommended to run a scan with a reputable anti-malware program such as Malwarebytes or HitmanPro. These programs can help identify and remove any malicious software that may be causing the issue.

After removing the unwanted scheduled tasks and running a malware scan, be sure to restart your computer to complete the removal process. This should help stop the annoying audio ads from playing in the background.

Execute Full System Scans with Dedicated Anti-Malware Tools

  • Download and Install Anti-Malware Software: Choose a reputable anti-malware program such as Malwarebytes, Avast, or Bitdefender.
  • Update the Anti-Malware Software: Make sure the software is up to date with the latest virus definitions to effectively detect and remove malware.
  • Perform a Full System Scan: Run a comprehensive scan of your entire computer to identify and remove any malware causing the annoying audio ads.
  • Review Scan Results: Take note of any malware or suspicious files that are detected during the scan.
  • Quarantine or Delete Malware: Follow the prompts from the anti-malware software to quarantine or delete any identified threats.
  • Restart Your Computer: After removing the malware, restart your computer to ensure the changes take effect.

Employ AdBlockers to Prevent Future Intrusions

To prevent future intrusions like annoying audio ads playing in the background, it is recommended to employ AdBlockers. AdBlockers are tools that can help block unwanted advertisements from displaying on websites while you browse the internet. This can help in reducing the chances of encountering intrusive ads that disrupt your online experience.

AdBlockers can be easily installed as browser extensions or add-ons. Simply search for an AdBlocker extension compatible with your web browser and install it to start blocking ads.

Once the AdBlocker is installed, you can customize its settings to block specific types of ads, including audio ads that automatically play in the background. This can help in creating a more seamless and enjoyable browsing experience without interruptions from unwanted ads.

It is important to regularly update your AdBlocker to ensure that it is effectively blocking new types of ads and staying up-to-date with the latest ad-blocking technology. This can help in maximizing the effectiveness of the AdBlocker and preventing future intrusions from unwanted ads.

In addition to using AdBlockers, it is also recommended to practice safe browsing habits and avoid clicking on suspicious ads or links. This can help in minimizing the risk of encountering malware or potentially unwanted programs that may be hidden within ads.

By employing AdBlockers and practicing safe browsing habits, you can help prevent future intrusions like annoying audio ads playing in the background and enjoy a more secure and uninterrupted online experience.

F.A.Q.

Why am I hearing ads on my computer?

I am hearing ads on my computer because adware is injecting them into web pages in a way that can’t be blocked. The best way to get rid of these ads is to remove the malware causing them. You can follow the basic steps for finding and removing adware and other types of malware to solve this issue. Additionally, using tools like AdBlock can help protect your computer from malware.

Why do ads keep playing on my computer?

Ads keep playing on your computer because you may have unwanted software or malware installed. This can cause pop-up ads, new tabs that won’t go away, changes to your homepage or search engine, and unwanted Chrome extensions or toolbars.

Why am I getting ads out of nowhere?

You are getting ads out of nowhere because third-party apps that are not installed by default on your phone may be causing the issue. To troubleshoot, try restarting your phone in Safe Mode to see if the ads persist.

Why do virus ads keep popping up?

Virus ads keep popping up because your device may be infected with a virus. These ads are designed to trick you into clicking on malicious links or downloads, which can lead to further infection or data theft.

Microsoft Shut Down My Computer, Remove Scam Virus Alert

Recently, I experienced the frustration of having my computer shut down by Microsoft due to a scam virus alert.

Understanding the Shutdown Issue

If you encounter a message claiming that Microsoft has shut down your computer due to a virus alert, it is likely a scam. Do not call the number provided or provide any personal information. Scammers often use scare tactics to manipulate individuals into giving them access to their computers.

The best course of action is to close the browser window or restart your computer to get rid of the scam message. It is important to run a full system scan using a reputable antivirus program to ensure that your computer is not infected with any malware.

Remember to keep your operating system and antivirus software updated to protect your computer from potential security threats. If you are unsure about the legitimacy of a message or pop-up on your computer, seek help from a trusted IT professional.

By staying informed and cautious, you can avoid falling victim to scams like the one claiming Microsoft has shut down your computer. Protect your data and privacy by being proactive in your approach to online security.

Potential Causes of Unwanted Shutdowns

  • Run a full system scan using a reputable antivirus program.
  • Remove any detected threats and restart your computer.

Update Operating System and Software

  • Check for available updates for your operating system and installed programs.
  • Download and install all updates to ensure security and stability.

Check for Overheating

  • Clean out any dust or debris from the computer’s cooling system.
  • Ensure proper ventilation around the computer to prevent overheating.

Check Hardware Components

  • Inspect hardware components such as RAM, hard drive, and power supply for any issues.
  • Replace any faulty hardware if necessary.

Preventing Unwanted Programs Installation

A pop-up warning message about a potential virus infection

To prevent unwanted programs from being installed on your computer, be cautious when downloading software or clicking on pop-up ads. Make sure to only download programs from reputable sources and avoid clicking on suspicious links. Regularly update your operating system and antivirus software to protect against potential threats.

Additionally, be mindful of the permissions you grant to applications and only allow access to necessary features. Avoid clicking on unfamiliar email attachments or links as they may contain malware. Enable pop-up blockers in your web browser to prevent unwanted pop-ups from appearing.

If you encounter a scam virus alert claiming to be from Microsoft, do not click on any links or provide any personal information. Run a full scan of your computer using your antivirus software to check for any potential threats. If you suspect that your computer may be infected, seek professional help to remove the virus and prevent further damage to your system.

Steps to Remove Unwanted Programs

Step Description
1 Press Ctrl + Alt + Delete to open Task Manager
2 Go to the Processes tab and look for any suspicious programs
3 Right-click on the program and select End Task to stop it from running
4 Open Control Panel and go to Programs and Features
5 Find the unwanted program in the list and click Uninstall
6 Follow the on-screen instructions to complete the uninstallation process

Cleaning Up Internet Browsers

To clean up your internet browser after encountering a scam virus alert from Microsoft, follow these steps:

1. First, close all browser windows and open the browser again in safe mode. This will prevent the scam virus alert from popping up again.

2. Next, clear your browsing history, cache, and cookies. This will remove any traces of the scam virus alert and improve your browser’s performance.

3. Disable any suspicious browser extensions or add-ons that may have caused the scam virus alert. These can often be the source of such issues.

4. Run a full antivirus scan on your computer to ensure that the scam virus alert hasn’t caused any further damage. This will help to protect your data and privacy.

5. If the scam virus alert keeps appearing, consider resetting your browser settings to their default state. This will remove any unwanted changes made by the scam virus alert.

Additional Support Options

Contact Microsoft Support: Reach out to Microsoft Support for assistance in dealing with the scam virus alert. They can provide guidance on how to remove the virus and protect your computer from future attacks.

Use Online Resources: Look for online forums or support communities where you can find advice from other users who have experienced similar issues. You may also find step-by-step guides on how to remove the scam virus alert yourself.

Seek Professional Help: If you are unable to remove the virus on your own, consider contacting a professional IT service provider. They can help you safely remove the virus and ensure your computer is secure.

Exploring More Solutions

If you have encountered a scam virus alert claiming that Microsoft has shut down your computer, there are steps you can take to address the issue. Firstly, do not panic and do not call the number provided on the alert. This is a common scam tactic used to trick users into giving away personal information or money.

To resolve this issue, you can try force quitting your web browser by using the Task Manager (Ctrl+Alt+Delete on Windows or Command+Option+Esc on Mac). This will close the browser and prevent the scam alert from reappearing.

It is also recommended to run a full antivirus scan on your computer to check for any malicious software that may have caused the scam alert to appear. Additionally, make sure your operating system and all software are up to date to prevent future security vulnerabilities.

If the issue persists, you may need to contact Microsoft support directly for further assistance. Be cautious of providing any personal information over the phone or through email, as scammers may attempt to impersonate legitimate support representatives.

F.A.Q.

Why did Microsoft disable my computer?

Microsoft did not disable your computer. If you are experiencing issues, it is likely a scam or malware causing the problem. Try restarting your browser and running an antivirus scan to resolve the issue.

Why did Microsoft lock me out of my computer?

Microsoft locked you out of your computer because they may have detected suspicious activity on your account and temporarily locked it for security reasons. You will need to go through the account recovery process to regain access.

How do I get rid of fake Microsoft security warning?

To get rid of fake Microsoft security warnings, you can reset your browser settings to their original defaults. This can usually be done by clicking on the three dots at the top right corner of your browser, selecting “Settings”, clicking on “Advanced”, then selecting “Reset and clean up” followed by “Restore settings to their original defaults” and finally clicking “Reset settings”.

Is the Microsoft virus warning real?

The Microsoft virus warning is not real. If you encounter a pop-up warning about malware, close it immediately, disconnect from the internet, run security scans, and change your passwords to protect your information. These warnings are fake and meant to deceive you.