Malwarebytes Tray App Won’t Close – Disable MBAMService

I recently encountered an issue where the Malwarebytes tray app wouldn’t close, even after clicking the exit button. One solution I found was to disable the MBAMService.

Understanding the Tray Application

If the Malwarebytes tray application won’t close on your computer, you can disable the MBAMService to resolve the issue. To do this, first open the Task Manager by pressing Ctrl + Shift + Esc. In the Task Manager, locate the MBAMService process and click on it. Then, click on the “End Task” button at the bottom right corner of the Task Manager window. Once you have successfully ended the MBAMService process, the Malwarebytes tray app should close without any issues.

Common Issues and Solutions

  • Open Task Manager by pressing Ctrl+Shift+Esc
  • Locate the MBAMService process in the list of running processes
  • Right-click on the MBAMService process and select End Task

Troubleshooting Steps

If the Malwarebytes tray app won’t close, you can try disabling the MBAMService. To do this, first right-click on the Malwarebytes tray icon in the taskbar. Click on “Quit Malwarebytes. ” If this doesn’t work, press Ctrl+Shift+Esc to open the Task Manager.

Look for “MBAMService. exe” in the list of processes. Right-click on it and select “End task. ” If the issue persists, you may need to reboot your computer to fully close the Malwarebytes tray app.

Preventive Measures and Best Practices

To prevent the Malwarebytes Tray App from not closing, follow these best practices. First, try closing the app through the Task Manager. Press Ctrl + Shift + Esc to open the Task Manager, locate the Malwarebytes Tray App, and click on “End Task”. If that doesn’t work, you can try restarting your computer to see if that resolves the issue. Another option is to disable the MBAMService by opening the Start menu, searching for “Services”, finding MBAMService in the list, right-clicking on it, and selecting “Stop”.

F.A.Qs

How do I close Malwarebytes in the tray?

To close Malwarebytes in the tray, you can right-click the Malwarebytes icon located in the system tray next to your clock, then select Quit Malwarebytes.

Why can’t i close Malwarebytes in Task Manager?

You can’t close Malwarebytes in Task Manager because it includes self-protection to prevent unexpected termination. To exit Malwarebytes, right-click on the Malwarebytes tray icon, select Quit Malwarebytes, and click Yes if prompted by User Account Control.

How do I stop Malwarebytes from running in the background?

To stop Malwarebytes from running in the background on your Android device, you can adjust the app settings by navigating to Settings, selecting Apps, choosing Malwarebytes, tapping on Battery Usage, and then selecting either Don’t optimize or Allow background activity.

How do you turn off Malwarebytes?

To turn off Malwarebytes, you can right-click on the system tray icon and select Stop Protection, or double-click on the system tray icon and choose Stop Protection within Malwarebytes Anti-Exploit.

How to detect and remove spyware on my Mac

In this article, I will discuss how to detect and remove spyware on my Mac computer.

Identifying and Removing Suspicious Apps

To identify and remove suspicious apps on your Mac, start by checking your Applications folder for any unfamiliar programs. Look for any apps that you don’t remember installing or that seem suspicious.

Next, use a reliable anti-malware software like Malwarebytes to scan your Mac for spyware. This tool can help detect any malicious software that may be hiding on your system.

If you notice any strange behavior on your Mac such as pop-up ads, browser redirects, or sudden performance issues, these could be signs of spyware. In this case, it’s important to run a thorough scan of your system with Malwarebytes.

Remove any apps that you suspect to be spyware immediately. You can do this by dragging the app to the trash and emptying it. Make sure to also empty your trash to completely remove the app from your Mac.

Updating Operating Systems and Software

To ensure your Mac is protected from spyware, it is essential to regularly update your operating system and software. Make sure to regularly check for updates in the MacOS App Store and install them promptly to patch any security vulnerabilities. Additionally, keep your web browser up to date to prevent any potential exploits from being used by spyware.

Regularly updating your iOS devices is also crucial, as spyware can target iPhones and iPads through various means such as malicious mobile apps or phishing attacks. By keeping your iOS devices updated, you can minimize the risk of spyware infections.

In addition to updating your operating systems, it is important to regularly scan your Mac for any signs of spyware. Consider using reputable anti-spyware tools such as CleanMyMac X to detect and remove any malicious software that may have infiltrated your system.

By staying vigilant and proactive in updating your operating systems and software, you can significantly reduce the risk of spyware infections on your Mac and other Apple devices.

Utilizing Spyware Detection Tools

  1. Download a reputable spyware detection tool
    • Research and choose a reputable spyware detection tool
      Download a reputable spyware detection tool
Research and choose a reputable spyware detection tool
    • Download the software from a trusted source
  2. Install the spyware detection tool on your Mac
    • Follow the installation instructions provided by the software
    • Ensure the software is fully installed and updated
      Follow the installation instructions provided by the software
Ensure the software is fully installed and updated
  3. Run a full system scan with the spyware detection tool
    • Select the option for a full system scan
    • Let the scan run completely to detect any spyware on your Mac
  4. Review the scan results and remove any detected spyware
    • Review the list of detected spyware and select the option to remove them
    • Follow any additional instructions provided by the software for removing spyware

Preventing Future Spyware Infections

To prevent future spyware infections on your Mac, there are a few key steps you can take. First, be cautious when downloading any software or files from the internet. Always verify the source and ensure that you are downloading from a reputable website.

Additionally, keep your MacOS and any applications up to date with the latest patches and updates. This will help to patch any security vulnerabilities that could be exploited by spyware.

Be mindful of what permissions you grant to apps on your Mac. Only provide necessary permissions and revoke any that you feel are unnecessary.

Consider using a reliable antivirus software that includes spyware detection capabilities. Regularly scan your Mac for any potential threats and remove them promptly.

Lastly, avoid clicking on suspicious links or pop-up ads that could potentially lead to spyware infections. Be cautious when browsing the web and only visit trusted websites.

Frequently Asked Questions

How can I tell if my Mac has spyware?

To determine if your Mac has spyware, look out for signs such as slow operating speed, changes in your browser’s homepage or extensions, an increase in ads or pop-ups, security alerts without scanning your Mac, and your contacts receiving spam from your accounts.

How do I clean spyware off my Mac?

To clean spyware off your Mac, you can start by using Activity Monitor to identify any malicious apps. Next, boot into safe mode, uninstall any suspicious apps, reset and verify your browser, clean up extensions to remove adware and viruses, and remove any Mac malware from your Login Items.

How do I check for suspicious activity on my Mac?

To check for suspicious activity on your Mac, you can open Activity Monitor in the Utilities folder. Look for processes with high CPU usage and quit them if necessary. If you notice any other suspicious processes, you can search them on Google to see if they are associated with malware.

How do I know if my Mac is being monitored by my laptop?

To find out if your Mac is being monitored by your laptop, you can open the Activity Monitor by using the Command + Spacebar shortcut to open Spotlight Search, typing Activity Monitor, and pressing Enter. Look through the list for any unfamiliar programs or processes that may indicate monitoring software. To stop a program or process, double click on it and then click Quit.

Microsoft Account Security Code Email Spam – Trust Issues

I recently received numerous spam emails claiming to be security codes from Microsoft. This has raised serious trust issues regarding the security of my Microsoft account.

Exploring Additional Assistance

If you are still experiencing issues with receiving the Microsoft Account Security Code email, there are other avenues you can explore for assistance. One option is to try receiving the security code through text messaging instead of email. This can help bypass any potential issues with your email provider or spam filters.

Another option is to utilize the Microsoft Authenticator mobile app for generating security codes. This can provide an additional layer of security for your account and ensure that you always have access to the necessary codes.

If you continue to have trust issues with the security code emails, consider updating your password to improve security. Make sure to choose a strong password that is not easily guessable.

Lastly, if you are still unable to receive the security code emails, reach out to Microsoft customer support for further assistance. They may be able to provide additional information or help troubleshoot any issues with your account.

Diverse Assistance Options

  • Contact Microsoft Support:
    • Go to the Microsoft website and navigate to the Support section.
    • Choose the option to contact support either through chat, email, or phone.
    • Explain your issue with receiving security code email spam.
    • Follow the instructions provided by the support representative to resolve the issue.
  • Check Email Filters:
    • Log in to your email account where you are receiving the security code email spam.
    • Go to the settings or options section and look for email filters.
    • Review the filters to see if any have been set up to automatically mark these emails as spam.
    • Adjust or remove any filters that may be causing the issue.
  • Update Security Settings:
    • Access your Microsoft account settings.
    • Look for the security options and review them for any suspicious changes.
    • Change your password and enable two-factor authentication for added security.
    • Review the recent activity on your account to check for any unauthorized access.

Troubleshooting with Command Prompts

If you are experiencing issues with receiving your Microsoft Account Security Code email spam, you can troubleshoot using Command Prompts. First, open Command Prompt by searching for it in the Start menu. Next, type ipconfig /flushdns and press Enter to clear your DNS cache. Then, type netsh int ip reset and press Enter to reset your TCP/IP stack.

Finally, restart your computer and try accessing your Microsoft Account again. If the issue persists, consider using alternative methods such as receiving the security code through text messaging or using the mobile app.

Final Thoughts on Resolving Issues

Microsoft Account security settings page

Final Thoughts: Trust is the foundation of any relationship, including the one you have with your Microsoft account. To resolve security code email spam and trust issues, ensure that your email address is secure and regularly check for any unauthorized activity. Strengthen your password by using a combination of letters, numbers, and special characters.

Keep your personal information private and never share sensitive details over the phone or email. If you receive suspicious messages, contact Microsoft directly through their official telephone number to verify the authenticity of the communication. Stay informed and continuously update your knowledge on online security practices. Provide feedback to Microsoft if you encounter any issues to help improve their services.

F.A.Qs

Why do I keep getting emails from Microsoft with a code?

I keep getting emails from Microsoft with a code because it is likely that I am signing into my Microsoft account from a new device or browser or resetting my Microsoft account password.

Why am i getting Microsoft verification codes i didn t request?

You are receiving Microsoft verification codes you did not request because someone may be trying to access your account, or there may have been an error in entering the phone/email during a sign-in attempt. It is also possible that the delivery of a code requested previously was delayed.

Why did I receive a Microsoft account security code?

I received a Microsoft account security code because Microsoft may ask for additional proof of identity when signing in to ensure it’s really me. This code is sent to one of the email addresses or phone numbers linked to my account for verification purposes.

Why do I keep getting a code for my Microsoft account?

I keep getting a code for my Microsoft account because someone may be trying to access my account without permission or there could be a glitch in the system. To address this issue, I should check my account activity for any suspicious sign-in attempts or devices.

Allow Windows 7 to Install Software from Unknown Publisher

In this article, I will discuss how to enable Windows 7 to install software from unknown publishers.

Understanding Unknown Publisher Security Warnings

To allow Windows 7 to install software from an unknown publisher, you may encounter security warnings. These warnings are designed to protect your computer from potentially harmful programs.

When you see a security warning, it means that the software you are trying to install is not digitally signed or verified by a trusted source.

Before proceeding, it’s important to understand the risks associated with installing software from unknown publishers. These programs may contain malware or other malicious code that can harm your computer or compromise your personal information.

To bypass the security warning and install the software, follow these steps:

1. Right-click on the software installer file.
2. Select “Properties” from the context menu.
3. In the Properties window, click on the “Unblock” button, if available. This will remove the security warning.
4. Click “Apply” and then “OK” to save the changes.

Once you have unblocked the software, you can proceed with the installation. However, it’s important to exercise caution and only install software from trusted sources.

Keep in mind that this process may vary depending on the version of Windows you are using and the specific security settings on your computer.

Always ensure that your antivirus software is up to date and running to provide an additional layer of protection.

Repairing File Registry and Modifying UAC Settings

Windows registry and UAC settings interface

To allow Windows 7 to install software from unknown publishers, you may need to repair the file registry and modify the User Account Control (UAC) settings.

To repair the file registry, follow these steps:

1. Press the Windows key + R to open the Run dialog box.
2. Type “regedit” and press Enter to open the Windows Registry Editor.
3. In the left pane, navigate to the following key: HKEY_LOCAL_MACHINE\SOFTWARE\Microsoft\Windows\CurrentVersion\Policies\System
4. In the right pane, look for a value named “EnableLUA“. If it doesn’t exist, right-click on an empty space and select New > DWORD (32-bit) Value. Name it “EnableLUA“.
5. Double-click on the “EnableLUA” value and change its data to “0“.
6. Click OK and close the Registry Editor.

To modify the UAC settings, follow these steps:

1. Click the Start button and open the Control Panel.
2. In the Control Panel, click on “User Accounts“.
3. Click on “Change User Account Control settings“.
4. Move the slider to the lowest position to disable UAC.
5. Click OK and restart your computer for the changes to take effect.

After following these steps, Windows 7 will allow the installation of software from unknown publishers.

Running a Full System Scan to Ensure Safety

Running a full system scan is an important step to ensure the safety of your computer when installing software from an unknown publisher. It helps to detect any potential threats or malware that may be present in the files you are downloading.

To run a full system scan on Windows 7, follow these steps:

1. Open Microsoft Defender Antivirus by clicking the Start button, typing “Defender” into the search box, and then clicking on “Windows Defender Security Center.”

2. In the Windows Defender Security Center, click on “Virus & threat protection” in the left-hand menu.

3. Under the “Quick scan” section, click on “Full scan.”

4. Microsoft Defender Antivirus will now scan your entire system for any malicious files or software. This may take some time depending on the size of your hard drive.

5. Once the scan is complete, Microsoft Defender Antivirus will display the results. If any threats are found, follow the recommended actions to remove or quarantine them.

Running a full system scan regularly is recommended to ensure the ongoing safety of your computer. It is especially important when installing software from unknown publishers, as they may not have gone through the rigorous code signing process that verifies the authenticity of the software.

By taking this proactive step, you can help protect your computer from potential security risks and maintain a safe computing environment.

Bypassing Security Warnings for Trusted Software

Padlock icon

To bypass security warnings for trusted software on Windows 7, follow these steps:

1. Open the Control Panel by clicking on the Windows Start button and selecting “Control Panel.”

2. In the Control Panel, navigate to “System and Security” and click on “Action Center.”

3. In the Action Center window, click on “Change User Account Control settings” on the left-hand side.

4. A User Account Control settings dialog box will appear. Move the slider to the bottom to select “Never notify” and click on “OK.”

5. Now, Windows 7 will no longer display security warnings for trusted software installations.

It is important to note that bypassing security warnings can pose a risk to your computer’s security. Only do this for software you trust and have verified its authenticity.

If you encounter any issues or have concerns about the security implications, it is recommended to consult with an IT professional or do further research before proceeding.

The Risks of Ignoring Security Warnings from Unknown Publishers

Ignoring security warnings from unknown publishers can pose significant risks to your computer and personal data. When you allow Windows 7 to install software from unknown publishers, you expose yourself to potential malware, viruses, and other security threats.

Code signing is a method used by reputable software publishers to verify the authenticity and integrity of their applications. By ignoring security warnings from unknown publishers, you bypass this important security measure, leaving your computer vulnerable to malicious software.

NTFS, the file system used by Windows, includes built-in security features that help protect your computer from unauthorized access. However, allowing software from unknown publishers can bypass these protections, potentially compromising the security of your files and sensitive information.

Web browsers, such as Internet Explorer, play a crucial role in your online security. When you ignore security warnings and install software from unknown publishers, you may inadvertently allow malicious code to exploit vulnerabilities in your browser, putting your personal information at risk.

It’s important to note that Windows 10 has implemented stricter security measures compared to Windows 7. By continuing to allow software from unknown publishers on an outdated operating system, you’re missing out on important security updates and leaving your computer more susceptible to attacks.

Additionally, 32-bit computing is becoming less common, and many software developers are focusing their efforts on 64-bit applications. By ignoring security warnings and installing software from unknown publishers, you may inadvertently install outdated or incompatible software that can negatively impact your computer’s performance and security.

To protect yourself, it’s crucial to rely on reputable sources and only download software from trusted publishers. Be cautious when downloading files in ZIP format, as they can contain malicious code. Always scan downloaded files with antivirus software before opening them.

By ignoring security warnings and allowing Windows 7 to install software from unknown publishers, you jeopardize the overall security of your computer. Take the necessary precautions to protect your personal information and ensure the safety of your system.

Verifying Software Publishers for Device Safety

  • Research the software publisher’s reputation and history
  • Check if the publisher is well-known and established in the industry
    Research the software publisher's reputation and history
Check if the publisher is well-known and established in the industry
  • Look for positive reviews and ratings from other users
  • Verify if the publisher has a professional website with detailed information about their software
  • Check if the publisher has a valid digital signature for their software
  • Ensure that the publisher’s software is frequently updated to address security vulnerabilities
  • Verify if the publisher is registered with recognized software associations or organizations
  • Look for any awards or certifications the publisher has received
    Verify if the publisher is registered with recognized software associations or organizations
Look for any awards or certifications the publisher has received
  • Consider if the publisher has a support system in place to assist users with any issues
  • Take into account any recommendations or endorsements from trusted sources
    Consider if the publisher has a support system in place to assist users with any issues
Take into account any recommendations or endorsements from trusted sources

The Significance of Code Signing Certificates

Lock and key

Code signing certificates play a significant role in allowing Windows 7 to install software from unknown publishers. These certificates provide a way for software developers to digitally sign their applications, ensuring their authenticity and integrity.

By obtaining a code signing certificate, developers can establish trust with the Windows operating system and its users. When a user attempts to install software from an unknown publisher, Windows 7 will display a security warning. However, if the software is signed with a valid code signing certificate, Windows will recognize it as trustworthy and allow the installation to proceed without any warnings.

To allow Windows 7 to install software from an unknown publisher, you can follow these steps:

1. Obtain a code signing certificate from a trusted certificate authority (CA).

2. Sign your software using the private key associated with the code signing certificate. This can be done using tools like Microsoft SignTool or other code signing utilities.

3. Verify that the signed software includes a valid digital signature. This can be done by right-clicking the software file, selecting “Properties,” and navigating to the “Digital Signatures” tab.

4. If the digital signature is valid, Windows 7 will consider the software as trusted and allow the installation to proceed without any security warnings.

By using code signing certificates, software developers can ensure that their applications are not tampered with or modified by malicious actors. This enhances the security and integrity of the software installation process on Windows 7.

F.A.Q.

How do I allow unknown publisher in Windows 7?

To allow unknown publisher in Windows 7, open the Control Panel, go to System and Security, then access the Action Center. Choose Change User Account Control settings and set it to Never Notify by scrolling to the bottom. Click on OK.

How to allow installation from unknown sources in Windows 7?

To allow installation from unknown sources in Windows 7, you can follow these steps:

1. Click on the Start menu.
2. Go to Control Panel.
3. Open the “System and Security” category.
4. Click on “Windows Firewall.”
5. On the left side, click on “Allow a program or feature through Windows Firewall.”
6. Click on the “Change settings” button.
7. Check the box next to the program or feature you want to allow installation from unknown sources.
8. Click on “OK” to save the changes.

How do I stop Windows from blocking unknown publishers?

To stop Windows from blocking unknown publishers, you can modify the UAC settings, perform a system scan, override the error message, eliminate the publisher from untrusted lists, and disable file blocking.

Understanding and Troubleshooting lsass.exe Process

Understanding and troubleshooting the lsass.exe process is essential for maintaining a secure and stable system. Through this article, we delve into the intricacies of lsass.exe, its functions, and common issues that may arise.

Identifying a Fake File

Image showing a file with a red X mark

When troubleshooting the lsass.exe process, it is essential to be able to identify a fake file. Fake files can be a sign of malware or spyware on your computer, and it’s important to remove them to ensure the security of your system. Here are some tips on how to identify a fake file:

1. Pay attention to the file location: The lsass.exe process is typically located in the System32 folder on your computer. If you find it in a different location, it is likely a fake file. Make sure to verify the file location before taking any further action.

2. Check the file properties: Right-click on the file and select “Properties” from the context menu. Look for any suspicious information in the properties such as an incorrect publisher or a file description that doesn’t match the lsass.exe process. Verify the file properties to determine if it is genuine.

3. Scan the file with antivirus software: Use a reputable antivirus program to scan the file for any malware or viruses. This will help you determine if the file is legitimate or if it poses a threat to your system. Perform a thorough scan to ensure the file’s authenticity.

4. Compare the file size: The genuine lsass.exe file is usually around 30-40 kilobytes in size. If you find a file with a significantly different size, it is likely a fake. Compare the file size to the known size of the genuine lsass.exe file.

Location and File Size Verification

A file icon with a checkmark symbol.

When troubleshooting the lsass.exe process, it is important to verify the location and file size of the executable. This helps ensure that the process is legitimate and not a potential threat like spyware or a computer worm.

To verify the location of the lsass.exe process, follow these steps:

1. Open the Task Manager by pressing Ctrl + Shift + Esc.
2. Go to the “Processes” tab and locate lsass.exe in the list.
3. Right-click on lsass.exe and select “Open File Location” from the context menu.
4. This will open a new window showing the file location of lsass.exe. Make sure it is located in the System32 folder, typically “C:\Windows\System32”. If it is located elsewhere, it could be a sign of a malicious process.

To verify the file size of lsass.exe, follow these steps:

1. Right-click on lsass.exe in the Task Manager and select “Properties” from the context menu.
2. In the Properties window, go to the “Details” tab.
3. Look for the “Size” field and verify that it matches the expected file size for lsass.exe. On Windows 10, the file size should be around 35-40 kilobytes (KB).

By verifying the location and file size of lsass.exe, you can ensure that the process is legitimate and not a potential security risk. If you suspect any issues, such as an unusual location or file size, it is recommended to run a thorough scan with reliable antivirus software to detect and remove any potential threats.

Memory Usage Concerns
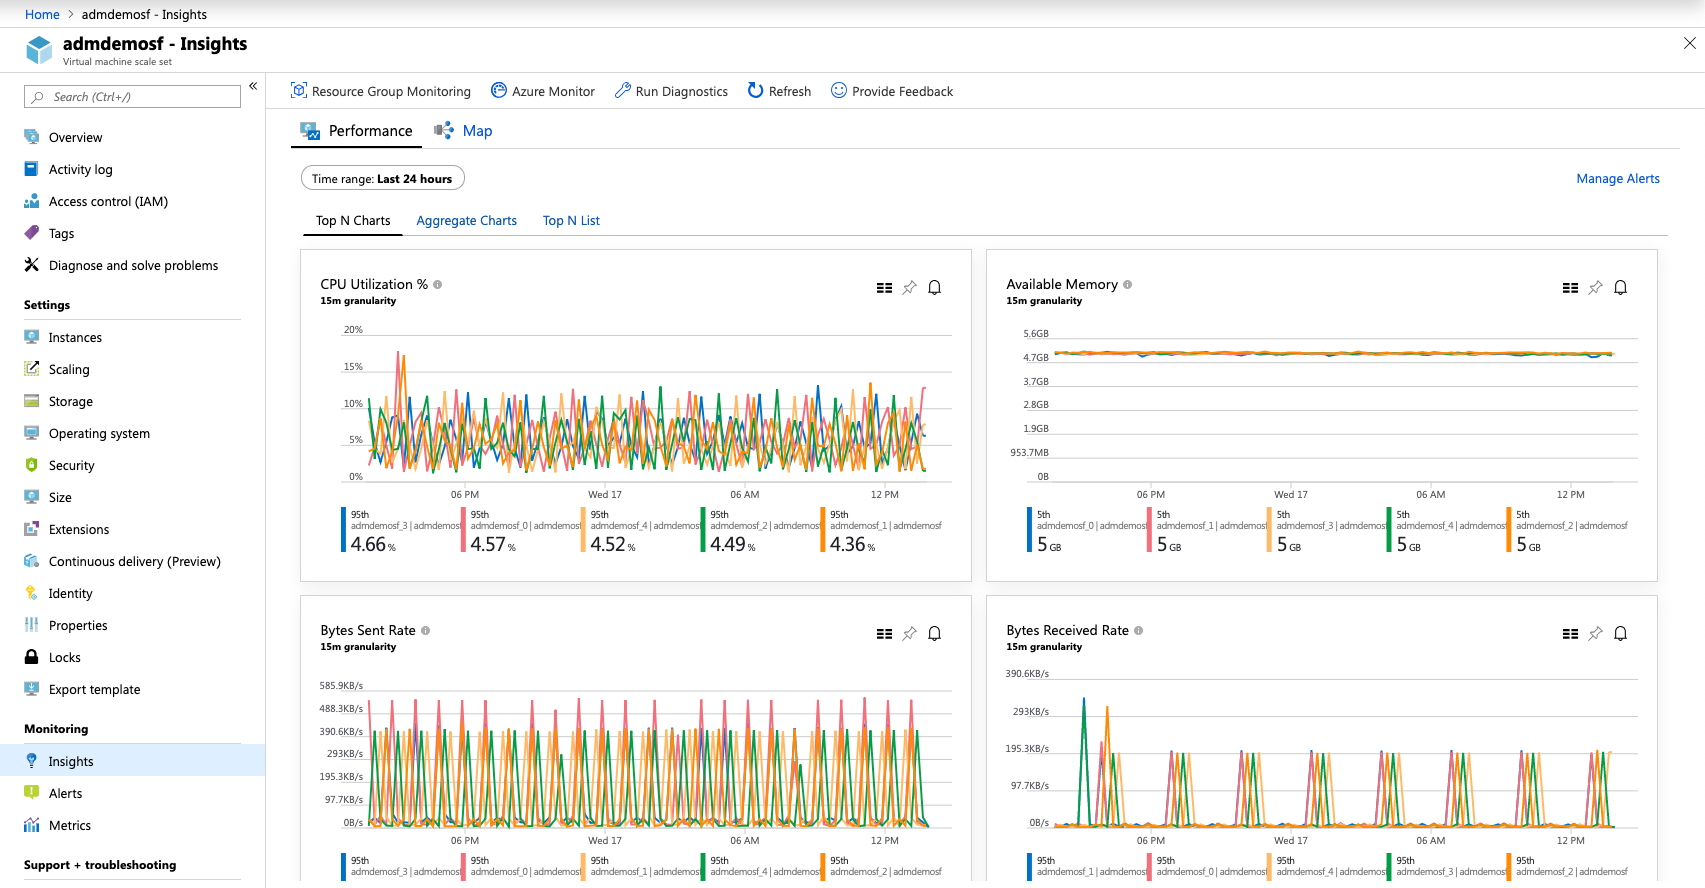
Computer memory usage graph.

First, lsass.exe is the Local Security Authority Subsystem Service, a crucial component in Windows operating systems. It is responsible for authentication and security policies.

One common issue is high memory usage by lsass.exe, which can slow down the system. To address this, check for any malware or viruses that may be causing the problem. Run a thorough scan using reliable security software.

Another potential cause of high memory usage is an overload of login requests. This can occur in environments with a large number of users or when there are issues with the Active Directory. Check the event logs for any relevant errors or warnings.

To reduce memory usage, consider optimizing the system. Disable unnecessary startup programs, limit the number of fonts and applications running in the background, and close any unused tabs or applications.

Additionally, updating the operating system and installed software can help resolve memory issues. Keeping the system up-to-date ensures that any known memory-related bugs or vulnerabilities are patched.

If memory usage is consistently high, it may be necessary to upgrade the system’s RAM. Increasing the amount of random-access memory can provide better performance and alleviate memory concerns.

Remember to regularly back up important data in case of any unforeseen issues. This ensures that data is protected and can be easily restored if needed.

By troubleshooting and addressing memory usage concerns in the lsass.exe process, you can improve system performance and stability.

Virus Removal Guidelines

  • Scan your computer using a reliable antivirus software to detect and remove any viruses or malware.
  • Update your antivirus software and keep it up to date to ensure maximum protection against the latest threats.
  • Enable automatic updates for your operating system and other software to patch any vulnerabilities that could be exploited by viruses.
  • Be cautious when downloading and installing software or files from the internet, especially from unknown sources.
  • Avoid clicking on suspicious links or opening email attachments from unknown senders, as they may contain viruses.
  • Regularly backup your important data to an external storage device or cloud service to prevent data loss in case of a virus attack.
  • Use a strong and unique password for your computer and online accounts to prevent unauthorized access.
  • Enable firewall protection on your computer to block unauthorized network connections and prevent virus infections.
  • Educate yourself about common virus removal techniques and stay informed about the latest security threats.
  • Seek professional help if you are unable to remove a persistent virus or if you suspect your computer is infected with a complex malware.

Symptoms and Causes

The lsass.exe process is an essential component of the Windows operating system, responsible for security and authentication tasks. However, sometimes this process can encounter problems that may cause various symptoms. Here are some common symptoms and their possible causes:

1. System Errors and Reboots: If your system repeatedly crashes or reboots unexpectedly, it could be due to a faulty lsass.exe process. This can occur if the process becomes corrupted or infected by malware, such as a computer worm.

2. High CPU Usage: If you notice that your computer’s CPU usage is unusually high, lsass.exe might be the culprit. This can happen if the process is stuck in a loop or if it is being exploited by malicious software.

3. Authentication Issues: Problems with user authentication, such as being unable to log in or frequent password prompts, can also be linked to lsass.exe. It may indicate a corruption or misconfiguration within the process or the associated systems like Active Directory or Domain Controllers.

4. Error Messages: Sometimes, you may encounter error messages related to lsass.exe, such as “lsass.exe – System Error” or “The application failed to initialize properly.” These messages can indicate issues with the lsass.exe process or its dependencies.

To troubleshoot lsass.exe issues, you can try the following steps:

1. Scan for Malware: Run a reputable antivirus or anti-malware scan to detect and remove any malicious software that may be affecting the lsass.exe process.

2. Update Windows: Ensure that your operating system is up to date with the latest Windows updates. These updates often include critical security patches that can resolve issues with lsass.exe.

3. Check for Corrupted System Files: Use the System File Checker tool (sfc /scannow) to scan for and repair any corrupted system files that may be affecting the lsass.exe process.

4. Review Recent Changes: If you recently installed or updated any software or drivers, consider rolling back those changes to see if they are causing conflicts with lsass.exe.

Resolution Steps

  1. Restart your computer: Sometimes, a simple restart can resolve issues related to the lsass.exe process. This helps in case the problem is caused by a temporary glitch.
  2. Run a full system scan with your antivirus software: The lsass.exe process can be exploited by malware. Scan your system thoroughly to detect and remove any malicious programs.
  3. Update your operating system: Outdated software can have vulnerabilities that can be exploited by malware. Make sure your operating system is up to date with the latest security patches.
  4. Check for system file corruption: Run the System File Checker (SFC) tool to scan and repair any corrupted system files that may be causing issues with the lsass.exe process.
  5. Review startup programs and services: Some third-party applications or services may conflict with the lsass.exe process. Disable unnecessary startup programs and services to identify if any of them are causing the problem.
  6. Perform a clean boot: This helps identify if a third-party program or service is causing the issue. By starting your computer with only essential services and startup programs, you can narrow down the cause of the problem.
  7. Restore your system: If you recently made changes to your system configuration and started experiencing issues with the lsass.exe process, you can try restoring your system to a previous stable state using System Restore.
  8. Seek professional help: If you have tried all the above steps and the problem persists, it may be time to consult a professional technician or IT support for further investigation and resolution.

Safety Checks for lsass.exe

Windows security shield

When troubleshooting the lsass.exe process, it is important to perform safety checks to ensure the security and stability of your system.

First and foremost, scan your computer for malware using a reliable antivirus program. Malicious software can disguise itself as lsass.exe and cause harm to your system.

Next, verify the file location and properties of lsass.exe. The legitimate lsass.exe file is located in the System32 folder on your Windows system. Check the file size, creation date, and digital signature to ensure it matches the official version.

Monitor CPU and memory usage to identify any abnormal behavior. High CPU or memory usage by lsass.exe could indicate a problem or potential attack.

Ensure that Windows and all software are up to date with the latest security patches and updates. This helps protect against known vulnerabilities that could be exploited by attackers.

If you suspect any issues with lsass.exe, run a system scan using the System File Checker (SFC) tool. This utility scans and repairs corrupted system files, including lsass.exe.

Additionally, backup your important files regularly to prevent data loss in case of any system failures or attacks.

Network Access Explained

Network access refers to the ability of a computer or device to connect to and communicate with other devices or networks. It is an essential aspect of modern computing and allows users to access resources, share files, and collaborate with others.

To troubleshoot network access issues, it is important to understand the lsass.exe process. LSASS (Local Security Authority Subsystem Service) is a critical component of the Windows operating system that manages security policies and authentication on a local system. It plays a crucial role in granting or denying network access to users and applications.

If you are experiencing network access problems, here are some troubleshooting steps you can follow:

1. Check your network connection: Ensure that your computer is properly connected to the network. Check the physical connection, such as cables and ports, and make sure that your network adapter is enabled.

2. Verify network settings: Check your network settings to ensure they are configured correctly. This includes IP address, subnet mask, default gateway, and DNS settings.

3. Check firewall settings: Firewalls can sometimes block network access. Make sure that the necessary ports and protocols are allowed through your firewall. Consult your firewall’s documentation for specific instructions.

4. Restart the lsass.exe process: Sometimes, the lsass.exe process may encounter issues that prevent it from functioning properly. Restarting the process can help resolve these issues. To do this, follow these steps:
a. Press Ctrl+Alt+Delete to open the Task Manager.
b. Go to the “Processes” tab and look for “lsass.exe”.
c. Right-click on “lsass.exe” and select “End Process”.
d. After the process has ended, go to the “File” menu and select “New Task (Run…)”.
e. Type “lsass.exe” and click “OK” to restart the process.

5. Update Windows: Outdated operating systems can sometimes cause network access problems. Make sure that your Windows version is up to date by installing the latest updates from Windows Update.

Join Our Security Newsletter

Lock and key symbol

Sign up for our security newsletter to receive regular updates and tips on understanding and troubleshooting the lsass.exe process. Our newsletter provides valuable information on how to identify and resolve issues related to this critical Windows system process.

By joining our newsletter, you will gain access to expert insights and practical advice that can help you navigate potential security risks and optimize the performance of your computer. We cover topics such as:

Identifying lsass.exe-related issues: Learn how to recognize common symptoms and error messages associated with lsass.exe problems. Our troubleshooting tips will help you diagnose and resolve these issues efficiently.

Preventing security threats: Stay one step ahead of cybercriminals by understanding the vulnerabilities that can be exploited through the lsass.exe process. Our newsletter provides guidance on implementing effective security measures to protect your system.

Optimizing system performance: Discover techniques to optimize the lsass.exe process and improve the overall performance of your computer. From managing CPU time to optimizing memory usage, our newsletter provides practical tips for enhancing system efficiency.

Keeping up with the latest updates: Stay informed about the latest developments related to lsass.exe and other Windows components. Our newsletter highlights important updates, patches, and fixes released by Microsoft that can enhance the security and stability of your system.

Don’t miss out on this valuable resource! Sign up for our security newsletter today to stay informed and protected.

Frequently Asked Questions

Is Lsass a protected process?

Yes, LSASS is a protected process when enabled without a UEFI lock.

How many lsass.exe should be running?

There should only be one lsass.exe running in Task Manager.

How do I know if my LSA is running?

To know if your LSA is running, you can check by running the following command in cmd.exe: `RunAsPPL` value should be present and set to `0x1`. Additionally, you can confirm LSA Protection is enabled by opening the Event Viewer (eventvwr.exe).

How do I fix Local Security Authority process high CPU?

To fix Local Security Authority process high CPU:
– Run Active Directory Data Collector.
– Run an antivirus program to check for malware.
– Check certificates.
– Delete a user file.
– Run an SFC scan in Safe Mode.

Troubleshooting and Fixing Windows Error Code 0x8009002d

Windows Error Code 0x8009002d can be frustrating, but with the right troubleshooting steps, it can be fixed efficiently.

Overview of Error Code 0x8009002d

Overview of Error Code 0x8009002d

Error Code 0x8009002d is a common issue that Windows users may encounter. This error typically occurs when there is a problem with the cryptographic services on your computer. It can be frustrating, but there are steps you can take to troubleshoot and fix this error.

First, try restarting your computer. Sometimes a simple reboot can resolve the issue. If that doesn’t work, there are a few other steps you can try.

Check for malware or viruses. Spyware, adware, and viruses can cause various errors on your computer, including Error Code 0x8009002d. Use a reliable antivirus program to scan your computer and remove any threats that are found.

Verify your Windows installation. If you recently installed or updated Windows, there may have been a problem with the installation process. Go to the Control Panel and navigate to “Programs” or “Programs and Features.” Look for any recently installed Windows updates or programs and uninstall them.

Reset your cryptographic services. Open the Command Prompt as an administrator and type the following commands, pressing Enter after each one:
– “net stop cryptsvc”
– “ren %systemroot%\System32\Catroot2 oldcatroot2”
– “net start cryptsvc”

Check for corrupted system files. Open Command Prompt as an administrator and type “sfc /scannow” and press Enter. This will scan your system for any corrupted files and attempt to repair them.

Reinstall Windows. If none of the above steps work, you may need to reinstall Windows to fix the Error Code 0x8009002d. Make sure to back up your important files before proceeding with this step.

Common Causes of the Error

  • Incorrect user credentials: Entering wrong username or password can trigger error code 0x8009002d.
  • Corrupted system files: Damaged or missing system files can lead to the occurrence of this error.
  • Outdated or incompatible software: Using outdated or incompatible software may result in error code 0x8009002d.
  • Registry issues: Problems within the Windows registry can cause this error to occur.
  • Security software conflicts: Conflicts between security software and Windows settings can trigger error code 0x8009002d.
  • Hardware issues: Faulty hardware components or drivers can contribute to the occurrence of this error.
  • Insufficient system resources: Running low on system resources such as memory or disk space can cause this error.

Troubleshooting Steps to Resolve Sign-in Issues

If you’re experiencing sign-in issues on your Windows device and encountering the error code 0x8009002d, follow these troubleshooting steps to resolve the problem:

1. Check your internet connection: Ensure that you have a stable internet connection before attempting to sign in. If you’re using a wireless connection, try connecting via Ethernet cable for a more reliable connection.

2. Restart your computer: Sometimes a simple reboot can resolve sign-in issues. Restart your computer and try signing in again.

3. Verify your credentials: Double-check that you’re entering the correct username and password. Make sure that the Caps Lock key is not enabled as it can affect your password input.

4. Reset your password: If you’re unable to sign in due to a forgotten password, follow the password reset process provided by your operating system or the sign-in screen.

5. Run a malware scan: Use a reputable antivirus or anti-malware software to scan your computer for any potential spyware, viruses, or adware that may be causing sign-in issues.

6. Disable third-party software: Temporarily disable any third-party software, such as antivirus or firewall programs, to check if they are causing conflicts with the sign-in process.

7. Check for Windows updates: Make sure your Windows operating system is up to date by checking for and installing any available updates. Outdated software can sometimes lead to sign-in issues.

8. Try a different user account: If you have multiple user accounts on your computer, try signing in with a different account to determine if the issue is specific to one user.

Advanced Solutions: Resetting ACLs on Critical Folders

Folder Path Command Description
C:\Windows\System32\config icacls “C:\Windows\System32\config” /reset /t /c Resets ACLs on the config folder and all subfolders and files
C:\Program Files\Common Files icacls “C:\Program Files\Common Files” /reset /t /c Resets ACLs on the Common Files folder and all subfolders and files
C:\Users\%username% icacls “C:\Users\%username%” /reset /t /c Resets ACLs on the user’s profile folder and all subfolders and files

Frequently Asked Questions

What is signtool 0x8009002d?

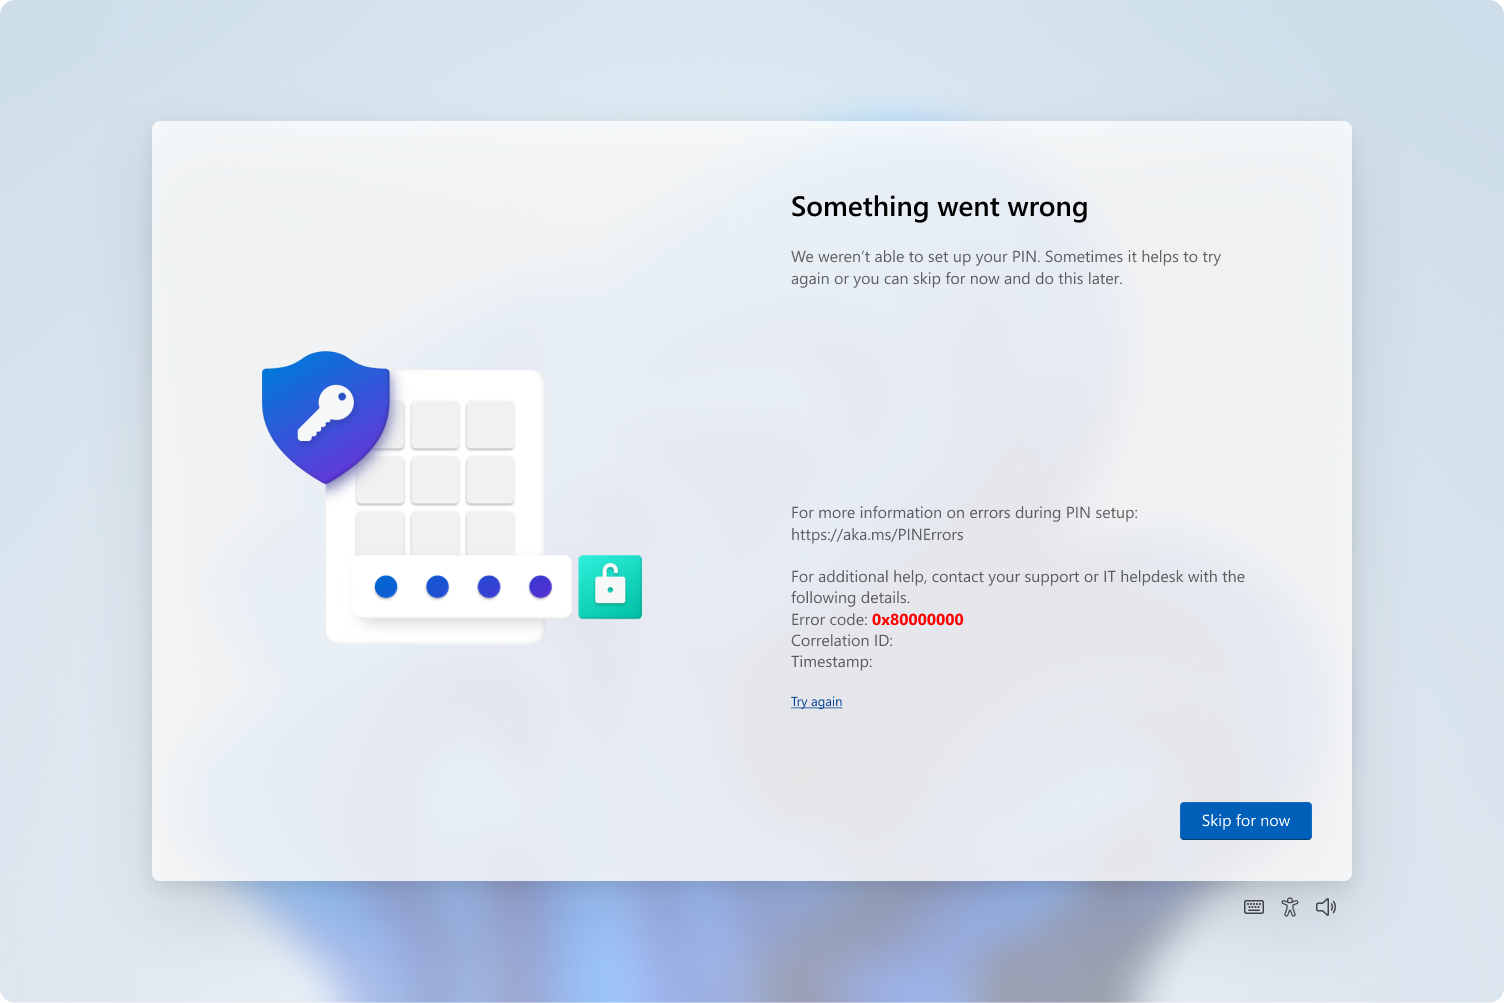
Signtool 0x8009002d is an error code that typically occurs when attempting to sign in to a Windows account after the computer has been awakened from Sleep or Hibernate using a PIN or Password. It can also occur when changing the PIN.

How do I fix Windows PIN error?

To fix a Windows PIN error, you can try the following steps:

1. Double-check that you are not entering the wrong PIN.
2. Attempt to sign in using alternative methods, such as a password or biometric authentication.
3. Delete the Ngc folder in Windows.
4. Check for any user account specific issues.
5. Adjust PIN sign-in settings in the Group Policy Editor.
6. Consider updating or downgrading your operating system if necessary.

How do I fix a window error code?

To fix a window error code, you can try the following steps:
1. Restart your PC.
2. Use the System File Checker (SFC) and CHKDSK system utilities.
3. Install the latest Windows 10 Updates on your PC.
4. Uninstall incompatible Windows 10 updates, apps, or drivers.
5. Perform a System Restore.

What is Windows error code 0x80073d23?

Windows error code 0x80073d23 is an error that occurs when attempting to launch or uninstall a Microsoft Store app. This error message indicates that the app cannot be launched or uninstalled. To resolve this issue, you can use Windows Repair from MajorGeeks to reset all Windows Update settings and potentially fix the error.

Ultrasurf Malware Threat Review

In this article, I will review the potential malware threat posed by Ultrasurf and its impact on internet security.

Overview and Key Findings

The review highlights the potential risks associated with Ultrasurf, including its use as a platform for malware distribution. It explores how the malware can compromise the security and privacy of users’ devices and networks.

Key findings from the review include the discovery of various malware strains being distributed through Ultrasurf, such as Trojan horses and computer viruses. The review also highlights the use of obfuscation techniques and executable compression to evade detection by antivirus software.

Furthermore, the review discusses the implications of Ultrasurf’s popularity in countries with strict internet censorship, such as China and Myanmar. It explores the role of Ultrasurf in enabling communication and information access during events like the Arab Spring and the Saffron Revolution.

The review also provides recommendations for users to protect themselves from Ultrasurf malware. It suggests regularly updating antivirus software, using a reliable firewall, and being cautious when downloading and installing software from unknown sources.

Performance and Speed Analysis

Internet Speed Performance
Before Ultrasurf High
With Ultrasurf Slower

Security and Privacy Evaluation

The Ultrasurf Malware Threat Review article provides a comprehensive evaluation of the security and privacy aspects related to Ultrasurf, a tool used for internet censorship circumvention. This section focuses on the key findings and recommendations from the evaluation.

  • The evaluation reveals that Ultrasurf, being an open-source software, offers transparency and allows for debugging and customization.
  • However, it is important to note that Ultrasurf is not immune to security vulnerabilities, as it has been found to contain executable compression and obfuscation techniques that can hinder security analysis.
  • Furthermore, Ultrasurf’s reliance on proprietary software components raises concerns about the extent of privacy protection it provides.
  • The evaluation also highlights that Ultrasurf bypasses internet censorship by establishing HTTP tunnels, which can be detected and blocked by internet filters.
  • Users need to be cautious when using Ultrasurf, as it modifies the Windows Registry and may interfere with other software applications on the system.

To enhance security and privacy while using Ultrasurf, the following recommendations are suggested:

  • Keep Ultrasurf updated to the latest version, as developers regularly release security patches and updates.
  • Use Ultrasurf in conjunction with other tools like Tor or Freegate to further enhance privacy and bypass internet censorship.
  • Ensure that your computer is protected by a reliable firewall and antivirus software, as Ultrasurf can potentially expose your system to malware threats.
  • Consider using alternative internet censorship circumvention tools that are more secure and reliable, such as Hotspot Shield or VPN services.
  • Regularly review your privacy settings and encryption preferences within Ultrasurf to maximize your online privacy.

Compatibility and Network Reach

  • Check System Requirements
  • Update Operating System
  • Update Network Drivers
  • Disable Firewall and Antivirus

Check System Requirements:

  • Verify minimum system requirements for Ultrasurf
  • Check operating system version and compatibility

Update Operating System:

  • Open Settings by clicking on the Start menu and selecting it
  • Select Update & Security from the Settings menu
  • Click on Check for updates to search for available updates
  • If updates are found, click on Install now to update the operating system
  • Restart the computer if prompted

Update Network Drivers:

  • Open Device Manager by right-clicking on the Start menu and selecting it
  • Expand the Network adapters category
  • Right-click on the network driver and select Update driver
  • Choose the option to Search automatically for updated driver software
  • Follow the on-screen instructions to complete the driver update process

Disable Firewall and Antivirus:

  • Open Windows Security by clicking on the Start menu and selecting it
  • Click on Virus & threat protection in the Windows Security window
  • Click on Manage settings under the Virus & threat protection settings
  • Toggle off the switches for Real-time protection and Cloud-delivered protection
  • Open your third-party antivirus software and disable the real-time protection

Frequently Asked Questions

Is Ultrasurfing a virus?

Ultrasurfing is not a virus or malware. Some anti-virus software may misclassify it due to its encryption and ability to bypass internet censorship. However, certain security companies have recognized Ultrasurfing as safe and have whitelisted it.

Is Ultrasurf safe to use?

Is Ultrasurf safe to use? Yes, Ultrasurf is safe to use as it employs a secure and encrypted TLS tunnel to route all of your internet traffic.

MacOS Startup Security Utility No Administrator Found

As a MacOS user, encountering the “No Administrator Found” message in the Startup Security Utility can be frustrating and concerning.

Check for any unauthorized changes or suspicious activity in the startup security utility settings.

Overview of Mac’s Startup Security Utility

A screenshot of the Mac's Startup Security Utility interface.

The MacOS Startup Security Utility is a valuable tool for managing the security settings of your Mac’s startup process. If you are encountering the error message “No Administrator Found” when trying to access the Startup Security Utility, there are a few steps you can take to address this issue.

First, ensure that you are logged in to your Mac with an account that has administrator privileges. If you are not, log out and log back in with an administrator account.

If you are still unable to access the Startup Security Utility, you may need to reset the NVRAM (non-volatile random-access memory) on your Mac. To do this, restart your Mac and immediately hold down the Command + Option + P + R keys until you hear the startup chime for the second time.

If the issue persists, you can try resetting the System Management Controller (SMC) on your Mac. The process for resetting the SMC varies depending on the model of Mac you have, so you may need to consult Apple’s support documentation for specific instructions.

If none of these steps resolve the issue, it may be necessary to boot your Mac into Recovery Mode and use Disk Utility to repair any disk errors that could be causing the problem.

MacOS startup security: No administrator found. Access denied.

Accessing and Launching Procedures

MacOS startup screen

  1. Check for correct login credentials
    • Ensure that the correct username and password are being entered
      Check for correct login credentials
Ensure that the correct username and password are being entered
    • Verify that the keyboard layout is correct to avoid typing errors
  2. Reset the password
    • Restart the computer and hold down Command+R to enter Recovery Mode
    • Open Terminal from the Utilities menu
    • Enter the command resetpassword and follow the instructions to reset the password
  3. Use another admin account
    • If another admin account exists, log in with that account to access the Startup Security Utility
    • Once in the Utility, you can modify the security settings as needed

Common Issues and Troubleshooting

MacOS startup screen

First, ensure that your UEFI settings are correctly configured to allow for booting from the appropriate device. If you’re using a USB flash drive to boot your MacOS Mojave or MacOS Big Sur system, make sure it’s properly inserted and recognized by your computer.

If you’re experiencing issues with disk partitioning or booting from a recovery disc, you may need to use Disk Utility to check and repair your disk. This can help resolve any underlying issues with your hard disk drive or solid-state drive.

In some cases, the error message may be related to user credentials or encryption settings. If you’re unable to access the MacOS Startup Security Utility, try logging in as a superuser or using an alternate login method.

If you’re using a MacBook, MacBook Pro, Mac Mini, or any other Mac computer, make sure you’re running the latest version of the operating system and that all software updates are installed.

Security utility: MacOS startup requires administrator approval.

External Startup Disk Permissions and Software Update Requirements

External Startup Disk Permissions Software Update Requirements
Requires administrator privileges to set an external disk as a startup disk. Requires the latest version of MacOS and security updates to ensure compatibility and security.
Only users with admin privileges can change the startup disk settings for an external disk. Regular software updates are necessary to maintain the security and stability of the system.

Fix SSL_ERROR_BAD_CERT_DOMAIN Firefox Help

Having trouble with SSL_ERROR_BAD_CERT_DOMAIN in Firefox? This article provides help for fixing this issue.

Verify Website Address Accuracy

1. Check the website address in the address bar to ensure it matches the intended domain. If there is a mismatch, do not proceed and report the issue to the website owner.

2. Clear the browser cache and cookies to remove any outdated or incorrect data that may be causing the error. To do this, go to the History menu in Firefox, select Clear Recent History, and choose the appropriate options.

3. Ensure that the website has a valid public key certificate from a trusted certificate authority. You can do this by clicking on the padlock icon in the address bar and checking the certificate information.

4. If the issue persists, try accessing the website using a different web browser, such as Google Chrome, to see if the error is browser-specific.

By verifying the website address accuracy and following these steps, you can address the SSL_ERROR_BAD_CERT_DOMAIN error in Firefox and ensure a secure connection to the intended website.

Clearing Browser Cache

To fix the SSL_ERROR_BAD_CERT_DOMAIN error in Firefox, you may need to clear your browser cache. This error can occur when the browser’s cache contains outdated or incorrect data related to SSL certificates.

To clear the browser cache in Firefox, follow these steps:
1. Click on the menu button (three horizontal lines) in the top right corner of the browser window.
2. Select “Options” and then click on “Privacy & Security” in the left-hand menu.
3. Scroll down to the “Cookies and Site Data” section and click on “Clear Data.”
4. Check the box next to “Cached Web Content” and then click “Clear.”

After clearing the cache, try reloading the page that was giving you the SSL_ERROR_BAD_CERT_DOMAIN error. This should refresh the SSL certificate information and resolve the issue.

If you continue to experience problems, consider checking for updates to your browser or reaching out to the website’s administrator for further assistance.

Ensuring SSL Certificate Validity

SSL Certificate Validity
Check the expiration date of the SSL certificate
Renew the SSL certificate before it expires
Keep track of SSL certificate validity and renewal dates
Regularly monitor SSL certificate status and validity

Correcting SSL Configuration

SSL certificate settings

To fix SSL_ERROR_BAD_CERT_DOMAIN in Firefox, the SSL configuration on the web server needs to be corrected. First, ensure that the correct Transport Layer Security (TLS) version is enabled on the server. Then, check that the public key certificate includes the correct Subject Alternative Name (SAN) for the domain.

Next, clear the cache and cookies in the web browser to make sure that the changes take effect. This can be done by navigating to the browser’s settings and selecting the option to clear browsing data.

If the issue persists, consider checking for any deprecated features in the SSL configuration and update them accordingly. Additionally, ensure that the domain name in the certificate matches the actual domain of the website.

After making these changes, restart the web server to apply the updates. Test the SSL configuration using an online SSL checker tool to verify that the issue has been resolved.

For more detailed instructions, refer to the documentation provided by the web server software or consult with a qualified IT professional.

Remove Spigot Malware from Mac OSX

If you’re dealing with the Spigot malware on your Mac running OSX, you’ll want to remove it as soon as possible to protect your data and system.

Keep your macOS updated to ensure compatibility with the latest Spigot releases.

Understanding Spigot Malware and Its Effects

Spigot Malware is a type of adware that can affect Mac OSX systems, causing unwanted pop-ups, browser redirects, and a decrease in overall system performance. It can often be unknowingly installed alongside free software downloads or browser extensions.

To remove Spigot Malware from your Mac, start by checking for any suspicious browser extensions or plugins that may be associated with the malware. These can usually be found in the settings or preferences of your web browser.

Next, use reputable antivirus software to scan your system and remove any detected malware. Additionally, consider using a program like CleanMyMac X to thoroughly clean and optimize your system.

It’s also important to clear your web browser’s cache and cookies to remove any lingering traces of the malware. Finally, reset your browser settings to default to ensure that any changes made by the malware are undone.

Identifying the Presence of Spigot on Your Mac

To identify the presence of Spigot on your Mac, you can start by checking your browser extensions. Open your web browser (such as Safari, Google Chrome, or Firefox) and go to the menu bar. Look for the “Extensions” or “Add-ons” option and click on it to see the list of installed extensions. If you see any suspicious or unfamiliar extensions, remove them immediately.

Another way to identify Spigot on your Mac is to check your applications. Open Finder and go to the “Applications” folder. Look for any unfamiliar or suspicious applications that you don’t remember installing. If you find any, drag them to the Trash and empty it to remove the application from your Mac.

You can also check your browser settings for any changes that may have been made by Spigot. Open your browser and go to the settings or preferences. Look for any changes to your homepage, default search engine, or new toolbars. If you notice any unauthorized changes, reset your browser settings to the default.

Manual Removal Process for Spigot Adware

To manually remove the Spigot adware from Mac OSX, start by quitting any open web browsers on your computer. Then, go to the Finder menu and choose “Go” followed by “Go to Folder.” Type ~/Library/LaunchAgents/ into the dialog box and hit enter.

Once you’re in the LaunchAgents folder, look for any files related to Spigot or any suspicious-looking files. Drag these files to the Trash to remove them from your system. Next, go to the ~/Library/Application Support/ folder and repeat the process of searching for and deleting any Spigot-related files.

After that, navigate to the ~/Library/LaunchDaemons/ folder and again, search for and delete any Spigot-related files. Finally, empty the Trash to permanently remove the adware from your Mac.

It’s also a good idea to check your web browsers for any Spigot-related browser extensions. Open each browser and go to the Extensions or Add-ons menu to remove any suspicious extensions.

After completing these steps, restart your computer to ensure that the Spigot adware has been completely removed from your system.

Quick Removal of Spigot with Software Tools

Spigot removal interface

To remove the Spigot malware from Mac OSX quickly, you can use software tools such as CleanMyMac X. First, open CleanMyMac X and click on the Malware Removal tab in the sidebar. Then, click on the Scan button to search for any malware on your system.

Once the scan is complete, select the checkbox next to the Spigot malware and click on the Remove button to get rid of it. You may be prompted to enter your administrator password to complete the removal process.

After removing the Spigot malware, it’s a good idea to reset your browser settings to ensure that any lingering traces of the malware are completely eliminated. In Safari, for example, you can go to the menu bar and select Safari > Clear History and Website Data to reset your browser.

In addition to using CleanMyMac X, you can also consider installing reputable antivirus software to help protect your Mac from future malware infections. Keep your software up to date to minimize the risk of infection and always be cautious when downloading software from the internet.

Cleaning Spigot from Browsers: Chrome, Safari, and Firefox

Screenshot of Chrome, Safari, and Firefox browsers

    Cleaning Spigot from Browsers: Chrome, Safari, and Firefox

  • Remove Spigot extension from Chrome:

    • Open Chrome and click on the three-dot menu icon in the top-right corner.
    • Select More tools and then Extensions.
    • Locate the Spigot extension and click on Remove to uninstall it.
  • Remove Spigot from Safari:

    • Open Safari and go to the Preferences in the top menu.
    • Click on the Extensions tab and locate the Spigot extension.
    • Click on Uninstall to remove the extension from Safari.
  • Clean Spigot from Firefox:

    • Open Firefox and go to the Add-ons menu.
    • Select Extensions and find the Spigot extension.
    • Click on Remove to uninstall the extension from Firefox.

Preventing Future Spigot Adware Installations

To prevent future spigot adware installations on your Mac OSX, it’s important to be vigilant about the software you download and install. Always download from reputable sources and avoid free software from unfamiliar or untrustworthy websites.

Regularly scan your system for spyware and malware using reliable antivirus software. This can help catch any potential threats before they have a chance to install themselves on your system.

Be cautious when installing browser extensions or add-ons. Only install those from trusted developers and be sure to read the permissions and reviews before adding them to your browser.

Keep your MacOS and web browsers up to date with the latest security patches and updates to help protect against potential vulnerabilities.

If you suspect that a file or program may be infected with adware or malware, do not hesitate to remove it from your system. Move it to the Trash and then empty the Trash to completely remove it from your computer.