
Is your Windows 10 update causing your computer to slow down? Discover effective solutions to fix this issue.
Uninstall the recently installed update
If you’ve recently installed a Windows 10 update and noticed that your computer has become slow, there is a solution. To fix this issue, you need to uninstall the update. Here’s how:
1. Open the Start menu and click on the Settings icon.
2. In the Settings window, click on “Update & Security.”
3. On the left-hand side, click on “Windows Update.”
4. In the Windows Update settings, click on “View update history.”
5. This will open a new window showing all the updates installed on your computer. Look for the recently installed update that is causing the slowdown.
6. Once you’ve identified the update, click on “Uninstall updates” at the top of the window.
7. This will open the Control Panel with a list of installed updates. Locate the problematic update and right-click on it.
8. From the context menu, select “Uninstall.”
9. Follow the on-screen instructions to complete the uninstallation process.
10. After uninstalling the update, restart your computer to apply the changes.
Repair corrupt system files
If your Windows 10 update is slowing down your computer, one possible reason could be corrupt system files. Luckily, there’s a way to fix this issue.
To repair corrupt system files, you can use the built-in System File Checker tool in Windows 10. Here’s how:
1. Open the Command Prompt as an administrator by pressing the Windows key + X and selecting “Command Prompt (Admin).”
2. In the Command Prompt window, type “sfc /scannow” and press Enter. This command will scan your system for corrupt files and repair them if possible.
3. Wait for the scan to complete. This process may take some time, so be patient.
4. Once the scan is finished, you’ll see a message indicating whether any corrupt files were found and repaired.
5. Restart your computer to apply the changes.
By running the System File Checker tool, you can fix any corrupt system files that may be causing your Windows 10 update to slow down your computer. This should help improve the overall speed and performance of your system.
Clear Windows Update cache
- Stop Windows Update service: Open Command Prompt as administrator and type “net stop wuauserv”.
- Delete Windows Update cache: Navigate to C:\Windows\SoftwareDistribution folder and delete all files and folders within it.
- Restart Windows Update service: Open Command Prompt as administrator and type “net start wuauserv”.
- Reset Windows Update Components: Open Command Prompt as administrator and run the following commands in sequence:
- net stop bits
- net stop wuauserv
- net stop appidsvc
- net stop cryptsvc
- ren %systemroot%\SoftwareDistribution SoftwareDistribution.old
- ren %systemroot%\system32\catroot2 catroot2.old
- net start bits
- net start wuauserv
- net start appidsvc
- net start cryptsvc
- Run Windows Update Troubleshooter: Open Settings, go to Update & Security, select Troubleshoot, and run the Windows Update troubleshooter.
python

import subprocess
def optimize_windows():
# Clear temporary files
subprocess.run('del /q/f/s %TEMP%\*')
# Disable unnecessary startup programs
subprocess.run('tasklist > tasks.txt', shell=True)
with open('tasks.txt', 'r') as file:
for line in file:
if 'SomeStartupProgram.exe' in line: # Replace with the name of unnecessary programs
program_name = line.split()[0].strip()
subprocess.run(f'taskkill /f /im {program_name}')
# Update drivers
subprocess.run('DriverUpdate.exe') # Replace with appropriate driver update mechanism
# Perform disk cleanup
subprocess.run('cleanmgr.exe /sagerun:1')
# Disable unnecessary visual effects
subprocess.run('SystemPropertiesPerformance.exe')
print("Optimization completed successfully.")
# Call the function to optimize the system
optimize_windows()
Optimize disk drives
If your Windows 10 update is slowing down your computer, one possible solution is to optimize your disk drives. This can help improve the performance of your system and make it run smoother.
To optimize your disk drives, follow these steps:
1. Open the Task Manager by pressing Ctrl + Shift + Esc on your keyboard.
2. Go to the “Performance” tab and click on “Open Resource Monitor” at the bottom.
3. In the Resource Monitor window, click on the “Disk” tab.
4. Look for the “Disk Activity” section and sort the processes by “Total (B/sec)” to see which processes are using the most disk activity.
5. Identify any processes that are using a high amount of disk activity and causing your computer to slow down.
6. Right-click on the process and select “End Process” to stop it from running.
7. If you’re unsure about a process, you can search for it online to determine if it’s necessary or if it could be a malware or virus.
8. You can also check the “Disk” tab in the Task Manager to see if any programs are using a high amount of disk usage. If so, you can right-click on the program and select “End Task” to close it.
9. Another way to optimize your disk drives is to clean up your hard drive. You can do this by going to the “Settings” menu, selecting “System,” and then “Storage.” From there, you can click on “Temporary files” and remove any unnecessary files that are taking up space on your disk.
10. Finally, you can defragment your hard drive to improve its performance. To do this, go to the “Settings” menu, select “System,” and then “Storage.” Under the “More storage settings” section, click on “Optimize Drives.” From there, select your hard drive and click on “Optimize” to start the defragmentation process.
Disable background apps
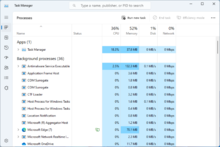
1. Open the Task Manager by pressing Ctrl + Shift + Esc on your keyboard.
2. In the Task Manager window, click on the “More details” option at the bottom if it’s not already expanded.
3. Go to the “Processes” tab and look for any unnecessary or resource-intensive apps running in the background. You can sort the list by clicking on the “CPU” or “Memory” column header to identify the culprits.
4. Select the apps you want to disable by clicking on them and then click on the “End task” button at the bottom right. Be cautious not to close any essential system processes.
5. If you want to permanently prevent an app from running in the background, go to the “Startup” tab in the Task Manager and disable it from starting up with your computer.
Disabling background apps can help free up system resources and improve the overall performance of your computer. Remember to only disable apps that you don’t need running in the background to avoid any unintended consequences.
If you continue to experience performance issues after disabling background apps, it’s recommended to check for other potential causes such as malware, software bugs, or outdated drivers.
Turn off visual effects and transparency
Here’s how to do it:
1. Open the Start menu and type “Performance Options” in the search bar. Press Enter.
2. In the Performance Options window, go to the Visual Effects tab.
3. Select the option for “Adjust for best performance” to disable all visual effects, or manually uncheck specific visual effects that you don’t need.
4. Click Apply and then OK to save the changes.
By turning off visual effects and transparency, you can improve the performance of your Windows 10 computer. This will free up system resources and make your computer run faster.
Scan for viruses
1. Open your antivirus software. If you don’t have one installed, consider downloading a reputable antivirus program from a trusted source.
2. Update your antivirus software to ensure that it has the latest virus definitions. This will help it detect and remove the most recent threats.
3. Perform a full system scan using your antivirus software. This will scan all files and folders on your computer for any potential viruses.
4. If your antivirus software detects any viruses, follow the instructions to remove or quarantine them. This will help protect your computer and speed up its performance.
5. After the scan is complete and any viruses have been removed, restart your computer. This can help clear out any lingering issues and improve overall performance.
Scanning for viruses is an essential step in troubleshooting a slow Windows 10 update. It can help identify and eliminate any potential threats that may be affecting your computer’s performance.
Update device drivers
- Open Device Manager by right-clicking on the Start button and selecting Device Manager.
- Expand the category of the device you want to update the driver for by clicking on the arrow next to it.
- Right-click on the device and select Update driver.
- Choose the option to Search automatically for updated driver software.
- If Windows finds an updated driver, follow the on-screen instructions to install it.
- If Windows doesn’t find an updated driver, you can try searching for one on the manufacturer’s website.
- Download the latest driver for your device from the manufacturer’s website.
- Open the downloaded driver file and follow the on-screen instructions to install it.
- Restart your computer to apply the driver update.
Perform a clean boot

Performing a clean boot can help resolve issues with a Windows 10 update slowing down your computer. To do this, follow these steps:
1. Press the Windows key + R to open the Run dialog box.
2. Type “msconfig” (without quotes) and press Enter to open the System Configuration window.
3. In the General tab, select the “Selective startup” option.
4. Uncheck the box next to “Load startup items.”
5. Go to the Services tab and check the box next to “Hide all Microsoft services.”
6. Click on the “Disable all” button.
7. Go to the Startup tab and click on “Open Task Manager.”
8. In the Task Manager window, disable any unnecessary startup programs by right-clicking on them and selecting “Disable.”
9. Close the Task Manager and go back to the System Configuration window.
10. Click on the “Apply” button and then click “OK.”
11. Restart your computer.
Performing a clean boot will disable all non-Microsoft services and startup programs, allowing you to identify if any of them were causing the slow performance issue. Once your computer has restarted, check if the Windows 10 update is still slowing down your computer. If the issue is resolved, you can gradually enable the disabled services and startup programs to identify the culprit.


