
Unlocking the potential of Pro Tools just got a whole lot easier. In this article, we unveil the ultimate solution to the long-standing audio interface detection issues, empowering audio enthusiasts to seamlessly navigate their projects with confidence.
Troubleshooting Audio Interface Detection Issues
If you’re experiencing audio interface detection issues in Pro Tools, here are some troubleshooting steps to help you resolve the problem.
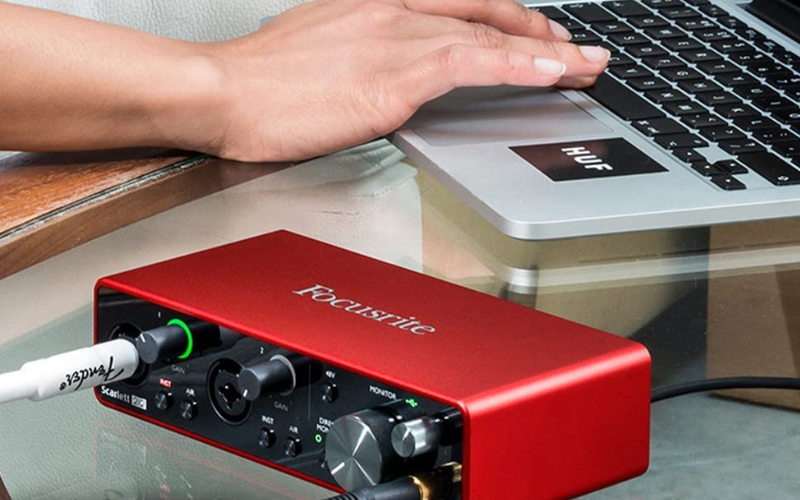
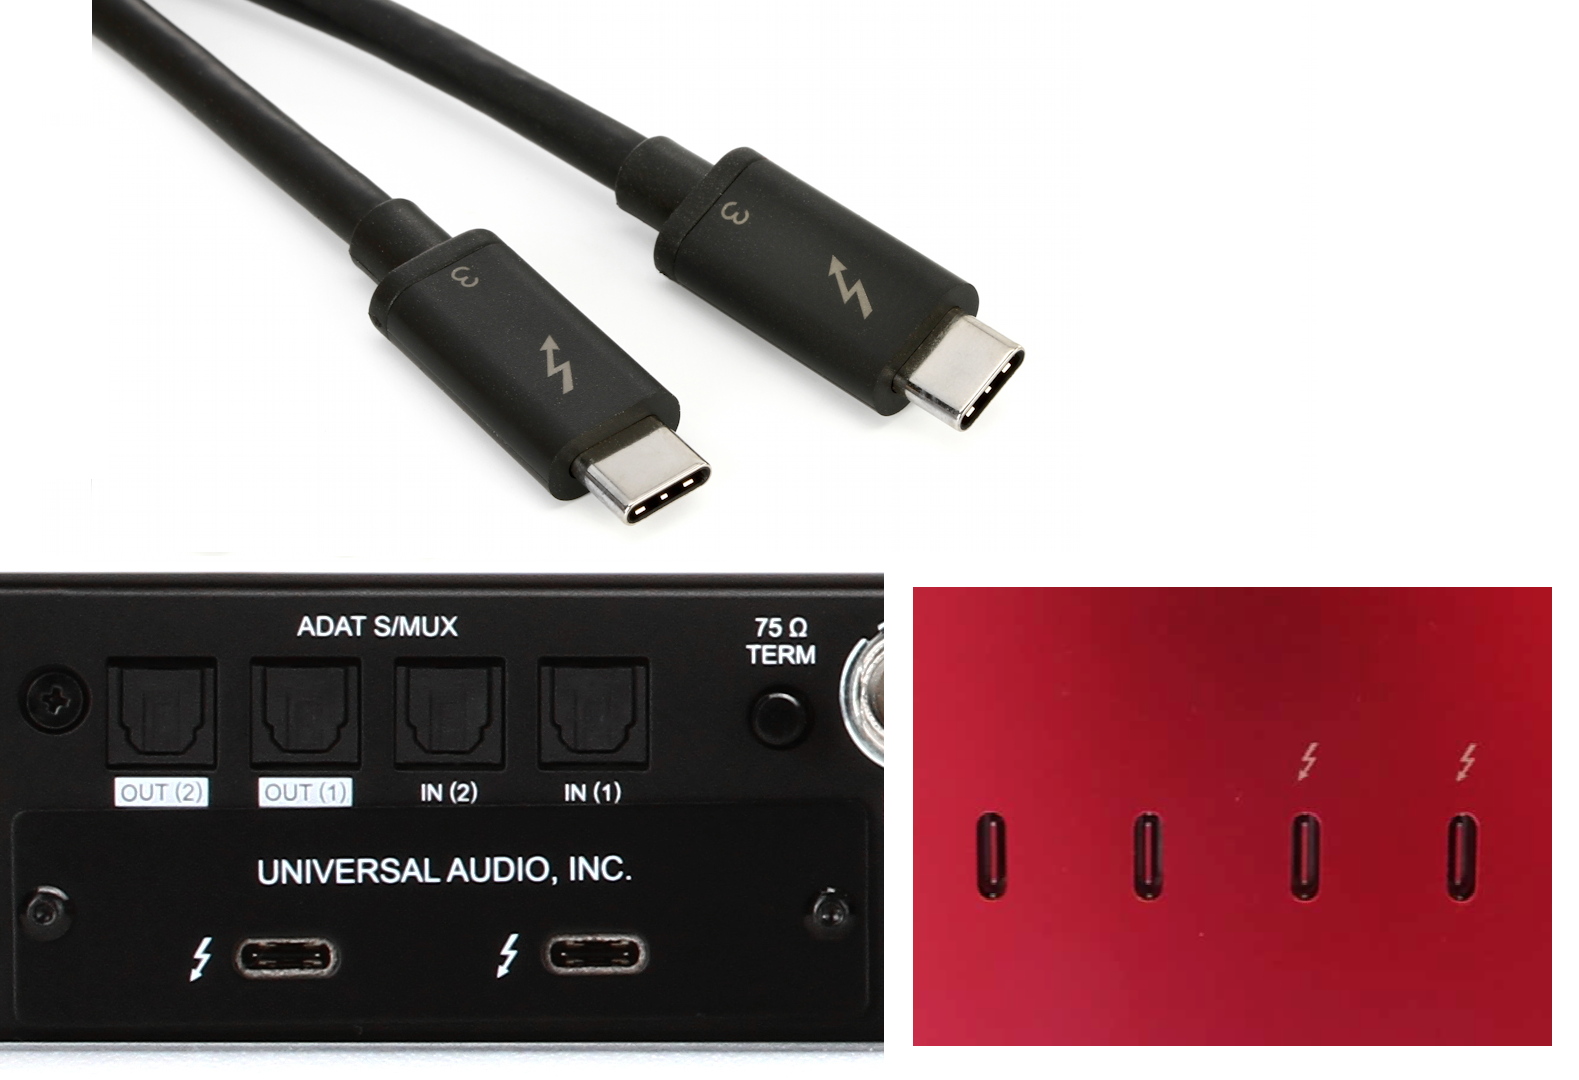
1. Check your connections: Ensure that your audio interface is properly connected to your computer via USB or Thunderbolt cable. Make sure all connections are secure.
2. Verify device settings: In Pro Tools, go to the Setup menu and select Playback Engine. Make sure your audio interface is selected as the default playback device.
3. Update drivers: Visit the manufacturer’s website for your audio interface and download the latest drivers. Install them on your computer to ensure compatibility.
4. Try different USB ports: Sometimes, USB ports can have issues. Switch to a different USB port on your computer to see if that resolves the problem.
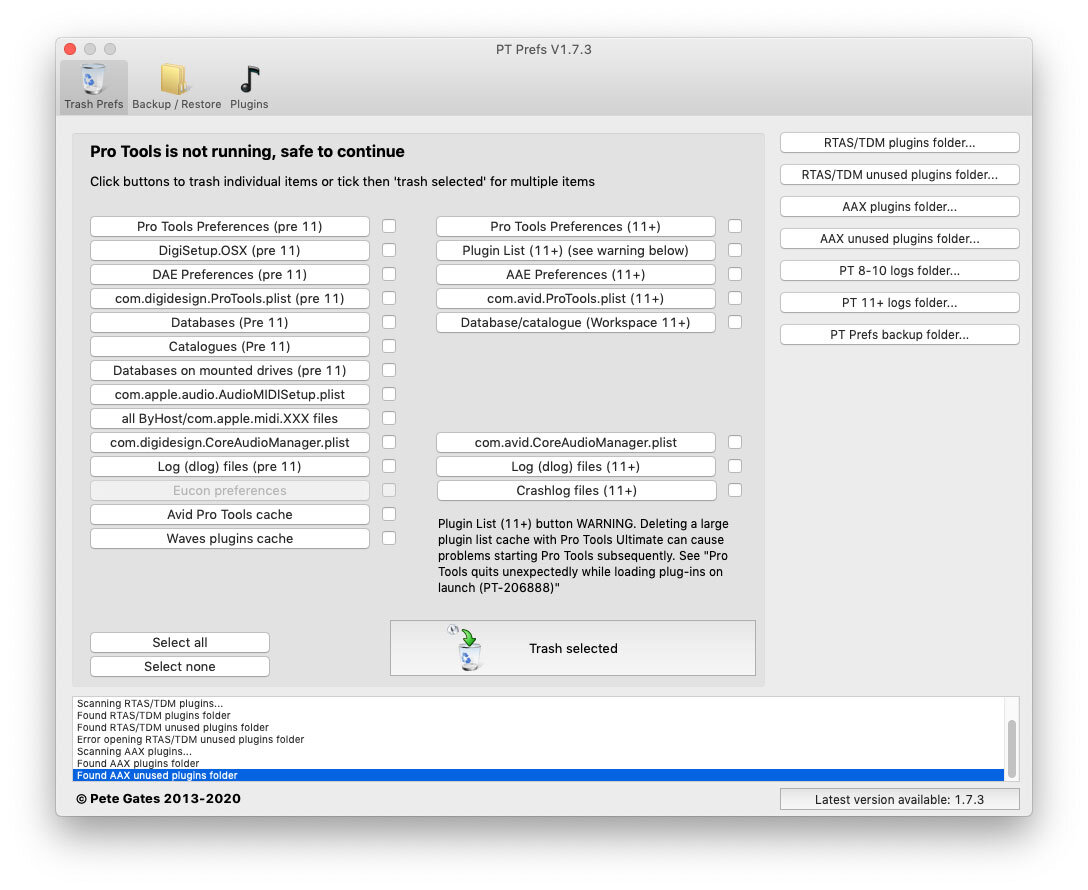
5. Reset Pro Tools preferences: If none of the above steps work, you can try resetting Pro Tools preferences. Press and hold the “N” key while launching Pro Tools. Select the option to reset preferences when prompted.
Checking Hardware and Cable Connections
To check hardware and cable connections for resolving Pro Tools audio interface detection issues, follow these steps:
1. Ensure that all audio interfaces and cables are securely connected to your computer and devices. Check for any loose connections or damaged cables.
2. Inspect the USB cable connecting your audio interface to the computer. Try using a different USB port or a different cable to rule out any issues with the connection.
3. Verify that your audio interface is powered on and properly set up. Check the manufacturer’s website or documentation for specific setup instructions.
4. If you are using a USB hub, try connecting the audio interface directly to your computer instead. USB hubs can sometimes cause compatibility issues.
5. Update your audio interface drivers to the latest version. Visit the manufacturer’s website for driver updates and follow their installation instructions.
6. Adjust the settings in Pro Tools to ensure that the correct audio interface is selected as the playback engine. Go to the “Setup” menu, then select “Playback Engine” and choose your audio interface from the list.
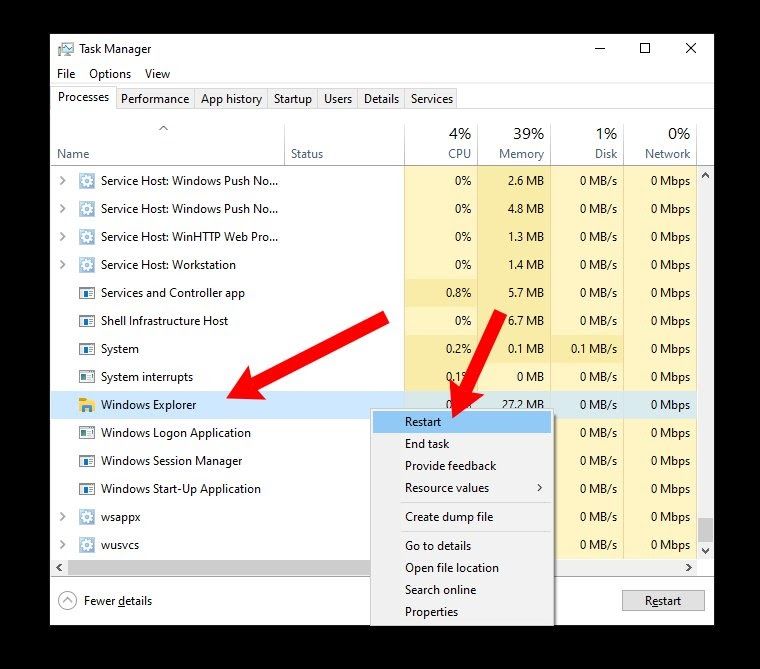
7. Restart your computer and relaunch Pro Tools. Sometimes, a simple restart can resolve detection issues.
Updating and Reinstalling Audio Drivers
To update or reinstall audio drivers for resolving Pro Tools audio interface detection issues, follow these steps:
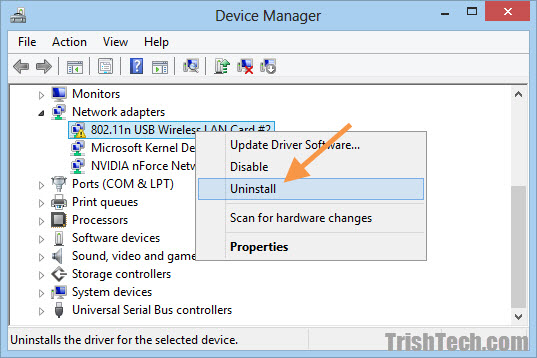
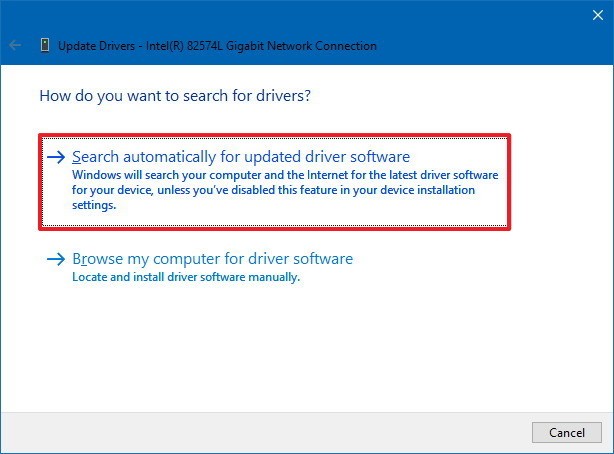
1. Press the Windows key + X and select Device Manager.
2. Expand the “Sound, video, and game controllers” section.
3. Right-click on your audio device and select “Update driver.”
4. Choose the “Search automatically for updated driver software” option.
5. If a driver update is found, follow the on-screen instructions to install it.
6. If no update is found, right-click on your audio device again and select “Uninstall device.”
7. Restart your computer, and Windows will automatically reinstall the audio driver.
8. If the issue persists, visit the manufacturer’s website and download the latest driver for your specific audio interface.
9. Once downloaded, run the installer and follow the prompts to install the updated driver.
10. Restart your computer again, and the audio interface detection issue should be resolved.
If you have any further questions or need additional assistance, please contact our customer support team or visit our website for more information.
python

import pyaudio
def list_audio_devices():
p = pyaudio.PyAudio()
info = p.get_host_api_info_by_index(0)
num_devices = info.get('deviceCount')
print("Available Audio Devices:")
for i in range(num_devices):
device_info = p.get_device_info_by_host_api_device_index(0, i)
device_name = device_info.get('name')
print(f"Device {i + 1}: {device_name}")
p.terminate()
list_audio_devices()
Keep in mind that this code only lists the available audio devices and doesn’t directly address the Pro Tools detection issue. It uses the `pyaudio` library, so you would need to install it using `pip install pyaudio` before running the code.
Configuring Pro Tools Settings for Audio Interface
To resolve audio interface detection issues in Pro Tools, follow these steps:
1. Connect your audio interface to your computer using a USB cable or Thunderbolt connection.
2. Launch Pro Tools and go to the “Setup” menu.
3. Select “Playback Engine” from the drop-down menu.
4. In the Playback Engine settings, choose your audio interface from the list.
5. Set the Default Sample Rate and Default IO Buffer Size to match your audio interface’s specifications.
6. Click on the “OK” button to save your changes.
7. If you’re still experiencing issues, ensure that your audio interface’s driver is up to date. Visit the manufacturer’s website for the latest driver updates.
8. If you’re using a USB hub, try connecting your audio interface directly to your computer to rule out any potential connection issues.
9. If troubleshooting doesn’t resolve the problem, refer to Pro Tools’ documentation or contact customer support for further assistance.
Additional Steps and Workarounds for Audio Interface Detection
- Check physical connections:
- Ensure that the audio interface is properly connected to the computer.
- Inspect cables for any damages or loose connections.
- Try using a different USB or Thunderbolt port.
- Restart the computer:
- Save any ongoing work before restarting.
- Click on the “Start” button, then select “Restart” to reboot the computer.
- Once the computer is back on, check if the audio interface is detected.
- Update the audio interface drivers:
- Visit the manufacturer’s website to download the latest drivers for your specific audio interface model.
- Follow the installation instructions provided by the manufacturer.
- Restart the computer after installing the updated drivers.
- Check the device manager:
- Press Win+X on your keyboard and select “Device Manager” from the menu.
- Expand the “Sound, video and game controllers” section.
- Look for any exclamation marks (!) or question marks (?) next to the audio interface device.
- If there are any issues indicated, right-click on the device and select “Update driver.”
- Choose the option to search automatically for updated driver software.
- Restart the computer after the driver update is complete.
- Disable USB selective suspend:
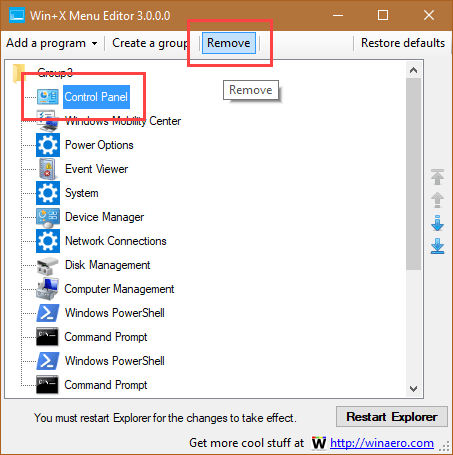
- Open the Control Panel by pressing Win+X and selecting “Control Panel.”
- Click on “Power Options.”
- Click on “Change plan settings” next to the selected power plan.
- Click on “Change advanced power settings.”
- Expand the “USB settings” section.
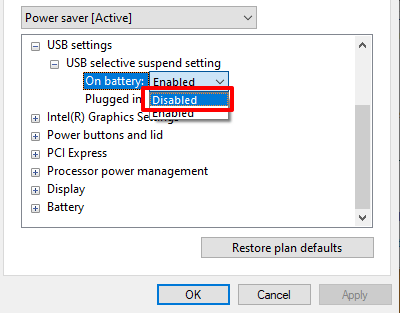
- Expand the “USB selective suspend setting” section.
- Make sure both “On battery” and “Plugged in” options are set to “Disabled.”
- Click “OK” to save the changes.
- Try a different USB cable or port:
- If possible, use a different USB cable to connect the audio interface to the computer.
- Try connecting the audio interface to a different USB or Thunderbolt port on the computer.
- Check if the audio interface is detected after making these changes.
- Reset Pro Tools preferences:
- Close Pro Tools if it is open.
- Press and hold the N key on your keyboard while launching Pro Tools.
- Continue holding the N key until the “Pro Tools Preferences” window appears.
- Click on the “Delete Preferences” button.
- Once the preferences are deleted, close the window and relaunch Pro Tools.


