XAMPP API MS Win CRT Runtime L1 1 0 DLL Missing Error

In my experience, encountering the XAMPP API MS Win CRT Runtime L1 1 0 DLL missing error can be frustrating and confusing.

Sign Up or Log In Process

To sign up or log in to XAMPP API MS Win CRT Runtime L1 1 0 DLL Missing Error, follow these simple steps:

1. Open your web browser and navigate to the XAMPP website.

2. Locate the “Sign Up” or “Log In” button on the homepage and click on it.

3. If you are signing up for a new account, enter your email address, create a password, and fill out any other required information.

4. If you already have an account, enter your email address and password to log in.

5. Once you have successfully signed up or logged in, you will be able to access the XAMPP API MS Win CRT Runtime L1 1 0 DLL Missing Error features and functionalities.

Missing DLL Message on Startup

Error Message Description
XAMPP API MS Win CRT Runtime L1 1 0 DLL Missing Error This error message typically appears on startup when a required DLL file is missing for the XAMPP API MS Win CRT Runtime.
Possible Causes 1. The DLL file may have been accidentally deleted or corrupted.
2. The file may have been quarantined by antivirus software.
3. The file may not have been properly installed during XAMPP setup.
Solution 1. Reinstall XAMPP to ensure all necessary files are properly installed.
2. Check antivirus quarantine and restore the DLL file if needed.
3. Download and manually place the missing DLL file in the appropriate directory.

Error During App Installation

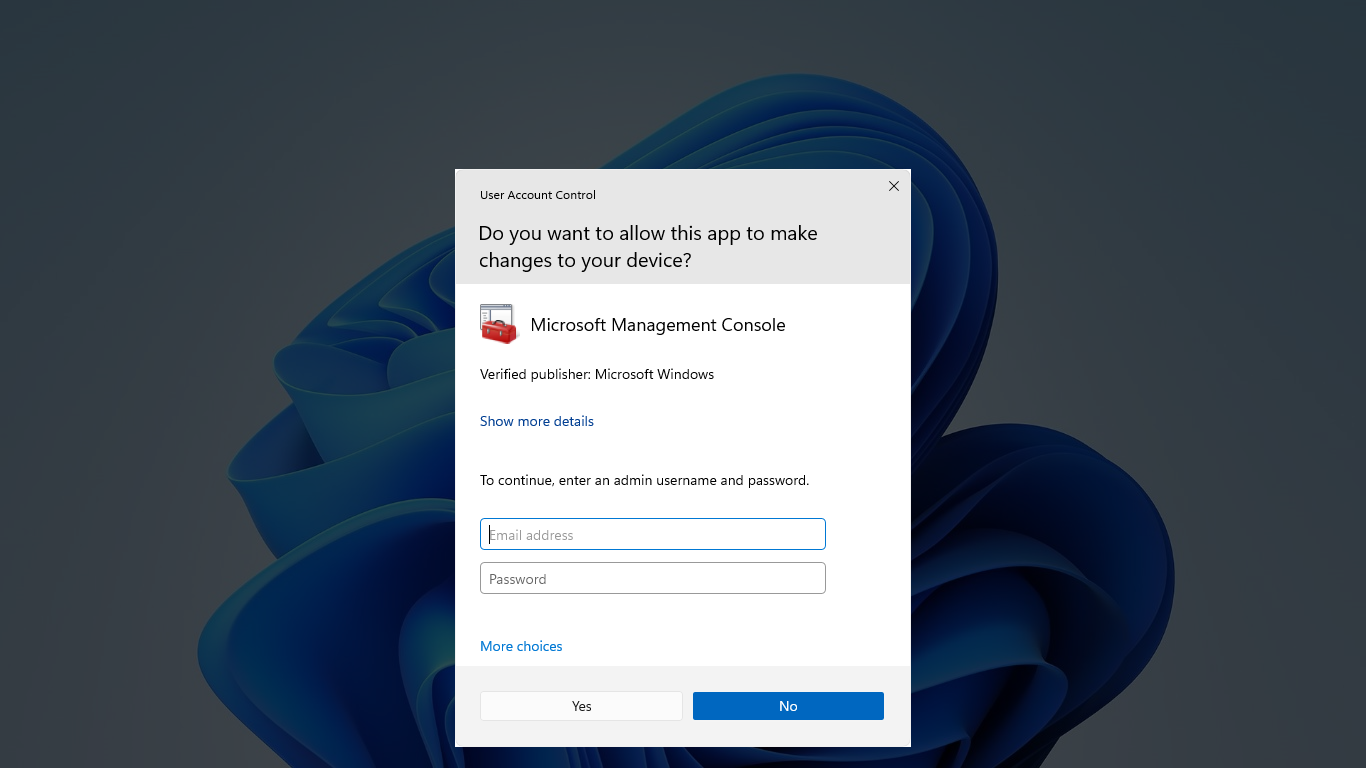
First, ensure that you have the necessary permissions to install software on your computer. Check if you are logged in as an administrator or have administrative privileges.

If you have the required permissions, the missing DLL file may need to be manually added to your system. Download the missing DLL file from a reputable source and place it in the appropriate directory on your computer.

After adding the missing DLL file, restart your computer to apply the changes and try reinstalling the app. This should resolve the error and allow the installation to proceed successfully.

If the error persists, you may need to repair or reinstall the XAMPP software to ensure that all necessary files are properly installed on your system. Follow the instructions provided by the XAMPP documentation for repairing or reinstalling the software.

Additionally, check for any updates or patches for the XAMPP software that may address the missing DLL error. Updating to the latest version of XAMPP can often resolve compatibility issues and errors during installation.

Error When Launching App

If you encounter the XAMPP API MS Win CRT Runtime L1 1 0 DLL Missing Error when launching your app, follow these steps to resolve the issue:

First, make sure you have the necessary DLL file installed on your system. You can download it from the official Microsoft website or reinstall the Visual C++ Redistributable package.

If the DLL file is already installed, try running the app as an administrator. Right-click on the app’s shortcut or .exe file and select “Run as administrator” from the context menu.

If the error persists, check for any recent updates or changes that may have caused the issue. You can use the Event Viewer in Windows to view system logs and identify potential triggers for the error.

Additionally, ensure that your operating system is up to date with the latest patches and updates from Microsoft. This can help resolve compatibility issues with the app and the required DLL files.

If the error still occurs, consider reinstalling XAMPP or the app itself. Make sure to back up any important data before uninstalling and reinstalling the software to avoid data loss.

FAQ

How to fix API MS Win Crt Runtime l1 1 0 dll is missing?

To fix the “API MS Win Crt Runtime l1 1 0 dll is missing” error, you should first ensure all Windows updates are installed. Then, download the Visual C++ Redistributable and run the appropriate version (64-bit or 32-bit). Select Uninstall, then run setup.exe and choose Install.

How to fix missing API MS Win Crt Convert l1 1 0 dll?

To fix the missing API MS Win Crt Convert l1 1 0 dll error, you can try reinstalling the program. If that doesn’t work, you may need to contact your system administrator or the software vendor for further support.

Logitech Mouse Scroll Not Working Windows 10 Fix

Having trouble with your Logitech mouse scroll not working on Windows 10? Let’s find a solution.

Cleaning and Maintenance Tips

  • Clean the scroll wheel
    • Use a can of compressed air to blow out any dust or debris that may be clogging the scroll wheel.
    • Gently wipe the scroll wheel with a clean, dry cloth to remove any dirt or grime.
  • Check for software updates
    • Make sure your Logitech mouse drivers are up to date by visiting the Logitech website and downloading any available updates.
    • Restart your computer after installing any updates to ensure they take effect.
  • Adjust mouse settings
    • Go to the Control Panel and open the Mouse settings.
    • Adjust the scroll wheel settings to see if that resolves the issue.

Application and Compatibility Checks

Logitech mouse compatibility check screen

Check Device Drivers: Outdated or corrupted device drivers can also be the culprit behind the Logitech mouse scroll not working on Windows 10. To check and update your device drivers, go to Device Manager by right-clicking on the Start button, then click on “Mice and other pointing devices” to locate your Logitech mouse. Right-click on the device and select “Update driver” to search for the latest driver updates.

Verify Compatibility with Windows 10: Ensure that your Logitech mouse is compatible with Windows 10 by checking the manufacturer’s website for any compatibility issues or driver updates specifically for this operating system. Updating the mouse firmware can also help resolve compatibility issues with Windows 10.

Updating Drivers and System Files

  • Check for Windows Updates:
    • Open Settings by pressing Windows key + I.
    • Click on Update & Security.
    • Click on Check for updates.
    • Install any pending updates.
  • Update Mouse Driver:
    • Open Device Manager by pressing Windows key + X and selecting Device Manager.
    • Expand the Mice and other pointing devices category.
    • Right-click on your Logitech mouse and select Update driver.
    • Follow the on-screen instructions to update the driver.
  • Run System File Checker:
    • Open Command Prompt as an administrator by searching for CMD in the start menu, right-clicking on Command Prompt, and selecting Run as administrator.
    • Input the command sfc /scannow and press Enter.
    • Wait for the scan to complete and follow any on-screen instructions.

Contact Manufacturer for Support

Logitech support page

If you have tried all the troubleshooting steps and your Logitech mouse scroll is still not working on Windows 10, it may be time to contact the manufacturer for support.

Reach out to Logitech’s technical support team via email or their website to explain the issue you are facing with your mouse scroll. They may provide you with personalized troubleshooting steps or recommend downloading the latest device driver for your mouse.

It’s important to check if there are any Windows Registry errors causing the scroll issue, as these can sometimes interfere with the functionality of your mouse. Consider using an uninstaller tool to remove any conflicting software that may be causing the problem.

If the problem persists, Logitech’s support team may suggest cleaning your mouse to remove any dust or debris that could be affecting the scroll wheel’s movement. Be sure to follow their instructions carefully to avoid damaging the hardware.

Remember to provide as much detail as possible when contacting the manufacturer for support, including any signs and symptoms you have noticed with your mouse. They may also provide you with a URL to download any necessary software updates or drivers for your device.

By contacting the manufacturer for support, you can ensure that your Logitech mouse scroll issue is resolved in a timely manner without spending unnecessary money on repairs.

F.A.Q.

Why has my Logitech mouse stopped scrolling?

Your Logitech mouse may have stopped scrolling due to debris or dust blocking the scroll wheel. Check the wheel for any obstructions and clean it with compressed air. Additionally, ensure that the scroll wheel settings in Logitech Options are correctly selected.

How do I enable scrolling on my Logitech mouse?

To enable scrolling on your Logitech mouse, you need to go to the point and scroll settings in the Logitech software. From there, select the scroll wheel option and choose to activate smooth scrolling.

Why is my wireless mouse not scrolling Windows 10?

Your wireless mouse may not be scrolling in Windows 10 due to issues such as dust and dirt accumulation causing mechanical problems with the mouse wheel, or low battery levels in wireless mice. However, there could be other factors at play as well.

Why has my mouse stopped scrolling?

Your mouse has likely stopped scrolling due to either dust and grime clogging the mouse wheel or a low battery in a wireless mouse.

Why Amazon Prime Video isn’t working – Official Help Fix

In this article, I will discuss common reasons why Amazon Prime Video may not be working and provide official help to fix the issue.

Troubleshooting Streaming and Connection Issues

If you are experiencing streaming and connection issues with Amazon Prime Video, there are a few troubleshooting steps you can take to resolve the issue. First, check your internet connection to ensure it is stable and strong. Try restarting your modem or router to refresh the connection.

Next, make sure your device is connected to the internet and try accessing Amazon Prime Video on a different device to see if the issue is specific to one device. Clear the cache and cookies on your web browser if you are streaming on a computer or tablet.

If you are using a streaming device such as Amazon Fire TV, try unplugging the device and plugging it back in to reset it. Check for any available updates for the Amazon Prime Video app or your device’s software.

If the issue persists, you may need to contact your internet service provider or Amazon Prime Video customer support for further assistance.

Resolving Payment and Account Access Problems

If you are experiencing payment or account access issues while trying to use Amazon Prime Video, there are a few steps you can take to resolve them. First, double-check that your payment method is up to date and ensure there are sufficient funds available. If you are still having trouble, try clearing your browser’s cache and cookies or using a different web browser such as Google Chrome or Firefox.

If the problem persists, try accessing Amazon Prime Video from a different device such as a tablet or Amazon Fire TV. You can also try resetting your router or DNS settings to ensure a stable internet connection. If you are still unable to access your account or make payments, it may be helpful to contact Amazon customer support for further assistance.

Fixing Prime Video on Different Devices

  • Check your internet connection:
    • Make sure you are connected to a stable and strong Wi-Fi network.
    • Restart your modem or router to reset the connection.
  • Update the Prime Video app:
    • Go to the app store on your device and check for any available updates for the Prime Video app.
    • Download and install any updates to ensure you have the latest version of the app.
  • Clear cache and cookies:
    • Go to the settings or preferences section of your device.
    • Find the option to clear cache and cookies for the Prime Video app.
    • Follow the prompts to clear the cache and cookies to improve app performance.
  • Restart the device:
    • Turn off your device completely.
    • Wait for a few minutes before turning it back on.
    • Open the Prime Video app again to see if the issue is resolved.
  • Contact customer support:
    • If none of the above steps work, reach out to Amazon customer support for further assistance.
    • Provide them with details about the issue you are experiencing and any troubleshooting steps you have already taken.

Solutions for App Freezes and Crashes

If you are experiencing app freezes and crashes while trying to use Amazon Prime Video, there are a few solutions you can try to resolve the issue.

First, clear the cache and data of the Amazon Prime Video app on your device. This can help to remove any corrupted files that may be causing the app to freeze or crash.

Next, make sure your device’s software is up to date. Outdated software can sometimes cause compatibility issues with streaming apps like Amazon Prime Video.

If the problem persists, try uninstalling and reinstalling the app. This can sometimes fix any underlying issues that are causing the app to freeze or crash.

F.A.Qs

Is there a problem with Amazon Prime Video right now?

There doesn’t appear to be any issues with Amazon Prime Video at the moment. The last outage was on Monday, April 5th, which lasted around 57 minutes.

How do I reset Amazon Prime on my TV?

To reset Amazon Prime on your TV, you can clear the cache and data, then restart your TV and try using Prime Video again. For Roku TV users, resetting the Prime Video app on your device is easy by pressing the home button on your remote.

Why won t Amazon let me watch Prime?

Amazon won’t let you watch Prime if you’re not using a supported device or if your download speed is insufficient.

What happened to Amazon Prime Video?

Amazon Prime Video introduced ads to their content in January, giving customers the choice to remove them for an additional fee.

Fix Outlook POP Error 0x8004210A: Resolve Timeout Issues

In this article, I will discuss how to fix Outlook POP error 0x8004210A and resolve timeout issues.

Identifying the Causes of Timeout Errors

Identifying the Causes of Timeout Errors: Timeout errors in Outlook POP can be caused by various factors such as slow internet connection, server issues, or antivirus software blocking the connection. Check your internet speed and ensure it is stable to prevent timeouts. Verify the server settings in your Outlook account to ensure they are correct and up to date. Disable any antivirus software temporarily to see if it is causing the timeout error.

If the issue persists, try accessing Outlook in safe mode to rule out any third-party software conflicts.

Additionally, check for any corruption in your Outlook data files by running the built-in repair tool. Clearing the cache and temporary files in your browser can also help resolve timeout errors. Make sure your firewall settings are not blocking the Outlook application from accessing the internet.

Checking Internet Connectivity

To check your internet connectivity, first ensure that your device is connected to a stable network. Open your web browser and try to load a website to confirm the connection. If the page loads successfully, move on to checking your email. Open Microsoft Outlook and send a test email to yourself.

If the email goes through without any issues, your internet connection is likely not the problem.

Managing Your Mailbox

  • Check your internet connection to ensure it is stable and not causing the timeout issues.
  • Adjust the server timeout settings in Outlook to a longer duration to prevent the error from occurring.
  • Clear out your mailbox by deleting unnecessary emails and attachments to reduce the size of your mailbox.
  • Disable any antivirus or firewall software that may be blocking Outlook from connecting to the server.
  • Update your Outlook application to the latest version to ensure it is compatible with the server settings.
  • Consider switching to IMAP instead of POP for a more reliable email delivery system.

Adjusting Server Timeout Settings

To adjust server timeout settings in Outlook, go to the “File” menu and select “Account Settings. ” Choose the email account causing the timeout error and click “Change. ” Next, click on “More Settings” and go to the “Advanced” tab. In the “Server Timeouts” section, adjust the value to a higher number to prevent timeouts. Make sure to save your changes before closing the dialog box. This will help resolve the Outlook POP error 0x8004210A caused by server timeout issues.

Configuring Security Software

To configure security software for fixing Outlook POP Error 0x8004210A, start by opening the security software on your computer. Look for any settings related to email scanning or firewall protection. Disable any features that may be interfering with Outlook’s ability to connect to the server.

If you have Windows Firewall enabled, navigate to the Control Panel and access the Firewall settings. Add an exception for Outlook to ensure it can communicate with the server without any interruptions.

Make sure your security software is not blocking Outlook’s access to the internet. Check the settings to see if Outlook is listed as a trusted program.

If the issue persists, try accessing Outlook in Safe Mode to rule out any third-party plugins causing the error. To do this, press the Windows key + R, type “outlook.exe /safe” in the dialog box, and hit Enter.

If you are still experiencing timeout issues, consider temporarily disabling your security software to see if Outlook can connect to the server without any interruptions.

Repairing and Creating Outlook Profiles

To repair and create Outlook profiles, follow these steps:

Repair Outlook Profile: Open Control Panel, select Mail, and then click on Show Profiles. Choose the profile you want to repair and click on Properties. Go to Data Files, select the data file, and click on Settings. Click on Compact Now to repair the file.

Create Outlook Profile: Open Control Panel, click on Mail, and then select Show Profiles. Click on Add to create a new profile. Enter a name for the profile and configure the email account settings. Set the new profile as the default one.

Configure Server Timeout: Open Outlook, go to File, then Options, and click on Advanced. Under Send/Receive, adjust the server timeout settings. Increase the timeout value to resolve error 0x8004210A.

Follow these steps to repair and create Outlook profiles and resolve timeout issues efficiently.

Professional and Comprehensive Solutions

To fix Outlook POP Error 0x8004210A and resolve timeout issues, follow these steps:

First, check your internet connection to ensure it is stable. Restart your computer and router to refresh the connection.

Next, check your email settings in Outlook to make sure they are correct. Verify the server settings and adjust the timeout setting if necessary.

If the issue persists, try disabling your Windows Firewall temporarily to see if it is causing the problem. If disabling the firewall resolves the issue, you may need to add an exception for Outlook.

Check for any updates for Outlook and install them if available. Outdated software can sometimes cause errors like this.

Lastly, if none of the above steps work, you may need to contact your email provider for further assistance. They may be able to provide specific settings or solutions to fix the problem.

FAQ

How to fix error 0x8004210A?

To fix error 0x8004210A, you can start by checking your internet access, deleting unwanted emails from the mailbox, expanding the server timeout limit, configuring antivirus and Windows Firewall settings, repairing Outlook email using Scanpst.exe, trying a comprehensive Outlook repair tool, or creating a new Outlook account.

How do I fix a timeout error in Outlook?

To fix a timeout error in Outlook, adjust the server settings by increasing the server timeout limit to 10 minutes in the Internet E-Mail Settings window under the Advanced tab.

How do I fix pop server in Outlook?

To fix the POP server in Outlook, you can go to Settings, then Mail, and then Sync email. From there, under POP and IMAP, make sure to select Yes under Let devices and apps use POP, and then save your changes.

What is receiving reported error 0x80042104?

Receiving reported error 0x80042104 means that the email server does not have the necessary features to allow messages to be kept on the server.

Troubleshooting Smart Card Reader Issues

Having trouble with your smart card reader? Here are some common issues and troubleshooting tips to help you get back on track.

Checking and Testing Your Smart Card Reader

To check and test your smart card reader, follow these steps:

Step 1: Ensure that the smart card reader is properly connected to your computer via USB.

Step 2: Insert a smart card into the reader and check if it is recognized by your operating system.

Step 3: Verify that the device driver for the smart card reader is installed correctly. You can do this by checking the Device Manager in Windows.

Step 4: Test the smart card reader with different smart cards to rule out any issues with the cards themselves.

If you are still experiencing problems with your smart card reader after following these steps, it may be necessary to troubleshoot further or seek professional assistance.

Validating and Testing Your Badge

Smart card reader with a badge being tested

  • Check the badge reader connection:
    • Ensure that the badge reader is properly connected to the computer.
    • If using a USB connection, try plugging the reader into a different USB port.
    • Inspect the cable for any visible damage or wear.
  • Verify badge compatibility:
    • Check the badge specifications to ensure compatibility with the reader.
    • Test the badge on a different reader, if available, to determine if the issue is with the badge or the reader.
  • Test with a different badge:
    • If possible, test the reader with a different badge to see if the issue is specific to one badge.
    • Ensure that the new badge is also compatible with the reader.

Troubleshooting Smart Card Certificate Issues

If the smart card reader is not being recognized by the operating system, try reinstalling the device driver. You can do this by accessing the Device Manager in Windows and updating or reinstalling the driver for the smart card reader.

Verify that the smart card is not expired or revoked by checking its status in the Microsoft CryptoAPI. If the smart card certificate has expired or been revoked, you will need to obtain a new certificate and update it on the smart card.

Make sure that the smart card reader is compatible with the smart card being used. Some smart cards may require specific readers or software in order to work properly.

If you are still experiencing issues, try using a different smart card reader or testing the smart card on another device to determine if the issue is with the card or the reader.

Debugging Smart Card Services and Protocols

Smart card reader with error message

To debug smart card services and protocols, start by checking the Windows software trace preprocessor or using WinDbg to analyze any potential issues. Make sure the smart card reader is properly connected to the laptop via USB hardware.

Next, verify the communication protocols being used, such as Kerberos or NTLM, and ensure the correct software, like Microsoft CryptoAPI, is being utilized. Check for any errors related to key distribution centers or authentication protocols.

If troubleshooting a Common Access Card, make sure the personal identification number is entered correctly and check for any errors related to Lightweight Directory Access Protocol or RSA encryption. Utilize any available software development kits or tools to assist in debugging the smart card reader issues.

Configuring and Using Diagnostic Tools

Tool Description Usage
Device Manager Allows you to view and manage hardware devices connected to your computer. Check if the smart card reader is recognized by the system and if the drivers are properly installed.
Event Viewer Logs system events and errors, providing insights into potential issues. Look for any error messages related to the smart card reader or its drivers.
Smart Card Troubleshooter A built-in Windows tool that helps diagnose and fix common smart card reader issues. Run the troubleshooter to identify and resolve any problems with the smart card reader.
Manufacturer’s Diagnostic Tool Specialized software provided by the smart card reader’s manufacturer for troubleshooting purposes. Download and run the diagnostic tool to perform in-depth tests and diagnostics on the smart card reader.

Addressing Login and Authentication Failures

Smart card authentication error message.

When troubleshooting smart card reader issues related to login and authentication failures, there are a few key steps to follow.

First, check the physical connection of the smart card reader to the laptop or desktop computer. Ensure that the USB hardware is securely connected and that there are no issues with the Common Access Card being used.

Next, verify that the smart card reader is properly configured in the system settings. Make sure that the appropriate drivers are installed and that the reader is recognized by the operating system.

If the issue persists, check the authentication protocols being used. Ensure that Kerberos or NTLM protocols are correctly configured for the smart card reader authentication process.

Additionally, verify the user’s credentials and permissions in the system. Make sure that the Personal Identification Number (PIN) and other authentication details are entered correctly.

If all else fails, consider contacting technical support for further assistance. They may be able to provide additional troubleshooting steps or recommend a software development kit (SDK) to help resolve the smart card reader issues.

Resolving Enterprise Connectivity Problems

Check Smart Card Reader Connections: Make sure the smart card reader is properly connected to the computer. Disconnect and reconnect the reader to ensure a secure connection. Inspect the reader for any physical damage that may be causing connectivity issues.

Update Smart Card Reader Drivers: Ensure that the drivers for the smart card reader are up to date. Visit the manufacturer’s website to download and install the latest drivers for the device. Updating drivers can often resolve compatibility issues and improve connectivity.

Restart Smart Card Services: Sometimes, simply restarting the smart card services can resolve connectivity problems. Open the Command Prompt and type “services.msc”. Locate the Smart Card service, right-click on it, and select “Restart”. This can refresh the service and potentially fix any issues.

Check Smart Card Reader Settings: Verify that the smart card reader settings are configured correctly. Go to the Control Panel, select “Administrative Tools”, and then “Services”. Ensure that the Smart Card service is set to start automatically. Adjust any settings as needed to ensure proper connectivity.

Test with Different Smart Cards: If the issue persists, try using different smart cards with the reader. This can help determine if the problem lies with the card itself or the reader. Test multiple cards to see if any of them are recognized and connected successfully.

F.A.Q.

How do I check if my smart card reader is working?

To check if your smart card reader is working, you can go to Device Manager on your computer. Find the Smart Card Readers section, select the reader you want to check, and then view its properties to ensure it is functioning properly.

Why is my card reader not working?

Your card reader may not be working due to a poor connection between the SD card and the reader, a missing SD card driver, or a virus infecting the SD card. Have you tried restarting your computer to see if that resolves the issue?

How to fix a CAC card that won’t read?

To fix a CAC card that won’t read, try reinserting the card reader into a different USB port. Make sure you are using a compatible reader such as an SCR3310v2 or Belkin F1DN005U. Check that the reader drivers are up to date and that the operating system recognizes the reader.

How to resolve smart card error?

To resolve a smart card error, you can try restarting the computer or device with the smart card reader. Additionally, double-check the smart card connections to ensure it is inserted correctly and free from any debris that could be causing the error.

Rhythm Discord Bot Not Playing: Troubleshooting Guide

In troubleshooting the Rhythm Discord bot not playing, several common issues may arise.

Rejoining Voice Channels

If you are experiencing issues with the Rhythm Discord Bot not playing music in voice channels, one common troubleshooting step is to rejoin the voice channel.

To rejoin a voice channel:
– Right-click on the Rhythm bot in the Discord server
– Select ‘Disconnect’ to remove the bot from the current voice channel
– Right-click on the Rhythm bot again and select ‘Connect’ to rejoin the voice channel

Rejoining the voice channel can help refresh the connection and resolve any playback issues that may be occurring.

If rejoining the voice channel does not resolve the problem, you can also try restarting the bot by typing ‘!disconnect’ and then ‘!play’ in the chat to restart the music playback process.

If you continue to experience issues with the Rhythm Discord Bot not playing music, you may want to check for any updates or announcements on the Rhythm bot’s official Discord server or Reddit page for any known issues or troubleshooting tips.

Keeping the bot updated and ensuring a stable connection to the voice channel can help prevent playback issues in the future.

Volume and Mute Checks

A volume slider and mute button

  • Check Volume Levels:
    • Ensure that the volume on your device is turned up and not muted.
    • Check the volume settings within the Discord app to make sure it is not set to zero.
    • Adjust the volume slider to an appropriate level.
  • Check Bot Permissions:
    • Make sure the bot has the necessary permissions to play audio in the Discord server.
    • Check the bot’s role in the server and ensure it has the “Connect” and “Speak” permissions.

Keeping the Bot Online

If the Rhythm Discord bot is not playing music, first check the server status to ensure it is not down. If the server is online, restart the bot by using the command “!play” to see if that resolves the issue. If the bot is still not playing, check the music permissions in the server settings to make sure the bot has the necessary permissions to play music.

Another common issue could be with the bot’s connection to the voice channel. Try disconnecting and reconnecting the bot to the voice channel by using the command “!disconnect” followed by “!connect.” This can help reset the connection and get the bot playing music again.

If the issue persists, it may be helpful to update the bot to the latest version to ensure compatibility with Discord’s current API. You can do this by checking the bot’s website or Discord server for any available updates.

Utilizing Bots on Discord

Issue Solution
Bot is not connected to voice channel Make sure the bot is in a voice channel and has permissions to speak and play music
Bot is muted Check the bot’s volume settings and make sure it is not muted
Bot is experiencing lag Try restarting the bot or the Discord server to see if the issue resolves
Bot is not responding to commands Check if the bot is online and has not crashed. If needed, restart the bot

FAQ

How to get rythm bot to play music?

To get Rythm bot to play music, you need to add it to a server and grant it the necessary permissions. After authorizing the bot, you can then start playing music by switching over to Discord.

Why is Rhythm not working in Discord?

Rhythm may not be working in Discord because the bot’s volume could be set to zero. To check this, right-click on the bot and look at the volume bar to see if it is empty or filled.

Is the Rythm bot still working?

The Rythm bot is no longer working as it officially shut down on Sep.

Why is my Discord bot not playing music?

Your Discord bot may not be playing music because of the volume level settings. Ensure that the volume level is appropriately adjusted on your server to allow the bot to function properly and play music.

Windows 10 update 1803 won’t install – solved techsupport

Struggling to install Windows 10 update 1803? Find out how I solved this frustrating tech support issue.

Utilize the Windows Update Troubleshooter

If you are facing issues with installing the Windows 10 update 1803, you can try using the Windows Update Troubleshooter to resolve the problem. This tool is designed to automatically detect and fix common Windows Update issues.

To use the Windows Update Troubleshooter, follow these steps:

1. Press the Windows key + I to open the Settings menu.
2. Go to Update & Security > Troubleshoot.
3. Click on Windows Update and then select Run the troubleshooter.
4. Follow the on-screen instructions to complete the troubleshooting process.

If the Troubleshooter is unable to fix the issue, you can try other troubleshooting methods such as running System Restore, checking your internet connection, or ensuring that your PC meets the system requirements for the update.

It is also recommended to check for any pending updates in the Windows Update settings and install them before attempting to install the 1803 update.

By utilizing the Windows Update Troubleshooter and following these troubleshooting steps, you can hopefully resolve the issue of Windows 10 update 1803 not installing on your system.

Reset the Windows Update Components

1. Stop Windows Update Service: Press Windows key + R, type “services.msc” and hit Enter. Scroll down to Windows Update, right-click and select Stop.

2. Rename SoftwareDistribution folder: Press Windows key + X and select Command Prompt (Admin). Type the following commands:
– “net stop wuauserv”
– “net stop bits”
– “ren C:\Windows\SoftwareDistribution SoftwareDistribution.old”
– “net start wuauserv”
– “net start bits”

3. Reset Catroot2 folder: In the Command Prompt (Admin), type:
– “net stop cryptsvc”
– “md %systemroot%\system32\catroot2.old”
– “xcopy %systemroot%\system32\catroot2 %systemroot%\system32\catroot2.old /s”
– “net start cryptsvc”

4. Restart Windows Update Service: Go back to the Services window, right-click Windows Update and select Start.

After completing these steps, try installing the Windows 10 update 1803 again. If the issue persists, consider seeking further assistance from Microsoft support or a professional technician.

Employ the DISM Tool and System File Checker

Step Description
1 Open Command Prompt as an administrator
2 Run the DISM tool with the following command: dism /online /cleanup-image /restorehealth
3 Wait for the process to complete
4 Run System File Checker with the following command: sfc /scannow
5 Wait for the scan to complete and follow any on-screen instructions
6 Restart your computer

Update Windows Using the ISO File

First, download the Windows 10 ISO file from the official Microsoft website. Make sure to select the correct version that matches your current installation.

Next, mount the ISO file by double-clicking on it. This will create a virtual DVD drive on your system.

Open File Explorer and navigate to the mounted ISO file. Double-click on the ‘setup.exe’ file to start the installation process.

Follow the on-screen instructions to update Windows. Make sure to select the option to keep your files and apps to avoid losing any data.

After the update is complete, restart your computer to apply the changes.

If you encounter any issues during the update process, you can use the built-in Windows Update troubleshooter to identify and fix the problem.

Alternatively, you can also use the DISM tool or System File Checker to repair any corrupted system files that may be causing the update failure.

By updating Windows using the ISO file, you can bypass any issues with the Windows Update service and ensure that your system is up to date with the latest features and security patches.

Frequently Asked Questions

Why is Update failing to install?

Update is failing to install due to potential issues such as problems with the Windows Update service, corrupt system files, or outdated drivers. Solutions include running a Windows update troubleshooter, freeing up disk space, or performing a system scan.

How do I manually install Windows 10 Update version 1803?

To manually install Windows 10 Update version 1803, you can go to Start, Control Panel, Updates. If the update is not available through Windows Updates, you can visit the Microsoft website and click on Update now. Alternatively, you can download the media creation tool from the same page to create a Windows 10 ISO for a clean install.

How to Update Windows 10 version 1803 to 21H2?

To update Windows 10 version 1803 to 21H2, ensure that the latest Servicing Stack Updates (SSU) are installed on the older Windows 10 version.

Resolve Bluestacks 3 Black Screen App Crash Windows Fix

In my experience, resolving the Bluestacks 3 black screen app crash on Windows can be frustrating.

Running Command Prompt with Administrator Privileges

To resolve the Black Screen App Crash issue on BlueStacks 3 for Windows, you may need to run Command Prompt with Administrator privileges.

To do this, simply right-click on the Start button and select Command Prompt (Admin) from the menu.

Once Command Prompt opens, type sfc /scannow and press Enter to run the System File Checker tool. This will scan and repair any corrupted system files that may be causing the issue.

After the scan is complete, restart your computer and try running BlueStacks 3 again to see if the Black Screen App Crash issue has been resolved.

Adjusting User Account Control Settings

  • Open the Control Panel on your Windows computer.
  • Click on User Account Control Settings in the Control Panel menu.
  • Move the slider to adjust the User Account Control settings to your desired level.
  • Click on OK to save the changes.
  • Restart your computer for the changes to take effect.

Temporarily Disabling Antivirus Software

To resolve the Bluestacks 3 black screen app crash on Windows, one potential solution is to temporarily disable your antivirus software. Sometimes, antivirus programs can interfere with the performance of Bluestacks, causing it to crash or display a black screen.

Before disabling your antivirus: Make sure to close any open applications and save your work to prevent any data loss. Then, locate your antivirus software in the system tray or the task manager and right-click on the icon. Look for an option to temporarily disable the antivirus or turn off real-time protection.

Once the antivirus is disabled: Restart your computer to apply the changes. Launch Bluestacks 3 again and see if the black screen app crash issue is resolved. If the problem persists, you may need to explore other troubleshooting steps.

Troubleshooting Permission Issues in Windows

Windows permissions settings

If you are experiencing permission issues in Windows when trying to run Bluestacks 3 and encountering a black screen or app crash, there are a few troubleshooting steps you can take to resolve the issue.

First, make sure that your user account has the necessary permissions to run Bluestacks 3. To do this, right-click on the Bluestacks 3 shortcut and select Run as administrator.

Additionally, you can try running Bluestacks 3 in compatibility mode for an earlier version of Windows. Right-click on the Bluestacks 3 shortcut, select Properties, go to the Compatibility tab, and check the box for Run this program in compatibility mode for.

If the issue persists, you may need to update your graphics drivers or reinstall DirectX on your system. Make sure your computer meets the minimum system requirements for Bluestacks 3 to run smoothly.

FAQs

How do I fix the black screen on BlueStacks BlueStacks?

To fix the black screen on BlueStacks, you can try accessing the system configuration by typing “msconfig” in the Run dialog box and then clicking on the boot tab.

Why BlueStacks is not working properly?

BlueStacks is not working properly because it may not be responding after launch. This issue can potentially be resolved by restarting your desktop or laptop, or by closing “BstkSVC.exe” from the Task Manager.

Why does Honkai Star Rail keep crashing on BlueStacks?

Honkai Star Rail keeps crashing on BlueStacks due to compatibility issues when playing the game with high graphics settings on the latest version of BlueStacks 5. To prevent crashing, it is recommended to lower the graphics settings to medium or lower.

Fix System Error 5: Access Denied Occurred Windows CMD

In my article, I will discuss how to fix System Error 5: Access Denied that occurred in Windows CMD.

Causes and Fixes for Access Denial Errors

Access denial errors in Windows CMD can be frustrating to deal with, but there are common causes and fixes that can help resolve the issue.

One of the main causes of access denial errors is insufficient permissions. To fix this issue, you can try running the command prompt as an administrator. Right-click on the CMD shortcut in the Start menu or File Explorer, and select “Run as administrator”.

Another common cause of access denial errors is the User Account Control (UAC) settings. To fix this, you can adjust the UAC settings by following these steps:
– Press the Windows key + R to open the Run dialog box.
– Type “secpol.msc” and hit Enter to open the Local Security Policy.
– Navigate to Security Settings > Local Policies > Security Options.
– Look for the setting “User Account Control: Run all administrators in Admin Approval Mode” and double-click on it.
– Set it to “Enabled” and click OK to save the changes.

If the issue persists, you can also try running the command prompt in safe mode to troubleshoot any third-party software conflicts that may be causing the access denial error.

Running Command Tools with Elevated Privileges

Windows UAC prompt

To run command tools with elevated privileges in Windows CMD and fix the “System Error 5: Access Denied” issue, you can use the following steps.

1. Use the Windows Key: Press the Windows key on your keyboard to open the Start menu.

2. Search for CMD: Type “cmd” in the search bar to locate the Command Prompt application.

3. Right-click on Command Prompt: Right-click on the Command Prompt icon in the search results.

4. Choose “Run as administrator”: From the context menu that appears, select “Run as administrator” to open CMD with elevated privileges.

5. Confirm the User Account Control prompt: If prompted by User Account Control, click “Yes” to allow the Command Prompt to run with elevated privileges.

Adjusting User Account Control Settings

User Account Control settings icon

  • Open Control Panel by pressing Win + X and selecting Control Panel.
  • Click on User Accounts and then Change User Account Control settings.
  • Move the slider to select a different level of UAC settings.
  • Click OK to save the changes.

Overcoming Installation and Permission Issues

To overcome installation and permission issues in Windows CMD when encountering the “System Error 5: Access Denied” message, follow these steps:

1. First, run Command Prompt as an administrator by right-clicking on the Windows icon in the taskbar and selecting “Windows Terminal (Admin)”.

2. If you are still facing permission issues, try changing the ownership of the folder or file that is causing the error. Right-click on the file or folder, select Properties, go to the Security tab, and click on Advanced. Then, click on the Change link next to the Owner field.

3. Add your user account as the owner and enable the option to replace owner on subcontainers and objects. Click Apply and OK to save the changes.

4. If the issue persists, you can grant full control permissions to your user account for the file or folder. Go back to the Security tab in Properties, click on Edit, select your user account, and check the box for Full Control under Allow. Click Apply and OK to apply the changes.

Frequently Asked Questions

How do I fix error 5 access is denied?

To fix error 5 access is denied, run the application or installer as an administrator by right-clicking and selecting “Run as Administrator.” This may resolve the issue.

How do I bypass access denied system error 5?

To bypass an “Access Denied” system error 5 on Windows 10 or Windows 11, you can try running the command prompt as an administrator. This elevated privilege may allow you to access the necessary resources without encountering the error message.

How can I fix the access denied error?

To fix the access denied error, you can try clearing your browser cookies and history, turning off VPN and VPN extensions, disabling your proxy, switching to a premium VPN service, or resetting your browser data.

CSGO Lagging with Good Ping and High FPS Fix

Experiencing lag in CSGO despite having good ping and high FPS can be frustrating.

Identifying Causes of Lag Spikes

To identify the causes of lag spikes in CSGO despite having good ping and high FPS, first check your internet connection stability. Make sure your network is not being overloaded by other devices or applications. Additionally, close any background programs that may be consuming resources.

Next, check your hardware components such as RAM, CPU, and GPU. Ensure that they are not overheating or underperforming due to outdated drivers or hardware issues.

If the issue persists, consider optimizing your game settings to improve performance. Lowering graphics settings or adjusting the resolution can help reduce lag spikes.

Finally, consider reaching out to the CSGO community on platforms like Reddit for additional troubleshooting tips and support.

Optimizing Hardware and Video Settings

  • Update Graphics Drivers
    • Open Device Manager by pressing Windows key + X
    • Expand the Display adapters category
    • Right-click on your graphics card and select Update driver
    • Follow the on-screen instructions to complete the update process
  • Adjust In-Game Video Settings
    • Launch CSGO
    • Go to Settings and click on Video Settings
    • Lower the graphics settings such as Resolution and Texture Quality
    • Disable Vertical Sync (V-Sync) and Anti-Aliasing
  • Monitor CPU and GPU Usage
    • Open Task Manager by pressing Ctrl+Shift+Esc
    • Go to the Performance tab
    • Monitor the CPU and GPU usage while playing CSGO
    • If either is consistently high, consider upgrading your hardware

Ensuring Smooth Connectivity and System Health

Network connection diagram

To ensure smooth connectivity and system health while playing CSGO, first, make sure your internet connection is stable. Check your network settings and close any bandwidth-hogging applications running in the background. Next, optimize your system’s performance by updating your graphics card drivers and cleaning up temporary files. Increasing your RAM and CPU speeds can also help reduce lag. Ensure your game settings are optimized for performance, such as lowering graphics quality if necessary.

Additionally, consider using an Ethernet connection instead of Wi-Fi for a more stable connection. Regularly restart your router and modem to prevent any connectivity issues.

Advanced Solutions for Lag Issues

To resolve CSGO lagging issues despite having good ping and high FPS, first ensure your computer meets the game’s system requirements. Update your graphics card drivers to the latest version and optimize your in-game settings for better performance. Consider increasing your RAM if you have enough space for smoother gameplay. Check for background processes that may be hogging your CPU resources and causing lag spikes. Lowering your resolution or disabling unnecessary features can also help improve performance.

If you’re still experiencing lag, try connecting to a wired network instead of Wi-Fi for a more stable connection. Additionally, consider restarting your modem or router to refresh your internet connection. Experiment with these solutions to find the best fit for your specific setup.

Frequently Asked Questions

Why am I lagging but my ping is good?

You are experiencing lag even though your ping is good because you may have an unstable connection causing packet loss.

Why am I lagging with low ping CSGO?

You are lagging with low ping in CSGO because other apps running in the background may be using up your bandwidth. To prevent this, close streaming and torrenting sites, as well as pause any ongoing software downloads or updates on Steam or Windows.

Why is my CSGO so laggy all of a sudden?

Your CSGO may be laggy all of a sudden due to reasons such as a slow and unstable internet connection, corrupted or incomplete game files, or too many resource-hogging programs running in the background.

Why is CSGO choppy with high FPS?

CSGO is choppy with high FPS because certain graphical settings may be too high, causing lag. Adjusting settings such as texture quality, shadows, anti-aliasing, and effects can help improve performance.