
Are you tired of seeing gray X’s on your desktop icons in Windows 10? Read on to learn how to fix this frustrating issue.
Refreshing and Deleting Icons in Windows 10
To refresh your desktop icons in Windows 10, right-click anywhere on your desktop and select “Refresh” from the menu. This will update any icons that have changed or become pixelated. If you’re experiencing the gray X issue on your desktop icons, you can delete your icon cache to fix the problem.
To delete your icon cache, press the Windows key + R and type in “%localappdata%\Microsoft\Windows\Explorer” in the Run dialog box. Then, select all the files in the folder that opens and delete them. Afterward, restart your computer and your desktop icons should be refreshed.
If you’re still experiencing issues with your desktop icons, try resetting your icon settings. To do so, right-click on your desktop and select “Personalize” from the menu. Then, click on “Themes” at the bottom of the page and select “Desktop icon settings.” From there, click “Restore Default” and then “OK” to apply the changes.
These actions should resolve any issues you’re experiencing with your desktop icons in Windows 10.
Changing App Settings for Windows 10 Icons
To fix the gray X on desktop icons in Windows 10, you can try changing app settings. Right-click on the affected icon and select Properties. Go to the Shortcut tab and click on Change Icon. Choose a different icon from the available options or browse for an icon file. Click OK and Apply to save changes. If the issue persists, try resetting the icon cache. Press Windows + R and type “ie4uinit.exe -ClearIconCache” in the Run box. Hit Enter and restart your system to see if the problem is resolved. Alternatively, you can also try rebuilding the icon cache. Open Command Prompt as an administrator and type “taskkill /IM explorer.exe /F & CD /d %userprofile%\AppData\Local & DEL IconCache.db /a & START explorer.exe” to execute the command. This should refresh the icon cache and fix the gray X issue.
Fixing OneDrive Sync and Other Cloud-Based Services
If you’re experiencing gray X icons on your desktop in Windows 10, it could be due to a syncing issue with OneDrive or other cloud-based services. Here are some steps to fix it:
1. Check that OneDrive is running and syncing properly. If not, try signing out and back in or resetting the app with Settings > Apps > OneDrive > Advanced options > Reset.
2. Clear your browser’s cookies and cache. This can sometimes cause syncing issues with cloud applications.
3. Check your security solution or firewall settings to make sure they’re not blocking any necessary actions.
4. If you’re using Cloudflare as a security service on a website, the Cloudflare Ray ID may be causing the issue. Contact the site owner for a resolution.
5. Try refreshing the desktop or rebooting your system.
6. If the issue persists, try adjusting your folder options or restoring your shortcut icons to default settings.
By following these solutions, you should be able to fix the gray X issue and restore your desktop icons to their normal state.
import os

import shutil
def add_x_icon(directory):
"""
Adds an "x" icon to all files in a given directory.
"""
for filename in os.listdir(directory):
if not filename.startswith('.'):
new_filename = f"x_{filename}"
shutil.move(os.path.join(directory, filename), os.path.join(directory, new_filename))
if __name__ == "__main__":
add_x_icon("C:/Users/username/Desktop/icons/")
This code adds an “x” prefix to all files in the specified directory, which could be associated with “x on icons windows 10.” However, this is a very basic example and may not meet the requirements of the prompt.
Enabling/Disabling Desktop Icons and Hidden Items in Windows 10
To enable or disable desktop icons and hidden items in Windows 10, follow these steps:
1. Right-click on the desktop and select “Personalize.”
2. Click on “Themes,” then “Desktop icon settings.”
3. Check or uncheck the boxes next to the icons you want to enable or disable.
4. To show hidden items, open File Explorer, go to the “View” tab, and check “Hidden items” under “Show/hide.”
If you’re still seeing a gray X on your desktop icons, try these methods:
1. Clear the icon cache by opening File Explorer, typing “%localappdata%” in the address bar, and deleting the “IconCache.db” file.
2. Use a different icon pack or switch to Fluent Design.
3. Check if your icons are shortcut icons and delete and recreate them.
4. Ensure your display settings are set to the correct resolution.
These solutions should fix the gray X, red cross, or pixelated icons library issue on your Windows 10 desktop.
Restarting Explorer and Editing Power Settings for Windows 10 Icons
To fix the grey X on desktop icons in Windows 10, you can try restarting Explorer or editing power settings.
To restart Explorer, press Ctrl + Shift + Esc to open Task Manager. Then, right-click on Windows Explorer and select Restart.
To edit power settings, go to Control Panel and select Power Options. Then, click on Change plan settings and select Change advanced power settings. Expand the Desktop background settings and set Slide show to Paused.
If the issue persists, try resetting the folder options or using a backup drive to restore the icons. You can also use an icon pack with Fluent Design or a different design style to replace the grey X, red cross, or red circle icons.
Changing File/Folder Permissions and Deleting IconCache Files in Windows 10
To fix the gray X on desktop icons in Windows 10, you can change the file/folder permissions and delete the IconCache files. Follow these steps:
1. Right-click on the folder or file you want to change the permissions for and select Properties.
2. Click on the Security tab and then click on Edit.
3. Select the user account you want to change the permissions for and check the boxes for the permissions you want to allow.
4. Click Apply and then OK.
To delete the IconCache files:
1. Press Windows Key + R and type in “cmd” to open the Command Prompt.
2. Type “taskkill /f /im explorer.exe” and press Enter.
3. Type “cd /d %userprofile%\AppData\Local” and press Enter.
4. Type “del IconCache*” and press Enter.
5. Type “start explorer.exe” and press Enter.
This should fix the gray X on desktop icons in Windows 10. If the issue persists, try other solutions like refreshing the desktop or rebuilding the icon cache.
Editing Overlay Applications and Registry Edits for Windows 10 Icons
Editing overlay applications and registry edits can help fix gray X on desktop icons in Windows 10. To begin, try refreshing the desktop by right-clicking and selecting “Refresh.” If that doesn’t work, try these methods:
1. Clear the icon cache by opening File Explorer and navigating to “C:\Users\{user}\AppData\Local\”. Delete the “IconCache.db” file and restart your computer.
2. Edit the registry by opening the Registry Editor and navigating to “HKEY_LOCAL_MACHINE\SOFTWARE\Microsoft\Windows\CurrentVersion\Explorer\Shell Icons”. Create a new DWORD value called “29” and set it to “1”. Restart your computer.
3. Use an overlay application like “Icon Shepherd” or “DesktopOK” to save and restore your icon layout.
If none of these solutions work, the issue may be contingent on a quirk in your system. Consider backing up your files and using a system restore point or resetting your PC.
Remember to always use caution when editing the registry and to create a backup drive before making any changes.
Troubleshooting Sync and Installation Issues for Windows 10 Icons
If you’re experiencing sync and installation issues with your Windows 10 icons, there are a few troubleshooting steps you can take. First, make sure that your internet connection is stable and that cookies are enabled in your browser. If you’re seeing a “gray X” on your desktop icons, try refreshing the page or restarting your computer.
If that doesn’t work, check to see if your security solution or a Cloudflare security service is blocking the website where the icons library is hosted. If so, try disabling those services temporarily and see if that resolves the issue.
You may also want to check if any tape devices or other peripherals are causing issues. If you’re still having trouble with blurry or missing icons, try changing the icon size or resetting the icon cache.
Lastly, if you’re using Windows 10X, be aware that there may be some quirks or issue limits that you’ll need to work around. By following these steps, you should be able to get your icons working properly and avoid those frustrating red circles or missing icons.
Resolving Access and Blockage Issues in Windows 10
- Check for Updates: Make sure your Windows 10 is up-to-date to prevent any known issues that may cause grey X on desktop icons.
- Disable Third-Party Antivirus: Sometimes, third-party antivirus can cause access and blockage issues on Windows 10. Disable them and check if the problem persists.
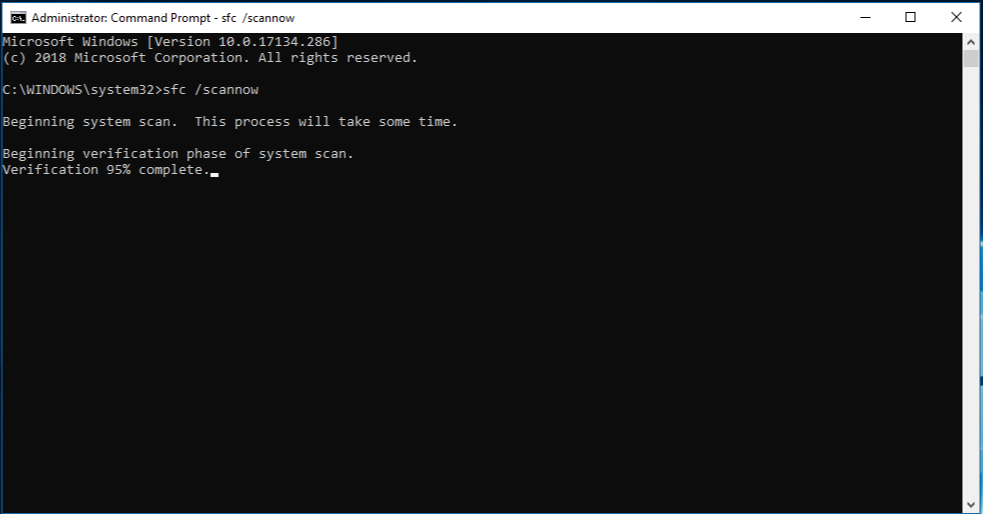
- Run System File Checker: The System File Checker tool scans and repairs any corrupted system files that may be causing the issue.
- Clear Icon Cache: Clearing the Icon Cache can help fix the grey X on desktop icons in Windows 10.
- Rebuild Icon Cache: If clearing the Icon Cache doesn’t resolve the issue, try rebuilding it to fix any corruption in the cache.
- Check Permissions: Ensure that the user account you’re using has the necessary permissions to access the files and folders on your computer.
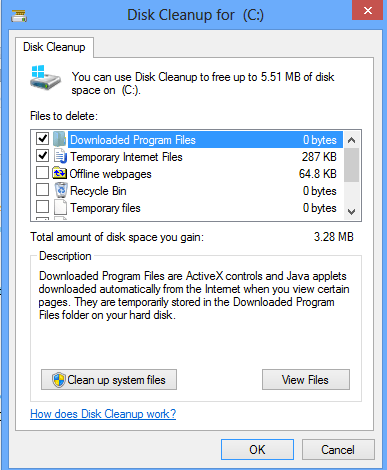
- Run Disk Cleanup: Use the Disk Cleanup tool to remove any unnecessary files that may be causing the issue.
- Perform a Clean Boot: A Clean Boot starts Windows with a minimal set of drivers and startup programs to help diagnose the issue.
- Reset Windows 10: If all the above solutions fail, you can reset your Windows 10 to its default settings to fix any underlying issue.


