iPhone 6 Won’t Turn On After Update? Try These 7 Fixes

Having trouble with your iPhone 6 not turning on after an update? Here are 7 fixes to try.

Force Restart Your Device

Press and hold the Power button and the Home button simultaneously for about 10 seconds. This should force your iPhone to restart, potentially fixing any glitches that are preventing it from turning on properly.

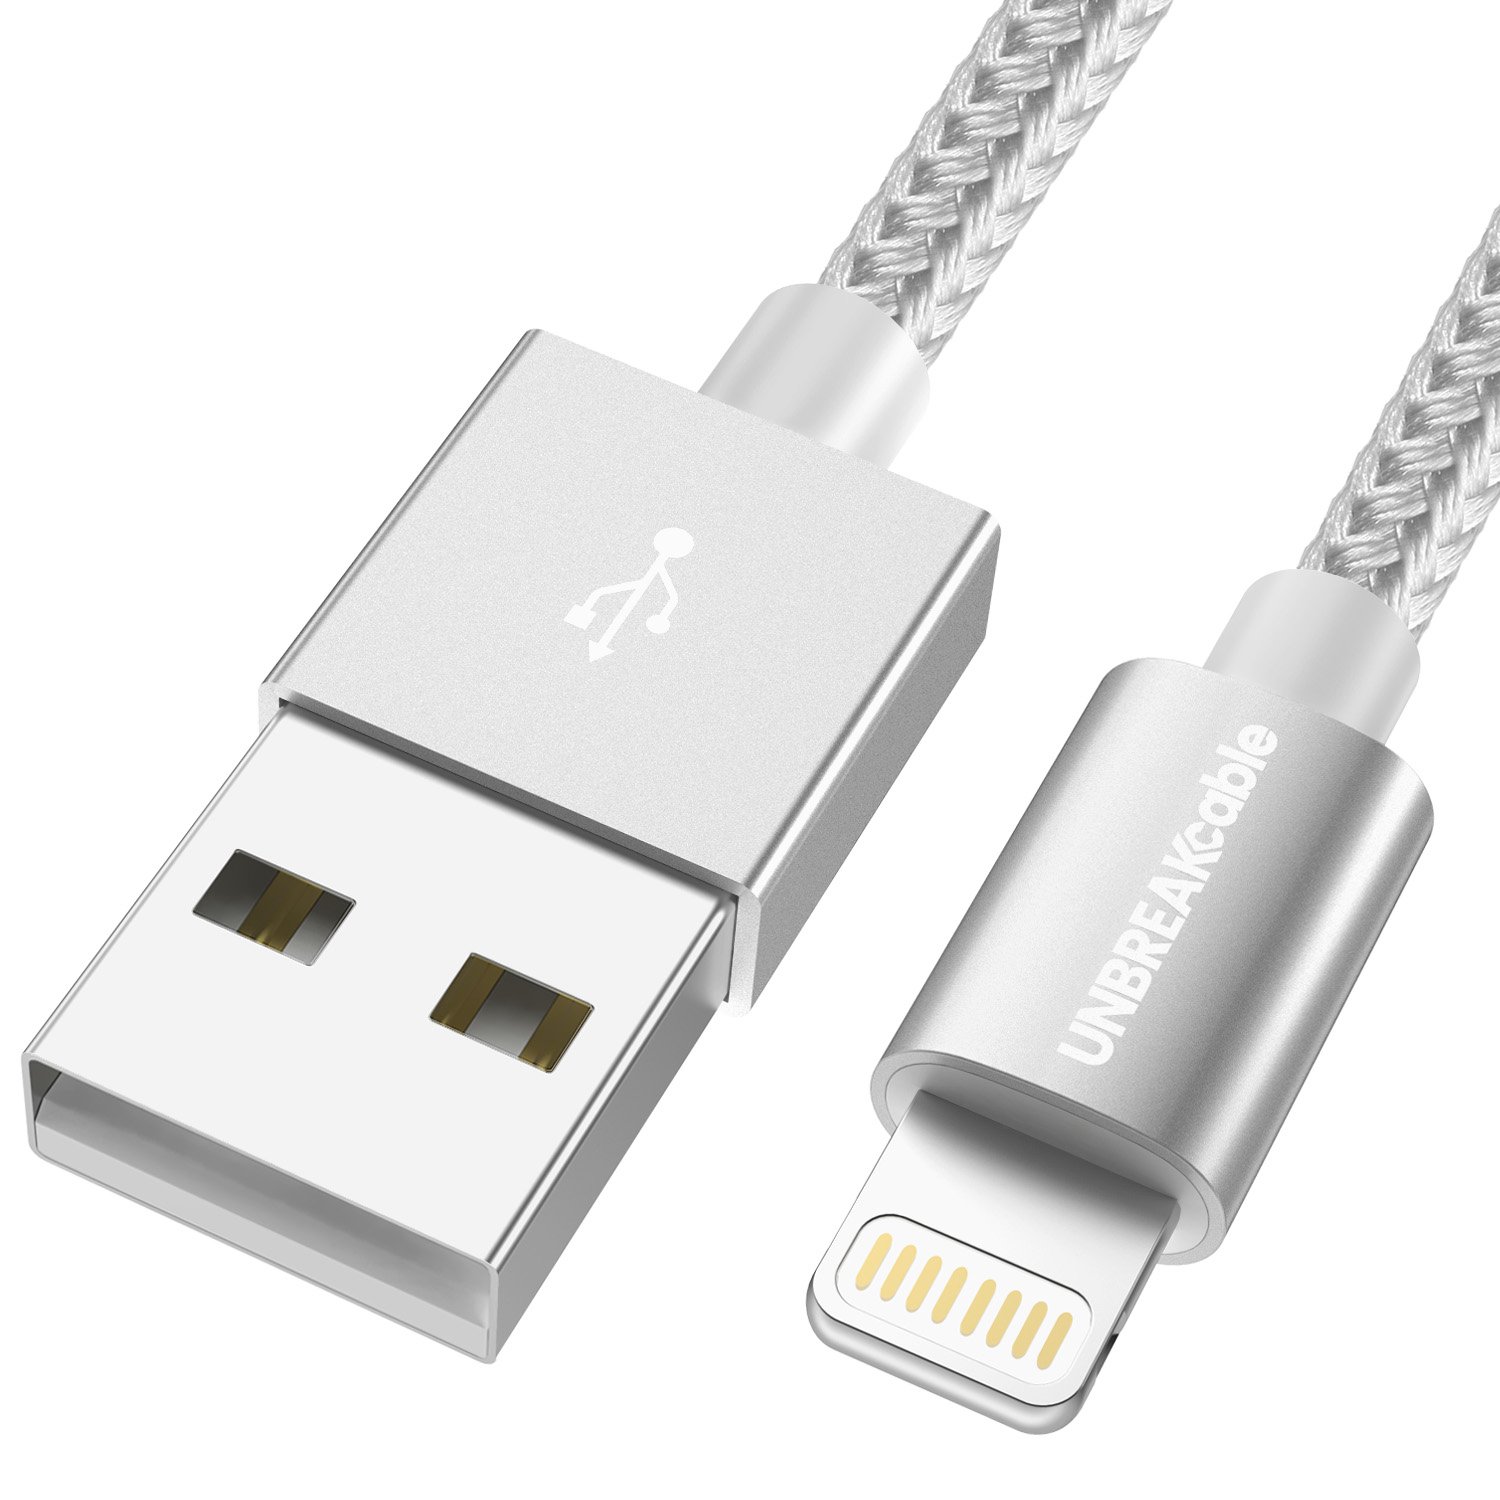
If the force restart doesn’t work, try connecting your iPhone to a computer with iTunes installed. Connect your iPhone to the computer using a USB cable and open iTunes. Try to perform a restore by selecting your iPhone and clicking on the “Restore” button. This may help in fixing any software issues causing the device not to turn on.

If the issue persists, it could be related to hardware problems. Check if the battery is charged by using a different charging cable and adapter. Make sure the charging port is free from debris and try connecting it to a power source for at least an hour to rule out a drained battery.

If none of the above fixes work, you may need to consider a factory reset. Perform a factory reset by going to Settings > General > Reset > Erase All Content and Settings. Keep in mind that this will erase all data on your iPhone, so make sure to back up your data before proceeding.

If you’re still experiencing issues with your iPhone 6 not turning on, it may be time to contact Apple Support for further assistance.

Charge Your Device

Charging cable and iPhone 6

If your iPhone 6 won’t turn on after an update, try these 7 fixes to get it up and running again. First, try performing a hard reset by holding down the power button and home button simultaneously for about 10 seconds until the Apple logo appears.

If that doesn’t work, try connecting your iPhone to a power source using a USB adapter and letting it charge for at least an hour. Sometimes a drained battery can cause the device not to turn on.

If the issue persists, try cleaning the charging port with a soft brush or toothpick to remove any debris that may be blocking the connection. This can prevent the device from charging properly.

If your iPhone is still not turning on, try putting it into DFU mode by connecting it to a computer, opening iTunes, and following the on-screen instructions to restore the device to its factory settings.

If none of these fixes work, you may need to contact Apple support or visit an authorized service provider for further assistance. It’s possible that there may be a hardware issue causing the problem.

Remember not to panic and try these troubleshooting steps before considering more drastic measures. It’s always best to try the simple fixes first before resorting to the “nuclear option” of drilling into your device.

Restore Your Device Using iTunes

1. Connect your iPhone to your computer using a USB cable. Make sure iTunes is open on your computer.

2. Put your iPhone into recovery mode. To do this, press and hold the Power button and the Home button simultaneously until you see the recovery mode screen on your iPhone.

3. In iTunes, you should see a message prompting you to restore your iPhone. Click on the “Restore” option to begin the process.

4. Follow the on-screen instructions in iTunes to complete the restoration. This will erase all the data on your iPhone, so make sure to back up any important information before proceeding.

5. Once the restoration is complete, your iPhone should restart and hopefully turn on successfully. If not, you may need to repeat the process or seek further assistance from Apple support.

6. If your iPhone is still not turning on, you may need to consider contacting Apple for additional troubleshooting or repair options. It’s possible that there may be a hardware issue causing the problem.

7. Remember to stay calm and patient throughout the process. It can be stressful when your device is not functioning properly, but with the right steps and support, you should be able to resolve the issue.

Use Recovery Mode for Update

If your iPhone 6 won’t turn on after an update, one potential fix is to use Recovery Mode to restore your device. To do this, connect your iPhone to your computer and open iTunes. Put your iPhone into Recovery Mode by holding down the Home and Power buttons together until you see the iTunes logo on your screen.

Once in Recovery Mode, iTunes will prompt you to restore your device. Click on the “Restore” option and follow the on-screen instructions to complete the process. This will erase all data on your iPhone, so make sure to back up any important information beforehand.

After the restore is complete, your iPhone should turn on and function properly. If it still won’t turn on, you may need to contact Apple Support for further assistance.

Using Recovery Mode can sometimes fix software glitches that are causing your iPhone to not turn on properly. It’s a useful troubleshooting step when all else fails.

Remember to always keep your iPhone’s software up to date to avoid encountering issues like this in the future. Regular updates can help prevent software bugs and ensure your device runs smoothly.

Address Hardware Issues

  • Check the charging port and cable:
    • Inspect the charging port for any debris or damage.
    • Try using a different charging cable and power adapter.
    • Plug the iPhone into a computer to see if it recognizes it.
  • Perform a hard reset:
    • Press and hold the Power button and Home button simultaneously for about 10 seconds.
    • Release the buttons when the Apple logo appears on the screen.
  • Check the battery:
    • Take the iPhone to an authorized Apple service provider to have the battery tested.
    • If the battery is faulty, consider replacing it.
  • Update iOS:
    • Connect the iPhone to Wi-Fi and go to Settings > General > Software Update.
    • Download and install the latest iOS version available.
  • Restore the iPhone:
    • Connect the iPhone to a computer and open iTunes.
    • Select the iPhone icon and click on “Restore iPhone.”
    • Follow the on-screen instructions to complete the restoration process.
  • Seek professional help:
    • If none of the above steps work, take the iPhone to an authorized Apple service provider for further diagnosis and repair.

F.A.Qs

What do I do if my iPhone won’t turn on after update?

If your iPhone won’t turn on after an update, you can try force restarting it. For iPhone 8/8 Plus/X/11/12, quickly press and release the ‘Volume Up’ button, then the ‘Volume Down’ button, and finally hold down the ‘Power’ button until the Apple logo appears. For iPhone 7/7 Plus, press the ‘Volume Down’ and ‘Power’ buttons simultaneously.

How do I revive a dead iPhone 6?

To revive a dead iPhone 6, you can force restart it by pressing the Home and Power buttons simultaneously for 10-15 seconds. This should power the device back on.

What is the iPhone black screen of death?

The iPhone black screen of death refers to when the display remains black or shows black lines, indicating that the device may not be turning on properly. This can be accompanied by the appearance of an Apple logo or spinning wheel on the black screen.

iPhone 7 Constant Reboot Loop Fix Solutions 2024

If you’re experiencing a constant reboot loop issue with your iPhone 7, you’re not alone. In this article, I will discuss some potential solutions to fix this problem in 2024.

Identifying Causes of Boot Loop Issues

To identify the causes of boot loop issues on your iPhone 7, start by checking for any recent software updates or installations that may have triggered the problem. Connect your iPhone 7 to your Mac using a USB cable and launch Finder or iTunes to see if there are any pending updates or patches available for your device.

Next, consider if any physical damage or liquid exposure could be causing the reboot loop. Inspect the exterior of your iPhone 7 for any signs of damage and ensure that all ports are clean and free from debris.

If the issue persists, try performing a hard reset on your iPhone 7. Press and hold the Power button along with the Volume Down button simultaneously until the Apple logo appears on the screen. This can sometimes resolve boot loop problems caused by software glitches.

Lastly, if none of the above solutions work, consider restoring your iPhone 7 to factory settings. Make sure to back up your data before proceeding with a factory reset to avoid losing any important information.

Effective Solutions for Boot Loop Without Data Loss

  • Press and hold the Volume Down button and Power button simultaneously.
  • Continue holding both buttons until the Apple logo appears on the screen.
  • Release both buttons and wait for the device to restart.

Update iOS to the Latest Version

  • Go to Settings on your iPhone.
  • Select General and then Software Update.
  • If an update is available, download and install it.
  • Restart your device once the update is complete.

Use iTunes to Restore Your iPhone

  • Connect your iPhone to your computer and open iTunes.
  • Select your device in iTunes and choose Restore.
  • Follow the on-screen instructions to complete the restoration process.
  • Once the process is finished, set up your iPhone as a new device.

Restoring and Resetting Techniques to Address Reboot Loop

If your iPhone 7 is stuck in a constant reboot loop, there are a few restoring and resetting techniques you can try to fix the issue.

First, try performing a hard reset by pressing and holding the power and volume down buttons simultaneously until the Apple logo appears. This can sometimes help break the cycle of continuous rebooting.

If that doesn’t work, you can try restoring your iPhone 7 using iTunes on a computer. Connect your iPhone to the computer, open iTunes, and select the option to restore your device. Make sure to back up your data before doing this to avoid losing any important information.

If the issue persists, you may need to put your iPhone 7 into DFU (Device Firmware Update) mode and restore it using iTunes. This is a more advanced troubleshooting step, so make sure to follow a detailed guide to avoid any mistakes.

Preventative Measures to Avoid Future Boot Loop Problems

To prevent future boot loop problems on your iPhone 7, there are a few preventative measures you can take. Firstly, make sure to regularly update your device’s software to the latest version to ensure that any bugs or glitches that could cause boot loops are patched. Additionally, backing up your data regularly is crucial in case a boot loop occurs and you need to restore your device.

Another important step is to avoid installing unauthorized or suspicious apps that could potentially harm your device’s software and cause it to enter a boot loop. If you do encounter a boot loop, try force restarting your device by pressing and holding the power and volume down buttons simultaneously until the Apple logo appears.

It’s also advisable to contact Apple Support if the issue persists or if you are unsure of how to resolve it yourself. By taking these preventative measures, you can avoid future boot loop problems on your iPhone 7 and ensure a smoother user experience.

FAQs

How do I fix my iPhone 7 boot loop?

To fix your iPhone 7 boot loop, you can try entering recovery mode by pressing and holding both the Volume Down button and the Sleep/Wake button until you see the recovery mode screen. This may help resolve the issue.

How do I stop my iPhone from rebooting loop?

To stop your iPhone from rebooting in a loop, you can try performing a hard reset by pressing the volume up button, then the volume down button, and finally holding down the side (power) button until you see the Apple logo.

Why does my iPhone 7 keep restarting?

Your iPhone 7 may be constantly restarting due to faulty or outdated apps. Consider updating any apps that need it and removing any apps from unverified sources to see if this resolves the issue.

Facebook Group Notifications Not Working Fix

Having trouble with Facebook Group notifications not working properly? Let’s explore some potential fixes.

Turning Notifications On or Off

Facebook notification settings

To turn Facebook group notifications on or off, follow these steps:

1. Visit the Facebook group you want to manage notifications for.
2. Click on the Notifications bell icon located at the top of the group page.
3. Select the notification settings you prefer, such as All Posts, Highlights, Friends’ Posts, or Off.
4. To turn off notifications completely, click on the bell icon again and select Off.
5. If you are using the Facebook mobile app, go to the group, tap on the Notifications icon, and adjust your settings there.

Remember, turning notifications on or off can help manage your online presence and stay up to date with group activity without being overwhelmed. Make sure to regularly check and adjust your settings to suit your preferences and needs.

Customizing Notification Preferences

  • Open Facebook Group and navigate to the group you are having notification issues with.
  • Click on three dots located at the top right corner of the group page.
  • Select ‘Notification Settings’ from the drop-down menu.
  • Adjust Notification Preferences by selecting the type of notifications you want to receive for the group.
  • Save Changes by clicking the ‘Save’ button at the bottom of the notification settings.

Managing Notifications on Mobile and Desktop

To manage Facebook Group notifications on mobile and desktop, follow these steps:

1. Check Notification Settings: Make sure your notification settings are configured correctly. On mobile, go to the group, click on “Notifications” and select the desired option. On desktop, go to the group, click on “Notifications” and adjust settings accordingly.

2. Clear Cache and Cookies: Sometimes notifications may not work due to a cache or cookie issue. Clear cache and cookies on your browser or mobile app to resolve this.

3. Update App and Software: Ensure that your Facebook app and operating system are up to date. Outdated software can cause notification issues.

4. Check Internet Connection: Poor internet connection can also impact notification delivery. Make sure you have a stable connection on your mobile device or desktop computer.

5. Contact Facebook Support: If notifications are still not working after following these steps, reach out to Facebook support for further assistance.

Understanding Different Types of Notifications

Notification Type Description
Push Notifications These are notifications that appear on your device’s screen, even if you’re not actively using the app.
Email Notifications These notifications are sent to your email address to alert you to new activity within the app or website.
In-App Notifications These are notifications that appear within the app itself, usually in the form of a pop-up or badge icon.
SMS Notifications These notifications are sent to your phone via text message to alert you to new activity.

Frequently Asked Questions

Why am I not getting notifications from my group on Facebook?

You are not receiving notifications from your Facebook group because your notification settings may be set to “All Posts.” To adjust this setting, tap on the top right of Facebook, then tap Groups, select your group, tap the group’s name, and then tap Notifications. From there, you can customize your notification preferences.

Why is Facebook not sending me push notifications?

Facebook may not be sending you push notifications because your notifications for Facebook are not turned on in the settings of your mobile device. Make sure to check and adjust your notification settings to ensure you receive notifications from Facebook.

Why am I not getting notifications even though they are turned on?

You are not getting notifications even though they are turned on because there may be settings such as Do Not Disturb or Airplane Mode turned on, notifications may be turned off for specific apps, or power/data settings may be blocking notification alerts. Additionally, outdated apps or OS software can also cause issues with notifications.

How do I turn on push notifications for Facebook?

To turn on push notifications for Facebook, you can go to the Notifications section within the Facebook app and toggle the Allow Notifications option to on.

Fix Instagram Notification Issue on iPhone 13

If you’re experiencing issues with Instagram notifications on your iPhone 13, here is a guide to help you fix the problem.

iPhone Notifications Settings

  • Step 1:

    • Open the Settings app on your iPhone.
    • Scroll down and tap on Notifications.
  • Step 2:

    • Find Instagram in the list of apps and tap on it.
  • Step 3:

    • Make sure that Allow Notifications is turned on.
    • Adjust other notification settings as needed.

Adjusting Instagram Preferences

To adjust your Instagram preferences on your iPhone 13 and fix any notification issues you may be experiencing, follow these simple steps:

1. Open the Instagram app on your iPhone 13.

2. Tap on your profile picture in the bottom right corner to access your profile.

3. Tap on the three horizontal lines in the top right corner to open the menu.

4. Scroll down and tap on “Settings.”

5. In the settings menu, tap on “Notifications.”

6. Here, you can adjust your notification preferences for various activities on Instagram, such as likes, comments, and mentions.

7. Make sure that the notifications you want to receive are turned on by toggling the switches next to each option.

8. If you are still experiencing issues with notifications, you may need to log out of your Instagram account and log back in.

9. To do this, go to your profile, tap on the three horizontal lines, and scroll down to the bottom of the menu.

10. Tap on “Log Out” and then log back in with your username and password.

Utilizing Instagram for Business

Utilizing Instagram for Business

Instagram has become a powerful tool for businesses to connect with their target audience and promote their products or services. With over a billion active users, it offers a huge potential reach for businesses looking to increase their online presence.

Article Title Fix Instagram Notification Issue on iPhone 13

Managing Replies and Interactions

To manage replies and interactions on Instagram, you can easily navigate through your notifications and respond to comments directly from the app. If you’re experiencing issues with notifications on your iPhone 13, here are some steps you can take to fix the problem.

First, make sure your Instagram app is up to date. Check the App Store for any available updates and install them if necessary.

Next, check your notification settings within the Instagram app. Open the app, go to your profile, tap on the three lines in the top right corner, select “Settings,” then “Notifications.” From there, you can customize which notifications you receive and how you receive them.

If you’re still not receiving notifications, you may need to reset your notification settings. To do this, go to your iPhone’s settings, select “Notifications,” find the Instagram app, and make sure notifications are enabled.

If you’re still having issues, you can try logging out of your Instagram account and then logging back in. This can sometimes reset any notification glitches.

If all else fails, you may need to troubleshoot further by checking your network connection, restarting your iPhone, or even reinstalling the Instagram app.

Remember to adhere to Instagram’s terms of service and policy when interacting with notifications and replies. It’s important to maintain a positive and respectful online presence.

If you have any questions or concerns about managing replies and interactions on Instagram, you can always reach out to Instagram’s support team or seek help from online communities like Reddit.

F.A.Q.

How do I get Instagram notifications on my iPhone?

To get Instagram notifications on your iPhone, you need to open the Settings app, find Instagram in the Notification Style section, and tap the slider next to Allow Notifications.

Why is the Notification Center not showing on my iPhone?

The Notification Center may not be showing on your iPhone because the settings need to be adjusted. To resolve this, go to Settings, then Face ID & Passcode or Touch ID & Passcode, enter your passcode, scroll down, and turn on Notification Center.

Where is the Notification Center on Instagram?

The Notification Center on Instagram is located within your profile page. Simply tap on the three lines in the top right corner of your screen and navigate to the Notifications section to customize your notification settings.

Why does Instagram only notify me when I open the app?

Instagram only notifies you when you open the app because of notification settings that may need to be enabled in your device’s settings.

PSN Sign-In Error Solutions – Troubleshoot PS4 Network Failure

Having trouble signing into your PSN account on your PS4? Learn how to troubleshoot network failure and fix sign-in errors with these solutions.

Culprits Behind Failed Sign-Ins

If you are using a proxy server, make sure it is set up properly to avoid any connection problems. Additionally, check for any system software updates that may be available for your PS4 to ensure it is running the latest version. Sometimes, simply restarting your console can resolve sign-in errors and network failures.

If you are still unable to sign in to the PlayStation Network, consider enabling multi-factor authentication for an added layer of security. Double-check your password and login information to make sure there are no typos or errors.

Essential Fixes for Sign-In Issues

  • Turn off your PS4 completely by holding the power button for at least seven seconds.
  • Unplug the power cable from both your PS4 and router.
  • Wait for at least five minutes before plugging them back in.
  • Turn on your router first and wait for it to fully boot up before turning on your PS4.

Check PSN Server Status

  • Visit the official PlayStation Network status page to check if there are any ongoing server issues.
  • Look for any red bars or error messages indicating service disruptions.
  • Wait for the server issues to be resolved before trying to sign in again.

Update PS4 System Software

  • Go to Settings on your PS4 dashboard.
  • Select System Software Update.
  • Download and install any available updates.
  • Restart your PS4 after the update is complete.

Updating System and Personal Info

To update your system and personal information on your PlayStation 4, navigate to the settings menu. From there, select “Account Management” and then “Account Information.” Here, you can update your personal details such as your email address or password.

Make sure your system software is up to date by going to “System Software Update” in the settings menu. It’s important to keep your PlayStation 4 software current to avoid potential network issues.

If you are experiencing network errors, check your internet connection settings. Go to “Network” in the settings menu, select “Set Up Internet Connection,” and ensure your Wi-Fi or LAN connection is configured correctly. You may need to adjust settings such as your IP address, DNS, or proxy server.

If you continue to encounter issues, try using Google Public DNS for a more reliable connection. Go to the network settings, select “Custom,” and enter the Google Public DNS addresses.

Reset and Rebuild: Ultimate Solutions

Resetting your PlayStation Network (PSN) sign-in error can be frustrating, but don’t worry – we have the ultimate solutions for you to troubleshoot PS4 network failure. If you are experiencing issues signing in to your PSN account, follow these steps to reset and rebuild your network connection:

First, try restarting your PS4 system to see if that resolves the sign-in error. If the issue persists, you may need to reset your network settings on your console.

To do this, go to Settings > Network > Set Up Internet Connection. Choose either Wi-Fi or LAN cable, depending on your connection type. Select Custom and follow the on-screen instructions to set up your network connection again.

If resetting your network settings doesn’t work, you may need to rebuild the database on your PS4. To do this, turn off your console, then hold the power button until you hear two beeps. Connect your controller with a USB cable and select the Rebuild Database option.

If you are still experiencing sign-in errors, you may need to restore your PS4 to factory settings. Be sure to back up your data before doing this, as it will erase all content on your console.

Frequently Asked Questions

Why is there an error when I try to sign into PSN?

There may be an error when trying to sign into PSN due to a connection issue between your console and router. Try turning both off and on again, and consider using a wired connection instead of WiFi for a more stable connection. For further troubleshooting, visit PlayStation Repairs.

Why isn’t my PlayStation not letting me sign in?

Your PlayStation may not be letting you sign in due to log-in issues. You can try going to the Account Management sign-in page and select “Trouble Signing in?” to reset your password by entering your sign-in ID (email address). An email will be sent to you containing a secure link to help you resolve the issue.

Why can’t i sign up for PSN?

You can’t sign up for PSN because your internet connection may be lost or PlayStation Network is undergoing maintenance. Verify your internet connection and check the PSN status page. If you can’t create an account due to a used email address, contact customer support for assistance.

How do I fix PlayStation connection error?

To fix a PlayStation connection error, you can start by checking the status of the PlayStation Network, restarting your modem and router, restarting the PlayStation 4, confirming your Wi-Fi password is correct, moving your PS4 closer to the wireless router, changing the Wi-Fi network’s channel number, and adjusting the DNS settings on the PS4.

Fix Samsung A70 Home Button Not Working

Having trouble with your Samsung A70 home button not working? Let’s troubleshoot the issue and find a solution.

Troubleshooting with Diagnostic Tools

  • Check for software updates:

    • Go to Settings on your Samsung A70.
    • Select Software Update.
    • Tap on Download and Install if there are any updates available.
  • Restart the device:

    • Press and hold the Power button on your Samsung A70.
    • Select Restart from the options provided.
    • Wait for the device to reboot and check if the Home button is working.
  • Perform a factory reset:

    • Backup your data as this will erase all content on your device.
    • Go to Settings on your Samsung A70.
    • Select General Management and then Reset.
    • Choose Factory Data Reset and follow the on-screen instructions.

Restart and System Software Update

If your Samsung A70 home button is not working, a simple restart or system software update may help resolve the issue.

To restart your device, press and hold the power button until the power off menu appears, then select Restart. This can help refresh the system and potentially fix any minor glitches causing the home button to malfunction.

If restarting doesn’t work, try updating your device’s software to the latest version. This can often fix bugs or issues that may be affecting the functionality of the home button. To check for updates, go to Settings > Software Update > Download and Install.

After updating the software, restart your device again to ensure the changes take effect. If the home button still doesn’t work after these steps, you may need to consider further troubleshooting or contacting Samsung support for assistance.

Clearing Cache and Factory Reset Options

If your Samsung A70 home button is not working, you may be able to fix the issue by clearing the cache or performing a factory reset.

To clear the cache on your Samsung A70, follow these steps:
Go to Settings > Apps > App Manager.
– Tap on the app that is experiencing the home button issue.
– Select “Storage” and then tap on “Clear Cache.”

If clearing the cache does not resolve the problem, you can try performing a factory reset on your Samsung A70. Keep in mind that this will erase all data on your device, so make sure to back up any important information before proceeding.

To perform a factory reset on your Samsung A70, follow these steps:
Go to Settings > General Management > Reset > Factory Data Reset.
– Tap on “Reset Device” and then select “Erase Everything.”
– Follow the on-screen instructions to complete the reset process.

After clearing the cache or performing a factory reset, check to see if the home button on your Samsung A70 is now working properly. If the issue persists, contact Samsung customer support for further assistance.

Hardware Solutions and Accessibility Features

Samsung A70 home button

Hardware Solutions Accessibility Features
Check for Physical Damage Enable Assistant Menu
Restart the Device Use Voice Control
Update Software Use One-Handed Mode
Perform a Factory Reset Adjust Touch Sensitivity
Replace the Home Button Use Gesture Navigation

F.A.Q.

Why is my home button not working?

Your home button may not be working due to a software issue. Try restarting your device to see if that resolves the problem.

Fix iMessage Activation Error – 4 Ways to Turn it On

Struggling with iMessage activation error? Here are 4 ways to fix it.

Verify Internet Connection and Data Availability

To fix the iMessage Activation Error, first verify your internet connection and data availability. Make sure you are connected to Wi-Fi or have a strong cellular network signal.

If using Wi-Fi, ensure that your device is connected to a stable network. Open your web browser and try to load a webpage to confirm internet access.

If you are using cellular data, check to see if you have a strong signal. Turn on Airplane mode for a few seconds and then turn it off to reset your connection.

Additionally, make sure that your Apple ID is correctly logged in and that your device has the latest software updates installed. Go to Settings > Messages and make sure iMessage is turned on.

By verifying your internet connection and data availability, you can troubleshoot and resolve the iMessage Activation Error more effectively.

Toggle iMessage and Restart Messages App

To toggle iMessage off and then back on, follow these steps:

1. Open the Messages app on your iPhone or iPad.
2. Go to “Settings” and tap on “Messages.”
3. Toggle the iMessage switch off.
4. Wait a few seconds, then toggle it back on.

Restarting the Messages app can also help resolve activation errors:

1. Close the Messages app completely by swiping it away from your app switcher.
2. Reopen the Messages app and try activating iMessage again.

These steps can often help resolve activation errors related to iMessage. If the issue persists, you may need to try additional troubleshooting steps.

Update iOS and Check System Status

To fix iMessage activation error, make sure to update your iOS to the latest version. This can often resolve any compatibility issues that may be causing the problem. Additionally, it’s important to check the system status of Apple’s servers to ensure that iMessage is functioning properly.

If updating your iOS and checking the system status does not resolve the activation error, try logging out of your Apple ID and then logging back in. This can sometimes reestablish the connection and fix the issue.

Another potential solution is to reset your network settings on your iPhone or iPad. This can help resolve any network-related issues that may be preventing iMessage from activating properly.

If all else fails, you may need to contact Apple Support for further assistance. They can provide more in-depth troubleshooting steps and help you get iMessage up and running again.

Adjust Date, Time, and Time Zone Settings

Calendar and clock settings

To adjust the date, time, and time zone settings on your Apple device, follow these steps:

1. Adjust Date and Time Settings: Go to Settings > General > Date & Time. Toggle off the “Set Automatically” option, then manually set the correct date and time.

2. Change Time Zone Settings: In the Date & Time settings, tap on Time Zone and select the correct time zone from the list.

3. Ensure Network Connectivity: Make sure your device has a stable internet connection through Wi-Fi or cellular data to properly sync with the network.

Utilize Apple ID for Messaging

Utilize Apple ID for Messaging
Article Title: Fix iMessage Activation Error – 4 Ways to Turn it On

Reset Network and All Settings

To reset your network and all settings on your iPhone, follow these steps. First, go to your “Settings” and tap on “General.” Next, scroll down and tap on “Reset.” Then, tap on “Reset Network Settings” and enter your passcode if prompted.

Reset Network and All Settings

This will reset all your network settings, including Wi-Fi passwords and cellular settings. It can help resolve any network-related issues that may be causing the iMessage activation error. Once the reset is complete, try activating iMessage again to see if the error has been fixed.

Remember that resetting your network settings will also remove any saved Wi-Fi passwords, so you will need to re-enter them when reconnecting to Wi-Fi networks. Additionally, all your device settings will be reset to their default values, so you may need to adjust them again to your preferences.

If resetting your network settings does not resolve the iMessage activation error, you can also try resetting all settings on your iPhone. This will reset all settings on your device, but will not delete any data. To do this, go to “Settings,” tap on “General,” then “Reset,” and finally tap on “Reset All Settings.”

After resetting all settings, try activating iMessage again to see if the error has been resolved. If you are still experiencing issues, you may need to contact Apple support for further assistance.

Consult Apple Support for Persistent Issues

If you are still experiencing issues with activating iMessage after trying the 4 methods mentioned in this article, it is recommended to consult Apple Support for further assistance.

Apple Support can provide personalized troubleshooting steps based on your specific device and network settings. They may also be able to identify any underlying issues that are causing the activation error.

Reach out to Apple Support through their website, email, or phone number to get the help you need in resolving the persistent iMessage activation problem. Remember, they are there to assist you in getting your iMessage up and running smoothly.

Don’t hesitate to contact Apple Support if you are still facing difficulties despite trying various troubleshooting methods on your own. They have the expertise and resources to help you get your iMessage activated without any further delays.

FAQ

Why is my phone not letting me use iMessage?

Your phone may not be letting you use iMessage because it requires a data connection to work. Make sure you have 3G, 4G, or WiFi available. Try checking your connection by performing a quick search in Safari.

Why does my iPhone not use iMessage?

Your iPhone may not be using iMessage because there could be an issue with your network connection. Make sure to check if you have a stable cellular data or Wi-Fi connection, as iMessage requires one of these to work properly. If you are trying to send a message as an SMS, you specifically need a cellular network connection. Restarting your device may also help resolve any connectivity issues.

Why is my iMessage activation not working?

Your iMessage activation may not be working due to a variety of reasons. Some steps you can take include resetting the iMessage and FaceTime apps, restarting your phone, refreshing your connection, or resetting your Apple ID. Additionally, make sure your time and date settings are correct and consider updating or resetting your device.

Why is iMessage not working for one person?

iMessage may not be working for one person because the contact may not be registered with iMessage. To troubleshoot, back up important messages, delete current messaging threads with the contact, and try sending a new message.

Fix Xbox One Error Code 0x801901f4 – Full Guide

In this article, I will provide a comprehensive guide on how to fix Xbox One error code 0x801901f4.

Restart and Power Cycle Your Console

Xbox One power button

If you’re encountering the Xbox One Error Code 0x801901f4, one of the first steps you should take is to restart your console. Simply turn off your Xbox One, wait for a few seconds, and then turn it back on. This may help resolve any temporary issues causing the error code.

If a restart doesn’t work, try performing a power cycle. To do this, unplug the power cable from your Xbox One and wait for at least 10 seconds before plugging it back in. This can sometimes help clear out any lingering issues that a simple restart may not fix.

After completing these steps, check to see if the error code has been resolved. If not, you may need to explore other troubleshooting options.

Update Your Console and Check Server Status

Steps Description
1 Ensure your console is connected to the internet
2 Go to Settings on your Xbox One
3 Select System and then Updates
4 Check for updates and install if available
5 Restart your console
6 Visit the Xbox Live Status page to check server status

Sign In and Internet Connection Troubleshooting

To troubleshoot the Xbox One Error Code 0x801901f4, ensure that you are signed into your Xbox account. If you are experiencing internet connection issues, check your network settings and reset your router if necessary. Make sure your Xbox is connected to a stable internet connection to resolve this error.

If you are unable to sign in to your account, try signing in on a different device to ensure your account is working properly. Restart your Xbox and router to refresh the connection. Additionally, clear your cache and cookies on your Xbox to potentially fix the error code.

If the issue persists, consider reaching out to Xbox support for further assistance.

Reset Your Xbox Console

1. Press the Xbox button on your controller to open the guide.

2. Go to Settings, then All Settings.

3. Select System, then Console info & updates.

4. Select Reset console.

5. Choose Reset and keep my games & apps.

6. Follow the on-screen instructions to complete the reset process.

After resetting your Xbox console, check to see if the error code 0x801901f4 has been resolved. If not, you may need to explore other troubleshooting options or seek further assistance from Xbox support.

Run Troubleshooter and Clear Store Cache

To fix Xbox One error code 0x801901f4, you can try running the troubleshooter and clearing the store cache. First, go to the Settings menu on your Xbox One. Then, navigate to the System tab and select Console Info. Next, choose Reset console and select Reset and keep my games & apps. This will clear the store cache on your Xbox One and may resolve the error code.

Alternatively, you can also try running the troubleshooter to diagnose and fix any issues. To do this, go to the Settings menu, then select Network and run the Network troubleshooter. This will help identify any network-related problems that may be causing the error.

After trying these steps, restart your Xbox One and check if the error code 0x801901f4 has been resolved.

Re-Register and Reset Microsoft Store

Microsoft Store app icon

If you are experiencing the Xbox One Error Code 0x801901f4, one of the solutions you can try is to re-register and reset the Microsoft Store.

To do this, first, go to the Home screen on your Xbox One and press the Xbox button on your controller. Then, navigate to the Store tab and select the ellipsis (…) icon. From there, choose Settings and then Account. Finally, select the option to Sign out.

After signing out of your Microsoft account, restart your Xbox One by holding down the power button for 10 seconds. Once the console has rebooted, sign back into the Microsoft Store with your account credentials. This should re-register and reset the Microsoft Store, potentially resolving the error code issue.

Make sure to check your internet connection and router settings as well to ensure there are no connectivity issues causing the error.

FAQ

How do I fix error code 0x801901f4 on Xbox?

To fix error code 0x801901f4 on Xbox, you can try restarting your console. Press the Xbox button on your controller to open the guide, go to Profile & system > Settings > General > Power mode & startup, and select Restart now.

How do I fix Xbox 0x800704cf?

To fix Xbox 0x800704cf, you can clear local storage to remove any corrupted or conflicting data. Go to Settings, then System, and select Storage. Clear the cache and delete unnecessary data to free up space and resolve the error.

What is error code 0x80a4001a on Xbox One?

Error code 0x80a4001a on Xbox One could indicate that your account credentials are corrupted.

How do I fix error code 0x80a40019 on Xbox?

To fix error code 0x80a40019 on Xbox, you can start by restarting your Xbox One to reset the network connection. If that doesn’t work, try waiting a few minutes and then attempt signing in again.

Xbox One Won’t Open Settings Troubleshoot Fix

Are you having trouble opening the settings on your Xbox One console? Let’s troubleshoot and find a fix for this issue.

Initiating a Restart or Power Cycle

Xbox One power button

To initiate a restart or power cycle on your Xbox One to troubleshoot the issue of settings not opening, follow these steps:

First, press and hold the Xbox button on the console for at least 10 seconds until it powers off completely. This will perform a hard reset.

Next, unplug the power cord from the back of the console and wait for about a minute before plugging it back in.

After reconnecting the power cord, press the Xbox button on the console to turn it back on.

If the issue persists, you can also try clearing the cache on your Xbox One. To do this, go to Settings > System > Storage > Clear local saved games.

If clearing the cache does not resolve the issue, you may need to perform a factory reset on your console. This will erase all data, so make sure to back up any important information before proceeding.

Verifying Xbox Live Server Status

Xbox Live server status page.

To verify the Xbox Live server status, you can visit the official Xbox Live status page on the Xbox website. This page will show you if there are any ongoing issues with the servers that could be causing your Xbox One to have trouble opening settings.

If the Xbox Live status page shows that the servers are up and running, but you are still experiencing issues with your Xbox One settings, you can try restarting your console to see if that resolves the problem.

Another option is to check for any system updates that may be available for your Xbox One. Sometimes, a software update can fix bugs or glitches that are preventing you from accessing certain settings on your console.

If neither of these steps work, you may want to reach out to Xbox support for further assistance. They may be able to provide you with more specific troubleshooting steps based on the issue you are experiencing.

Testing Network Connections

Ethernet cable plugged into a router

  • Check network cables for any loose connections
  • Restart your router and modem
  • Ensure your Xbox One is connected to the correct Wi-Fi network
  • Try connecting your Xbox One to the Internet using an ethernet cable
  • Test the network connection on another device to see if the issue is with your Xbox One or network

Ensuring Account and Purchase Verification

To ensure account and purchase verification on your Xbox One, make sure you are signed in with the correct account that has the necessary permissions to access settings. If you are experiencing issues with verification, try signing out and then signing back in to refresh the account information.

Another step to troubleshoot account and purchase verification issues is to clear the cache on your Xbox One. This can help resolve any temporary glitches that may be affecting the verification process. Additionally, check your internet connection to ensure it is stable and not causing any disruptions in account verification.

If you are still experiencing problems with account and purchase verification, contact Xbox support for further assistance. They can provide guidance on resolving any issues related to account settings and verification on your Xbox One.

Updating or Resetting the Console

To update or reset the console to fix the issue of Xbox One not opening settings, follow these steps:

First, try restarting the console by holding down the power button for 10 seconds until it completely shuts off. Then, turn it back on and check if the settings can now be accessed.

If restarting doesn’t work, try updating the console by connecting to the internet and checking for any available system updates. Make sure the console is connected to a stable internet connection to successfully download and install any updates.

If updating doesn’t resolve the issue, you may need to perform a factory reset. This will erase all data on the console, so make sure to back up any important information beforehand. To reset the console, go to Settings > System > Console info & updates > Reset console.

After resetting, set up the console again and check if the settings can now be opened without any issues.

FAQ

Why is my Xbox not letting me open anything?

Your Xbox may not be letting you open anything because it may need to be reset. Press and hold the Xbox button on your console for about 10 seconds to turn it off completely, then turn it back on and try opening the game or app again to see if the issue is resolved.

How do you reset an unresponsive Xbox One?

To reset an unresponsive Xbox One, you can hold down the Xbox button on the front of the console for about 10 seconds to shut it down completely. After that, unplug the power cable, plug it back in, and then press the Xbox button to turn it back on.

How do I fix my Xbox One not loading anything?

To fix your Xbox One not loading anything, you can try restarting or resetting your console, downloading and updating the Offline System Update file (OSU1), restoring your console to factory defaults, or ultimately getting it repaired if necessary.

Fix Android Text Message Notifications Not Working

Having trouble with Android text message notifications not working? Let’s dive into some possible solutions.

Examine Notification and Network Settings

To fix Android text message notifications not working, first check your notification settings. Go to Settings on your device, then Apps & Notifications, and select the messaging app you are using. Make sure notifications are enabled.

Next, ensure your network settings are properly configured. Check your Wi-Fi or data connection to make sure you are connected to the internet. If you are having trouble receiving messages, try toggling airplane mode on and off to reset your connection.

If the issue persists, consider restarting your device to refresh the system. Sometimes a simple reboot can resolve notification problems. Additionally, check for any software updates that may address notification issues.

By examining your notification and network settings, you can troubleshoot and fix Android text message notifications that are not working.

Resolve Software and Storage Conflicts

  • Clear Cache Partition:
    • Turn off the device.
    • Press and hold the Volume Up, Power, and Home buttons simultaneously.
    • Release the buttons when the Android System Recovery screen appears.
    • Use the Volume Down button to navigate to Wipe Cache Partition and press the Power button to select it.
    • Restart the device once the process is complete.
  • Uninstall Unused Apps:
    • Go to Settings on your device.
    • Tap on Apps or Applications.
    • Select the app you want to uninstall and tap Uninstall.
    • Repeat this process for all unused apps.
  • Update Android OS:
    • Go to Settings on your device.
    • Tap on System and then Software Update.
    • If an update is available, download and install it.
    • Restart your device after the update is complete.

Adjust Power and Disturbance Settings

Adjust the volume settings to ensure that your text message notifications are not muted or set too low.

Next, check the notification settings for your messaging app. Make sure that notifications are enabled and configured to your liking.

If you are still experiencing issues, consider adjusting the disturbance settings. Turn off Do Not Disturb mode and ensure that your messaging app is not on a blacklist that could be blocking notifications.

After making these adjustments, test your text message notifications to see if they are now working properly. If not, you may need to further troubleshoot or seek assistance from the manufacturer or a tech support professional.

Update System and Messaging Apps

To fix Android text message notifications not working, make sure to update your system and messaging apps regularly. Outdated software can cause notification issues.

Check for updates in the Play Store: Go to the Play Store, tap on the menu icon, and select “My apps & games.” Update any available system and messaging apps.

Reset app preferences: Go to Settings > Apps > Menu (three dots) > Reset app preferences. This will reset app permissions and notification settings.

Clear app cache: Go to Settings > Apps > select messaging app > Storage > Clear cache. This can resolve any temporary issues causing notifications not to work.

If the problem persists, consider restarting your phone or contacting customer support for further assistance. Keeping your system and apps updated is crucial for optimal performance.

F.A.Q.

Why am I not getting notifications even though they are turned on?

You are not receiving notifications even though they are turned on because Do Not Disturb or Airplane Mode may be activated, system or app notifications could be disabled, power or data settings may be blocking notifications, or outdated apps/OS software could be causing issues with notifications.

Why is my phone not notifying me when I get text messages from one person?

Your phone may not be notifying you when you receive text messages from one person because they might be accidentally blocked. Check your blocked contacts list in Settings > Messages and unblock them if necessary. Also, ensure that your phone is not on silent or do not disturb mode, as this can prevent text message alerts from coming through.

Why does my phone not make a sound when I get a text message?

Your phone may not make a sound when receiving a text message if it is in silent or vibrate-only mode, or if the sound or vibration for text message notifications has been turned off in the phone’s settings.

How do I get text notifications on my Android?

To get text notifications on your Android, you can adjust your notification settings in the Settings app. Open Settings, tap on Apps & notifications, then select the desired app for text notifications. From there, you can choose the type of notification (alerting or silent) and customize your preferences.