Fix YouTube Update Issue in 2 Minutes: Can’t Install or Update on Android

Having trouble installing or updating YouTube on your Android device? Learn how to fix this issue quickly in just 2 minutes.

Clearing Cached Files for Better Performance

To clear cached files on your Android device for better performance and potentially fix the YouTube update issue, follow these steps:

1. Go to your device’s Settings.
2. Scroll down and find the “Apps” or “Applications” section.
3. Look for YouTube in the list of installed apps.
4. Tap on YouTube and then select “Storage.”
5. Tap on “Clear Cache” to remove any temporary files that may be causing issues with updating or installing the app.

Restarting the Device and Updating Services

To fix the YouTube update issue on Android, restart your device first. This can help resolve any temporary glitches or bugs that may be causing the problem. After restarting, try updating the YouTube app again. If the issue persists, update your Google Play Services. This can often fix compatibility issues with app updates.

Go to the Google Play Store, search for Google Play Services, and click on the update button. Once the update is complete, try updating the YouTube app again. If the problem still persists, you may need to check for any system updates on your device or contact YouTube support for further assistance.

Downloading Updates from Third-Party Sites

  • Ensure the third-party site is reputable and trustworthy
  • Download the update from the site directly to your Android device
  • Enable the option to install apps from unknown sources in your device settings
  • Scan the downloaded file for viruses or malware before opening
  • Follow the on-screen instructions to complete the installation process

Adjusting Visual and Hardware Settings

To adjust visual and hardware settings to fix the YouTube update issue on Android, start by clearing the cache and data of the YouTube app. This can help resolve any update problems. Next, check your device’s storage to ensure there is enough space for the update to download and install properly. You can also adjust your device’s display settings to optimize the viewing experience on YouTube. If all else fails, try updating your device’s operating system to the latest version.

These simple steps can help resolve the YouTube update issue on your Android device quickly and effectively.

F.A.Q.

Why is my YouTube not getting updated?

Your YouTube may not be getting updated because of a cache issue. Try clearing the YouTube cache in your device settings to see if that resolves the issue.

How do I update YouTube when it is out of date?

To update YouTube when it is out of date, you can do so by opening the Google Play Store app, tapping your profile picture, selecting My apps and games, and then tapping on the Update button next to the YouTube app.

How do I update my YouTube version?

To update your YouTube version, go to the device settings and tap on the “manage” option. Look for the YouTube app and check when it was last updated to see if a newer version is available.

How do I download the latest version of YouTube?

To download the latest version of YouTube, you can find it on Google Play.

Fix Display Driver Error Windows 10: How to Troubleshoot and Resolve Display/Graphics Driver Issues

In this article, I will discuss how to troubleshoot and resolve display driver errors in Windows 10.

Update Graphics Drivers for Improved Stability

To update your graphics drivers for improved stability and performance, follow these steps:

Step 1: Press the Windows key + X on your keyboard to open the Start menu, then select Device Manager.

Step 2: In Device Manager, expand the Display adapters category to see your graphics card.

Step 3: Right-click on your graphics card and select Update driver.

Step 4: Choose to search automatically for updated driver software.

Step 5: Follow the on-screen instructions to complete the driver update process.

Updating your graphics drivers can help resolve display driver errors and improve the overall performance of your computer. Make sure to regularly check for updates to keep your system running smoothly.

Close Unnecessary Programs to Enhance Performance

  • Open Task Manager by pressing Ctrl+Shift+Esc
  • Click on the “Processes” tab to view all running programs
  • Identify programs that are not essential for your current tasks
  • Select the unnecessary programs and click on “End Task” to close them
  • Monitor performance improvements after closing unnecessary programs

Adjust Visual Effects Settings

To adjust the visual effects settings on Windows 10 and troubleshoot display driver issues, follow these steps:

1. Right-click on the Start menu and select “System.”

2. Click on “Advanced system settings” on the left-hand side.

3. Under the “Advanced” tab, click on “Settings” under the “Performance” section.

4. Choose the option for “Adjust for best performance” to disable all visual effects, or select “Custom” to choose which effects to enable or disable.

5. Click “Apply” and then “OK” to save your changes.

If you encounter any issues with the display driver after adjusting the visual effects settings, consider updating or reinstalling the driver to resolve the problem.

Increase GPU Processing Time Through Registry

To increase GPU processing time through the registry, you can tweak certain settings to optimize performance. Access the Windows Registry by pressing Windows key + R, typing in “regedit”, and hitting Enter. Navigate to HKEY_LOCAL_MACHINE\SOFTWARE\Microsoft\Windows\CurrentVersion and create a new key called GraphicsDrivers. Within this key, create a new DWORD value named TdrDelay and set it to 8 for an 8-second delay.

This change can prevent the display driver from timing out too quickly, giving your GPU more time to process data. Make sure to restart your computer for the changes to take effect. This simple tweak may help resolve display driver errors and improve overall graphics performance on Windows 10.

Uninstall and Reinstall Graphics Drivers

To uninstall and reinstall your graphics drivers to fix display driver errors in Windows 10, follow these steps:

1. Uninstall the current graphics drivers:
– Press the Windows key + X and select Device Manager.
– Expand the Display adapters category.
– Right-click on your graphics card and select Uninstall device.
– Check the box to delete the driver software for this device.
– Follow the on-screen instructions to complete the uninstallation process.

2. Reinstall the graphics drivers:
– Visit the official website of your graphics card manufacturer (such as Nvidia or AMD).
– Download the latest drivers for your specific graphics card model and Windows 10.
– Run the driver installation file and follow the on-screen instructions to install the new drivers.
– Restart your computer to apply the changes.

3. Test your display:
– Check if the display driver error has been resolved by opening a video or playing a game.
– If the issue persists, consider updating other drivers or seeking further assistance from a professional.

By uninstalling and reinstalling your graphics drivers, you can troubleshoot and resolve display and graphics driver issues in Windows 10 efficiently.

Monitor and Resolve GPU Overheating

Step Description
1 Check GPU Temperature: Use monitoring software to check the temperature of your GPU. If it is consistently running hot, it may be causing display driver errors.
2 Clean Dust Buildup: Dust can accumulate in the GPU fan and heatsink, causing it to run hotter than normal. Use compressed air to clean out any dust buildup.
3 Improve Airflow: Make sure your computer has proper airflow to prevent overheating. Consider adding additional fans or adjusting the placement of your computer to improve airflow.
4 Update GPU Drivers: Make sure your GPU drivers are up to date. Outdated drivers can cause display driver errors and overheating issues.
5 Underclock GPU: If your GPU is consistently overheating, consider underclocking it to reduce the heat output.

Reset Hardware to Default Settings

1. Open the Device Manager by right-clicking on the Start button and selecting “Device Manager” from the menu.

2. Locate the hardware device you want to reset, such as the graphics card, under the appropriate category.

3. Right-click on the device and select “Properties” from the context menu.

After opening the Properties window, navigate to the “Driver” tab and select “Roll Back Driver” to revert to the previous driver version. If that option is not available, you can choose “Uninstall Device” to remove the current driver completely.

4. Restart your computer to apply the changes and let Windows automatically install the default driver for the hardware device.

By resetting the hardware to default settings, you can troubleshoot and resolve display driver errors in Windows 10 efficiently.

Frequently Asked Questions

How to solve display driver problem in Windows 10?

To solve a display driver problem in Windows 10, you can roll back the driver by accessing Device Manager, expanding Display adapters, right-clicking the adapter, selecting Properties, going to the Driver tab, and then selecting Roll Back Driver and confirming with Yes.

How do I fix driver errors in Windows 10?

To fix driver errors in Windows 10, you can update the driver by going to the device’s Properties dialog box, clicking the Driver tab, and then clicking Update Driver to start the Hardware Update Wizard. Follow the instructions provided. If updating the driver does not resolve the issue, refer to your hardware documentation for further assistance.

What causes display driver issues?

Display driver issues can be caused by a variety of factors such as outdated or corrupted display drivers, GPU overheating, old or defective graphic cards, corrupt system or registry files, and too many programs running on the computer.

How do I fix a corrupted display driver?

To fix a corrupted display driver, you can start by using System Restore to return to a stable state. You can also run a Blue Screen Troubleshooter, uninstall faulty drivers, reset Windows, check for corrupted BIOS and update it if necessary, and update device drivers.

Fix Outlook Profile Not Configured Error

In my experience, fixing the Outlook profile not configured error can be a frustrating task.

Repairing Your Outlook Profile

If you are encountering the “Outlook Profile Not Configured Error,” follow these steps to repair your Outlook profile:

1. Close Outlook: Make sure Outlook is completely closed before proceeding with the repair process.

2. Open Control Panel: Go to the Control Panel on your computer to access the Mail settings.

3. Click on Mail: In the Control Panel, click on the Mail icon to open the Mail Setup – Outlook window.

4. Show Profiles: In the Mail Setup – Outlook window, click on the Show Profiles button.

5. Add a new profile: Click on the Add button to create a new profile for Outlook.

6. Enter your account information: Follow the prompts to enter your email account information and set up the new profile.

7. Set as default: Once the new profile is created, set it as the default profile for Outlook.

Utilizing Microsoft 365 Support Tools

  • Ensure your device is connected to the internet.
  • Check your network settings to make sure everything is properly configured.

Repair Step 2: Restart Outlook

  • Close Outlook completely.
  • Reopen Outlook to see if the error has been resolved.

Repair Step 3: Repair Office Installation

  • Open Control Panel on your computer.
  • Click on Programs and Features.
  • Find Microsoft Office in the list of installed programs.
  • Click on Repair and follow the on-screen instructions.

Ensuring Correct Account Setup

Outlook account setup page

To ensure correct account setup in Outlook and fix the “Profile Not Configured” error, follow these steps:

First, double-check that your email address and password are entered correctly in the account settings. Make sure to also verify the incoming and outgoing mail server settings provided by your email service provider.

Next, ensure that your computer is connected to the internet and that there are no connectivity issues. Try accessing other websites or sending emails from a different email account to confirm the internet connection is working properly.

If the issue persists, try restarting your computer and then opening Outlook again. Sometimes a simple restart can resolve the error.

If the problem still persists, consider deleting the existing email profile and creating a new one. To do this, go to the Control Panel, then click on “Mail” and choose “Show Profiles.” From there, you can add a new profile and set up your email account again.

After creating the new profile, make sure to set it as the default profile in Outlook to ensure that it is being used for sending and receiving emails.

Upgrading and Configuring Correctly

To fix the “Outlook Profile Not Configured Error,” you need to upgrade and configure correctly. First, make sure your Microsoft Outlook and Exchange Server are up to date by checking for any available Windows Updates.

Next, ensure that your Microsoft 365 subscription is active and properly linked to your Outlook account. If you are using Microsoft Windows, double-check that your operating system is compatible with the latest version of Outlook.

Download the latest version of Outlook from the official Microsoft website and follow the on-screen instructions to install it on your computer. Once installed, open the application and navigate to the settings menu to configure your email box.

If you encounter any issues during the configuration process, use the troubleshooting tools provided by Microsoft to identify and resolve any errors. Additionally, seek help from online forums or Microsoft’s support directory for further assistance.

After configuring your Outlook profile correctly, test the settings by sending a test email to ensure that the error has been resolved.

FAQs

Why is my Outlook not configured?

Your Outlook may not be configured due to a corrupted Outlook profile or damaged Outlook data file (OST or PST).

How do I configure my Outlook profile?

To configure your Outlook profile, you can use a command line switch. Right click the Windows Start button, select Run, then type “Outlook.exe /profiles” in the dialog box and press Enter. While Outlook is running, go to File > Account Settings > Change Profile.

Netflix Error Code 30103: Cannot Play Title – Fix Now

In my experience with Netflix, encountering error code 30103 can be frustrating.

Restart Your Device

Restarting your device can help refresh the system and clear any temporary glitches that may be causing the error. To do this, simply power off your device completely and then turn it back on after a few seconds.

If you are using a mobile device such as an iPhone, iPad, or iPod Touch, make sure to restart it by holding down the power button until the slider appears, then slide it to power off. Wait a few seconds before turning it back on.

For those using a computer or laptop, simply click on the Start button and select “Restart” from the options provided.

By restarting your device, you may be able to resolve the Netflix Error Code 30103 and start playing your favorite titles again. If the issue persists, you can proceed with further troubleshooting steps to identify and fix the underlying problem.

Update or Reinstall the App

When you update or reinstall the Netflix app, you are essentially refreshing the software and ensuring that it is running smoothly and up to date. This can help to clear any glitches or bugs that may be causing the error code to appear.

To update the Netflix app on your device, simply go to the app store or marketplace where you originally downloaded it from. Search for Netflix and see if there is an option to update the app. Click on the update button, and once it is complete, try playing the title again to see if the error has been resolved.

If updating the app does not work, you may need to reinstall it completely. To do this, first uninstall the current Netflix app from your device. Then, go back to the app store or marketplace and download the app again. Once it is installed, log in to your account and try playing the title once more.

By updating or reinstalling the Netflix app, you are taking proactive steps to troubleshoot and fix the Error Code 30103. These simple solutions can often resolve the issue quickly and easily, allowing you to continue enjoying your favorite content without any further interruptions.

Check Network Compatibility

  • Ensure that your device is connected to the internet and that the connection is stable.
  • Check if your device is compatible with the network you are using, especially if you are using a VPN or proxy server.
  • Restart your modem or router to refresh the network connection.
  • Try connecting to a different network to see if the issue is specific to your current network.

Enhance Wi-Fi Connection and Reset Network Settings

To enhance your Wi-Fi connection and potentially fix the Netflix Error Code 30103, you can try resetting your network settings. This can help resolve any issues that may be causing the error and improve your overall internet connection.

1. Reset Network Settings: To reset your network settings on an iPhone or iPad, go to Settings > General > Reset > Reset Network Settings. This will clear any saved Wi-Fi passwords and other network settings, so make sure you have this information handy before proceeding.

2. Restart Your Router: Sometimes simply restarting your router can help improve your Wi-Fi connection. Unplug your router, wait a few seconds, and then plug it back in. This can help refresh your connection and potentially resolve any network issues.

3. Check Your Wi-Fi Signal: Make sure you have a strong Wi-Fi signal where you are trying to stream Netflix. If your signal is weak, consider moving closer to your router or using a Wi-Fi extender to boost the signal.

4. Check for Interference: Other electronic devices or appliances in your home could be causing interference with your Wi-Fi signal. Keep devices like microwaves, cordless phones, and Bluetooth speakers away from your router to avoid signal disruptions.

5. Contact Your Internet Service Provider: If you continue to experience issues with your Wi-Fi connection and streaming Netflix, contact your internet service provider for further assistance. They may be able to troubleshoot any network issues on their end.

FAQ

Why does my Netflix keep saying cannot play titles?

Your Netflix may be saying “cannot play titles” due to a network connection issue preventing your device from accessing Netflix.

Why is my Netflix saying not part of my household?

Your Netflix is saying not part of your household because Netflix was unable to link your TV with your Netflix Household. To resolve this issue, you may need to verify your device or create a new account.

How do I clear my Netflix error code?

To clear your Netflix error code, you can start by signing out of Netflix on your device. If you are on an error screen, select More Details, then choose Sign out or Reset. After signing back in, try accessing Netflix again to see if the error has been resolved.

How to fix error 40103 on Netflix?

To fix error 40103 on Netflix, you can start by turning off any VPN you may be using. Additionally, resetting the network settings on the device in question and restoring your modem or router to its default settings may also help resolve the issue.

HP Printer Unavailable Offline Driver Issues Fix

In this article, we will discuss how to fix HP printer offline driver issues.

Updating Printer Drivers

  • Check for driver updates:
    • Go to the HP website and search for your printer model
    • Download the latest driver software available
    • Install the driver on your computer
  • Use Windows Update:
    • Go to Settings > Update & Security > Windows Update
    • Check for updates and install any related to your printer
  • Update drivers manually:
    • Open Device Manager by pressing Windows key + X and selecting Device Manager
    • Locate your printer under Printers or Imaging devices
    • Right-click on the printer and select Update Driver
    • Choose Search automatically for updated driver software

Uninstalling and Reinstalling Printer Drivers

If you are facing issues with your HP printer being offline or unavailable, one potential solution is to uninstall and reinstall the printer drivers. This can help resolve any driver-related issues that may be causing the problem.

First, you will need to uninstall the current printer drivers on your computer. To do this, go to the Control Panel on your computer and select “Devices and Printers.” Find your HP printer in the list of devices, right-click on it, and select “Remove device.” This will uninstall the printer drivers from your computer.

Next, you will need to reinstall the printer drivers. You can do this by visiting the HP website and downloading the latest drivers for your specific printer model. Make sure to download the correct drivers for your operating system.

Once the drivers are downloaded, run the installation file and follow the on-screen instructions to install the drivers on your computer. Make sure to restart your computer after the installation process is complete.

After reinstalling the printer drivers, check to see if the issue has been resolved. Try printing a test page to see if the printer is now available and online. If the problem persists, you may need to troubleshoot further or contact HP support for assistance.

In some cases, uninstalling and reinstalling the printer drivers can help resolve offline or unavailable printer issues. It is a simple and effective troubleshooting step that can be done relatively quickly.

Remember to always keep your printer drivers up to date to avoid any potential issues in the future. Regularly checking for driver updates on the HP website can help ensure that your printer continues to work properly.

Checking for Windows Updates

Windows update screen

To check for Windows updates that could potentially fix HP printer offline driver issues, follow these steps:

1. Open the Windows Update settings: Click on the Start menu, then select Settings. Click on Update & Security, then Windows Update. Click on Check for updates to see if there are any available updates for your system.

2. Install any pending updates: If there are updates available, click on Download and install. Make sure to follow the on-screen instructions to complete the update process.

3. Restart your computer: After installing updates, it’s important to restart your computer to ensure that the changes take effect.

Checking for Windows updates regularly can help ensure that your system is up to date with the latest drivers and software, which can potentially resolve HP printer offline driver issues. Remember to also check for updates for your printer driver specifically, as HP may release updates to address known issues.

Running System File Checker (SFC) Scan

To run a System File Checker (SFC) scan on your HP Printer to fix offline driver issues, follow these steps:

First, open the Command Prompt by searching for it in the Windows search bar.

Next, right-click on Command Prompt and select “Run as administrator” to ensure you have the necessary permissions to run the scan.

In the Command Prompt window, type “sfc /scannow” and press Enter to start the System File Checker scan. This process may take some time to complete, so be patient.

The scan will check for any corrupted system files that may be causing your HP Printer to go offline or have driver issues. If any issues are found, the SFC scan will attempt to repair them automatically.

Once the scan is complete, restart your computer to apply any repairs that were made during the process.

After restarting your computer, check if the HP Printer is now available and online. If the issue persists, you may need to further troubleshoot the printer driver or connectivity issues.

By running a System File Checker scan, you can help resolve offline driver issues with your HP Printer and ensure smooth printing functionality.

Remember to regularly perform system maintenance tasks like SFC scans to keep your computer and devices running smoothly.

If you continue to experience issues with your HP Printer, consider reaching out to HP customer support for further assistance.

FAQ

Why does my HP printer say unavailable?

Your HP printer says unavailable because Windows is unable to locate the correct driver needed to communicate with the printer. This could be caused by incorrect, corrupted, or outdated drivers, or by system access permission issues.

Why is my HP printer never available?

Your HP printer may not be available because it is not connected to the same network as your computer or mobile device. Make sure the wireless signal is on and check if the Wireless light on your printer is illuminated.

How do I get my HP printer back online?

To get your HP printer back online, check the Wi-Fi network connection by ensuring the printer is within 8 m (26 ft) of the router or range extender and check the Wireless light. Also, check the wired network (Ethernet) connection by disconnecting the Ethernet cable from the router and printer. Finally, check the USB connection.

Why is my HP printer unavailable on the HP Smart App?

Your HP printer may be unavailable on the HP Smart App because of connectivity issues or a glitch in the app. To resolve this, try resetting the printer, re-adding it to the app, and clearing the app cache.

Why Can’t My SD Card Be Read – Fixing Errors & Issues

Having trouble accessing the data on your SD card? Learn how to fix common errors and issues preventing your device from reading the card.

Reinstall the SD Card Reader Driver

SD card reader driver icon

Right-click on the SD card reader and select “Uninstall device.” Once it is uninstalled, right-click on any item in the list and select “Scan for hardware changes.” Windows will automatically reinstall the driver for the SD card reader.

After the driver has been reinstalled, try accessing the SD card again to see if the issue has been resolved. If not, you may need to consider other troubleshooting steps.

Assign a New Drive Letter

  • Open Disk Management by typing “disk management” in the Windows search bar
  • Locate your SD card in the list of drives
  • Right-click on the SD card and select Change Drive Letter and Paths
  • Click Change and then choose a new drive letter from the dropdown menu
  • Click OK to save the changes
  • Close Disk Management and re-insert the SD card to see if it can be read now

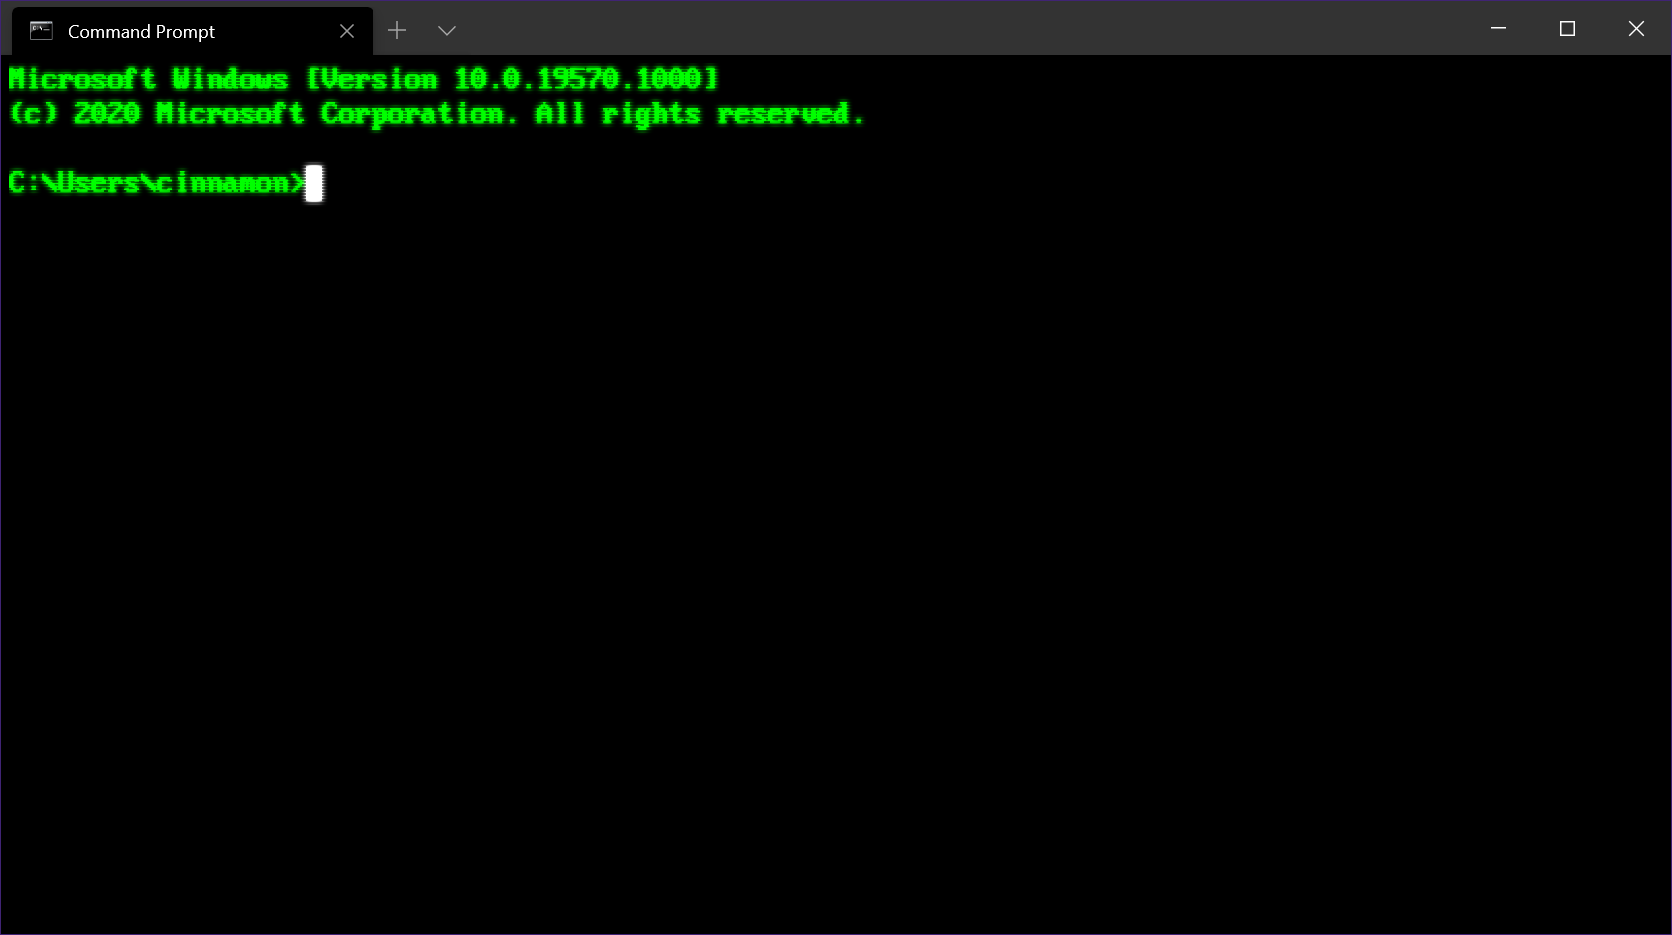
Repair SD Card Corruption with CHKDSK

To repair SD card corruption using CHKDSK, follow these steps:

Step 1: Insert the SD card into your computer’s card reader.
Step 2: Press the Windows key + X and select “Command Prompt (Admin)” to open a command prompt window.
Step 3: Type chkdsk [drive letter]: /f and press Enter. Replace [drive letter] with the letter assigned to your SD card.

If CHKDSK detects and fixes any errors on the SD card, you should be able to access your files again. If the issue persists, consider using data recovery software to retrieve your files before formatting the SD card.

Create a New Partition

Right-click on the SD card and select “Shrink Volume” to create unallocated space. Enter the amount of space you want to shrink and click “Shrink” to create unallocated space on the SD card.

Next, right-click on the unallocated space and select “New Simple Volume.” Follow the on-screen instructions to create a new partition on your SD card. Assign a drive letter to the new partition and format it with a file system such as FAT32 or exFAT.

Once the new partition is created, you should be able to access your SD card without any issues. This process can help resolve errors and issues that may be preventing your SD card from being read properly.

Recover Hidden or Lost Data

If you are unable to read your SD card, it may be due to hidden or lost data. To recover this data, try using data recovery software specifically designed for SD cards. These programs can help retrieve lost files and repair any errors on the card.

In addition, try using a different card reader or USB port to see if the issue lies with the hardware. Sometimes, a faulty reader or port can prevent the card from being read properly. If this doesn’t work, try using a different computer to see if the issue is with your current system.

If you are still unable to read the SD card, it may be due to a corrupted file system. Try formatting the card to fix any errors that may be causing the issue. Just be aware that formatting will erase all data on the card, so make sure to back up any important files before proceeding.

Clean the SD Card Slot

SD card slot with dust and debris

After cleaning, try inserting the SD card again to see if it can be read. If the issue persists, try using a different SD card to determine if the problem is with the card or the slot itself.

If the slot continues to have trouble reading any SD card, it may need to be professionally cleaned or repaired. Consult a technician or the device manufacturer for further assistance.

Regularly cleaning the SD card slot can help prevent future issues with reading or writing data to the card. Keep the slot free from dust and debris to ensure smooth operation.

Format the SD Card

To format your SD card, follow these steps:

First, insert the SD card into your computer or laptop.

Next, open File Explorer and locate the SD card under “This PC” or “My Computer.”

Right-click on the SD card icon and select “Format” from the drop-down menu.

A new window will appear with formatting options. Choose the desired file system (such as FAT32 or exFAT) and allocation unit size.

Check the box next to “Quick Format” to speed up the process.

Click “Start” to begin formatting the SD card. Note that all data on the card will be erased during this process.

Once the formatting is complete, you will receive a message indicating the successful completion of the format.

Eject the SD card safely from your computer and reinsert it to check if the issue has been resolved.

Check SD Card Compatibility and Insertion

If the SD card is still not being recognized: It may be necessary to format the SD card. Be aware that formatting will erase all data on the card, so make sure to back up any important files beforehand. Insert the SD card into a computer, right-click on the drive, and select “Format.” Choose the appropriate file system and allocation unit size, then click “Start” to format the card.

If the issue persists: The problem may be related to the card reader or device driver. Update the device driver for the card reader or try using a different card reader. If all else fails, the SD card may be damaged beyond repair and will need to be replaced.

Repair or Replace Faulty Hardware

If repairing the SD card does not work, it might be time to consider replacing the faulty hardware. Make sure to backup any important data before proceeding.

Consider replacing the SD card with a new one to see if the issue persists. If the problem is not with the SD card itself, it could be related to the card reader or the device you are using.

If the SD card reader is the issue, try using a different USB port on your computer or a different card reader altogether. This can help determine if the problem lies with the reader or the SD card.

If you suspect the device you are using is causing the issue, try inserting the SD card into a different device to see if it can be read. This can help pinpoint where the problem is originating from.

If all else fails, contact the manufacturer of the SD card or the device you are using for further assistance. They may be able to provide additional troubleshooting steps or recommend a replacement.

Clean SD Card Contacts

Next, use a pencil eraser to lightly rub the contacts to remove any corrosion or buildup that may be affecting the connection.

If the contacts are still not clean, try using a small amount of rubbing alcohol on a cotton swab to gently clean the contacts.

Once the contacts are clean, reinsert the SD card into the device and check to see if it is now being read properly.

If the issue persists, it may be a sign of a more serious problem with the SD card itself, such as bad sectors or write protection. Consider backing up the data on the card and seeking professional help if needed.

Unlock and Secure SD Card Insertion

If the problem persists, try using a different USB port or card reader to rule out any connection issues. You can also update the drivers for the card reader in your device manager. If you are using Windows, you can also try assigning a new drive letter to the SD card via Disk Management.

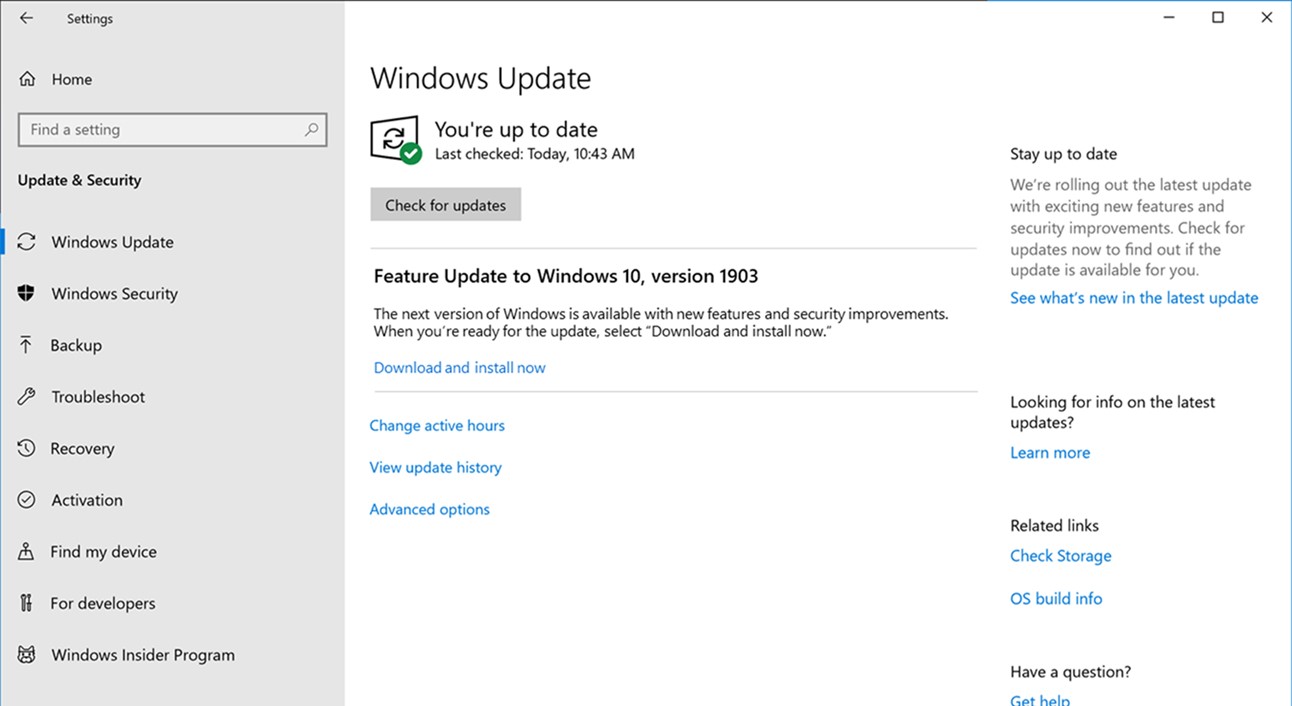
Update Necessary Drivers

1. Press the Windows key + X on your keyboard and select Device Manager from the menu that appears.

2. Locate the SD card reader under the Disk drives or Universal Serial Bus controllers section.

3. Right-click on the SD card reader and select Update driver.

4. Choose Search automatically for updated driver software and follow the on-screen instructions to complete the update process.

If updating the drivers does not resolve the issue, consider checking the SD card for physical damage or trying it on another device to see if the problem persists.

Protect and Maintain Your SD Card

To protect and maintain your SD card, always handle it carefully and avoid bending or dropping it. Keep it in a protective case when not in use to prevent physical damage. Regularly backup the data on your SD card to prevent data loss in case of errors. Avoid using the same SD card in multiple devices to reduce the risk of corruption. Scan the SD card for errors using the CHKDSK tool on Windows.

If your SD card is write-protected, check the physical switch on the card and make sure it is in the correct position. Try using a different card reader or USB port to see if the issue is with the device or the card itself. If you continue to experience issues, consider formatting the SD card to resolve any file system errors.

F.A.Qs

How do I fix my SD card that won’t read?

To fix an SD card that won’t read, you can try restarting the device, cleaning the contacts, checking compatibility, using another card reader, accessing Disk Management, or updating device firmware.

Why is my SD card not being detected?

Your SD card is not being detected likely due to it being in an unsupported file format or damaged. Try using a new SD card instead and force restart your device to resolve the issue.

How do I make my SD card readable again?

To make your SD card readable again, you can connect it to your computer, access This PC, right-click on the SD card, select Properties, go to Tools, and choose the Check option, then click on Scan and repair drive.

Why wont my SD card go into the slot?

Your SD card may not go into the slot if it is not inserted far enough to lock into place properly. Make sure to remove the battery (if applicable) and use a fingernail or the side of a coin to push the card in until you hear a clicking sound.

Windows Installer Error 0x800b0101 Fix Guide

In my experience troubleshooting Windows Installer errors, Error 0x800b0101 is a common issue that can be frustrating to deal with. In this guide, I will provide you with a step-by-step solution to fix this error and get your installation process back on track.

Correct Time Settings

1. Click on the clock in the bottom right corner of your screen.
2. Select “Adjust date/time.”
3. Toggle the “Set time automatically” option to ON.
4. Choose your correct time zone from the drop-down menu.

By ensuring your system has the right time settings, you can prevent errors like Windows Installer Error 0x800b0101 from occurring during installation. If you continue to experience issues, consider running a System File Checker scan or checking for updates through Windows Update.

Having the correct time settings is crucial for smooth installation processes on devices like HP Envy laptops or MacBook Pro computers. It ensures that your system is in sync with the correct time and can communicate effectively with servers.

Utilize Windows Update Troubleshooter

  • Press Windows key + I to open Settings.
  • Select Update & Security.
  • Click on Troubleshoot in the left pane.
  • Scroll down and click on Windows Update.
  • Click on Run the troubleshooter and follow the on-screen instructions.

Execute DISM and SFC Scans

Command prompt window

To run a DISM scan, open Command Prompt as an administrator and type “DISM /Online /Cleanup-Image /RestoreHealth”. This will scan and repair any issues with the Windows image.

For an SFC scan, type “sfc /scannow” in Command Prompt and press Enter. This will scan your system files for errors and automatically fix any issues it finds.

After running these scans, restart your computer and try installing the program again. If the error persists, consider seeking further assistance from Microsoft support or a professional technician.

Clear Update Cache and Rename Files

To fix Windows Installer Error 0x800b0101, start by clearing the update cache. To do this, open Command Prompt as an administrator and type “net stop wuauserv” followed by “net stop cryptSvc” and “net stop bits”. Then, navigate to C:\Windows\SoftwareDistribution and delete all the contents. Next, restart the services by typing “net start wuauserv”, “net start cryptSvc”, and “net start bits” in Command Prompt.

Another step to resolve the error is to rename the SoftwareDistribution folder. To do this, open Command Prompt as an administrator and type “net stop wuauserv”. Then, navigate to C:\Windows and locate the SoftwareDistribution folder. Right-click on it, select Rename, and change the name to SoftwareDistribution.old. Finally, restart the Windows Update service by typing “net start wuauserv” in Command Prompt.

FAQs

How do I fix error code 0x800b0101?

To fix error code 0x800b0101, you can try changing the date and time, running the Windows Update Troubleshooter, clearing the Windows Update Cache, renaming the Pending.xml file, and running SFC and DISM scans.

What is error code 0x800b0101 on Yahoo Mail?

Error code 0x800B0101 on Yahoo Mail indicates a problem with a certificate or digital signature within the program.

Fix Dell Inspiron DVD Drive Not Working Windows 10

In this article, I will discuss how to fix the Dell Inspiron DVD drive not working on Windows 10.

Recognizing Symptoms

If you are experiencing any of these symptoms, it is important to troubleshoot the issue promptly. Check the Device Manager to see if the DVD drive is being detected by the system. You can also try updating the device driver or running the Hardware and Devices troubleshooter in Windows 10.

Another common fix is to check the Windows Registry for any issues related to the DVD drive. You can also try using the built-in Windows troubleshooter to automatically fix any problems with the drive. If all else fails, you may need to contact Dell technical support for further assistance.

Identifying the Cause

Dell Inspiron DVD drive not working

To identify the cause of your Dell Inspiron DVD drive not working on Windows 10, first, check if the device is properly connected to your computer. If the connections are secure and the issue persists, check the Device Manager to see if there are any exclamation marks or error messages next to the DVD drive.

If the DVD drive is not showing up in the Device Manager, you may need to update the device driver or run a troubleshooter to diagnose and fix any issues.

Additionally, you can check the Windows Registry to see if there are any entries that may be causing the problem. Sometimes, incorrect registry settings can prevent the DVD drive from functioning properly.

Steps to Resolution

  • Open Device Manager by pressing Win+X and selecting it from the list
  • Expand the category for DVD/CD-ROM drives
  • Right-click on the DVD drive and select Update Driver
  • Choose Search automatically for updated driver software
  • Follow the on-screen instructions to complete the driver update process

Check DVD Drive Connection

  • Power off your Dell Inspiron laptop
  • Remove the DVD drive from the laptop
  • Clean the connectors on the DVD drive and in the laptop
  • Reconnect the DVD drive securely
  • Power on your laptop and check if the DVD drive is detected

Run Hardware Troubleshooter

  • Open Settings by pressing Win+I
  • Go to Update & Security
  • Select Troubleshoot from the left pane
  • Click on Hardware and Devices and run the troubleshooter
  • Follow the on-screen instructions to fix any detected issues

Updating Device Drivers and BIOS

To fix the Dell Inspiron DVD drive not working in Windows 10, a common solution is to update the device drivers and BIOS. This can help ensure that the DVD drive is compatible with the operating system and running smoothly.

To update the device drivers, go to the Device Manager by right-clicking on the Start menu and selecting it. Look for the DVD drive under the “DVD/CD-ROM drives” section, right-click on it, and select “Update driver.” You can choose to search automatically for updated driver software or browse your computer for driver software.

To update the BIOS, visit the Dell support website and enter your service tag or model number to find the latest BIOS update for your specific Dell Inspiron model. Follow the instructions on the website to download and install the BIOS update.

After updating the device drivers and BIOS, restart your computer to apply the changes. This may resolve the issue with the DVD drive not working on your Dell Inspiron in Windows 10.

Configuring Auto-Play and DMA Settings

To configure Auto-Play and DMA settings on your Dell Inspiron DVD drive in Windows 10, follow these steps:

1. Adjust Auto-Play settings:
– Open Control Panel and click on “AutoPlay.”
– Choose the desired action for different types of media.
– Save changes.

2. Enable DMA settings:
– Press the Windows key + X and select “Device Manager.”
– Expand “IDE ATA/ATAPI controllers” and right-click on the DVD drive.
– Go to “Properties” and click on the “Advanced Settings” tab.
– Check the box to enable DMA if available.

3. Restart your computer:
– After making these changes, restart your system to apply the settings properly.

By configuring Auto-Play and DMA settings, you can troubleshoot your Dell Inspiron DVD drive not working in Windows 10 efficiently.

Utilizing Dell’s Diagnostic Tools

To fix your Dell Inspiron DVD drive not working on Windows 10, you can utilize Dell’s diagnostic tools to troubleshoot the issue quickly and efficiently.

Firstly, ensure that the DVD drive is properly connected to your laptop and that the drivers are up to date.

Next, open Dell’s diagnostic tools by searching for “Dell SupportAssist” in the Windows search bar and running a scan on the optical disc drive.

If any issues are detected, follow the on-screen instructions to resolve them.

Additionally, you can try updating the firmware of the DVD drive through Dell’s website to ensure compatibility with Windows 10.

By using Dell’s diagnostic tools, you can easily identify and fix any problems with your Inspiron’s DVD drive, allowing you to enjoy your favorite movies and software without any interruptions.

Restoring System to Default Settings

To restore your Dell Inspiron system to default settings, follow these steps:

1. Click on the Start button and select Settings.
2. In the Settings window, click on Update & Security.
3. Select Recovery from the left menu.
4. Under Reset this PC, click on Get started.
5. Choose Remove everything to restore your system to default settings.
6. Follow the on-screen instructions to complete the process.

Restoring your system to default settings can help resolve issues with your DVD drive not working on Windows 10 by eliminating any potential software conflicts or errors.

Accessing Additional Resources and Support

To access additional resources and support for fixing your Dell Inspiron DVD drive not working on Windows 10, you can start by reaching out to technical support for assistance. They can provide guidance specific to your issue and help troubleshoot any problems you may be experiencing.

Additionally, you can try performing a System Restore to revert your system back to a previous state where the DVD drive was working properly. This can help resolve any software conflicts that may be causing the issue.

If the problem persists, you can also check for any updates for your operating system or device drivers related to the DVD drive. Make sure your Windows is up to date and the drivers are properly installed.

It’s also recommended to check the Device Manager in Windows to see if the DVD drive is recognized and functioning correctly. You can access the Device Manager by right-clicking on the Windows icon and selecting it from the context menu.

FAQs

How do I fix Windows 10 not recognizing my DVD?

To fix Windows 10 not recognizing your DVD, you can start by checking the CD/DVD drive name in Device Manager, using the Hardware and Devices troubleshooter, resetting the computer power, and checking the drive cable connections for desktop tower computers.

Why isn’t my DVD playing on my Dell laptop?

Your DVD may not be playing on your Dell laptop due to outdated or corrupted drivers for the optical drive, or issues with the Dell-provided playback software. Try updating or reinstalling the drivers, and uninstalling and reinstalling the playback software. If the issue persists, consider performing a Windows System Restore or restoring your computer to factory defaults.

Why is my DVD drive not detecting discs?

Your DVD drive may not be detecting discs because the data surface may be damaged. Check for scratches or other damage on the disc that may be preventing it from being read properly.

How do I get my computer to recognize my DVD drive?

To get your computer to recognize your DVD drive, you can start by checking if the drive is recognized in BIOS/System Setup. Then, try running the Hardware and Devices troubleshooter and the Microsoft CD/DVD Fix it troubleshooter. Lastly, update or reinstall the driver for the optical drive.

Google App Won’t Search: Fixing Search Bar Issues

Having trouble with your Google app search bar not working properly? Let’s troubleshoot the issue together.

Restart or Reboot Devices

To restart or reboot your device, press and hold the power button until the options menu appears. Then, select the restart option. If the issue persists, try turning off the device completely and then turning it back on after a few seconds. This can help resolve any temporary glitches affecting the search bar on your Google app.

Additionally, clearing the cache of the Google app may also fix the problem. To do this, go to Settings > Apps > Google > Storage > Clear Cache. Restart the device after clearing the cache to see if the search bar starts working properly.

Check and Troubleshoot Network Connection

  • Restart your router and modem
    • Unplug the power cables from both your router and modem
    • Wait for 30 seconds
    • Plug the power cables back in
    • Wait for the devices to restart
  • Check your network cables
    • Ensure all cables are securely connected to your router and modem
    • Check for any visible damage on the cables
    • Try using a different cable, if possible
  • Restart your computer
    • Click on the “Start” menu
    • Select “Restart”
    • Wait for your computer to reboot

Clear Cache and Cookies in Browser and Google App

To fix search bar issues on the Google App, a common solution is to clear the cache and cookies in both the browser and the Google App. This can help resolve any glitches or bugs causing the search bar not to function properly.

After clearing the cache and cookies, try restarting the Google App to see if the issue has been resolved. If the problem persists, you may need to uninstall and reinstall the Google App to ensure a fresh installation without any lingering issues.

This process can help refresh the app and potentially resolve any search bar issues you may be experiencing.

Disable and Re-enable Google or Browser Extensions

If you are using a different browser, the process may vary slightly but will generally involve accessing the extensions menu and toggling the switches on and off. This can help resolve any issues with the search bar not working properly.

Update Browser and Google App

To fix issues with the Google App search bar, make sure to update your browser and Google App to the latest versions. Check Google Play for any available updates for the Google App and download them. Similarly, update Google Chrome on your device to ensure smooth functionality. If the problem persists, try clearing the cache and data of the Google App through the settings menu. You can also uninstall and reinstall the Google App to troubleshoot any glitches.

Remove and Re-add Google Search Widget

To remove and re-add the Google Search Widget on your Android device, first, long-press on the widget until you see options to remove it. Tap on the remove option to delete the widget from your home screen. Next, go to the Google Play Store and search for the Google app. Download and install the app if you don’t already have it. Once installed, go back to your home screen and long-press to add a new widget.

Look for the Google Search Widget and drag it to your desired location on the screen. This should fix any search bar issues you were experiencing.

Check Google Service Status and DNS Settings

To check Google Service Status, visit the Google Apps Status Dashboard online. Ensure that all Google services are operational before troubleshooting further.

Next, check the DNS settings on your device. Go to the settings menu and locate the network settings. Check that the DNS settings are correct and match those recommended by your internet service provider.

If the issue persists, try clearing the cache on the Google App. This can help resolve any software bugs or glitches that may be causing the search bar issues.

Additionally, try updating the Google Chrome app on your Android device. Sometimes outdated versions can cause search bar problems.

Scan Device for Malware or Adware

To scan your device for malware or adware, download a reputable antivirus app from the Google Play Store. Run a full scan of your device to detect any malicious software. If the scan identifies any threats, follow the app’s instructions to remove them. Additionally, clear the cache and data of the Google app to eliminate any potential glitches. You can do this by going to Settings > Apps > Google > Storage, then selecting Clear Cache and Clear Data. Once you have completed these steps, restart your device and check if the search bar issue has been resolved.

Configure or Change DNS Settings

To configure or change DNS settings on your Android device, follow these steps. First, go to the Settings menu on your smartphone. Next, locate the Network & Internet section and tap on it. Then, select the Wi-Fi option and find the network you are connected to.

After that, tap on the network name and choose the IP settings section. Finally, select “Static” and enter the DNS server information provided by your ISP. This should resolve any DNS-related issues with the Google app not searching properly.

Use Specialized Tools or Methods to Resolve Issues

To resolve issues with the Google app search bar, try using specialized tools or methods. One option is to clear the cache of the Google app on your Android device. This can help eliminate any glitches that may be affecting the search function. Another method is to uninstall and reinstall the Google app, which can also fix any software bugs that are causing the issue. If these steps don’t work, consider using the Android Debug Bridge (ADB) to debug the app and identify the root of the problem.

By using these specialized tools or methods, you can effectively troubleshoot and resolve search bar issues with the Google app.

Frequently Asked Questions

Why is my Google not letting me search anything?

Your Google may not be letting you search anything due to browser issues. To troubleshoot this problem, try clearing your browser history and cache, and disabling any browser extensions that could be causing compatibility problems.

Why is Google not showing searches?

Google is not showing searches because there may be conflicts or inconsistencies caused by temporary files and data stored in your browser. Clearing your cache and cookies can often resolve this issue by refreshing your browser and eliminating any potential glitches.

Why is my Google app not working?

Your Google app may not be working because there could be errors causing it to stop. Try force-stopping the app and updating your Android to see if that resolves the issue.

Why isn’t Google search working on my iPhone?

Google search may not be working on your iPhone due to a poor or non-existent network connection. Make sure your device is not in Airplane Mode and check the stability of your Wi-Fi connection.

Brother printer printing black pages with white text in inverse

Experiencing an issue with your Brother printer where it is printing black pages with white text in inverse?

Identifying the Cause

To identify the cause of your Brother printer printing black pages with white text in inverse, first check the printer settings. Make sure the printer is not set to print in negative mode or grayscale. Additionally, check the ink levels and replace any low cartridges. Clean the print head and check for any clogs that may be causing the issue. If the problem persists, consider updating the printer drivers.

Updating Printer Drivers

Printer driver update icon

To update your Brother printer drivers, go to the official Brother website and locate the driver download section. Enter your printer model and operating system details. Download the latest driver and follow the on-screen instructions to install it. Ensure to restart your computer after installation to apply the changes.

This should resolve any issues with black pages and white text printing in inverse.

Checking Printer Settings

To check the printer settings on your Brother printer, first, access the printer properties on your computer. Go to the “Advanced” tab and select “Print in Grayscale” or “Black and White” option. Ensure that the color settings are not causing the inverse printing issue. Make sure the paper type and size settings match the paper loaded in the printer.

Adjust the settings accordingly to resolve the issue.

Troubleshooting Cartridge Issues

Illustration of a printer cartridge being removed or replaced

  • Check the ink levels:
    • Access the printer settings on the device or computer.
    • Look for an option to check the ink levels of the cartridges.
    • If the levels are low, replace the cartridge with a new one.
  • Inspect the cartridges:
    • Open the printer cover to access the cartridges.
    • Remove the cartridges carefully and inspect them for any damage or leaks.
    • If there is any issue, replace the cartridge with a new one.
  • Clean the cartridges:
    • Remove the cartridges from the printer.
    • Use a lint-free cloth and some distilled water to gently clean the contacts on the cartridges.
    • Let the cartridges dry completely before reinserting them into the printer.
  • Reset the printer:
    • Turn off the printer and unplug it from the power source.
    • Wait for a few minutes before plugging it back in and turning it on.
    • Print a test page to see if the issue is resolved.

F.A.Qs

Why is my printer printing Black pages when it has ink?

Your printer is printing black pages because the ink or toner cartridges may have become dislodged, there might be the wrong paper size loaded, the printer head nozzles could be clogged, or there may be blank pages in the document being printed.

Why is my Brother printer not printing Black ink?

Your Brother printer may not be printing black ink due to low ink levels or a clogged print head. Make sure the black ink cartridge has enough ink and try running a print head cleaning function.

Why is my printer printing white on Black?

Your printer is printing white on black because of either empty or low color ink/toner cartridges or a blocked printhead. Check and replace cartridges if needed, and clean the printhead to ensure proper ink flow.