Unraveling the perplexing conundrum of printing emails from your default printer
Check for updates
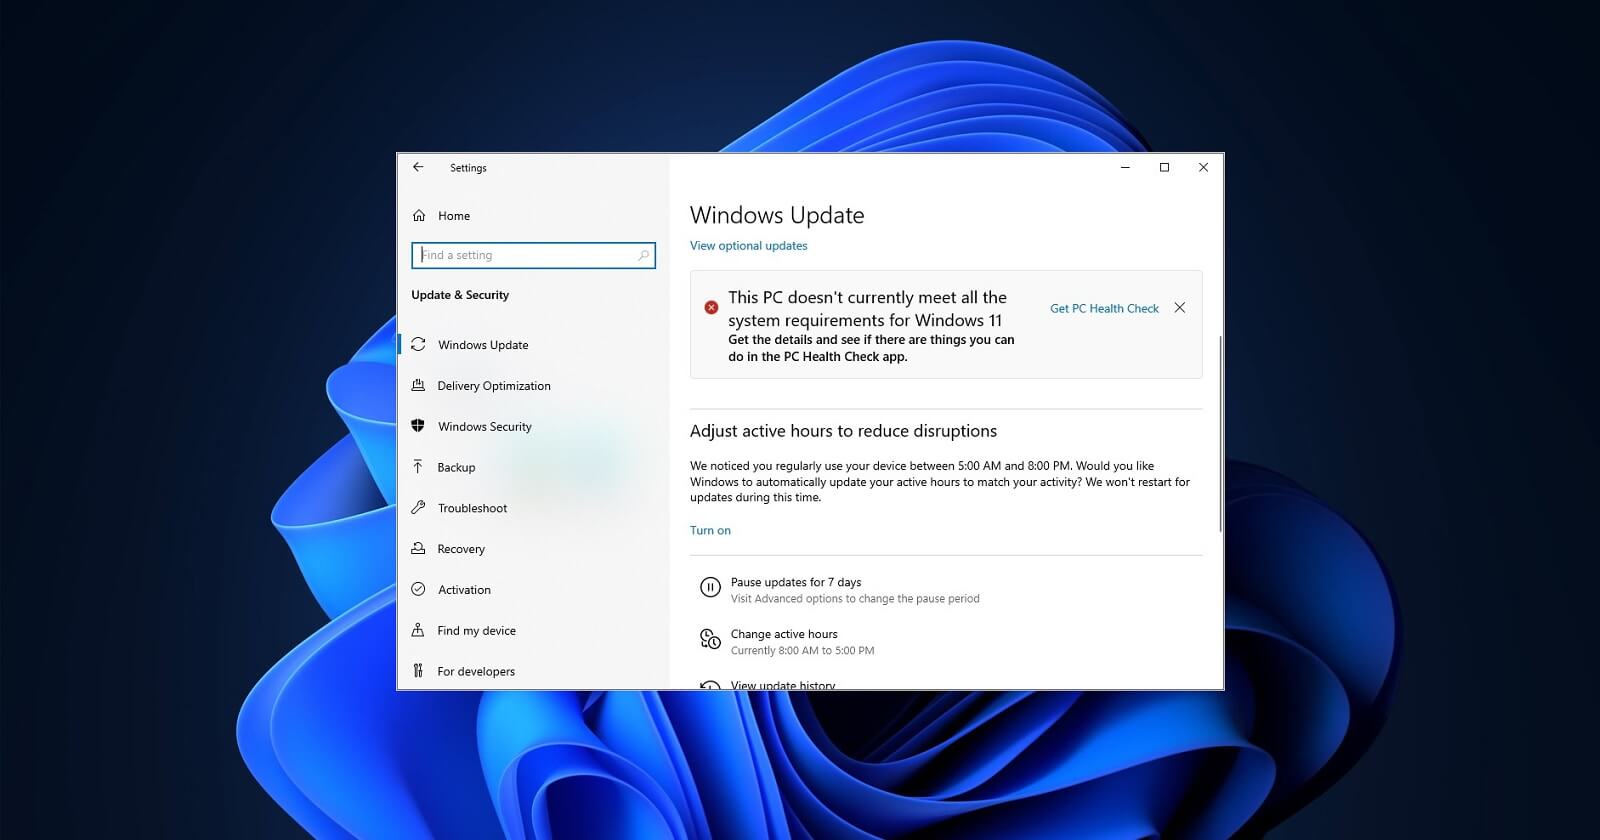
– First, make sure you have the latest updates for Windows 10 installed on your PC. Updates often include bug fixes and improvements that can resolve printing issues.
– Open the Windows 10 Settings app by pressing Windows Key + I, then click on “Update & Security”.
– In the left-hand menu, click on “Windows Update” and then click on the “Check for updates” button.
– If updates are available, Windows will download and install them. Make sure to restart your PC if prompted.
– Additionally, check for updates specifically for the Windows 10 Mail app. Open the Microsoft Store app, click on the three dots in the top right corner, then click on “Downloads and updates”. If an update is available for the Mail app, click on “Get updates” to install it.
– After updating, try printing your emails again to see if the issue is resolved.
If the problem persists, there may be other factors causing the issue. Consider reaching out to Microsoft support for further assistance.
Update printer drivers
To update printer drivers and resolve the issue of not being able to print emails from your default printer, follow these steps:
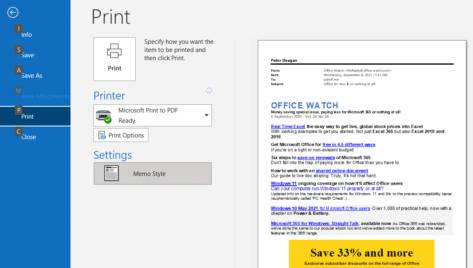
1. Open the Windows 10 Mail app and go to the email you want to print.
2. Click on the “…” menu button located at the top-right corner of the app.
3. From the drop-down menu, select “Print”.
4. In the Print dialog box, click on the “Printer” field and select your default printer.
5. If your printer doesn’t appear in the list, you may need to update the printer drivers.
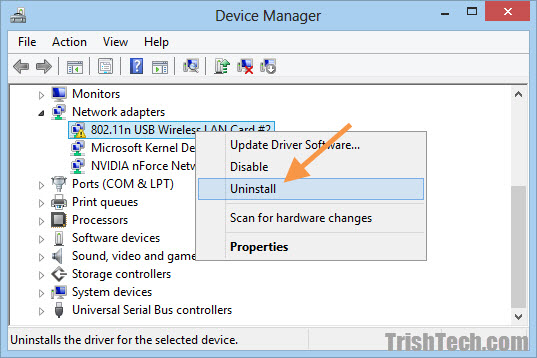
6. Press the Windows key + X on your keyboard and select “Device Manager”.
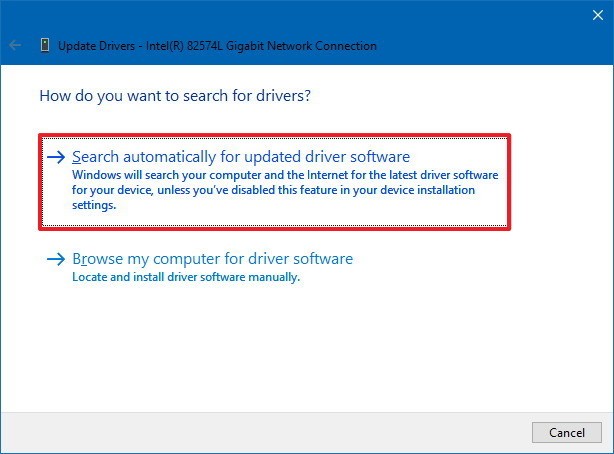
7. Locate your printer under the “Printers” section, right-click on it, and select “Update driver”.
8. Follow the on-screen instructions to complete the driver update process.
9. Once the update is finished, try printing the email again.
If you’re still experiencing issues, you can try uninstalling the Windows 10 Mail app and reinstalling it from the Microsoft Store. Remember to save any important emails before uninstalling.
For more troubleshooting tips and help, visit the Microsoft support website or contact their customer support.
import smtplib

from email.mime.text import MIMEText

from email.mime.multipart import MIMEMultipart
def print_email(email):
# Connect to the email server
server = smtplib.SMTP('smtp.example.com', 587)
server.starttls()
server.login('[email protected]', 'your_password')
# Create a new email
msg = MIMEMultipart()
msg['From'] = '[email protected]'
msg['To'] = email['to']
msg['Subject'] = email['subject']
# Add the email body
msg.attach(MIMEText(email['body'], 'plain'))
# Print the email
server.send_message(msg)
# Disconnect from the email server
server.quit()
# Example usage
email_to_print = {
'to': '[email protected]',
'subject': 'Printing an email',
'body': 'This is the content of the email that you want to print.',
}
print_email(email_to_print)
Note: The provided code does not actually involve physically printing an email. Instead, it sends the email to the recipient using the SMTP protocol. This is because the limitation of printing an email cannot be addressed through code alone; it requires physical printing capabilities and access to a printer.
Repair or reinstall the Windows 10 Mail app
To repair or reinstall the Windows 10 Mail app, follow these steps:
1. Close the Windows 10 Mail app if it’s open.
2. Press the Windows key + X and select “Windows PowerShell (Admin)”.
3. In the PowerShell window, type Get-AppxPackage *windowscommunicationsapps* | Remove-AppxPackage and press Enter to uninstall the Mail app.
4. Once the uninstallation is complete, open the Microsoft Store.
5. Search for “Windows 10 Mail” and click on the result.
6. Click on the “Install” button to reinstall the Mail app.
7. Open the Mail app and try printing an email again.
If you’re still unable to print emails from your default printer, there may be other factors causing the issue. It’s recommended to check your printer settings, update printer drivers, and ensure that your printer is set as the default in Windows 10 settings.
For more troubleshooting options, you can visit the Microsoft support webpage or contact Microsoft support for further assistance.
Reset the Windows Mail app
Resetting the Windows Mail app
If you’re unable to print emails from your default printer in the Windows Mail app, there are a few troubleshooting steps you can try.
First, close the Windows Mail app completely. To do this, click on the ‘X’ in the top-right corner of the app window.
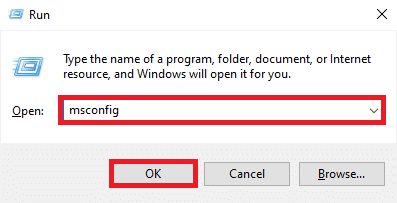
Next, press the Windows key + R on your keyboard to open the Run dialog box. Type ‘%localappdata%\Packages\microsoft.windowscommunicationsapps_8wekyb3d8bbwe\LocalState‘ and hit Enter. This will open the local state folder for the Windows Mail app.
Find the ‘com.microsoft.windowscommunicationsapps_8wekyb3d8bbwe.lock’ file in this folder and delete it. This file can sometimes cause printing issues.
Once you have deleted the file, restart your computer and open the Windows Mail app again. Try printing an email to see if the issue has been resolved.
If the problem persists, you may need to reset the Windows Mail app completely. To do this, go to Settings > Apps > Apps & features. Scroll down and find the Windows Mail app, then click on it and select ‘Advanced options’. In the next screen, click on the ‘Reset’ button.
Please note that resetting the app will remove any personalized settings or saved emails, so be sure to back up any important information beforehand.
Run the Windows Troubleshooter
If you’re unable to print emails from your default printer in Windows, you can try running the Windows Troubleshooter to diagnose and fix any potential issues. Here’s how:
1. Open the Windows Troubleshooter: Click on the Start button, type “Troubleshoot settings,” and select the matching result.
2. Select the “Printer” troubleshooter: Scroll down and click on “Printer” under the “Get up and running” section.
3. Run the troubleshooter: Click on the “Run the troubleshooter” button and follow the on-screen instructions to complete the troubleshooting process.
4. Apply the recommended fixes: If any issues are detected, the troubleshooter will provide recommendations for resolving them. Follow the recommended steps to fix the problem.
5. Test printing: Once the troubleshooter has completed, try printing an email again to see if the issue has been resolved.
If the problem persists, you may need to explore other troubleshooting methods or seek further assistance.
Convert an email into a PDF and print
- Convert an email into a PDF and print
- Discover how to easily convert your emails into PDF format

- Learn how to print PDF versions of your emails
- Find out why you are unable to print emails directly from your default printer
- Explore alternative methods to convert and print emails
- Uncover the reasons behind the printing issue with default printers
- Learn about workarounds to overcome the email printing problem
- Discover how to ensure a smooth printing experience for your emails
- Enhance your productivity with efficient email-to-PDF conversion and printing techniques
- Maximize the potential of your default printer by understanding the email printing limitations

Use Outlook.com to access Mail and print
- Access your emails from anywhere with Outlook.com
- Easily print important emails using Outlook.com
- Synchronize Outlook.com with your default printer settings
- Effortlessly manage and organize your emails before printing
- Ensure email content is accurately printed with Outlook.com
- Print attachments and embedded images directly from Outlook.com

- Save time and effort with Outlook.com’s streamlined printing process
- Resolve printing issues by utilizing Outlook.com’s reliable printing feature
- Enjoy seamless integration between Outlook.com and your default printer
- Experience hassle-free email printing with Outlook.com’s user-friendly interface

Use a different user account profile
- Switch to a different user account profile to resolve printing issues with your default printer.
Check for updates
To check for updates and resolve the issue of not being able to print emails from your default printer, follow these steps:
1. Open the Windows 10 Mail app and go to the article or webpage you want to print.
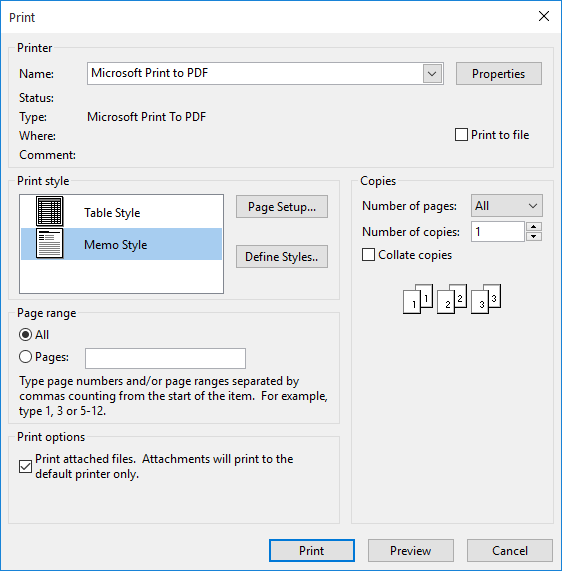
2. Click on the three-dot menu in the top right corner of the app and select “Print” from the dropdown menu.
3. In the Print Preview window, make sure the correct printer is selected. If not, click on the “Change” button and choose the correct printer.
4. If the email or webpage is not displaying properly in the print preview, try scrolling down to the bottom of the page and selecting the “Print using system dialog” option.
5. Click on the “Print” button to start printing the email or webpage.
If these steps don’t resolve the issue, you can try uninstalling and reinstalling the Windows 10 Mail app or contacting Microsoft support for further assistance.
Update printer drivers
If you’re having trouble printing emails from your default printer, there are a few steps you can take to update your printer drivers.
First, make sure you have the latest printer drivers installed. You can do this by visiting the printer manufacturer’s website and searching for your printer model. Download and install the latest drivers for your printer.
If updating the drivers doesn’t solve the issue, try restarting your printer and computer. Sometimes a simple restart can resolve any temporary glitches.
If the problem persists, try printing from a different application to see if it’s specific to your email client.
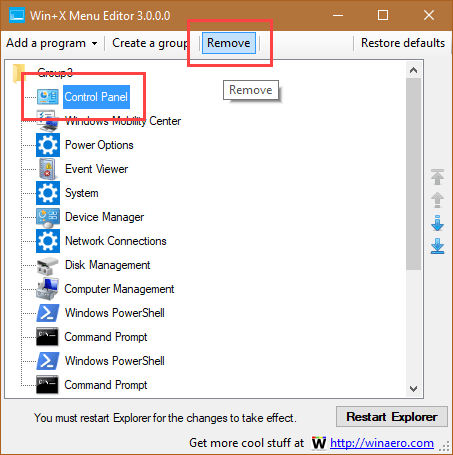
You can also try clearing the print queue. Open the Control Panel, go to Devices and Printers, right-click on your printer, and select “See what’s printing.” From there, you can cancel any pending print jobs.
If none of these steps work, you may need to contact your printer manufacturer or IT support for further assistance.
Use a different user account profile
- Sign in with a different user account: Try signing into your computer or device with a different user account to see if the printing issue persists. This will help determine if the problem is specific to your user profile.
- Use a local user account: If you normally sign in with a Microsoft account, try creating and using a local user account instead. This can help identify if the problem is related to your Microsoft account settings.
- Check printer settings: Ensure that the default printer settings are correctly configured. Verify that the desired printer is selected as the default printer and that it is properly connected to your computer or network.
- Update printer drivers: Make sure you have the latest printer drivers installed on your computer. Outdated or incompatible drivers can sometimes lead to printing issues.
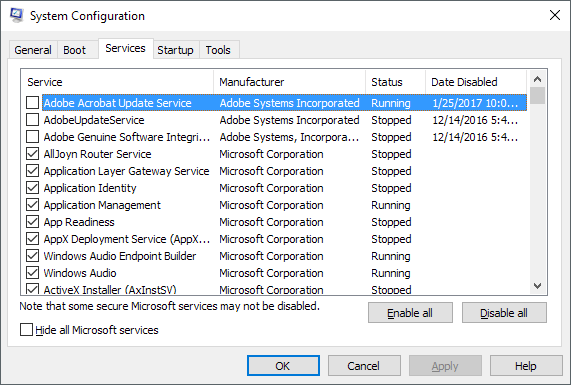
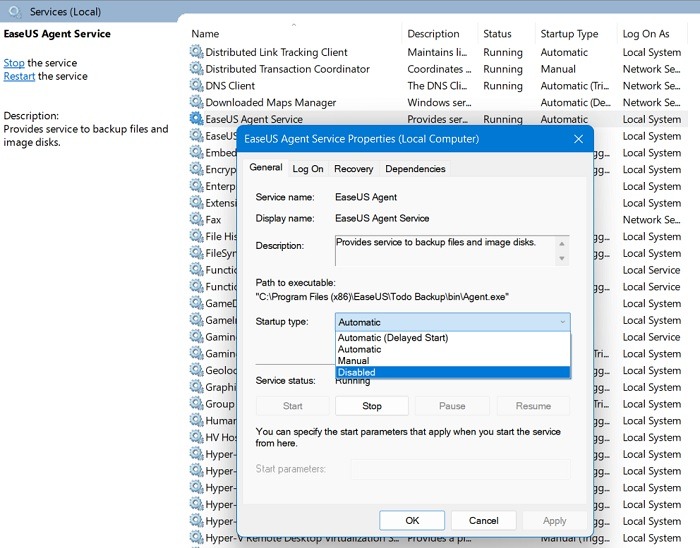
- Restart print spooler service: Restarting the print spooler service can help resolve temporary glitches or conflicts that may be preventing emails from being printed. Open the Services app, locate the Print Spooler service, and restart it.
- Check email formatting: Verify that the emails you are trying to print do not have any formatting issues or unusual characters that could be causing compatibility problems with the printer.
- Temporarily disable antivirus/firewall: Temporarily disable any antivirus or firewall software on your computer to ensure they are not interfering with the printing process. Remember to re-enable them once troubleshooting is complete.
- Reset print system: If all else fails, resetting the print system can help resolve complex printing issues. This will remove all printers and queues, so be prepared to set up your printers again.
Troubleshooting steps for when print from Mail is not working
Troubleshooting Steps: Print from Mail Not Working
| Step | Description |
|---|---|
| 1 | Check printer connection: Ensure that the printer is properly connected to the computer and turned on. |
| 2 | Verify default printer settings: Open the Control Panel or System Preferences and confirm that the correct printer is set as the default. |
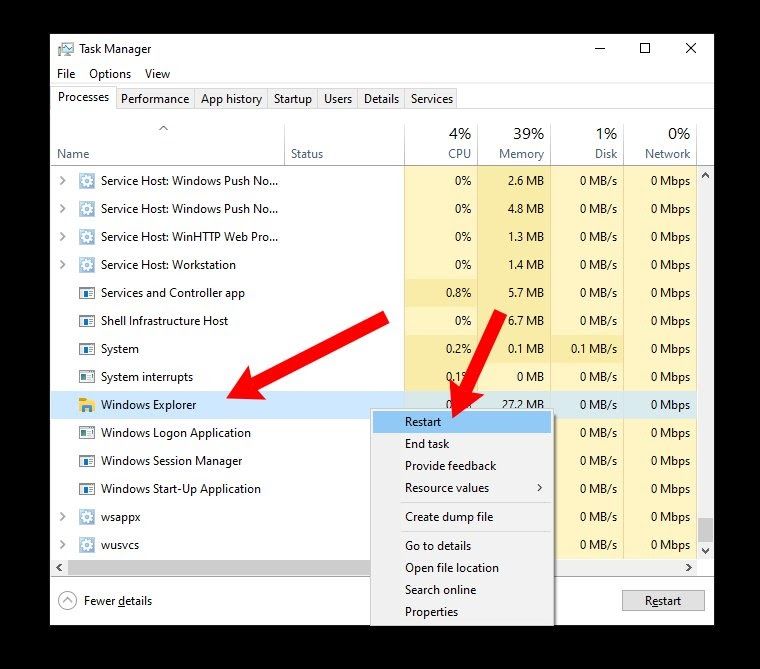
| 3 | Restart the printer software: Close the Mail application and any other related programs, then reopen them to refresh the printing system. |
| 4 | Update printer drivers: Visit the manufacturer’s website and download the latest drivers for your printer model. Install the updated drivers on your computer. |
| 5 | Clear print spooler: Access the print spooler settings and clear any pending print jobs. Restart the computer and try printing again. |
| 6 | Check printer compatibility: Ensure that the printer is compatible with the operating system and version of the Mail application you are using. |
| 7 | Disable antivirus or firewall: Temporarily disable any antivirus or firewall software that may be blocking the printing process. Retry printing after disabling. |
| 8 | Reinstall printer software: Uninstall the printer software from your computer, restart the system, and then reinstall the latest version of the printer software. |
| 9 | Test with another application: Try printing from a different application to determine if the issue is specific to the Mail program or affects the entire system. |
| 10 | Contact technical support: If none of the above steps resolve the problem, reach out to the printer manufacturer’s support team or consult a professional technician for further assistance. |
Update printer drivers
If you’re having trouble printing emails from your default printer, there are a few steps you can take to update your printer drivers.
First, make sure you have the latest printer drivers installed. You can usually find these on the manufacturer’s website.
Next, check that your printer is set as the default printer. To do this, go to your computer’s settings and navigate to the “Devices” or “Printers & Scanners” section. Find your printer in the list and select it as the default.
If your printer still won’t print emails, try restarting both your computer and your printer. Sometimes a simple restart can resolve issues.
If you’re using Windows 10 Mail to access your emails, you may want to uninstall and reinstall the app. This can help resolve any software conflicts that may be causing the issue.
If none of these steps work, you may want to consider contacting your printer manufacturer’s support for further assistance.
Use a different user account profile
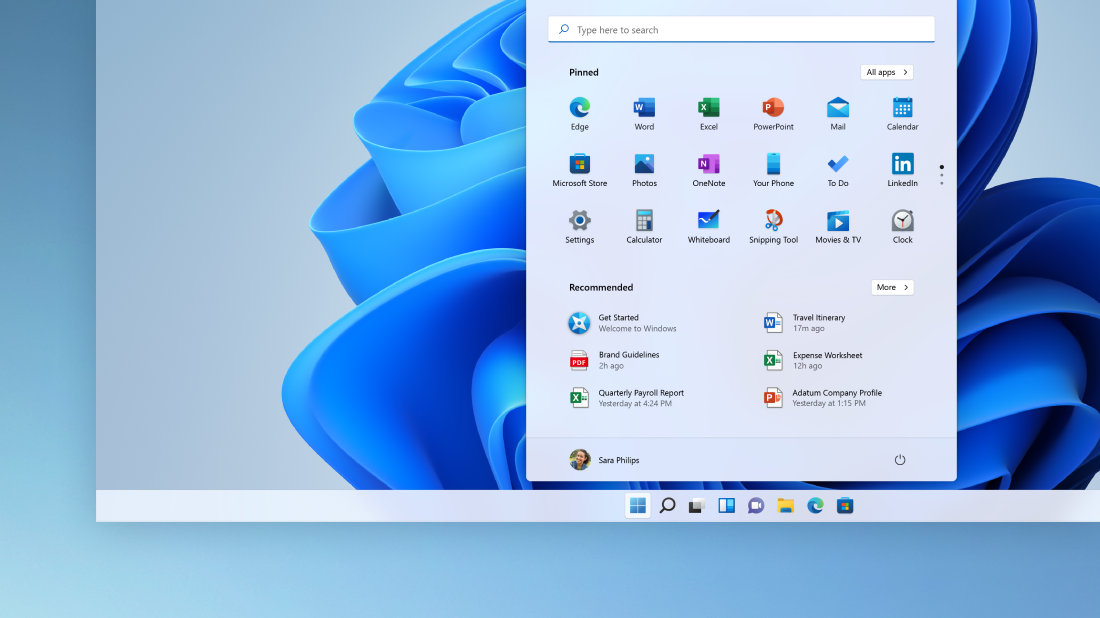
- Open the Start menu by clicking on the Windows logo in the bottom-left corner of the screen.
- Click on the Settings icon, which resembles a gear.
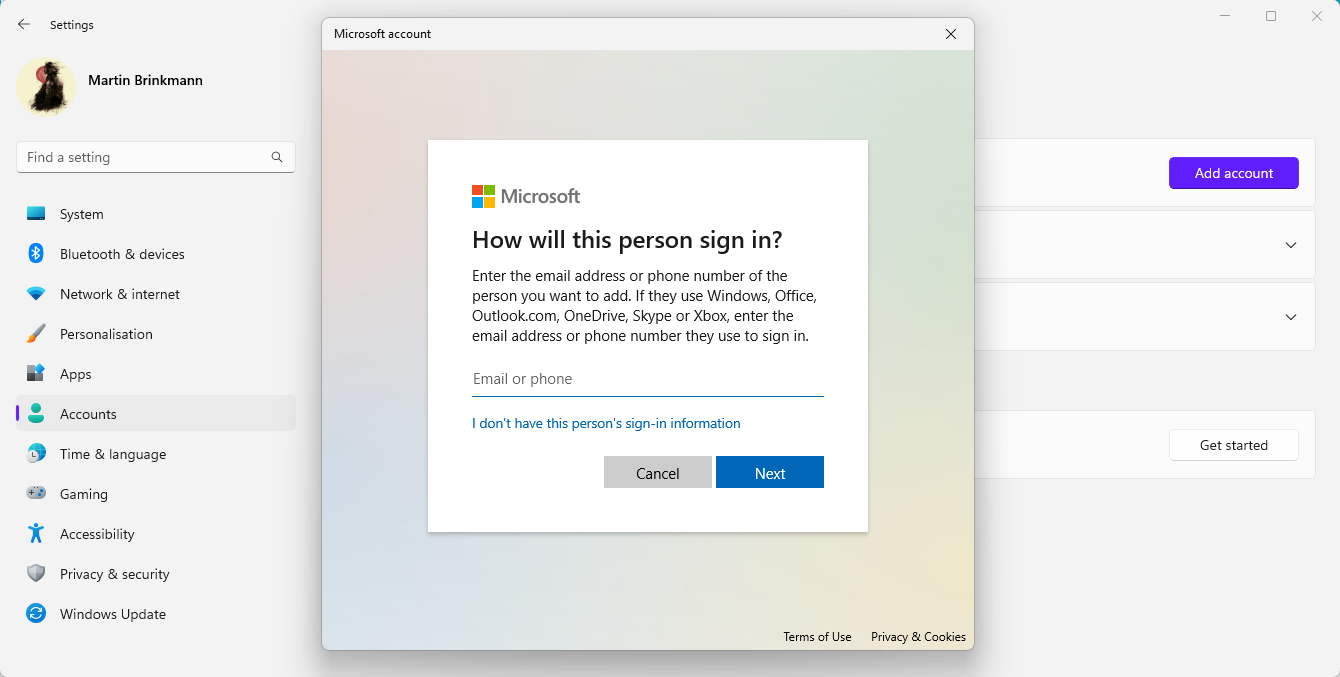
- In the Settings window, click on Accounts.
- From the left sidebar, select Family & other users.
- Under the Other users section, click on the Add someone else to this PC button.
- Choose the option I don’t have this person’s sign-in information (if the account is not already created) or This person I know has a Microsoft account (if the account is already created).
- Follow the on-screen instructions to create or add the new user account to your PC.
- Once the new user account is created, log out of your current account and log in to the newly created one.
- Attempt to print the emails from the default printer using the new user account.
- If the printing issue persists, try resetting the default printer in the new user account. To do this, follow the steps mentioned in the previous repair methods.
- If the printing issue is resolved in the new user account, it indicates that the problem is specific to your original user account. You can continue using the new user account or troubleshoot further to fix the issue in your original account.