Unraveling the Enigma: Taming the Troublesome Microsoft Error 0x80070002
Understanding Microsoft Error 0x80070002
To fix Microsoft Error 0x80070002, try the following solutions:
Fix 1: Delete the SoftwareDistribution Folder
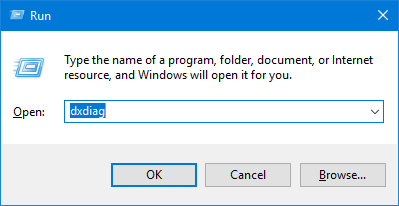
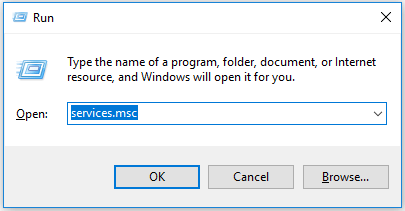
1. Press the Windows key + R to open the Run dialog box.
2. Type “services.msc” and press Enter.
3. In the Services window, find and double-click “Windows Update”.
4. Click “Stop” to temporarily disable the Windows Update service.
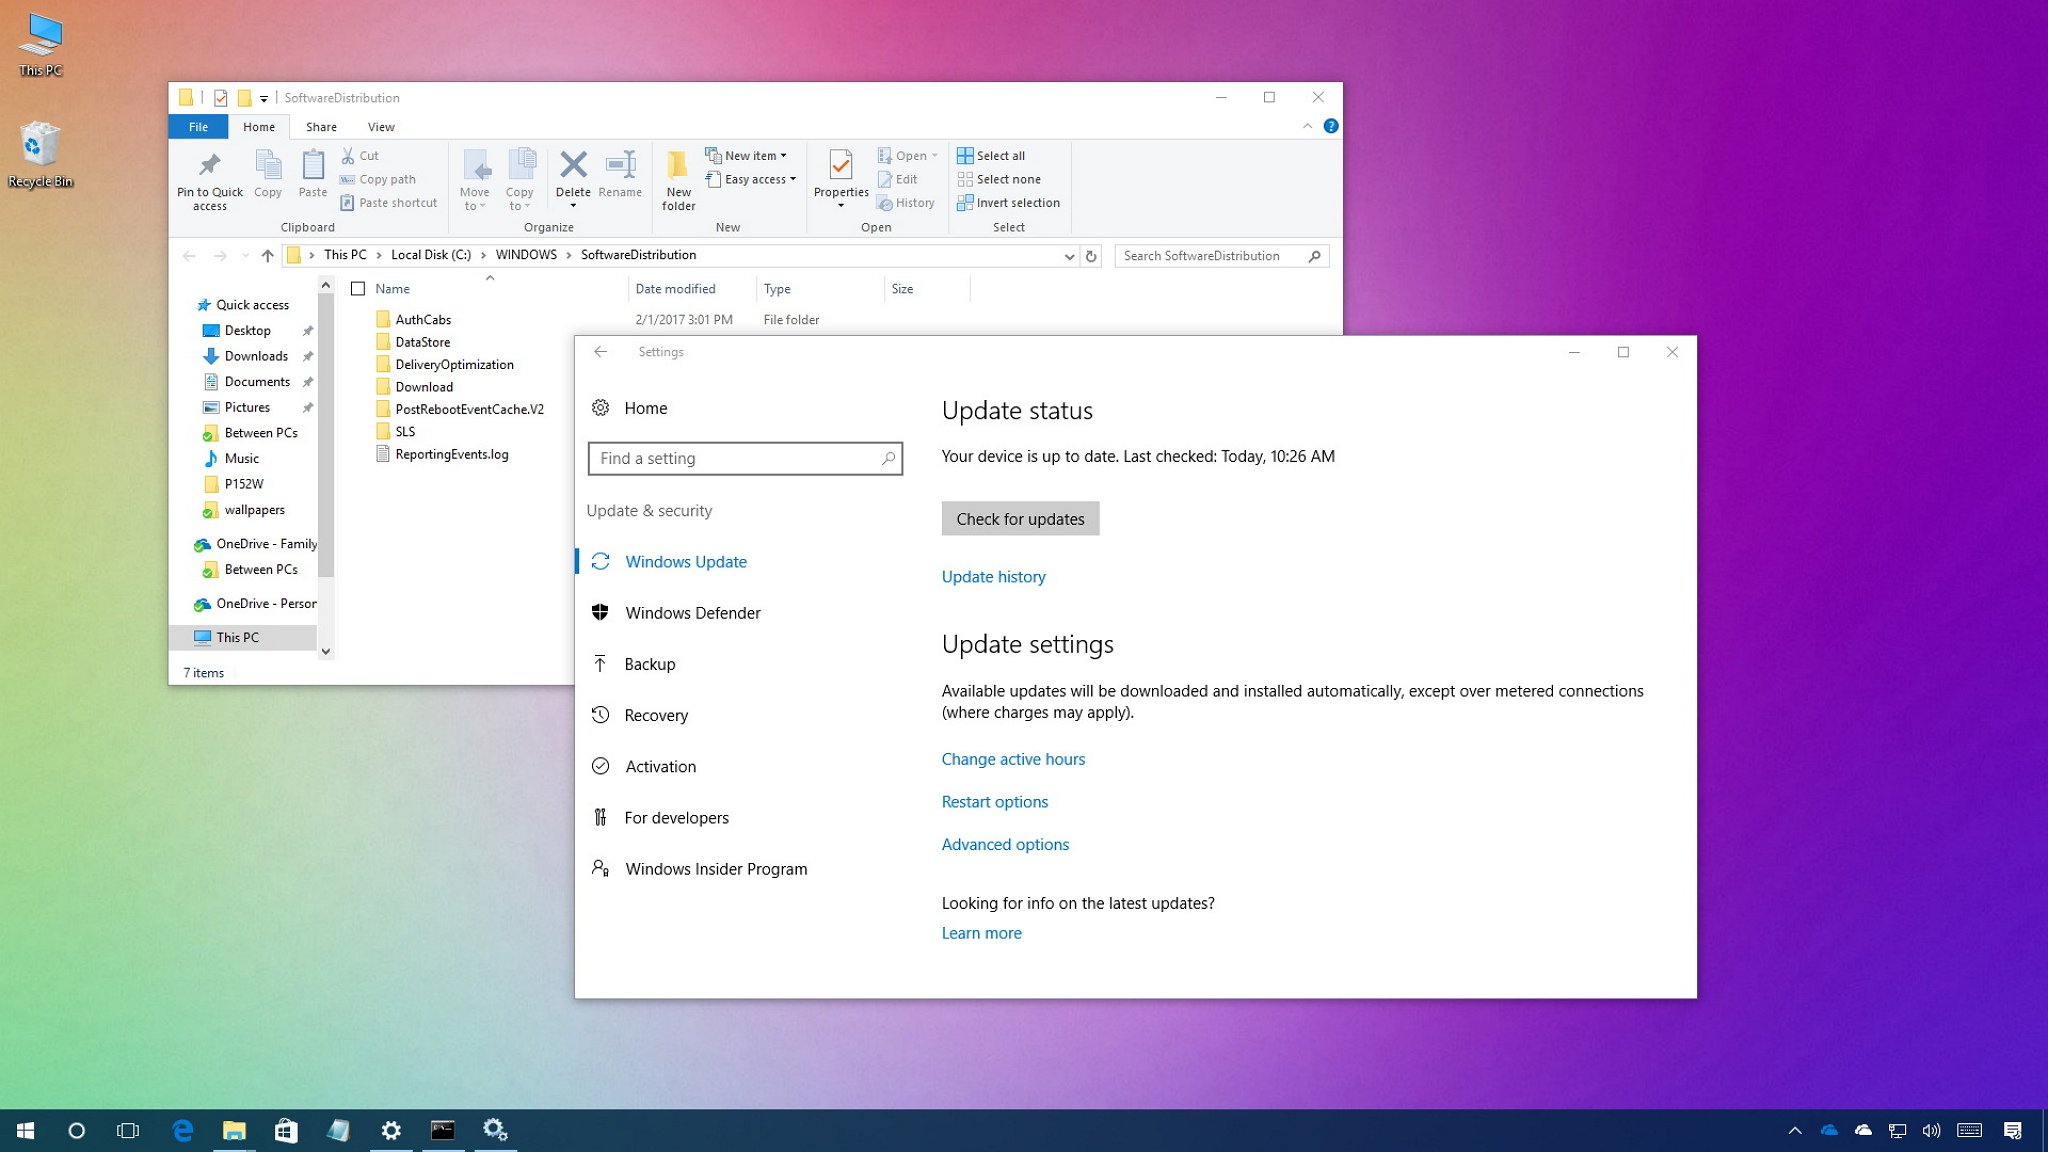
5. Open File Explorer and navigate to C:\Windows.
6. Locate and delete the “SoftwareDistribution” folder.
7. Go back to the Services window and click “Start” to restart the Windows Update service.
Fix 2: Run the Windows Update Troubleshooter
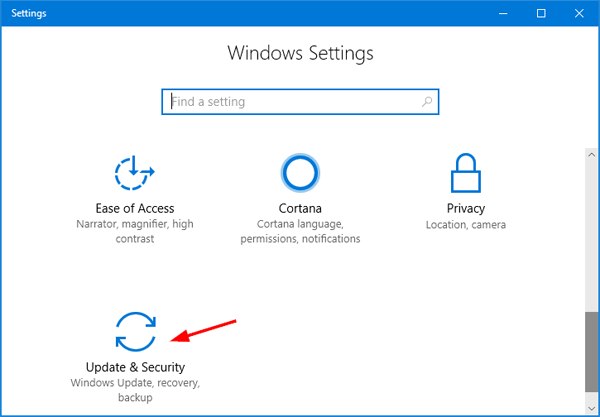
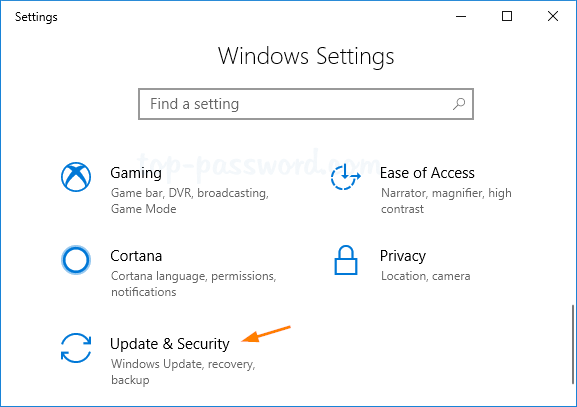
1. Press the Windows key + I to open Settings.
2. Click “Update & Security” and select “Troubleshoot” from the left sidebar.
3. Scroll down and click “Windows Update” under Get up and running.
4. Click “Run the troubleshooter” and follow the on-screen instructions.
Fix 3: Check System Files
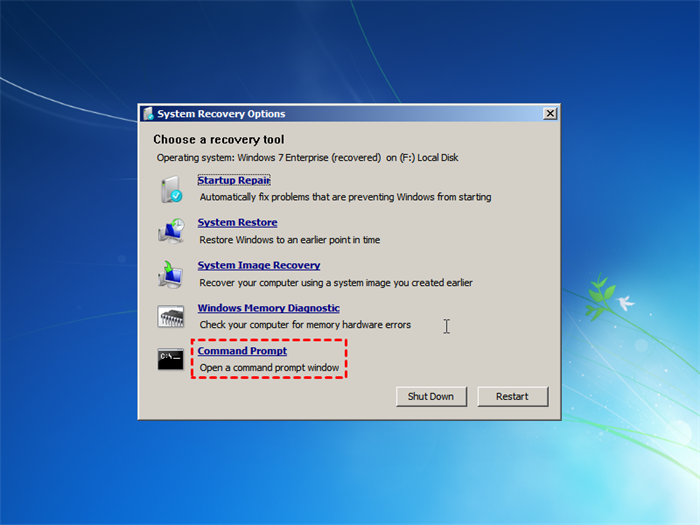
1. Press the Windows key + X and select “Command Prompt (Admin)”.
2. Type “sfc /scannow” and press Enter.
3. Wait for the scan to complete and follow any repair instructions provided.
Fix 4: Reset Windows Update Components
1. Press the Windows key + X and select “Command Prompt (Admin)”.
2. Type the following commands one by one, pressing Enter after each:
– net stop wuauserv
– net stop cryptSvc
– net stop bits
– net stop msiserver
3. Type “ren C:\Windows\SoftwareDistribution SoftwareDistribution.old” and press Enter.
4. Type “ren C:\Windows\System32\catroot2 catroot2.old” and press Enter.
5. Type the following commands to restart the stopped services:
– net start wuauserv
– net start cryptSvc
– net start bits
– net start msiserver
6. Close the Command Prompt and restart your computer.
These solutions should help resolve Microsoft Error 0x80070002 and allow you to update your Windows system successfully.
Common Causes of Error 0x80070002
- Open the Settings app by clicking on the Start button and selecting Settings.
- Click on Update & Security.
- Click on Windows Update in the left pane.
- Click on Advanced options.
- Click on View update history.
- Check for any failed updates. If there are any, note down the KB number.
- Go back to the Windows Update page and click on Check for updates to install any pending updates.
- If the issue persists, proceed to the next repair method.
Repair Method 2: Run Windows Update Troubleshooter
- Press Win + I to open the Settings app.
- Click on Update & Security.
- In the left pane, click on Troubleshoot.
- Scroll down and click on Windows Update.
- Click on Run the troubleshooter and follow the on-screen instructions.
- Restart your computer and check if the error is resolved.
- If the issue persists, move on to the next repair method.
Repair Method 3: Delete Windows Update Cache
- Press Win + R to open the Run dialog box.
- Type “services.msc” and press Enter.
- Scroll down and double-click on Windows Update in the list of services.
- Click on the Stop button to stop the service.
- Open File Explorer and navigate to the “C:\Windows\SoftwareDistribution” folder.
- Select all the files and folders inside the “SoftwareDistribution” folder and delete them.
- Go back to the Services window and click on the Start button to start the Windows Update service again.
- Restart your computer and check if the error is resolved.
- If the issue persists, proceed to the next repair method.
Quick Fixes for Error 0x80070002
Quick Fixes for Error 0x80070002
| Error Code | Possible Fixes |
|---|---|
| 0x80070002 | 1. Run Windows Update Troubleshooter 2. Delete SoftwareDistribution Folder 3. Check Date and Time Settings 4. Disable Firewall and Antivirus temporarily 5. Perform a clean boot 6. Use System File Checker to scan for corrupted files 7. Reset Windows Update components 8. Update drivers 9. Perform a system restore 10. Contact Microsoft Support for further assistance. |
python

import winerror

import win32api
def check_error_code():
error_code = 0x80070002
error_message = win32api.FormatMessage(error_code)
if error_message:
print(f"Error code: {hex(error_code)}")
print(f"Error message: {error_message.strip()}")
else:
print("Invalid error code.")
check_error_code()
In this Python code, we import the `winerror` and `win32api` modules to handle Windows error codes. The `check_error_code()` function takes the error code 0x80070002 as an example and uses `win32api.FormatMessage()` to retrieve the associated error message. It then prints the error code and message if a valid message is found; otherwise, it indicates that the error code is invalid.
Keep in mind that this is a basic demonstration, and the specific implementation might differ depending on the programming language, libraries, and context you are working with. Additionally, resolving the error code 0x80070002 typically involves troubleshooting the specific software or system component generating the error.
If you provide more details about the specific context or purpose of the tool you are seeking, I can try to assist you further.
Checking Date and Time Settings
To fix Microsoft Error 0x80070002, it’s important to check your date and time settings. Incorrect settings can cause various errors, including the 0x80070002 error. Here’s how to verify and adjust your settings:
1. Open the Control Panel by searching for it in the Windows 10 Search bar.
2. In the Control Panel, locate the “Date and Time” icon and click on it.
3. In the Date and Time settings window, ensure that the time and date are correct. If they are incorrect, click on the “Change date and time” button and manually adjust them.
4. Additionally, make sure the “Set time automatically” and “Set time zone automatically” options are enabled.
5. Click on the “OK” button to save the changes.
By verifying and adjusting your date and time settings, you can resolve potential conflicts that may be causing the error. If the issue persists, proceed with the other troubleshooting steps provided in this article.
Modifying Windows Update Installation Files
To fix Microsoft Error 0x80070002 while modifying Windows Update installation files, follow these steps:
1. Run the Windows Update Troubleshooter. Search for it in the Windows 10 Start menu and select “Troubleshoot settings.” Then, select “Windows Update” and click the “Run the troubleshooter” button.
2. Repair system files using the Command Prompt (CMD). Open CMD as an administrator, then type “sfc /scannow” and press Enter. This scans and repairs any corrupted system files.
3. Clear the SoftwareDistribution folder. In CMD, run the following commands one by one:
“net stop wuauserv”
“net stop cryptSvc”
“net stop bits”
“net stop msiserver”
“ren C:\Windows\SoftwareDistribution SoftwareDistribution.old”
“net start wuauserv”
“net start cryptSvc”
“net start bits”
“net start msiserver”
4. Reset the Windows Update components by running these commands in CMD:
“net stop bits”
“net stop wuauserv”
“net stop appidsvc”
“net stop cryptsvc”
“Del /f /q %windir%\SoftwareDistribution\*.*”
“Del /f /s /q %windir%\system32\catroot2\*.*”
“net start bits”
“net start wuauserv”
“net start appidsvc”
“net start cryptsvc”
Deleting the Software Distribution Folder
To fix Microsoft Error 0x80070002, you can try deleting the Software Distribution Folder. This folder contains temporary files that may be causing the error. Here’s how:
1. Stop Windows Update Service: Press Windows Key + R, type “services.msc”, and press Enter. In the Services window, locate and right-click on “Windows Update” and select “Stop”.
2. Delete Software Distribution Folder: Open File Explorer and navigate to C:\Windows. Locate the “SoftwareDistribution” folder and delete it. Note that you may need administrative privileges to delete this folder.
3. Restart Windows Update Service: Go back to the Services window, right-click on “Windows Update”, and select “Start”.
After following these steps, try updating your system again and check if the error persists. Deleting the Software Distribution Folder can help resolve various Windows Update issues.
Using Windows Update Troubleshooter
If you’re encountering Microsoft Error 0x80070002, you can try using the Windows Update Troubleshooter to resolve the issue. Here are some workable solutions:
Fix 1: Run the Windows Update Troubleshooter.
Fix 2: Repair system files by running the System File Checker tool.
Fix 3: Reset the Windows Update components.
Fix 4: Delete the SoftwareDistribution folder.
To use the Windows Update Troubleshooter, follow these steps:
1. Press the Windows key and type “Troubleshoot settings.” Open the Troubleshoot settings.
2. Scroll down and click on “Additional troubleshooters.”
3. Under “Get up and running,” click on “Windows Update” and then click “Run the troubleshooter.”
The troubleshooter will automatically detect and fix any issues with Windows Update. After running the troubleshooter, check if the error is resolved.
Updating Device Drivers for Error 0x80070002
- Identify the problematic device driver:
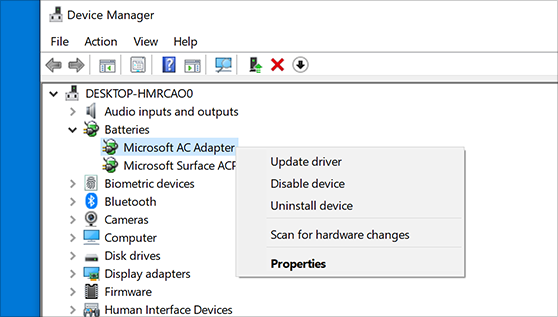
- Open Device Manager by pressing Windows Key + X and selecting Device Manager from the menu.
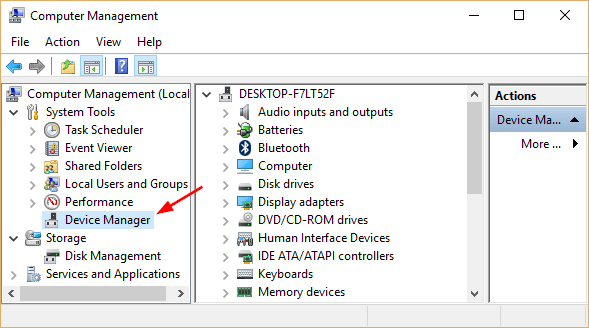
- In the Device Manager window, look for any devices with a yellow exclamation mark or question mark next to them. These indicate problematic drivers.
- Download the latest driver:
- Visit the manufacturer’s website for the problematic device.
- Search for the latest driver version compatible with your operating system.
- Download the driver to your computer.
- Uninstall the current driver:
- Return to the Device Manager window.
- Right-click on the problematic device and select Uninstall device.
- Follow the on-screen instructions to complete the uninstallation process.
- Install the new driver:
- Locate the downloaded driver file on your computer.
- Double-click on the file to initiate the installation process.

- Follow the on-screen instructions to install the new driver.
- Restart your computer:
- After the installation is complete, restart your computer to allow the changes to take effect.