Fix Google Chrome Black Screen

If you’re encountering a frustrating black screen issue while using Google Chrome, you’re not alone. Let’s explore effective methods to fix this problem and get your browser back up and running smoothly.

Troubleshooting Google Chrome Black Screen Issues

If you’re experiencing black screen issues with Google Chrome, there are a few troubleshooting steps you can try to resolve the problem.

First, try clearing your browser cache and cookies. To do this, open Chrome and click on the three-dot menu in the top-right corner. From there, go to “Settings” and click on “Privacy and security” in the left sidebar. Then, click on “Clear browsing data” and select the options for clearing cache and cookies. Click “Clear data” to confirm.

If clearing the cache and cookies doesn’t fix the issue, try disabling your Chrome extensions. Sometimes, certain extensions can cause conflicts that result in a black screen. To disable extensions, type “chrome://extensions” into the address bar and hit Enter. From there, you can toggle off any extensions you suspect might be causing the problem.

Next, try updating your graphics drivers. Outdated or incompatible drivers can sometimes lead to display issues. To update your drivers, right-click on the Windows Start button and select “Device Manager.” Expand the “Display adapters” category, right-click on your graphics card, and select “Update driver.” Follow the prompts to search for and install the latest driver updates.

If updating your drivers doesn’t help, you can try resetting Chrome to its default settings. To do this, go to “Settings” in Chrome, click on “Advanced” at the bottom of the page, and then click on “Reset settings” under the “Reset and clean up” section. Confirm the reset by clicking “Reset settings.”

If none of the above steps resolve the issue, you might consider reinstalling Chrome. To do this, first, uninstall Chrome from your computer. On Windows, you can do this by going to the Control Panel and selecting “Uninstall a program” or “Apps & Features.” Find Google Chrome in the list, right-click on it, and select “Uninstall.” Then, visit the official Chrome website to download and reinstall the latest version of the browser.

Solutions to Disable Chrome Extensions and Flags

  • Open Google Chrome.
  • Click on the three-dot menu icon in the top-right corner of the window.
  • Select “More tools” from the drop-down menu.
  • Choose “Extensions” from the expanded menu.
    Select "More tools" from the drop-down menu.
Choose "Extensions" from the expanded menu.
  • A list of installed extensions will appear. Locate the extensions causing issues.
  • Toggle the switch next to each problematic extension to disable it.
  • Restart Google Chrome to see if the black screen issue is resolved.

Solution 2: Disable Chrome Flags

  • Open Google Chrome.
  • Type “chrome://flags” in the address bar and press Enter.
  • A page with various experimental features will appear.
  • Using the search bar on the page, look for flags related to hardware acceleration or GPU processes.
    A page with various experimental features will appear.
Using the search bar on the page, look for flags related to hardware acceleration or GPU processes.
  • Disable any flags related to hardware acceleration or GPU processes by selecting “Disabled” from the drop-down menu.
  • Click on the “Relaunch” button at the bottom of the page to restart Chrome with the new settings.

Resolving Google Chrome Black Screen with Hardware Acceleration

If you’re experiencing a black screen issue with Google Chrome due to hardware acceleration, here are some steps to resolve it:

1. Open Google Chrome and type “chrome://settings” in the address bar, then press Enter.

2. Scroll down and click on the “Advanced” option to expand the settings.

3. Under the “System” section, toggle off the “Use hardware acceleration when available” option.

4. Restart Google Chrome for the changes to take effect.

5. If the black screen issue persists, you can try disabling extensions that might be causing conflicts. To do this, type “chrome://extensions” in the address bar and press Enter.

6. On the extensions page, toggle off the switch next to each extension to disable them temporarily.

7. Restart Google Chrome and check if the black screen issue is resolved. If it is, you can enable the extensions one by one to identify the problematic one.

8. If the issue still persists, you can try resetting Google Chrome settings to their default values. To do this, type “chrome://settings/reset” in the address bar and press Enter. Click on the “Reset settings” button to confirm.

9. Restart Google Chrome again and check if the black screen problem is resolved.

Remember, if you have any important bookmarks or passwords saved in your Chrome profile, make sure to back them up before resetting the settings.

html


Black Screen


By saving the above code in an HTML file (e.g., `black_screen.html`) and opening it in a web browser, you will see a plain black screen.

Additional Steps to Fix Google Chrome Black Screen

Google Chrome logo

If you’re still experiencing a black screen on Google Chrome after trying the basic troubleshooting steps, here are some additional steps you can take to fix the issue:

1. Disable browser extensions: Sometimes, incompatible or malfunctioning extensions can cause a black screen. To disable extensions, type “chrome://extensions” in the address bar and press Enter. Toggle off each extension using the switch next to it. Restart Chrome and check if the black screen is resolved.

2. Clear browsing data: Accumulated cache and cookies can also interfere with Chrome’s performance. To clear browsing data, press Ctrl+Shift+Delete. In the dialog box that appears, select the time range and the types of data you want to delete. Click “Clear data” to remove the selected information.

3. Reset Chrome settings: Resetting Chrome to its default settings can help resolve various issues. Type “chrome://settings/reset” in the address bar and press Enter. Click on the “Reset settings” button and confirm the action. Note that this will reset your startup page, new tab page, search engine, and pinned tabs.

4. Update graphics drivers: Outdated or faulty graphics drivers can cause display issues. Visit the website of your graphics card manufacturer (e.g., Nvidia, AMD, Intel) and download the latest drivers for your specific model. Install the drivers and restart your computer before checking if the black screen problem is resolved.

5. Disable hardware acceleration: Hardware acceleration uses your computer’s GPU to render graphics, but it can sometimes cause conflicts. To disable hardware acceleration in Chrome, go to “chrome://settings/system” and toggle off the “Use hardware acceleration when available” option.

Unable to see other player’s skill effects in BDO

As a player of Black Desert Online, one frustrating aspect I have encountered is the inability to see other player’s skill effects.

Check your game settings: Ensure that your game settings are configured properly to display other players’ effects. Look for options related to graphics, visual effects, and player visibility settings.

Customizing User Interface Options

To customize the user interface options in BDO and be able to see other player’s skill effects, follow these steps:

1. Open the game settings: Click on the menu button in the top right corner of the screen. This will open a drop-down menu.

2. Access the options menu: From the drop-down menu, click on “Settings” to access the game options.

3. Navigate to the interface settings: In the options menu, locate and click on the “Interface” tab. This will open the interface settings.

4. Enable skill effects: Within the interface settings, find the option for “Skill Effects” and make sure it is enabled. If it is already enabled, you may want to try disabling and re-enabling it to see if that resolves the issue.

5. Adjust the skill effect visibility: BDO provides different levels of visibility for skill effects. If you are still unable to see other player’s skill effects, try adjusting the visibility settings. Locate the “Skill Effect Visibility” option and increase the level to a higher setting. This should make the skill effects more noticeable.

6. Save the changes: After making any adjustments to the user interface options, remember to save the changes before exiting the settings menu. Look for a “Save” or “Apply” button and click on it.

7. Test the changes: Once you have saved the changes, go back to the game and test if you can now see other player’s skill effects. Join a group or encounter other players to observe their skill effects.

If you are still experiencing issues with seeing other player’s skill effects, you may want to seek further assistance from the BDO community. Reddit is a great platform to join discussions and ask for help from experienced players who might have encountered similar issues.

Remember to always ensure the privacy and security of your information while seeking help or sharing your experiences online. Be cautious of any external sources or websites that may require you to provide personal information or install suspicious software. It is recommended to review the privacy policy and terms of use of any website before engaging in discussions or sharing information.

By customizing the user interface options in BDO, you can enhance your gaming experience and fully enjoy the skill effects displayed by other players.

Blind to the effects of others, one remains oblivious to the interconnectedness of the world.

Understanding Gear and Stats

Gear plays a crucial role in BDO, as it directly impacts your character’s abilities and performance. Each piece of gear has its own set of stats that contribute to your overall power. These stats can include things like attack power, defense, accuracy, evasion, and more. It’s important to equip gear that aligns with your character’s playstyle and desired build.

Stats are the numerical representation of your character’s abilities. They determine how effective your attacks are, how well you can defend against enemy attacks, and other important factors. Understanding the different stats and how they interact with each other is key to optimizing your character’s performance.

One way to improve your gear and stats is through enhancing. Enhancing allows you to make your gear stronger by using materials and in-game currency. However, enhancing can be a risky process, as there is a chance for your gear to fail and become destroyed. It’s important to weigh the risks and rewards before attempting enhancements.

In BDO, gear can also have set bonuses. These bonuses provide additional benefits when you have multiple pieces of gear from the same set equipped. Set bonuses can greatly enhance your character’s abilities and should be considered when choosing your gear.

Additionally, gems can be socketed into gear to further enhance your character’s stats. Gems come in different types and qualities, each providing different bonuses. Experiment with different gem combinations to find the ones that best suit your playstyle and desired build.

Understanding the different stats and gear options is crucial for optimizing your character’s performance. It’s important to do thorough research and seek advice from experienced players to make informed decisions about your gear and stats.

To address the issue of not being able to see other player’s skill effects in BDO, there are a few things you can try. First, make sure that your graphics settings are properly configured. Sometimes, certain effects may be disabled or set to a lower quality, causing them to be invisible. Adjusting your graphics settings can potentially solve the problem.

Another thing to consider is your internet connection. BDO is an online game, and a stable internet connection is necessary for proper gameplay. If your connection is unstable or slow, it may affect the visibility of certain skill effects. Try resetting your internet connection or contacting your internet service provider for assistance.

If the issue persists, you can try reaching out to the BDO community for help. The Reddit community for BDO is a great resource for troubleshooting and getting advice from fellow players. Post your issue on the subreddit and see if anyone else has experienced the same problem or has a solution.

Effects of Inhaling Wildfire Smoke on Health

Inhaling wildfire smoke can have serious effects on your health. It is important to be aware of these effects and take necessary precautions to protect yourself.

1. Respiratory Issues: Wildfire smoke contains harmful pollutants such as particulate matter, carbon monoxide, and volatile organic compounds. These pollutants can irritate your respiratory system and cause problems like coughing, wheezing, shortness of breath, and asthma attacks. It is especially dangerous for individuals with pre-existing respiratory conditions.

2. Cardiovascular Problems: The fine particles in wildfire smoke can penetrate deep into your lungs and enter your bloodstream. This can lead to inflammation and oxidative stress, increasing the risk of heart attacks, strokes, and other cardiovascular issues. People with heart disease or high blood pressure are particularly vulnerable.

3. Eye and Skin Irritation: Wildfire smoke can cause eye irritation, redness, and itching. It can also affect your skin, causing dryness, rashes, and allergic reactions. Protecting your eyes and skin from smoke exposure is important, especially for those with sensitive skin or existing eye conditions.

4. Worsening of Existing Conditions: If you have pre-existing health conditions such as allergies, asthma, or chronic obstructive pulmonary disease (COPD), inhaling wildfire smoke can exacerbate these conditions. It can trigger flare-ups, increase symptoms, and make it harder to manage your condition effectively.

5. Long-Term Health Risks: Prolonged exposure to wildfire smoke can have long-term health consequences. Studies have shown that it can increase the risk of respiratory infections, lung cancer, and premature death. Protecting yourself from smoke exposure is crucial for maintaining your long-term health.

6. Vulnerable Populations: Certain groups of people are more susceptible to the health effects of wildfire smoke. These include children, older adults, pregnant women, and individuals with compromised immune systems. It is important for these vulnerable populations to take extra precautions and minimize their exposure to smoke.

To minimize the health risks associated with inhaling wildfire smoke, follow these protective measures:

1. Stay Indoors: If possible, stay indoors and keep windows and doors closed to reduce smoke infiltration. Use air purifiers or create a clean indoor air space to minimize smoke exposure.

2. Avoid Outdoor Activities: Limit your time spent outdoors, especially during times when the air quality is poor. Check local air quality indexes or government advisories for updates on smoke conditions.

3. Use N95 Masks: When going outside is necessary, wear an N95 or higher-rated mask to filter out harmful particles. Ensure that the mask fits properly and is worn consistently.

4. Stay Hydrated: Drink plenty of water to keep your respiratory system hydrated and help flush out toxins from your body.

5. Follow Medical Advice: If you have pre-existing health conditions, follow your healthcare provider’s advice on managing your condition during wildfire smoke events. Make sure you have an adequate supply of medications on hand.

6. Monitor Air Quality: Stay informed about the air quality in your area. Use online resources and smartphone apps to check the air quality index and plan your activities accordingly.

Inhaling wildfire smoke can have serious consequences for your health, particularly for individuals with underlying health conditions or vulnerable populations. By taking appropriate precautions and following the recommended protective measures, you can minimize your exposure to smoke and reduce the associated health risks. Stay informed, stay indoors, and prioritize your health during wildfire events.

Precautions to Reduce Risks from Wildfire Smoke

  • Stay indoors: If possible, stay inside your home or a building with good air filtration to minimize exposure to wildfire smoke.
  • Keep windows and doors closed: Close all windows and doors to prevent smoke from entering your home.
  • Use air purifiers: Consider using air purifiers with High Efficiency Particulate Air (HEPA) filters to help remove smoke particles from the air.
  • Avoid outdoor activities: Limit your time spent outdoors and avoid engaging in strenuous activities, especially in areas with heavy smoke.
  • Monitor air quality: Stay updated on air quality reports and follow any advisories or warnings issued by local authorities.
  • Wear a respirator mask: If you need to be outside, wear a N95 or higher rated mask to help filter out harmful particles in the smoke.
  • Keep indoor air clean: Avoid activities that can increase indoor air pollution, such as smoking, using candles, or burning incense.
  • Create a clean air space: Designate a room in your home as a clean air space by sealing any gaps or cracks and using a portable air purifier.
  • Stay hydrated: Drink plenty of water to help reduce respiratory irritation caused by smoke exposure.
  • Stay informed: Stay updated on the wildfire situation and follow evacuation orders or other instructions given by emergency management officials.

Troubleshoot Windows 10 Safe Mode Start-Up Issue

Having trouble with Windows 10 Safe Mode start-up? Let’s troubleshoot the issue.

Troubleshooting Safe Mode Access on Windows 10

If you’re having trouble accessing Safe Mode on Windows 10, follow these troubleshooting steps to resolve the issue:

1. Restart your computer and repeatedly press the F8 or Shift key.
– This will bring up the Advanced Boot Options menu, where you can select Safe Mode.

2. If the F8 or Shift key method doesn’t work, try using the System Configuration tool.
– Press the Windows key + R to open the Run dialog box.
– Type “msconfig” and press Enter to open the System Configuration window.
– Go to the Boot tab and check the “Safe boot” option.
– Select the type of Safe Mode you want to access (Minimal, Networking, or Alternate Shell).
– Click OK and restart your computer.

3. If you have BitLocker enabled on your computer, you may need to enter your recovery key to access Safe Mode.
– When prompted to enter your recovery key, do so and press Enter.
– This will allow you to access Safe Mode.

4. If you’re unable to access Safe Mode through the methods mentioned above, you can try using a Windows 10 installation USB.
– Insert the USB into your computer and restart it.
– Press the appropriate key (usually F12 or Del) to access the boot menu.
– Select the USB drive as the boot device and press Enter.
– Follow the on-screen instructions to repair your computer or access Safe Mode.

5. If you’re still unable to access Safe Mode, you can try using the Command Prompt.
– Restart your computer and repeatedly press the F8 or Shift key.
– Select “Repair your computer” and choose the Troubleshoot option.
– Click on Advanced options and select Command Prompt.
– In the Command Prompt window, type “bcdedit /set {default} safeboot minimal” and press Enter.
– Restart your computer and it will boot into Safe Mode.

Alternative Methods to Enter Safe Mode

  1. Using System Configuration:

    • Press Windows Key + R to open the Run dialog box.
    • Type msconfig and press Enter to open the System Configuration window.
    • In the System Configuration window, go to the Boot tab.
    • Under the “Boot options” section, check the box next to Safe boot.
    • Select the appropriate option for Safe Mode: Minimal, Alternate shell, or Network.
    • Click Apply and then OK.
    • When prompted to restart your computer, click Restart.
  2. Using Shift + Restart:

    • Click on the Start button and then click Power.
    • Hold down the Shift key on your keyboard and click on Restart.
    • Your computer will restart and a blue screen with options will appear.
    • Click on Troubleshoot and then Advanced options.
    • From the Advanced options menu, select Startup Settings.
    • Click Restart.
    • After your computer restarts, a list of options will appear.
    • Press the number key corresponding to the Enable Safe Mode option.
  3. Using Bootable USB/DVD:

    • Insert the bootable USB or DVD into your computer.
    • Restart your computer.
    • Press the key to enter the Boot Menu (usually F12 or Esc).
    • Select the option to boot from the USB or DVD.
    • When the boot menu appears, select the option to Start Windows in Safe Mode.

Fixing Startup Issues in Safe Mode

If your Windows 10 computer is experiencing issues during start-up, one troubleshooting option you can try is to fix the problem in Safe Mode. Safe Mode is a diagnostic mode that allows you to start your computer with a minimal set of drivers and services, which can help identify and resolve start-up issues. Here’s how you can fix start-up issues in Safe Mode:

1. Restart your computer: To access Safe Mode, you’ll need to restart your computer. If your computer is frozen or unresponsive, you can try a hard reset by holding down the power button for a few seconds until the computer turns off. Once it’s off, press the power button again to turn it back on.

2. Access the Advanced Startup options: As your computer starts up, press and hold the Shift key until you see the Windows logo. Keep holding the Shift key until you see the Advanced Startup options. Select “Troubleshoot” from the menu.

3. Choose Startup Settings: In the Troubleshoot menu, select “Advanced options” and then “Startup Settings”. Click on the “Restart” button to restart your computer and access the Startup Settings menu.

4. Enable Safe Mode: Once your computer restarts, you’ll see a list of options in the Startup Settings menu. Press the corresponding number key or function key to enable Safe Mode. This will typically be F4 or F5, but it may vary depending on your computer. Once enabled, your computer will start in Safe Mode.

5. Resolve start-up issues: Now that you’re in Safe Mode, you can troubleshoot and fix the start-up issues. Here are a few steps you can try:

– Update drivers: In Safe Mode, you can update device drivers or roll back to a previous version to resolve driver-related issues. Open Device Manager by pressing the Windows key + X and selecting “Device Manager”. Locate the problematic device, right-click on it, and select “Update driver” or “Roll back driver”.

– Disable unnecessary startup programs: Some programs and services may be causing conflicts during start-up. Press the Windows key + R to open the Run dialog box, type “msconfig”, and press Enter. In the System Configuration window, go to the “Startup” tab and uncheck any unnecessary programs. Click “Apply” and then “OK” to save the changes.

– Scan for malware: Malicious software can also cause start-up issues. Use a reliable antivirus program to scan your computer for malware and remove any threats.

– Check for Windows updates: Outdated software can sometimes cause start-up problems. In Safe Mode, open the Settings app by pressing the Windows key + I, go to “Update & Security”, and click on “Check for updates”. Install any available updates and restart your computer.

6. Exit Safe Mode: After you’ve resolved the start-up issues, you can exit Safe Mode and start your computer normally. Press the Windows key + R to open the Run dialog box, type “msconfig”, and press Enter. In the System Configuration window, go to the “Boot” tab and uncheck the “Safe boot” option. Click “Apply” and then “OK” to save the changes. Restart your computer and it should start normally.

Additional Tips for Safe Mode Access on Windows 10

Windows 10 logo

Here are some additional tips to help you access Safe Mode on Windows 10:

1. Use the Shift + Restart method: If you’re unable to access Safe Mode through the Start menu, you can try the Shift + Restart method. Hold down the Shift key and click on the Restart option in the Windows 10 Start menu. This will bring up the Advanced Startup Options menu.

2. Enable Safe Mode through the System Configuration tool: Press the Windows key + R on your keyboard to open the Run dialog box. Type “msconfig” (without quotes) and press Enter. In the System Configuration window, go to the Boot tab and check the “Safe boot” option. Choose the type of Safe Mode you want to access (Minimal, Alternate shell, or Network) and click Apply.

3. Use the Command Prompt: If you’re comfortable with using the command-line interface, you can access Safe Mode through the Command Prompt. Press the Windows key + X on your keyboard and select Command Prompt (Admin) from the menu. In the Command Prompt window, type “bcdedit /set {default} safeboot minimal” (without quotes) and press Enter. Restart your computer, and it will boot into Safe Mode.

4. Use a Windows 10 installation USB: If none of the above methods work, you can create a Windows 10 installation USB and use it to access Safe Mode. Insert the USB flash drive into your computer and restart it. Press the appropriate key (usually F12 or Esc) to access the boot menu. Select the USB drive as the boot device and follow the on-screen instructions to access the Windows 10 installation wizard. From there, you can choose the Repair your computer option and navigate to Troubleshoot > Advanced options > Startup Settings. Select Safe Mode from the list of options and restart your computer.

Remember to remove the USB drive after accessing Safe Mode to avoid booting into it again.

5. Disable BitLocker: If your computer has BitLocker encryption enabled, you may need to disable it before accessing Safe Mode. Open the Control Panel from the Start menu, then go to System and Security > BitLocker Drive Encryption. Click on the Turn off BitLocker link next to the drive that Windows is installed on. Once BitLocker is disabled, you should be able to access Safe Mode.

Fix Windows 10 Update Stuck Checking for Updates

Are you frustrated with your Windows 10 update being stuck on the “Checking for updates” screen? Let’s explore some effective solutions to fix this issue.

Restart your computer: Sometimes, a simple restart can resolve issues related to Windows Update. So, try restarting your computer and then check for updates again.

Understanding Windows Update Errors and Solutions

Windows Update errors can be frustrating, but there are solutions available to help you fix them. Here are some common Windows Update errors and their corresponding solutions:

1. Error: Windows 10 update stuck checking for updates.

Solution:
Step 1: Restart your computer and try Windows Update again.
Step 2: Check your internet connection and make sure it is stable.
Step 3: Disable any third-party antivirus or firewall software temporarily, as they may interfere with Windows Update.
Step 4: Run the Windows Update Troubleshooter. Go to Settings > Update & Security > Troubleshoot > Windows Update Troubleshooter.
Step 5: Reset the Windows Update components by running the following commands in Command Prompt (Admin):
a. net stop wuauserv
b. net stop cryptSvc
c. net stop bits
d. net stop msiserver
e. ren C:\Windows\SoftwareDistribution SoftwareDistribution.old
f. ren C:\Windows\System32\catroot2 catroot2.old
g. net start wuauserv
h. net start cryptSvc
i. net start bits
j. net start msiserver
Step 6: Manually download and install the latest Windows updates from the Microsoft Update Catalog.

Patience is the key when dealing with Windows updates stuck on checking for updates; it may take some time, but eventually, it will resolve itself.

Troubleshooting Methods to Resolve Windows Update Issues

  1. Restart Windows Update Service:

    • Press Win + R to open the Run dialog box.
    • Type services.msc and press Enter.
    • Scroll down and locate Windows Update in the list of services.
    • Right-click on Windows Update and select Restart.
      Scroll down and locate Windows Update in the list of services.
Right-click on Windows Update and select Restart.
  2. Run Windows Update Troubleshooter:

    • Press Win + I to open the Settings app.
    • Click on Update & Security.
    • In the left pane, click on Troubleshoot.
    • Click on Additional troubleshooters in the right pane.
    • Scroll down and click on Windows Update.
    • Click on Run the troubleshooter and follow the on-screen instructions.
  3. Reset Windows Update Components:

    • Press Win + X and select Command Prompt (Admin).
    • Type the following commands one by one and press Enter after each:
      • net stop wuauserv
      • net stop cryptSvc
      • net stop bits
      • net stop msiserver
    • Type the following commands one by one and press Enter after each:
      • ren C:\Windows\SoftwareDistribution SoftwareDistribution.old
      • ren C:\Windows\System32\catroot2 catroot2.old
    • Type the following commands one by one and press Enter after each:
      • net start wuauserv
      • net start cryptSvc
      • net start bits
      • net start msiserver
  4. Manually Download and Install Updates:

    • Go to the Microsoft Update Catalog website.
    • Search for the specific update using the KB number.
    • Download the appropriate update for your system.
    • Double-click on the downloaded file to install the update manually.

Restarting the PC to Fix Windows Update Stuck on Checking for Updates

Restart button on a PC

If your Windows 10 update is stuck on “Checking for Updates,” restarting your PC may help resolve the issue. Follow these steps to restart your computer and hopefully fix the problem:

1. Save any important work and close all open programs.
2. Click on the “Start” menu in the bottom-left corner of your screen.
3. Click on the “Power” button.
4. From the options that appear, click on “Restart.” This will initiate a restart of your computer.
5. Wait for your computer to fully restart.
6. Once your computer has restarted, check if the Windows update is still stuck on “Checking for Updates.”

If the issue persists, there may be other underlying problems preventing the update from progressing. In such cases, you may need to consider other troubleshooting steps or seek further assistance.

python
import wua

def check_for_updates():
update_session = wua.Session()
update_searcher = update_session.CreateUpdateSearcher()

print("Searching for updates...")
search_result = update_searcher.Search("IsInstalled=0")

if search_result.Updates.Count == 0:
print("No updates available.")
else:
print("Updates available:")
for update in search_result.Updates:
print(update.Title)

check_for_updates()

This code uses the `wua` module to create a Windows Update session, initiate a search for updates, and display the titles of any available updates. However, please ensure you have installed the required `wua` module before running this code.

Setting the Correct Date and Time for Successful Windows Updates

To ensure successful Windows updates, it is important to set the correct date and time on your computer. Incorrect date and time settings can cause issues with the update process. Follow these steps to set the correct date and time:

1. Click on the clock icon in the taskbar, usually located at the bottom right corner of the screen.

2. In the pop-up window, click on “Date and time settings” or “Adjust date/time.”

3. In the settings window, make sure the “Set time automatically” option is turned on. This will allow your computer to synchronize with an internet time server and set the correct time automatically.

4. If the option is already turned on and you are still experiencing issues, you can try manually setting the date and time. To do this, turn off the “Set time automatically” option and click on “Change” under “Change date and time.”

5. Select the correct date and time from the calendar and clock, and click “Change” to save the settings.

6. Once you have set the correct date and time, you can close the settings window and proceed with your Windows updates.

Setting the correct date and time is a simple yet crucial step in ensuring the successful installation of Windows updates.

Running an SFC Scan to Identify and Resolve Corrupt File Errors

To fix corrupt file errors and resolve the issue of Windows 10 update getting stuck on “checking for updates,” you can try running an SFC (System File Checker) scan. This scan will scan your computer for any corrupt or missing system files and attempt to repair them.

Here’s how you can run an SFC scan:

1. Press the Windows key + X on your keyboard and select Command Prompt (Admin) or Powershell (Admin) from the menu that appears.

2. In the Command Prompt or Powershell window, type sfc /scannow and press Enter.

3. The scan will now begin and may take some time to complete. It will automatically scan all protected system files and replace any corrupted files it finds with a cached copy that is located in a compressed folder at %WinDir%\System32\dllcache.

4. Once the scan is complete, you will see a message indicating whether any corrupt files were found and successfully repaired. If any errors were found but not repaired, you may need to run the scan again.

5. After the scan is finished, restart your computer and check if the issue with Windows 10 update getting stuck on “checking for updates” has been resolved.

Running an SFC scan can help fix corrupt file errors and improve the overall stability and performance of your Windows 10 system. It is a useful troubleshooting step that can often resolve issues related to system files.

Trying Different Network Connections to Overcome Windows Update Stuck Issue

Connection Type Description
1. Wired Ethernet Connection An Ethernet connection provides stable and reliable network connectivity. Connect your computer directly to the modem/router using an Ethernet cable.
2. Wi-Fi Connection If you’re using Wi-Fi, try connecting to a different Wi-Fi network. This can help determine if the issue is specific to your current network.
3. Mobile Hotspot Create a mobile hotspot using your smartphone or portable hotspot device. Connect your computer to the hotspot and check for updates. This can help bypass any issues with your home network.
4. VPN Connection If you have a VPN (Virtual Private Network) installed, try connecting to a different VPN server location. Sometimes, certain server locations may have restrictions or issues that can affect Windows updates.
5. Public Wi-Fi If available, try connecting your computer to a public Wi-Fi network, such as a library or café. This can help determine if the issue is specific to your home network.

PC freezing with Event ID 19 WHEA-Logger

Recently, I have been experiencing frequent PC freezing accompanied by Event ID 19 WHEA-Logger, and it has become a significant concern.

Plan ahead: For a successful event, start planning well in advance. Set a timeline, allocate tasks, and ensure everyone involved understands their responsibilities. This will help you stay organized and avoid any last-minute chaos.

Detect and Respond to Threats in Real-time

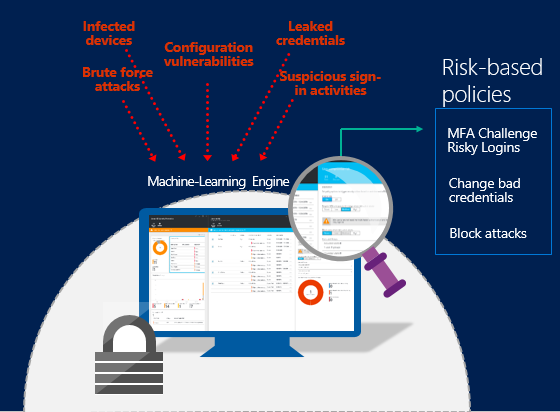
Real-time threat detection and response interface

1. Start by checking for any recent changes made to your system, such as software installations or updates. Use the command-line interface to review the list of installed programs and verify their trustworthiness.

2. Analyze the Event ID 19 WHEA-Logger error and identify any patterns or common triggers. This information will help you determine the underlying cause and take appropriate action.

3. Perform a thorough scan of your system using reliable antivirus software. Run a full system scan to detect and eliminate any potential threats that might be causing the PC freezing.

4. Ensure that your operating system and drivers are up to date. Visit the official Microsoft website to download the latest updates and patches for your Windows version.

5. Consider checking your computer’s hardware components for any signs of failure or malfunction. Pay particular attention to the CPU, RAM, and graphics card. Consult the user manual or contact the manufacturer for guidance on performing hardware diagnostics.

Enhance Security Measures with Free Resources

  • Install antivirus and anti-malware software to protect against malicious threats.
  • Regularly update your operating system and software to ensure you have the latest security patches.
  • Enable a firewall to add an extra layer of protection to your PC.
  • Use strong and unique passwords for all your accounts.
  • Enable two-factor authentication whenever possible for enhanced login security.
  • Backup your important files and data regularly to prevent data loss.
  • Use a virtual private network (VPN) when connecting to public Wi-Fi networks.
  • Enable automatic updates for all your installed applications.
  • Regularly scan your PC for malware and remove any threats detected.
  • Be cautious while clicking on links or downloading attachments from unknown sources.

Utilize Supercharger Free Edition for Enhanced Event Management

Supercharger interface

Utilize Supercharger Free Edition to enhance event management and resolve PC freezing issues related to Event ID 19 WHEA-Logger. This powerful tool can help you identify and troubleshoot the root cause of the problem.

To start, download and install Supercharger Free Edition from the Microsoft website. Once installed, follow these steps to optimize your event management:

1. Launch Supercharger Free Edition by double-clicking the desktop icon or searching for it in the Start menu.
2. In the main interface, navigate to the “Event Management” tab.
3. Click on the “Event ID 19 WHEA-Logger” category to view related events.
4. Analyze the events and look for any patterns or common triggers.
5. Right-click on an event and select “View Details” to access more information about it.
6. Use the “Filter” option to narrow down the events based on specific criteria, such as date or severity.
7. Apply appropriate actions based on the information provided, such as updating drivers or adjusting hardware settings.
8. Monitor the system after implementing changes to ensure the freezing issue is resolved.

Utilizing Supercharger Free Edition for event management can significantly improve your troubleshooting process, enabling you to efficiently resolve PC freezing issues caused by Event ID 19 WHEA-Logger.

Learn from Real-world Examples of Event ID 19

Event ID Event Description Possible Cause Solution
Event ID 19 WHEA-Logger error indicating PC freezing Hardware or driver-related issue Various potential solutions
Event ID 19 PC freezing and displaying WHEA-Logger error Overheating or faulty hardware Check cooling system and perform hardware diagnostics
Event ID 19 WHEA-Logger error causing system instability Outdated or incompatible drivers Update or reinstall drivers
Event ID 19 PC freezing with WHEA-Logger error in Windows Event Viewer Memory or RAM issues Test and replace faulty memory modules
Event ID 19 WHEA-Logger error leading to frequent crashes Power supply or voltage-related problems Check power supply and ensure stable voltage

Windows 10 Update Slowing Computer? Here’s How to Fix It

Is your Windows 10 update causing your computer to slow down? Discover effective solutions to fix this issue.

Check for updates and install the latest drivers: Sometimes, slow performance issues can be resolved by updating the drivers for your computer’s hardware components. Go to the manufacturer’s website and download the latest drivers for your system.

Uninstall the recently installed update

If you’ve recently installed a Windows 10 update and noticed that your computer has become slow, there is a solution. To fix this issue, you need to uninstall the update. Here’s how:

1. Open the Start menu and click on the Settings icon.
2. In the Settings window, click on “Update & Security.”
3. On the left-hand side, click on “Windows Update.”
4. In the Windows Update settings, click on “View update history.”
5. This will open a new window showing all the updates installed on your computer. Look for the recently installed update that is causing the slowdown.
6. Once you’ve identified the update, click on “Uninstall updates” at the top of the window.
7. This will open the Control Panel with a list of installed updates. Locate the problematic update and right-click on it.
8. From the context menu, select “Uninstall.”
9. Follow the on-screen instructions to complete the uninstallation process.
10. After uninstalling the update, restart your computer to apply the changes.

After a Windows 10 update, a slow computer can be incredibly frustrating, but don’t worry, there are steps you can take to fix it.

Repair corrupt system files

Computer with a wrench or repair tool

If your Windows 10 update is slowing down your computer, one possible reason could be corrupt system files. Luckily, there’s a way to fix this issue.

To repair corrupt system files, you can use the built-in System File Checker tool in Windows 10. Here’s how:

1. Open the Command Prompt as an administrator by pressing the Windows key + X and selecting “Command Prompt (Admin).”

2. In the Command Prompt window, type “sfc /scannow” and press Enter. This command will scan your system for corrupt files and repair them if possible.

3. Wait for the scan to complete. This process may take some time, so be patient.

4. Once the scan is finished, you’ll see a message indicating whether any corrupt files were found and repaired.

5. Restart your computer to apply the changes.

By running the System File Checker tool, you can fix any corrupt system files that may be causing your Windows 10 update to slow down your computer. This should help improve the overall speed and performance of your system.

A sluggish computer post-Windows 10 update is not uncommon, but with some troubleshooting and optimization, you can restore its speed.

Clear Windows Update cache

  • Stop Windows Update service: Open Command Prompt as administrator and type “net stop wuauserv”.
  • Delete Windows Update cache: Navigate to C:\Windows\SoftwareDistribution folder and delete all files and folders within it.
  • Restart Windows Update service: Open Command Prompt as administrator and type “net start wuauserv”.
  • Reset Windows Update Components: Open Command Prompt as administrator and run the following commands in sequence:
    • net stop bits
    • net stop wuauserv
    • net stop appidsvc
    • net stop cryptsvc
    • ren %systemroot%\SoftwareDistribution SoftwareDistribution.old
    • ren %systemroot%\system32\catroot2 catroot2.old
    • net start bits
    • net start wuauserv
    • net start appidsvc
    • net start cryptsvc
  • Run Windows Update Troubleshooter: Open Settings, go to Update & Security, select Troubleshoot, and run the Windows Update troubleshooter.

python
import subprocess

def optimize_windows():
# Clear temporary files
subprocess.run('del /q/f/s %TEMP%\*')

# Disable unnecessary startup programs
subprocess.run('tasklist > tasks.txt', shell=True)
with open('tasks.txt', 'r') as file:
for line in file:
if 'SomeStartupProgram.exe' in line: # Replace with the name of unnecessary programs
program_name = line.split()[0].strip()
subprocess.run(f'taskkill /f /im {program_name}')

# Update drivers
subprocess.run('DriverUpdate.exe') # Replace with appropriate driver update mechanism

# Perform disk cleanup
subprocess.run('cleanmgr.exe /sagerun:1')

# Disable unnecessary visual effects
subprocess.run('SystemPropertiesPerformance.exe')

print("Optimization completed successfully.")

# Call the function to optimize the system
optimize_windows()

Optimize disk drives

If your Windows 10 update is slowing down your computer, one possible solution is to optimize your disk drives. This can help improve the performance of your system and make it run smoother.

To optimize your disk drives, follow these steps:

1. Open the Task Manager by pressing Ctrl + Shift + Esc on your keyboard.
2. Go to the “Performance” tab and click on “Open Resource Monitor” at the bottom.
3. In the Resource Monitor window, click on the “Disk” tab.
4. Look for the “Disk Activity” section and sort the processes by “Total (B/sec)” to see which processes are using the most disk activity.
5. Identify any processes that are using a high amount of disk activity and causing your computer to slow down.
6. Right-click on the process and select “End Process” to stop it from running.
7. If you’re unsure about a process, you can search for it online to determine if it’s necessary or if it could be a malware or virus.
8. You can also check the “Disk” tab in the Task Manager to see if any programs are using a high amount of disk usage. If so, you can right-click on the program and select “End Task” to close it.
9. Another way to optimize your disk drives is to clean up your hard drive. You can do this by going to the “Settings” menu, selecting “System,” and then “Storage.” From there, you can click on “Temporary files” and remove any unnecessary files that are taking up space on your disk.
10. Finally, you can defragment your hard drive to improve its performance. To do this, go to the “Settings” menu, select “System,” and then “Storage.” Under the “More storage settings” section, click on “Optimize Drives.” From there, select your hard drive and click on “Optimize” to start the defragmentation process.

Disable background apps

Task Manager

1. Open the Task Manager by pressing Ctrl + Shift + Esc on your keyboard.
2. In the Task Manager window, click on the “More details” option at the bottom if it’s not already expanded.
3. Go to the “Processes” tab and look for any unnecessary or resource-intensive apps running in the background. You can sort the list by clicking on the “CPU” or “Memory” column header to identify the culprits.
4. Select the apps you want to disable by clicking on them and then click on the “End task” button at the bottom right. Be cautious not to close any essential system processes.
5. If you want to permanently prevent an app from running in the background, go to the “Startup” tab in the Task Manager and disable it from starting up with your computer.

Disabling background apps can help free up system resources and improve the overall performance of your computer. Remember to only disable apps that you don’t need running in the background to avoid any unintended consequences.

If you continue to experience performance issues after disabling background apps, it’s recommended to check for other potential causes such as malware, software bugs, or outdated drivers.

Turn off visual effects and transparency

Here’s how to do it:

1. Open the Start menu and type “Performance Options” in the search bar. Press Enter.
2. In the Performance Options window, go to the Visual Effects tab.
3. Select the option for “Adjust for best performance” to disable all visual effects, or manually uncheck specific visual effects that you don’t need.
4. Click Apply and then OK to save the changes.

By turning off visual effects and transparency, you can improve the performance of your Windows 10 computer. This will free up system resources and make your computer run faster.

Scan for viruses

1. Open your antivirus software. If you don’t have one installed, consider downloading a reputable antivirus program from a trusted source.

2. Update your antivirus software to ensure that it has the latest virus definitions. This will help it detect and remove the most recent threats.

3. Perform a full system scan using your antivirus software. This will scan all files and folders on your computer for any potential viruses.

4. If your antivirus software detects any viruses, follow the instructions to remove or quarantine them. This will help protect your computer and speed up its performance.

5. After the scan is complete and any viruses have been removed, restart your computer. This can help clear out any lingering issues and improve overall performance.

Scanning for viruses is an essential step in troubleshooting a slow Windows 10 update. It can help identify and eliminate any potential threats that may be affecting your computer’s performance.

Update device drivers

  • Open Device Manager by right-clicking on the Start button and selecting Device Manager.
  • Expand the category of the device you want to update the driver for by clicking on the arrow next to it.
  • Right-click on the device and select Update driver.
  • Choose the option to Search automatically for updated driver software.
  • If Windows finds an updated driver, follow the on-screen instructions to install it.
  • If Windows doesn’t find an updated driver, you can try searching for one on the manufacturer’s website.
  • Download the latest driver for your device from the manufacturer’s website.
  • Open the downloaded driver file and follow the on-screen instructions to install it.
  • Restart your computer to apply the driver update.

Perform a clean boot

Computer with a broom and dustpan

Performing a clean boot can help resolve issues with a Windows 10 update slowing down your computer. To do this, follow these steps:

1. Press the Windows key + R to open the Run dialog box.
2. Type “msconfig” (without quotes) and press Enter to open the System Configuration window.
3. In the General tab, select the “Selective startup” option.
4. Uncheck the box next to “Load startup items.”
5. Go to the Services tab and check the box next to “Hide all Microsoft services.”
6. Click on the “Disable all” button.
7. Go to the Startup tab and click on “Open Task Manager.”
8. In the Task Manager window, disable any unnecessary startup programs by right-clicking on them and selecting “Disable.”
9. Close the Task Manager and go back to the System Configuration window.
10. Click on the “Apply” button and then click “OK.”
11. Restart your computer.

Performing a clean boot will disable all non-Microsoft services and startup programs, allowing you to identify if any of them were causing the slow performance issue. Once your computer has restarted, check if the Windows 10 update is still slowing down your computer. If the issue is resolved, you can gradually enable the disabled services and startup programs to identify the culprit.

USB Drive Basics and Usage on Windows PC

USB drives are essential tools for storing and transferring data on Windows PCs. Understanding the basics and optimal usage of these portable devices is crucial for efficient file management and data security.

History and Technology Improvements of USB Drives
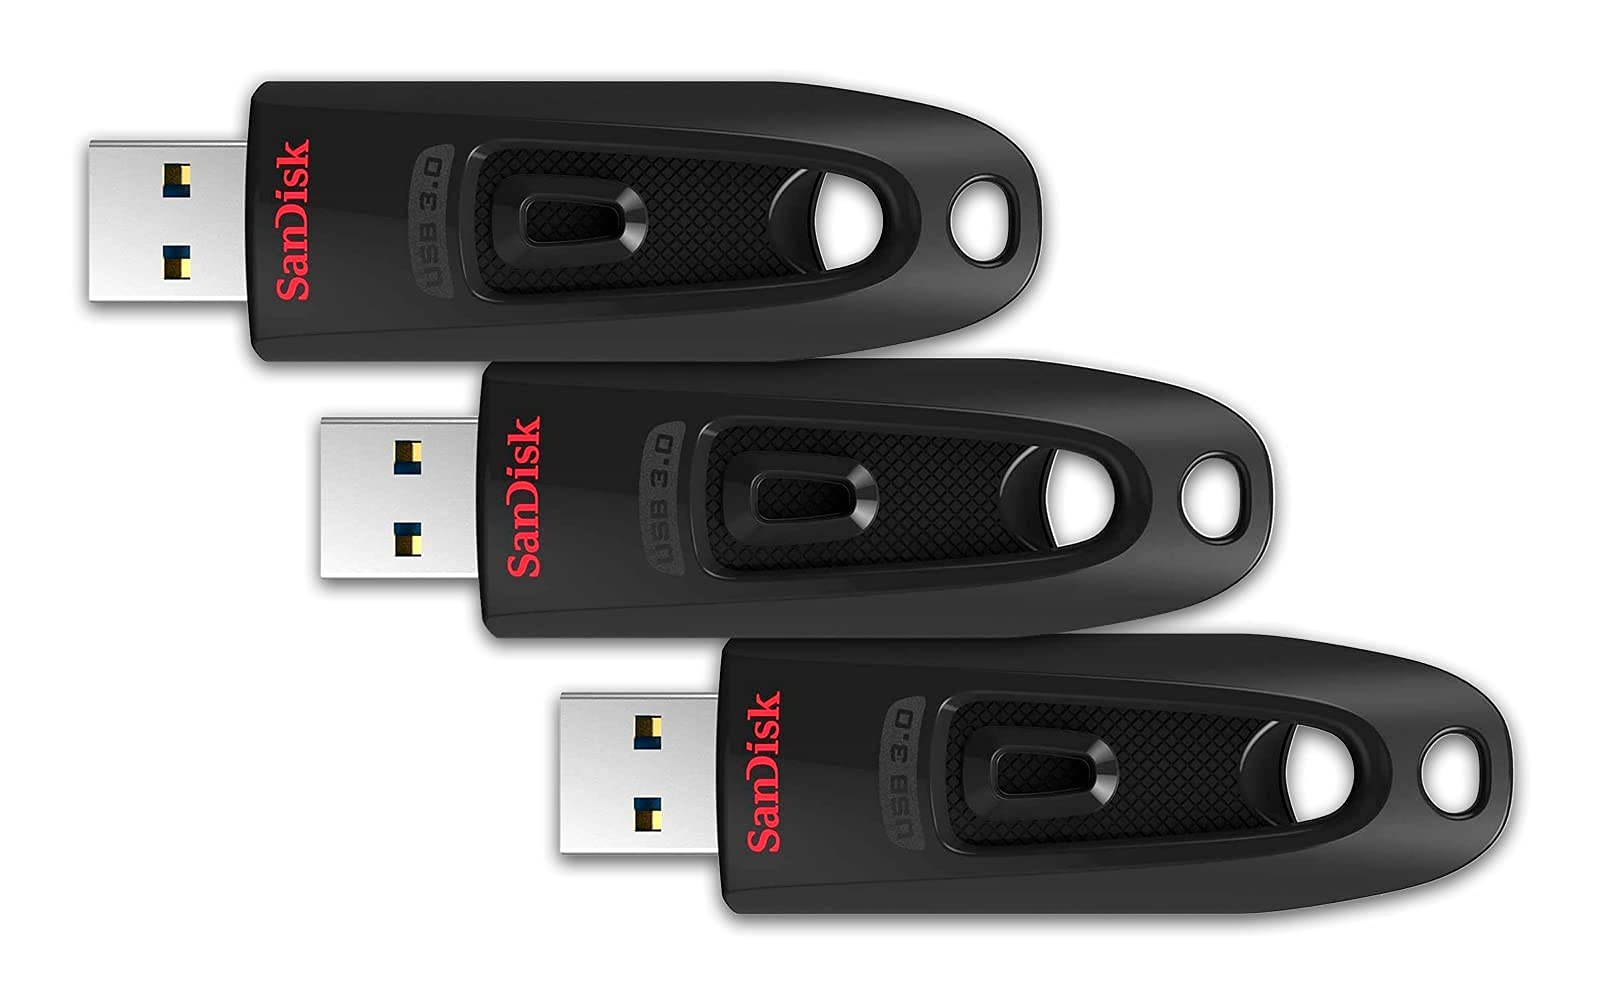
USB drive evolution and a computer

USB drives have come a long way since their inception. Originally introduced in the late 1990s, USB drives quickly became popular due to their compact size and ability to store and transfer data.

One of the most significant technological improvements in USB drives is the evolution of flash memory. Flash memory is a type of non-volatile storage that can retain data even when power is disconnected. This advancement allowed USB drives to become portable and reliable storage devices.

Another important development in USB drive technology is the introduction of different file systems. File systems determine how data is organized and stored on the device. Two commonly used file systems for USB drives are FAT32 and NTFS. FAT32 is an older file system that is compatible with a wide range of devices, while NTFS offers better security and file management features.

USB drives have also benefited from the introduction of USB-C technology. USB-C is a versatile connector that offers faster data transfer speeds and the ability to connect to various devices using a single port. This advancement has made USB drives even more convenient to use with laptops and other devices.

In terms of capacity, USB drives have significantly increased their storage capabilities over the years. From the initial sizes of a few megabytes, USB drives can now hold several terabytes of data. This improvement allows users to store large files, such as videos and high-resolution images, on their USB drives.

Furthermore, USB drives have replaced older storage mediums like floppy disks and optical discs. These older technologies had limited storage capacity and were prone to damage. USB drives, on the other hand, offer more durability and flexibility, making them a preferred choice for data storage and backup.

Essential and Additional Components of USB Drives
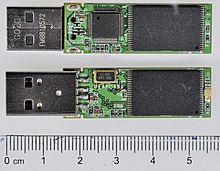
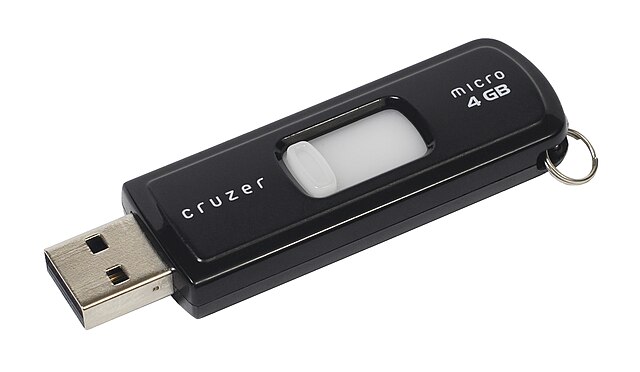
USB drive with a variety of components

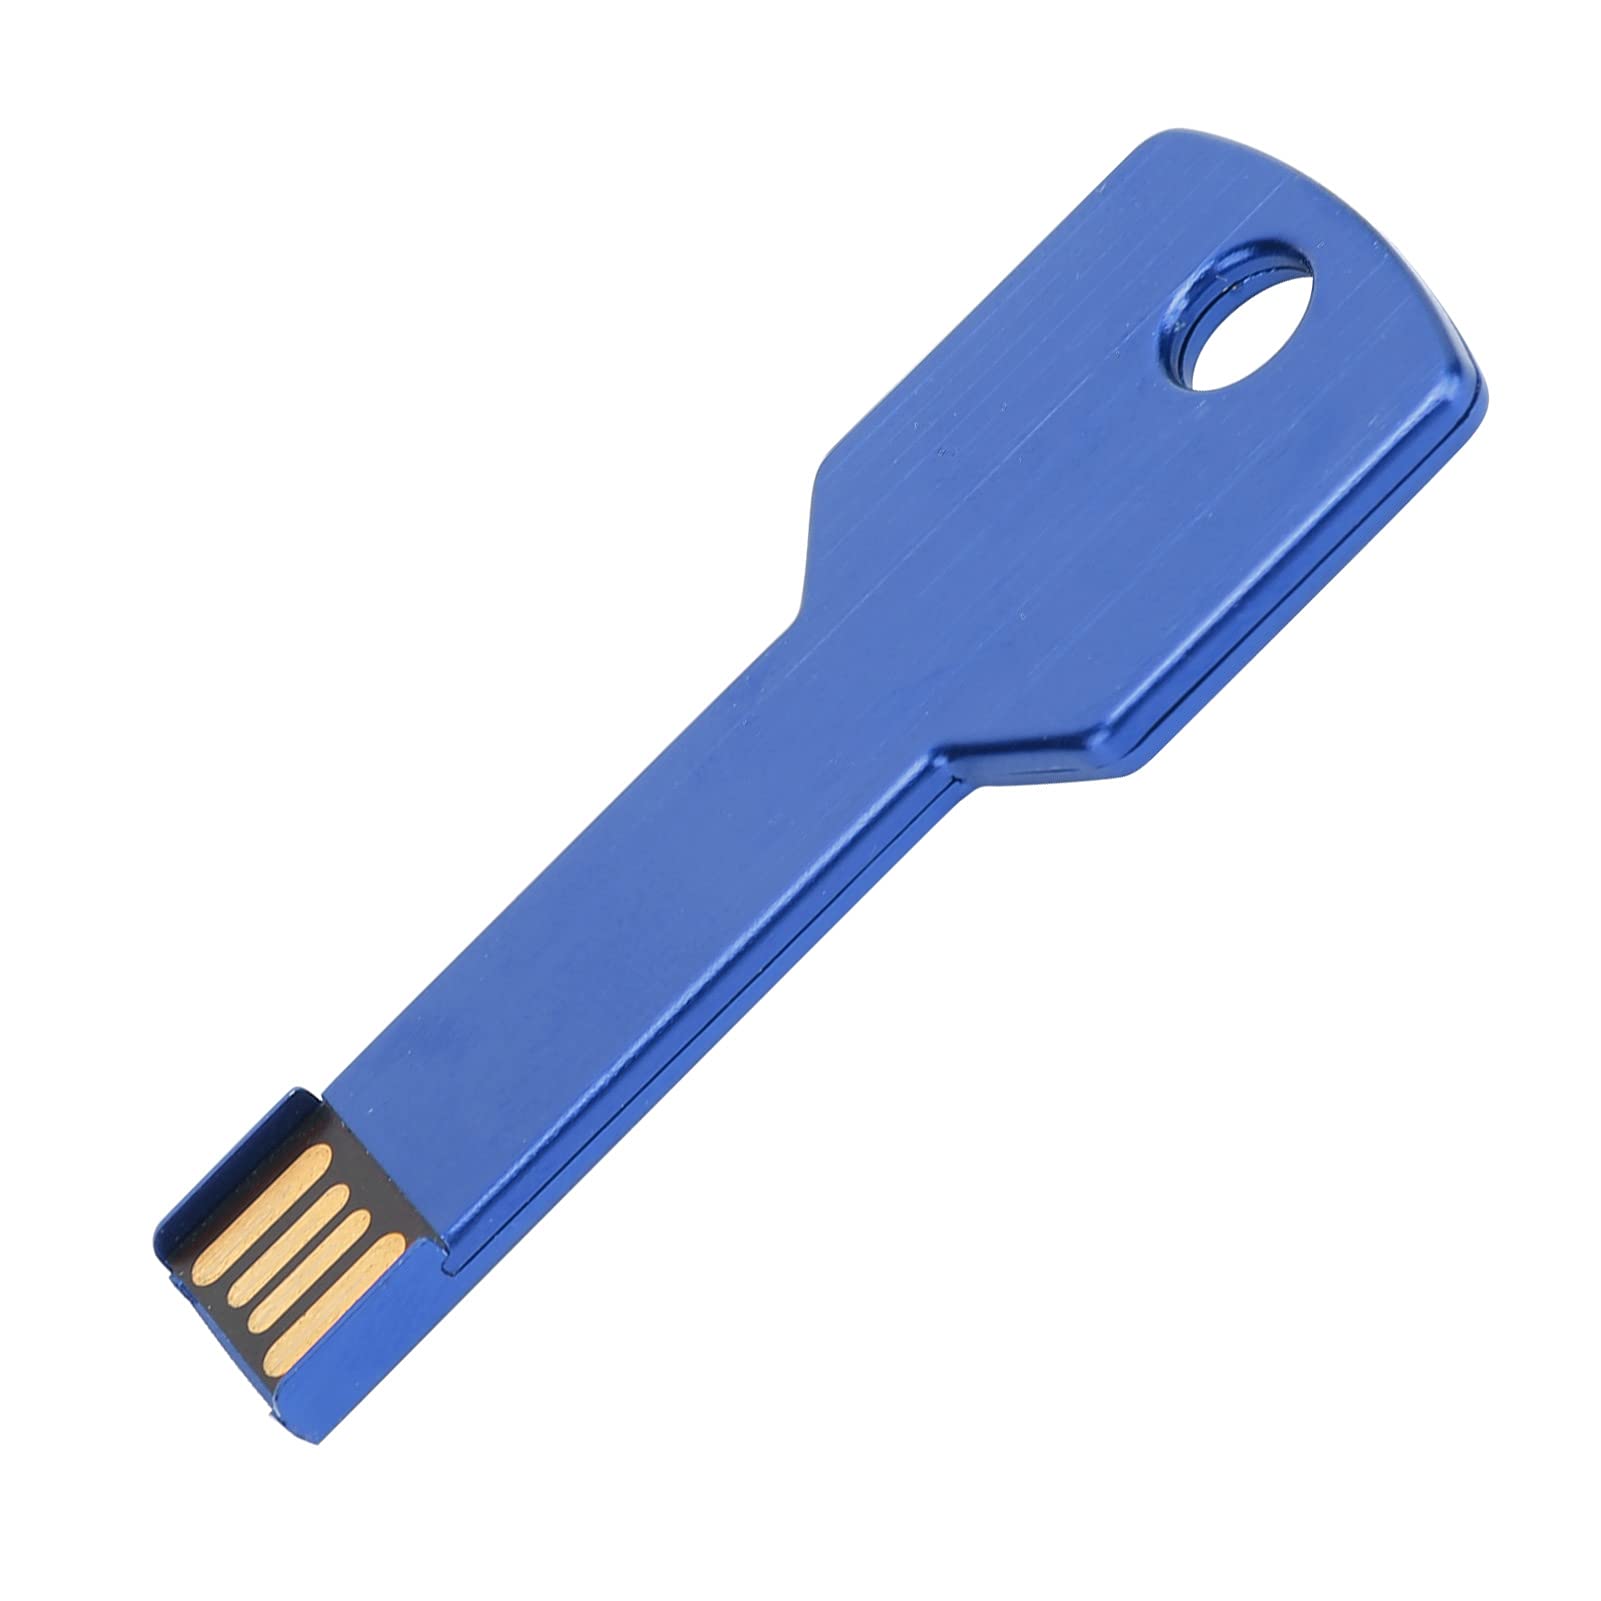
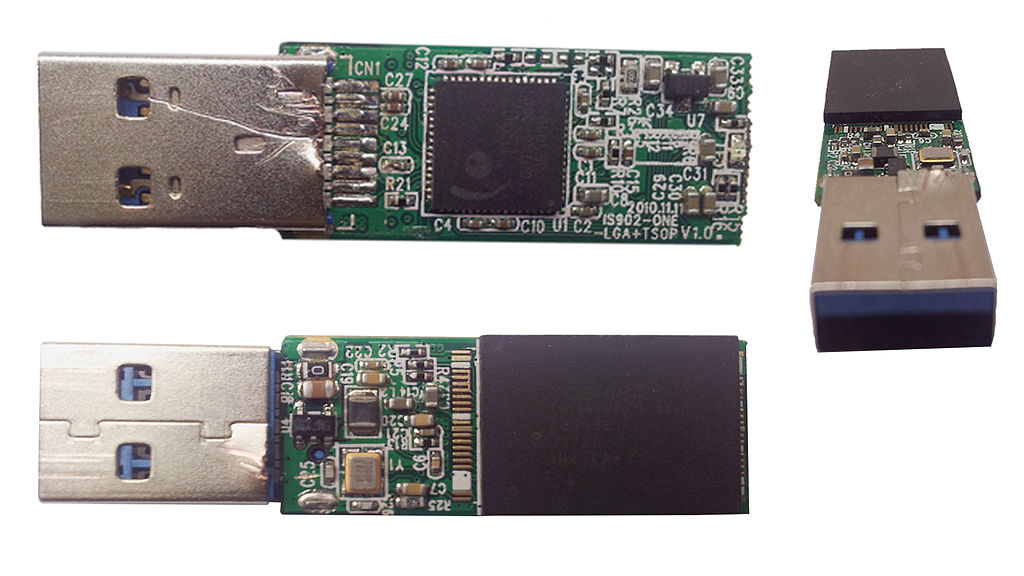
  • USB connector: The physical port that allows the USB drive to be connected to a computer or other compatible device.
  • Data storage chip: The internal component that stores data on the USB drive.
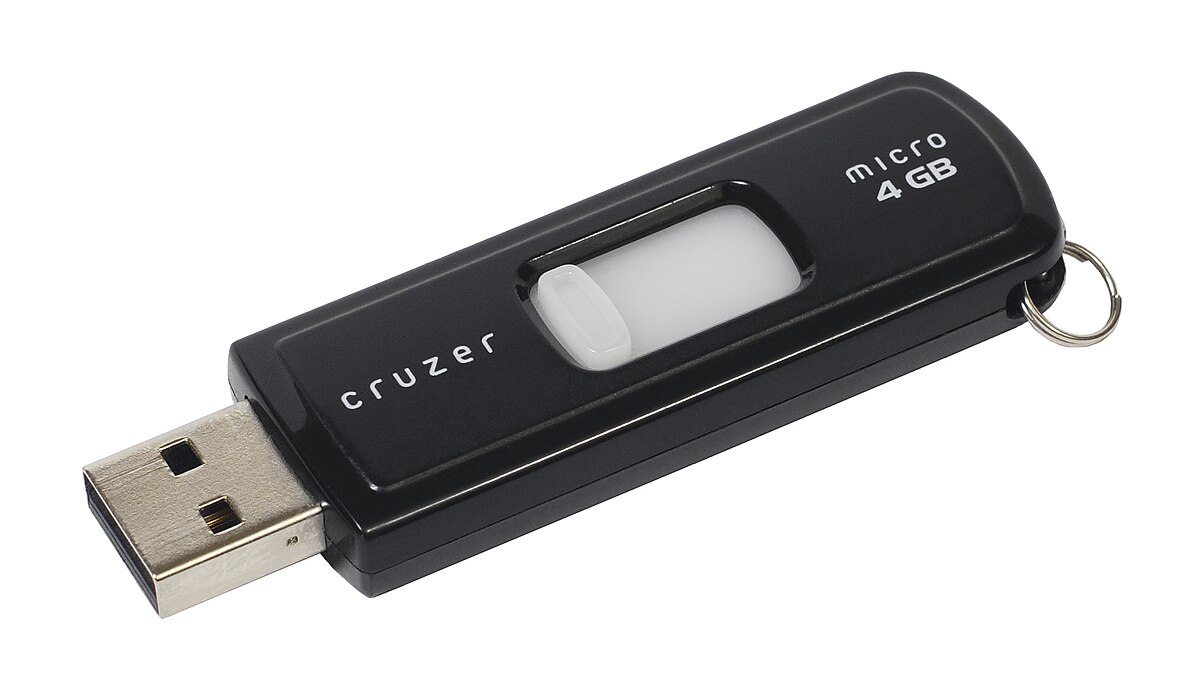
    USB connector: The physical port that allows the USB drive to be connected to a computer or other compatible device.
Data storage chip: The internal component that stores data on the USB drive.
  • Capacity: The amount of data that can be stored on the USB drive, typically measured in gigabytes (GB) or terabytes (TB).
  • Data transfer speed: The rate at which data can be read from or written to the USB drive, usually measured in megabytes per second (MB/s) or gigabits per second (Gbps).
  • File system: The way in which the USB drive organizes and stores files, such as FAT32 or NTFS.
  • Read-only switch: Some USB drives have a physical switch that can make the drive read-only, preventing accidental deletion or modification of stored data.
  • LED indicator: A light on the USB drive that indicates when it is connected to a computer and when data is being transferred.
  • Password protection: Certain USB drives offer the ability to encrypt data and require a password for access, ensuring data security.
  • Backup software: Some USB drives come with built-in backup software that allows for automatic data backups.
  • Compatibility: USB drives can work with various operating systems, including Windows, Mac, and Linux.
  • Plug-and-play capability: USB drives can be easily connected to a computer without the need for additional drivers or software installation.
  • Physical durability: USB drives can differ in their resistance to physical damage, with some offering rugged designs for enhanced durability.
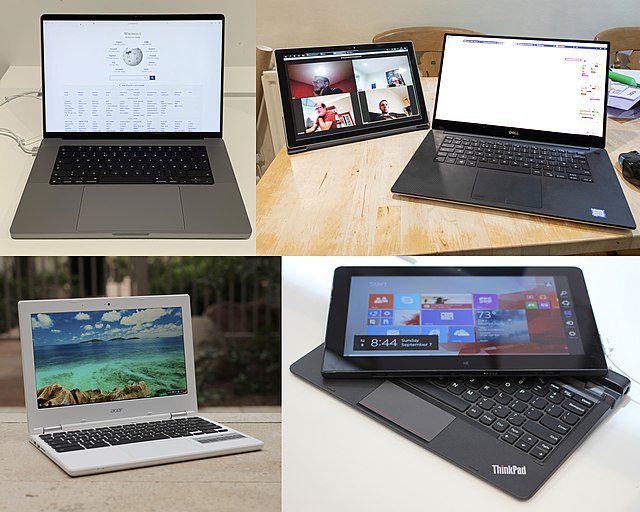
    Plug-and-play capability: USB drives can be easily connected to a computer without the need for additional drivers or software installation.
Physical durability: USB drives can differ in their resistance to physical damage, with some offering rugged designs for enhanced durability.
  • Keychain or lanyard attachment: Some USB drives include a small hole or loop for attaching to a keychain or lanyard, making it easy to carry and prevent loss.
  • USB 3.0 or USB 3.1: USB drives with these specifications offer faster data transfer speeds compared to older USB 2.0 drives.
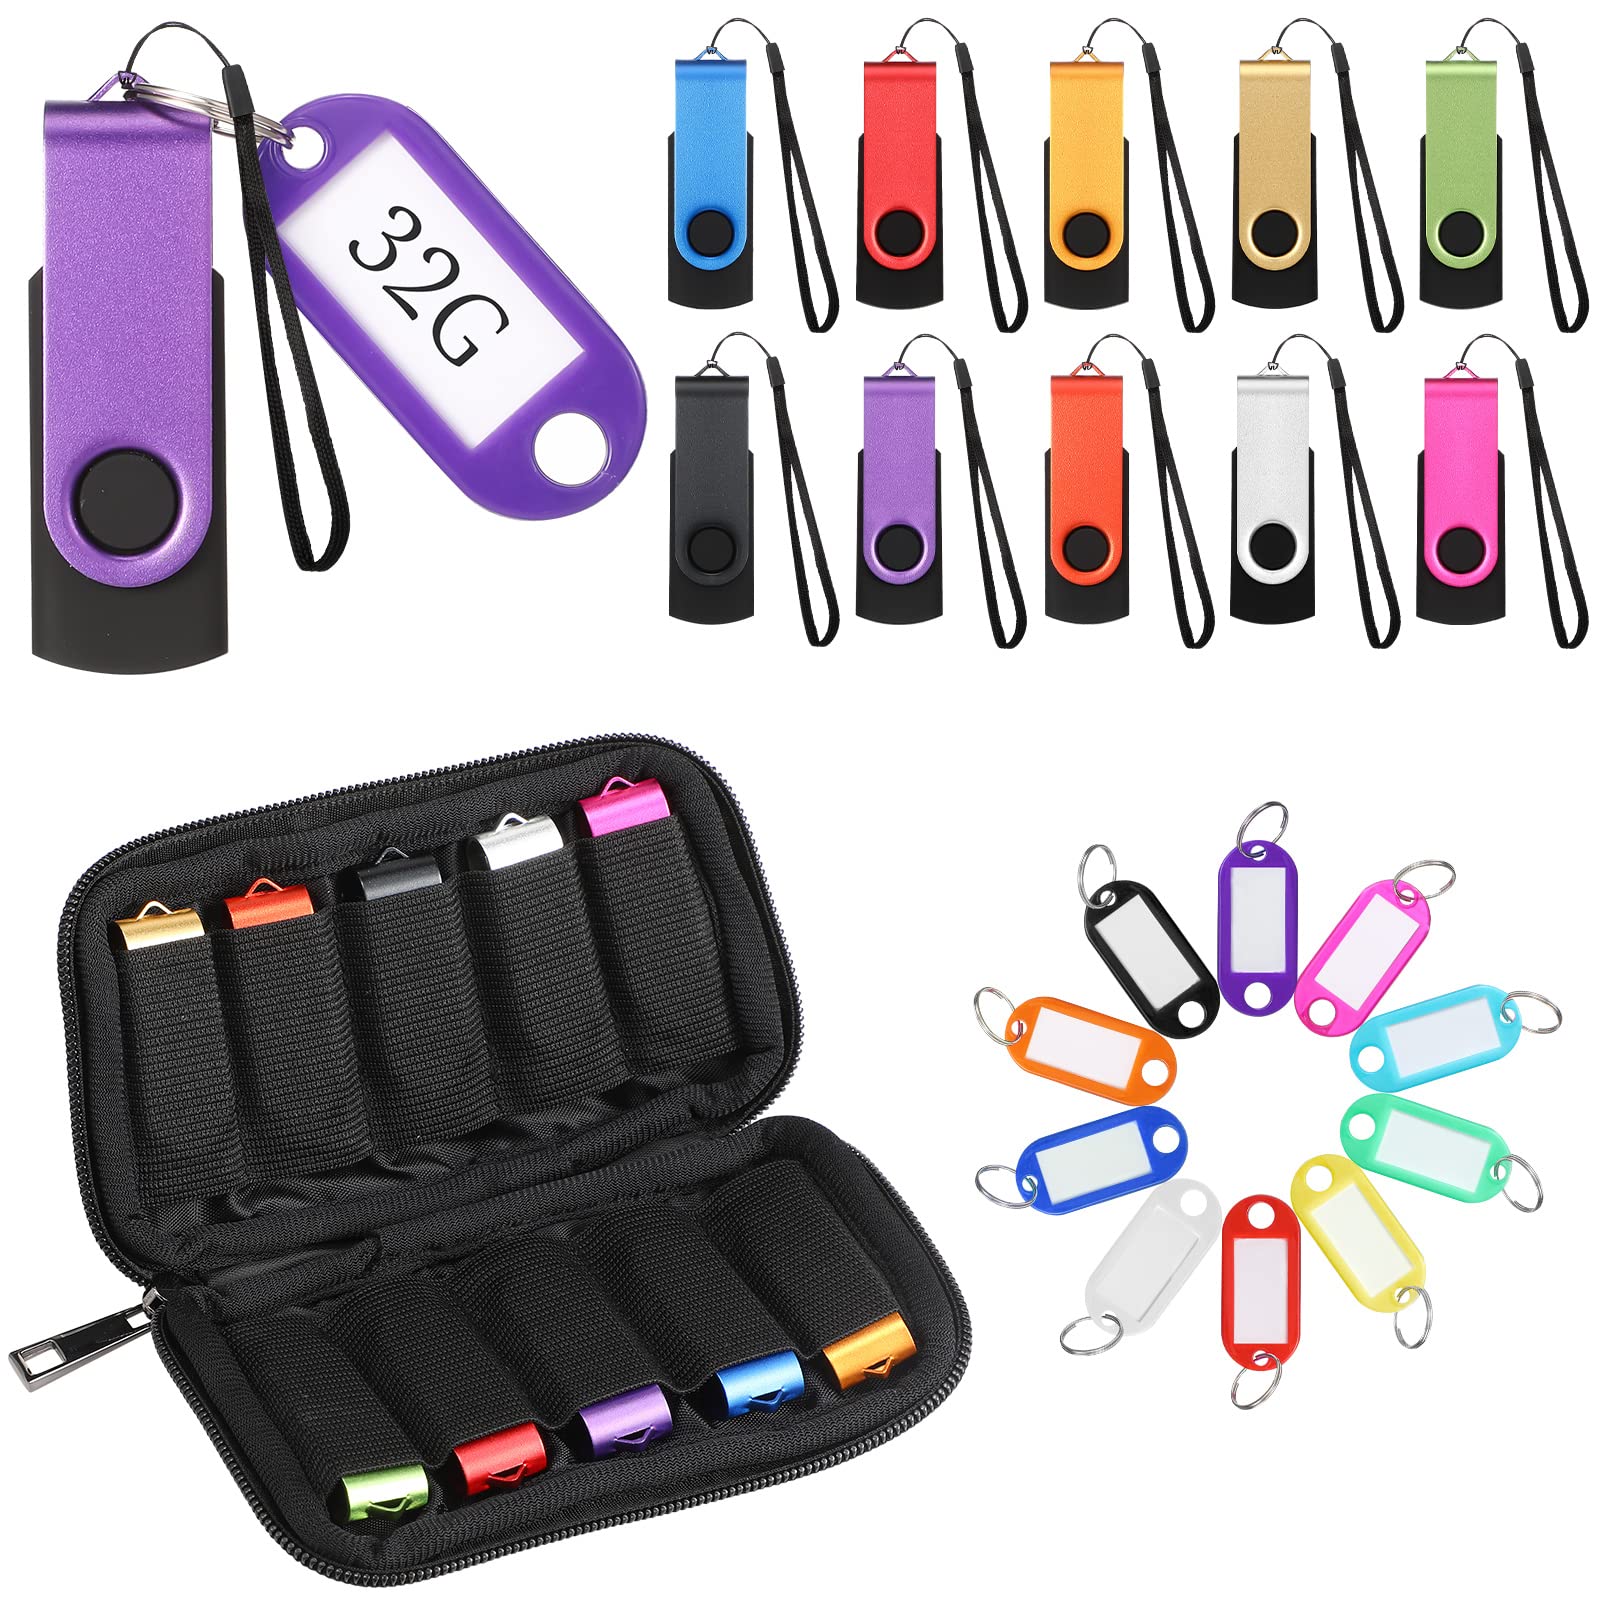
    Keychain or lanyard attachment: Some USB drives include a small hole or loop for attaching to a keychain or lanyard, making it easy to carry and prevent loss.
USB 3.0 or USB 3.1: USB drives with these specifications offer faster data transfer speeds compared to older USB 2.0 drives.
  • Wireless functionality: Certain USB drives support wireless connectivity, allowing for easy file sharing and access across multiple devices.

Size and Packaging of USB Drives
USB drives of different sizes and packaging

When it comes to USB drives, size and packaging are important factors to consider. The size of a USB drive refers to its physical dimensions, while packaging refers to the way it is presented and protected.

USB drives come in various sizes, ranging from small and compact to larger, more robust options. The smaller ones are usually more portable and convenient to carry around, while the larger ones may offer more storage capacity. When choosing a USB drive, consider your specific needs and preferences.

In terms of packaging, USB drives typically come in blister packs or plastic cases. The packaging helps protect the drive from damage during transportation and storage. It is important to handle the packaging with care, as any damage to it could potentially affect the integrity of the USB drive.

When using a USB drive on a Windows PC, it is important to follow the proper steps to ensure smooth usage. First, insert the USB drive into an available USB port on your computer. Make sure to wait for the computer to recognize the drive before proceeding.

To access the files on the USB drive, open File Explorer by clicking on the folder icon in the taskbar or by pressing the “Windows key + E” on your keyboard. Locate the USB drive under “This PC” or “Devices and Drives.” Double-click on the USB drive’s icon to open it and view its contents.

To safely remove the USB drive, right-click on its icon and select “Eject” or “Safely Remove Hardware.” This will prevent any data loss or corruption on the USB drive. Once the computer notifies you that it is safe to remove the drive, you can physically unplug it from the USB port.

Remember to always backup important files on your USB drive to avoid data loss. Additionally, if you plan to use the USB drive on different devices, make sure it is formatted in a compatible file system, such as FAT32 or exFAT.

By understanding the size and packaging of USB drives, as well as how to properly use them on a Windows PC, you can make the most out of this versatile storage solution.

File System and Defragmenting of USB Drives
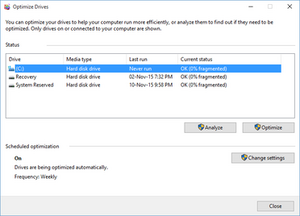
A fragmented USB drive being defragmented.

When using USB drives on a Windows PC, it is important to understand the file system and how to optimize their performance through defragmentation.

The file system is the structure that organizes and stores files on a storage device. For USB drives, the most commonly used file systems are FAT32 and exFAT. FAT32 is compatible with a wide range of devices and has a maximum file size limit of 4GB. On the other hand, exFAT supports larger file sizes and is ideal for storing multimedia files.

To ensure optimal performance, it is recommended to regularly defragment USB drives. Defragmentation is the process of reorganizing files on a storage device to improve access speed. This is especially important for USB drives that are frequently used to transfer or store large files.

To defragment a USB drive on a Windows PC, follow these steps:

1. Connect the USB drive to your computer.
2. Open “File Explorer” by clicking on the folder icon on the taskbar or pressing the Windows key + E.
3. Right-click on the USB drive and select “Properties.”
4. In the “Properties” window, go to the “Tools” tab.
5. Under the “Optimize and defragment drive” section, click on “Optimize.”
6. Select the USB drive from the list and click on “Optimize.”
7. Wait for the defragmentation process to complete. This may take some time depending on the size and fragmentation level of the USB drive.

By defragmenting your USB drives regularly, you can improve their performance and ensure smoother file transfers and access. Remember to safely eject the USB drive before removing it from your computer to avoid data corruption.

Whether you use USB drives for work, school, or personal use, understanding the file system and the importance of defragmentation can help you make the most of your storage devices.

Even Distribution and Longevity of USB Drives

When using USB drives on a Windows PC, it is important to ensure an even distribution of files and maintain their longevity. By following a few simple steps, you can optimize the usage of your USB drive and avoid potential issues.

Firstly, it is recommended to format your USB drive before using it. This will create a clean slate and ensure compatibility with your Windows PC. To format your USB drive, simply right-click on it in the File Explorer, select “Format,” and choose the desired file system, such as FAT32 or exFAT.

Once your USB drive is formatted, it is essential to organize your files properly. Avoid cluttering your USB drive with unnecessary files or duplicates. Create separate folders for different types of files, such as documents, photos, or videos, to keep everything organized and easily accessible.

To ensure the longevity of your USB drive, it is important to safely eject it from your Windows PC. Simply right-click on the USB drive in the File Explorer and select “Eject.” This will prevent any data corruption or loss that may occur if the drive is removed abruptly.

In addition, it is recommended to regularly back up your USB drive to prevent data loss. You can do this by copying the contents of your USB drive to another storage device, such as a computer hard drive or cloud storage. This way, even if your USB drive fails or gets lost, you will still have a copy of your important files.

Lastly, it is crucial to protect your USB drive from potential threats. Install reliable antivirus software on your Windows PC and scan your USB drive regularly to detect and remove any malware or viruses. Be cautious when inserting your USB drive into unknown or suspicious computers to avoid potential risks.

Counterfeit Products and File Transfer Speeds of USB Drives
Image of USB drives and a magnifying glass

USB Drive Basics and Usage on Windows PC
Counterfeit Products
Issue Solution
1. Purchasing counterfeit USB drives Always buy from trusted retailers or official manufacturer websites.
2. Fake capacity claims Verify the drive’s actual capacity using reliable software tools.
3. Poor build quality Research and read product reviews before making a purchase.
File Transfer Speeds of USB Drives
USB Generation Maximum Transfer Speed
USB 2.0 Up to 480 Mbps
USB 3.0 Up to 5 Gbps
USB 3.1 Up to 10 Gbps
USB 3.2 Up to 20 Gbps

Various Uses of USB Drives

USB drive plugged into a computer

  • Fixing USB Drive Not Recognized:

    1. Disconnect the USB drive from the computer.
    2. Try connecting the USB drive to a different USB port on the computer.
    3. If the USB drive is still not recognized, restart the computer.
    4. Update the USB drivers on the Windows PC.
    5. If the issue persists, try using the USB drive on a different computer to check if it is recognized.
    6. If none of the above steps work, the USB drive may be faulty and needs to be replaced.
  • Fixing Corrupted USB Drive:

    1. Connect the corrupted USB drive to the Windows PC.
    2. Open File Explorer by pressing Win+E.
    3. Locate the USB drive in the list of connected drives.
    4. Right-click on the USB drive and select Properties.
    5. Go to the Tools tab and click on Check under the Error checking section.
    6. Follow the on-screen instructions to scan and repair the corrupted USB drive.
    7. If the drive is still corrupted after the scan, try using data recovery software to retrieve your files.
    8. If the USB drive is not repairable, it may be necessary to format it, erasing all data on the drive.
  • Fixing Slow USB Transfer Speed:

    1. Make sure the USB drive is connected directly to a USB port on the computer, avoiding the use of USB hubs.
    2. Check if the USB drive is formatted with the correct file system (e.g., NTFS for larger files).
    3. Scan the USB drive for malware or viruses using a reliable antivirus software.
    4. Delete unnecessary files and folders from the USB drive to free up space.
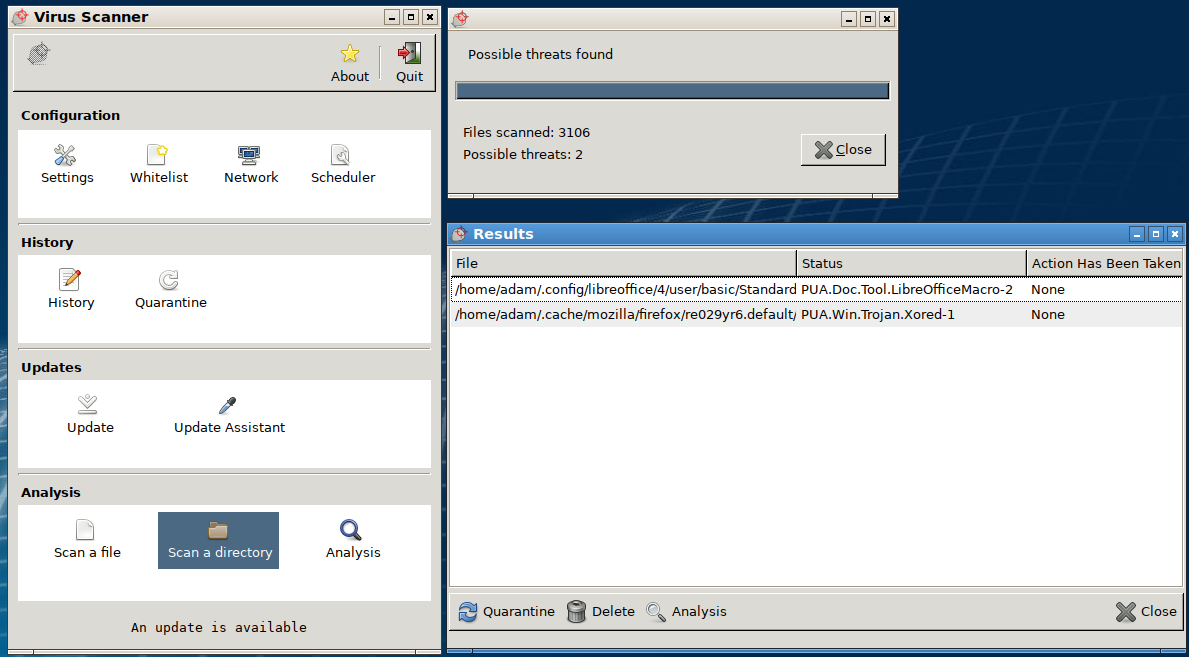
      Scan the USB drive for malware or viruses using a reliable antivirus software.
Delete unnecessary files and folders from the USB drive to free up space.
    5. Defragment the USB drive to optimize its performance.
    6. If the transfer speed is still slow, try using a different USB drive or cable.
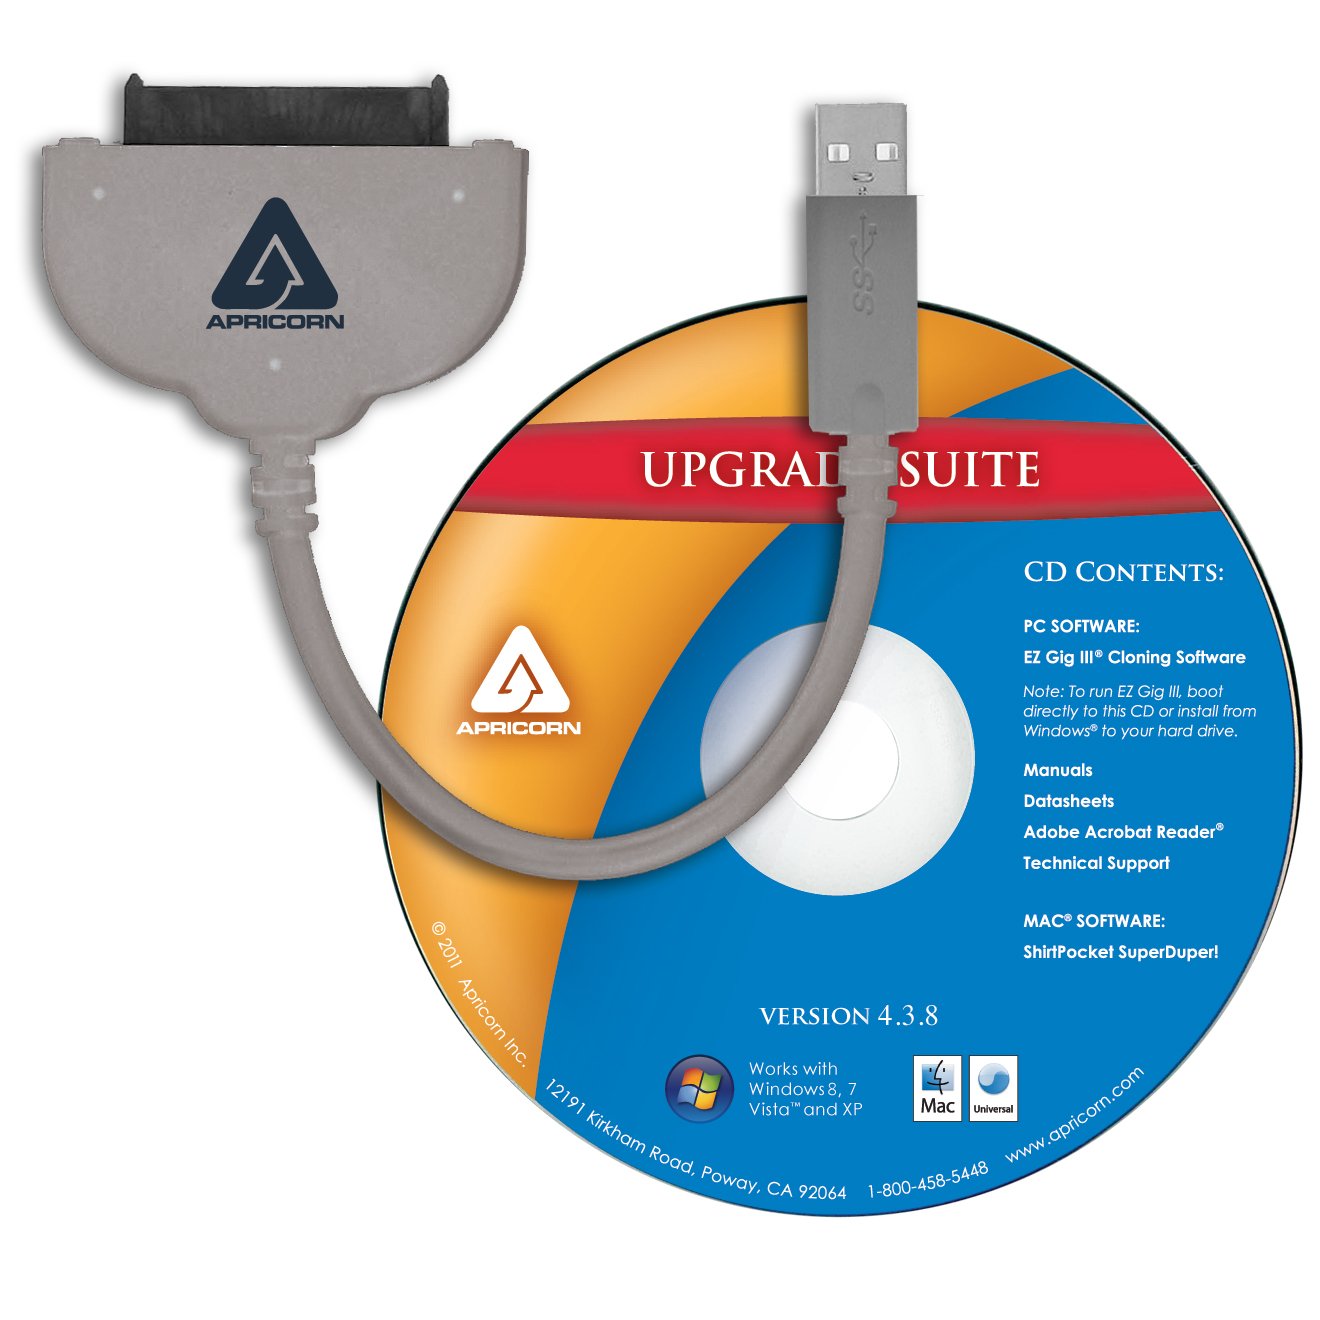
      Defragment the USB drive to optimize its performance.
If the transfer speed is still slow, try using a different USB drive or cable.
  • Fixing USB Drive Write Protection:

    1. Check if the USB drive has a physical write protection switch. If so, toggle it to the opposite position.
    2. Open Command Prompt by pressing Win+R and typing cmd.
    3. Type diskpart and press Enter.
    4. Type list disk and press Enter to display a list of connected disks.
    5. Type select disk X (replace X with the number of the write-protected USB drive) and press Enter.
    6. Type attributes disk clear readonly and press Enter to remove the write protection.
    7. Close the Command Prompt and check if the USB drive can now be written to.
    8. If the issue persists, the USB drive may be damaged and needs to be replaced.

USB Drives in Computer Forensics and Law Enforcement
USB drive connected to a computer

USB drives are an essential tool in computer forensics and law enforcement. They provide a means for investigators to collect and preserve digital evidence from Windows PCs. When using USB drives in this context, it is important to follow proper procedures to ensure the integrity of the evidence.

First, it is crucial to handle USB drives carefully to avoid damaging or contaminating the evidence. Always use clean gloves when handling USB drives to prevent leaving fingerprints or other traces on the device.

Next, it is important to create a forensic image of the USB drive before conducting any analysis. This ensures that the original data is preserved and can be used as evidence if necessary. Use forensic software, such as dd, to create a bit-by-bit copy of the USB drive.

Once the forensic image is created, it can be analyzed using specialized software. This software allows investigators to examine the files and folders on the USB drive, recover deleted data, and extract valuable information that may be relevant to the investigation.

It is important to note that USB drives can contain hidden or encrypted data. Investigators should be familiar with techniques for detecting and decrypting such data. Specialized tools and software can assist in these processes.

Finally, it is crucial to document each step of the USB drive analysis process. This includes recording the date and time of each action taken, as well as any relevant findings or observations. This documentation is essential for maintaining the chain of custody and ensuring the validity of the evidence in court.

USB Drives for Updating Motherboard Firmware and Booting Operating Systems
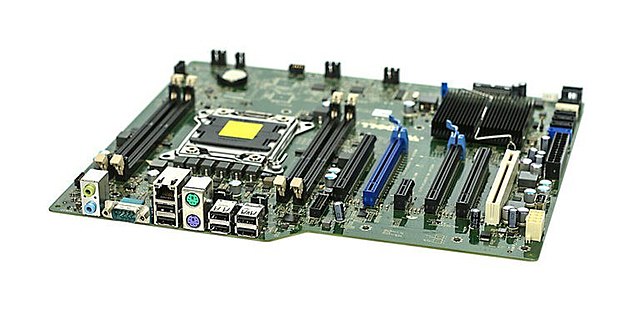
Motherboard and USB drive.

USB drives are essential tools for updating motherboard firmware and booting operating systems on a Windows PC. These small, portable devices allow you to easily transfer and store files, making them ideal for these tasks.

When updating motherboard firmware, a USB drive is often required to transfer the necessary files from your computer to the motherboard. To do this, first, visit the manufacturer’s website and download the latest firmware update for your specific motherboard model.

Once you have the firmware file, follow these steps:

1. Insert the USB drive into an available USB port on your computer.
2. Format the USB drive to ensure compatibility. Right-click on the USB drive in File Explorer and select “Format.” Choose the appropriate file system (usually FAT32) and click “Start” to begin formatting.
3. After formatting, open the folder containing the downloaded firmware file. Right-click on the file and select “Copy.”
4. Navigate to the USB drive in File Explorer and right-click inside the drive. Select “Paste” to transfer the firmware file to the USB drive.
5. Safely eject the USB drive from your computer.

When it comes to booting operating systems from a USB drive, the process is slightly different. This method can be useful when troubleshooting issues or installing a new operating system.

To boot from a USB drive, follow these steps:

1. Insert the USB drive into an available USB port on your computer.
2. Restart your computer and enter the BIOS settings. This is typically done by pressing a specific key (e.g., F2 or Delete) during the boot process. Consult your computer’s manual or manufacturer’s website for the exact key.
3. Navigate to the “Boot” or “Boot Order” section in the BIOS settings. Adjust the boot order so that the USB drive is listed as the first boot option.
4. Save the changes and exit the BIOS settings.
5. Your computer will now boot from the USB drive, allowing you to install or troubleshoot the operating system.

USB drives provide a convenient and efficient way to update motherboard firmware and boot operating systems on a Windows PC.

USB Drives as Application Carriers and for Backup Purposes

USB drives are not only useful for storing and transferring files, but they can also serve as application carriers and backup devices on your Windows PC.

When it comes to using USB drives for applications, you can install portable applications directly on the drive so you can use them on any Windows PC without the need for installation. This is particularly handy if you frequently work on different computers or if you want to keep your personal settings and preferences intact. To install a portable application on a USB drive, simply download the portable version of the application and extract it to the drive. You can then run the application directly from the USB drive by double-clicking on its executable file.

In addition to being application carriers, USB drives are also great for backup purposes. You can use them to back up important files and folders from your Windows PC, ensuring that your data is safe in case of hardware failure or accidental deletion. To back up files to a USB drive, simply connect the drive to your PC and copy and paste the files or folders you want to back up onto the drive. Alternatively, you can use backup software to automate the process and create scheduled backups.

Remember to regularly update your backups and keep multiple copies of important files in different locations to further protect your data. It’s also a good idea to label and organize your USB drives for easy identification and retrieval.

When using USB drives for applications and backups, it’s important to safely eject the drive from your Windows PC to avoid data corruption. To do this, right-click on the drive in File Explorer and select “Eject” or “Safely Remove Hardware and Eject Media”. Wait for the confirmation message before physically removing the drive from your PC.

By utilizing USB drives as application carriers and backup devices, you can conveniently carry your favorite applications and keep your important files safe and secure. So, make the most out of your USB drives and take advantage of their versatility and portability on your Windows PC.

USB Drives in Media Storage and Marketing
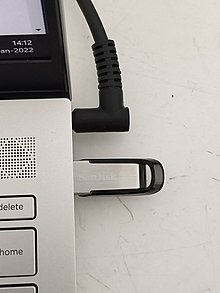
USB drives connected to a computer

USB drives are a versatile tool for both media storage and marketing purposes. They provide a convenient and portable solution for storing and transferring files on a Windows PC. Whether you need to transport important documents, share promotional materials, or back up important data, USB drives offer a reliable and efficient solution.

To use a USB drive on your Windows PC, simply plug it into an available USB port. The drive will be detected by your computer and assigned a drive letter. You can then access the drive by opening File Explorer and navigating to the corresponding drive letter.

To transfer files to a USB drive:
1. Open File Explorer and locate the files you want to transfer.
2. Select the files and folders you want to transfer by holding down the Ctrl key and clicking on each item.
3. Right-click on the selected files and choose “Copy.”
4. Open the USB drive in File Explorer.
5. Right-click inside the USB drive and choose “Paste” to transfer the files.

To safely remove a USB drive:
1. Locate the “Safely Remove Hardware” icon in the system tray, usually located in the bottom right corner of the screen.
2. Click on the icon and select the USB drive you want to remove.
3. Wait for the system to notify you that it is safe to remove the USB drive.
4. Gently remove the USB drive from the USB port.

It’s important to note that USB drives can be easily damaged if not handled properly. Avoid dropping or exposing the drive to extreme temperatures or moisture. Additionally, it’s a good practice to regularly back up the data stored on your USB drive to ensure you don’t lose any important files.

Encryption and Security of USB Drives
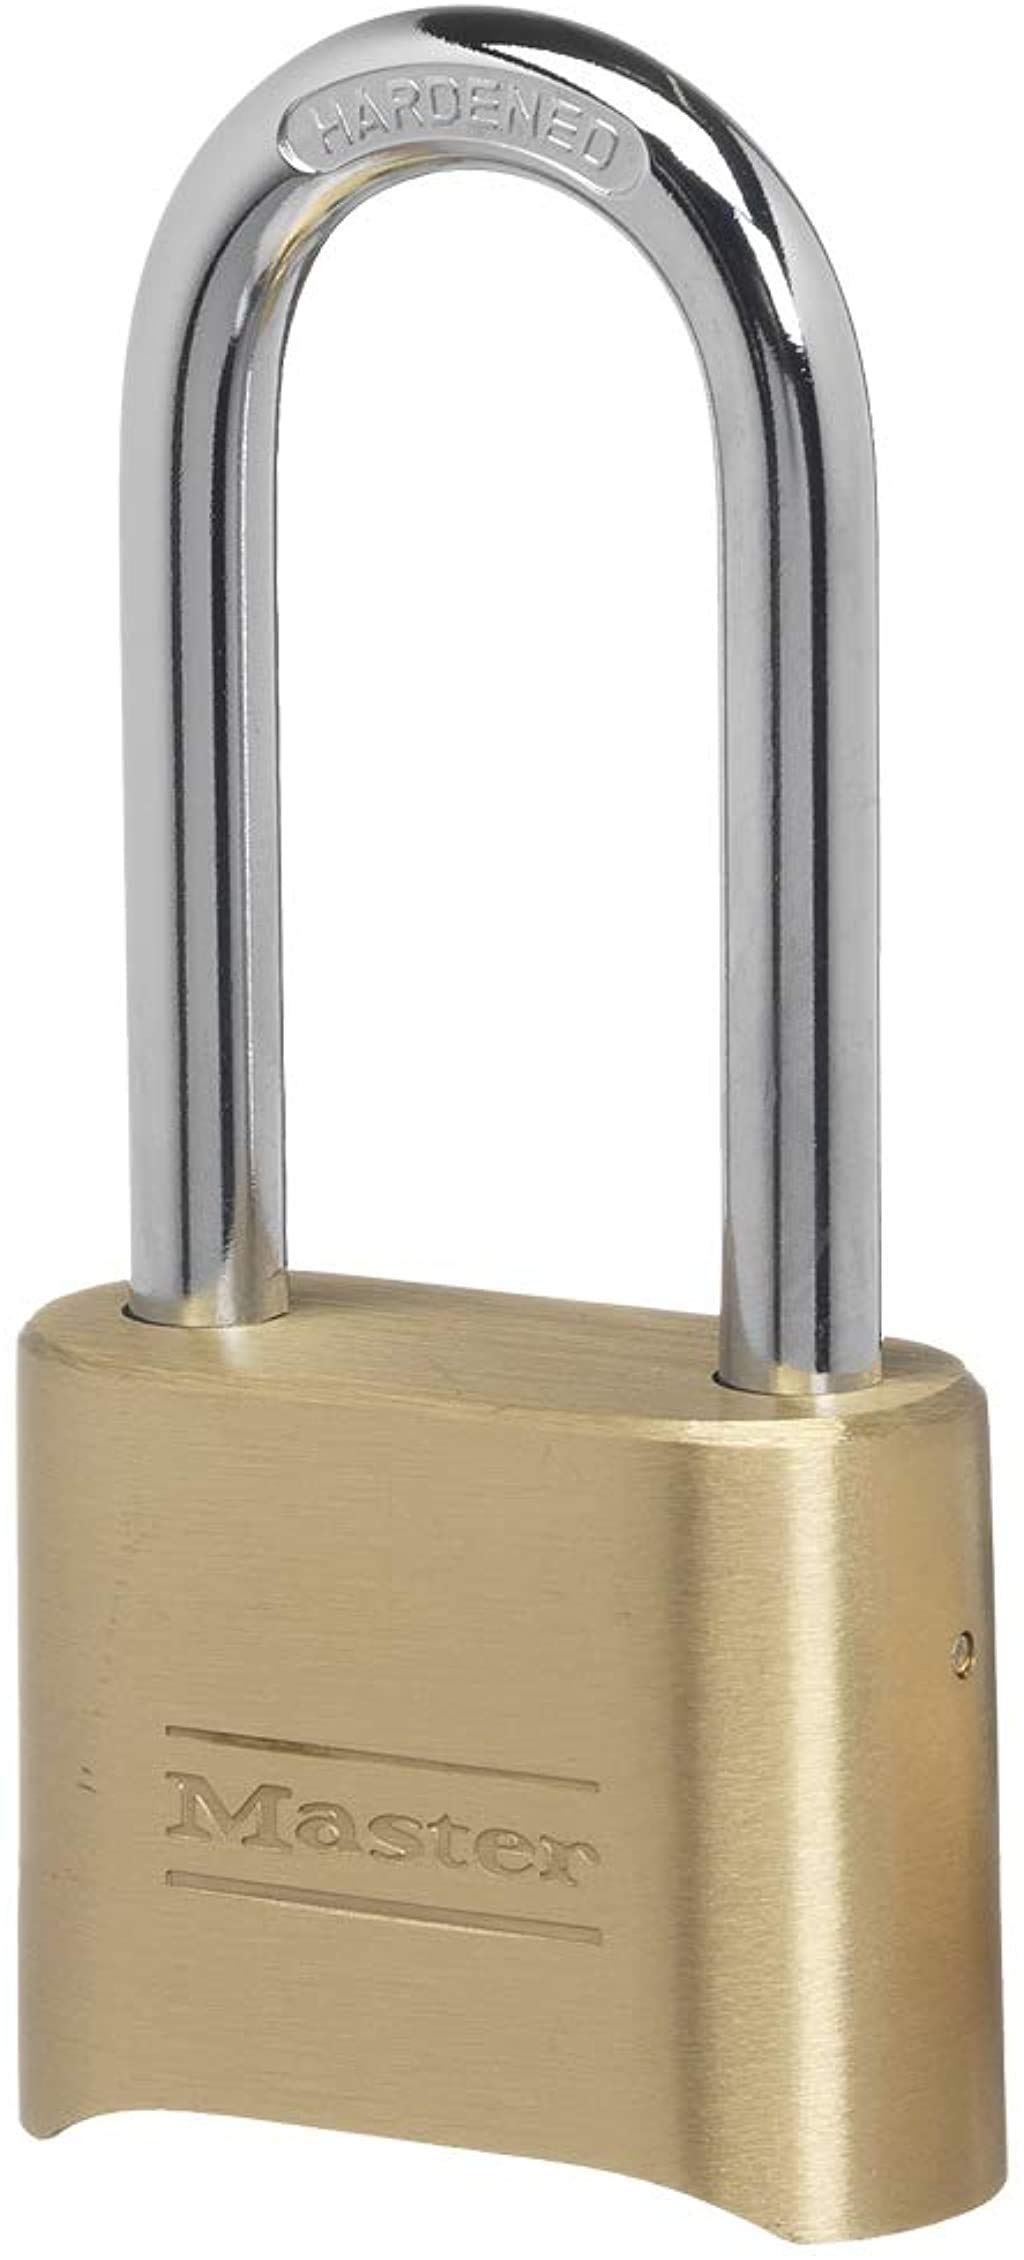
Padlock

When using USB drives on a Windows PC, it is crucial to prioritize the encryption and security of your data. By following these guidelines, you can ensure the safety of your files and protect them from potential threats.

Firstly, make sure to use encryption software to protect the data stored on your USB drive. This will add an extra layer of security, making it difficult for unauthorized users to access your files even if the drive gets lost or stolen.

Additionally, always use a strong password to lock your USB drive. This will prevent anyone from accessing the data without your permission. Avoid using easily guessable passwords, and consider using a password manager to securely store and manage your passwords.

Furthermore, regularly update your antivirus software and run scans on your USB drive. This will help detect and remove any malware or viruses that may have been transferred onto the drive from an infected computer.

It is also recommended to enable the “BitLocker” feature on your Windows PC, which provides full disk encryption for your USB drive. This feature is available on most versions of Windows and adds an additional layer of protection to your data.

When not in use, safely eject your USB drive from the Windows PC. This will ensure that all data has been written and that the drive can be safely removed without any risk of data corruption.

Lastly, regularly back up the data on your USB drive to another secure location. This will prevent data loss in case the drive gets damaged or lost.

Current and Future Developments in USB Drive Technology

One of the most significant advancements is the increase in storage capacity. USB drives now come in sizes ranging from a few gigabytes to multiple terabytes, making them capable of storing large amounts of data. This is especially useful for individuals who need to transfer or backup large files such as videos, photos, or documents.

Another important development is the introduction of USB 3.0 technology. USB 3.0 offers faster data transfer speeds compared to its predecessor, USB 2.0. This means that transferring files to and from a USB drive is much quicker, saving valuable time. To take advantage of this improvement, make sure to use a USB 3.0 port when connecting your drive to a computer or laptop.

USB drives have also become more durable. Many models now feature shockproof, waterproof, and dustproof designs, making them suitable for various environments and situations. This added durability ensures that your data remains safe, even in challenging conditions.

Encryption and security features have also seen advancements in USB drive technology. Some USB drives now come with built-in encryption software, allowing you to protect sensitive data from unauthorized access. This is particularly useful for individuals who frequently carry important or confidential information on their USB drives.

Additionally, USB drives have become more versatile in terms of compatibility. Most modern operating systems, including Windows, Mac, and Linux, support USB drives without the need for additional device drivers. This makes it easier to use USB drives across different platforms and devices.

As for future developments, USB drives are expected to continue increasing in storage capacity and speed. There is also ongoing research and development to enhance the security features of USB drives, including biometric authentication and advanced encryption methods.
Detected in Laptop

When I first discovered a mysterious object hidden within my laptop, I couldn’t help but feel a surge of curiosity and apprehension. Little did I know that this unexpected finding would lead me down a rabbit hole of intrigue and unexpected revelations.
Check the connections: Ensure that the WD hard disk is properly connected to your laptop. Disconnect and reconnect the cables to ensure a secure connection.
Troubleshooting Steps for WD External Hard Drive Not Recognized

If your WD external hard drive is not being recognized by your laptop, follow these troubleshooting steps:

1. Check the physical connections: Ensure that the USB cable is securely connected to both the hard drive and the laptop. Try using a different USB cable or port to rule out any connection issues.

2. Check the power supply: Make sure the external hard drive is receiving enough power. Use a different power adapter or USB port to see if the issue is power-related.

3. Update device drivers: Open Device Manager on your laptop and look for any yellow exclamation marks or error symbols next to the external hard drive. Right-click on the device and select “Update driver” to install the latest drivers.

4. Check for drive letter assignment: Open Disk Management by pressing Windows key + X and selecting “Disk Management.” Look for your WD external hard drive in the list of disks. If it does not have a drive letter assigned, right-click on the disk and select “Change Drive Letter and Paths.” Assign a new drive letter to the external hard drive.

5. Test the hard drive on a different computer: Connect the WD external hard drive to another laptop or computer to see if it is recognized. If it is, the issue may be with your laptop’s settings or drivers.

6. Data recovery: If the WD external hard drive is recognized on another computer, but not on your laptop, consider using data recovery software to retrieve your files.

Technology is only as reliable as its weakest link, and sometimes that link is a faulty hard disk.

Checking Connections and Resetting BIOS Settings

A computer motherboard or circuit board.

To check connections and reset BIOS settings on your laptop, follow these steps:

1. Start by shutting down your laptop and unplugging it from the power source.
2. Remove any external devices connected to your laptop, such as USB drives or external monitors.
3. Open your laptop’s casing to access the internal components. If you’re not comfortable doing this, consider seeking professional help.
4. Check all the connections inside your laptop, including the cables connecting the hard drive, motherboard, and power supply. Make sure they are securely plugged in.
5. While you’re inside the laptop, locate the CMOS battery on the motherboard. Remove it for a few seconds and then reinsert it. This will reset the BIOS settings to their default values.
6. Close the laptop’s casing and reconnect the power source.
7. Turn on your laptop and enter the BIOS settings by pressing the appropriate key at startup. This key is usually displayed on the screen during boot or mentioned in the laptop’s manual.
8. In the BIOS settings, navigate to the “Reset to Defaults” or “Load Default Settings” option. Use the arrow keys to select it and press Enter to reset the BIOS settings.
9. Save the changes and exit the BIOS settings.
10. Wait for your laptop to boot up normally and check if the issues you were facing are resolved.

When your hard disk fails to be detected, it’s like losing a piece of your digital life – a reminder to always have backups.

Resolving Issues in Disk Management for WD External Hard Drive

WD external hard drive connected to a laptop

To resolve issues in disk management for a WD external hard drive detected in a laptop, follow these steps:

1. Check for compatibility: Ensure that the WD external hard drive is compatible with your laptop’s operating system and hardware. Verify if the laptop supports USB 3.0 or USB-C connections, depending on the type of WD drive you have.

2. Update device drivers: Update the device drivers for the WD external hard drive. Visit the WD website or use a driver update tool to download and install the latest drivers for your specific model.

3. Scan for malware: Run a full scan with reliable antivirus software to check for any malware or viruses that may be affecting the WD drive. Remove any detected threats and ensure your laptop is protected.

4. Check disk partitioning: Open Disk Management in Windows 10 by pressing Windows key + X and selecting “Disk Management.” Ensure that the WD external hard drive is recognized and properly partitioned. If not, right-click on the drive and select “New Simple Volume” to create a new partition.

5. Assign drive letter: If the WD external hard drive does not have a drive letter assigned, right-click on it in Disk Management and select “Change Drive Letter and Paths.” Assign a drive letter that is not already in use.

6. Repair file system: If the WD external hard drive is not accessible or showing errors, right-click on it in Disk Management and select “Properties.” Go to the “Tools” tab and click on “Check” under the Error-checking section to repair any file system issues.

python
import subprocess

def check_disk_availability():
# Run the command to list all disks connected to the system
result = subprocess.run(['lsblk'], capture_output=True, text=True)

# Check if the WD hard disk is listed in the output
if 'sdb' in result.stdout:
return True
else:
return False

# Example usage
if check_disk_availability():
print("WD hard disk is detected.")
else:
print("WD hard disk is not detected.")

In the above code, the `check_disk_availability()` function uses the `lsblk` command to list all disks connected to the system. It then checks if the WD hard disk (represented by `sdb` in this example) is present in the output. If the disk is found, it returns `True`; otherwise, it returns `False`. You can customize this code by modifying the disk identifier (`sdb`) based on your specific situation.

Updating and Installing Device Drivers for WD External Hard Drive

To update and install device drivers for a WD external hard drive that has been detected in a laptop, follow these steps:

1. Connect the WD external hard drive to your laptop using a USB cable. Make sure the connection is secure.

2. Open File Explorer by pressing the Windows key and E on your keyboard, or by clicking on the File Explorer icon in the taskbar.

3. In File Explorer, locate and right-click on the WD external hard drive. Select “Properties” from the context menu.

4. In the Properties window, click on the “Hardware” tab. You will see a list of devices associated with the external hard drive.

5. Select the WD external hard drive from the list, then click on the “Properties” button at the bottom-right corner of the window.

6. In the Properties window for the WD external hard drive, click on the “Driver” tab.

7. Click on the “Update Driver” button. If your laptop is connected to the internet, Windows will search for the latest driver software for the device and install it automatically. If not, you can choose to manually update the driver by selecting “Browse my computer for drivers” and specifying the location of the driver software.

8. Once the driver update is complete, restart your laptop to ensure the changes take effect.

Removing Viruses and Cleaning USB Root Hub for WD External Hard Drive Recognition

A USB port with a cleaning brush

To ensure that your WD external hard drive is properly recognized by your laptop, it is important to remove any viruses that may be affecting its functionality and clean the USB root hub. Here are some direct instructions to help you with this process:

1. Start by scanning your laptop for any viruses or malware using reliable antivirus software. This will help identify and remove any potential threats that could be causing issues with your external hard drive recognition.

2. Once your laptop is virus-free, you can proceed to clean the USB root hub. To do this, follow these steps:

a. Connect your WD external hard drive to your laptop using the appropriate USB cable (such as USB-C or USB 3.0).

b. Open the Device Manager on your laptop. You can do this by right-clicking on the Start menu and selecting “Device Manager” from the list.

c. In the Device Manager, expand the “Universal Serial Bus controllers” category.

d. Locate the USB root hub associated with your WD external hard drive. It may be labeled as “USB Mass Storage Device” or something similar.

e. Right-click on the USB root hub and select “Uninstall device” from the context menu. Confirm the uninstallation if prompted.

f. After uninstalling the USB root hub, restart your laptop.

g. Once your laptop has restarted, it will automatically reinstall the USB root hub and its drivers.

3. After performing these steps, your laptop should recognize your WD external hard drive without any issues. If the problem persists, you may need to consider other factors such as disk partitioning, drive letter assignment, or checking for any firmware updates for your WD external hard drive.

Making Unrecognized WD External Hard Drive Detectable on PC

  1. Connect the WD External Hard Drive to your PC.
  2. Open Disk Management by pressing Windows Key + X and selecting Disk Management from the menu.
  3. Locate the WD External Hard Drive in the list of drives.
  4. If the drive shows as “Not Initialized,” right-click on it and select Initialize Disk.
  5. Choose the appropriate disk initialization option (MBR or GPT) and click OK.
  6. Once the drive is initialized, right-click on the unallocated space and select New Simple Volume.
    Choose the appropriate disk initialization option (MBR or GPT) and click OK.
Once the drive is initialized, right-click on the unallocated space and select New Simple Volume.
  7. Follow the on-screen instructions to create a new partition and format the drive.
  8. After the process is complete, the WD External Hard Drive should be detectable on your PC.

Method 2: Update WD External Hard Drive Driver

  1. Connect the WD External Hard Drive to your PC.
  2. Press Windows Key + X and select Device Manager from the menu.
  3. Expand the Disk drives category.
  4. Right-click on the WD External Hard Drive and select Update driver.
  5. Choose the option to automatically search for updated driver software.
  6. If a new driver is found, follow the on-screen instructions to install it.
  7. Once the driver update is complete, restart your PC.
  8. Check if the WD External Hard Drive is now detectable on your PC.

Method 3: Change Drive Letter and Paths

  1. Connect the WD External Hard Drive to your PC.
  2. Open Disk Management by pressing Windows Key + X and selecting Disk Management from the menu.
  3. Locate the WD External Hard Drive in the list of drives.
  4. Right-click on the drive and select Change Drive Letter and Paths.
    Locate the WD External Hard Drive in the list of drives.
Right-click on the drive and select Change Drive Letter and Paths.
  5. If no drive letter is assigned, click Add and choose a drive letter from the dropdown menu.
  6. If a drive letter is already assigned, click Change and select a different available drive letter.
  7. Click OK to save the changes.
  8. Check if the WD External Hard Drive is now detectable on your PC.

Restoring Data from WD Not Working External Hard Drive

If your WD external hard drive is not working and not being detected in your laptop, there are a few steps you can take to try and restore the data.

Firstly, check the physical connections of the hard drive. Make sure the USB cable is securely plugged in both the laptop and the hard drive. If possible, try using a different USB cable or port to see if that resolves the issue.

If the physical connections seem fine, it’s possible that the hard drive is not being recognized due to a driver issue. To fix this, you can try updating the device driver for the hard drive. You can do this by following these steps:

1. Press the Windows key + X and select “Device Manager” from the menu.
2. Expand the “Disk drives” category and locate your WD external hard drive.
3. Right-click on the hard drive and select “Update driver.”
4. Follow the on-screen instructions to complete the driver update process.

If updating the driver doesn’t work, you can also try using the “Disk Management” tool in Windows to see if the hard drive is recognized but not assigned a drive letter. To do this:

1. Press the Windows key + X and select “Disk Management” from the menu.
2. Look for your WD external hard drive in the list of disks. It may be labeled as “Unknown” or “Not Initialized.”
3. Right-click on the hard drive and select “Initialize Disk.”
4. Follow the on-screen instructions to initialize the disk and assign it a drive letter.

If none of these steps work, it’s possible that the hard drive may be physically damaged or there may be an issue with the data itself. In this case, you may need to seek professional help to recover your data.

Fixing Partition and Drive Letter Issues for WD External Hard Drive

If your WD external hard drive is detected in your laptop but you’re experiencing partition and drive letter issues, there are a few steps you can take to fix the problem.

First, you’ll need to access the Disk Management utility in Windows. To do this, right-click on the Start menu and select “Disk Management” from the menu.

Once in Disk Management, you may see your WD external hard drive listed, but without a drive letter assigned to it. To fix this, right-click on the drive and select “Change Drive Letter and Paths”. Then, click “Add” and choose a drive letter from the dropdown menu. Click “OK” to save the changes.

If the drive is not listed in Disk Management or if it shows up as unallocated space, it’s possible that the partition on the drive has been corrupted. In this case, you’ll need to recreate the partition. To do this, right-click on the unallocated space and select “New Simple Volume”. Follow the prompts in the wizard to create a new partition with a drive letter.

If you encounter any error messages or if the drive still doesn’t work after following these steps, it’s possible that there may be a deeper issue with the drive itself. In this case, you may need to contact WD support for further assistance.

How to Fix iPhone Battery Draining While Charging

Having your iPhone battery drain while charging can be a frustrating experience. In this guide, I will share effective solutions to fix this common issue and ensure your iPhone charges efficiently.

Check the charging cable and adapter: Ensure that you are using a genuine Apple charger and cable, as third-party ones may not provide the necessary power or could be faulty.

Use MFI-Certified Cables and Adapters for Faster Charging

MFI-Certified cable and adapter logo.

To fix iPhone battery draining while charging, it’s important to use certified cables and adapters. MFI stands for “Made for iPhone/iPod/iPad” and ensures that the product has been tested and approved by Apple.

Why is this important? Non-certified cables and adapters may not provide the necessary power to charge your iPhone efficiently. This can lead to slower charging times and even battery drain while charging.

How do I know if a cable or adapter is MFI-certified? Look for the “Made for iPhone/iPod/iPad” logo on the packaging or the product itself. You can also check Apple’s official MFI program website for a list of certified products.

What are the benefits of using MFI-certified cables and adapters? MFI-certified cables and adapters are designed to deliver the right amount of power to your iPhone, ensuring faster charging times. They also undergo rigorous testing to meet Apple’s standards for safety and performance.

What if I’m already using MFI-certified cables and adapters? If you’re still experiencing battery drain while charging, there may be other factors at play. Consider troubleshooting other potential issues such as background app activity, software updates, or a faulty battery charger.

Where can I purchase MFI-certified cables and adapters? MFI-certified cables and adapters are widely available from reputable retailers and online stores. Be cautious of counterfeit products, as they may not provide the same level of performance or safety.

Conclusion

Using MFI-certified cables and adapters is essential for faster charging and preventing battery drain while charging your iPhone. Make sure to look for the “Made for iPhone/iPod/iPad” logo and purchase from reputable sources to ensure you’re getting a genuine MFI-certified product.

Optimize iPhone Charging by Closing Background Apps and Enabling Low Power Mode

To optimize iPhone charging and prevent battery draining while charging, there are a few key steps you can take. First, make sure to close any background apps that are not in use. These apps can consume power even when you’re not actively using them, causing your battery to drain faster.

To close background apps, simply double-click the Home button or swipe up from the bottom of the screen (for iPhones without a Home button, swipe up from the bottom and pause in the middle of the screen). This will open the App Switcher, where you can see all the apps that are currently running. Swipe left or right to find the app you want to close, and then swipe it up and off the screen to close it.

Additionally, enabling Low Power Mode can help conserve battery life while charging. Low Power Mode reduces or disables certain features and background activities to extend your battery life. To enable Low Power Mode, go to Settings, then Battery, and toggle on Low Power Mode.

By closing background apps and enabling Low Power Mode, you can optimize your iPhone’s charging process and ensure that your battery charges efficiently without draining too quickly. Remember to follow these steps whenever you’re charging your iPhone to maximize battery life and performance.

For more information and troubleshooting tips related to iPhone battery issues, visit the Apple Support website or contact Apple Support directly.

Troubleshoot Charging Issues with Different Power Outlets and Airplane Mode

  1. Try a Different Power Outlet:
    • Make sure the power outlet is working by plugging in another device.
    • Ensure the outlet provides enough power by using a different outlet with a higher amperage rating.
      Make sure the power outlet is working by plugging in another device.
Ensure the outlet provides enough power by using a different outlet with a higher amperage rating.
    • Check for any loose connections or damaged cables.
  2. Use a Genuine Apple Charger and Cable:
    • Verify that you are using a genuine Apple charger and cable.
    • Avoid using cheap or third-party chargers as they may not provide the required power.
    • Inspect the charger and cable for any signs of damage or frayed wires.
  3. Enable Airplane Mode:
    • Swipe up from the bottom of the screen to access the Control Center.
    • Tap on the airplane icon to enable Airplane Mode.
    • Leave your iPhone in Airplane Mode while charging to prevent any background activities or connectivity issues.

python
import time

def monitor_battery_charging():
while True:
battery_percentage = get_battery_percentage() # Function to get the battery percentage
charging_status = get_charging_status() # Function to check if the device is charging

if charging_status and battery_percentage < 100: print("iPhone battery is charging. Current percentage:", battery_percentage) elif charging_status and battery_percentage == 100: print("iPhone battery is fully charged.") else: print("iPhone battery is not charging. Current percentage:", battery_percentage) time.sleep(60) # Check battery status every 60 seconds def get_battery_percentage(): # Function to retrieve the battery percentage using appropriate APIs or methods # You may need to use platform-specific libraries or tools to access this information def get_charging_status(): # Function to check if the device is currently charging # You may need to use platform-specific libraries or tools to access this information # Start monitoring the battery charging status monitor_battery_charging()

Monitor and Maintain Battery Health to Extend iPhone Lifespan

Monitor and Maintain Battery Health Extend iPhone Lifespan
1. Enable Optimized Battery Charging 1. Avoid extreme ambient temperatures
2. Check Battery Usage 2. Reduce screen brightness
3. Update to the latest iOS version 3. Enable low power mode
4. Avoid excessive battery drain 4. Limit background app refresh
5. Keep battery within optimal temperature range 5. Disable push email
6. Use original or certified chargers 6. Disable unnecessary notifications
7. Manage battery-intensive apps 7. Enable airplane mode in low signal areas
8. Restart or reset settings if necessary 8. Close unused apps
9. Avoid overcharging 9. Use Wi-Fi instead of cellular data
10. Monitor battery health and consider replacement if necessary 10. Enable auto-lock at the shortest possible time

Prevent Website App Opening

As a web user, preventing unwanted website app openings can significantly enhance online browsing experience.

Disable Instant Apps

1. Open your Android device’s Settings.
2. Scroll down and tap on “Google.”
3. Tap on “Instant Apps” under the Services section.
4. Toggle off the “Enable Instant Apps” option.

This will prevent websites from opening as apps on your device. You can always enable Instant Apps again by following the same steps and toggling the option back on.

By disabling Instant Apps, you have greater control over which apps are installed on your device and can avoid any unwanted behavior or data usage.

Method 1

Preventing website apps from opening on your device can help optimize your browsing experience. To do this, follow Method 1: Adjusting Browser Settings. First, open your preferred web browser, such as Google Chrome. Next, tap the three-dot menu icon located at the top-right corner of the screen.
Scroll down and select Settings. Within the settings menu, locate and tap on Site settings. Then, select Pop-ups and redirects. Toggle the switch to block pop-ups and redirects from websites. This will prevent website apps from opening automatically, allowing you to navigate the web more efficiently.

Method 2

If you want to prevent a website from automatically opening as an app on your Android device, follow these steps:

1. Open Google Chrome, your default web browser on Android.
2. Tap the three dots at the top right corner of the screen to access the menu.
3. Select “Settings” from the menu.
4. Scroll down and tap on “Site settings.”
5. Under the “Permissions” section, tap on “Additional permissions.”
6. Tap on “Open by default” to view the list of supported actions.
7. Select “Open supported links” or “Don’t open supported links” based on your preference.
8. To customize the behavior for specific websites, tap on “Open in this app” and select “Don’t allow.”

By following these steps, you can manage how websites open on your Android device and prevent them from automatically launching as apps.

Note: Some websites may request permission to open as an app. You can choose to allow or deny this request based on your preference, ensuring a personalized browsing experience.

Remember, you have control over your device’s behavior and can optimize it to suit your needs and preferences.

For more information or assistance, visit our support page or contact our customer service team.

[Optional: With Microsoft’s commitment to user privacy and security, we strive to provide a seamless web browsing experience while respecting your data and maintaining anonymity.]

[Optional: This method is applicable to various Android devices, including the Samsung Galaxy S22, ensuring compatibility across different platforms.]

[Optional: Microsoft, a global leader in technology, offers a wide range of innovative applications and services to enhance your digital experience.]

[Optional: Icon used for illustrative purposes only. The actual interface may vary based on your device and software version.]

[Optional: Android 13 and Google Account integration allow for a personalized browsing experience, syncing preferences and data across devices.]

[Optional: Experience the power of Microsoft’s applications while browsing the web, with seamless integration and enhanced functionality.]

Method 3

To prevent websites from automatically opening in apps on your device, you can follow these steps:

1. Open the Settings app on your device.
2. Scroll down and tap on “Apps” or “Applications”, depending on your device.
3. Look for the app associated with the website you want to prevent from opening. It might be the web browser app or a specific app related to the website.
4. Tap on the app to open its settings.
5. Look for the “Open by default” or “Open supported links” option.
6. Tap on this option to access the app’s link handling settings.
7. Select “Ask every time” or “Don’t open in this app” to prevent the website from automatically opening in the app.

Change Behavior of How Links Open

Browser window with different link opening options

To change the behavior of how links open on your device, you can follow these simple steps. First, locate the “Settings” app on your device’s home screen and tap on it. Within the settings menu, scroll down and find the “Apps” or “Applications” option and tap on it. Next, locate the specific web browser or app you want to change the link behavior for and tap on it. Within the app settings, look for the “Open by default” or “Link handling” option and tap on it. Finally, choose the desired behavior for links, such as “Open in app” or “Ask every time.”

Note: The steps may vary slightly depending on your device’s make and model.

Method 1

To prevent a website from opening as an app, follow these steps on your Android device:

1. Open the website in your preferred browser.
2. Tap the three-dot menu icon in the top-right corner.
3. From the menu, select “Settings” or “Preferences”.
4. Look for an option like “Open webpages in app” or “Open links in app”.
5. Toggle the switch to disable this feature.

By turning off the setting to open webpages in an app, your browser will continue to load websites as regular pages instead of opening them in dedicated apps. This can help you maintain a consistent browsing experience and avoid unnecessary app launches.

Method 2

Preventing website apps from opening on your device is simple with Method 2. First, open the settings menu on your device. Then, navigate to the “Apps” or “Applications” section. Look for the specific website app you want to prevent from opening and select it.
Next, locate the “Open by default” or “Default apps” option. Tap on it and choose “Clear defaults” or “Reset app preferences. ” This will remove the app’s default status, preventing it from automatically opening. Repeat these steps for any other website apps you want to block.
Enjoy a hassle-free browsing experience!

Reset App Preferences

Resetting app preferences can help prevent websites from automatically opening in certain apps on your Android device. To do this, follow these steps:

1. Open the Settings app on your Android device.
2. Scroll down and tap on “Apps” or “Applications” (may vary depending on your device).
3. Tap on the three-dot menu icon in the top-right corner of the screen.
4. Select “Reset app preferences” from the menu.
5. A confirmation pop-up will appear, informing you that this action will reset app preferences to their default settings. Tap “Reset apps” to proceed.

By resetting app preferences, any customized preferences you have set for individual apps will be reset, including default app settings for actions like opening links or files. This can help prevent websites from automatically opening in specific apps.

Remember, resetting app preferences will not delete any of your app data or remove any apps from your device. It simply resets the preferences to their default settings.

If you’re facing issues with certain websites automatically opening in apps like YouTube, Facebook, Reddit, or others, resetting app preferences can be a useful troubleshooting step. It can also be beneficial if you want to regain control over which apps are used for certain actions on your device.

Note that the steps mentioned above may vary slightly depending on the Android version and device you’re using. However, the general process should be similar.

Keep in mind that resetting app preferences will not change your Google Account settings or any other system settings on your device. It only affects the preferences set for individual apps.

If you’re using a Samsung Galaxy device with the One UI, the steps may be slightly different. You can navigate to “Settings” > “Apps” > “Menu” > “Reset app preferences.”

Preventing websites from automatically opening in specific apps can enhance your browsing experience, providing you with more control and avoiding any unwanted redirects.

Chrome Still Opening Apps

If you’re experiencing the issue of Chrome opening apps automatically, follow these steps to prevent it:

First, open the Chrome browser on your device. Then, tap on the three-dot menu icon in the top-right corner of the screen. From the drop-down menu, select “Settings.”

In the Settings menu, scroll down and tap on “Site settings.” Next, select “Media and downloads.” Here, you’ll find an option called “Open supported links.” Tap on it to proceed.

You’ll see a list of apps that are set to open certain types of links. To prevent Chrome from automatically opening apps, toggle off the switch next to the respective app.

If you want to disable the feature entirely, toggle off the switch at the top of the screen labeled “Open supported links.”

These steps should help you prevent Chrome from opening apps when you visit websites. Enjoy a seamless browsing experience without any unwanted interruptions.

Don’t Allow Apps to Open Links

To prevent apps from automatically opening links, follow these simple steps:

1. Open your device’s “Settings” app.
2. Scroll down and tap on “Apps” or “Applications”.
3. Look for the app that you want to prevent from opening links and tap on it.
4. In the app settings, locate and tap on “Open by default” or “Set as default”.
5. Tap on “Open supported links” or a similar option.
6. Select “Don’t open in this app” or “Ask every time” to disable automatic link opening.
7. Repeat these steps for any other apps you want to adjust.

Clear defaults

To prevent a website app from opening by default on your device, you can clear the defaults for that app. Here’s how:

1. Go to your device’s settings menu.
2. Look for the “Apps” or “Applications” option and tap on it.
3. Find the app that you want to clear the defaults for and tap on it.
4. Scroll down and look for the “Open by default” or “Set as default” option.
5. Tap on “Clear defaults” or “Clear defaults for this app”.

By clearing the defaults, you are removing the app’s status as the default option for certain actions, such as opening specific types of links. This will prompt your device to ask you which app you want to use the next time you perform that action.

Remember that these instructions may vary slightly depending on your device and Android version. If you’re unsure, you can refer to your device’s user manual or search for specific instructions online.

Open Supported Links Within the App

To prevent websites from opening in separate apps, follow these steps on your Android device. First, open the Settings app. Then, locate and select “Apps & notifications” or a similar option, depending on your device’s One UI. Next, select “Default apps” or “App settings” and tap on “Opening links. ” Finally, choose “Don’t open in this app” or “Ask every time” to ensure supported links open within the current app.
This way, you can stay focused on your browsing experience without interruptions.

Wrapping Up

1. To prevent a website from automatically opening as an app, follow these steps:
a. Open your preferred web browser on your device.
b. Go to the website you want to prevent from opening as an app.
c. Tap on the three-dot menu icon in the top-right corner.
d. From the menu, select “Settings” or “Preferences.”
e. Look for an option related to opening websites as apps or custom tabs.
f. Disable this option to prevent the website from opening as an app.

2. This feature is commonly found in browsers like Google Chrome, Firefox, and Safari, among others. Refer to your specific browser’s settings for accurate instructions.

3. By preventing websites from opening as apps, you can maintain a focused browsing experience without interruptions.