In my experience with Windows 10 and 11, I have encountered the frustrating issue of 100% disk usage. This article provides effective solutions to fix this problem and improve the performance of your Windows operating system.
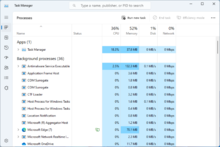
Check for resource-intensive processes: Use the Task Manager or Activity Monitor (for Mac) to identify any processes that are consuming a significant amount of disk usage. End or troubleshoot these processes to alleviate the strain on your disk.
Disable SuperFetch to fix high disk usage
If you’re experiencing high disk usage on your Windows 10 or 11 device, disabling SuperFetch can help resolve the issue. SuperFetch is a feature in Windows that aims to improve system performance by preloading frequently used applications into memory. However, in some cases, it may contribute to high disk usage.
To disable SuperFetch:
1. Open the Task Manager by pressing Ctrl + Shift + Esc on your keyboard.
2. Click on the “Processes” tab in the Task Manager.
3. Locate and right-click on the “Service Host: SuperFetch” process.
4. From the context menu, click on “Open Services.”
5. In the Services window, scroll down and locate “SuperFetch” in the list.
6. Right-click on “SuperFetch” and select “Properties.”
7. In the SuperFetch Properties window, go to the “General” tab.
8. Under the “Startup type” section, select “Disabled.”
9. Click on “Apply” and then “OK” to save the changes.
Disabling SuperFetch may result in slightly longer application launch times, but it should help alleviate the high disk usage issue. If you notice any negative impact on performance, you can always re-enable SuperFetch by following the same steps and selecting “Automatic (Delayed Start)” as the startup type.
Remember to regularly update your Windows operating system and keep your antivirus software up to date to protect your device from malware and potential vulnerabilities. Additionally, performing regular backups of your important files and data is always a good practice.
If you continue to experience high disk usage or encounter any other technical issues, Microsoft’s technical support team is available to assist you. You can visit the Microsoft website or contact their support team for further assistance.
A computer disk at 100% is like a marathon runner constantly sprinting – it’s bound to crash and burn eventually.
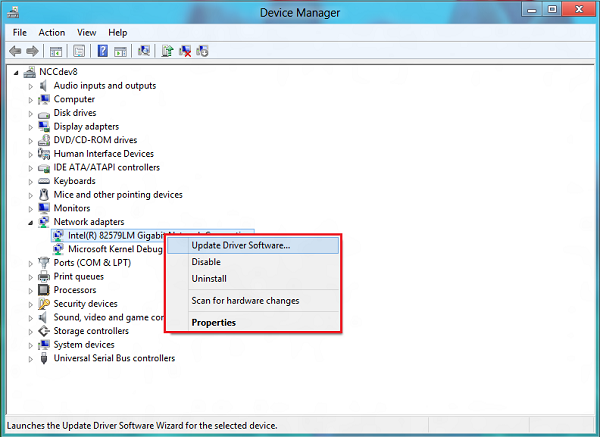
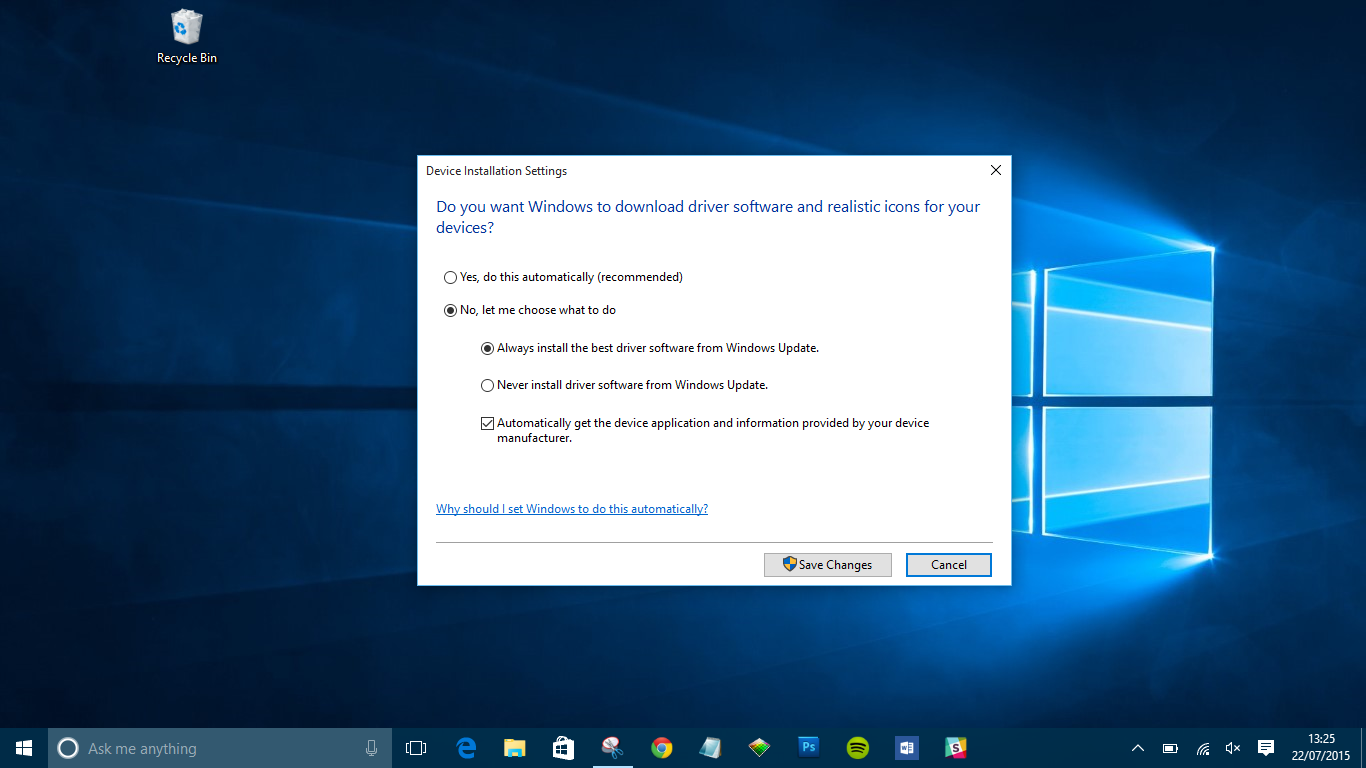
Update device drivers to resolve 100% disk usage
Update your device drivers to resolve the issue of 100% disk usage on Windows 10 and 11. Outdated or incompatible drivers can often cause high disk usage, leading to slow performance and system freezes. By keeping your drivers up to date, you can ensure optimal functionality and improve overall system performance.
To update your device drivers, follow these steps:
1. Open the Device Manager by right-clicking on the Start menu and selecting “Device Manager” from the context menu.
2. In the Device Manager window, expand the categories to locate the device drivers you want to update. Common drivers that can contribute to high disk usage include storage controllers, network adapters, and display adapters.
3. Right-click on the device driver you want to update and select “Update driver” from the context menu.
4. Choose the option to automatically search for updated driver software. Windows will then search for the latest driver updates online and install them on your system. Alternatively, you can choose to browse your computer for driver software if you have downloaded the updated drivers manually.
5. Repeat steps 3 and 4 for all the device drivers you want to update.
6. After updating the drivers, restart your computer to apply the changes.
Updating your device drivers can help resolve 100% disk usage issues by ensuring compatibility and improving system performance. If you continue to experience high disk usage after updating your drivers, consider performing a full system scan for viruses and malware using a reliable antivirus software. Viruses and malware can also cause high disk usage, so it’s important to ensure your system is clean and secure.
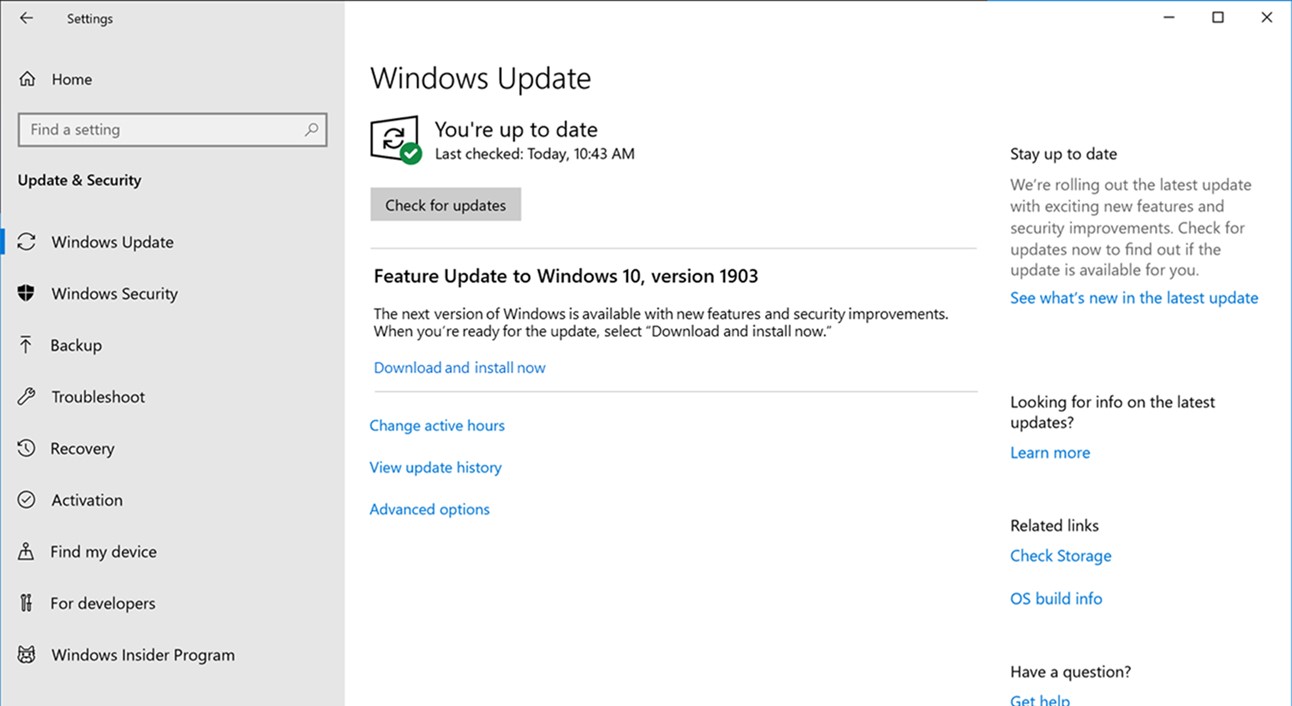
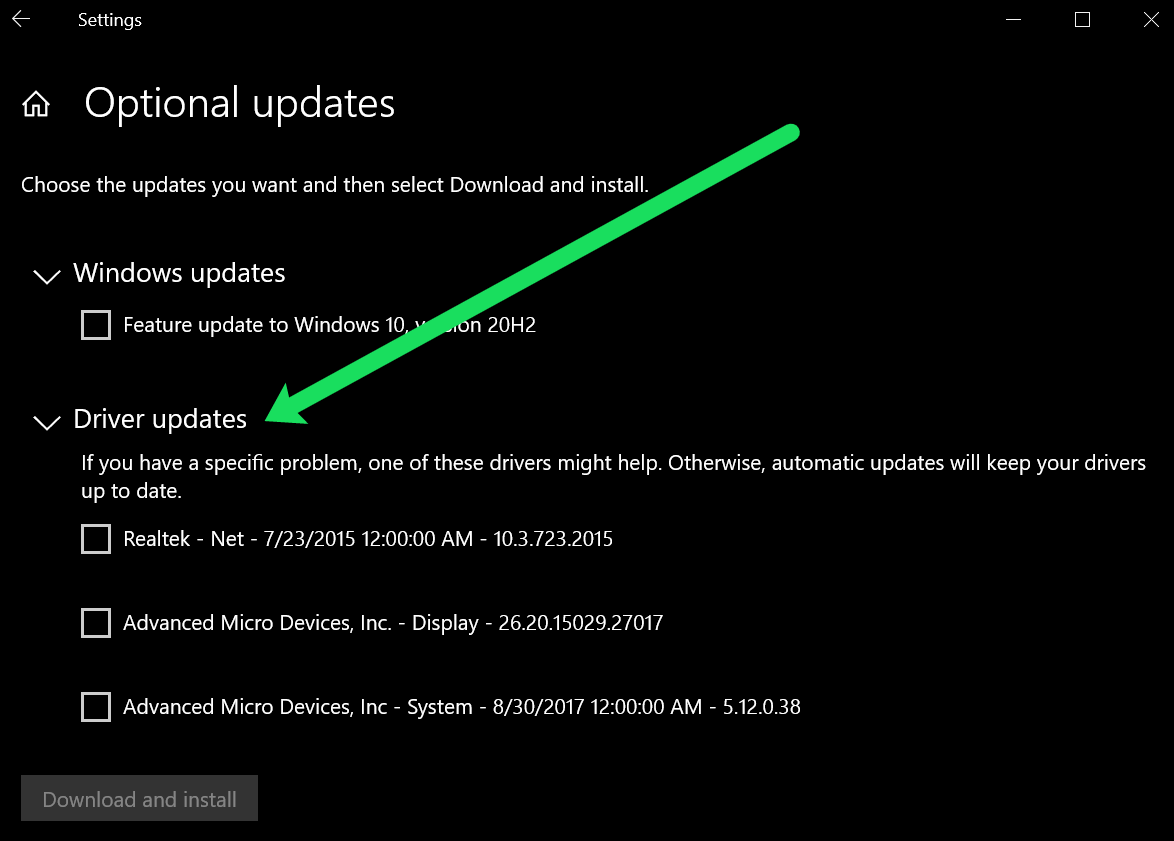
Regularly updating your drivers is essential for maintaining a healthy and efficient system. You can also enable automatic driver updates through Windows Update to ensure you always have the latest drivers installed. Simply go to Settings > Update & Security > Windows Update and click on “Check for updates” to install any available driver updates.
Check for and repair corrupted system files
If you’re experiencing high disk usage on your Windows 10 or 11 computer, it could be due to corrupted system files. Thankfully, Microsoft provides a built-in tool that can help you check for and repair these files. Here’s how:
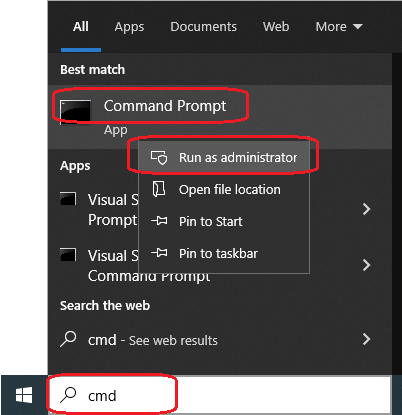
1. Open the Command Prompt as an administrator. You can do this by searching for “Command Prompt” in the Windows Start menu, right-clicking on it, and selecting “Run as administrator.”
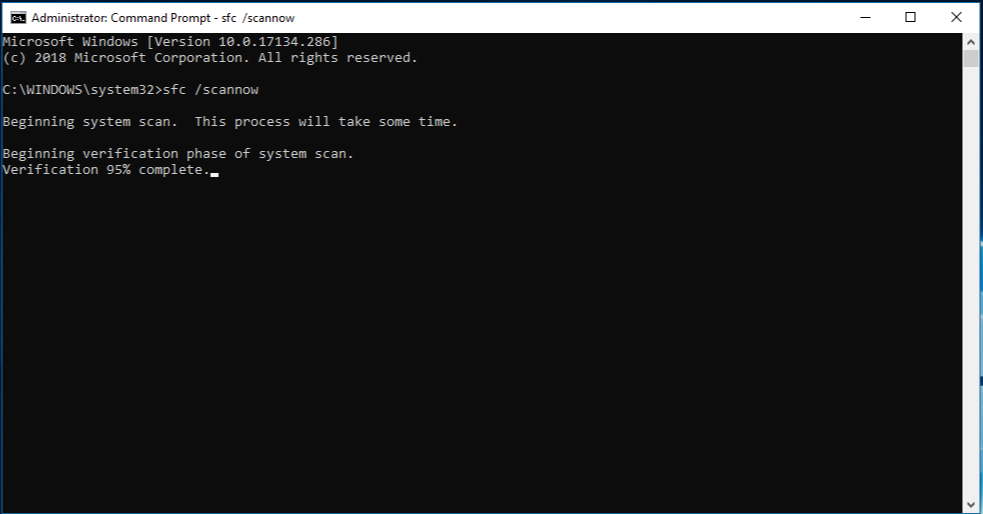
2. In the Command Prompt window, type the following command and press Enter: sfc /scannow
3. The System File Checker (SFC) tool will now scan your system for any corrupted files and attempt to repair them. This process may take some time, so be patient and let it complete.
4. Once the scan is finished, you will see the results displayed in the Command Prompt window. If any corrupted files were found and successfully repaired, you will see a message indicating this. If no issues were found, you will see a message stating that as well.
5. After the scan is complete, restart your computer to apply any repairs that were made.
By using the SFC tool, you can easily check for and repair corrupted system files that may be causing high disk usage on your Windows 10 or 11 computer. This can help improve system performance and resolve any issues you may be experiencing.
If you continue to experience high disk usage after running the SFC tool, there may be other factors contributing to the problem. It’s always a good idea to check for malware or viruses using a reliable antivirus program, and to ensure that your device drivers are up to date. You can also try disabling any unnecessary startup programs or services to see if that helps reduce disk usage.
If you’re still having trouble, you may want to consider reaching out to Microsoft’s technical support for further assistance. They can provide personalized guidance and help you troubleshoot the issue.
Remember, maintaining a healthy and optimized system is crucial for smooth performance. Regularly checking for and repairing corrupted system files is just one step you can take to ensure your Windows 10 or 11 computer is running at its best.
Next: Optimize Windows for better performance
python

import psutil
def get_disk_usage():
disk_usage = psutil.disk_usage('/')
return disk_usage.percent
disk_usage_percent = get_disk_usage()
print(f"Disk usage: {disk_usage_percent}%")
The code above uses the `psutil` library to retrieve the disk usage information of the root directory (‘/’). It then returns the percentage of disk usage. Please note that this code only retrieves the disk usage information and does not control or modify disk usage in any way.
Perform a disk check for disk usage issues
Performing a disk check can help resolve disk usage issues on Windows 10 and 11. To do this, follow these steps:
1. Open Task Manager by pressing Ctrl + Shift + Esc on your keyboard or by right-clicking the taskbar and selecting “Task Manager.”
2. In Task Manager, click on the “Processes” tab and look for any processes that are using a high amount of disk resources. If you find any, you can end those processes by right-clicking on them and selecting “End Task.”
3. If the high disk usage persists, click on the “Performance” tab in Task Manager and then click on “Open Resource Monitor” at the bottom.
4. In Resource Monitor, go to the “Disk” tab and check the “Total” column to see which processes are using the most disk resources. If you find any processes that are using a high amount of disk resources, you can end those processes by right-clicking on them and selecting “End Process.”
5. If the issue still persists, you can try disabling Windows Search temporarily. Open the Command Prompt as an administrator by pressing the Windows key + X and selecting “Command Prompt (Admin).” Then, type the following command and press Enter: net.exe stop “Windows Search”. This will temporarily stop the Windows Search service.
6. If you are using OneDrive, it may also contribute to high disk usage. You can try temporarily disabling it by right-clicking on the OneDrive icon in the taskbar and selecting “Settings.” In the Settings tab, uncheck the “Start OneDrive automatically when I sign in to Windows” option.
7. Another potential solution is to update your device drivers. Outdated or incompatible drivers can sometimes cause high disk usage. To update your drivers, go to the manufacturer’s website and download the latest drivers for your hardware.
8. Lastly, you can try running a disk check to scan and repair any errors on your hard disk drive. Open Command Prompt as an administrator and type the following command: chkdsk /f /r. This will prompt you to schedule a disk check for the next time you reboot your computer. Type “Y” and press Enter. Then, restart your computer to initiate the disk check.
Following these steps should help you identify and resolve any disk usage issues on your Windows 10 or 11 computer. If you continue to experience high disk usage, it may be worth seeking further assistance from Microsoft support or consulting online resources such as Trustpilot for user reviews and recommendations.
Reset virtual memory to optimize disk performance
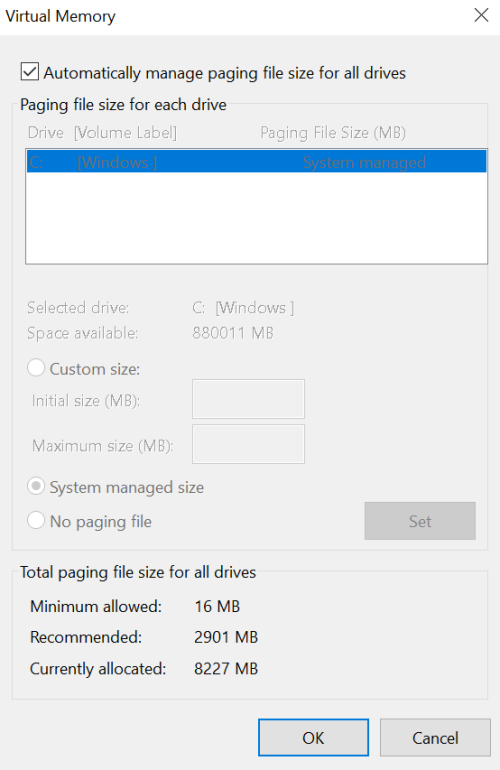
Resetting virtual memory can help optimize disk performance on Windows 10 and 11.
Virtual memory is a feature in Windows that allows your computer to use a portion of your hard drive as if it were RAM. This can help improve performance when your physical RAM is limited. However, over time, virtual memory can become fragmented or corrupted, leading to disk performance issues.
To reset virtual memory and optimize disk performance, follow these steps:
1. Press Ctrl + Shift + Esc to open Task Manager. Alternatively, you can right-click on the taskbar and select “Task Manager.”
2. In the Task Manager window, click on the “Performance” tab.
3. Under the “Performance” tab, click on “Memory” in the left-hand menu.
4. Locate the section labeled “Virtual Memory” and click on the “Change” button.
5. In the Virtual Memory window, uncheck the box that says “Automatically manage paging file size for all drives.”
6. Select your system drive (usually labeled “C:”) and click on the “Custom size” option.
7. Enter a value for the initial and maximum size of the paging file. The recommended size is typically 1.5 times the amount of physical RAM installed on your computer. For example, if you have 8GB of RAM, you can set the initial and maximum size to 12GB.
8. Click on the “Set” button to save the changes.
9. Click on “OK” to close the Virtual Memory window.
10. Restart your computer for the changes to take effect.
By resetting virtual memory, you can help optimize disk performance and improve overall system responsiveness. This can be particularly useful if you’re experiencing high disk usage or slow performance on your Windows 10 or 11 PC.
Remember to regularly monitor your computer’s performance and adjust virtual memory settings as needed. If you continue to experience disk performance issues, it’s recommended to check for any software bugs, update device drivers, and run a full system scan for viruses and malware.
Additionally, consider implementing regular backups and keeping your operating system up to date with the latest patches and firmware updates. These measures can help ensure the security and stability of your system.
For more troubleshooting tips and tricks, visit the Microsoft website or consult the Windows documentation.
Temporarily disable antivirus software to alleviate disk usage
Temporarily disabling antivirus software can help alleviate high disk usage on Windows 10 and 11.
If you’re experiencing 100% disk usage on your Windows 10 or 11 computer, temporarily disabling your antivirus software can be a potential solution. High disk usage can slow down your system and make it difficult to perform tasks efficiently. Here’s how you can disable your antivirus software to alleviate this issue:
1. Open the Task Manager by pressing Ctrl + Shift + Esc on your keyboard. Alternatively, you can right-click the taskbar and select “Task Manager” from the menu.
2. In the Task Manager, click on the “Performance” tab to view the disk usage details.
3. Identify the antivirus software that is currently running on your system. It might be listed under the “Background processes” section or the “Apps” section, depending on your Windows version.
4. Once you’ve identified the antivirus software, open its interface. This can usually be done by right-clicking the antivirus icon in the system tray and selecting “Open” or “Settings.”
5. Look for an option to temporarily disable the antivirus software. This option might be located in the settings, preferences, or the main interface of the antivirus software. Keep in mind that the exact steps may vary depending on the antivirus program you’re using.
6. After disabling the antivirus software, go back to the Task Manager and monitor the disk usage. If the disk usage has significantly decreased and your system is running smoothly, it indicates that the antivirus software was contributing to the high disk usage.
7. While your antivirus software is disabled, it’s important to exercise caution and avoid visiting potentially harmful websites or downloading suspicious files. This will help prevent any potential security risks during this temporary period.
8. Once you’ve resolved the high disk usage issue, remember to re-enable your antivirus software to ensure the ongoing protection of your system.
By temporarily disabling your antivirus software, you can address high disk usage on your Windows 10 or 11 computer.
Fix StorAHCI.sys driver to address high disk usage
If you’re experiencing high disk usage on your Windows 10 or 11 computer, one possible culprit could be the StorAHCI.sys driver. This driver is responsible for managing your computer’s storage devices, and a malfunctioning or outdated version can lead to excessive disk usage. Fortunately, there are steps you can take to fix this issue.
First, open the Task Manager by pressing Ctrl + Shift + Esc. In the Task Manager window, click on the “Processes” tab. Look for any processes that are using a significant amount of disk resources. If you notice that the “System” process is causing high disk usage, it’s likely related to the StorAHCI.sys driver.
To fix this issue, you’ll need to disable the StorAHCI.sys driver. To do this, follow these steps:
1. Press the Windows key + X on your keyboard and select “Device Manager” from the menu that appears.
2. In the Device Manager window, expand the “IDE ATA/ATAPI controllers” category.
3. Right-click on the “Standard SATA AHCI Controller” and select “Properties” from the context menu.
4. In the Properties window, navigate to the “Driver” tab and click on the “Roll Back Driver” button. This will revert the driver to a previous version, which may resolve the high disk usage issue.
5. If the “Roll Back Driver” option is grayed out or not available, you can try updating the driver instead. In the Properties window, click on the “Update Driver” button and follow the on-screen instructions to search for updated drivers online.
6. After updating or rolling back the driver, restart your computer to apply the changes.
Once your computer has restarted, check the Task Manager again to see if the disk usage has decreased. If the issue persists, you may need to further troubleshoot the problem or seek additional assistance.
It’s worth noting that high disk usage can also be caused by other factors such as malware infections, software bugs, or insufficient system resources. It’s always a good idea to run a thorough antivirus scan and ensure that your computer is running the latest updates and patches.
We hope this guide has helped you address the high disk usage issue on your Windows 10 or 11 computer. If you have any further questions or need additional support, don’t hesitate to reach out to our customer service team.
Switch to ChromeOS for improved disk usage

To make the switch to ChromeOS, follow these steps:
Step 1: Research and choose a Chromebook that meets your needs. Chromebooks are laptops that run on ChromeOS and are designed to be fast and efficient. They come in a variety of models and price ranges, so you can find one that fits your budget and requirements.
Step 2: Transfer your files and data to the cloud. ChromeOS is designed to work seamlessly with cloud storage services like Dropbox. By moving your files to the cloud, you can free up disk space on your Windows device and access your files from anywhere with an internet connection.
Step 3: Install any necessary apps and extensions. ChromeOS has a wide range of apps and extensions available in the Chrome Web Store. Whether you need productivity tools, entertainment apps, or specialized software, you can find it in the Chrome Web Store.
Step 4: Set up your Chromebook and start using ChromeOS. Follow the on-screen instructions to set up your Chromebook and sign in with your Google account. Once you’re logged in, you can start exploring the features and benefits of ChromeOS.
With ChromeOS, you can enjoy improved disk usage and faster performance compared to Windows. ChromeOS is designed to be lightweight and efficient, so it uses less system resources and requires less disk space. This means you can run multiple apps and tasks simultaneously without experiencing slowdowns or disk usage issues.
In addition to improved disk usage, ChromeOS offers a streamlined and user-friendly interface. You can easily navigate through your apps and files, and perform tasks with just a few clicks. The ChromeOS dashboard provides quick access to your most-used apps and settings, making it easy to stay organized and productive.
By switching to ChromeOS, you can also benefit from enhanced security. ChromeOS is built with multiple layers of security to protect your data and personal information from malware, viruses, and other threats. Updates and patches are automatically applied in the background, so you can rest assured that your system is always up to date and protected.
Identify the cause of 100% disk usage in Windows 10
Identifying the Cause of 100% Disk Usage in Windows 10
If you’re experiencing 100% disk usage on your Windows 10 or Windows 11 device, it can significantly slow down your system and impact your overall productivity. Fortunately, there are several potential causes for this issue, and we’ll help you identify and fix them.
1. Check Task Manager: Open Task Manager by pressing Ctrl + Shift + Esc and go to the “Processes” tab. Look for any processes that are using a large amount of disk resources. If you find any suspicious processes, try ending them and see if it resolves the issue.
2. Scan for Malware: A computer virus or malware can be the cause of high disk usage. Use a reliable antivirus software to perform a full system scan and remove any detected threats. Additionally, make sure your antivirus software is up to date to protect against the latest threats.
3. Update Windows: Outdated or incompatible Windows updates can also lead to high disk usage. Go to Settings > Update & Security > Windows Update and click on “Check for updates.” Install any available updates and restart your computer.
4. Disable Superfetch: Superfetch is a Windows feature that preloads frequently used applications into memory. However, it can sometimes cause high disk usage. To disable Superfetch, press Win + R, type “services.msc,” and press Enter. In the Services window, find “Superfetch,” right-click on it, and select “Properties.” Change the startup type to “Disabled” and click OK.
5. Adjust Power Settings: Windows power settings can impact disk usage. Open Control Panel and go to “Power Options.” Select the power plan you’re using and click on “Change plan settings.” Then click on “Change advanced power settings.” Expand the “Hard disk” option and set it to a higher value, such as 0 or 1.
6. Check for Faulty Hardware: Faulty hardware, such as a failing hard disk drive (HDD) or outdated device drivers, can also cause high disk usage. Run a diagnostic test on your HDD and update your device drivers to their latest versions.
7. Disable Windows Search Indexing: Windows indexing can use a significant amount of disk resources. To disable it, press Win + R, type “services.msc,” and press Enter. In the Services window, find “Windows Search,” right-click on it, and select “Properties.” Change the startup type to “Disabled” and click OK.
Remember to restart your computer after making any changes to apply the fixes. If the issue persists, you may need to consult with a professional or seek further assistance from Microsoft Support.
Remove viruses and malware causing high disk usage
If you’re experiencing high disk usage on your Windows 10 or 11 computer, it could be due to viruses or malware. These malicious programs can consume a significant amount of your system’s resources, leading to slow performance and high disk usage. To resolve this issue, follow the steps below:
Step 1: Open Task Manager
– Press Ctrl + Shift + Esc to open Task Manager.
– Alternatively, you can right-click on the taskbar and select “Task Manager.”
Step 2: Identify the process causing high disk usage
– In Task Manager, click on the “Processes” tab.
– Look for any processes with high disk usage. These processes will be listed under the “Disk” column.
– If you’re unsure which process is causing the issue, click on the “Disk” column to sort the processes in descending order of disk usage.
Step 3: End the problematic process
– Once you’ve identified the process causing high disk usage, right-click on it and select “End Task.”
– If the process is unresponsive or doesn’t end, you may need to force close it. To do this, right-click on the process again and select “End Task” from the context menu.
Step 4: Run a full system scan
– To ensure that there are no viruses or malware on your computer, run a full system scan using your preferred antivirus software.
– Make sure your antivirus software is up to date with the latest virus definitions before starting the scan.
– Quarantine or remove any detected threats.
Step 5: Enable real-time protection
– To prevent future infections, enable real-time protection in your antivirus software.
– This feature will actively monitor your system for any suspicious activity and block potential threats in real-time.
Step 6: Update your operating system and software
– Keeping your operating system and software up to date is essential for security and performance.
– Install the latest Windows updates by going to “Settings” > “Update & Security” > “Windows Update.”
– Additionally, update your applications, especially those frequently targeted by malware, such as web browsers, media players, and file-sharing programs.
By following these steps, you can remove viruses and malware causing high disk usage on your Windows 10 or 11 computer. Regularly scanning your system for threats and keeping your software up to date will help protect your personal data and ensure smooth performance. If you need further assistance, consult the documentation provided by your antivirus software or seek support from their official website or customer service.
Close background applications to reduce disk usage
When your disk usage is at 100% on Windows 10 or 11, it can significantly slow down your computer’s performance. One way to alleviate this issue is by closing background applications that may be consuming excessive disk resources. Here’s how you can do it:
1. Open the Task Manager by pressing Ctrl + Shift + Esc on your keyboard. Alternatively, you can right-click on the taskbar and select “Task Manager” from the context menu.
2. In the Task Manager window, click on the “Processes” tab to view all the running applications and processes on your computer.
3. Look for any applications or processes that are consuming a high amount of disk usage. You can identify them by looking at the “Disk” column, which displays the percentage of disk resources being utilized by each process.
4. Right-click on the high disk usage application or process and select “End Task” from the context menu. This will close the application and free up disk resources.
5. Repeat this process for any other applications or processes that are using a significant amount of disk resources.
By closing these background applications, you can reduce the overall disk usage on your computer and improve its performance. It’s worth noting that some applications may automatically restart after being closed. If this happens, consider uninstalling or disabling those applications if they are not essential to your workflow.
In addition to closing background applications, there are a few other steps you can take to further optimize your disk usage:
– Run a malware scan: Computer viruses or malware can also contribute to high disk usage. Use a reliable antivirus program to scan your system and remove any potential threats.
– Update your device drivers: Outdated or faulty device drivers can sometimes cause excessive disk usage. Visit the manufacturer’s website for your hardware components and download the latest drivers.
– Perform a disk cleanup: Use the built-in Disk Cleanup tool in Windows to remove unnecessary files and free up disk space. You can access this tool by typing “Disk Cleanup” in the search bar and selecting the appropriate result.
– Disable unnecessary startup programs: Some applications automatically start when you boot up your computer, which can contribute to high disk usage. Use the Task Manager’s “Startup” tab to disable any non-essential programs from starting up with your computer.
Remember to regularly back up your important files and consider updating your operating system to the latest version to benefit from performance improvements and security patches.